Olympus C-700 Ultra ZoomOlympus packs a 10x zoom lens into an amazingly small body, for an amazingly low price.<<Optics :(Previous) | (Next): Shutter Lag & Cycle Time Tests>> Page 6:Exposure & FlashReview First Posted: 5/31/2001 |
Exposure
The C-700 offers a full range of exposure control options, from a completely automatic mode to fully manual control. The basic exposure modes include Auto, Program (P), Aperture Priority (A), Shutter Priority (S), and Manual (M) modes, in addition to a handful of preset modes for specific shooting situations (Landscape, Sports, and Portrait). The Mode dial on top of the camera offers a variety of exposure mode settings, and makes it easy to quickly change from one mode to another when shooting on the fly.
In full Auto mode, the camera remains in charge of all exposure options, leaving the user to set only the image quality. (This is thus a true "point & shoot" mode, suitable for use when handing the camera to a non-photographer spouse or friend, or for those times when you really don't care to worry about exposure parameters.) The only available flash mode is Auto, and Macro and Sequential Shooting modes are not available. In Program mode, the camera controls only the shutter speed and lens aperture settings. Flash mode, White Balance, Metering, etc. are all available for adjustment, or can be set to their automatic settings. Aperture Priority, Shutter Priority, and Manual modes are all accessed at one stop on the Mode dial, indicated by the "A / S / M" mark. Upon turning the Mode dial to this position, you'll need to specify through the Record menu which mode you'd like to use (Camera sub-menu, A / S / M option). In Aperture Priority mode, the user controls the aperture setting (from f/2.8 to f/8.0, depending on the zoom position), while the camera selects the best corresponding shutter speed. Shutter Priority mode works along similar lines, although the user selects the shutter speed (from 1/1,000 to 1/2 second) and the camera chooses the lens aperture. Manual mode turns over all exposure control to the user, from Aperture and Shutter speed to Flash mode and White Balance.
In addition to the basic exposure modes, there are three preset shooting modes, also accessible via the Mode dial. These include Portrait, Sports, and Landscape modes. In Portrait mode, the camera uses a smaller aperture setting to decrease the depth of field, capturing the subject in sharp focus in front of a blurred background. Sports mode employs faster shutter speeds to freeze action. Landscape uses a smaller aperture setting to increase the depth of field, so both the foreground and background are in sharp focus. In all three modes, the only settings available to the user are image Quality, Exposure Compensation, and Flash Off (by closing the pop-up Flash). In Sports and Landscape modes, the Flash On setting is always set on Auto. In Portrait mode, the Flash On setting is always set to Fill Flash.
The C-700 uses a Digital ESP metering system to determine exposure in its normal shooting mode. Under the default Digital ESP setting, the camera takes an exposure reading from the center of the image as well as the surrounding area, and chooses the best averaged reading for the entire scene. A Spot Metering option is also available, accessed by pressing the Macro / Spot Metering button on the back panel until the Spot Metering symbol appears in the LCD display. A set of target brackets appears in the center of the screen to help with framing. With Spot Metering, the camera bases the exposure on a reading from the very center of the subject, which works well with the C-700's AE Lock function. AE Lock freezes the exposure reading when the AE Lock button is pressed, allowing you to recompose the shot without holding down the Shutter button. A Multi-Metering function allows you to take up to eight individual exposure readings from various locations in the frame. These readings are then averaged together to gauge the exposure. Once activated through the Record menu, Multi-Metering works with the AE Lock button to gather the exposure data (in Spot Metering mode). An exposure bar appears in the LCD display to help track your progress. You can save the set of readings by holding down the AE Lock button for more than one second. Once a multi-exposure setting has been locked, a "Memo" icon appears on the LCD displays. This exposure setting will apply to all subsequent photos, until you cancel it by again hitting the AE Lock button briefly. Locked multi-exposure readings aren't saved when the camera is turned off.
In all exposure modes except for Manual and Auto, you can adjust exposure with the camera's Exposure Compensation setting, which lightens or darkens the scene from -2 to +2 exposure equivalents (EV) in one-third-step increments. To access the setting, just press the right or left buttons on the Four-Way Arrow pad while in Record mode. You'll see the EV readings changing in the upper right corner of the monitor. In Program, Aperture Priority, Shutter Speed, and Manual modes, the C-700 offers an automatic light sensitivity (ISO) setting, or you can set the ISO to 100, 200, 400, or 800 equivalents, depending on the shooting conditions. White Balance is also adjustable in these modes, with options for Auto, Daylight, Overcast, Incandescent, and Fluorescent light sources, as well as a Quick Reference, or manual adjustment. A White Balance compensation adjustment in the Mode menu (Picture sub-menu) allows you to correct a red or blue color shift in the image.
A 12-second Self-Timer mode provides a small window of time between pressing the Shutter button and the camera making the actual exposure, a great feature for self-portraits. The Drive button on the back of the camera enables the Self Timer mode, and a full press of the Shutter button triggers the countdown. As the camera counts down the seconds, the Self-Timer lamp on the front panel lights solid red for the first 10 seconds, then flashes for the remaining two.
The C-700 also enables you to capture images in black and white or sepia tones, or to use the White and Black Board settings for capturing text on white or black backgrounds respectively. (These modes appear to adjust image contrast and default exposure levels to maximize contrast and force the background toward the appropriate tonal value.) The C-700 also features Sharpness and Contrast adjustments.
 Flash
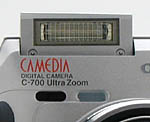
FlashThe C-700 is equipped with a built-in, pop-up flash, which operates in either Auto, Red-Eye Reduction, Fill-In Flash, or Slow Synchro modes. Pushing the Flash Release button on top of the camera releases the flash from its compartment. Another Flash button on the back panel controls the operating mode. Closing the flash automatically disables the unit. The Auto flash mode sets the flash to fire when subjects are backlit or the light level is low. In Red-Eye Reduction mode, the camera fires approximately 10 small pre-flashes before firing the flash at full power. This eliminates the occurrence of red-eye effect, caused when light from the flash reflects off of a person's pupils. Fill-In Flash mode sets the flash to fire with every exposure, regardless of the light level. Slow Synchro mode times the flash with a slower shutter speed, which allows more ambient light in to balance the exposure. Through the Mode menu, Slow Synchro can be set to fire either at the beginning or end of the exposure, or at the beginning of the exposure with the Red-Eye Reduction pre-flashes. Using any of these settings with a moving object produces interesting light or motion trails in front of or behind the subject.
The Record menu also offers a flash intensity control, which adjusts the flash power from -2 to +2 EV in one-third-step increments. Coupled with the external flash sync socket, the C-700 provides very flexible control over flash exposure. The external flash sync socket is covered by a threaded, plastic cap that screws into place (and in our opinion, is easily lost). The plastic cover protects a five-pin socket, which accepts the Olympus FL-40 external flash unit, as well as compatible third-party flash units. There isn't a flash mounting on the camera, but Olympus offers a mounting bracket as an optional accessory.
The C-700's onboard flash is unusually powerful: Olympus rates it for a range of up to 14.4 feet (4.4m) when the lens is set to its telephoto position, and 18 feet (5.5m) with the lens at its wide angle setting. This agreed well with our own tests, in which we found the flash perfectly bright at 14 feet.
Sequential Shooting and AF Sequential Shooting
In addition to the Self-Timer mode, the Drive button also activates the two Sequential Shooting modes. Both modes take a rapid series of images, with the AF Sequential Shooting mode adjusting the focus before each shot, and the normal Sequential Shooting mode locking the focus with the initial shot. Resetting the focus before each exposure slows down the cycle time between shots a fair amount. In normal Sequential Shooting mode, the camera captures as many as 37 images (at the lowest size/quality setting, decreasing 2-3 at maximum quality), at approximately 1.4 frames per second. The cycle times and the number of images in a series vary depending on the image quality setting and the amount of SmartMedia storage space available. The flash is available in both modes, but also slows down the shooting time (the average flash recharge time is six seconds).
Auto-Exposure Bracketing
Also accessible via the Drive button, the Auto-Exposure Bracketing mode takes a series of images at different exposure levels, to ensure that you get the best possible exposure. The Auto-Exposure Bracketing mode can be set through the Mode menu (Camera sub-menu) to capture either three or five images at a time, with exposure variations of 0.3, 0.6, or 1.0 exposure equivalents (EV) in each direction. For example, in a three-image series, the camera takes one image at the normal exposure reading, plus one at the underexposed setting, and one at the overexposed setting.
Panorama Mode
The C-700 offers a Panorama exposure mode when using an Olympus brand panorama-enabled SmartMedia memory card. The Panorama function is accessed in the Mode menu through the Panorama option of the Camera sub-menu. When activated, it provides light blue guidelines at the edges of the pictures to help you align successive shots, leaving enough overlap between them for the stitching software to be able to do its job. Exposure and white balance are determined for a series of shots by the first exposure, and as many as 10 shots can be taken in a panoramic series. (Note that this function is only enabled by SmartMedia cards with built-in panorama-related firmware found on Olympus brand memory cards.) Images are saved individually and then compiled on a computer after they've been downloaded to Olympus' Stitching Software application.
Movie and Sound Recording
The C-700 also features a Movie mode for recording moving images with sound. The movie camera symbol on the Mode dial designates the Movie mode. QuickTime movies are recorded in either HQ (320 x 240 pixels) or SQ (160 x 120 pixels) resolution. Both resolutions record at approximately 15 frames per second. Sound recording can be turned On or Off via the Record menu. Aperture and shutter speed are automatically determined in Movie mode, with shutter speeds ranging from 1/10,000 to 1/30 second. Recording begins and ends with a full press of the Shutter button, and the amount of available recording time shows up on the LCD display. A memory gauge also appears on the display, reporting how much SmartMedia memory is available for recording.
The sound recording function is activated through the Mode menu (Camera sub-menu, "microphone" icon). You can also activate sound recording for still images, which allows you to record a short sound clip (approximately four seconds) to accompany the captured image.
A feature that was first seen in the Camedia C-3030 and again in the C-3040 is the C-700's in-camera movie "editing" capability in Playback mode. (Accessed via the Playback menu, Movie Play option.) In this mode, you can scroll forward and backward within the movie, and set cut points at the beginning and end of the sequence. Movie content between the two cut points will be preserved, the rest discarded. Olympus also allows you to choose whether to modify the original movie file, or to save a new copy of it, reflecting the edit you've made -- a feature that makes the Movie mode much more useful.
Reader Comments! --> Visit our discussion forum for the Olympus C-700 Ultra Zoom!

Follow Imaging Resource: