Kodak DC5000Familiar 2 megapixel electronics in a super-rugged case make a *true* take-anywhere camera!<<Executive Overview :(Previous) | (Next): Viewfinder>> Page 3:DesignReview First Posted: 09/10/2000 |
Design
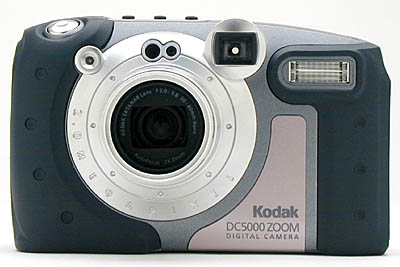
The picture below shows the front of the camera. From right to left, key features are the onboard flash, viewfinder, light sensor (flash and autofocus), lens, and indicator light for the self-timer. The DC280's lens retracted into the camera body when it was shut off, but the DC5000's is protected with a rigidly-mounted tubular metal housing, capped with a glass protective cover. The lens still extends and retracts when the camera is turned on or off, but does so within the safety of this protective assembly. A set of 37mm filter threads are available at the end of the housing assembly, allowing filters and auxiliary lenses to be attached.
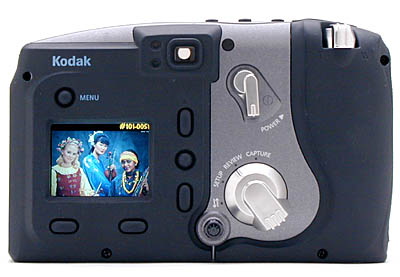
The picture below shows the back side of the camera, with a control layout that will be immediately recognizable to anyone familiar with the previous DC280. Most camera functions are controlled via the LCD menu system, activated by the "Menu" button at upper left. Major operating modes are selected with the rotating function dial at lower right, while menu options are selected with the buttons to the right and bottom of the LCD screen. The central button (which Kodak calls the "Do It" button) also serves to turn on the LCD screen for use as a viewfinder when in Capture mode.
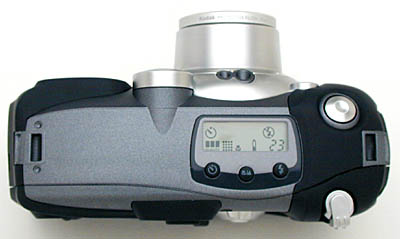
Other control buttons are placed very similarly to other cameras. On the top of the camera, you'll find the Status Display which shows icons for the different camera settings, if the settings are enabled. It's an easy reminder of which menu options you have enabled, the battery power status, and pictures remaining on the picture card, among other things. Also easily accessed atop the camera are the Shutter Button, Zoom Control for telephoto or wide angle shooting, Self-Timer Button, Infinity Focus/Close-Up Button, and lastly, the Flash Button to change flash settings for different exposures. The left-hand side of the camera contains easily accessible ports for the AC Adapter, Video Out, and Serial/USB connections.
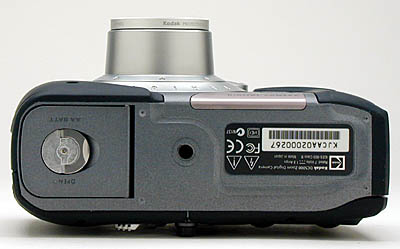
Batteries load easily in the battery compartment in the bottom of the camera, and the AC adapter, video out, and serial ports are nicely tucked into the left-hand side of the camera (behind a sealed, latching cover hatch) for easy accessibility. The CompactFlash memory card is also accessed through this same hatch.![]()
As mentioned, the camera is easily managed with one hand when capturing images, while camera users can navigate through the various buttons and menu options on the LCD viewfinder with the other.
Reader Comments! --> Visit our discussion forum for the Kodak DC5000!

Follow Imaging Resource: