The Imaging Resource
Quick Review
Kodak EasyShare DX4900 Digital Camera
 |
Camera QuickLook | |
|
Review Date
|
04/08/02 | |
|
User Level
|
|
|
|
Product Uses
|
|
|
|
Digicam Design
|
|
|
|
Picture Quality
|
Great, 4.0-megapixel CCD | |
|
Print Sizes
|
4x6, 5x7, 8x10, 11x14 inches | |
|
Availability
|
April, 2002 | |
|
Suggested Retail Price
|
$399 | |
|
||||||||||
Introduction
Eastman Kodak Company has a long history of bringing professional imaging
processes to the everyday consumer. Kodak's EasyShare System is the company's
digital equivalent to its turn-of-the-century Brownie box camera, which came
with pre-loaded film and no manual controls (once users shot all their film,
they simply sent the boxes back to Kodak for processing and printing). While
the first two Kodak EasyShare digicams, the DX3500 and DX3600, were much more
sophisticated than a Brownie, they did feature the same "just press the
button" simplicity, with fully automatic controls and an optional docking
station that takes all of the guesswork out of digital image manipulation,
management, and sharing. As Kodak has evolved the line though, they've introduced
more advanced cameras that do offer a few user options. The latest of these
is the EasyShare 4900, a 4-megapixel camera that offers a surprising range
of options, but also remains true to the EasyShare "just push the button"
ease of use.
The Kodak Picture Software is also extremely easy to use -- walking you through every step of the uploading, enhancing, and emailing process -- and has a more graphically intuitive interface than almost any other consumer imaging software I've seen. It automatically sizes the images for printing or emailing, stores copies, applies simple effects, and allows you to make image corrections, such as color, brightness, and contrast adjustments. Overall, the DX4900 and its lesser cousins are some of the simplest, most goof-proof cameras currently available. With the DX4900, Kodak has moved the line upmarket to four megapixel resolution, while remaining true to its "anyone can do it" consumer roots. - And while maintaining a very attractive price point. (The DX4900 hit the market in April of 2002 at a suggested retail price of only $399. - At the time, one of the least expensive four megapixel cameras available, particularly surprising given its rich feature set and 2x optical zoom lens.)
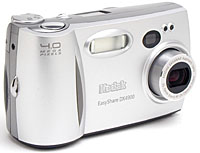
Camera Overview
Small, sleek, and sophisticated, Kodak's new EasyShare DX4900 digital camera
is portable and compact, ready for just about any excursion. As its name implies,
the EasyShare DX4900 was designed to be exactly that - easy. Limited camera
controls and a very short LCD menu make for fast setting changes, and a very
straightforward "plain English" menu structure make the menus understandable
even to novices. Kodak designed the DX4900 to fit into the (optional) EasyShare
camera dock, which provides quick uploading to your computer, rechargeable batteries
and a charger, and very easy photo printing. The DX4900 is a little larger
than most average shirt pockets, but shouldn't have any trouble slipping into
a larger coat pocket or an average purse. A wrist strap comes with the camera,
and Kodak offers a selection of small camera bags as separate accessories. A
nifty power switch on the left side of the camera (when looking from the back)
slides the built-in lens cover out of the way and turns the camera on. With
the lens cover built in, you don't have to worry about accidentally misplacing
the lens cap, and the lens is well-protected when the camera isn't in use. The
DX4900's 4.0-megapixel CCD delivers high quality images, suitable for printing
as large as 11x14 inches, meaning you'll get great-quality 8x10 prints. (Of
more importance than being able to print 11x14s though, is that you'll be able
to crop out just the most interesting parts of your photos, yet still have plenty
of resolution to make a sharp 8x10. Cropping to improve composition is one of
the least-appreciated aspects of digital photography, yet one that can make
the biggest improvement in your printed photos.)
Equipped with a 2x, 7.3-14.6mm lens, the DX4900's optical zoom range is equivalent to that of a 35-70mm zoom on a 35mm camera. This is a range from a moderate wide angle to a slight telephoto. Maximum aperture ranges from f/2.8 at full wide angle to f/4.0 at full telephoto, and is automatically controlled at all times. Focus ranges from 19.7 inches (500 millimeters) to infinity in normal AF mode, and from 2.7 to 27.5 inches (70 to 700 millimeters) in Macro mode. The DX4900 also features an Infinity focus mode, which speeds up shooting times for distant subjects, so you won't have to wait for the camera to adjust focus when the subject is more than 30 feet or so away. In addition to the camera's 2x optical zoom, a 3x digital zoom option is available. I always remind readers that digital zoom decreases the overall image quality because it simply enlarges the center pixels of the CCD's original image. You thus shouldn't rely on it if you need sharp details and high image quality. On the other hand, with four megapixels to work with from the CCD, you can enlarge the image a fair bit (50% or so) and still get a reasonably sharp image.
For framing your shots, the DX4900 has both a real-image optical viewfinder and 1.5-inch color LCD monitor. The LCD monitor's information display includes detailed exposure information, including shutter speed and aperture settings, so you have an idea of what the exposure will be, even though you don't directly control either parameter. (This is a feature I really like to see, even on a fully-automatic camera. As you become more experienced with the camera, knowing the shutter speed and aperture its chosen lets you know when you need to worry about camera shake, what to expect in terms of depth of field, etc. Don't worry though, you don't have to understand these terms to get started with the DX4900 - It's just nice to know that the information is there waiting for you when you're ready for it.) Besides the information shown on the LCD monitor, a small status display panel on the camera's top displays the current state of a variety of camera settings, including file size, flash mode, focus mode, etc.
Exposure is automatically controlled on the DX4900, though the LCD menu offers a range of manually-set slow shutter speed settings for shooting in low light. Kodak doesn't report the DX4900's full shutter speed range in the DX4900's manual, but the slowest speed I found in Auto mode was 1/8, and the fastest was 1/2,000 of a second. However, through the Record menu, you can set the exposure time from 0.7 to 16 seconds, which gives the camera great low-light shooting capabilities. (It's really a lot of fun to play with really long exposure times on a camera like the DX4900: It can take bright, well-balanced photos under conditions where you actually have a hard time seeing yourself.)
A Mode dial on the top panel puts the camera in either Record, Playback, or Setup modes. The Record menu offers a handful of adjustable exposure features, including Exposure Compensation, White Balance, Quality, ISO (light sensitivity), Metering mode, and Sharpness. Exposure Compensation brightens or darkens the overall exposure, from -2 to +2 exposure equivalent units (EV) in one-half-step increments. (An "exposure equivalent unit" corresponds to an increase or decrease in overall exposure by a factor of two - Thus, a halving or doubling of the effective "brightness" of the photo for each exposure equivalent unit.) The White Balance setting adjusts color balance, with settings for Auto, Daylight, Tungsten, and Fluorescent. A sensitivity adjustment offers 100, 200, and 400 ISO equivalents, as well as an Auto setting that lets the camera pick the ISO itself. By default, the DX4900 uses a Multi-Pattern metering mode, which bases the exposure on the lighting conditions of the entire frame. Also available are Spot and Center-Weighted Metering options, for more specific exposure readings. (These are very handy for situations where the subject is darker or brighter than the rest of the image. A good example is a backlit portrait, where your subject's face is in shadow, but the rest of the frame bright. Spot metering will get the exposure right for the subject's face, without being fooled by the brighter area around it.)
The camera's Sharpness adjustment lets you vary the amount of sharpening applied to your photos, with settings of Sharp, Standard, and Soft. (In my testing though, I found relatively little obvious difference between the various sharpness options.) A Flash button on top of the camera activates either the Auto, Fill, Off, or Red-Eye Reduction flash modes.
For capturing short bursts of images, the DX4900 features a 1.0-megapixel Burst mode, which works like a motor drive on a 35mm camera. Burst mode captures as many as 12 consecutive images while the Shutter button is held down. Resolution is automatically reduced to 1,224 x 816 pixels so the camera can handle the data quickly enough. The the actual shot-to-shot cycle time will vary depending on exposure settings and the amount of image information being recorded, but averages about three frames per second. (That's pretty fast.) While the maximum sequence length is about 12 shots, you may find you can't capture that many shots if your memory card is almost out of space: There has to be enough space on the memory card to store the shots, or the camera won't snap them. The DX4900 also features a 10-second self-timer, which delays the shutter for about 10 seconds after the Shutter button is pressed, so you can get into your own photos. A small light on the front of the camera lights continuously for the first eight seconds of the self-timer countdown, then blinks for the remaining two.
The DX4900 stores images on CompactFlash memory cards, and a 16MB card is included in the box. Given the DX4900's maximum 2,448 x 1,632-pixel resolution, I highly recommend purchasing a larger-capacity CompactFlash card right away. Cards are currently available separately in capacities as large as 1 gigabyte (that's a thousand megabytes). You can get 64 megabyte cards very cheaply these days though, and I recommend that as a good, practical size for most people.
The DX-4900 uses either two AA-sized batteries or one CRV3 lithium battery for power. One lithium batteries comes with the camera. If you purchase the accessory camera dock, a set of two NiMH rechargeable batteries are included, and can be charged in the camera while the camera is in the dock. I strongly advise picking up an additional set of rechargeables, and keeping a freshly-charged set on-hand. (Read my review of NiMH batteries to read about the best makes on the market. Also read the review of my favorite battery charger, if you decide to not get the DX4900's dock.)
The DX4900 features a USB jack for downloading images to a computer, though you can also connect the camera to the dock (which in turn is connected to a computer) and download files with the press of a button. In my tests, the DX4900's USB port proved to be among the fastest I've tested, transferring data to my G4 Mac at a speedy 586 KB/second. A software CD accompanies the camera, loaded with Kodak's Picture Software, compatible with Windows 98/98SE/ME/2000/XP and Macintosh OS 8.6-X. For connecting to a television set, the DX4900 has a Video Out jack and comes with a video cable. The DX4900 is also DPOF (Digital Print Order Format) compatible, with a range of print settings available through the Playback menu. (DPOF lets you specify how many prints you want of each picture while your memory card is still in the camera. You can then pop the card into a DPOF-compatible printer and it'll crank out your photos automatically. The downside of this is that it's a little cumbersome (IMHO) to specify print quantities using the tiny camera user interface. Also, DPOF-compatible printers are relatively few and far between.)
Basic Features
- 4.0-megapixel CCD.
- 1.5-inch color LCD monitor.
- Real-image optical viewfinder.
- Glass, 2x (35-70mm equivalent) zoom lens.
- 3x digital zoom.
- Automatic exposure control with manual slow-shutter settings.
- Maximum aperture of f/2.8 to f/4.0, depending on lens zoom position.
- Shutter speed range from 1/2,000 to 16 seconds.
- Built-in flash with four operating modes.
- CompactFlash memory storage.
- Power supplied by two AA batteries, one CRV3 battery, or optional AC adapter via camera dock accessory.
Special Features
- Burst and 10-second Self-Timer modes.
- Sharpness adjustment.
- White balance (color) adjustment with four modes.
- ISO adjustment with three ISO equivalents and an Auto setting.
- Multi-Pattern, Center-Weighted, and Spot metering options.
- DPOF (Digital Print Order Format) compatibility.
- USB cable for connection to a computer (driver software included).
- Compatible with the Kodak EasyShare camera dock, for quick connection to a PC or printer.
Recommendation
The DX4900 is a good camera for people who want simple
operation, good image quality, a nice range of options for when they're feeling
adventurous, and few hassles downloading and printing cameras. I could see it
being a good "family" camera, used by both parents and kids. It might
also be a good choice for an office environment, where you need good print-quality
images, but there may be a number of less experienced users who need to take
photos. Its automatic exposure mode keeps things simple, while the available
slow-shutter and other exposure settings provide some exposure flexibility.
The 4.0-megapixel CCD captures high-resolution images, excellent for printing
to 8x10-inches and larger, or for cropping out important detail without losing
too much resolution. The DX4900's compact design makes it a travel-worthy companion,
and the accessory dock means you can just plop down the camera, transfer images,
and get back to shooting in a matter of minutes. Additionally, the telescoping
lens with self-contained cover does a good job of protecting the lens, while
also keeping the camera body smooth and low-profile when not in use. With its
simple, straightforward user interface and great image quality, the DX4900 is
perfect for novices, as well as more experienced amateurs looking for a hassle-free
point-and-shoot camera to use at the office, or take on vacations, to family
events, etc.
Design
Light and compact, the DX4900's two-toned silver body is a portable size, great
for travel. Measuring 4.6 x 1.7 x 2.6 inches (116 x 42 x 67 millimeters), the
DX4900 should easily fit into coat pockets, purses, and possibly some larger
shirt pockets. The camera's wrist strap is great when holding the camera in-hand,
but I'd recommend a small camera bag for better protection when traveling. An
all-plastic body keeps the DX4900's weight down, at just 7.9 ounces (225 grams),
without batteries. The all-plastic body may be a negative point for some users:
It lacks the substantial "feel" of metal-bodied cameras, so some people
may find it cheap-feeling. In my use, it seemed rugged enough, but I don't know
if it would survive a drop to a hard floor. (Even a metal body won't protect
the delicate optics of most cameras against such a blow though, so this may
not be much of an indictment against the 4900.)
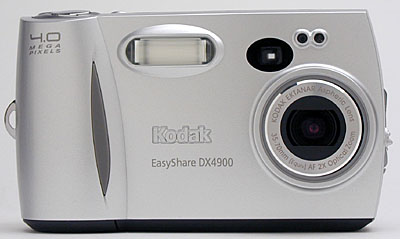
The DX4900's front panel is fairly smooth, with only a few small protrusions. The telescoping lens is protected by a metal cover, which slides out of the way whenever the camera is powered on. If the Mode dial is set to Record, the lens extends out from the camera body slightly less than half an inch when its turned on. (The lens stays retracted when the camera is turned on in Playback or Setup modes.) Just inside the lip of the plastic lens barrel, a set of filter threads accommodates Kodak's accessory lens adapter kits, which provide extended wide-angle, telephoto, and macro capabilities. (The availability of these lens kits is another nice touch for a relatively low-cost camera like the 4900: You usually only see accessory lens kits offered with much more expensive models.) Sharing the front panel with the lens are the flash, optical viewfinder window, exposure sensor, and self-timer lamp. A small handgrip on the right side features an inset rubbery pad, providing a grip for your fingers as they wrap around the camera.
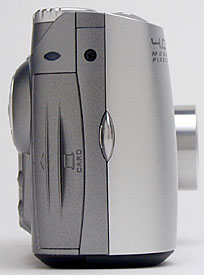
On the right side of the camera (as viewed from the back) is the memory card compartment, and an eyelet for attaching the wrist strap. The memory card compartment door has small ribs on it to make opening it a little easier (you can hook a nail in one and pull), and slides outward before opening to reveal the CompactFlash card. The button that actually releases the card is on the bottom panel, which is slightly inconvenient when using a tripod (though I doubt this will be a concern for many of the camera's users). Although I wasn't too bothered by the all-plastic body of the 4900, I have to say that the memory card compartment door felt pretty flimsy.
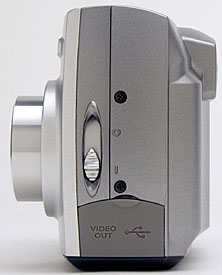
The opposite side of the camera features the power switch (which also opens the lens cover), and a connector compartment. A small, rubbery flap snaps over the connector compartment, covering the USB and Video Out jacks when not in use.
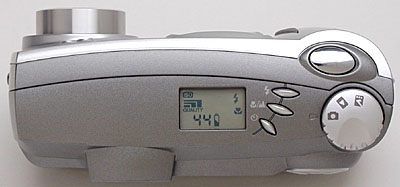
The DX4900's sloped top panel holds the oblong Shutter button, Mode dial, and three other control buttons. I liked the pointed tips of the control buttons, as they're easy for your fingers to find without looking at the camera. A small status display panel reports limited information about important camera settings, such as file size, flash mode, focus mode, etc. I like seeing LCD data readouts like this because they help conserve battery power by making it easier to shoot without using the power-hungry LCD monitor.
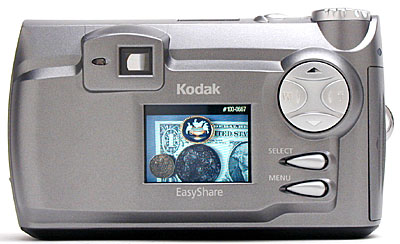
The remaining camera controls share the back panel with the optical viewfinder eyepiece and the LCD monitor. Though the optical viewfinder does not feature a diopter adjustment (for near- or farsighted users), it does have a fairly high eyepoint, making it pretty usable while wearing eyeglasses. A Four Way Arrow pad toggles up and down, and left and right, controlling the zoom lens and navigating through settings menus. Two small control buttons (Select and Menu) are just below, with protruding teardrop designs that are easy for your fingers to find.
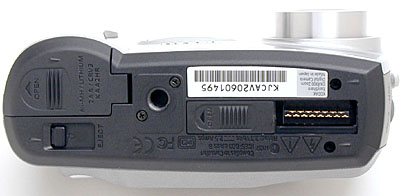
The DX4900's bottom panel hosts several features, including the dock connector jack, memory card Eject slider, battery compartment, and tripod mount. A sliding plastic cover protects the dock jack when not in use. The battery compartment and Eject slider are side by side, and too close to the tripod mount for easy access when the camera is attached to a tripod. The plastic tripod mount is off-center, making it more difficult to shoot multi-shot panoramas, admittedly a concern for only a small minority of users. The off-center position of the tripod socket places it directly under the camera's center of gravity though, making for a more secure mount. A sliding plastic door covers the docking connector, and snaps securely into place without any locking mechanism.
Camera Operation
With just a few control buttons and only a handful of exposure controls, the
DX4900's user interface is uncomplicated, just as its EasyShare name would suggest.
Flash, focus, and Self-Timer modes all feature external controls, as do the optical
and digital zoom. The status display panel on top of the camera reports some settings,
making it easy to quickly check resolution, flash mode, etc. without scrolling
through the LCD menu. When you do have to access the LCD menu system, navigation
is again straightforward, with only a short scrolling list of options to choose
from. The Mode dial on the camera simplifies operation as well, offering only
three modes. With the instruction manual, it shouldn't take much more than a half-hour
to an hour for the average user to become familiar with the camera.
External Controls
Shutter Button: With a smooth, elliptical shape, the Shutter button
protrudes slightly from the camera's top panel. Pressed halfway, it triggers
the autofocus and exposure mechanisms. A full press fires the shutter. Half-pressing
and holding the shutter button will "lock" the exposure and focus,
letting you focus on an off-center subject and then recompose the scene before
snapping the shot.
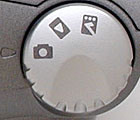
Mode Dial: Behind the Shutter button, this dial controls the camera's
operating mode, putting it into Record, Playback, or Setup modes.
![]()
Flash Button: As the first button in
a series beside the status display panel, this button controls the flash operating
mode. Pressing it repeatedly cycles through Auto, Forced, Suppressed, and
Red-Eye Reduction modes.
![]()
Macro / Infinity Button: Just behind the Flash button, this button
adjusts the focus mode for closeup subjects, or sets focus at infinity for
distant ones.

Self-Timer Button: The final button in the series on the top panel,
this button places the camera into Self-Timer mode.
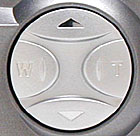
Four Way Arrow Pad: Dominating the top right corner of the back
panel, this large button toggles either left and right or up and down. In
normal Record mode, the left and right arrows control the optical and digital
zoom. All four arrows navigate through settings menus.
In Playback mode, all four arrows can be used to scroll through captured images on the card.
![]()
Select Button: Just beneath the Four Way Arrow pad, this button
selects menu items in the LCD menu system, and confirms menu settings.
In Record mode, this button turns the LCD monitor on and off.
![]()
Menu Button: Directly below the Select button, and the final control
on the back panel, this button displays the settings menu in Record and Playback
modes.
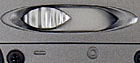
Power Switch: Located on the left side of the camera (as viewed
from the back), this switch turns the camera on and off, and opens and closes
the lens cover as well.
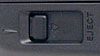
Card Eject Slider: Tucked on the camera's bottom panel, next to
the battery compartment, this switch ejects the CompactFlash card from the
slot.
Camera Modes and Menus
 Record
Mode: Designated on the Mode dial by a small camera symbol, this mode
sets up the camera for capturing still images. If the camera is powered on
in this mode, the lens automatically extends forward. Pressing the Menu button
displays the following selections on the LCD screen:
Record
Mode: Designated on the Mode dial by a small camera symbol, this mode
sets up the camera for capturing still images. If the camera is powered on
in this mode, the lens automatically extends forward. Pressing the Menu button
displays the following selections on the LCD screen:
- Exposure Compensation: Lightens or darkens the overall exposure from -2 to +2 exposure equivalents (EV) in one-half-step increments.
- White Balance: Sets the color balance to match Daylight, Tungsten, or Fluorescent lighting, with an Auto setting as well.
- Color: Lets the camera record images in full color (Color setting), or Black & White or Sepia tones.
- Quality: Specifies the image size and quality setting. Choices are 4.0 MP (2,448 x 1,632 pixels), 4.0 MP High Compression, 3.1 MP (2,136 x 1,440 pixels), 2.2 MP (1,800 x 1,200 pixels), 1.0 MP (1,224 x 816 pixels), and 1.0 MP Burst.
- Metering: Changes the camera's metering system to Multi-Pattern (default), Center-Weighted, or Spot.
- Sharpness: Adjusts the in-camera sharpening to Sharp, Standard, or Soft.
- ISO Speed: Determines the camera's sensitivity to light. Choices are Auto, or 100, 200, and 400 ISO equivalents.
- Shutter Speed: Sets the shutter speed to Auto control, or offers a selection of slow shutter speeds from 0.7 to 16 seconds.
- Date/Time Stamp: Lets you "stamp" the date and time over the image, with a selection of formats.
 Playback
Mode: This mode lets you review captured images and movies on the memory
card, as well as erase them, protect them, or set them up for printing. Pressing
the Menu button displays the following options:
Playback
Mode: This mode lets you review captured images and movies on the memory
card, as well as erase them, protect them, or set them up for printing. Pressing
the Menu button displays the following options:
- Magnify: Enlarges the currently-displayed captured image as much as 4x.
- Delete: Pulls up the Delete menu, which erases the current image or all images from the CompactFlash card.
- Protect: Marks the current image for write-protection, or removes write-protection. Protected images cannot be deleted or manipulated, except through card formatting, which erases all files.
- Slide Show: Activates an automated playback of all images on the card, with a selection of interval times.
- Print Order: Determines how many copies of the current image will be printed, with an option for creating an index print.
- Picture Info: Displays a long list of exposure information about the current image.
 Setup
Mode: Automatically displays the camera's settings menu:
Setup
Mode: Automatically displays the camera's settings menu:
- Power Save: Designates whether or not the camera turns itself off after a length of inactivity.
- Digital Zoom: Disables digital zoom, or specifies how the camera activates digital zoom while zooming. Choices are Continuous (meaning the zoom range continues from optical to digital automatically) or Pause (meaning the zoom pauses at the end of the optical range).
- Camera Sounds: Controls the camera's beep sounds, with choices of Off, Selected On, and All On.
- Date/Time Set: Sets the camera's internal calendar and clock.
- Video Out: Specifies NTSC or PAL video timing.
- Language: Changes the camera's menu language to English, French, German, Spanish, Italian, or Portugese.
- Format Card: Formats the CompactFlash card, erasing all files (even protected ones).
- Reset User Settings: Determines whether camera settings are reset when the camera is powered off.
- About This Camera: Displays an information page listing the camera's firmware version.
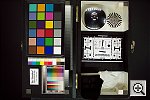
Sample Pictures
See our sample pictures and detailed analysis here. The thumbnails below show a subset of our test images. Click on a thumbnail to see the full-size photo.
 |
 |
 |
|
|
|
|
|
|
|
|
|
|
|
|
|
|
|
|
|
|
|
|


Specifications
See the specifications sheet here.
Picky Details
Information on shooting speed, battery life, etc. can be found here.
- Color: The DX4900 did a great job here, producing accurate color
when shooting outdoors and under the studio lighting. White balance wasn't
always spot-on, as I saw slight reddish casts from the Daylight setting,
and slight greenish/yellow ones when using the Auto option. Overall though,
color was really exceptional, and I doubt the average user would even be
aware of the slight casts I'm commenting on. The DX4900 did exceptionally
well under standard incandescent room lighting, a lighting condition that
many digicams have a great deal of trouble with. All in all, the DX4900's
photos definitely live up to the reputation of "Kodak color."
- Exposure: The DX4900 produced an accurate exposure in most cases,
although its photos tended to be rather contrasty. The camera's high contrast
resulted in lost highlight and shadow detail under the harsh lighting of
my outdoor tests, shot in full sun. The half-step EV adjustments were also
too coarse to accurately control exposure under these situations as well:
Third-step controls would have been much preferable.
- Sharpness: The DX4900 generally produced sharp images with little
distortion. Its images have enough detail for good-quality prints at sizes
up to 11x14, or sharp 8x10s with significant cropping to improve composition.
The 4.0-megapixel CCD and lens produced good detail and definition. Optical
(geometric) distortion was very low, but chromatic aberration in the corners
of the image produced colored "halos" around bright objects there.
The strongest distortion was in the form of corner softness, with the most
visible instance in the Macro test shot.
- Closeups: The DX4900 performed slightly better than average in
this category, capturing a macro area of just 3.06 x 2.04 inches (77 x 52
millimeters). The coins, brooch, and dollar bill all showed great detail,
but there was a lot of softness in the corners of the image. (This is a
frequent, albeit unfortunate characteristic of many digicams I test - Plan
on centering your subject in the frame when snapping macro shots.) Color
and exposure were both accurate. The camera's flash had just a little trouble
throttling down for the macro area, creating a hot spot in the top right
of the frame, and a very dark lower left corner.
- Night Shots: The DX4900's maximum shutter speed of 16 seconds results
in excellent low-light shooting capabilities, as the camera was able to
capture bright, clear images at light levels as low as 1/16 foot-candle
(0.067 lux) at both the 200 and 400 ISO settings. The ISO 100 setting produced
bright images down to 1/8 foot-candle, or 0.134 lux, with a slightly dim
image at the 1/16 foot-candle setting. Thus, the DX4900 should easily handle
dark shooting situations, well below average city street lighting at night.
Color was good, but slightly warm and yellowish/greenish at the lower light
levels. Noise was only moderately high at the 400 ISO setting, and minimal
at ISO 100.
- Battery Life: Because it uses only two AA cells, battery life on
the DX4900 is a bit limited. With the LCD display on in capture mode, a
freshly charged set of high-capacity NiMH batteries will only last about
an hour. With the LCD off though, you can leave the camera on for as long
as five hours and still manage to snap a few shots. In playback mode, your
batteries will last between an hour and a half and two hours. (Even if you
buy the dock with its rechargeable batteries, definitely plan on
buying another set or two of high-capacity NiMH AA cells to charge and pack
along on any excursion.)
In the Box
The DX4900 arrives with the following items:
- Wrist strap.
- One CR-V3 lithium battery.
- USB cable.
- NTSC video cable (US models).
- 16MB CompactFlash card.
- Dock insert (for use with optional accessory camera dock).
- Software CD.
- Instruction manual, software guide, and registration kit.
Recommended Accessories
- Larger capacity CompactFlash card.
- Dock kit (which includes rechargeable batteries).
- Additional set of rechargeable batteries.
- Battery charger (if you're not buying the dock kit).
- Soft case.
- Lens accessory kits.
Conclusion
With its 4.0 megapixel CCD and advanced feature set, the DX4900 currently (April,
2002) crowns Kodak's EasyShare camera lineup. Although it sports advanced options
like variable ISO, spot metering, and long manual shutter times, the 4900 remains
true to its EasyShare roots, remaining simple enough for even relative novices
to operate confidently. Its images are a bit overly contrasty in my opinion,
but show excellent color under a wide variety of shooting conditions. In particular,
it handles indoor incandescent lighting with aplomb, something few digicams
manage well. While it won't by any means qualify as an "enthusiast"
camera, the DX4900 has enough advanced options that it could satisfy the camera
bug in a family, while still remaining easy enough to operate that the kids
could manage it. Kodak's aggressive pricing is the icing on the cake: If they'd
introduced the DX4900 at $499, it would have been a good deal, but at only $399
it's an outstanding one. (This review was written in early April, 2002: Digicam
prices drop over time, so the "amazing" price of $399 will be amusing
a year or two from now. As of this writing though, the DX4900 is one of the
best camera bargains on the market.)

Follow Imaging Resource: