Canon EOS-1Ds Mark IICanon upgrades their "ultimate" d-SLR with 16.7 megapixels of resolution and significant performance improvements.<<Exposure :(Previous) | (Next): Flash>> Page 8:The "Red Problem," Description and WorkaroundReview First Posted: 9/26/2005 |
The "Red Problem," Description and Workaround
Soon after production models of the 1D Mark II began hitting retail shelves, users reported odd behavior when photographing strong reds. As time went on, some users also found similar issues with some shades of blue, under certain ill-defined conditions. In our review of the EOS-1D Mark II, we reported in quite some detail on this problem, and how to work around it.
It turns out that the EOS-1Ds Mark II also has the same problem, albeit not quite as severely. To study the problem, I put together a "red-hue torture test" in the studio, using our artificial "sunlight" lighting setup. (The smooth spectrum of the dichroic-filtered incandescent lighting of this setup should give rise to fewer potential problems with metamerism than the more "spiky" spectral distribution of HMI lights, and would avoid potential problems with fluorescence from the UV content of strobes.)
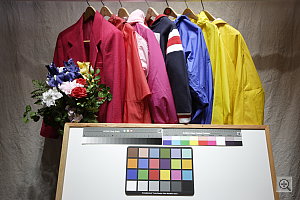
The image above shows the test scene I set up (as rendered by Digital Photo Professional, which did indeed produce the best results). There's a collection of bright colors in the red/magenta portion of the spectrum, as well as a bright blue and yellow, some greens in the flower bouquet, and several color and grayscale reference targets, so I could see how the color management affected other portions of the spectrum.
This test revealed that the 1D Mark II and (to a slightly lesser extent) the 1Ds Mark II oversaturate the red channel when faced with very strong, out-of-gamut red hues, when shooting in an sRGB color space. This has the effect of losing considerable detail in strong reds and magentas. The problem is greatly alleviated by shooting in the Adobe RGB color space, and pretty much entirely goes away if you shoot in RAW format, and then process the images in Canon's Digital Photo Professional software.
In early communications with them, Canon felt that the problem was caused by people inadvertently shooting with the 1D Mark II configured with a high-saturation color matrix setting. Our tests on that model, though, indicated that this was not the issue. Rather, the problem seems to lie in the camera's internal color management processing, as it rendered the images into sRGB JPEGs -- RAW files processed through the Digital Photo Professional application did just fine, and JPEGs in the Adobe RGB color space don't show the problem nearly as strongly.
For a full discussion of the issue, and the diagnostic tests that led us to the conclusions just stated, see page 8 of my Canon EOS-1D Mark II review.
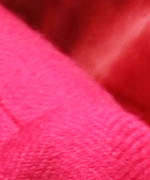
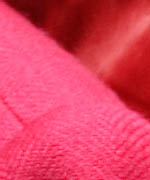
Rather than go back over all the ground I covered with the 1D Mark II, this time around, I'll simply show you the results produced by the 1Ds Mark II straight from the camera, as well as after processing from RAW files in Digital Photo Professional and Adobe Camera Raw.The results were very interesting, and underscore the importance of RAW shooting and the use of the Digital Photo Professional software package for color-critical work with the EOS-1Ds Mark II. The thumbnails below show the results with various combinations of color settings and conversion methods. The color of the magenta jacket on the left side of the frame should be more purplish, with more color separation between it and the red nylon shell to the right of it. Also, because the red channel completely saturates in the highlight on the shoulder of the jacket, considerable detail is lost.
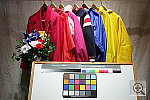
| EOS-1Ds Mark II Red Hues (All examples rendered in the sRGB color space) |
||
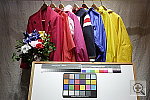
| sRGB JPEG straight from the camera | Digital Photo Professional from RAW |
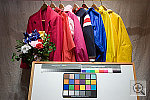
Adobe Camera Raw, processed through Adobe Photoshop CS2 |
 |
 |
 |
 |
 |
 |
The color of the magenta jacket on the left side of the frame should be more purplish, with quite a bit of color separation between it and the red nylon shell to the right of it, and the EOS 1Ds Mark II does a pretty good job of this. Because the red channel completely saturates in the highlight on the shoulder of the jacket though, considerable detail is lost. From this, it's pretty clear that the 1Ds Mark II has difficulty with the (admittedly very tough, out-of-gamut) magenta of the jacket on the left, and also somewhat oversaturates the magenta jacket that's more towards the middle of the frame as well. While not shown here, it seemed that reducing the camera's saturation setting had relatively little effect. As noted, close inspection reveals that what's happening is that the red channel saturates completely, well short of the point of maximum brightness/saturation. This is a not-uncommon issue in color management when dealing with out-of-gamut colors: The color management scheme just tries for the best match it can manage, and when the color goes out of gamut, it "clips", the affected color channel staying pegged at its maximum value, while the others change in accordance with the color-mapping equations.
A better (or at least, more often preferable) approach is that taken by the Digital Photo Professional software. Rather than aiming for the best accuracy for in-gamut colors, and letting out-of-gamut ones clip, this approach is to compress the color at the edges of the available color space, so some range of out-of-gamut colors are mapped to the edge of the color space. Typically, colors are mapped exactly in areas that are well within the available color space, but a region of color space near the edge of the gamut is selectively compressed, so at least some differences in relative color will still be displayed as the subject moves out of gamut, but a broader range of color can still be accommodated. (This is a very simple description of the concept of gamut compression. - The real art comes in deciding exactly how to compress the color, over what range of values, and how to transition from exact mapping to varying degrees of compression.)
Adobe Camera Raw (Version 3.0, running from within Photoshop CS2) seems to do an even better job of holding onto detail in the highlights on the magenta jacket, but the result is a little open to interpretation: A larger version of the image, viewed in Photoshop itself (rather than via a web browser) reveals an unnatural-looking level of contrast in the weave of the magenta fabric, and the hues are shifted further away from the actual colors of the original objects.
Bottom line then, there are issues to be found in some areas of the spectrum (strong magentas and reds in our testing, possibly other colors as well - Shawn also had issues with a bright orange on a model's bikini he shot with the 1D Mark II), but when working with the JPEG files generated in-camera. Processing RAW images through Canon's Digital Photo Professional software seems to avoid these color issues almost entirely, and Adobe Camera Raw also does a much better job than the camera's internal processing.
Tonality and Custom Tonal Curves
This was a major feature of the original 1D, but also a bit an Achilles heel. In the 1Ds Mark II, most limitations have been addressed. The original 1D's default tone curve was rather contrasty, but its support for custom tone curves at least gave you a way to deal with the issue. The remaining problem though, was that the process of manipulating tone curves in Canon's EOS Capture utility was glacially slow, at least on Macintosh computers. With the version shipped with the 1Ds Mark II though, not only is the camera's default tone curve less contrasty, but the software is much more responsive when you're interactively adjusting a tone curve. Now, creating a custom tone curve and downloading it into the camera is a relatively painless process. (Although I would still like to see it be a little faster in displaying the results of a tone curve tweak.)

Follow Imaging Resource: