Fuji FinePix F601 ZoomA new SuperCCD sensor gives Fuji's latest ultra compact true 3.1 megapixel resolution and great color.<<Optics :(Previous) | (Next): Shutter Lag & Cycle Time Tests>> Page 6:Exposure & FlashReview First Posted: 6/21/2002 |
Exposure
Exposure control is fairly uncomplicated on the F601 Zoom, though you have a lot of options to choose from. The Mode dial selects between Manual, Scene, Auto, Movie, and Audio recording modes, while a Mode switch on the back panel controls whether the camera is in Record or Playback mode. In Auto mode, the camera maintains control over the entire exposure (including aperture and shutter speed settings), leaving you only to decide whether to use the flash or not. Both shutter speed and aperture are reported on the LCD monitor when the Shutter button is halfway pressed, giving you an idea of what the exposure will be. Under Manual exposure mode, you have the option of working in Program AE, Aperture Priority, Shutter Priority, or full Manual exposure modes. Program AE keeps the camera in control of both shutter speed and aperture, while the remaining modes offer control over one or both settings. (Note though, that the "Shutter priority" mode is rather limited because the camera has only two aperture settings available to match up with the selected shutter speed.) Shutter speeds range from 1/2,000 to three seconds, giving the camera good low-light shooting capabilities. (I noticed rather noisy results at the highest sensitivity settings in the low-light test, but camera performance at the other ISO settings was good enough to capture bright, clear images in average city street lighting.)
In Scene mode, you have five preset "scene" options to choose from: Portrait, Landscape, Sports, Night Scene, and Continuous Shooting. In Portrait mode, the camera employs a larger aperture setting to decrease the depth of field, capturing a sharply focused subject in front of a slightly blurred background. Alternatively, Landscape mode uses a smaller lens aperture and sets focus at infinity to capture broad vistas of scenery. Landscape shots typically have both the foreground and background in sharp focus, and the flash is unavailable. Sports mode selects faster shutter speeds, for capturing fast-moving action. The flash is available in Sports mode, but only with Auto or Forced settings. Night Scene uses slower shutter speeds for shooting at lower light levels, allowing more ambient light into the image. Night Scene is good for sunsets and city night shots (such as neon lights), as the increased amount of ambient light allowed into the image preserves color in darker settings. Finally, Continuous Shooting mode captures as many as 40 consecutive shots while the Shutter button is held down. Resolution automatically switches to 1,280 x 960 pixels in Continuous mode, although both Fine and Normal quality settings remain available. Continuous mode also automatically disables the flash. (Note that this Continuous Shooting mode is separate from the one available through the main Record menu, described further on.)
The F601 Zoom's three metering modes include Average, Spot, and Multi settings. Average metering reads the entire scene and averages the readings to get the best overall exposure. Spot metering takes just one exposure reading from the center of the subject, and works best when the lighting on the subject is significantly different than that on the background. The third option, Multi, takes a series of exposure readings throughout the image to determine the best overall exposure. Multi is the default metering system in most exposure modes. Instead of offering an AE / AF lock button, the F601 Zoom lets you manually lock exposure and focus by framing a portion of the subject in the center of the frame, halfway pressing the Shutter button, and then recomposing the shot while keeping the Shutter button halfway pressed. You can also use this method to lock exposure only, after setting the manual focus. An exposure compensation adjustment is available through the Record menu in Manual record mode only, adjusting the exposure from -1.5 to +1.5 exposure equivalents (EV) in one-third step increments. If you're unsure of the correct exposure, an Auto Exposure Bracketing option captures three consecutive shots at different exposure settings (one at the suggested meter reading, one underexposed, and one overexposed). Successive shots can vary by 1/3, 2/3, or one exposure equivalent (EV), depending on your selection in the Record menu. (Auto Bracketing is activated through the Continuous Shooting option of the Record menu.) After the series is shot, a preview screen appears on the LCD monitor, letting you select which image you want to record to the memory card. (You can also choose to record or delete all three images.)
Light sensitivity options include ISO equivalents of 160, 200, 400, 800, and 1,600. When 800 or 1,600 equivalents are selected, the image resolution is automatically set to 1,280 x 960 pixels with Normal JPEG compression. White Balance settings match a wide variety of light sources, including Sunny, Shade, Daylight Fluorescent, Warm White Fluorescent, Cool White Fluorescent, and Incandescent, with an Auto setting as well. When the self-timer is activated (through the Record mode), the camera counts down from 10 seconds by lighting a small LED on the front of the camera for five seconds, and then flashing it for another five seconds. A numerical countdown also displays on the LCD monitor. Finally, there's also a sharpness adjustment that softens or sharpens the outlines in the image, with settings of Hard, Normal, and Soft.
Flash
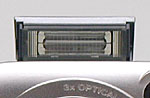 A Flash Open button at the top of the back panel pops the flash up from its compartment on top of the camera. The default flash mode is Auto, which fires the flash as dictated by lighting conditions. Three other flash modes are controlled through an option in the Record menu, and include Red-Eye Reduction, Forced, and Slow Synchro. Red-Eye Reduction works in a similar manner to Auto, although the camera fires a small pre-flash before the main exposure to make your subjects' eyes contract, reducing the occurrence of Red-Eye. Forced flash mode means that the flash fires with every exposure, regardless of light level. For night or twilight exposures, the Slow Synchro flash mode fires the flash in conjunction with a slower shutter speed, allowing more ambient light into the picture to balance the flash exposure. A fifth flash mode, Suppressed, is accessed simply by returning the flash to its compartment, preventing the flash from firing at all. The F601 Zoom also allows you to adjust the intensity of the flash from -0.6 to +0.6 exposure equivalents (EV) in one-third increments.
Fuji rates the F601 Zoom's flash as effective from 0.6 to 11.5 feet (0.2 to 3.5 meters) at wide angle and from 0.6 to 6.6 feet (0.2 to 2.0 meters) at the telephoto lens setting. These numbers agreed well with my own testing, and if anything are a little on the conservative side.
Continuous Shooting
The F601 Zoom can capture as many as four consecutive frames in rapid succession, at intervals as fast as 0.2 seconds in the standard Continuous Shooting exposure mode. (This mode is accessed through the Continuous Shooting option of the Record menu, as opposed to the Scene Continuous Shooting mode). In my own testing, the minimum interval I measured between frames in Continuous mode was 0.24 seconds, not quite up to Fuji's stated spec. After the series is captured, a preview screen displays all four images at thumbnail size, letting you review the series and pick the images to be recorded or deleted. The camera may capture less than four consecutive shots if the SmartMedia card is out of memory space. Interval times may vary as well, depending on the image size and quality settings, and the amount of image information to record. The camera apparently captures the raw CCD data to a buffer memory in continuous mode, meaning that lower resolution settings don't result in longer capture series.
Movie Mode
Indicated on the Exposure Mode dial by a tiny movie camera symbol, Movie mode captures movies with sound for as long as the SmartMedia card has available memory space. Both 640 x 480- and 320 x 240-pixel resolutions are available, and movies record at approximately 15 frames per second. The LCD monitor must be activated in Movie mode, and the flash is disabled. Digital zoom is also deactivated in this mode, but the full range of optical zoom is available. Recording starts and stops with a full press of the Shutter button, and a timer appears in the upper right corner of the LCD monitor to count down the remaining seconds of available recording time.
Audio Recording
In addition to the sound recorded with movie files, the F601 Zoom can also record as much as 4.5 hours of sound per audio recording, depending on the amount of SmartMedia space available. As with Movie mode, the available recording time appears on the LCD screen, and a full press of the Shutter button starts and stops recording. To prevent the lens from extending from the camera, turn the Mode dial to the Audio position (small microphone icon) before powering on the camera. An Audio Indexing feature lets you mark key points in an audio recording. Simply pressing the up arrow of the Multi controller during recording places an index marker in the file, so you can quickly return to each key moment. As many as 256 index markers can be set in one recording, with intervals between them as short as one second.
You can also record voice captions to accompany captured still images, although in Automatic exposure mode only. To record captions, simply turn on the Voice Memo option in the Record menu. Once you capture an image, a "Rec Standby" message appears in the LCD monitor. Pressing the Menu/OK button begins the recording, which can last as long as 30 seconds. The amount of remaining recording time appears in the LCD monitor. Pressing the Menu button again saves the sound clip on the SmartMedia card.
For both types of audio recording, Fuji recommends placing the microphone (on the front panel) at least 7.8 inches (20 centimeters) away from the subject.
Reader Comments! --> Visit our discussion forum for the Fuji FinePix F601 Zoom!

Follow Imaging Resource: