Fuji FinePix S3 ProFuji updates their digital SLR with a 12.34-megapixel Super CCD SR II, for amazing tonal range.<<Video & Power :(Previous) | (Next): Test Results & Conclusion>> Page 12:Included SoftwareReview First Posted: 9/7/2005 |
Included Software
The S3 is accompanied by both USB and FireWire cables for connection to a PC or Mac. Included software CDs offer Adobe Photoshop Elements, USB drivers, Fuji's FinePix Viewer, Fuji's Hyper-Utility 2, a fairly capable file browser/manipulator that also incorporates RAW file conversion and manipulation, VideoImpression, and Apple QuickTime 5.0. Fuji's software provides the basics for downloading and browsing images, while Photoshop Elements provides good image-manipulation capability. I applaud Fuji for including software for converting the RAW image files to other formats in the box, at no added charge. In the case of the S3 Pro, the RAW converter is also key for unlocking the full power of its "SR" sensor technology, letting you choose just how much dynamic range expansion you want for each image. Kudos too, for the fairly extensive remote-capture capability that Fuji's Hyper-Utility now offers. Here's a look at some of the software that accompanies the S3 Pro:
Hyper-Utility
Main Screen
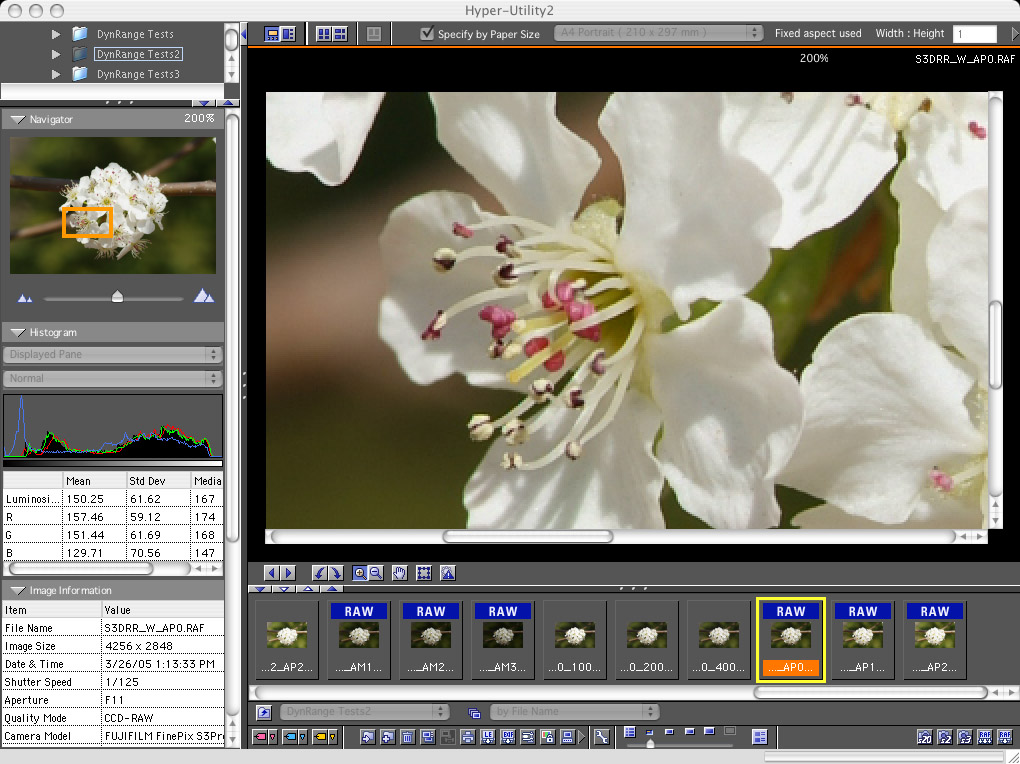
Hyper-Utility's main screen shows a typical "filmstrip" view, popular in many image browsers. At the top left corner is a directory tree that can be expanded or contracted as you'd like (it's somewhat contracted in this view). Below the directory tree is a "navigator" thumbnail showing what part of the larger image is being shown in the main panel on the right. Below that is a very nice 3-color + luminosity histogram display, followed by fairly detailed image information, extracted from the file's EXIF headers. A nice feature of the histogram display is that you can choose to view the histograms of the image as a whole, just the portion that's currently displayed in the preview pane, or a rectangular area that you've selected with a cropping tool. A row of thumbnails run along the bottom of the screen in this view, but they can be moved to the right side of the currently-displayed image by selecting a vertical-format view.
Besides simply browsing through your images, Hyper-Utility lets you do the following (listed in the order they appear in the application's toolbar, with menu options at the bottom):
- Rotate images left or right, zoom in or out.
- Trim to a rectangle, copy to clipboard.
- Show/hide exposure warnings.
- Mark images with Cyan, Blue, or Yellow "markers." Marked images can be moved or manipulated as groups.
- Move to Folder, Copy to Folder, Move to Trash.
- Display in a slide show.
- Preview printed output and print.
- Convert RAW images to EXIF-TIFF, extract to EXIF-JPEG, or compress RAW files.
- Modify CustomRendered information, to disable automatic correction when printed or edited with a device/application that respects the CustomRendered data.
- Rename, edit date, edit comments.
- Set thumbnail display size
- Enable or disable "tooltip" display of image pixel data.
- Switch from thumbnail "filmstrip" view to text listing of file details. (name, type, date/time, size, exposure info, etc.)
While I didn't want to take the space or time to show the relevant screens here, Hyper-Utility is an unusually configurable application. Through no fewer than 14 separate preferences screens, you can change options for image display, color matching, highlight/shadow warning points, image types than can be displayed or saved from the program, thumbnail caching, histogram display normalization, button sizes, and even which controls appear on the application's toolbar.
Expanded thumbnail view
You can have as many or as few thumbnails in view as you like, simply by dragging the bar that separates the image preview window and the thumbnail pane. Thumbnails may be any of five different sizes. The screenshot here shows the vertical format mentioned above. (Best-suited for vertical-format images, of course.)

Image Info Option
Clicking the Image Info icon at the bottom of the screen displays all the EXIF information next to each thumbnail, handy if you're needing to quickly sort through a batch of bracketed exposures for particular exposure settings. Dragging the bar between the thumbnail and preview windows all the way over the preview pane lets you see only the thumbnails, as seen here.
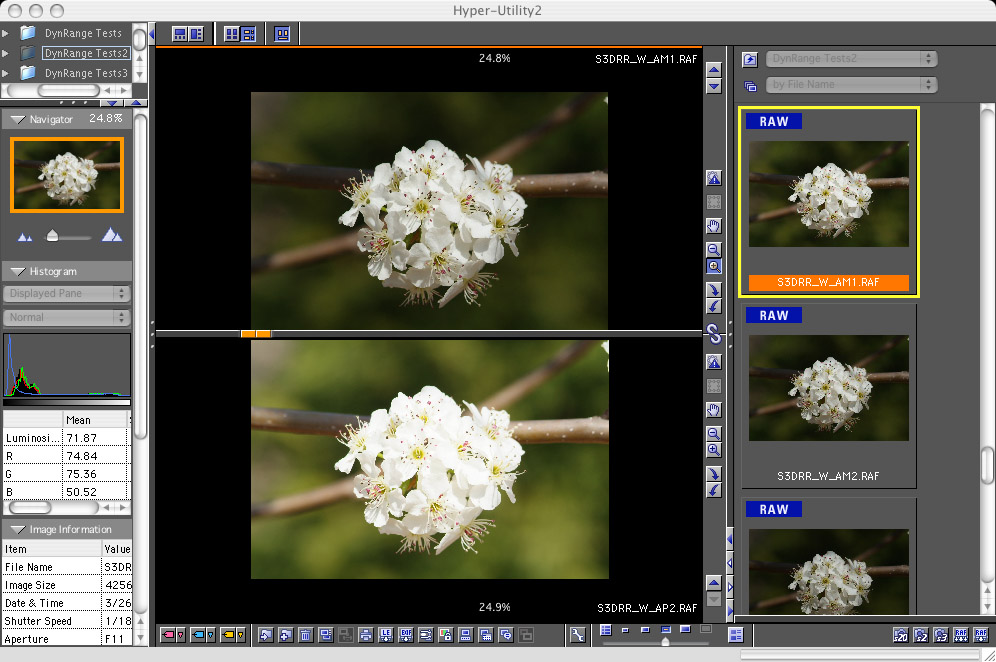
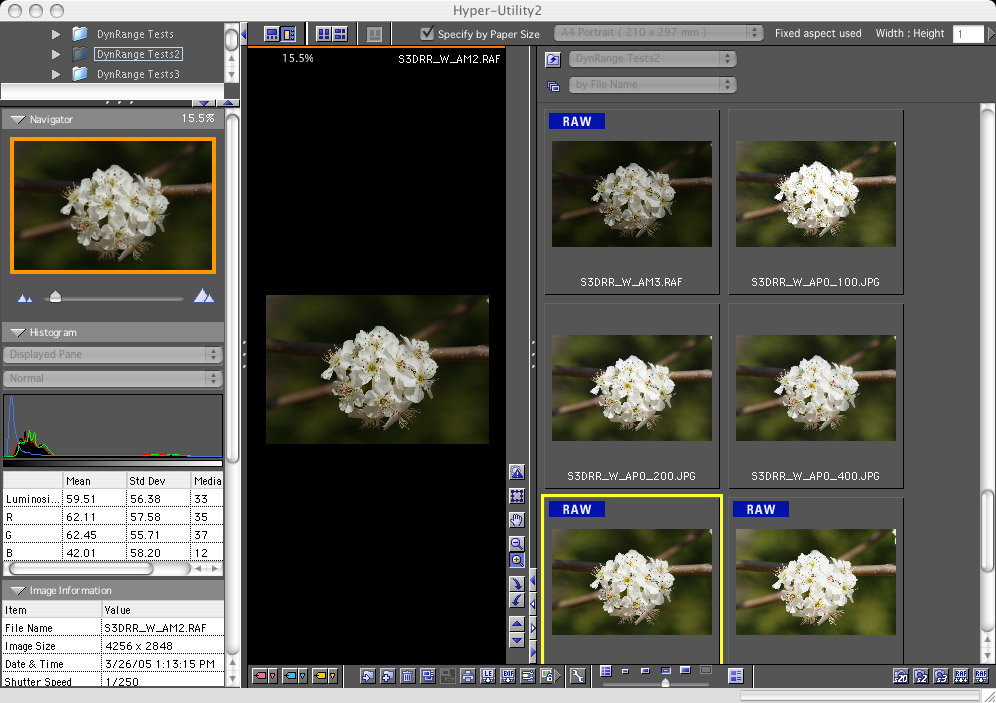
Image Comparison
A nice feature of Hyper-Utility is an image-comparison option. You can not only see two images side by side, but you can zoom in on them as well, with the pan/zoom settings locked between the two windows. This is very handy for checking details in two different shots, to pick the best version.

RAW File Converter Utility
I found the Raw converter function in Hyper-Utility to be more than a little awkward to navigate. You access it by clicking on a thumbnail to select it, then clicking on the tiny "RAF" Raw File Converter icon in the extreme lower right corner of the window. This opens the Raw File Converter pane on the right side of the screen, and the image or images you'd selected now appear(s) in a new thumbnail filmstrip along the bottom of the screen. Bizarrely, if you had only one image selected, you have re-select it once you're in RAF in order to work with it.
Options at the top of the RAW File Converter pane control output parameters, settings saving and restoring, and single or batch conversion. Output options include a choices for color/film simulation including sRGB, Adobe RGB, sRGB/Pro Negative, and sRGB/Fujichrome. File format options include TIFF (8 or 16 bit) and JPEG at any of three compression levels. Settings can be saved to and recalled from disk, and you can also revert any manual settings you've made to the original camera values.
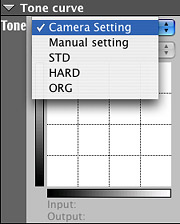
Initially, the image-manipulation controls in the right pane are disabled, since the converter defaults to "Camera Settings" in the "Conversion Conditions" pulldown menu. Selecting "Custom setting" there enables the image-adjustment controls.
By default, all the adjustment control panes are opened, I've collapsed them all down in the shot above, so you can see the list of them all together. Controls include Tone Curve, White balance, Sensitization (think EV adjust), Color, Sharpness, and Dynamic Range. The table below shows each adjustment pane separately in the order they appear in the application (right-left, top to bottom), with pulldown options where appropriate.
 |
 |
| Tone Curve: You can choose either the tone setting in the camera when the image was shot, or one of the three camera settings, or a manual curve, entered by tugging points on a curve up or down. The tone curve only appears when you're in Manual mode, so there's no indication of what sort of tone curves the camera settings correspond to, something that would be nice to be able to see. |
White Balance: Again, the first option is the setting in the camera at the time of capture. Other options are as shown. Some mimic camera options, while the gray picker lets you pick a point that you know to be a neutral tone. Kelvin options range from 2500 - 9500K in 100K increments. All settings here can be "fine tuned" by dragging a cursor point around an RGB color-circle display. (This does indeed seem to provide pretty fine control.) |
 |
 |
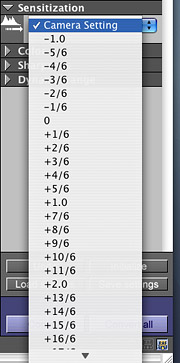
| Sensitization: Fuji uses the term "sensitization" where others would say "exposure compensation." This is a typical exposure adjustment, in units of fractions of an EV, ranging from -1.0 to +3.0 |
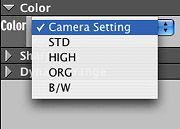
Color: These are just the four color options from the camera's shooting menu, including black and white. |
 |
 |
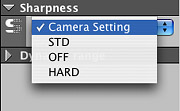
| Sharpness: The three options from the camera shooting menu for image sharpening. |
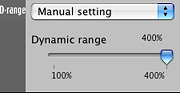
Dynamic Range: This control determines how much of the low-sensitivity pixel data is used in the image. The percentage here refers to exposure headroom above that provided by the "S" pixels. 100% means no dynamic range expansion, 400% means the full range of the low-sensitivity pixels is being used to preserve highlight detail. |
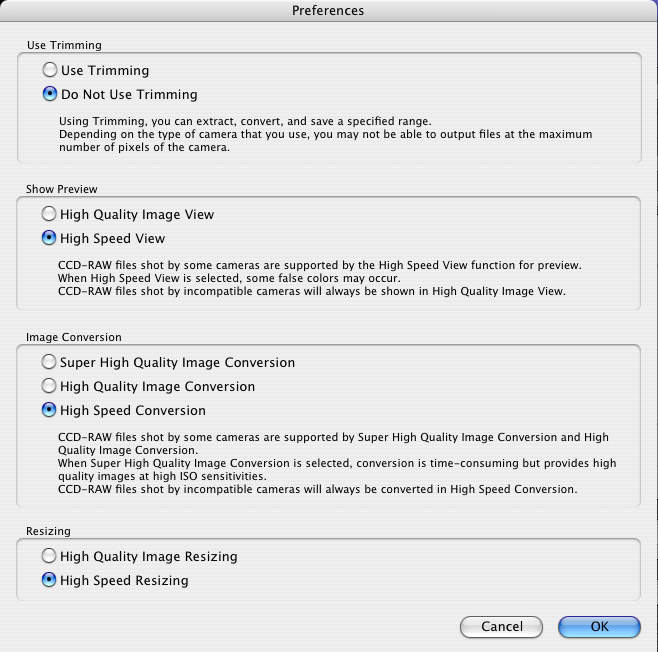
In addition to the controls just covered, a preferences dialog lets you select trimming/resizing and preview display options, as well as parameters affecting the conversion process itself. (Interestingly, the notes here suggest that the "Super High Quality Image Conversion" option applies more sophisticated noise reduction techniques than the default.) The Image Resizing options seem to affect how the software creates 6-megapixel images from the 12 megapixels of raw image data. The "High Quality Image Resizing" option seems to preserve edge detail better and reduce color aliasing somewhat
Camera Control and Remote Capture
The latest versions of Hyper-Utility now support fairly complete camera control from a computer, as well as a tethered mode in which the camera is controlled locally, but images are automatically transmitted to the computer for storage. The remote capture mode also includes an intervalometer function, that lets you program the camera/computer combo to snap anywhere from 1 to 1475 images, at intervals ranging from 4 seconds to 120 minutes and 59 seconds.

The screenshot above shows the Hyper-Utility in Camera-Capture mode. As successive images are captured, they're immediately transmitted to the computer and displayed in the preview window. The readouts on the right show the exposure mode, ISO setting, shutter speed and aperture, and exposure compensation used to capture each shot. Previous shots appear in the thumbnail "filmstrip" along the bottom of the window.
In the Box
The Fuji S3 Pro ships to the US market with the following items in the box. (Note that overseas models may have very different complements of software and accessories.)
- S3 Pro camera body
- Shoulder Strap
- 4x AA NiMH batteries
- Battery charger
- USB Cable
- IEEE 1394 (FireWire) cable
- Video Cable
- Cable cover and cable clamp
- Body Cap, eye piece cap, LCD cover
- Software CD
Reader Comments! --> Visit our discussion forum for the Fuji FinePix S3 Pro!

Follow Imaging Resource: