Fuji FinePix S9000By: Dave EtchellsFuji's latest bridge camera offers a larger, 9.0-megapixel SuperCCD HR imager with a high resolution electronic optical viewfinder. <<Optics :(Previous) | (Next): Shutter Lag & Cycle Time Tests>> Page 6:Exposure & FlashReview First Posted: 12/14/2005 |
Exposure
Exposure control on the Fujifilm FinePix S9000 can seem a little complicated at first, given the number of external controls and their wide layout. Once you get the hang of it though, camera operation becomes very simple. The large number of external controls is actually a great time-saver, helping you avoid fishing through LCD menu screens for common settings changes. The S9000 also features the FinePix menu button, which provides quick access to the resolution, sensitivity, and color settings - but oddly not to the camera's RAW file format, which remains hidden in the setup menu.
A Power / Mode switch on top of the camera puts the Fuji S9000 into either Record or Playback modes, with an Off setting that completely powers down the camera. Once in Record mode, the main exposure modes are all accessed via the Exposure Mode dial, with options of Auto, Program AE, Shutter Priority, Aperture Priority, Manual, Movie, Night, Landscape, Portrait, Natural Light, and Anti-Blur. In full Auto exposure mode, the camera controls most aspects of the exposure, leaving you in charge of zoom, flash mode, metering mode, focus mode, ISO sensitivity, AE lock, and any special drive settings. The Scene Program modes offer a handful of preset shooting modes, set up for specific situations. Portrait, Landscape, and Night Scene modes are self explanatory; the Natural Light and Anti-Blur modes bear a little further explanation. Natural Light mode boosts ISO sensitivity, enough to allow low light scenes to be captured without blurring, and without using a burst of flash that might disturb your subject, and give harsh, unflattering shadows. Anti-Blur mode likewise boosts ISO sensitivity, but with a bias toward faster shutter speeds that freeze both blurring from camera shake and subject movement. Both modes aim to take advantage of the better-than-average high ISO sensitivity of Fujifilm's proprietary SuperCCD image sensors, although we still found images shot at ISO 800 and 1600 to have objectionable levels of noise that gave images a pointillist effect.
The remaining exposure modes on the dial offer a range of manual control options. Program AE lets the camera control shutter speed and aperture, but gives you control over all other exposure variables. A nice feature here is that rotating the Command wheel cycles through a range of equivalent exposure settings, letting you choose between wider apertures and faster shutter speeds or the opposite. (A nice touch, since this is often what you're trying to accomplish when you'd otherwise drop into Aperture or Shutter Priority mode.) Aperture and Shutter Priority modes both offer limited control, letting you adjust either the lens aperture or shutter speed while the camera picks the best value of the other variable. In both modes, turning the Command wheel adjusts the setting you're controlling. An exposure readout on the LCD reports whether the resulting shot will be under- or overexposed, giving you a chance to change the setting. Finally, Manual exposure mode offers total exposure control, letting you select both aperture and shutter speed together. In all exposure modes other than Auto, the Scene modes, and Manual, the Exposure Compensation adjustment lightens or darkens the overall image from -2 to +2 exposure equivalents (EV) in one-third-step increments.
Unusually, neither the shutter or aperture priority modes allows access to the full range of the variable in question. In Shutter priority mode, shutter speeds range from 1/4,000 to four seconds at wide angle, or 1/2000 to four seconds at telephoto. In Aperture priority mode, available apertures range from f/2.8 at wide angle or f/4.9 at telephoto to f/8. Manual mode unlocks the full range - shutter speeds from 1/4,000 to 30 seconds (plus Bulb, which is likewise limited to 30 seconds), and apertures as small as f/11. It is fairly common to see cameras restrict the longer shutter speeds in Auto, Program and Shutter priority modes, but rather less common to see faster shutter speeds or the aperture range restricted in all but manual mode. Turning the Command wheel alone in Manual mode sets shutter speed, while holding down the Exposure Compensation button and turning the wheel adjusts the aperture setting.
By default, the Fuji S9000 uses a multi-segment metering system, which bases the exposure on readings taken from 256 zones throughout the frame. The camera also offers Average and Spot metering modes, accessible using the metering mode dial on the camera's rear dial (which can be a bit fiddly to grip and turn - good to prevent accidental settings changes, but awkward to adjust in a hurry). Average metering reads the entire scene and bases the overall exposure on the average value. Alternatively, Spot metering bases the exposure on a reading from the very center of the frame (good for off-center or high contrast subjects). The AE Lock button lets you lock the exposure for a specific part of your subject, by aiming the camera to center the area you want to base exposure on in the viewfinder, and then pressing the button until the AE Lock icon appears on the LCD display. Depending on the AE-Lock Mode setting in the camera's menu system, the exposure will either remain locked until the AE Lock button is pressed again or the Shutter button is fully pressed and released, or the lock will be held for only as long as the AE-Lock button remains pressed in.. While you can achieve much the same effect with most cameras by half-pressing and holding the Shutter button prior to the exposure, that approach has the sometimes undesired side effect of also locking focus. You may not need it often, but when you do, a separate AE Lock control is invaluable.
If you're not sure of the exact exposure to use, an Auto Exposure Bracketing function snaps a series of three images at different exposure settings, making it easier to get a good exposure in critical shooting conditions. You can set the exposure step size for these series through the Record menu - either 1/3, 2/3 or 1EV steps. The camera captures one image at the normal exposure, one slightly underexposed, and one slightly overexposed. In any exposure mode except for the Natural Light and Anti-Blur scene modes, the camera's ISO sensitivity setting can be adjusted to Auto, 80, 100, 200, 400, 800, or 1600.
The Fujifilm S9000 has a full range of color balance settings, adjusted through the White Balance option. Choices include Auto, Custom 1, Custom 2, Daylight, Shade, Daylight Fluorescent, Warm White Fluorescent, Cool White Fluorescent, and Incandescent settings. The two Custom settings are manual adjustments, and base the white balance on a white card placed in front of the camera. These settings are saved in the camera's memory, allowing you to recall either the Custom 1 or Custom 2 setting at any time. (Having two separate custom white balance settings can be very handy if you're shooting in an environment with mixed lighting.) In addition to white balance, a choice of Sharpness, Saturation, and Contrast adjustments lets you control each variable in-camera, with one arbitrary step above or below the default setting. A Color adjustment lets you record images in Standard Color, Black-and-White, or Chrome. The Chrome option raises contrast and saturation for more vivid images.
For delayed exposures, the Fuji S9000's Self-Timer mode offers two- and 10-second countdowns between the time the Shutter button is fully pressed and when the shutter actually fires. The 10-second option gives you time to compose the shot, then run around in front of the camera to get into your own pictures. The two-second self-timer option is very handy when you have the camera propped on a tripod or other support for a long exposure, and don't want the pressure of your finger on the Shutter button to jostle it. With the short self-timer option, you can prop the camera, trip the timer, and the shutter will release a couple of seconds later, after any vibrations have died down.
Drive Modes
The Fuji S9000 offers a range of high-speed shooting modes, all selected by holding down the Drive Mode button and turning the Command wheel. The available modes are called Top-4 Frame, Auto Bracketing (discussed above), Final-4 Frame, and Long-Period Continuous Shooting.
Perhaps the most interesting of the continuous modes are the ones called Top-4 Frame and Final-4 Frame. Top-4 Frame captures four consecutive frames at intervals as quick as 0.61 seconds, depending on the file size and quality settings. After the series is captured, all images are displayed at the bottom of the LCD screen as thumbnails while they are being recorded to the memory card. Final-4 Frame mode captures as many as 40 frames at the same 1.65 fps frame rate while the Shutter button is held down. The camera then records the last four frames of the series, recording what happened just before you released the shutter button. Final-4 Frame mode is thus especially handy for capturing fleeting moments. If you're like me, you always recognize the perfect expression on your child's face or the perfect pose by your pet a fraction of a second after it's gone. With the Final-4 Frame feature, I can finally capture all those previously-missed moments, since the camera effectively reaches back in time to grab what I was looking at up to a second before I released the shutter button. For more extended rapid-fire shooting, Long-Period Continuous Shooting mode works only in Auto and Scene exposure modes, and at a reduced speed of 1.1 frames per second. What you gain though, is the ability to capture a maximum of 40 frames in a row, although the camera does slow after the first several frames. (See the detailed timing information later in this review for more information on buffer capacities and capture speeds.) As with the Movie mode though, you do need a fast memory card to get the best performance from Long-Period Continuous Shooting mode, and the S9000 seems to do quite a bit better with xD Picture cards than even high-speed CF cards.
A Multi-Exposure mode available only in the Program, Aperture Priority, Shutter Priority and Manual modes lets you overlay images in the same file, for a double-exposure effect. Activated through the settings menu, Multi-Exposure mode continuously overlays exposures until you tell it to stop, merging each new image with the one (itself possibly also a composite) already in memory. A preview screen appears after each shot, so that you can check the effect. You can also opt to return to the previous version of the image (before your last exposure) and start over from there. It seems easier to do this (with more control to boot) in an image-editing program, but perhaps users who prefer to make prints directly from their camera may appreciate the feature.
Flash
 The built-in, pop-up flash on the Fuji FinePix S9000 has a reasonable degree of power, effective to 18.4 feet (5.6 meters) at full wide angle. (At telephoto, the flash is effective to 9.8 feet (3 meters), not bad but the smaller maximum aperture at telephoto definitely hurts its range. The flash operates in one of five modes, all accessed by turning the Command wheel while pressing the Flash button on top of the camera. Modes include Auto (lightning bolt icon with an "A"), Red-Eye Reduction (eyeball icon), Forced On (lightning bolt), Slow-Synchro (lightning bolt with an "S"), and Slow-synchro with Red-Eye Reduction (eyeball with "Slow" beneath it). Auto and Forced On are pretty self-explanatory. Red-eye Reduction means that the camera fires a small pre-flash before the full flash, to reduce the occurrence of the Red-eye Effect. The Slow-Synchro modes combine the flash with a slow shutter speed and are good for night subjects because they allow more ambient light into the image. (This helps avoid the common syndrome of a ghastly white subject in front of a pitch-dark background so common in flash shots from low-end cameras.) A small release button on the left side of the flash (as viewed from the back) mechanically releases the flash from its compartment. Note that the flash must be popped up in order to change its operating mode. To disable the flash, it is simply pressed back down, latching it shut once more. A brightness adjustment accessed through the settings menu increases or decreases the overall flash power from -0.6 to +0.6 EV in one-third-step increments. This is handy for balancing flash exposure with light coming from other sources in the scene, although I'd really like to see it extend further toward negative exposure compensation, for those times when you really want only a subtle fill-light.
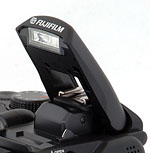
The external flash hot shoe on top of the camera features a single contact, and hosts a range of Fuji and third-party flash units, apparently synchronizing to shutter speeds as fast as 1/1,000-second. The internal and external flash units cannot operate together, so the pop-up flash should be closed when an external flash is in use. Finally, a PC Sync connector on the front of the camera caters for off-camera / studio flash strobes.
Movie and Sound Recording
The Fuji S9000's Movie mode captures moving images with sound at either VGA (640 x 480 pixels) or QVGA (320 x 240 pixels) resolutions, with a frame rate fixed at 30 fps, for as long as there is available card space. Full VGA resolution movies are becoming a little more commonplace these days, but as with most cameras offering such capabilities you do have to have a very fast memory card to keep up with the high data rate. Fujifilm also notes that when using microdrives in higher ambient temperatures to record movies, the microdrive may eventually overheat, requiring the camera to stop recording automatically. Movie recording stops and starts with a full press of the Shutter button, and a timer appears in the LCD monitor to report the available recording time. Most of the exposure features are adjustable in Movie mode, with the exception of flash, digital zoom, and the high-speed still-capture shooting options.
Accessed via the Playback menu, a Voice Memo mode lets you record short sound clips to accompany already-recorded still images. Voice captions can last as long as 30 seconds. When activated, Voice Memo mode begins recording audio immediately, with a recording indication on the LCD screen.
Reader Comments! --> Visit our discussion forum for the Fuji FinePix S9000!

Follow Imaging Resource: