
Digital Cameras – Canon EOS M3 Test Images
Not sure which camera to buy? Let your eyes be the ultimate judge!
Visit our Comparometer(tm)
to compare images from the Canon EOS M3 with those from other
cameras you may be considering. The proof is in the pictures, so let
your own eyes decide which you like best!
|
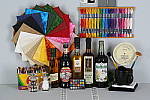
This is our new “Still Life” test target. We’re combining Here’s what to look for in this target:
|
||||||||||||||||||||||||||||||
|
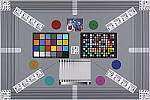
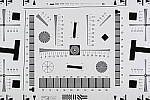
Our new “Multi Target” was first put into use in April, 2009, replacing the earlier “interim” design. This target incorporates a number of elements that combine aspects of the previous Multi target, as well as the previous Viewfinder Accuracy or “VFA” chart. Here’s some of what you’ll find in this target: Framing marks: This chart evolved from the earlier Viewfinder Accuracy chart, so one of its major uses is to measure viewfinder accuracy. (See notes in the Viewfinder Accuracy section, at the bottom of this page, for more information on this.) USAF resolution targets: An important use of this target is in evaluating lens quality, looking how well sharpness holds up as you move from the center to the corners of the frame. The little “USAF” resolution targets arranged at the center, in the corners, and along the diagonals are very useful for making fine judgements about blur, flare and aberrations in the image. We generally show crops of a USAF chip from a corner of the target and from the center, to show how lenses hold sharpness at wide and telephoto focal lengths. Alignment “bullseyes:” We find these graphics from the graphic arts world (used to align sheets of film in the old film-based prepress days) very useful for seeing chromatic aberration in lenses. The bold black/white elements are good for seeing the colored fringes caused by CA in the corners of the frame. MacBeth ColorChecker Chart: This is about as common a color standard as you can get these days, very widely available for only mildly exorbitant cost, and quite well controlled in its production. It thus serves as a good basis of comparison between cameras and between test setups. Imatest also understands the MacBeth colors very well, and uses them to produce its color accuracy map that we feature in all our reviews. MacBeth ColorChecker SG Chart: The ColorChecker SG chart provides a wider range of colors, to give a more detailed map of a camera’s color handling. We haven’t begun using this chart in the color-accuracy graphs we routinely offer, but expect to do so at some point in the future. In the meantime, we sometimes refer to this chart internally, to get a more complete idea of what a camera’s color map looks like. Log C/F Target: The progressive resolution pattern located just below the center of the target is a Log C/F (logarithmic contrast vs spatial frequency) chart. Digital camera noise reduction routines work by looking at levels of local contrast, flattening-out detail at progressively lower spatial frequencies as the local contrast decreases. (This is very commonly seen in human hair, grass, foliage, and other subjects with subtly-contrasting fine detail.) This chart lets Imatest analyze just how a camera makes the tradeoff between contrast, detail, and image noise. Color Starbursts: The six circular starburst elements arranged around the target are intended to reveal de-mosaicing artifacts and color-dependent resolution issues. The six starbursts provide examples of each combination of RGB colors intersecting each other. (That is, red, green, and blue against black, plus red against green, green against blue, and blue against red.) Given that the most common sensor RGB color filter pattern (the so-called Bayer) pattern has twice as many green pixels as red or blue, you’ll generally see that the green/black starburst shows the best resolution, while the blue/red one shows the worst. The effects of different sensor geometries and color filter array patterns will be revealed here. Musicians Image: Synthetic test patterns only tell you so much. While we have a lot of pictorial images in our other test targets, we thought it would be useful to include a small “natural” image here as well.
|
||||||||||||||||||||||||||||||
|
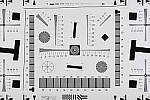
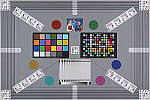
Part of the impetus in developing the new Multi Target in April 2009 was to switch to using a new 2x target for the resolution measurements, since the original ISO 12233 chart we’d used since the site first began in 1998(!) had become inadequate for testing the highest-resolution cameras. We’d for quite some time had a “homemade” 2x target, employing a shrunk version of the ISO 12233 chart, shot at 1/2 size. The resolution numbers on that chart all needed to be doubled to convert to the actual values, though, so we decided to go with a commercial 2x target to eliminate possible confusion on the part of our readers. Numbers on this new 2x resolution chart now read directly in hundreds of lines/picture height. (Because almost all of the area of this new resolution chart is now meaningful for resolution measurements, there was no longer space on it to overlay the MacBeth and other color targets on our prior Multi chart; hence the simultaneous change in our Multi target.) |
||||||||||||||||||||||||||||||
|
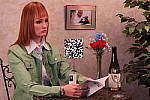
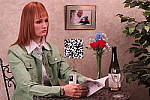
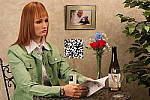
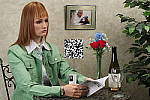
“Sunlit” Portrait The lighting in this shot is deliberately awful, about what you’d expect The reason for the harsh lighting is to provide a real “torture Look for:
To view the entire exposure series from zero to +1.0 EV, see files EOSM3OUTMP0.HTM through /cameras/canon-eos-m3-review/image/657644?section=samples on the thumbnail
|
||||||||||||||||||||||||||||||
Indoor Portrait, Flash
This shot duplicates indoor shooting conditions in most US homes, with Finally, exposure is important here, and frequently a tough challenge Note too, that the normal flash shot (as opposed to the slow sync one, To view the exposure series from zero to +1.0 EV in the normal flash To view the same series in the Slow-Sync flash mode, see files EOSM3INBFSP0.HTM |
||||||||||||||||||||||||||||||
Indoor Portrait, No Flash
The incandescent lighting used in most US homes actually has a very The incandescent lighting used for this shot is thus not only very common Most cameras’ auto white balance systems have a great deal of difficulty If you intend to do much shooting indoors after dark, pay careful attention To view the entire exposure series from zero to +1.0 EV, see files EOSM3INBMP0.HTM through EOSM3INBMP3.HTM on the thumbnail ISO Series One additional note about this particular test series though: Because
|
||||||||||||||||||||||||||||||
House Shot
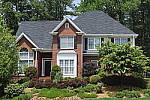
Like several of our tests, these images are actually photos of a high-resolution poster, shot under studio lighting. The shots for this camera were captured with our third-generation House poster, which was assembled from 45 separate 11-megapixel images, shot with a very high-quality lens, and then stitched together into a single image. The resulting image amounts to about 450 very high-quality megapixels. This should have sufficient detail to comfortably challenge cameras up to at least 80-100 megapixels. (And even with higher-resolution cameras, we believe that the camera lenses themselves would be more likely to limit resolution than would the detail in the poster.) Why did we choose to shoot a picture of a picture? The idea was to show a typical subject (a house and surrounding foliage) in a way that would be absolutely consistent from camera to camera. Any outdoor subject is going to vary considerably from day to day, as the lighting changes with the weather, atmospheric conditions, and season. Shooting a poster lets us compare images from cameras shot weeks, months, or even years apart, with the sure knowledge that nothing has changed from one shot to another. Things to look for here are fine detail, as seen in the foliage and tree limbs against the sky, sharpness in the corners, and the preservation of subtle detail in the shaded brick patterns. – Many cameras with overactive noise suppression severely blur the brick patterns that are in shadow. |
||||||||||||||||||||||||||||||
Far Field Test 2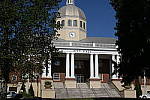
While the House poster in the shot above provides absolute repeatability from test to test, it doesn’t offer the range of brightness (dynamic range) that the original scene had, nor does it contain the nearly infinite range of fine detail found in nature. For these reasons, we shoot an outdoor photo of a building, to provide a more challenging (if more variable) subject for the cameras. Until Summer of 2011, we used the original house from the House poster for this “Far Field” shot, but the ever-encroaching trees made it less and less useful. The coup de grace for that subject was when the neighbor across the street relandscaped his yard so we could no longer shoot from our original position. In place of the original house, we’ve switched to using the Roswell, GA City Hall building, which offers many of the elements of the original Far Field subject, but in a setting where we’re guaranteed access into the future, and without the threat of trees eventually obscuring the building. In this shot, we look at how the camera handles rendering of subtle detail (the bricks, both in the sunlight and in the deep shadows under the entryway roof), how it handles bright highlights (the white columns and reflections from the dome), and shadow detail (in the dark areas beneath the shrubs on either side of the steps). Note though, that because this is shot outdoors, the character of the light is unavoidably going to change quite a bit, depending on the atmospheric humidity and the time of year. – You thus shouldn’t rely on it for absolute comparisons between cameras, since it’s unlikely that conditions will be exactly the same from one test to the next.
|
||||||||||||||||||||||||||||||
|
Low-Light Tests Low light photography is an area where there are really enormous differences between digital camera models. This test is now shot at three ISO settings, at a light level about equivalent to typical city street lighting at night (one foot-candle), and at 1/16 foot-candle. Shots in the rightmost column of the table below are taken with long exposure noise reduction disabled and high ISO noise reduction minimized. You may also see the effect of poor low-light autofocus in some of these shots, although we use a different test setup to check autofocus performance more directly. (The results of which are reported on in the main Test Results section.) Things to look for here include:
(Note: If you’d like to use a light meter to check light levels
|
||||||||||||||||||||||||||||||
|
Manufacturer-Specified Flash Range Lately, many manufacturers specify flash range with the camera set to Auto mode, in which the camera is free to boost its ISO setting to help increase the flash range. This does increase the range, but it’s easy to have too much of a good thing: Too high an ISO can leave you with too much image noise. The variable ISO setting also means that there isn’t an easy way to compare the range with the fixed-ISO shots in our standard flash range series. So now, we also test the flash under the manufacturer-specified conditions (whatever they may be, but frequently with the camera set to Auto mode), and the look at both how brightly the scene is lit, and how much image noise is present in the resulting images. Flash range for SLRs will vary with the lens used (depending on the maximum aperture), so their flash range is commonly expressed as a Guide Number, or GN for short. The guide number is a distance, in either feet or meters, at a given ISO. To find the maximum flash range at a given aperture, just divide the guide number by the aperture. For instance, a guide number of 56 feet would translate to a range of 10 feet with a lens set to an aperture of f/5.6. The range would be twice that if you had an f/2.8 lens (56/2.8 = 20).
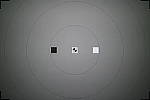
Flash Uniformity The flash units on many digital cameras don’t illuminate the scene very evenly, especially at wide angle focal lengths, so the photo here shows how uniform the flash coverage is. As noted earlier, this test uses the same target as our flash range test, but for the uniformity tests, we take care to frame the target the same from camera to camera. The concentric circles on the target mark distances 25%, 50%, and 75% of the way from the center to the corners. (Approximate, they roughly split the difference between the 4:3 and 3:2 aspect ratios.)
|
||||||||||||||||||||||||||||||
|
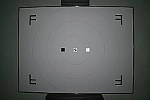
Viewfinder Accuracy Viewfinder accuracy is an important parameter, especially for shots Unlike the optical viewfinders, the LCD viewfinders on most digital Things to look for on this test chart are:
|
||||||||||||||||||||||||||||||





Digital Cameras – Canon EOS M3 Test Images
Not sure which camera to buy? Let your eyes be the ultimate judge!
Visit our Comparometer(tm)
to compare images from the Canon EOS M3 with those from other
cameras you may be considering. The proof is in the pictures, so let
your own eyes decide which you like best!
|
This is our new “Still Life” test target. We’re combining Here’s what to look for in this target:
|
||||||||||||||||||||||||||||||
|
Our new “Multi Target” was first put into use in April, 2009, replacing the earlier “interim” design. This target incorporates a number of elements that combine aspects of the previous Multi target, as well as the previous Viewfinder Accuracy or “VFA” chart. Here’s some of what you’ll find in this target: Framing marks: This chart evolved from the earlier Viewfinder Accuracy chart, so one of its major uses is to measure viewfinder accuracy. (See notes in the Viewfinder Accuracy section, at the bottom of this page, for more information on this.) USAF resolution targets: An important use of this target is in evaluating lens quality, looking how well sharpness holds up as you move from the center to the corners of the frame. The little “USAF” resolution targets arranged at the center, in the corners, and along the diagonals are very useful for making fine judgements about blur, flare and aberrations in the image. We generally show crops of a USAF chip from a corner of the target and from the center, to show how lenses hold sharpness at wide and telephoto focal lengths. Alignment “bullseyes:” We find these graphics from the graphic arts world (used to align sheets of film in the old film-based prepress days) very useful for seeing chromatic aberration in lenses. The bold black/white elements are good for seeing the colored fringes caused by CA in the corners of the frame. MacBeth ColorChecker Chart: This is about as common a color standard as you can get these days, very widely available for only mildly exorbitant cost, and quite well controlled in its production. It thus serves as a good basis of comparison between cameras and between test setups. Imatest also understands the MacBeth colors very well, and uses them to produce its color accuracy map that we feature in all our reviews. MacBeth ColorChecker SG Chart: The ColorChecker SG chart provides a wider range of colors, to give a more detailed map of a camera’s color handling. We haven’t begun using this chart in the color-accuracy graphs we routinely offer, but expect to do so at some point in the future. In the meantime, we sometimes refer to this chart internally, to get a more complete idea of what a camera’s color map looks like. Log C/F Target: The progressive resolution pattern located just below the center of the target is a Log C/F (logarithmic contrast vs spatial frequency) chart. Digital camera noise reduction routines work by looking at levels of local contrast, flattening-out detail at progressively lower spatial frequencies as the local contrast decreases. (This is very commonly seen in human hair, grass, foliage, and other subjects with subtly-contrasting fine detail.) This chart lets Imatest analyze just how a camera makes the tradeoff between contrast, detail, and image noise. Color Starbursts: The six circular starburst elements arranged around the target are intended to reveal de-mosaicing artifacts and color-dependent resolution issues. The six starbursts provide examples of each combination of RGB colors intersecting each other. (That is, red, green, and blue against black, plus red against green, green against blue, and blue against red.) Given that the most common sensor RGB color filter pattern (the so-called Bayer) pattern has twice as many green pixels as red or blue, you’ll generally see that the green/black starburst shows the best resolution, while the blue/red one shows the worst. The effects of different sensor geometries and color filter array patterns will be revealed here. Musicians Image: Synthetic test patterns only tell you so much. While we have a lot of pictorial images in our other test targets, we thought it would be useful to include a small “natural” image here as well.
|
||||||||||||||||||||||||||||||
|
Part of the impetus in developing the new Multi Target in April 2009 was to switch to using a new 2x target for the resolution measurements, since the original ISO 12233 chart we’d used since the site first began in 1998(!) had become inadequate for testing the highest-resolution cameras. We’d for quite some time had a “homemade” 2x target, employing a shrunk version of the ISO 12233 chart, shot at 1/2 size. The resolution numbers on that chart all needed to be doubled to convert to the actual values, though, so we decided to go with a commercial 2x target to eliminate possible confusion on the part of our readers. Numbers on this new 2x resolution chart now read directly in hundreds of lines/picture height. (Because almost all of the area of this new resolution chart is now meaningful for resolution measurements, there was no longer space on it to overlay the MacBeth and other color targets on our prior Multi chart; hence the simultaneous change in our Multi target.) |
||||||||||||||||||||||||||||||
|
“Sunlit” Portrait The lighting in this shot is deliberately awful, about what you’d expect The reason for the harsh lighting is to provide a real “torture Look for:
To view the entire exposure series from zero to +1.0 EV, see files EOSM3OUTMP0.HTM through /cameras/canon-eos-m3-review/image/657512?section=test on the thumbnail
|
||||||||||||||||||||||||||||||
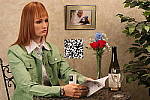
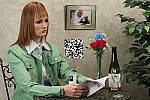
Indoor Portrait, Flash
This shot duplicates indoor shooting conditions in most US homes, with Finally, exposure is important here, and frequently a tough challenge Note too, that the normal flash shot (as opposed to the slow sync one, To view the exposure series from zero to +1.0 EV in the normal flash To view the same series in the Slow-Sync flash mode, see files EOSM3INBFSP0.HTM |
||||||||||||||||||||||||||||||
Indoor Portrait, No Flash
The incandescent lighting used in most US homes actually has a very The incandescent lighting used for this shot is thus not only very common Most cameras’ auto white balance systems have a great deal of difficulty If you intend to do much shooting indoors after dark, pay careful attention To view the entire exposure series from zero to +1.0 EV, see files EOSM3INBMP0.HTM through EOSM3INBMP3.HTM on the thumbnail ISO Series One additional note about this particular test series though: Because
|
||||||||||||||||||||||||||||||
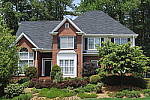
House Shot
Like several of our tests, these images are actually photos of a high-resolution poster, shot under studio lighting. The shots for this camera were captured with our third-generation House poster, which was assembled from 45 separate 11-megapixel images, shot with a very high-quality lens, and then stitched together into a single image. The resulting image amounts to about 450 very high-quality megapixels. This should have sufficient detail to comfortably challenge cameras up to at least 80-100 megapixels. (And even with higher-resolution cameras, we believe that the camera lenses themselves would be more likely to limit resolution than would the detail in the poster.) Why did we choose to shoot a picture of a picture? The idea was to show a typical subject (a house and surrounding foliage) in a way that would be absolutely consistent from camera to camera. Any outdoor subject is going to vary considerably from day to day, as the lighting changes with the weather, atmospheric conditions, and season. Shooting a poster lets us compare images from cameras shot weeks, months, or even years apart, with the sure knowledge that nothing has changed from one shot to another. Things to look for here are fine detail, as seen in the foliage and tree limbs against the sky, sharpness in the corners, and the preservation of subtle detail in the shaded brick patterns. – Many cameras with overactive noise suppression severely blur the brick patterns that are in shadow. |
||||||||||||||||||||||||||||||
Far Field Test 2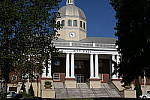
While the House poster in the shot above provides absolute repeatability from test to test, it doesn’t offer the range of brightness (dynamic range) that the original scene had, nor does it contain the nearly infinite range of fine detail found in nature. For these reasons, we shoot an outdoor photo of a building, to provide a more challenging (if more variable) subject for the cameras. Until Summer of 2011, we used the original house from the House poster for this “Far Field” shot, but the ever-encroaching trees made it less and less useful. The coup de grace for that subject was when the neighbor across the street relandscaped his yard so we could no longer shoot from our original position. In place of the original house, we’ve switched to using the Roswell, GA City Hall building, which offers many of the elements of the original Far Field subject, but in a setting where we’re guaranteed access into the future, and without the threat of trees eventually obscuring the building. In this shot, we look at how the camera handles rendering of subtle detail (the bricks, both in the sunlight and in the deep shadows under the entryway roof), how it handles bright highlights (the white columns and reflections from the dome), and shadow detail (in the dark areas beneath the shrubs on either side of the steps). Note though, that because this is shot outdoors, the character of the light is unavoidably going to change quite a bit, depending on the atmospheric humidity and the time of year. – You thus shouldn’t rely on it for absolute comparisons between cameras, since it’s unlikely that conditions will be exactly the same from one test to the next.
|
||||||||||||||||||||||||||||||
|
Low-Light Tests Low light photography is an area where there are really enormous differences between digital camera models. This test is now shot at three ISO settings, at a light level about equivalent to typical city street lighting at night (one foot-candle), and at 1/16 foot-candle. Shots in the rightmost column of the table below are taken with long exposure noise reduction disabled and high ISO noise reduction minimized. You may also see the effect of poor low-light autofocus in some of these shots, although we use a different test setup to check autofocus performance more directly. (The results of which are reported on in the main Test Results section.) Things to look for here include:
(Note: If you’d like to use a light meter to check light levels
|
||||||||||||||||||||||||||||||
|
Manufacturer-Specified Flash Range Lately, many manufacturers specify flash range with the camera set to Auto mode, in which the camera is free to boost its ISO setting to help increase the flash range. This does increase the range, but it’s easy to have too much of a good thing: Too high an ISO can leave you with too much image noise. The variable ISO setting also means that there isn’t an easy way to compare the range with the fixed-ISO shots in our standard flash range series. So now, we also test the flash under the manufacturer-specified conditions (whatever they may be, but frequently with the camera set to Auto mode), and the look at both how brightly the scene is lit, and how much image noise is present in the resulting images. Flash range for SLRs will vary with the lens used (depending on the maximum aperture), so their flash range is commonly expressed as a Guide Number, or GN for short. The guide number is a distance, in either feet or meters, at a given ISO. To find the maximum flash range at a given aperture, just divide the guide number by the aperture. For instance, a guide number of 56 feet would translate to a range of 10 feet with a lens set to an aperture of f/5.6. The range would be twice that if you had an f/2.8 lens (56/2.8 = 20).
Flash Uniformity The flash units on many digital cameras don’t illuminate the scene very evenly, especially at wide angle focal lengths, so the photo here shows how uniform the flash coverage is. As noted earlier, this test uses the same target as our flash range test, but for the uniformity tests, we take care to frame the target the same from camera to camera. The concentric circles on the target mark distances 25%, 50%, and 75% of the way from the center to the corners. (Approximate, they roughly split the difference between the 4:3 and 3:2 aspect ratios.)
|
||||||||||||||||||||||||||||||
|
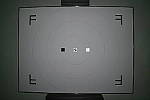
Viewfinder Accuracy Viewfinder accuracy is an important parameter, especially for shots Unlike the optical viewfinders, the LCD viewfinders on most digital Things to look for on this test chart are:
|
||||||||||||||||||||||||||||||





All test shots
Canon EOS M3 Thumbnails
Not sure which camera to buy? Let your eyes be the ultimate judge!
Visit our Comparometer(tm)
to compare images from the Canon EOS M3 with those from other
cameras you may be considering. The proof is in the pictures, so let
your own eyes decide which you like best!
This page may take a long time to load, due to the many thumbnails!
All images copyright © 2015 by The Imaging Resource. All rights reserved.
 EOSM3FAR2ALO0.JPG 9,198,493 bytes 6000×4000 1/1024 sec f8.0 0.0 EV 35.0 mm focal length ISO 100 |
 EOSM3FAR2ALO1.JPG 7,622,600 bytes 6000×4000 1/1024 sec f8.0 0.0 EV 35.0 mm focal length ISO 100 |
 EOSM3FAR2ALO2.JPG 9,846,324 bytes 6000×4000 1/960 sec f8.0 0.0 EV 35.0 mm focal length ISO 100 |
 EOSM3FAR2ALO3.JPG 7,935,174 bytes 6000×4000 1/1046 sec f8.0 0.0 EV 35.0 mm focal length ISO 100 |
 EOSM3FAR2HTP0.JPG 8,715,160 bytes 6000×4000 1/1024 sec f8.0 0.0 EV 35.0 mm focal length ISO 100 |
 EOSM3FAR2HTP1.JPG 9,583,255 bytes 6000×4000 1/2139 sec f8.0 0.0 EV 35.0 mm focal length ISO 200 |
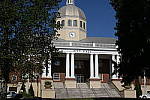 EOSM3FAR2I0100.JPG EOSM3FAR2I0100.CR2 9,387,640 bytes 6000×4000 1/1069 sec f8.0 0.0 EV 35.0 mm focal length ISO 100 |
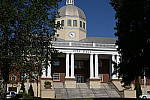 EOSM3FAR2I0200.JPG EOSM3FAR2I0200.CR2 8,639,316 bytes 6000×4000 1/2093 sec f8.0 0.0 EV 35.0 mm focal length ISO 200 |
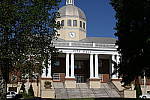 EOSM3FAR2I0800.JPG EOSM3FAR2I0800.CR2 9,423,064 bytes 6000×4000 1/1878 sec f16.0 0.0 EV 35.0 mm focal length ISO 800 |
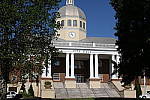 EOSM3FAR2I1600.JPG EOSM3FAR2I1600.CR2 10,067,220 bytes 6000×4000 1/3838 sec f16.0 0.0 EV 35.0 mm focal length ISO 1600 |
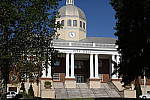 EOSM3FAR2I3200.JPG EOSM3FAR2I3200.CR2 9,732,497 bytes 6000×4000 1/3838 sec f22.0 0.0 EV 35.0 mm focal length ISO 3200 |
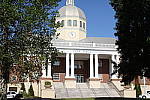 EOSM3FAR2I6400.JPG EOSM3FAR2I6400.CR2 10,765,948 bytes 6000×4000 1/4096 sec f22.0 0.0 EV 35.0 mm focal length ISO 6400 |
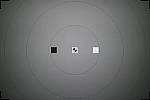 EOSM3FLFCW.JPG 5,196,393 bytes 6000×4000 1/64 sec f3.5 0.0 EV 18.0 mm focal length ISO 100 |
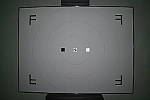 EOSM3FL_MFR047WM0100.JPG 5,329,555 bytes 6000×4000 1/64 sec f3.5 0.0 EV 18.0 mm focal length ISO 100 |
 EOSM3INBAP0.JPG 8,449,110 bytes 6000×4000 1/5 sec f8.0 0.0 EV 70.0 mm focal length ISO 200 |
 EOSM3INBAP1.JPG 8,754,740 bytes 6000×4000 1/4 sec f8.0 +0.3 EV 70.0 mm focal length ISO 200 |
 EOSM3INBAP2.JPG 9,037,398 bytes 6000×4000 0.3 sec f8.0 +0.7 EV 70.0 mm focal length ISO 200 |
 EOSM3INBAP3.JPG 9,281,840 bytes 6000×4000 0.4 sec f8.0 +1.0 EV 70.0 mm focal length ISO 200 |
 EOSM3INBFP0.JPG 7,860,107 bytes 6000×4000 1/64 sec f4.0 0.0 EV 70.0 mm focal length ISO 200 |
 EOSM3INBFP1.JPG 7,914,554 bytes 6000×4000 1/64 sec f4.0 0.0 EV 70.0 mm focal length ISO 200 |
 EOSM3INBFP2.JPG 7,966,397 bytes 6000×4000 1/64 sec f4.0 0.0 EV 70.0 mm focal length ISO 200 |
 EOSM3INBFP3.JPG 7,979,842 bytes 6000×4000 1/64 sec f4.0 0.0 EV 70.0 mm focal length ISO 200 |
 EOSM3INBFSP0.JPG 7,707,908 bytes 6000×4000 1/21 sec f4.0 0.0 EV 70.0 mm focal length ISO 200 |
 EOSM3INBFSP1.JPG 7,944,296 bytes 6000×4000 1/20 sec f4.0 0.0 EV 70.0 mm focal length ISO 200 |
 EOSM3INBFSP2.JPG 7,922,485 bytes 6000×4000 1/20 sec f4.0 0.0 EV 70.0 mm focal length ISO 200 |
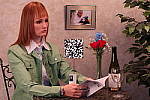 EOSM3INBFSP3.JPG 7,935,778 bytes 6000×4000 1/20 sec f4.0 0.0 EV 70.0 mm focal length ISO 200 |
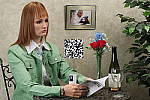 EOSM3INBI00100.JPG EOSM3INBI00100.CR2 8,787,731 bytes 6000×4000 0.6 sec f8.0 +0.3 EV 70.0 mm focal length ISO 100 |
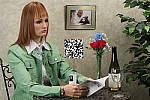 EOSM3INBI00200.JPG EOSM3INBI00200.CR2 8,697,874 bytes 6000×4000 0.3 sec f8.0 +0.3 EV 70.0 mm focal length ISO 200 |
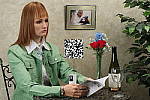 EOSM3INBI00400.JPG EOSM3INBI00400.CR2 8,996,742 bytes 6000×4000 1/7 sec f8.0 +0.3 EV 70.0 mm focal length ISO 400 |
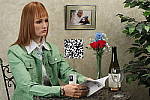 EOSM3INBI00800.JPG EOSM3INBI00800.CR2 9,403,808 bytes 6000×4000 1/13 sec f8.0 +0.3 EV 70.0 mm focal length ISO 800 |
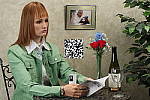 EOSM3INBI01600.JPG EOSM3INBI01600.CR2 9,802,385 bytes 6000×4000 1/27 sec f8.0 +0.3 EV 70.0 mm focal length ISO 1600 |
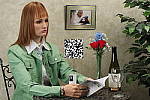 EOSM3INBI03200.JPG EOSM3INBI03200.CR2 10,043,329 bytes 6000×4000 1/54 sec f8.0 +0.3 EV 70.0 mm focal length ISO 3200 |
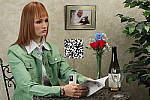 EOSM3INBI06400.JPG EOSM3INBI06400.CR2 10,646,034 bytes 6000×4000 1/108 sec f8.0 +0.3 EV 70.0 mm focal length ISO 6400 |
 EOSM3INBI12800.JPG EOSM3INBI12800.CR2 10,917,016 bytes 6000×4000 1/215 sec f8.0 +0.3 EV 70.0 mm focal length ISO 12800 |
 EOSM3INBI25600.JPG EOSM3INBI25600.CR2 12,005,337 bytes 6000×4000 1/431 sec f8.0 +0.3 EV 70.0 mm focal length ISO 25600 |
 EOSM3INBMP0.JPG 8,374,505 bytes 6000×4000 1/4 sec f8.0 0.0 EV 70.0 mm focal length ISO 200 |
 EOSM3INBMP1.JPG 8,496,354 bytes 6000×4000 0.3 sec f8.0 +0.3 EV 70.0 mm focal length ISO 200 |
 EOSM3INBMP2.JPG 8,994,264 bytes 6000×4000 0.4 sec f8.0 +0.7 EV 70.0 mm focal length ISO 200 |
 EOSM3INBMP3.JPG 9,219,879 bytes 6000×4000 0.5 sec f8.0 +1.0 EV 70.0 mm focal length ISO 200 |
 EOSM3INBTP0.JPG 8,587,499 bytes 6000×4000 1/4 sec f8.0 0.0 EV 70.0 mm focal length ISO 200 |
 EOSM3INBTP1.JPG 8,906,940 bytes 6000×4000 0.3 sec f8.0 +0.3 EV 70.0 mm focal length ISO 200 |
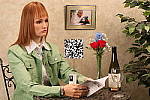 EOSM3INBTP2.JPG 9,183,853 bytes 6000×4000 0.4 sec f8.0 +0.7 EV 70.0 mm focal length ISO 200 |
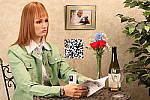 EOSM3INBTP3.JPG 9,392,900 bytes 6000×4000 0.4 sec f8.0 +1.0 EV 70.0 mm focal length ISO 200 |
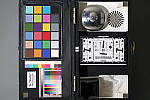 EOSM3LL001003.JPG EOSM3LL001003.CR2 7,217,230 bytes 6000×4000 2 sec f2.8 0.0 EV 70.0 mm focal length ISO 100 |
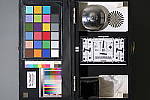 EOSM3LL001007.JPG EOSM3LL001007.CR2 7,230,299 bytes 6000×4000 32 sec f2.8 0.0 EV 70.0 mm focal length ISO 100 |
 EOSM3LL001007XNR.JPG EOSM3LL001007XNR.CR2 7,644,289 bytes 6000×4000 32 sec f2.8 0.0 EV 70.0 mm focal length ISO 100 |
 EOSM3LL032003.JPG EOSM3LL032003.CR2 9,113,710 bytes 6000×4000 1/16 sec f2.8 0.0 EV 70.0 mm focal length ISO 3200 |
 EOSM3LL032007.JPG EOSM3LL032007.CR2 9,339,307 bytes 6000×4000 1 sec f2.8 0.0 EV 70.0 mm focal length ISO 3200 |
 EOSM3LL032007XNR.JPG EOSM3LL032007XNR.CR2 11,066,678 bytes 6000×4000 1 sec f2.8 0.0 EV 70.0 mm focal length ISO 3200 |
 EOSM3LL256003.JPG EOSM3LL256003.CR2 11,879,675 bytes 6000×4000 1/128 sec f2.8 0.0 EV 70.0 mm focal length ISO 25600 |
 EOSM3LL256007.JPG EOSM3LL256007.CR2 11,885,666 bytes 6000×4000 1/8 sec f2.8 0.0 EV 70.0 mm focal length ISO 25600 |
 EOSM3LL256007XNR.JPG EOSM3LL256007XNR.CR2 15,927,627 bytes 6000×4000 1/8 sec f2.8 0.0 EV 70.0 mm focal length ISO 25600 |
 EOSM3OUTBALO1.JPG 6,989,687 bytes 4000×6000 1/52 sec f8.0 +0.3 EV 70.0 mm focal length ISO 100 |
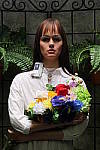 EOSM3OUTBALO2D.JPG 7,198,592 bytes 4000×6000 1/53 sec f8.0 +0.3 EV 70.0 mm focal length ISO 100 |
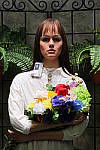 EOSM3OUTBALO3.JPG 7,557,366 bytes 4000×6000 1/50 sec f8.0 +0.3 EV 70.0 mm focal length ISO 100 |
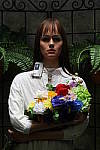 EOSM3OUTBAP0.JPG EOSM3OUTBAP0.CR2 6,579,113 bytes 4000×6000 1/57 sec f8.0 0.0 EV 70.0 mm focal length ISO 100 |
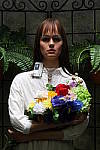 EOSM3OUTBAP1.JPG EOSM3OUTBAP1.CR2 6,872,874 bytes 4000×6000 1/45 sec f8.0 +0.3 EV 70.0 mm focal length ISO 100 |
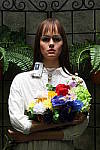 EOSM3OUTBAP2.JPG EOSM3OUTBAP2.CR2 7,184,374 bytes 4000×6000 1/36 sec f8.0 +0.7 EV 70.0 mm focal length ISO 100 |
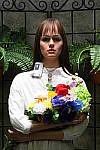 EOSM3OUTBAP3.JPG EOSM3OUTBAP3.CR2 7,374,420 bytes 4000×6000 1/29 sec f8.0 +1.0 EV 70.0 mm focal length ISO 100 |
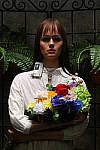 EOSM3OUTBDP0.JPG 6,593,033 bytes 4000×6000 1/57 sec f8.0 0.0 EV 70.0 mm focal length ISO 100 |
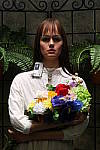 EOSM3OUTBDP1.JPG 6,897,432 bytes 4000×6000 1/45 sec f8.0 +0.3 EV 70.0 mm focal length ISO 100 |
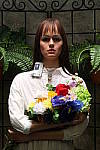 EOSM3OUTBDP2.JPG 7,205,387 bytes 4000×6000 1/36 sec f8.0 +0.7 EV 70.0 mm focal length ISO 100 |
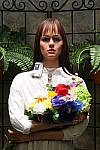 EOSM3OUTBDP3.JPG 7,427,880 bytes 4000×6000 1/28 sec f8.0 +1.0 EV 70.0 mm focal length ISO 100 |
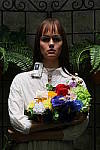 EOSM3OUTBHTP1.JPG 7,495,773 bytes 4000×6000 1/103 sec f8.0 +0.3 EV 70.0 mm focal length ISO 200 |
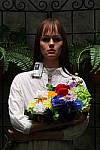 EOSM3OUTBMP0.JPG 6,559,379 bytes 4000×6000 1/57 sec f8.0 0.0 EV 70.0 mm focal length ISO 100 |
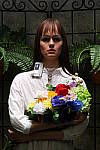 EOSM3OUTBMP1.JPG 6,872,074 bytes 4000×6000 1/45 sec f8.0 +0.3 EV 70.0 mm focal length ISO 100 |
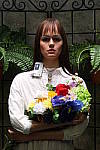 EOSM3OUTBMP2.JPG 7,183,278 bytes 4000×6000 1/36 sec f8.0 +0.7 EV 70.0 mm focal length ISO 100 |
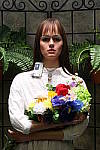 EOSM3OUTBMP3.JPG 7,374,614 bytes 4000×6000 1/29 sec f8.0 +1.0 EV 70.0 mm focal length ISO 100 |
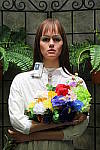 EOSM3OUTB_AUTO.JPG 6,751,309 bytes 4000×6000 1/304 sec f2.8 0.0 EV 70.0 mm focal length ISO 141 |
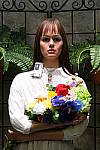 EOSM3OUTB_FACE.JPG 7,426,425 bytes 4000×6000 1/27 sec f8.0 0.0 EV 70.0 mm focal length ISO 100 |
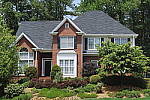 EOSM3hHOUSE.JPG EOSM3hHOUSE.CR2 14,949,509 bytes 6000×4000 1/27 sec f5.6 0.0 EV 70.0 mm focal length ISO 100 |
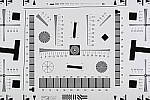 EOSM3hRES.JPG EOSM3hRES.CR2 5,864,538 bytes 6000×4000 1/40 sec f5.6 0.0 EV 70.0 mm focal length ISO 100 |
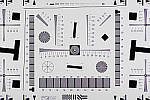 EOSM3hRES_ACRu300r03.JPG 10,149,841 bytes 6000×4000 1/40 sec f5.6 0.0 EV 70.0 mm focal length ISO 100 |
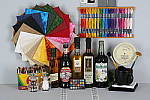 EOSM3hSLI00100NR0.JPG EOSM3hSLI00100NR0.CR2 9,711,515 bytes 6000×4000 1/16 sec f8.0 0.0 EV 70.0 mm focal length ISO 100 |
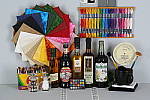 EOSM3hSLI00100NR2D.JPG EOSM3hSLI00100NR2D.CR2 9,127,878 bytes 6000×4000 1/16 sec f8.0 0.0 EV 70.0 mm focal length ISO 100 |
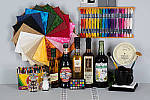 EOSM3hSLI00100_ACR.JPG 16,649,380 bytes 6000×4000 1/15 sec f8.0 0.0 EV 70.0 mm focal length ISO 100 |
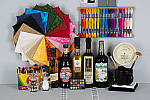 EOSM3hSLI00100_ACRu300r03.JPG 18,043,795 bytes 6000×4000 1/15 sec f8.0 0.0 EV 70.0 mm focal length ISO 100 |
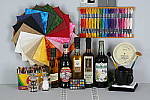 EOSM3hSLI00200NR0.JPG EOSM3hSLI00200NR0.CR2 9,842,019 bytes 6000×4000 1/32 sec f8.0 0.0 EV 70.0 mm focal length ISO 200 |
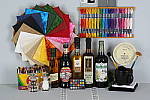 EOSM3hSLI00200NR2D.JPG EOSM3hSLI00200NR2D.CR2 9,197,714 bytes 6000×4000 1/32 sec f8.0 0.0 EV 70.0 mm focal length ISO 200 |
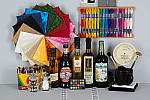 EOSM3hSLI00200_ACR.JPG 18,274,221 bytes 6000×4000 1/30 sec f8.0 0.0 EV 70.0 mm focal length ISO 200 |
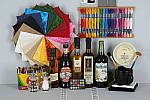 EOSM3hSLI00400NR0.JPG EOSM3hSLI00400NR0.CR2 10,289,221 bytes 6000×4000 1/64 sec f8.0 0.0 EV 70.0 mm focal length ISO 400 |
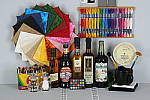 EOSM3hSLI00400NR2D.JPG EOSM3hSLI00400NR2D.CR2 9,605,952 bytes 6000×4000 1/64 sec f8.0 0.0 EV 70.0 mm focal length ISO 400 |
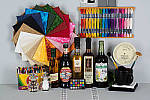 EOSM3hSLI00400_ACR.JPG 20,461,890 bytes 6000×4000 1/60 sec f8.0 0.0 EV 70.0 mm focal length ISO 400 |
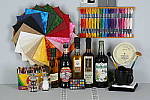 EOSM3hSLI00800NR0.JPG EOSM3hSLI00800NR0.CR2 10,771,877 bytes 6000×4000 1/128 sec f8.0 0.0 EV 70.0 mm focal length ISO 800 |
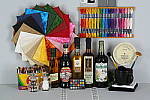 EOSM3hSLI00800NR2D.JPG EOSM3hSLI00800NR2D.CR2 10,006,851 bytes 6000×4000 1/128 sec f8.0 0.0 EV 70.0 mm focal length ISO 800 |
 EOSM3hSLI00800_ACR.JPG 23,054,813 bytes 6000×4000 1/125 sec f8.0 0.0 EV 70.0 mm focal length ISO 800 |
 EOSM3hSLI01600NR0.JPG EOSM3hSLI01600NR0.CR2 11,587,981 bytes 6000×4000 1/256 sec f8.0 0.0 EV 70.0 mm focal length ISO 1600 |
 EOSM3hSLI01600NR2D.JPG EOSM3hSLI01600NR2D.CR2 10,361,823 bytes 6000×4000 1/256 sec f8.0 0.0 EV 70.0 mm focal length ISO 1600 |
 EOSM3hSLI01600_ACR.JPG 26,158,843 bytes 6000×4000 1/250 sec f8.0 0.0 EV 70.0 mm focal length ISO 1600 |
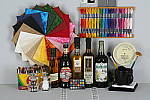 EOSM3hSLI03200NR0.JPG EOSM3hSLI03200NR0.CR2 12,785,251 bytes 6000×4000 1/512 sec f8.0 0.0 EV 70.0 mm focal length ISO 3200 |
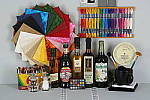 EOSM3hSLI03200NR2D.JPG EOSM3hSLI03200NR2D.CR2 10,588,482 bytes 6000×4000 1/512 sec f8.0 0.0 EV 70.0 mm focal length ISO 3200 |
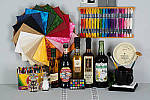 EOSM3hSLI03200_ACR.JPG 30,188,533 bytes 6000×4000 1/500 sec f8.0 0.0 EV 70.0 mm focal length ISO 3200 |
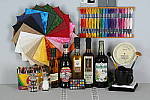 EOSM3hSLI06400NR0.JPG EOSM3hSLI06400NR0.CR2 14,213,788 bytes 6000×4000 1/1024 sec f8.0 0.0 EV 70.0 mm focal length ISO 6400 |
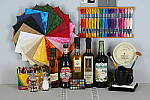 EOSM3hSLI06400NR2D.JPG EOSM3hSLI06400NR2D.CR2 11,151,408 bytes 6000×4000 1/1024 sec f8.0 0.0 EV 70.0 mm focal length ISO 6400 |
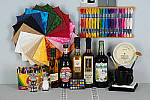 EOSM3hSLI06400_ACR.JPG 34,699,596 bytes 6000×4000 1/1000 sec f8.0 0.0 EV 70.0 mm focal length ISO 6400 |
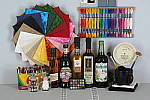 EOSM3hSLI12800NR0.JPG EOSM3hSLI12800NR0.CR2 16,053,255 bytes 6000×4000 1/2048 sec f8.0 0.0 EV 70.0 mm focal length ISO 12800 |
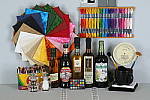 EOSM3hSLI12800NR2D.JPG EOSM3hSLI12800NR2D.CR2 11,249,435 bytes 6000×4000 1/2048 sec f8.0 0.0 EV 70.0 mm focal length ISO 12800 |
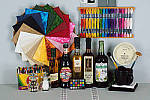 EOSM3hSLI12800_ACR.JPG 39,239,659 bytes 6000×4000 1/2000 sec f8.0 0.0 EV 70.0 mm focal length ISO 12800 |
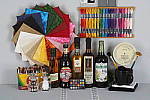 EOSM3hSLI25600NR0.JPG EOSM3hSLI25600NR0.CR2 16,183,222 bytes 6000×4000 1/2048 sec f11.0 0.0 EV 70.0 mm focal length ISO 25600 |
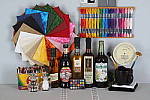 EOSM3hSLI25600NR2D.JPG EOSM3hSLI25600NR2D.CR2 12,199,418 bytes 6000×4000 1/2048 sec f11.0 0.0 EV 70.0 mm focal length ISO 25600 |
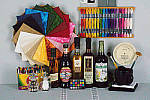 EOSM3hSLI25600_ACR.JPG 44,258,928 bytes 6000×4000 1/2000 sec f11.0 0.0 EV 70.0 mm focal length ISO 25600 |
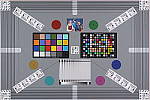 EOSM3hVFAI00100.JPG EOSM3hVFAI00100.CR2 8,611,688 bytes 6000×4000 1/32 sec f5.6 0.0 EV 70.0 mm focal length ISO 100 |
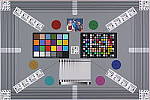 EOSM3hVFAI00200.JPG EOSM3hVFAI00200.CR2 8,968,496 bytes 6000×4000 1/64 sec f5.6 0.0 EV 70.0 mm focal length ISO 200 |
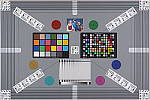 EOSM3hVFAI00400.JPG EOSM3hVFAI00400.CR2 9,699,679 bytes 6000×4000 1/128 sec f5.6 0.0 EV 70.0 mm focal length ISO 400 |
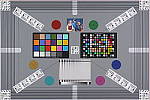 EOSM3hVFAI00800.JPG EOSM3hVFAI00800.CR2 10,678,458 bytes 6000×4000 1/256 sec f5.6 0.0 EV 70.0 mm focal length ISO 800 |
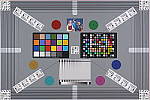 EOSM3hVFAI01600.JPG EOSM3hVFAI01600.CR2 11,552,912 bytes 6000×4000 1/512 sec f5.6 0.0 EV 70.0 mm focal length ISO 1600 |
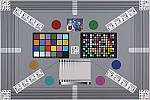 EOSM3hVFAI03200.JPG EOSM3hVFAI03200.CR2 11,910,656 bytes 6000×4000 1/1024 sec f5.6 0.0 EV 70.0 mm focal length ISO 3200 |
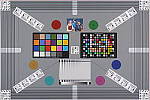 EOSM3hVFAI06400.JPG EOSM3hVFAI06400.CR2 12,505,407 bytes 6000×4000 1/2048 sec f5.6 0.0 EV 70.0 mm focal length ISO 6400 |
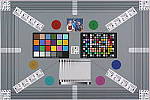 EOSM3hVFAI12800.JPG EOSM3hVFAI12800.CR2 12,121,180 bytes 6000×4000 1/2048 sec f8.0 0.0 EV 70.0 mm focal length ISO 12800 |
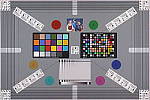 EOSM3hVFAI25600.JPG EOSM3hVFAI25600.CR2 12,866,976 bytes 6000×4000 1/2048 sec f11.0 0.0 EV 70.0 mm focal length ISO 25600 |
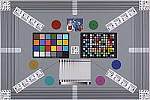 EOSM3hVFAL.JPG 8,611,688 bytes 6000×4000 1/32 sec f5.6 0.0 EV 70.0 mm focal length ISO 100 |
All images copyright © 2015 by The Imaging Resource. All rights reserved.