PASINI REPORTS
Configurator 1.0 --
Build Your Own Photoshop Panel
 By MIKE PASINI
Editor
The Imaging Resource Digital Photography Newsletter
Review Date: October 2008
Yesterday Adobe sent us a prerelease copy of Configurator, a program that makes it as easy as dragging and dropping to build your own Photoshop panels. And within five minutes, we'd read the short documentation, installed the application and built our first panel.
Dead easy.
But we expected it to be easy. What we didn't expect was just how useful the little panel we built would actually be.
After playing with our first panel for a few minutes and refining the layout, we built another one. And that, too, turned out to be very useful.
By being able to drag all sorts of Photoshop resources like tools, commands and Actions to one palette and being able to add tool tips to them or even longer text explanations, we were mining the Photoshop interface to build our own special purpose panel. Commands that you can't see until you click on a tool were a button on our panel. And third-party plug-ins using procedures hidden away in a script that was buried in a list of Actions were right there on another button.
And they were explained, too.
Press a button and the Photoshop engine did the work in the background, showing us the results when it was done. We didn't have to watch the Layers panel play out an action, for example. It was just done for us.
Dead cool.
Before we describe Configurator and our panels, let's take a look at what this is all about.
SOME BACKGROUND | Back to Contents
In our preview of Creative Suite 4, we mentioned Adobe's plans to release Configurator on Adobe Labs shortly after it starts shipping CS4.
The little application, we explained, "lets you build your own Photoshop control panels written in Flash (without having to learn Flash). Configurator, an AIR-based application, lets you drag and drop widgets and controls to build your own tool, which can easily be shared with your coworkers."
Earlier this week, we chatted with Photoshop Product Manager John Nack about Configurator. He's been a fan of Flash panels since 2000 when Adobe cloned the Flash Player so scripters could extend the LiveMotion authoring environment. Immediately after Adobe acquired Macromedia in 2005, Nack resumed the quest. And with CS4, it will finally become a reality.
Photoshop may be the industry standard, he told us, but it has by necessity offered a general interface. So whether you are a photographer, illustrator, graphic designer, retoucher, etc. you confront the same general interface.
"We could be smarter about that," Nack said. If tools are the stars in the Photoshop sky, he wondered, who shows you the constellations? How, that is, can you customize Photoshop so those five things you do to get one result are all in one place, not five places.
Configurator is the company's answer. It's a "box of Legos for Photoshop," Nack said. You an throw anything at it from tools on the toolbar to Actions you've recorded that include third-party plug-ins. You can even add video and audio to it for documentation.
Building a panel adds context to the commands, it doesn't just reposition them. With its various forms of documenation, it allows the panel author to teach Photoshop. And with millions of users, some very passionate about sharing their knowledge, the company hopes these custom panels become the lecturn from which they deliver their lectures.
To that end, Adobe has made it possible to export Configurator panels to share with others. This is a great way to standardize procedures in your own studio, but it's also a great way to share your expertise with other Photoshop users.
And the company doesn't plan to restrict this new technology to Photoshop. It expects to extend Configurator's domain to the entire suite so you can mix and match capabilities from different applications on the same panel.
Let's take a closer look at Configurator to see how it manages this magic.
CONFIGURATOR | Back to Contents
Creative Suite 4 installs Adobe AIR and Configurator runs on top of it. Otherwise Configurator is a self-contained application, 2.4-MB on the Mac.
When you launch the application, it presents a five-step help screen that explains the process in a nutshell.
Configurator in Action
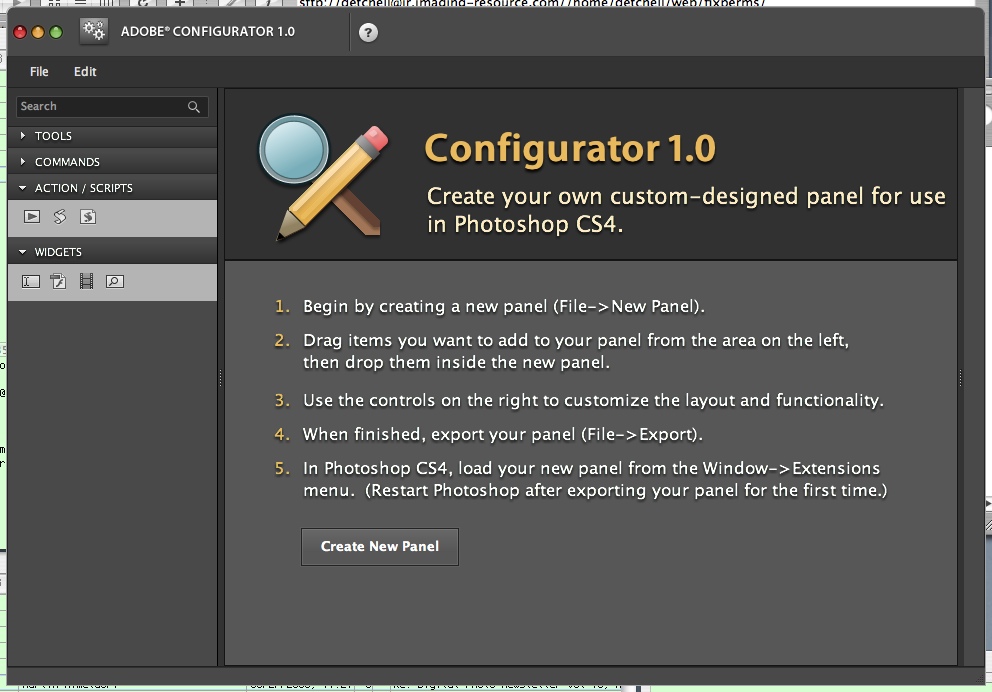
Sign On Screen. Five steps is all it takes.
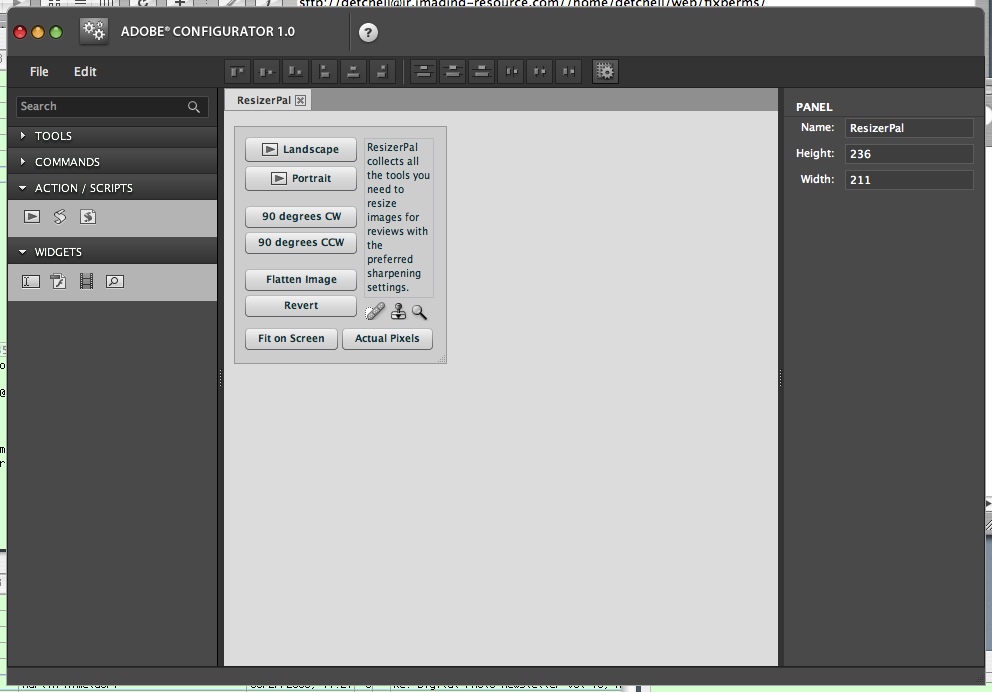
Building ResizerPal. Note left panel settings for the panel itself.
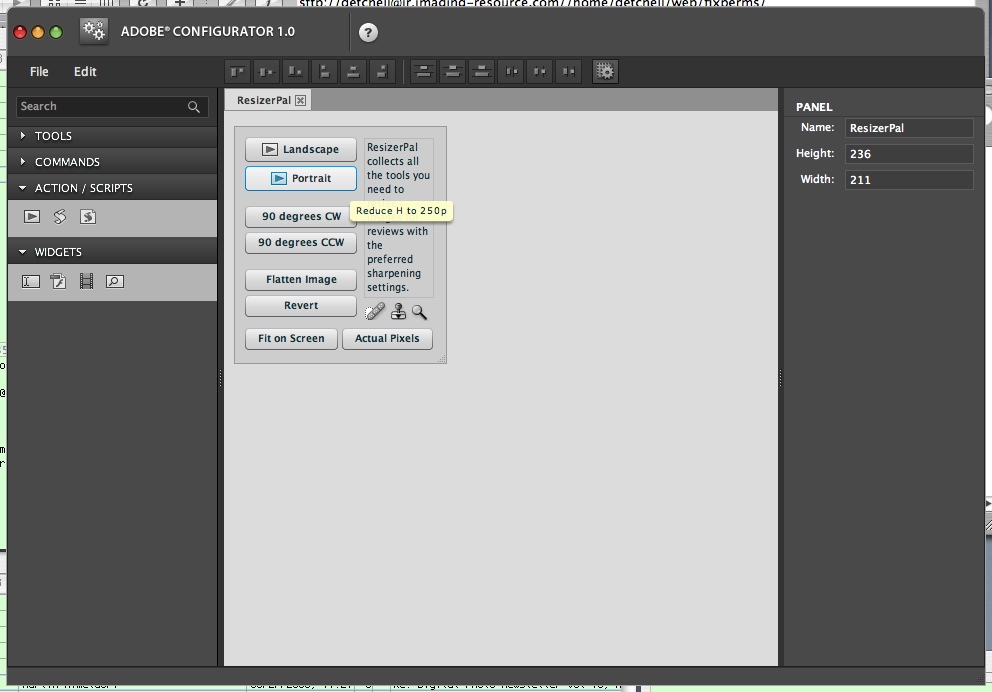
Tool Tip. Portrait button has tool tip help.

Action Button. Panel at left shows how an Action is assigned to the button.
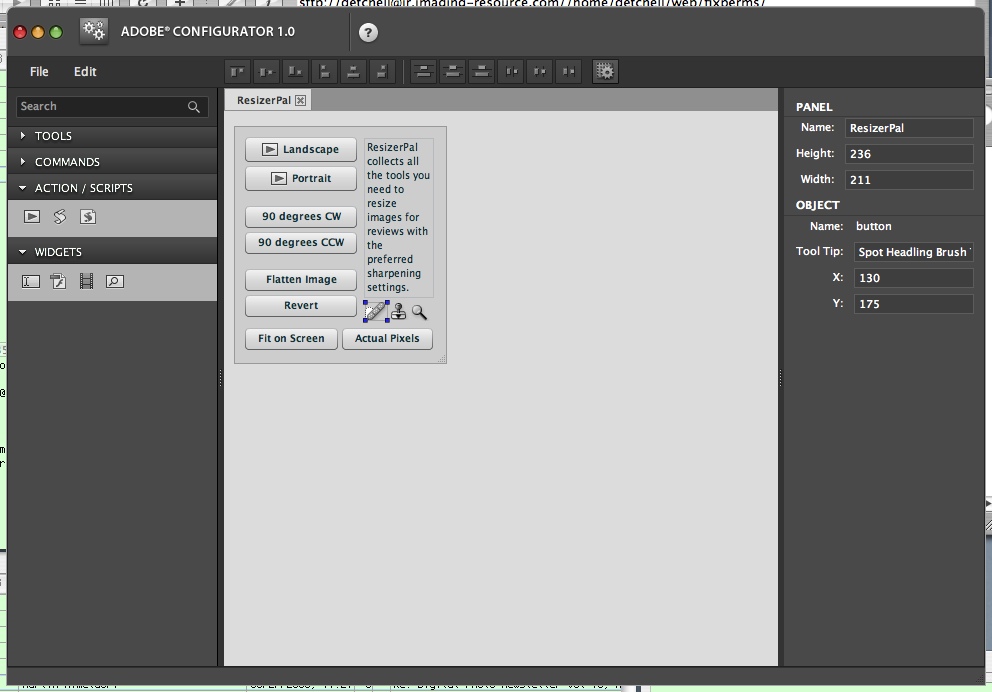
Tool Button. We dragged the Spot Healing Brush tool on as well.
You use the File, New Panel command to start a new panel, which can be any size to start with (and can be resized at any time). You should name it so its tab has some identification.
Then you can start adding items to it from the four sets of items on the left.
As you add an item, you can name it, rename the button, add tool tip help, position it precisely, change its size and add more attributes using the object panel on the left. Actions, for example, have to be named and their set specified. Video, in this version at least, requires a URL (use file:// for local files). You can File, Save the panel as you work on it.
There's no code to write. Just assemble your panel.
With this version, you can't duplicate the functionality of a dialog box with sliders and linked text entry boxes. But you can record an Action that uses the dialog box and link that to a button.
Once you've got things they way you want them, you can File, Export the panel. Configurator knows just where to write the panel's files.
Getting things the way you want them, we've subsequently found, isn't something that has to happen the first time you build a panel. In fact, we made several revisions as we worked with the panels and even wondered what ever made us think of doing them as distinctly different ones. Design issues, we call them.
But Configurator makes it very easy to rethink your original concept and quickly modify a panel. When you create a panel, you have to restart Photoshop so it can find it, but subsequent modifications are reflected as soon as you display the panel in Photoshop. Which is very convenient for the kind of revision you'll certainly want to indulge in.
Our first two panels were actually fun to build. We looked at two tasks we do frequently in Photoshop: resize and retouch product shots for our reviews.
We named our first one ResizerPal. The first two buttons were the obvious ones: one to resize landscape images to 250 pixels and the other to resize Portrait images to 250 pixels. Each of those is actually an Action that uses the Image Size command to resize the image with bicubic interpolation and then calls Nik Software's Sharpener Pro Display profile set at a particular value to sharpen the resized image. So we dragged the Action button icon onto our panel and associated an Action to each button and added some Tool Tip text.
Not all images are correctly oriented, so we added two buttons to rotate the image wither 90 degrees clockwise or counter clockwise. Those commands are buried a bit in the general interface. We found them by using the Search field in the right panel.
But that was when we realized we had something we would actually use. We're pretty weary of going through the menu system to find the flyout for those commands.
Fit on Screen and Actual Pixels work better for us as buttons, too, although all you have to do is click on the magnifier tool and find the button on the toolbar. Still, we cut our click-load down 50 percent with a button.
We added a Flatten Image and Revert button because sometimes we have to work on the image. And we added some tools, too.
But why not build a retouching panel of its own? Why not indeed. So we started a new panel we named RetouchPal.
That panel started with buttons for our Actions that build a Contrast Mask (to recover highlight detail and bring out shadow detail), a Highlight Mask (to just recover highlight detail) and Screen the image to lighten it (faking higher ISO sensitivity).
Then we added buttons to build adjustment layers with Levels and Curves.
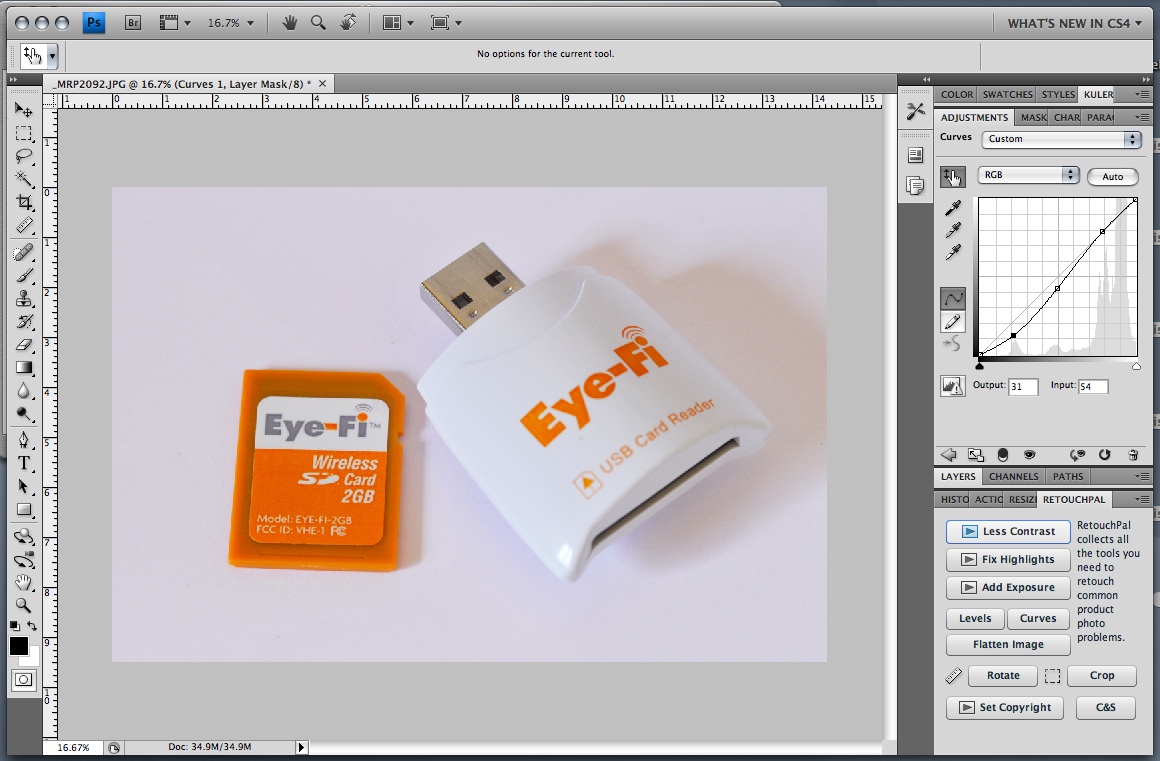
RetouchPal. Note the Curves adjustment layer activated by RetouchPal in the bottom left corner.
Then it occurred to us to add a row of buttons to duplicate the steps we take to straighten and crop an image. We dropped the Ruler tool on the panel because that lets us draw a line on the image that should be a flat horizon or perpendicular upright. Then we added a button to Rotate the image arbitrarily using that value. Then we dragged the Selection tool onto the panel so we could mark what we wanted to crop. And finally we added a button with the Crop command. That's usually a lot of mousing around for us now reduced to four clicks.
On the last row of the panel we added an Action that sets our copyright on the images and another button for Photoshop's crop and straighten command (just for variety).
Having all that in one place on the screen is a big productivity boost. And it makes it less likely we'll forget something (like adding a copyright notice).
To activate our panels in Photoshop, we just used the Window, Extensions command and loaded them. Then we dragged them to the same panel group that holds our Actions. Now when we open Photoshop, there they are.
The truth is that we resize most of our images quite a different way. We've tried, for example, Russell Brown's remarkable Image Processor, a JavaScript application to resize images in several steps with lots of options. But we found that too slow.
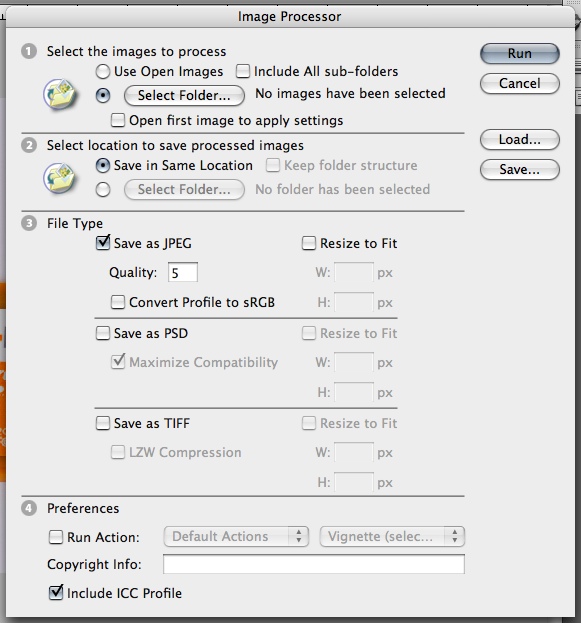
Image Processor. A JavaScript program to resize batches of images.
Instead, we rely on a Perl program that calls the free ImageMagick application. We slapped an AppleScript front end on that to let us quickly set options, even giving us precise control over the sharpening parameters. That runs very fast and is in fact what we used for this review to build the thumbnails with the zoom icon in the corner.
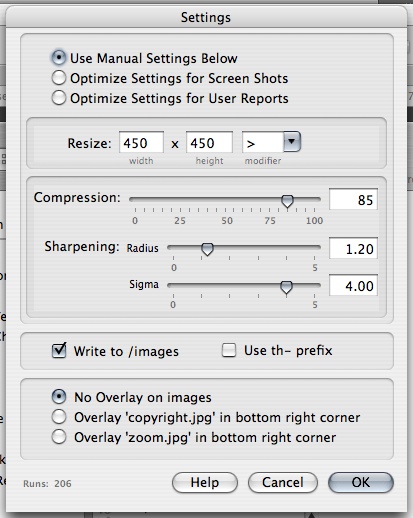
Resizer. A hybrid AppleScript/Perl program to resize batches of images.
That's not the kind of scripting Configurator can do. But that's actual code writing. In the one case JavaScript and in the other Perl and AppleScript.
Instead, Configurator lets you configure a panel of Photoshop commands and tools extended with Actions that can call third-party scriptable plug-ins. If the previous two examples are like calling a caterer (and who does that every Friday night?) and using Photoshop is like going to the market to shop for ingredients for dinner (and who wants to do that on Friday night?), then Configurator is like ordering pizza with the ingredients you want delivered to your door.
The thought of which has us salivating two different ways.