


Overview
Canon PowerShot A700 Overview
By: Mike Pasini and Dave Etchells
Review posted: 05/31/2006
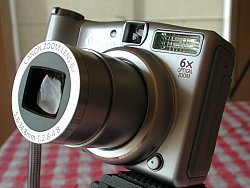
Canon is continually expanding its PowerShot A-series cameras, even as they reduce some of their other lines. The new A700, announced just before Spring PMA 2006, is the first step in yet another expansion of the A-series to a new level. This time the expansion is more than about pixels, but includes a longer lens than any A-series previously, reaching to 6x, or an equivalent of 35 to 210mm, making the PowerShot A700 excellent for all-purpose photography.
The Canon A700 also includes a respectable 6.0 megapixel sensor, more than enough for tack-sharp 11x14 inch prints. Like most of the other cameras announced at the same time, the A700 also includes an ISO range from 80 to 800. ISO 800 should be very good for indoor low-light shots.
Like nearly every other Canon A-series camera, the PowerShot A700 is replete with features to make the camera easier to use. You can just lock it into full Auto mode to point and shoot, or just turn the dial for gradually more and more control. Fourteen Scene modes allow you to look like a pro while the camera tunes its settings for certain situations, like Portrait, Snow, Beach, and even a setting for Fireworks.
An advanced movie mode allows you to capture TV-quality 640x480 or 320x 240 videos at 30 frames per second with the Canon A700.
A fast USB 2.0 connection allows easy offload of images from the SD or MMC card to a Mac or PC. You can even bypass the computer and print directly from the PowerShot A700 to a Canon or other PictBridge-enabled printer via the same USB connection.
Though it has a large 2.5 inch LCD, Canon didn't eliminate the A700's optical viewfinder, something we're seeing from other manufacturers. For saving battery life, sometimes it helps to turn off that LCD and just use the optical viewfinder. Despite its numerical position in the line, the A700 is lighter than the A620, partly owing to its use of only two AA batteries instead of the latter's four. In this sense, the A700 is quite the light, stealthy camera; more akin to the A500 series with its slimmer profile and lighter weight.
Any of the millions of A-series owners, going back to owners of the runaway bestseller A70, will find the A700 quite attractive. It's a smart, practical camera with a reasonable resolution, a big LCD, and a pretty long zoom, pressed into a small, light package that uses only two AA batteries. The A700 is another well-placed step in Canon's ongoing effort to make the PowerShot A-series the most complete line of family cameras on the market.
Canon A700 User Report
by Mike Pasini
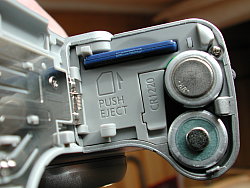
Not to Canon. Its A-Series digicams use AAs and the latest crop use only two. And these two require no compromise in performance. There are features galore and I never had to change batteries in the middle of a shoot.
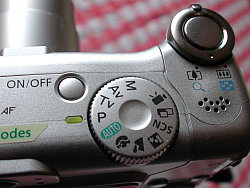
Canon doesn't always mean Manual when it says Manual (generally only offering control over a few more exposure factors, like white balance, than Auto). But in the case of the A700, they mean it. You can control the shutter from 15 to 1/2000 second (depending on aperture) and the aperture from f2.8 to f8.0 (depending on focal length).
I find that important for two reasons. The first is that Auto occasionally disappoints. And the solution to those disappointments is often taking some small aspect of control back from the camera. The Canon A700 is happy to oblige. Secondly, though, having PASM on your camera means you can grow with it. You can read about some technique and actually try it out with this camera. You can't say that about every $350 digital camera out there.
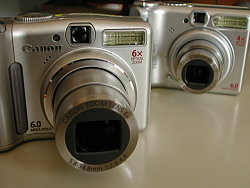
The Canon A700 is just one of the A-Series cameras, however. It distinguishes it from its siblings with its 6.0 megapixel sensor, generous enough for very nice-looking 11x14 prints, and even more so by its 6x optical zoom lens. The A540, a near clone to the A700, has instead a 4x optical zoom -- both more generous than the common 3x zoom lenses found on many consumer digital cameras. At 6x, you don't need optical stabilization or an electronic viewfinder either.
There are some other interesting features to explore, like the two Auto ISO settings and the unusually intimate macro mode. But to do that, we've got to go shoot!
Design. An AA-based design can't be super-compact, and the A-Series isn't. But it is small enough not to require any special consideration or luggage.
In the hand, it's quite comfortable. Your right hand wraps around the battery compartment, easily nesting the heaviest part of the camera. It isn't heavy but it isn't as light as a feather either. When you press the shutter, the camera doesn't yield. And that large shutter button can't be missed, either. When your thumb effortlessly finds the empty space on the back panel, you're ready to shoot.
You can get at most controls with your thumb, although it would be wise to stabilize the camera with your right hand while you do. You mainly work the Function/Set button, the four-way navigator, the Exposure Compensation/Delete button and the Menu button, all within reach of your thumb.
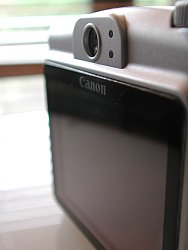
Display. The LCD is your primary display, even moreso than usual. That's because the Canon A700 features a Wide format that the optical viewfinder knows nothing about. (Wide format actually just crops the sensor image top and bottom a little. You could get the same effect by cropping the images on your computer after they were shot, the A700's Wide format just does it for you, right in the camera.) The optical viewfinder is handy for brightly lit conditions, but it isn't terribly accurate. Its lens seems pushed over by the flash so the back end, centered over the LCD, actually has to take an odd angle on the scene.
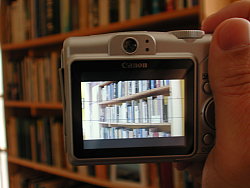
The LCD is bright and has sufficient resolution that you can actually admire your shots after you take them. There's no live histogram, however, something I miss. But Canon does provide an optional grid overlay that makes it easy to line up horizons and vertical elements. (There is a histogram display available in playback mode, so you can check your exposure after the fact, but I personally really like having a live histogram available in record mode.)
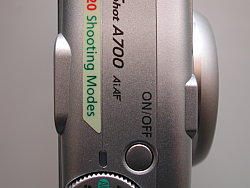
With all the controls within thumb's reach, I couldn't complain about making changes to the exposure options either. The EV setting was blissfully simple. Press the button, use the navigator, take a shot, use the navigator, take another.
I really liked having the 6x zoom. I'm used to the range a 3x zoom offers, but wary of long zooms because I just can't hold them still even to see what I'm shooting. But 6x is a nice boost from 3x and safe from the impracticality of a non-stabilized 10x.
Shooting. With the A700 strapped to my wrist, I only had to swing it up, dial in a shooting mode, press the power button and compose to get my shot. It couldn't have been simpler.
Faced with a more complex situation, say some bright flower in my yard, I'd add a little exposure compensation, half-pressing the shutter button to get a preview of the adjustment. That was even more fun that just taking the shot with Auto.

Why two Auto ISO settings? The point of an Auto ISO setting is to automatically increase sensitivity to use a faster shutter speed so you won't capture blurred images. Normal ISO, available in Auto, Program, Shutter Priority and Aperture Priority modes, won't set sensitivity so high that noise is introduced. But High ISO Auto isn't afraid of a little noise. It's only available in Auto and Program mode, but that's enough to let you decide whether you'd rather err on the side of blur or noise.
Tapping into ISO 800 is a mixed bag. On the one hand, you'll get a noisy image. On the other, it will be sharp. Next to image stabilization, high ISO sensitivity is a real blessing for natural light shooting, something I'm particularly fond of. So, I'm glad to see ISO 800 available on the A700. I can think of half a dozen ways to deal with the noise in my image editing software later. But there's nothing you can do about a blurred image.

Movie mode (one of the fun reasons to buy a digital camera, after all) is impressive at 640x480 and 30-fps. That's broadcast quality. It's a little disappointing that you can't record in a 16:9 aspect ration (since you can take stills that way), but you do get to zoom while recording sound. And you don't really pick up much motor noise, either, something many digital cameras struggle with.
One thing I didn't like so much about the Canon A700 was its manual, or more properly manuals. The camera manual is split into two volumes, a thin Basic User Guide, and a thicker Advanced one. This is perhaps a blessing to neophytes who might be intimidated by all the detail in the Advanced guide, but as a more sophisticated user, I found it maddening having to switch back and forth between the two guides to find information that was listed solely in one or the other.
Conclusion. I had no real quibbles with the Canon A700 (apart from the double-manual system), and lots of pleasant surprises. In the end what I most loved about this AA battery-based gem was the 6x zoom and manual control of exposure with an unusually easy to find and use EV adjustment setting.
- 6.0-megapixel CCD delivering image dimensions as large as 2,816 x 2,112 pixels
- 2.5-inch color LCD monitor
- Real-image optical viewfinder
- Glass, 6x 5.8-34.8mm lens (equivalent to 35-210mm zoom on a 35mm camera)
- 4.0x digital zoom
- AiAF autofocus and a manual focus mode
- AF Assist light for low-light focusing
- Automatic, Program AE, Shutter Priority, Aperture Priority, and Manual exposure modes, as well as 10 preset Scene modes plus Stitch Assist
- Manually adjustable aperture setting ranging from f/2.8 to f/8.0, depending on lens zoom position and shutter speed
- Shutter speed range from 1/2,000 to 15 seconds, depending on aperture (Shutter times longer than 1 second only available in shutter-priority and manual exposure modes and some scene modes.)
- Built-in flash with three operating modes plus red-eye reduction
- SD/MMC memory storage
- Power supplied by two AA batteries or optional AC adapter
Special Features
- Movie mode (with sound), up to 640x480 at 30 fps
- Sound caption recording
- Stitch-Assist mode for panoramic shots
- Continuous Shooting and a variable delay Self-Timer mode
- Creative Effects menu
- White balance (color) adjustment with seven modes
- ISO adjustment with six ISO equivalents and two Auto settings
- Evaluative, Center-Weighted, and Spot metering options
- DPOF (Digital Print Order Format) compatibility
- USB cable for connection to a computer (driver software included)
In the Box
The PowerShot A700 box includes the following items:
- PowerShot A700 camera
- Wrist strap WS-200
- Two AA-type alkaline batteries
- USB cable IFC-400PCU
- AV cable AVC-DC300
- 16MB MMC memory card MMC-16
- Software CD
- Instruction manual, software guide, and registration kit
Recommended Accessories
- Larger capacity SD/MMC card. (At least 128 MB recommended.)
- Two sets of high-capacity rechargeable AA batteries and a good-quality battery charger
- AC adapter kit
- Soft case
- High Power Flash HF-DC1
- Lens accessory kits
Conclusion:
| Pro: | Con: |
|---|---|
|
|
Featuring a 6x optical zoom, 6.0-megapixel CCD, automatic, partial, or fully manual exposure control, and a wide range of preset shooting modes, the PowerShot A700 is another fine addition to Canon's A-series of digital cameras. Built on the same long-tested design as many A-series predecessors, the Canon A700 offers a lot in its compact package. Its combination of automatic and manual features make it very approachable for novices, but interesting for experienced users, the net result being a camera that will satisfy a broad range of interests and provide a good path for novice users to expand their photographic horizons as their experience grows. The 6x zoom lens is quite easy to hand-hold under reasonably bright lighting, but as the light fades, the A700's lack of image stabilization will come to be more of a factor. I'd also like to see it equipped with a more accurate optical viewfinder, and its image noise at ISO 800 was on the high side. Bottom line though, this is a camera that will meet the needs of the average consumer very well, and one that's particularly well suited to situations where both novice and experienced users need to share the use of the same camera. It would also make a great inexpensive camera for a budding photo student to learn about the effects of shutter speed and aperture variations with. All in all, an easy Dave's Pick.
Design
Canon A700 Design
 The Canon PowerShot A700's compact body has a solid feel, thanks to its rugged body and healthy heft. Measuring 3.72 x 2.62 x 1.71 inches (95 x 67 x 43 millimeters), the A700 fits generous shirt pockets and larger coat pockets, purses, and hip packs, making it a good travel companion. The A700 has good heft, with its 9.0-ounce (256-gram) weight, with batteries and memory card, but isn't at all uncomfortable to carry. The two-toned silver body is sleek and understated with a retro look that's sophisticated enough for any age group.

The A700's front panel features the telescoping 6x zoom lens, which extends an additional 1.5 inches when fully extended to telephoto range. Also on the front panel are the optical viewfinder window, small microphone, flash, and a light emitter that serves multiple purposes, including autofocus assist, red-eye reduction, and the self-timer countdown. On the lower right side of the lens (as viewed from the rear) is a small button that releases the ring around the lens barrel. Removing the ring allows you to attach a lens adapter for extended telephoto, wide angle, or macro capabilities. There's also a good-sized hand grip on the front panel, created by the battery compartment.

On the right side of the camera (as viewed from the rear) is only the eyelet for attaching the wrist strap.

On the opposite side of the camera is the connector compartment, covered by a flexible, rubbery plastic flap that snaps in and out of place. When opened, the flap remains connected to the camera body, and folds out of the way to accommodate cables. Inside the compartment are the DC In, Digital (USB), and A/V Out jacks.

The Canon A700's top panel features a Mode dial with 13 shooting positions divided into three basic categories: Auto Exposure, Image Zone, and Creative Zone. The Shutter button is located diagonally in front of the Mode dial, with a Zoom lever surrounding it. Behind the Shutter button and Zoom lever is the camera's speaker. A Power button is on the other side of the Mode dial.

The rest of the exposure controls are located on the camera's rear panel, along with the optical viewfinder and 2.5-inch LCD monitor. The eye-level optical viewfinder features two LED lamps that report camera status. A Mode switch in the top right corner selects either Record or Playback modes. Below the Mode switch is a four-way multi-controller that navigates settings menus, pressing up, down, left, and right. Pressing the top edge also controls Flash mode, while the bottom edge accesses Macro and Manual Focus modes. A Set button at the center of the multi-controller confirms menu changes. Above the controller are the Exposure Compensation/Erase and Print/Share buttons. Below the controller are the Display and Menu buttons.

The Canon A700's bottom panel is reasonably flat, with a sliding door to access the battery compartment and a threaded plastic tripod mount off in the opposite corner. The battery door and tripod mount are far enough away from each other to make quick battery changes while working with a tripod. Inside the battery door are wells for two AA cells, a small slot for the tiny CR1220 battery that maintains the camera's clock settings when the main batteries are out, and the SD/MMC memory card compartment.
Canon A700 External Controls

Shutter Button: Resting in the center of the Zoom lever, this button sets focus and exposure when halfway pressed, and fires the shutter when fully pressed.
Zoom Lever (see image above): Surrounding the Shutter button on the top panel, this lever controls the optical and digital zoom while in Record mode. In Playback mode (when not using the playback zoom), the wide setting displays a nine-image index display of all images on the memory card, and accesses a "Jump" function that lets you scroll through index display screens quickly. Alternatively, the telephoto position enlarges the currently displayed image as much as 10x, so that you can check on fine details.

Mode Dial: Also on the camera's top panel, this large, notched dial is used to select the camera's shooting modes. Canon divides these functions into three categories: Auto, Image Zone, and Creative Zone. The options are as follows:

Auto: The camera controls everything about the exposure, except for Flash and Macro modes, image size and quality settings. Shutter speeds range from 1/2,000 to 1/8 second in Auto mode.- Creative Zone

Program AE (P): Places the camera in control of shutter speed and lens aperture, while you maintain control over everything else (i.e., white balance, ISO, metering, exposure compensation, flash, etc.). Shutter speeds range from 1/2,000 to 1 second in Program mode.
Shutter-Speed Priority AE (Tv): Allows you to control the shutter speed settings from 1/2,000 to 15 seconds, while the camera controls the aperture. All other exposure settings are available.
Aperture Priority AE (Av): Allows you to set the lens aperture from f/2.8 to f/8.0, while the camera controls the shutter speed, over a range from 1/2,000 to 1 second. (Max shutter speed is 1/1,500 at f/3.5 (wide) to f/6.3 (tele) and below, 1/2,000 at f/4.0 (wide) to f/7.1 (tele) and higher.)The maximum aperture depends on the zoom setting, ranging from f/2.8 at the wide angle end to f/4.8 at the telephoto position. In this mode, you maintain control over all other exposure variables.
Manual (M): Provides complete control over all exposure settings, including shutter speed and lens aperture. As with aperture-priority mode, the maximum aperture varies with the zoom setting from f/2.8 at wide angle to f/4.8 at telephoto. The fastest shutter speed varies with the aperture and zoom setting:- 1/1,500 at f/2.8-4.0 (wide) or f/2.8-6.3 (tele)
- 1/2,000 at f/4.0-8/0 (wide) or f/7.1-8.0 (tele)
- Image Zone

Portrait: Uses a large aperture setting to blur the background while keeping the primary subject in sharp focus.
Landscape: Employs a small aperture setting to keep both the background and foreground in focus. (May use a slower shutter speed, so a tripod is recommended.)
Night Scene: Uses slower shutter speeds and flash to even out nighttime exposures. The slow shutter speed allows more ambient light to be recorded in the low-light areas, while the flash freezes the subject. The Red-Eye Reduction mode can be used with this exposure mode to eliminate Red-Eye in night portraits.
Scene: Accesses more specific preset shooting modes, including Foliage, Snow, Beach, Fireworks, Color Accent, Color Swap, Night Snapshot, Indoor, Kids & Pets, and Indoor. (Color accent lets you dim or brighten a specific color in the scene, while color swap lets you pick a color in the scene, and another color you want to swap it with in your photos. The results can be pretty bizarre, but could be a lot of fun if you're creatively-minded.)
Stitch-Assist: Allows you to record a series of images, either horizontally, vertically, to be "stitched" together into one large image or panorama on a computer.
Movie: Records up to 640x480-pixel 30-fps moving images with sound while space remains on the storage card.

Power Button: To the left of the Mode dial, this button turns the camera on or off.

Mode Switch: In the top right corner on the rear panel, this switch selects between Record and Playback modes.

Multi-Controller Rocker Button: This four-way rocker button is marked with tiny (almost microscopic) arrows on the camera body, and actuates left, right, up, and down, simulating arrow keys to navigate through settings menus. In Record mode, the left and right buttons adjust available exposure settings, as well as manual focus, when enabled. The top button controls flash mode, while the bottom button accesses Macro and Manual Focus modes.
In Playback mode, the left and right buttons scroll through captured images. When an image has been enlarged, all four arrows pan within the view.
Function Set Button (see image above): In the center of the multi-controller, this button confirms menu selections. It also switches between available exposure adjustments in Manual mode. It also displays the following Function menu while in Record mode:
 ISO Speed: Sets the camera's sensitivity to Auto or Auto Hi (except in Manual), or to 80, 100, 200, 400, or 800 ISO equivalents.
- White Balance: Controls the color balance of images. Options are Auto, Daylight, Cloudy, Tungsten, Fluorescent, Fluorescent H, and Custom (manual setting).
- Drive Mode: Accesses Continuous Shooting and High Speed Continuous Shooting modes, and the three Self-Timer modes (a two- or 10-second delay, or the adjustable timer, which lets you program both the delay (from 0 to 30 seconds), and the number of shots to be taken once the delay expires from 1 to 10).
- Photo Effect: Enables Vivid Color, Neutral Color, Sepia, Black-and-White, Positive Film, Lighter Skin Tone, Darker Skin Tone, or Custom Color picture effects. Custom effects include 5-step adjustments for Contrast, Sharpness, Saturation, Red, Green & Blue hues, and Skin Tone.
- Flash Output: Adjusts the overall flash intensity from -2 to +2 EV in one-third step increments. In Manual mode, the flash fires only a single pulse, handy when you want to use the A700 with conventional "slave" triggers for external flash units.
- Light Metering System: Sets the metering mode to Evaluative, Center-Weighted Average, or Spot.
- Quality: Quality options are Superfine, Fine, and Normal.
- Resolution: Specifies the image resolution and quality settings. Still image resolutions are 2,816 x 2,112; 2,272 x 1,704; 1,600 x 1,200; and 640 x 480 pixels. Postcard mode also offers 1,600 x 1,200 pixel resolution but greys out a portion of the screen top and bottom, showing the part of the image that won't fit on a standard 4x6 print. Wide Screen mode captures 2,816 x 1,584. Movie resolutions are 640x 480, or 320 x 240 pixels.

Exposure Compensation/Erase Button: Directly above left of the controller, this button lets you increase or decrease the exposure from -2 to +2 exposure equivalents (EV) in one-third-step increments in Record mode. Not available in Manual mode, since the user controls the exposure variables directly there. In Playback mode, it displays the single-image erase menu.

Print/Share Button: To the right of the Exposure Compensation/Erase button, is the Print/Share button. When connected to a printer or Windows computer, this button lights up, indicating that sync or printing is one button away.
 While the PowerShot A700 will work with any PictBridge-enabled printer, when connected to a Canon-brand printer, printing options are particularly robust. With a Canon-brand printer, options include print quality, selection of paper type, a range of paper sizes, and borderless or bordered page layouts. You can also crop images for printing directly from the camera, to improve their composition. Finally, you can choose to have the camera boost the color saturation, and/or apply noise reduction to the image as it's printed.

Display Button: Below left of the multi-controller and adjacent to the lower right corner of the LCD monitor, this button controls the information and image display modes in Record and Playback modes.

Menu Button: Left of the Exposure Compensation/Erase button, this button calls up the settings menu in Record and Playback modes. It also dismisses the menu screen and backs out of menu selections.

Battery Compartment Latch: Nestled in the center of the battery compartment door on the bottom of the camera, this sliding switch unlocks the door, so that it can slide forward and open.

Lens Ring Release Button: Tucked under the lens on the camera's front panel, this button releases the lens ring. Once unlocked, the lens ring can then be turned and removed to accommodate accessory lens kits.
Operation
Canon A700 Operation
While the Canon A700's user interface may seem a little cryptic at first approach, it's actually quite efficient. Most camera functions are controlled externally, and a few of the external control buttons serve multiple functions. When you do need to enter the LCD menu system, navigation is straightforward with only two main pages of options. That said, the majority of external controls do require the LCD display to be active, which will impact battery life somewhat. Regardless, the A700's external controls cut down on the amount of time spent searching menu screens, and I particularly like the "Function" menu which became standard on Canon digital camera models in the 2003 model year. Combined with the instruction manual, the A700's user interface shouldn't take more than an hour to get comfortable with.
 Record Mode LCD Display: In Record mode, the Canon A700's LCD reports various exposure settings, including camera modes, the resolution and quality settings, number of available images, etc. Half-pressing the Shutter button reports the aperture and shutter speed settings, in all modes except Manual. (Aperture and shutter speed are displayed continuously in Manual mode, whether the Shutter button is pressed or not.) Pressing the Display button cycles through the available display modes, including the image with information, no display at all, and the image only.
 Playback Mode LCD Display: In Playback mode, the LCD reports the image sequence number on the card, resolution and quality setting, file name, and the date and time of image capture. Pressing the Display button once calls up an enhanced information display, with a histogram for checking the exposure. A third press cancels the information overlay entirely. The telephoto side of the zoom toggle lets you zoom in on a portion of the image, while the wide-angle side backs you out again, and lets you step out to an "index" view of captured images, displayed as nine thumbnails at a time. Zooming out one step past the point at which the index display appears adds a "jump" bar to the bottom of the screen, letting you jump forward or back nine images at a time, rather than scrolling from each image to the next individually.
Canon A700 Modes and Menus
Record Mode: Marked on the Mode switch with the red camera icon, this mode sets up the camera for capturing still and moving images. The following exposure modes are available:
- Auto: The camera controls everything about the exposure, except for Flash and Macro modes, and image size and quality settings.
- Program AE (P): Places the camera in control of shutter speed and lens aperture, while you maintain control over everything else (i.e., white balance, ISO, metering, exposure compensation, flash, etc.).
- Shutter-Speed Priority AE (Tv): Allows you to control the shutter speed settings from 1/2,000 to 15 seconds, while the camera controls the aperture. All other exposure settings are available.
- Aperture Priority AE (Av): Allows you to set the lens aperture from f/2.8 to f/8.0 (depending on the zoom setting), while the camera controls the shutter speed. In this mode, you maintain control over all other exposure variables.
- Manual (M): Provides complete control over all exposure settings, including shutter speed and lens aperture (available shutter speeds depend on the aperture and lens zoom settings).
- Portrait: Uses a large aperture setting to blur the background and keep the primary subject in sharp focus.
- Landscape: Employs a small aperture setting to keep both the background and foreground in focus.
- Night Scene: Uses slower shutter speeds and flash to even out nighttime exposures. The slow shutter speed allows more ambient light to be recorded in the low-light areas, while the flash fully exposes the subject.
- Scene: Accesses the remaining preset Scene modes, including Night Snapshot, Kids & Pets, Indoor, Foliage, Snow, Beach, Fireworks, Color Accent, and Color Swap.
- Stitch-Assist: Allows you to record a series of images, either horizontally or vertically, to be "stitched" together into one large image or panorama on a computer.
- Movie: Records up to 640x480 pixels at 30 or 15 frames per second while space remains on the memory card.
Record Menu: Pressing the Menu button in Record mode pulls up the following options (not all options are available in all modes):
 AF Frame: Selects between AiAF (intelligent autofocus) system , Center, or FlexiZone. In AiAF mode, the camera judges focus based on the subject's proximity to nine focus areas arrayed in the center of the image. FlexiZone mode lets you select a specific focusing area by pressing the +/- button a couple of times, and then using the arrow directions of the multi controller to position the focus zone anywhere within approximately the central 60% of the frame. Finally, as you might expect, Center AF mode bases focus on the very center of the frame.
- Red-Eye Reduction: Turns the Red-Eye Reduction pre-flash on or off, which works with all flash modes.
- Spot AE Point: If set to Center, the spot AE point frame appears at the center of the LCD monitor. If set to AF Point, it appears inside the selected AF frame.
- MF-Point Zoom: Turns the MF Point zoom option on or off. If on, the center of the frame is enlarged on the LCD display for better viewing while adjusting the manual focus.
- AF Assist Beam: Turns the AF Assist light on or off. If on, the light automatically illuminates in dark shooting conditions.
- Digital Zoom: Turns the 4.0x variable digital zoom on or off.
- Review: Turns the instant image review function on or off, with available image display times from two to 10 seconds in one second steps.
- Grid Lines: Turns a display of grid lines to align subjects in Record mode on or off.
Playback Mode: This mode lets you review captured images and movies on the memory card, as well as erase them, protect them, or tag them for printing and transfer. The traditional green Playback symbol denotes this mode on the Mode switch. Pressing the Menu button displays the following options:
 Auto Play: Automatically plays all captured images in a slide show. (The user has no control over the timing of the slide show, nor of the specific images displayed.)
- Sound Memo: Records a short sound clip to accompany a captured image.
- Protect: Marks the current image for write-protection, or removes write-protection. Protected images cannot be deleted or manipulated, except through card formatting, which erases all files.
- Rotate: Rotates the current image 90 degrees clockwise or anti-clockwise.
- Erase All: Erases all files on the memory card, except protected ones.
- Transfer Order: Marks images on the memory card to be transferred to a computer later.
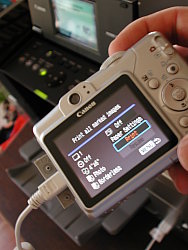
Print Menu: This menu is available in Playback mode, simply by pressing the Menu button and selecting the Print tab. The bottom line of the display shows how many images are selected for printing and the print method that is active.
 Print: Sends images tagged for printing to the printer.
- Select Images & Quantity: Allows you select images for printing and set the number of prints for each image selected.
- Select All Images: Selects all images on the memory card for printing.
- Clear All Selections: Clears all print selections.
- Print Settings: Brings up a menu of these options:
- Print Type: You can specify whether to print one image per page, an index of the images, or both.
- Date: Set printing of the date and time on or off.
- File No.: Set printing of the file number on or off.
- Clear DPOF data: Set the option to clear the DPOF tag on or off.
Setup Menu: This menu is available in all exposure modes, simply by pressing the Menu button and selecting the Setup tab.
 Mute: Turns the camera's start-up, operation, self-time, shutter and playback sounds on and off.
- Volume: Displays the volume settings for the camera's start-up, operation, self-timer, shutter, and playback sounds. (Disabled if Mute option is active.)
- Power Saving: Accesses the camera's Auto Power Down and Display Off settings. Auto Power Down can be enabled or disabled, and Display Off can be set to 10 / 20 / 30 seconds, or 1 / 2 / 3 minutes.
- Date/Time: Sets the camera's internal calendar and clock.
- Format: Formats the SD/MMC card, erasing all files (even those marked for write-protection).
- File Numbering: Specifies whether to reset file numbering with each new SD/MMC card or continue numbering in sequence, regardless of memory card.
 Create Folder: Specifies whether to capture new images in a new folder or to create a new folder for new images after a certain time.
- Auto Rotate: Specifies whether images appear vertically in the LCD monitor when the camera is held vertically.
- Distance Units: Sets the manual focus indicator to Meters/Centimeters or Feet/Inches.
- Lens Retract: Specifies whether or not to retract the lens after one minute.
- Language: Sets the camera's menu language to one of 21 choices. English is the default setting.
- Video System: Designates the camera's video-out signal as NTSC or PAL.
 Print Method: Specify either Auto or PictBridge as the print method.
- Reset All: Restores factory default settings.
My Camera Menu: This is the last menu tab on the menu screen, and appears in every mode.
 Startup Image: Sets whether to display the Canon logo startup image when you turn on the camera.
- Startup Sound: Sets whether to play the startup sound when you turn on the camera.
- Operation Sound: Sets whether to play a sound when any control or switch is use (except the Shutter button).
- Self-Timer Sound: Sets whether to lay a sound that signals you when the shutter release is two seconds away.
- Shutter Sound: Sets whether to play the shutter sound when you depress the Shutter button (there is no shutter sound in Movie mode).
Optics
Canon A700 Optics
With a range from 35 - 210mm equivalent focal lengths, the Canon PowerShot A700's 6x zoom lens reaches out quite a bit further than the 3-4x zooms more common on consumer point & shoot digital cameras. In our shooting with it, the maximum 210mm equivalent telephoto focal length struck us as a nice compromise between the desire for more telephoto capability and the practical limits of hand-holding a non-stabilized lens.
That said, the Canon A700 faces stiff competition in the market, where more and more cameras are appearing with image-stabilized optics. Under normal daylight illumination, it's no problem at all to hold the A700 steady enough to get sharp photos, but when the sun starts to go down or hides behind clouds, it can be challenging to hold the camera still enough without a tripod. For daylight shots (or darker ones with a tripod), there's no question that the longer zoom is nice to have.
When it came to optical quality, our test results with the A700 were a very pleasant surprise: It showed average amounts of barrel and pincushion distortion (not bad for a long-ratio zoom lens), but much better than average corner sharpness and chromatic aberration than we normally find in consumer cameras. Overall, the Canon A700 does very well in the optics department, the one fly in the ointment being an optical viewfinder that's excessively tight, showing only about 77% of the final frame area. (Happily though, the LCD monitor is essentially 100% accurate.)
Lens
Zoom
A generous 6x optical zoom range, with good performance.


The PowerShot zooms over the equivalent of a 35-210mm range, fairly unusual for its class (where 3x zoom predominate). The 4x digital zoom takes it out to 24x total with the loss of quality that digital zoom creates.
Macro
A small macro area with good detail and high resolution. Flash does not throttle down well at this range, so plan on using external flash for macro shots.


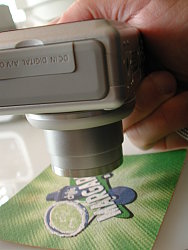
The PowerShot's macro setting performs well, capturing a small minimum area of 0.87 x 0.65 inches (22 x 16.5 millimeters). Detail is strong and resolution high, with only a moderate amount of softening in the corners from the lens. (Most cameras have some softening in the corners in macro mode.) Note, however, that Macro focuses only at the wide angle end of the zoom range, requiring you to move the lens very close to the subject and consequently blocking much of the available light. The flash, not surprisingly, doesn't throttle down well, so plan on using external lighting for your closest macro shots with the A700.
Distortion
Moderate barrel distortion.
This is the tendency for the lens to bend straight lines outward (like a barrel--usually at wide angle) or inward (like a pincushion--usually at telephoto). The A700's 0.80% barrel distortion at wide angle is average among the cameras I've tested. At the telephoto end, the A700's 0.22% pincushion distortion is also about average.
| Barrel distortion at 35mm is 0.80% |
 |
| Pincushion distortion at 210mm is 0.22% |
 |
Chromatic aberration
Quite low, small effect on images at edges.


The Canon A700 showed much lower chromatic aberration than we're accustomed to seeing in cameras of its class. Small amounts of CA were visible in the corners at wide angle focal lengths, with even smaller amounts present at the telephoto end of the lens' range.
Corner Sharpness
Very slight softening in the corners of the frame, much less than average.


The Canon A700 showed only a slight loss of sharpness in the corners of the frame, quite a bit less than is average among cameras of its class. The center of the frame was slightly sharper at wide angle than telephoto, but the difference between the two was minor indeed.
Viewfinder
Optical viewfinder is very tight and skewed to the upper right. Very good accuracy from the LCD monitor.


The A700's optical viewfinder was quite tight, showing only about 77% frame accuracy at both wide angle and telephoto lens settings. However, the LCD monitor showed close to 100 percent frame accuracy.
The images above were taken from our standardized test shots. For a collection of more pictorial photos, see our Canon PowerShot A700 Photo Gallery .
Exposure
Canon A700 Exposure & Imaging
Color
Saturation & Hue Accuracy
Slightly oversaturated color (especially strong reds), very typical of consumer digital cameras. Generally good hue accuracy.
 |
| In the diagram above, the squares show the original color, and the circles show the color that the camera captured. More saturated colors are located towards the periphery of the graph. Hue changes as you travel around the center. Thus, hue-accurate, highly saturated colors appear as lines radiating from the center. |
The other important part of color rendition is hue accuracy. Hue is "what color" the color is. Here, the PowerShot did quite well. Like most digital cameras, it shifts cyan colors toward blue, to produce better-looking sky colors, but the rest of the hues were quite accurate.


Our random "Gallery" shots showed very pleasing color across a wide variety of subjects. (See our Canon A700 Photo Gallery for more shots taken with the camera.)
Sensor
Exposure and White Balance
Indoors, incandescent lighting
Slight warm cast with Auto and Incandescent white balance and cool with Manual white balance. Exposure compensation was required.


Color balance indoors under Auto white balance was warm and under Incandescent lighting a bit cool. The PowerShot required a +1.0 EV exposure compensation boost to get a good exposure with Auto white balance and +0.7 EV with Incandescent. Overall color well-balanced and hue accurate. Our test lighting for this shot is a mixture of 60 and 100 watt household incandescent bulb, a pretty yellow light source, but a very common one in typical home settings here in the U.S.
Outdoors, daylight
Good color balance, very bright colors. Better than average exposure accuracy.


Outdoor shots generally showed accurate exposure with slightly blown out highlights. Shadow detail also tended to fall apart, but nothing that would raise an alarm for a consumer digicam. Sunlit shots showed high contrast and moderate oversaturation while overcast scenes managed a more accurate portrayal. Exposure accuracy overall was better than average, the camera typically requiring less exposure compensation than we're accustomed to seeing with consumer digicams.
See full set of test images with explanations
See thumbnails of all test and gallery images
Resolution
High resolution, 1,300 lines of strong detail.
Our laboratory resolution chart revealed sharp, distinct line patterns down to about 1,300 lines per picture height, with extinction at around 1,600. You could perhaps argue for 1,400 lines of resolution, but we felt that the level of artifacts there was too high to justify a rating at that level. (The camera did produce some artifacts even at lower line frequencies though, visible both below and in the full-sized res target shots.) Use these numbers to compare with other cameras of similar resolution, or use them to see just what higher resolution can mean in terms of potential detail. Beware that while you might be able to make out what looks like distinct lines at numbers higher than those we've mentioned here, the camera is just doing its best to continue interpreting the lines. If you zoom in and follow them from the wider portions, you'll see the lines converge and reappear several times, so the lines you see at 1,600 and higher are really only artifacts generated by the camera's imaging system.


See full set of test images with explanations
See thumbnails of all test and gallery images
Sharpness & Detail
Fairly sharp images, only minor blurring of detail from noise suppression.


The PowerShot's images are reasonably sharp, with only slight over-sharpening or edge enhancement on the camera's part. (Edge enhancement creates the illusion of sharpness by enhancing colors and tones right at the edge of a rapid transition in color or tone.)
Noise-suppression systems in digital cameras tend to flatten-out detail in areas of subtle contrast. The effects can often be seen in shots of human hair, where the individual strands are lost and an almost "watercolor" look appears. On the A700, noise suppression at shutter speeds above 1.3 seconds is fairly modest in its impact, with relatively little loss of subtle detail.
ISO & Noise Performance
Moderate noise at the normal sensitivity settings, very high noise that blurs detail at the higher settings.


The PowerShot A700's sensitivity ranges from ISO 80 to 800 equivalents. Up to ISO 200, the PowerShot produced very little noise, with only slightly blurred detail in the dark areas. At ISO 400 and especially at 800, the noise level and the amount of blurring that results increased noticeably. Overall though, the Canon A700's noise levels are lower than average for its class.
High resolution with good overall detail, but high contrast and limited shadow detail under harsh lighting. Excellent low-light performance, capable of capturing bright images under average city street lighting and much darker conditions.


Sunlight:
Because digital cameras are more like slide film than negative film (in that they tend to have a more limited tonal range), we test them in the harshest situations to see how they handle scenes with bright highlights and dark shadows, as well as what kind of sensitivity they have in low light. The shot above is designed to mimic the very harsh, contrasty effect of direct noonday sunlight, a very tough challenge for most digital cameras. (You can read details of this test here.)
The Canon A700 had a little trouble with the deliberately harsh lighting in the test above, producing somewhat high contrast with lost highlight detail and deep shadows. The A700 required a bit less exposure compensation than some competing models, as this shot usually calls for about +1.0 EV of adjustment. (In "real life" though, be sure to use fill flash in situations like the one shown above; it's better to shoot in the shade when possible.)
| 1 fc 11 lux |
1/2 fc 5.5 lux |
1/4 fc 2.7 lux |
1/8 fc 1.3 lux |
1/16 fc 0.67 lux |
|
| ISO 80 |
 1.3 sec f2.8 |
 3.2 sec f2.8 |
 8 sec f2.8 |
 15 sec f2.8 |
 15 sec f2.8 |
| ISO 100 |
 1 sec f2.8 |
 2 sec f2.8 |
 5 sec f2.8 |
 15 sec f2.8 |
 15 sec f2.8 |
| ISO 200 |
 1/2 sec f2.8 |
 1 sec f2.8 |
 2.5 sec f2.8 |
 8 sec f2.8 |
 15 sec f2.8 |
| ISO 400 |
 1/4 sec f2.8 |
 1/2 sec f2.8 |
 1.3 sec f2.8 |
 3.2 sec f2.8 |
 8 sec f2.8 |
| ISO 800 |
 1/8 sec f2.8 |
 1/4 sec f2.8 |
 1/1 sec f2.8 |
 1.6 sec f2.8 |
 4 sec f2.8 |
Low light:
The Canon PowerShot A700 did very well in our low light tests, producing bright images at the lowest light levels at ISO 200 and above. At ISO 80 and 100, images were bright down to the 1/8 foot-candle level, about 1/8 as bright as average city street lighting at night. The one limitation though, is that you have to resort to Shutter Priority or Manual exposure mode to get exposure times longer than 1 second. As seen by the type in even the darkest images, the auto focus system worked well, relying on its AF assist lamp to find focus at the very darkest levels, but was also able to focus down at a bit less than 1/4 foot-candle without resorting to the AF assist. Given that typical city street-lighting at night is about one foot-candle (the brightest level shown in the test above), the Canon A700 should have no trouble handling the after-dark photography needs of most consumers.
NOTE: This low light test is conducted with a stationary subject, and the camera mounted on a sturdy tripod. Most digital cameras will fail miserably when faced with a moving subject in dim lighting. (For example, a child's ballet recital or a holiday pageant in a gymnasium.) For such applications, you may have better luck with a digital SLR camera, but even there, you'll likely need to set the focus manually. For information and reviews on digital SLRs, refer to our SLR review index page.
Flash
The A700's small flash is limited to about 10 feet, and produces a slight blue cast in combination with typical incandescent room lighting. Our standard shots required roughly average exposure compensation.


Flash coverage was a bit uneven at wide angle but very good at telephoto. In the Indoor test, the flash on the A700 underexposed our subject at its default setting, requiring a +1.0 EV exposure compensation adjustment to get reasonably bright results. (This is about average among cameras we test.) The camera's Night mode produced brighter results, though with a stronger pinkish-orange cast from the room lighting. Night Portrait mode required the same +1.0 EV exposure adjustment.
| 8 ft | 9 ft | 10 ft | 11 ft | 12 ft | 13 ft | 14 ft |
 1/60 sec f3.5 |
 1/60 sec f3.5 |
 1/60 sec f4.0 |
 1/60 sec f4.0 |
 1/60 sec f4.0 |
 1/60 sec f4.5 |
 1/60 sec f4.5 |
At 11 feet, the flash did not quite illuminate the DaveBox target fully. This agrees well with Canon's own specs for the A700's flash, which state a range of 11 feet at wide angle, and 8.2 feet at telephoto, with the ISO set to Auto. (If anything, Canon's specs seem to be slightly conservative.)
Output Quality
Print Quality
Very good print quality, great color, very usable 13x19 inch prints. ISO 400 images are surprisingly clean at 8x10 inches, ISO 800 usable only to 5x7 inches though.
Testing hundreds of digital cameras, we've found that you can only tell just so much about a camera's image quality by viewing its images on-screen. Ultimately, there's no substitute for printing a lot of images and examining them closely. For this reason, we now routinely print sample images from the cameras we test on our Canon i9900 studio printer, and on the Canon iP5000 here in the office. (See the Canon i9900 review for details on that model.)
With the Canon A700, we found that it had enough resolution to make very crisp 8x10 inch prints. At 13x19, its prints were a bit softer looking, but perfectly adequate for wall or table display. At high ISO, image noise levels were held in check very well up to ISO 400, but the ISO 800 shots were quite a bit noisier. We think most consumers would be quite satisfied by the quality of 8x10 inch prints made from ISO 400 shots. At ISO 800, the images looked a little rough at 5x7 (but again, probably acceptable to most consumers), and fine at 4x6 inches.
Color-wise, the PowerShot A700's images looked really great when printed on the i9900, with bright, vibrant color, yet not to the point that most users would consider it overdone. A few users who prefer more subdued, technically accurate color saturation levels may find the A700's images a little too bright, but most consumers will probably find the A700's bright, snappy images very appealing.
The images above were taken from our standardized test shots. For a collection of more pictorial photos, see our Canon PowerShot A700 Photo Gallery .
Not sure which camera to buy? Let your eyes be the ultimate judge! Visit our Comparometer(tm) to compare images from the Canon PowerShot A700 with those from other cameras you may be considering. The proof is in the pictures, so let your own eyes decide which you like best!
Performance
Canon A700 Performance
Timing and Performance
Canon A700 Timing
Good to average speed for a consumer camera.
Startup/Shutdown |
||
Power on to first shot |
2.4 seconds |
Time it takes for LCD to turn on and lens to deploy. |
Shutdown |
1.6 seconds |
How long it takes to retract lens and stow in your pocket. |
Buffer clearing time |
2 seconds (Large/Fine JPEG, Unlimited shots in continuous mode) |
Worst case buffer clearing time.* This is the delay after a set of shots before you can remove the card. Some cameras won't retract their lenses and shut down until the buffer is cleared. |
Mode switching |
||
Play to Record, first shot |
1.7 seconds |
Time until first shot is captured |
Record to play |
1.79 seconds |
Time to display a large/fine file immediately after capture |
Display recorded image |
1.56 second |
Time to display a large/fine file already on the memory card. |
Shutter response (Lag Time): |
||
Full Autofocus Wide |
0.53 second |
Time from fully pressing shutter button to image capture, zoom lens at wide angle position. |
Full Autofocus Tele |
0.68 second |
Time from fully pressing shutter button to image capture, zoom lens at telephoto position. |
Prefocused |
0.074 second |
Time to capture, after half-pressing and holding shutter button. |
Manual focus |
0.37 second |
For most cameras, shutter lag is less in manual focus than autofocus, but usually not as fast as when the camera is "prefocused" |
Cycle time (shot to shot) |
||
Single Shot mode Large Fine JPEG |
2.18 seconds |
Time per shot, averaged over 20 shots |
Single Shot mode 640x480 JPEG |
2.18 seconds |
Time per shot, averaged over 20 shots |
Early shutter penalty? |
No |
Some cameras refuse to snap another shot if you release and press the shutter too quickly in Single Shot mode, making "No" the preferred answer |
Continuous mode Large Fine JPEG |
0.82 second (1.23 frames per second); No limit w/fast card*; ~2 seconds to clear |
Time per shot, averaged over buffer length or 20 shots, whichever came first |
Continuous mode 640x480 JPEG |
0.82 second (1.23 frames per second); No limit w/fast card*; ~2 seconds to clear |
Time per shot, averaged over buffer length or 20 shots, whichever came first |
Flash recycling |
11.5 seconds |
Flash at maximum output |
Download speed |
||
Windows Computer, USB 2.0 |
5,702 KBytes/sec |
Typical Values: Less than 600=USB 1.1; 600-770=USB 2.0 Low; 771-4000=USB 2.0 High |
*Note: Buffer clearing times measured with a Kingston Ultimate 120x SD memory card. Slower cards will produce correspondingly slower clearing times. Slow cards may also limit length of bursts in continuous mode. |
||
The A700's performance is generally average to faster than average. Startup and shutdown speeds are average. Shutter response is a bit faster than average but not dramatically so. Shot-to-shot cycle times and continuous-mode speeds are only average, too, but the impressive thing is that the A700 can shoot indefinitely in continuous mode, given a fast enough memory card. (We tested with a Kingston 120x Ultimate SD card.) The one slow spot is that the flash takes a leisurely 11.5 seconds to recharge after a full-power shot, well below average. On the other hand, connected to a computer or printer with USB 2.0, download speeds are very fast, pretty much eliminating the need for an external reader. Bottom line, while not a first choice for sports or other really fast-paced action, the A700 is responsive enough (particular at wide angle lens settings) to handle most family photo opportunities.
Battery and Storage Capacity
Battery
Short battery life with the LCD on, very good when LCD is switched off.
| Battery Type | Battery Life |
| Alkaline | 100 shots |
| NiMH (2500 mAh capacity) |
400 shots |
The Canon A700 uses two AA batteries for power. The table above shows the number of shots it can take with either Alkaline or NiMH batteries, based on the CIPA battery-life standard. (Based on 2500 mAh capacity cells.) A CIPA rating of 400 shots (with the LCD display enabled) is pretty good, but as always we strongly recommend that you purchase a couple of sets of high-capacity NiMH rechargeable batteries and a good-quality charger, as they'll save you many times their cost over the life of the camera.
(Interested readers can find an English translation of the CIPA DC-002 standards document here. (180K PDF document))
Storage
A 16-MB SD Memory Card is included with the PowerShot A700.
|
Image Capacity with 16-MB SD Memory Card |
Fine | |
| 2,816 x 2,112 | Images | 5 |
| File Size | 2.8MB | |
| 2,272 x 1,704 | Images | 7 |
| File Size | 2.1MB | |
| 1,600 x 1,200 | Images | 15 |
| File Size | 1MB | |
| 640 x 480 | Images | 56 |
| File Size | 283K | |
We strongly recommend buying at least a 128MB card, preferably a 256MB one, to give yourself extra space for extended outings.
Recommended Software: Rescue your images!
Just as important as an extra memory card is a tool to rescue your images when one of your cards fails at some point in the future. I get a lot of email from readers who've lost photos due to a corrupted memory card. Memory card corruption can happen with any card type and any camera manufacturer, nobody's immune. A surprising number of "lost" images can be recovered with an inexpensive, easy to use piece of software though. Given the amount of email I've gotten on the topic, I now include this paragraph in all my digicam reviews. The program you need is called PhotoRescue, by DataRescue SA. Read our review of it if you'd like, but download the program now, so you'll have it. It doesn't cost a penny until you need it, and even then it's only $29, with a money back guarantee. So download PhotoRescue for Windows or PhotoRescue for Mac while you're thinking of it. (While you're at it, download the PDF manual and quickstart guide as well.) Stash the file in a safe place and it'll be there when you need it. Trust me, needing this is not a matter of if, but when... PhotoRescue is about the best and easiest tool for recovering digital photos I've seen. (Disclosure: IR gets a small commission from sales of the product, but I'd highly recommend the program even if we didn't.) OK, now back to our regularly scheduled review...