


Overview
Canon PowerShot G9 Overview
by Mike Pasini and Dave Etchells
Review Date: 11/21/07
The Canon PowerShot G9, following last year's PowerShot G7 model, is visually very similar to its predecessor -- the only obvious changes being a re-profiling of the handgrip and rear panel. Under the skin, the Canon G9 offers a CCD sensor resolution of twelve megapixels (up from ten in the G7), coupled to the same Canon-branded 35-210mm equivalent 6x optical zoom lens.
The Canon G9 includes optical image stabilization, where a lens element is moved inside the lens body to compensate for camera movement. You can frame images with the Canon G9 via its optical zoom viewfinder (an increasingly rare option these days), or on a 3.0-inch LCD display. Optical viewfinders can be rather nice to have, allowing you to save battery life, or get the shot when harsh sunlight makes it harder to see an image on many digicam displays; the LCD will be the better choice when shooting scenes that will be affected by parallax error, or when precise framing is necessary, particularly if using the stabilizer.
In addition to the slight boost in sensor resolution that comes from a slightly larger 1/1.7 inches imager, there are some other changes in the Canon G9. The Raw file format is back on the G9, an option that had been removed in the previous model, much to the chagrin of many G-series fans. The Canon G9's LCD display is also half-an-inch larger, at 3.0 inches with 230,000 pixels. The Canon G9's maximum ISO sensitivity is 3,200, although this can only be accessed in a specific scene mode at a lower resolution -- otherwise the limit remains ISO 1,600, as in the previous camera. Other features of the Canon G9 include USB 2.0 connectivity, and SDHC/MMC card storage.
The Canon G9 went on sale in October 2007, priced at $500 -- fully $100 below the initial launch price of the PowerShot G7.
Canon G9 User Report
by Mike Pasini
Intro. Raw returns to the Canon G-Series with the G9, which also adds a 3.0-inch LCD, a 12 megapixel sensor and wireless flash capability to the controversial G7 it replaces. The Canon PowerShot G9 doesn't have the articulated LCD of the G6 but no one is going to confuse it with an A-Series model.
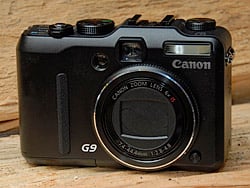
Closed. Even though it's snag-proof, the Canon G9 is too big for a pocket.
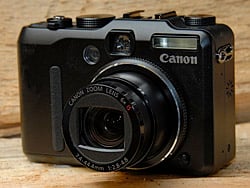
Open. The f/2.8 stabilized lens extends from a little over one inch to an inch and three-quarters when fully zoomed.
I traveled a few thousand miles with the Canon G9, shooting from the air and on the ground, and found it a pleasant companion.
Despite the weight and bulk, the Canon G9 was fun to pal around with. It's very responsive, very well built, and is a delight to fiddle with, thanks to its full manual exposure modes. If you want more than Auto exposure variants of Canon's ELPHs but don't want the entourage that comes with a dSLR, the G9 is the ticket. It's made for people who like to build their fires with wood, even if it burns as easily as a Presto log.
Design. I like the G9's design, but I have to admit it's an uninspired design. You might be tempted to call it retro and mention a rangefinder, but that's a stretch. It's not as sleek as any rangefinder I remember and no more interesting than any other black box, despite its soft curves. It's even less flashy than the G7 since the adapter ring on the G9 has just a subtle chrome accent instead of the entirely chrome one on the G7. It isn't unattractive, but it lacks style. I don't particularly mind that myself, but if you feel flagship models should wave in the breeze, don't salute the G9.
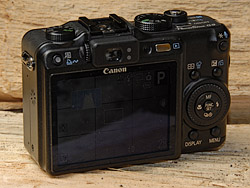
Back. That big LCD can't be ignored.
While it isn't really accurate to call it heavy or large, it isn't comfortable to carry in a shirt pocket and barely manages to make it into a coat pocket. I used it with a spare wrist strap but Canon only supplies a shoulder strap. I preferred transporting it in a carrying case, although my sports coat has large inside pockets that served for more formal occasions.
Still it's heavier than most cameras in its class. If it's in a pocket, you lean to that side. Heft in a small camera can be a stabilizing influence, but this is just a bit too much heft. Use the strap or find a case for it.
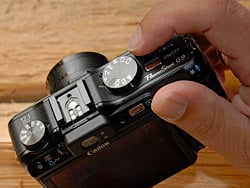
Grip. I had trouble keeping my thumb off the navigator.
That nearly cancels out one of the compelling reasons to choose a camera like this over a dSLR (which does not fit in a pocket either). But the G9 is flat and is slightly easier to carry along than even a compact dSLR. Just to put things in perspective.
The grip is a slight improvement over the G7, but calling it a grip is the sort of flattery you should reserve for romance. It's just a rubber bar to the side of the lens, as you can see in our top right shot of the top panel. On the back, however, there's a small bump in the corner that my thumb found very reassuring. So I didn't have any trouble gripping the camera, but I didn't mount an external flash on it or add any auxiliary lenses. I really liked the grip on the Nikon P5100 for that sort of thing, which provided a secure hold no matter what I added to the camera body.
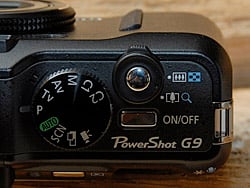
Top Right. The Mode dial is very clear. Note the small Power button, Shutter button and Zoom lever surrounding it. You can also see the small rubber grip on the front panel.
The controls were easy to find and use, although there were a few mysteries (like the asterisk button). They are all on either the top panel or the back panel, easy to reach, with a good feel to almost all of them.
The one exception is the zoom lever. Surrounding the small but adequate Shutter button, it doesn't travel far on a stiff spring. You get used to it quickly, however. And I do like it around the Shutter button instead of on the back panel.
Viewfinder. The LCD was a pleasure to work with, something I can't say about the optical viewfinder. When you need one, you really need it. But it seems it was put there just to make you think "rangefinder." As Luke Smith, who shot the lab test shots, put it, it was "aimed off in some other direction." There is a diopter adjustment so you can see just how far off it is, though. Nice touch, that.
The optical viewfinder actually never really came into play for me. It wasn't just misleading, it was less useful. It can't show the image crop when you shoot widescreen and it can't display the live histogram either.
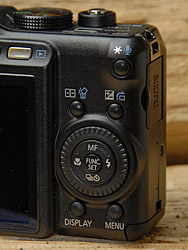
Controls. The navigator is surrounded by a very handy dial.
The LCD was bright and sharp with a wide viewing angle so I could hold the camera over my head and still get a glimpse of the scene I was shooting. That's not quite as satisfying as an articulated LCD, but if it lets you shoot from odd angles, it's doing the job.
With 230,000 pixels, it's also sharp enough to show good detail and to help with manual focusing, which shows an enlarged area in the center to assist in focusing (when MF-Point Zoom is enabled in the Record menu).
Lens. While the lens is not as fast as the beloved G-Series cameras before the G7, it is image-stabilized and a quick f/2.8 at wide-angle and f/4.5 at telephoto. The 6x range from 35-210mm (35mm equivalent) is a relief from the constrictions of a 3x zoom. While 35mm isn't very wide, it's wide enough to work inside most rooms and that 210mm range is very handy. Add the 4x digital zoom, which isn't bad, and you get a 24x range right out of the box (let me be grateful a second time for the image stabilization).
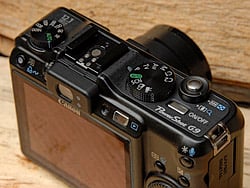
Top Panel. The thumb bulge is clearly visible on the back panel. See details of top panel below.
The focusing range in Macro mode can get as close as 0.39 inch for some remarkable close-ups, like our standard dollar bill shot. And the aperture range from f/2.8 to f/8.0 does make Aperture Priority feasible if not particularly meaningful.
There's some virtual whining out there about the f/2.8 lens. But frankly, I'd take the G9's lens over the G6's f/2.0 lens simply because it's optically image stabilized. That helps in low light at wide-angle focal lengths and in any light with telephoto focal lengths, making the G9 a far more useful tool. That advantage extends to any auxiliary lens you mount, too. And anyway, who would be happy with an f/2.0 that wasn't image stabilized? Nobody at 210mm.
Interface. The usual Canon PowerShot hierarchical menu system is employed here, relying on the Menu button for the tabbed panels and the Function Set button to access the more immediate options.
But the G9 goes a lot further than other PowerShots in providing buttons and dials. Every one of those additions is a blessing in my book, although a couple are mixed blessings. The EV button (which also handles image rotation in Playback mode) is just the most obvious. No trips to the LCD menus for that indispensable option now.
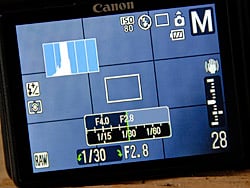
LCD. Gorgeous. Note the histogram and the f-stop/shutter speed scale. Manual mode shooting Raw with Manual focus shown.
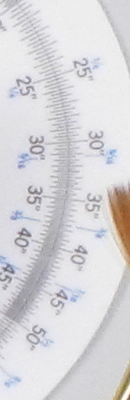
Like the G7, the G9 has an outer ring on its four-way navigator that functions much like a command dial on a dSLR. I really liked that. And the display that pops up on the LCD when you press that weird asterisk button is quite charming, too, showing you analog-like controls of the f-stop and aperture. It also appears when you spin the outer dial to change a setting in one of the manual modes.
In the mixed blessing category, both the Power button and the Playback button are small chrome rectangles. I had no trouble remembering where the Power button was, but finding the Playback button, which sits above the LCD, was never quite as easy. It's something of an alternative, powering the camera up for image review without extending the lens, and a second press toggles the power back off. If you press the shutter button instead, the lens extends and puts the camera into Record mode.
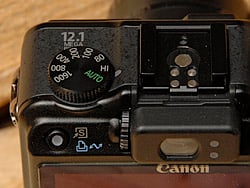
Top Left. The ISO dial keeps ISO out of the Custom settings. Note the offset on the optical viewfinder's front and back glass (and diopter to the left). And the hot shoe.
The ISO dial on the top panel was also a little troublesome. At first, I loved it. Just twist it to set the ISO, no need to hunt down ISO in the menu system. But then I began to find it somewhat aloof and disengaged. As a mechanical setting, you can't include it in any custom camera setup. If you want to create a natural light setup, ISO won't be part of it. That's a bit of a drawback.
Modes. The reason you buy a camera like the G9 is because it let's you make the exposure decisions. The problem with all compact cameras, however, is that they don't have much range (not many f-stops) and the controls are usually once-removed from reality on some LCD menu and thus awkward to use.
But the G9 has modes that take some of the work off your hands. The full list includes: Full Manual mode, Aperture Priority (Av), Shutter Priority (Tv), Programmed Auto, Auto, two Custom settings, Movie mode, Stitch Assist mode and, yes, Scene mode.

Aquarium mode. With face detect auto focus, just for laughs (no profiles, sorry). ISO 800.
Scene mode on the G9 includes a limited but healthy selection of options. They are: Portrait, Landscape, Night Scene, Sports, Foliage, Snow, Beach, Fireworks, Aquarium, Underwater, Indoor, ISO 3200, Kids & Pets, Night Snapshot, Color Accent, and Color Swap. One of these days we'll get an Aquarium mode shot worthy of the effort, but it's not a snap.
In addition to the Scene modes, there are several photo effects you can apply. Those include Vivid, Vivid Blue, Vivid Green, Vivid Red, Neutral, Sepia, Black & White, Positive Film, Lighter Skin Tone, Darker Skin Tone, and Custom.
But the fun is in making your own decisions. And Manual mode is, by that standard, the most fun.
Manual mode really is manual, not the Programmed Auto of PowerShot ELPHs. Press that asterisk button and you can see the aperture scale and the shutter speed scale below it in a small window. If you don't press the asterisk button, the active scale appears when you rotate the dial. The current settings are displayed in big text at the bottom edge of the LCD with a green arrows to indicate which setting you can adjust in which direction. Press the EV button to toggle between them.
That's pretty simple, but also delightful. You play the same game in Programmed Auto except EV really does change the exposure. Instead, you simply use the outer dial to scroll through your aperture/shutter speed options. The Priority modes work the same way, displaying the appropriate scale as you rotate the dial.
The Custom settings (there are two) intrigued me, but the inability to save an ISO setting really ruined it for me. Particularly since that has the most dramatic effect on image quality. I like to set up the camera for indoor natural light photography with a custom setting. Programmed Auto is great for sunlight (no custom needed there) but it never quite adapts to room light. But cranking up the ISO, setting a handholding shutter speed and turning off the flash is a big help when working in room light. But not on the PowerShot G9.

Fall Colors. Well, they're supposed to be saturated.
Custom is, however, easy to use. Set the camera however you like, then press the Menu button. Use the Up arrow to find the Save Settings option, which lets you specify whether to save the current camera settings to C1 or C2. When you dial the Mode dial to C1 or C2, you'll restore those settings.
Menu System. I'm no fan of Canon's menu system and the G9 reinforced that dislike. I appreciate it, I do. I understand the hierarchy of the Menu button for big stuff and the Function Set button for the little things with buttons to help out for the most transient settings.
But there's always some quirk (often more than just one) that makes it impossible to find just the thing you need when you want it.
For example, it took me a long time to find the 1024 option in Movie mode. You'd think it would be in the last shooting menu option displayed on the screen when you press the Function Set button. But no, that only showed me the 640 options and a 320 option. It turns out that you have to spin the outer dial to see it (where you'll also find the 160 option). That's how you select Scene modes, too, but not how you work with any other Mode dial option, where the outer dial functions quite differently depending on the mode.
Sure, as the owner of a Canon G9, you'd get used to those quirks. But it's odd.
Odd, too, is Canon's choice of a 1,024 x 768 Movie mode. That's the same 4:3 aspect ratio as 640 x 480, rather than the 16:9 aspect ratio of an HDTV, which would have been far more useful.

Not so odd, however, is the new twist on checking your image provided by the Image Inspection Tool in Playback mode. Let's say you used face detection as your autofocus method and the G9 identified three faces in the image. Press Display in Playback until you see a thumbnail of your image in the top left corner with boxes over the three faces and a magnification of what's in the active box in the lower right corner. Press the Set button to switch between the boxes (or faces) and use the Zoom lever to magnify the inset. You can also scroll around the inset with the arrow keys. That really helps evaluate an image on the spot, so you can do something about any problems right away.
Focus Modes. The PowerShot G9 offers three focus modes plus manual focus. The familiar and very reliable 9-point AiAF system leads the list. Face Detect can identify up to nine faces (and very quickly). And FlexiZone lets you move a green focus target to any of some 493 possibilities on the LCD.
The Canon G9 lets you switch between them pretty easily, too. Press the Focus mode button, then the Menu button to toggle through the three modes or the Display button to change the size of the green target. You can also just pick one in the LCD menu system.
Manual focus is activated by pressing the Up arrow key. The center of the LCD shows a magnified view of the scene so you can use the outer dial to fine-tune your focus.
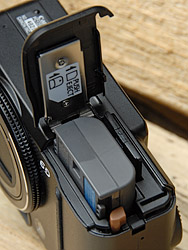
Bottom. The battery/card compartment has room for a Rebel XTi battery.
Storage and Battery. The Canon G9 uses SD or MultiMediaCard cards that slip into the camera next to the rather large battery in the combined compartment on the bottom of the camera. The hinge, however, is right next to the metal tripod mount, so you'll have to pop the camera off your tripod to change cards.
A 32MB card is included with the camera, but don't kid yourself. That only holds about five high quality images (or one Raw image). A 128MB card only holds six Raw images but about 23 high quality ones. So go for at least a 512MB card, which is what I shot with, although I wished I had a 1GB card. With a 1GB card, I could shoot up to eight minutes of quality video. So get a 4 to 8GB card if you're serious about shooting with your Canon G9.
The proprietary lithium-ion battery is larger than the ones used on other PowerShots, and is actually the same battery used in the Rebel XTi. That 7.4 volt 720 mAh battery has a cycle life of about 300 charges and a capacity of about 240 shots with the LCD on, or 600 with it off.
Love that charger, BTW. No cords -- wireless, let's call it. And very compact. Why everybody doesn't do this, I don't understand. Okay, perhaps it's because the whole world doesn't use US-style plugs, but I'm glad when a company makes the investment in developing a simple, neat solution like this.
Performance. Our usual performance criteria changes when we evaluate a flagship digicam. It jumps from the lowest set of an entry-level camera to the prosumer criteria. The red bulls eye gets smaller, the black rings narrower. Still, I was surprised to see the Canon G9 score Above Average marks on nearly everything I look at.
The exceptions were:
- An average amount of distortion for both wide-angle and telephoto focal lengths on the 6x zoom lens (which itself ranked average in this category, if unusual among entry-level cameras).
- The average but somewhat misleading flash recycle time, which at 5.4 seconds may seem a bit long until you consider that a powerful flash takes longer to recharge.
- Weight was heavy enough to score average (closer to Below than Above Average, frankly).
But download speed, LCD size, Startup and Shutdown times, Autofocus lag, pre-focus lag and Cycle time all ranked Above Average.
The lab reported that the camera operated much more slowly at ISO settings above 200. My hunch is that's noise reduction overhead, which you should be able to avoid by shooting Raw.
That's getting the horse before the cart, where it should be. And it should give you a clue to my shooting experience.


Zoom Range. 35mm to 210mm to 4x digital zoom.
Shooting. I had two other Canons here for review with the PowerShot G9, but it was very hard to pry my hands off the G9 to work with the other two. The only solution was to get through the Canon G9 review as soon as possible so I could give the other two the attention they deserved.
Sometimes I just needed a pocketable PowerShot, so I opted for one of the others. But when I could carry the Canon G9, I did.
Build quality is something you really appreciate when you use a camera, but something you don't always pick up on at the store. It took me a few times around the block with the G9 to appreciate its quick startup (that big image stabilized lens comes out like it owns the world) and the snappy shutter. I complained about the zoom lever, but it didn't get in the way of composing my shots. Sure, it could be better, but it isn't a problem.
Ever since I read Julieanne Kost's Window Seat, I seem to have gotten window seats on every flight I've taken. So I get out whatever camera I have with me and take pictures through the window. It's a lot of fun and certainly a distraction from turbulence, tight seating and airplane food.
I had the Canon G9 out when I took a turbo prop from Rochester to Philadelphia recently. We flew about 30 feet off the ground and the G9 got some lovely shots of the Finger Lakes and the leaves turning color. To cut through the atmosphere without using a filter, I fooled around with the Vivid photo effect. But even with that, these shots are really too flat to be gallery shots. They do, however, lend themselves spectacularly to the kind of manipulations Julieanne discusses in her book. Here's one of Pennsylvania that started life as a Raw file.
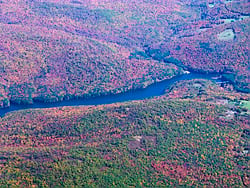
Raw. Pennsylvania from the air. Morning and into the sun.
I'm fond of 16:9 shooting, and did take a few with the G9, but primarily I stuck to a 4:3 aspect ratio. Why? Because I was enamored of the 3.0-inch LCD, simple as that, and wanted to see as much picture as possible.
I didn't take many movies, but when I did, I was stuck with 4:3. The Canon G9 can shoot 1,024 x 768 movies at 15 frames per second (which is a good enough frame rate). And you can tap into the 4x digital zoom, too. But, as I griped about above, that's not going to fill an HDTV's 16:9 aspect ratio.
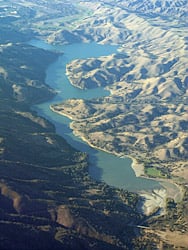
JPEG. California from the air. Evening with the sun to the left (you knew that, didn't you?).
But interval recording at one or two second intervals does make sense and it's nice to see it included on the G9.
My biggest problem shooting with the G9 was the Up arrow key. My thumb kept slipping down low enough to accidentally activate it, which pops up the Manual Focus option. That could explain why some of my shots are soft, but so could the FlexiZone focusing, which I left on the center of the image. I wasn't always using the focusing system I thought I had chosen.
Playback options allow you to magnify the image up to 10x, a great way to check focus. You can also display a histogram to check exposure. And Canon's nine-thumbnail index display with Jump control is also available.
Editing options allow you to use My Colors to highlight parts of the image in color, Rotate the image, assign a category with My Category, add a Sound Memo, run a Slide Show, perform Red-eye Correction, and Resize the image.

1,072 x 768 Movie. A 6.4MB file lasting 3 seconds. You can zoom up to 4x (digital zoom only). (Click to download AVI file.)
Image Quality. The Canon G9 uses a 1/1.7-inch type CCD sensor. And it packs 12.1 megapixels onto that small real estate, exhibiting the kind of problems any high resolution sensor has with noise at high ISO. Nevertheless, I was still able to print credible lettersize, borderless prints from a Kodak 5500 (with just three pigments) after running those ISO 1,600 images through Noiseware Pro.
What's credible? You don't see the noise at normal viewing distances. You do see good color and detail, however. What's a normal viewing distance? For a lettersized print, it's arm's length (framed and hung on the wall).
If you can print a credible 8x10 with ISO 1,600 you're doing something no color film emulsion could ever do.

ISO 80. 4000x3000 file size.

ISO 3200. 1600x1200 file size. A little too soft.
With the High ISO Scene mode, the camera combines adjacent pixels to render a smaller file size with less noise, a venerable approach calling pixel binning. These 1,600 x 1,200 images have good color but noticeably less detail than the 4,000 x 3,000 large JPEGs the G9 produces. Compare the full resolution images of our ISO 80 and ISO 3,200 Still Life shots on the Test Images page to see the difference (just click on the thumbnails reproduced to the left).
Shots taken in overcast conditions really looked nice, but sunlit shots struck me as oversaturated with bright highlights. I was surprised, however, to have to tone down even some of my overcast portraits about 15 units less saturation to get green grass to stop fluorescing.

Pumpkin. A little too intense for me.
You can see the problem in our pumpkin picture. That image was taken on a rainy day and the orange just glows unnaturally. If you look at the full resolution image you can see the orange blooming into the background at the top left.
If I'd been aware of it while I was shooting, I could have slipped into the Custom Color option and toned down the Saturation, although the controls are rather crude and this really should be in the main Menu list.
There was also some chromatic aberration at wide-angle, as our Test Image crop shows. Corner sharpeness was better than usual, though, with the Canon G9 producing very sharp shots.
To put the Canon G9's image quality in context, though, it ranks among the best digicams we've used. I wouldn't trade the 6x optical zoom to a 3x zoom to get less chromatic aberration or less optical distortion. And saturation can be dealt with by shooting Raw or using a Custom Color setting. These issues represent design tradeoffs, not defects. To see a more detailed analysis on the Canon G9's image quality, visit the Optics and Exposure tabs above or below.
Appraisal. The return of Raw format to the G-Series by itself makes the G9 a far more interesting option than its immediate predecessor. The large LCD just seals the deal. Fans of earlier G-Series cameras will have to content themselves with the knowledge that, while the LCD isn't articulating, it does have a wide-angle of view. And while the f/2.8 lens isn't as fast as the f/2.0 lens, it does include image stabilization. But anyone (not just G-Series fans) looking for a compact camera with real manual control will find a lot to like about the G9. It's as automatic a camera as any digicam but it also lets you take complete control.
Basic Features
- 12.10 Megapixel sensor
- 6x optical zoom (35-210mm equivalent)
- 4x maximum digital zoom
- Optical viewfinder
- 3.0-inch LCD
- Full Manual through Automatic exposure control, including Aperture and Shutter Priority and 16 Scene modes plus Stitch Assist
- Built-in flash with five modes and an intensity adjustment
- External flash hot shoe
- ISO sensitivity from 80 to 3,200
- Shutter speeds from 1/2,500 to 15 seconds
- Max Aperture of f/2.8
- SDHC/SD memory card storage (32MB card included)
- Lithium Battery Pack NB-2LH
- Canon Digital Camera Solution software CD for Mac and PC
Special Features
- Canon DIGIC III image processor
- Image Stabilization technology to minimize blurring from camera movement
- Face Detection autofocus
- Continuous shooting mode and Stitch Assist (panorama) shooting modes
- Movie recording with sound up to 1,024 x 768 at 15fps
- Interval recording at one or two second intervals
- Adjustable self-timer for delayed shutter release
- Available automatic exposure and flash exposure compensation to ensure correct exposures (Safety Shift and Safety FE options)
- My Colors menu for image saturation and color adjustment
- Two Custom exposure modes for saving banks of user-set variables
- Spot, Center-Weighted, and Evaluative metering modes
- Adjustable AF area and manual focus option, plus two AF modes
- Removable lens ring accommodates accessory lenses
- Focus and Auto Exposure Bracketing modes
- Auto ISO setting or 80, 100, 200, 400, 800, 1,600, and 3,200 ISO equivalents (3,200 option only as a special scene mode)
- White balance (color) adjustment with auto and seven preset options, plus two custom settings
- DPOF (Digital Print Order Format) and PictBridge printing compliance, Canon Direct Print and Bubble Jet Direct compatible
- USB 2.0 Hi-Speed
In the Box
The Canon PowerShot G9 ships with the following items in the box:
- PowerShot G9 body
- Lithium Battery Pack NB-2LH
- Battery Charger CB-2LW
- 32MB MMC Plus Card MMC-32MH
- Neck Strap NS-DC6
- Digital Camera Solution CD-ROM
- USB Interface Cable IFC-400PCU
- AV Cable AVC-DC300
Recommended Accessories
- Large capacity SD/SDHC memory card. These days, 2GB is a good tradeoff between cost and capacity, but for the G9 you'll want 4-8GB if you can afford it.
- Small camera case for outdoor and in-bag protection
- Waterproof Case WP-DC21 (to 130 feet)
- Speedlite Transmitter ST-E2 for wireless flash
- External flash like Canon's 580EX or 430EX
- 2x telephoto and a 0.75x wide-angle accessory lenses
- AC Adapter Kit ACK-DC20
Conclusion
| Pro: | Con: |
|---|---|
|
|
If you really loved the old rangefinder film cameras from 30 years ago, with their metal bodies, precision feel, and good heft, the Canon G9 is going to be your idea of a compact digital camera. It has the manual control you expect and the Raw format enthusiast photographers increasingly want to work with. But if you like the slimmest, most automatic camera on the market that you can take with you everywhere, the Canon G9 might not be your best choice in a digital camera.
Sure, I wish the Canon G9 were just a bit smaller to fit in a shirt pocket without strangling me. But at least the Canon G9's large body contains a lot of good stuff. With above-average performance, a 6x optical zoom, image stabilization, and that gorgeous 3.0-inch LCD, the Canon G9 is the G-series reborn. Though it's still lacking the swivel screen, I found the Canon G9's big LCD useful enough that I didn't miss it much. Though I'm one reviewer who will take the noise at ISO 1,600 and work with it later, I do wish ISO weren't stranded out on that dial, retro-cool as it is.
These are mere quibbles, when you come right down to it. I reached for the Canon G9 when I wanted to worry about the pictures not the camera, and it never disappointed me. I got some great shots of the Fall and the family and some nice lettersized prints to prove it. The Canon PowerShot G9 unquestionably rates a Dave's Pick.
Optics
Canon PowerShot G9 Optics
Lens
Zoom
An impressive 6x optical zoom lens with great performance. Digital zoom
also performs well.


The Canon PowerShot G9's optical zoom covers the equivalent of a 35-210mm, a much larger range than the average consumer digital camera. Details are sharp and well-defined at full wide angle, with low levels of coma distortion and very good corner-to-corner sharpness. Results at full telephoto are also quite good. Though the PowerShot G9 does sacrifice detail definition and resolution with its 4x digital zoom, results are actually much better than average. An excellent performance overall.
Macro
A very small macro area with good detail and high resolution. Flash performs
well also.


The Canon PowerShot G9's macro setting performed quite well, capturing a very small minimum area of 1.00 x 0.75 inches (26 x 19 millimeters). Exposure is a bit uneven, due to the very close shooting range, and the three dimensional structure of the target (the brooch and one of the coins are shading the dollar bill). Detail and resolution were both excellent, particularly in the center of the frame. There's quite a lot of softening in the corners from the lens, as well as some chromatic aberration along the left side of the frame. (Most cameras have some softening in the corners in macro mode.) The G9's flash throttled down for the macro area fairly well, but the exposure was again quite uneven. Plan on using external lighting for the very closest macro shots with the G9, and even then, you may have trouble getting the light in onto your subject given how close the G9 focuses. All in all, a very good performance, better than most cameras out there.
Distortion
Moderate barrel distortion, though low pincushion.
| Barrel distortion at 35mm is 0.8% |
 |
| Pincushion at 210mm is 0.2% |
 |
This is the tendency for the lens to bend straight lines outward (like a barrel -- usually at wide angle) or inward (like a pincushion -- usually at telephoto). The Canon PowerShot G9's 0.8% barrel distortion at wide angle is about average, though we think this level is too high, as it can be quite evident in photos. At the telephoto end, the G9's 0.2% pincushion distortion is reasonably low, if not the lowest we've seen.
Chromatic aberration
High and bright at wide angle, lower at telephoto. More than we'd like overall, noticeable in some of our images at wide angle.
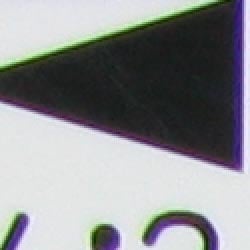



Chromatic aberration is fairly high at wide angle, showing about 10-12 pixels of bright coloration on either side of the target lines, and it extends fairly far into the frame. At telephoto, the effect isn't quite as strong, and pixels not nearly as bright. (This distortion is visible as a slight colored fringe around the objects at the edges of the field of view on the resolution target.)
Corner Sharpness
Excellent corner to corner sharpness, with only minimal blurring visible, and only in one or two corners at both zoom settings.
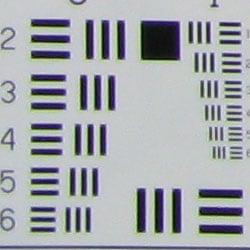
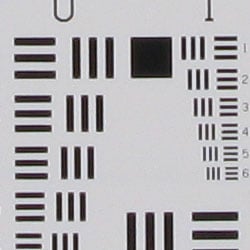
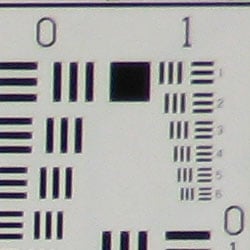
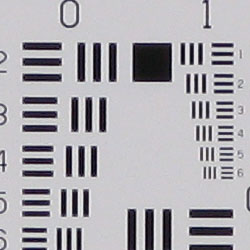
The Canon PowerShot G9 produced excellent corner-to-corner sharpness at both wide angle and telephoto zoom settings. At both settings, blurring was minimal, and only appeared in one or two corners of the frame. Excellent performance here. (But the colored ghosts from chromatic aberration are clearly visible, particularly at wide angle.)
Viewfinder
Coverage
A tight optical viewfinder, but accurate LCD monitor.


The Canon PowerShot G9's optical viewfinder proved very tight in its framing, showing only 82% of the final image area at both wide angle and telephoto. Our lab tech noted that the optical viewfinder was quite hard to frame with, seeming to point in a completely different direction than the lens. (You can clearly see this in the images above, the final image is quite a bit off-center to the top from where the camera was aimed through the viewfinder.) However, the LCD monitor proved much more accurate, showing about 103% at wide angle, and about 99% at telephoto. (The 103% at wide angle is likely just a reflection of the barrel distortion, which makes it hard to choose what to call "properly framed" when looking at the image. - The question becomes: do you pay more attention to the framing at the corners of the frame or the middle of each side?)
The images above were taken from our standardized test shots. For a collection of more pictorial photos, see our Canon PowerShot G9 Photo Gallery .
Exposure
Canon PowerShot G9 Exposure
Color
Saturation & Hue Accuracy
Overall pleasing and well-saturated color, though strong reds and blues
were a little oversaturated. Slightly reddish skin tones, but still good
results.
 |
| In the diagram above, the squares show the original color, and the circles show the color that the camera captured. More saturated colors are located towards the periphery of the graph. Hue changes as you travel around the center. Thus, hue-accurate, highly saturated colors appear as lines radiating from the center. |
Skin tones. Here, with the color balanced properly for the light source, the G9's skin tones were reddish, but not to an extreme. Where oversaturation is most problematic is on Caucasian skin tones, as it's very easy for these "memory colors" to be seen as too bright, too pink, too yellow, etc.
Hue. The Canon G9 produced a few color shifts relative to the correct mathematical translation of colors in its subjects, most visibly pushing cyan toward blue (for better-looking skies), red toward orange, and yellow toward green. Still, overall color was good. Hue is "what color" the
color is.


Sensor
Exposure and White Balance
Indoors, incandescent lighting
Good color with the Manual and Incandescent white balance settings, though Manual proved best overall. Even the Auto white balance results weren't too far off. About average positive exposure compensation required.


Color balance indoors under incandescent lighting was slightly yellow in Auto white balance mode, while the Incandescent and Manual settings produced more accurate color. Of the two, however, the Manual setting looked best, with the most natural skin tones. The Canon G9 required a +1.0 EV exposure compensation boost to get a good exposure, about average for this shot. Overall color with the Manual white balance setting is quite good, though the blue flowers are quite dark and purplish. (Many digital cameras reproduce these blue flowers with a dark, purplish tint, so the G9 fell for the trap.) Our test lighting for this shot is a mixture of 60 and 100 watt household incandescent bulbs, a pretty yellow light source, but a very common one in typical home settings here in the U.S.
Outdoors, daylight
Generally good color and exposure, though high contrast and hot highlights.


The Canon PowerShot G9 performed well under harsh outdoor lighting, though contrast was quite high. Overall color is good though, if slightly reddish, with the Manual white balance setting on the portrait (the Auto and Daylight settings were just slightly too cool). Though overall contrast is high, the shadows hold onto a fair amount of detail. On the outdoor house shot, the G9's contrast adjustment did do a fair job of toning down the hard lighting, so be sure to try lowering the contrast setting in bright exposures such as these.
See full set of test images with explanations
See thumbnails of all test and gallery images
Resolution
High resolution, 1,700 ~ 1,800 lines of strong detail.
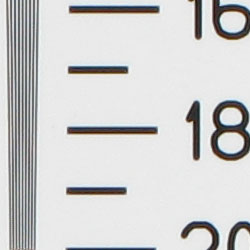
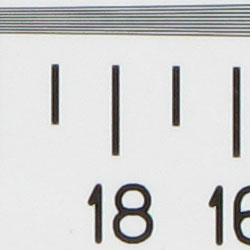
Our laboratory resolution chart revealed sharp, distinct line patterns down to about 1,800 lines (really almost 2,000 lines) per picture height horizontally, though some artifacts begin to appear around 1,700 lines. Extinction didn't really occur, though lines began to merge around 1,800-1,900 lines vertically. Use these numbers to compare with other cameras of similar resolution, or use them to see just what higher resolution can mean in terms of potential detail.
See full set of test images with explanations
See thumbnails of all test and gallery images
Sharpness & Detail
Sharp images, with minimal edge-enhancement on high-contrast subjects. Minor detail loss to noise suppression in the shadows.


Sharpness. The Canon PowerShot G9 captures good detail and sharp images. Slight enhancement artifacts are visible on high-contrast subjects such as the crop above left. Edge enhancement creates the illusion of sharpness by enhancing colors and tones right at the edge of a rapid transition in color or tone.
Detail. The crop above right shows relatively little detail lost to noise suppression, with darker areas of Marti's hair showing slightly limited detail, though individual strands remain visible in the more moderate shadows before blending into each other. Noise-suppression systems in digital cameras tend to flatten-out detail in areas of subtle contrast. The effects can often be seen in shots of human hair, where the individual strands are lost and an almost "watercolor" look appears.
ISO & Noise Performance
Low to moderate noise at the normal sensitivity settings, though a big
jump in noise with strong blurring at the higher settings.
 |
 |
 |
| ISO 80 | ISO 100 | ISO 200 |
 |
 |
 |
ISO 400 | ISO 800 | ISO 1,600 |
 |
ISO 3,200 (1,600 x 1,200) |
Noise levels are fairly low at the Canon PowerShot G9's lower sensitivity settings, though noise is quite visible and details a little blurred at the ISO 200 setting. At ISO 400, noise is high, with considerable blurring, although its 12-megapixel images still make good-looking 8x10 inch prints. At ISOs 800 and 1,600, noise is very high, and fine detail all but lost. The camera's ISO 3,200 setting limits the resolution to 1,600 x 1,200, but results here are still quite blurry, even though the noise pixels aren't as bright.
Extremes: Sunlit and low light tests
High resolution with strong overall detail, but high contrast and hot
highlights. Good low-light performance, capable of capturing bright images
in near darkness.


Sunlight:
The Canon PowerShot G9 produced high contrast under the deliberately harsh lighting in the test above, producing very hot highlights with limited detail. Shadow detail is fair, though noise suppression does smudge detail in deeper shadow areas. The camera required about average compensation to get proper exposure of skin tones, at +0.7 EV, but unfortunately blows the detail in the shirt. Definitely consider reducing the G9's contrast setting, and be sure to use fill flash in situations like the one shown above; it's better to shoot in the shade when possible. (Sorry, we neglected to shoot examples of this subject using the G9's lower contrast settings. We'll try to get back to do this, but can't promise to do so, given our review backlog.)
Because digital cameras are more like slide film than negative film (in that they tend to have a more limited tonal range), we test them in the harshest situations to see how they handle scenes with bright highlights and dark shadows, as well as what kind of sensitivity they have in low light. The shot above is designed to mimic the very harsh, contrasty effect of direct noonday sunlight, a very tough challenge for most digital cameras. (You can read details of this test here.)
| 1 fc 11 lux |
1/2 fc 5.5 lux |
1/4 fc 2.7 lux |
1/8 fc 1.3 lux |
1/16 fc 0.67 lux |
|
|---|---|---|---|---|---|
| ISO 80 |
 1.3 sec f2.9 |
 3.2 sec f3.0 |
 6.2 sec f3.0 |
 12.1 sec f3.0 |
 12.1 sec f2.9 |
| ISO 100 |
 1.1 sec f2.9 |
 2.1 sec f2.9 |
 5 sec f3.0 |
 9.7 sec f3.0 |
 12.1 sec f2.9 |
| ISO 200 |
 0.5 sec f2.9 |
 1.1 sec f2.9 |
 2.6 sec f3.0 |
 5 sec f3.0 |
 9.7 sec f3.0 |
| ISO 400 |
 0.3 sec f2.9 |
 0.5 sec f2.9 |
 1.3 sec f3.0 |
 2.6 sec f3.0 |
 5 sec f3.0 |
| ISO 800 |
 1/7 sec f2.9 |
 0.3 sec f2.9 |
 0.7 sec f3.0 |
 1.3 sec f3.0 |
 2.6 sec f3.0 |
| ISO 1600 |
 1/14 sec f2.9 |
 1/7 sec f2.9 |
 0.3 sec f3.0 |
 0.7 sec f3.0 |
 1.3 sec f3.0 |
| ISO 3200 |
 1/26 sec f2.9 |
 1/14 sec f2.9 |
 1/9 sec f2.9 |
 1/9 sec f2.9 |
 1/9 sec f2.9 |
Low light:
The Canon PowerShot G9 performed well on the low-light test, capturing bright images at the lowest light level with almost the lowest sensitivity setting (ISO 100). At ISO 80, the image at 1/16 foot-candle is dim. Alternatively, images captured at ISO 3,200 were only bright down to the 1/4 foot-candle light level because the camera limits its exposure times at that ISO setting, but noise is very high. Color balance was pretty good with the Auto white balance setting. The camera's autofocus system worked well also, as it was able to focus on the subject almost down to the 1/8 foot-candle light level unassisted, and down to the darkest light level with the AF assist enabled. (A useful trick when shooting under dim lighting is to just prop the camera on a convenient surface, and use its self-timer to release the shutter. This avoids any jiggling from your finger pressing the shutter button, and can work quite well when you don't have a tripod handy. The G9 should do quite well in such situations.)
How bright is this? The one foot-candle light level that this test begins at roughly corresponds to the brightness of typical city street-lighting at night. Cameras performing well at that level should be able to snap good-looking photos of street-lit scenes.
NOTE: This low light test is conducted with a stationary subject, and the camera mounted on a sturdy tripod. Most digital cameras will fail miserably when faced with a moving subject in dim lighting. (For example, a child's ballet recital or a holiday pageant in a gymnasium.) For such applications, you may have better luck with a digital SLR camera, but even there, you'll likely need to set the focus manually. For information and reviews on digital SLRs, refer to our SLR review index page.
Flash
Coverage and Range
A fairly powerful flash, with a pretty good range. Our standard shots required slightly lower than average exposure compensation. Coverage was pretty uniform most of the time, but uneven at wide angle.


Flash coverage was uneven at wide angle, with strong falloff in the corners of the frame, but more uniform at telephoto. In the Indoor test, the Canon G9's flash underexposed our subject just a little at its default setting, requiring a +0.7 EV exposure compensation adjustment to get good results. (This is less adjustment than most cameras require on this shot.) The camera's Slow-Sync flash mode produced slightly brighter and more even results at the same exposure setting, albeit with a stronger pinkish-orange cast from the room lighting.
| Flash Range: Wide Angle | |||||
|---|---|---|---|---|---|
| 6 ft | 7 ft | 8 ft | 9 ft | 10 ft | 11 ft |
 1/64 sec f2.9 ISO 100 |
 1/64 sec f2.9 ISO 100 |
 1/64 sec f2.9 ISO 100 |
 1/64 sec f2.9 ISO 100 |
 1/64 sec f2.9 ISO 100 |
 1/64 sec f2.9 ISO 100 |
| 12 ft | 13 ft | 14 ft | 15 ft | 16 ft | |
 1/64 sec f2.9 ISO 100 |
 1/64 sec f2.9 ISO 100 |
 1/64 sec f2.9 ISO 100 |
 1/64 sec f2.9 ISO 100 |
 1/64 sec f2.9 ISO 100 |
|
| Flash Range: Telephoto | |||||
|---|---|---|---|---|---|
| 6 ft | 7 ft | 8 ft | 9 ft | 10 ft | 11 ft |
 1/64 sec f4.9 ISO 100 |
 1/64 sec f4.9 ISO 100 |
 1/64 sec f4.9 ISO 100 |
 1/64 sec f4.9 ISO 100 |
 1/64 sec f4.9 ISO 100 |
 1/64 sec f4.9 ISO 100 |
| 12 ft | 13 ft | 14 ft | 15 ft | 16 ft | |
 1/64 sec f4.9 ISO 100 |
 1/64 sec f4.9 ISO 100 |
 1/64 sec f4.9 ISO 100 |
 1/64 sec f4.9 ISO 100 |
 1/64 sec f4.9 ISO 100 |
|
ISO 100 Range. At wide angle, flash shots at ISO 100 remained fairly bright all the way out to a distance of about 16 feet. At full telephoto and ISO 100, the intensity remained the same to about 11 feet, and decreased only slightly with each additional foot.
| Manufacturer-Specified Flash Range | |
|---|---|
| Wide Angle | Telephoto |
 13.0 feet Auto ISO 200 |
 8.2 feet Auto ISO 200 |
Manufacturer Specified Flash Test. In the wide angle shot above, the PowerShot G9 performs exactly as Canon says it will, producing a good exposure at the rated distance with its ISO set to Auto (which selected ISO 200). At telephoto, results are also good at the estimated distance. Our standard test method for flash range uses a fixed setting of ISO 100, to provide a fair basis of comparison between cameras. We've now also begun shooting two shots using the manufacturer-specified camera settings, at the range the company claims for the camera, to assess the validity of the specific claims.
Output Quality
Print Quality
Good print quality, good color, sharp 16x20-inch prints. ISO 400 images are quite good at 11x14, ISO 800 shots are good at 8x10, and ISO 1,600 shots look fine at 5x7 inches.
 The Canon PowerShot G9 had enough resolution to make good looking 16x20-inch prints. Slight chroma noise is present at 80, which begins to increase at 100, and gets noticable at ISO 200. But remember, I'm still talking about JPEGs printed at a very large 16x20 inches. ISO 200 images are better at 13x19 inches, and the jump to ISO 400 eliminates the chroma noise with more noise suppression evident, but it really requires a drop down to 11x14 inches before detail is acceptable. ISO 800 looks good at 8x10 inches, and ISO 1,600 looks pretty darn good at 5x7. ISO 3,200, on the other hand, looks terrible even at 4x6. It should have been left out of the camera design.
Color saturation looks good, fading only the slightest bit as ISO increases. It's an excellent performance overall. Consider that you can process the RAW images in any number of software programs to get better results, and the Canon G9 is every bit the cool enthusiast camera that the Canon G7 should have been.
Testing hundreds of digital cameras, we've found that you can only tell just so much about a camera's image quality by viewing its images on-screen. Ultimately, there's no substitute for printing a lot of images and examining them closely. For this reason, we now routinely print sample images from the cameras we test on our Canon i9900 studio printer, and on the Canon iP5200 here in the office. (See the Canon i9900 review for details on that model.)
The images above were taken from our standardized test shots. For a collection of more pictorial photos, see our Canon PowerShot G9 Photo Gallery .
Not sure which camera to buy? Let your eyes be the ultimate judge! Visit our Comparometer(tm) to compare images from the Canon PowerShot G9 with those from other cameras you may be considering. The proof is in the pictures, so let your own eyes decide which you like best!
Performance
Canon PowerShot G9 Performance
Timing and Performance
Good to average speed for a consumer camera.
| Startup/Shutdown |
||
| Power on |
1.5 seconds | Time it takes for LCD to turn on and lens to deploy. |
| Shutdown |
1.5 seconds | How long it takes to retract lens. |
| Buffer clearing time |
2 seconds (after 20 Large/Superfine JPEGs); 3 seconds (after 20 RAW frames) |
Worst case buffer clearing time. -- This is the delay after a set of shots before you can remove the card. Some cameras won't retract their lenses and shut down until the buffer is cleared. |
| Mode switching | ||
|---|---|---|
| Play to Record, |
1.5 seconds | Time until first shot is captured. |
| Record to play |
1.5 seconds | Time to display a large/superfine file immediately after capture. |
| Display |
1.5 seconds | Time to display a large/superfine file already on the memory card. |
| Shutter response (Lag Time) | ||
| Full Autofocus Wide |
0.57 second | Time from fully pressing shutter button to image capture, zoom lens at wide angle position. |
| Full Autofocus Tele |
0.69 second | Time from fully pressing shutter button to image capture, zoom lens at telephoto position. |
| Prefocused |
0.088 second | Time to capture, after half-pressing and holding shutter button. |
| Manual focus |
0.58 second |
For most cameras,
shutter lag is less in manual focus than autofocus, but usually not
as fast as when the camera is "prefocused" |
| Cycle time (shot to shot) | ||
| Single Shot mode |
2.79 seconds | Time per shot, averaged over 20 shots. |
| Single Shot mode Large SuperFine JPEG |
2.12 seconds | Time per shot, averaged over 20 shots. |
| Single Shot mode |
2.07 seconds | Time per shot, averaged over 20 shots. |
| Early shutter |
No | Some cameras refuse to snap another shot if you release and press the shutter too quickly in Single Shot mode, making "No" the preferred answer. |
| Continuous mode |
2.18 seconds (0.46 frames per second); >20 frames total; 3 seconds to clear |
Time per shot, averaged over buffer length or 20 shots, whichever came first. |
| Continuous mode |
0.92 second (1.09 frames per second); >20 frames total; 2 seconds to clear |
Time per shot, averaged over buffer length or 20 shots, whichever came first. |
| Continuous mode |
0.86 second (1.16 frames per second); >20 frames total; 2 seconds to clear |
Time per shot, averaged over buffer length or 20 shots, whichever came first. |
| Continuous mode |
0.48 second (2.07 frames per second); >20 frames total; 0.5 second to clear |
Time per shot, averaged over buffer length or 20 shots, whichever came first. |
| Flash recycling |
5.4 seconds | Flash at maximum output. |
| Download speed | ||
| Windows Computer, USB 2.0 |
1,991 KBytes/sec | Typical Values: |
| *Note: Buffer clearing times measured with a Kingston Ultimate 133x SD memory card. Slower cards will produce correspondingly slower clearing times. Slow cards may also limit length of bursts in continuous mode. ISO sensitivity also affects cycle times and burst mode performance, with higher ISOs generally increasing cycle times and reducing burst performance. |
||
The Canon PowerShot G9's performance ranges from good to about average, depending on the task at hand. Startup and mode switching times are a little sluggish, but not terrible. Shutter response is better than average at both wide angle and telephoto, at 0.57s and 0.69s respectively, and "prefocusing" the camera by half-pressing and holding down the shutter button before the final exposure results in a lag time of only 0.088 second. Shot-to-shot cycle times are slower than average, at about 2.1 seconds for large/superfine JPEGs, though the camera does capture frames continuously at this rate. (That is, given a fast enough memory card, it doesn't have to pause every few frames to wait for the card to catch up.) Also a consideration here is the very large 4,000 x 3,000 resolution: That's a lot of data to deal with and get written to the memory card for every shot. The PowerShot G9 also drags a little in its Continuous modes, capturing just over one frame per second, but again it never slows below that rate, as long as you have a fast card loaded. The flash takes 5.4 seconds to recharge after a full-power shot, which is about average, but good considering how powerful it is. Connected to a computer or printer with USB 2.0, download speeds are pretty good. Bottom line, the Canon G9 won't be a good choice for sporting events or any fast-paced action, but should handle fairly well under normal circumstances.
Battery and Storage Capacity
Battery
Average battery life for a lithium-ion design.
| Operating Mode | Number of Shots |
|---|---|
| Lithium-ion Rechargeable
Battery, LCD On (CIPA standard) |
240 |
| Lithium-ion
Rechargeable Battery, LCD Off (CIPA standard) |
600 |
The Canon PowerShot G9 uses a custom rechargeable lithium-ion battery for power, and ships with a charger. Although battery life is fair with the LCD on, we really recommend you pick up a spare battery and keep it freshly charged and on-hand for extended outings.
The table above shows the number of shots the camera is capable of (on either a fresh set of disposable batteries or a fully-charged rechargeable battery as appropriate), based on CIPA battery-life and/or manufacturer standard test conditions.
(Interested readers can find an English translation of the CIPA DC-002 standards document here. (180K PDF document))
Storage
The Canon PowerShot G9 accepts SDHC/SD/MMC memory cards, and comes with
a 32MB card.
| Image Capacity with 32MB Memory Card |
SuperFine | Fine | Normal | RAW | |
|---|---|---|---|---|---|
| 4,000
x 3,000 |
Images |
5 |
10 |
20 |
1 |
| File Size |
5.5 MB |
3.3 MB |
1.6 MB |
18.2 MB |
|
| 3,264
x 2,448 |
Images |
8 |
14 |
30 |
- |
| File Size |
3.7 MB |
2.2 MB |
1.1 MB |
- |
|
| 2,592
x 1,944 |
Images |
12 |
21 |
43 |
- |
| File Size |
2.7 MB |
1.5 MB |
762 KB |
- |
|
| 1,600
x 1,200 |
Images |
30 |
54 |
102 |
- |
| File Size |
1.1 MB |
610KB |
322 KB |
- |
|
| 640
x 480 |
Images |
114 |
177 |
278 |
- |
| File Size |
288 KB |
186 KB |
119 KB |
- |
|
We strongly recommend buying a large capacity SDHC or SD memory card at least a 1GB card, preferably a 4GB one, to give yourself extra space for extended outings and video. (Check the shopping link above, cards are really cheap these days, so no reason to skimp.)
Jpegvsraw
In-Camera JPEGs vs JPEGs from RAW files
It's often the case that a good third-party RAW converter can extract a lot more detail from a camera's RAW files than the camera's own internal processor can. RAW conversion software also generally gives you much more control over how to make the tradeoff between subject detail and noise suppression, better control over the sharpening process, and better control over tonal rendition.
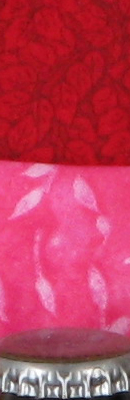
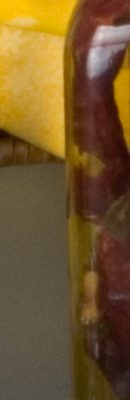
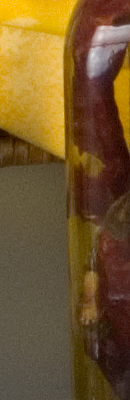
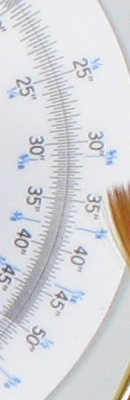
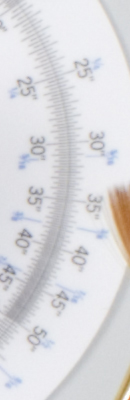
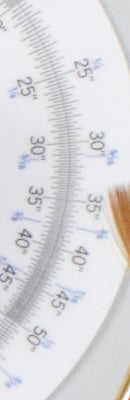
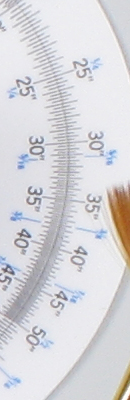
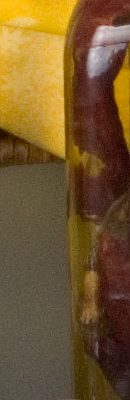
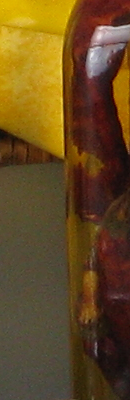
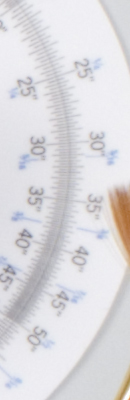
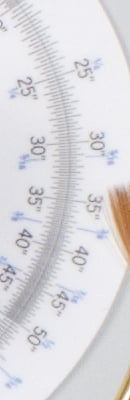
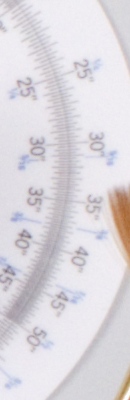
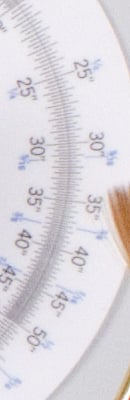
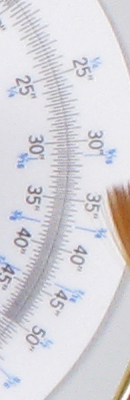
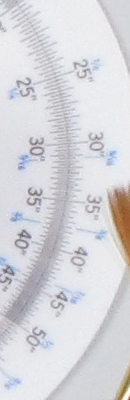
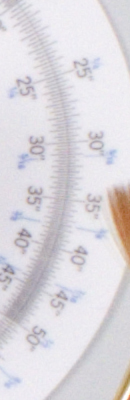
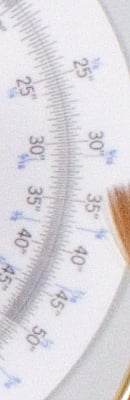
Much of this appears to be the case with the Canon PowerShot G9. While it does deliver very nice JPEGs right out of the camera, Adobe Camera Raw (as just one example of a third-party RAW converter program) manages to find quite a bit more subject detail, particularly at low ISO settings.
|
Canon G9 JPEG vs RAW Comparison
ISO 80 - 400 |
|||
|
JPEG
|
ACR RAW
|
ACR RAW, Sharpened
|
Image Browser RAW
|
| ISO 80 | |||
 |
 |
 |
 |
 |
 |
 |
 |
 |
 |
 |
 |
| ISO 100 | |||
 |
 |
 |
 |
 |
 |
 |
 |
 |
 |
 |
 |
| ISO 200 | |||
 |
 |
 |
 |
 |
 |
 |
 |
 |
 |
 |
 |
| ISO 400 | |||
 |
 |
 |
 |
 |
 |
 |
 |
 |
 |
 |
 |
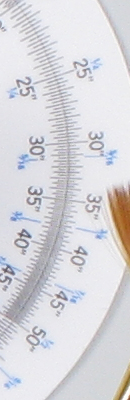
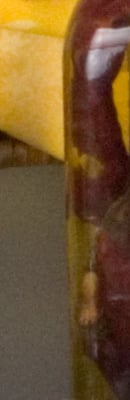
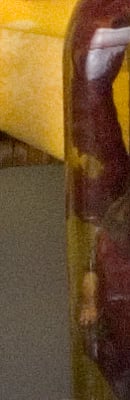
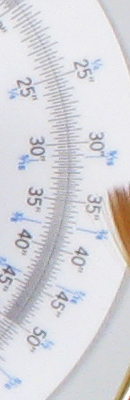
The above crops compare low ISO JPEG images with RAW files processed via Adobe Camera Raw and Canon's Image Browser that ships with the G9.
|
|||