


Overview

Way back in April 2013, the Ricoh GR took the company's GR-series of compact cameras -- long a cult favorite of enthusiasts -- in a brand new direction. Our understanding from talks with the company is that the Ricoh GR continued to deliver with strong sales, especially in Asian markets, but now it's time for a new camera to take over the reins.
One glance at the Ricoh GR II is enough to tell you that it's very closely-related to its predecessor, and indeed with a few exceptions, it shares almost exactly the same body, lens and imaging pipeline. But while it retains many of its predecessor's strengths, the Ricoh GR II builds on them with some very important features, key among them being a much closer integration with your smartphone, tablet and even your computers. And unlike most rivals, it does so pretty much regardless of which operating system(s) you favor.
Below is a list of the differences between the new model and its predecessor, as well as the high points of those features retained in the new model. If it's not on the list, take a look at our Ricoh GR review, because the feature will be the same as it was in that camera!
Let's take a look at how the Ricoh GR II compares to -- and differs from -- the Ricoh GR:
What's the same
-
The image sensor: A 16.2-effective megapixel, APS-C sized CMOS sensor with a total resolution of 16.93 megapixels, and a maximum resolution of 4,928 x 3,264 pixels. We believe it's the exact same sensor used in the GR, though it could have been tweaked along the way during its manufacturing life cycle.

-
The image processor: The Ricoh GR II uses the same Ricoh GR Engine V image processor as did its predecessor.
-
The lens: A street photography-friendly 18.3mm f/2.8 prime lens is retained in the Ricoh GR II, yielding a 35mm-equivalent focal length of approximately 28mm. The lens has seven elements in five groups, including two double-sided aspherics. It also has a nine-bladed aperture diaphragm, an aperture range of f/2.8 to f/16, and an on-demand two-stop neutral density filter.
-
The sensitivity range: Just as in its predecessor, the Ricoh GR II has a sensitivity range of ISO 100 to 25,600 equivalents.
-
The performance: Like the earlier GR, the Ricoh GR II shoots images at a maximum of four frames per second at full resolution, in JPEG format. (Oddly, both cameras actually shoot at over six frames per second with raw files.) It also has a manufacturer-rated startup or shutdown time of one second, and an autofocus time of 0.2 seconds.
-
The build: While the body design has changed just ever so slightly, the Ricoh GR II still has solid magnesium-alloy construction.

What's been changed
-
Wireless connectivity: The Ricoh GR II now sports in-camera Wi-Fi wireless networking capability, where its predecessor had to rely on the more limited third-party Eye-Fi cards if you wanted to transfer images to your smartphone or tablet. There's also an NFC antenna in the side of the handgrip, allowing for quick-and-easy pairing with Android devices.
The Ricoh GR II can communicate using the same Android / iOS-only Image Sync app used for the Pentax K-S2, which provides for image transfer, remote live view and basic settings changes. That's pretty handy, but here's the really, really good news. It can also be controlled remotely from a web browser, providing a feature akin to the FluCard remote control used in some of Ricoh's Pentax-branded cameras (but using the in-camera Wi-Fi, rather than the custom Pentax-branded FluCard accessory).
The web browser interface provides equivalents for every single control on the body and even allows remote menu system access, meaning that you can control every single camera feature remotely, and you'll get a live-view feed with the ability to touch or click on the preview image to indicate where you'd like the camera to focus.
And since you're using a web browser, you're not limited to just Android or iOS devices as you are with most cameras. You can also connect to your camera from a notebook or desktop PC, other smart device operating systems that are usually overlooked by camera manufacturers, and... well, anything with a Wi-Fi support, a reasonably capable web browser and a suitably generous display.
-
The body: While it looks near-identical to that of the earlier camera, the Ricoh GR II's body is just fractionally (2mm) taller, thanks to a new Wi-Fi antenna on its top deck. Overall dimensions are now 117mm wide, 63mm tall and 34.7mm deep with the lens retracted. Weight has also increased just slightly (5g), with the Ricoh GR II tipping the scales at 248g loaded and ready to shoot.
-
Wireless flash support: This is potentially huge news if you're a Pentaxian or a strobist who loves to play with remote flash setups. For the first time, the Ricoh GR II now supports wireless slave flash, triggering remote strobes such as the AF540FGZII, AF360FGZII and earlier compatible strobes, all using the internal flash strobe.

-
Raw file burst depth: With the original Ricoh GR, the company rated the camera as good for up to four raw frames in a single burst, and our lab test results confirmed that. Now, Ricoh tells us that the GR II is able to shoot as many as ten raw frames in a burst, and again, our GR II Performance test results have confirmed that. In JPEG mode, buffer depth is only limited by the card, the same as its predecessor.
-
White Balance: In addition to the comprehensive list of white balance modes provided in the earlier camera, the Ricoh GR II now offers one more mode which comes courtesy of its Pentax brand. Pentaxians have enjoyed the Color Temperature Enhancement mode since way back in 2009, when it made its debut on the Pentax K-7 DSLR. Now, it makes its Ricoh debut in the GR II, offering a way to emphasize the ambient light color, for example to boost the warmth of a sunset.
-
Autofocus during movie capture: This is, again, a pretty significant change. Where the Ricoh GR locked focus before movie capture began, the GR II now allows single autofocus operation using the AF button as well as continuous autofocus tracking during movie capture. If you're not a fan of focusing manually -- and many of us aren't, because it's a tough nut to crack well -- you'll now be able to let the camera do the job for you. It can be a little slow to respond to changes in subject distance, but otherwise seems to work fairly well.
-
Exposure compensation during movie capture: This is another handy addition for video fans, letting you get things back in the ballpark if scene brightness changes significantly during capture. If you use the on-camera controls, then you'll get objectionable noise in your videos, but if you're shooting remotely with the Ricoh GR Remote app, you can tweak exposure during video capture without shaking the camera or hearing the exposure rocker in action on your audio track.

-
Creative effects during movie capture: We think this is new, although it's been a while since we shot the original Ricoh GR, so we're not certain.
-
Top shutter speed wide-open: The Ricoh GR II now offers a maximum shutter speed of 1/2,500 second at f/2.8, up from the 1/2,000 second top shutter speed when wide-open for the original Ricoh GR when it hit the market. Also, while this shutter speed is new compared to the Ricoh GR at launch, note that the earlier camera gained the same maximum shutter speed in its firmware version 2.03 update, which arrived in October 2013. The top shutter speed at f/5.6 or smaller remains 1/4,000 second.
-
More effects modes: When it hit the market, the Ricoh GR offered a choice of nine effects modes, and subsequently two more were added in the version 3.00 and version 4.00 firmware updates. The Ricoh GR II includes both the Slight and Shift Crop modes that were added to the earlier camera, as well as six further modes that are entirely new. These include HDR Tone, Clarity, Brilliance, Vibrant, Bright and Portrait. All of these effects allow control of saturation and vignetting. In addition, contrast and sharpness controls are available for Brilliance, Vibrant, Bright and Portrait. Brilliance and Clarity provide an additional control over effect strength, while HDR Tone and Clarity allow additional toning controls.
-
Interval Composite shooting: The Ricoh GR provided this feature, but the Ricoh GR II extends it further. Previously, Interval Composite imagery was output only in JPEG mode, limiting your possibilities for post-processing. Now, you can also save in raw mode for the maximum versatility.

-
In-camera raw processing: While the original Ricoh GR allowed in-camera raw development, the Ricoh GR II adds a new twist. As well as the normal raw processing of the earlier camera, you can now opt for what the company is calling Original Ambient Brightness. This can't be used with Interval Composite imagery, but for standard raws, the company says that it will yield a mood more like that of a Ricoh GR film camera. (As far as we can tell, the only real difference is that more vignetting remains in images shot with this function.)
-
Better image review for raw files: If you want to review raw files post-capture, the Ricoh GR II now offers a more accurate representation of the image than did its predecessor, we're told. (Again, we don't have a Ricoh GR handy for a side-by-side comparison.) This will apparently be especially true if the image is viewed with playback zoom active.
-
Playback startup: With the original Ricoh GR, if you powered the camera on in Playback mode by holding down the playback button briefly, you could review images without first waiting for the lens to extend. However, if you wanted to switch to Record mode, you first had to press the power button in completely. (Assuming, that is, that you were running at least firmware version 2.03. Earlier versions, we believe, had to be powered down completely and then restarted.) Now, a half-press of the shutter button while powered on in Playback mode will bring the camera to life. It's a subtle change,
-
Control layout: While almost all controls are identical to those of the original Ricoh GR, the Ricoh GR II has made one control change. Previously, the button on the left of the body was used solely for effects selection, but it now serves double-duty as the Wi-Fi button. A long push on the button drives Wi-Fi mode, while a quick tap controls effects modes. If you use NFC pairing, this step is unnecessary, but it only works with the not-so-great Android and iOS apps.

-
Pixel mapping: Until now, Ricoh shooters who noticed hot pixels in their images were faced with a choice: Retouch them manually, or send the camera back to the manufacturer for service. That's no longer the case, a fact for which we're sure the company's fans will breathe a big sigh of relief. You can now map dead pixels in-camera, and they'll no longer show up in subsequent shots, with their contents simply being interpolated from surrounding pixels.
-
Improved battery life: The Ricoh GR II's battery life is CIPA-rated to 320 shots on a charge, up from 290 shots from its predecessor with the same DB-65 lithium-ion battery pack. That's about a 10% improvement, though we suspect that's without Wi-Fi enabled.
All things considered, it's a pretty impressive list of changes. The importance of Wi-Fi connectivity, especially, can't be understated in the smartphone age. And while the image pipeline is almost untouched, that's not necessarily a bad thing. We praised the earlier camera for its excellent lens and image quality (especially in raw mode), after all, and now the Ricoh GR II offers all of that and quite a bit more for the very same list price!
Want to compare the Ricoh GR II against the competition? Find side-by-side comparisons at the links below:
Ricoh GR II vs. Ricoh GR • Ricoh GR II vs. Nikon Coolpix A
Ricoh GR II vs. Fuji X100T • Ricoh GR II vs. Leica X (Typ 113)
Ricoh GR II vs. Sigma dp1 Quattro • Ricoh GR II vs. Sigma DP1 Merrill
In the Box
- Ricoh GR II camera
- Hot shoe cover
- DB-65 rechargeable lithium-ion battery pack
- AC-U1 USB power adapter
- Power plug
- USB cable
- Hand strap
- Software CD-ROM
- User Manual
- Warranty card
Recommended Accessories
- Extra battery pack for extended outings
- Dedicated BJ-6 battery charger to avoid in-camera charging
- Large capacity, high-speed SDHC/SDXC memory card. 16GB or larger makes sense if you plan on shooting lots of HD video. UHS-I type cards are supported.
- GW-3 21mm wide-angle conversion lens with rubber hood
- GH-3 mount adapter
- GH-3 lens hood
- GV-1 or GV-2 optical viewfinder
- Camera case
Optics
Lens Test Results
Fixed 18.3mm lens
Excellent far-field performance from the 18.3mm f/2.8 fixed lens.

The Ricoh GR II is equipped with a fixed 18.3mm f/2.8 lens, with a 35mm-equivalent focal length of about 28mm. Construction consists of 7 elements in 5 groups including two double-sided aspherics, with a 9-bladed diaphragm providing an aperture range of f/2.8 to f/16. There's a built-in 2 EV neutral density filter as well.
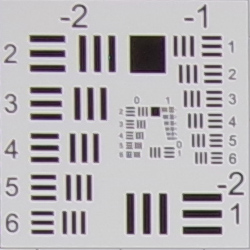
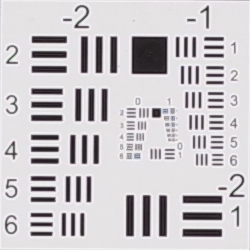
Sharpness and contrast are excellent at f/8 across the frame, and chromatic aberration is quite low (see below for more on that). Performance in the corners looks to be quite good (difficult to evaluate in this image), with just a hint coma distortion. There is some visible corner shading ("vignetting"), though. See below for test results on macro mode, geometric distortion, corner performance, chromatic aberration, etc.
The Ricoh GR II does not offer traditional "digital zoom", but it does offer a 35mm-equivalent crop mode that produces 10.3-megapixel images with no upsampling.
Macro
A larger-than-average minimum coverage area, with good performance. Flash exposure is offset at closest range, but it throttles down well.


The Ricoh GR II captures a fairly large minimum area measuring 4.27 x 2.83 inches (109 x 72 millimeters) in Macro mode. Sharpness is quite good over most of the frame at f/8, with only minor softening in the corners. (Most lenses have some softening in the corners at macro distances, but the GR II's lens does better than most.) The flash throttled down well, but coverage is not very even, illuminating the top left portion of the frame better than the bottom right, so plan on using external lighting for macro shots at closest distance.
Geometric Distortion
Very low geometric distortion.
| Barrel distortion is ~0.1 percent |
 |
The Ricoh GR II's lens produces only about 0.1 percent of complex (wavy) barrel distortion, which is very low, especially for a wide-angle lens. Uncorrected RAW files exhibit the same low distortion, which is a pleasant surprise (most compact wide-angle lenses are digitally corrected for distortion these days). This is the tendency for the lens to bend straight lines outward (like a barrel -- usually at wide-angle) or inward (like a pincushion -- usually at telephoto).
Chromatic Aberration and Corner Sharpness
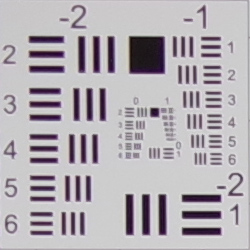
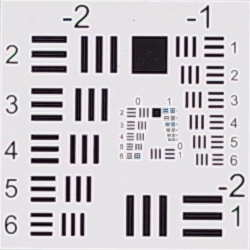
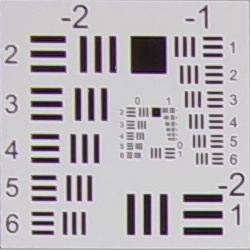
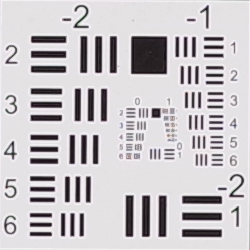
Very low levels of C.A. (and the camera suppresses what little there is). Very good corner performance even wide open, though with visible shading.
|
Aperture: f/2.8
|
|
 |
 |
| f/2.8: Upper left C.A.: Low Softness: Sharp |
f/2.8: Center C.A.: Very low Softness: Very sharp |
|
Aperture: f/5.6
|
|
 |
 |
| f/5.6: Upper left C.A.: Low Softness: Sharp |
f/5.6: Center C.A.: Very low Softness: Very sharp |
|
Aperture: f/8
|
|
 |
 |
| f/8: Upper left C.A.: Low Softness: Sharp |
f/8: Center C.A.: Very low Softness: Very sharp |
Chromatic Aberration. Chromatic aberration in the corners of in-camera JPEGs is fairly low even when wide open, while the center of the image shows almost no CA. Stopping-down to f/5.6 or f/8 reduces the number of colored pixels, but they are slightly more distinct. Still, CA is very low in JPEGs.
Corner Softness. Wide open at f/2.8, the GR II's lens exhibits surprisingly good sharpness in the corners while the center is very sharp. When stopped down to f/5.6 sharpness in the corners improves slightly, however the center is still slightly sharper. At f/8, we start to see slight softening across the frame due to diffraction. Still, really excellent performance across the frame.
Corner Shading. The Ricoh GR II's lens produces visible corner shading ("vignetting") even when stopped down compared to the center of the frame, even though shading correction is applied to JPEGs by default.
Lens Corrections
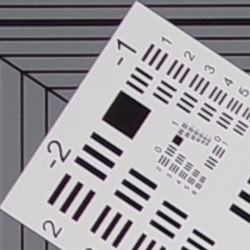
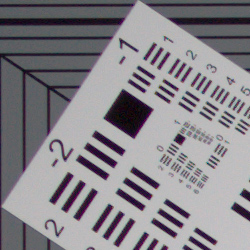
The Ricoh GR II appears to apply chromatic aberration suppression and some shading correction which can be disabled (it's enabled by default) to its JPEGs, however geometric distortion is the same as uncorrected RAW files.
Chromatic Aberration Suppression and Shading Correction
| Camera JPEG | Uncorrected RAW |
 |
 |
| f/2.8: Upper left C.A.: Very low |
f/2.8: Upper left C.A.: Low |
As you can see, lateral chromatic aberration is a little higher and brighter in the uncorrected RAW file (above right), however it's still fairly low. We measured about 0.9 EV of corner shading in RAW files versus about 0.5 EV in JPEGs wide open at f/2.8. And corner shading only reduces to about 0.8 EV and 0.4 EV respectively at f/8.
Overall, an excellent lens that's sharp from edge-to-edge even wide-open, with low distortion and minimal chromatic aberration, but with some noticeable corner shading especially in uncorrected RAW files.
Viewfinder Test Results
Coverage
Excellent accuracy from the LCD monitor.

The Ricoh GR II's LCD monitor shows about 100% horizontal coverage in record mode, but vertical coverage is a bit higher. This is excellent performance, though not a surprise given the low-distortion lens and the fact that the preview image is derived from the imaging sensor.
The images above were taken from our standardized test shots. For a collection of more pictorial photos, see our Ricoh GR II Photo Gallery .
Exposure
Color
Saturation & Hue Accuracy
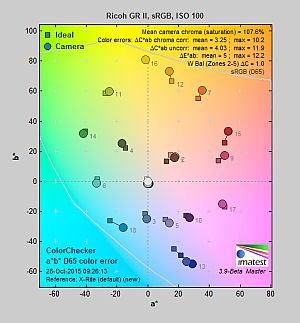
About average mean saturation with excellent overall hue accuracy.
 |
||
|
ISO Sensitivity
|
||
| In the diagram above, the squares show the original color, and the circles show the color that the camera captured. More saturated colors are located toward the periphery of the graph. Hue changes as you travel around the center. Thus, hue-accurate, highly saturated colors appear as lines radiating from the center. Mouse over the links to compare ISOs and click for larger versions. | ||


Saturation. The Ricoh GR II boosts most colors by a small amount or gets them pretty close to accurate. Overall mean saturation is 107.6%, or about 7.6% oversaturated at base ISO, which just below average at default settings. Saturation is quite stable across ISOs, ranging from a minimum of 104.9% at ISO 12,800 to a maximum of 108.1% at ISO 200. Keep in mind these results are with the default saturation setting. (See below for how well the saturation adjustment works.) Most consumer digital cameras produce color that's more highly saturated (more intense) than found in the original subjects. This is simply because most people like their color a bit brighter than life.
Skin tones. The Ricoh GR II's Caucasian skin tones look realistic when using Auto white balance in simulated daylight, with a subtle pink cast. Manual white balance is a bit warmer, but still very good. Where oversaturation is most problematic is on Caucasian skin tones, as it's very easy for these "memory colors" to be seen as too bright, too pink, too yellow, etc.
Hue. The Ricoh GR II does shift cyan toward blue and orange toward yellow, but shifts are relatively minor. (The cyan to blue shift is very common among the digital cameras we test; we think it's a deliberate choice by camera engineers to produce better-looking sky colors, and there's hardly any yellow to green shift that we often see.) With an average "delta-C" color error at base ISO of 3.25 after correction for saturation, overall hue accuracy is much better than average when using Manual white balance, and remains excellent across the entire range of ISOs. Hue is "what color" the
color is.


Sensor
Exposure and White Balance
Indoors, incandescent lighting
Good color with the Manual white balance setting, but very warm results with Auto. About average positive exposure compensation required.


Indoors, under normal incandescent lighting, color balance was much too warm and reddish-orange with the Auto white balance setting. The Incandescent setting did better, but was still a bit too warm, this time with a yellowish cast. The Manual setting however produced accurate results. The Ricoh GR II required an average amount of positive exposure compensation here, at +0.3 EV. Our test lighting for this shot is a mixture of 60 and 100 watt household incandescent bulbs, a pretty yellow light source, but a very common one in typical home settings here in the U.S.
Outdoors, daylight
Great colors, but with high contrast and mixed exposure accuracy.
The Ricoh GR II struggled a bit with our "Sunlit" Portrait shot, overexposing it a bit at default exposure using multi-segment metering, though perhaps not by as much as the original version did. Most cameras need about +0.7 EV for this shot, however the GR II probably needs -0.3 EV. Colors and skin tone are very good but contrast somewhat high. Our far-field shot was just slightly underexposed but as a result very few highlights clipped. Shadows are deep and although they're pretty clean, very deep shadows have some odd discoloration. Colors outdoors also look a touch on the cool side.
See full set of test images with explanations
See thumbnails of all test and gallery images
Resolution
~2,200 lines of strong detail from JPEGs, about 2,300 lines from ACR processed RAW files.
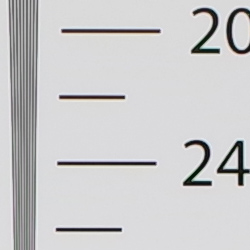
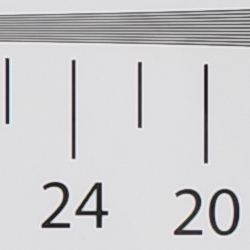
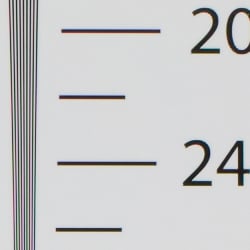
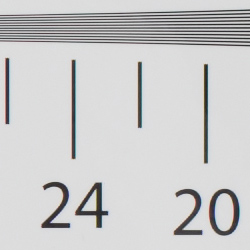
Our laboratory resolution chart revealed sharp, distinct line patterns up to about 2,200 lines per picture height in the horizontal direction, and to about 2,200 lines in the vertical direction, though there was some strong aliasing starting as low as 1,900 lines. Complete extinction of the pattern occurred at about 3,000 lines in both directions. We were able to do a little better with DNG files processed through Adobe Camera Raw, with the horizontal and vertical directions resolving slightly higher at about 2,300 lines per pixel height. As usual, color moiré is more evident in the converted RAW files, though camera JPEGs show some significant color moiré as well, which is no surprise given the lack of an OLPF. Use these numbers to compare with other cameras of similar resolution, or use them to see just what higher resolution can mean in terms of potential detail.
See full set of test images with explanations
See thumbnails of all test and gallery images
Sharpness & Detail
Very good sharpness, though sharpening artifacts can be seen. Minor loss of fine detail to noise suppression at base ISO.

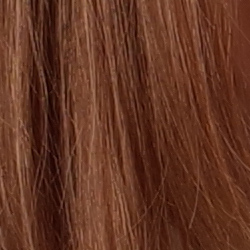
Sharpness. The Ricoh GR II produces JPEG images with very good sharpness, though moderately strong sharpening artifacts can be seen such as the obvious halos around the lines and text in the bottle label crop above left. Edge enhancement creates the illusion of sharpness by enhancing colors and tones right at the edge of a rapid transition in color or tone.
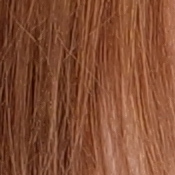
Detail. The crop above right shows some detail loss due to noise suppression in areas of lower contrast. Individual strands are still distinguishable in the lighter shadows and when they have high contrast, though they begin to merge as shadows deepen, and in places where the tone and color of adjacent strands is very close. Still, pretty good results here, especially considering the small form-factor of the GR II. Noise-suppression systems in digital cameras tend to flatten-out detail in areas of subtle contrast. The effects can often be seen in shots of human hair, where the individual strands are lost and an almost "watercolor" look appears.
RAW vs In-Camera JPEGs
As noted above, the Ricoh GR II does a great job at capturing lots of fine detail in its JPEGs, but more detail can often be obtained from carefully processing RAW files, while at the same time reducing sharpening artifacts. Take a look below, to see what we mean:
| Base ISO (100) | |
 |
 |
 |
 |
 |
 |
|
Camera JPEG, defaults
|
RAW via Adobe Camera Raw
|
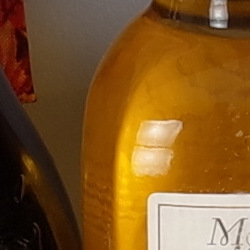
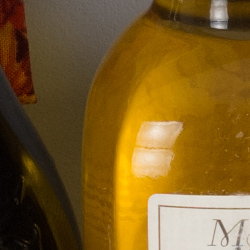
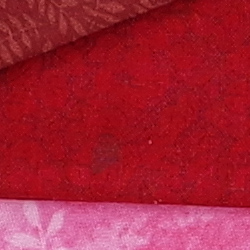
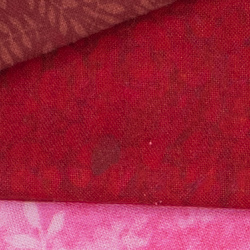
In the table above, we compare an in-camera JPEG taken at base ISO using default noise reduction and sharpening (on the left) to the matching RAW file converted with Adobe Camera Raw 9.1 using default noise reduction with some light unsharp masking applied in Photoshop (150%, radius of 0.3 pixels, and a threshold of 0).
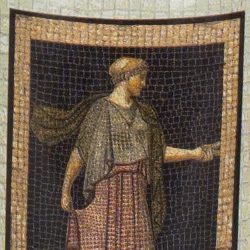
As is usually the case, Adobe Camera Raw delivers finer detail than the camera's processing, and its light default noise reduction does better with our difficult red-leaf swatch, even resolving some of its thread pattern which the camera mostly blurred away as noise. Adobe Camera Raw also produced finer detail in the mosaic, but left behind more noise, as seen in flatter areas such as in the bottle and background in the first pair of crops. Overall, though, the Ricoh GR II does a pretty good job with its JPEGs, but as is usually the case you can extract even more detail (with fewer sharpening artifacts) with a good RAW converter.
ISO & Noise Performance
Very good high ISO performance for its class.
| High ISO Noise Reduction = Auto (Default) | ||
 |
 |
 |
| ISO 100 | ISO 200 | ISO 400 |
 |
 |
 |
| ISO 800 | ISO 1,600 | ISO 3,200 |
 |
 |
 |
| ISO 6,400 | ISO 12,800 | ISO 25,600 |
Noise performance is very good at ISO 100 through 400, with only a minor drop in detail as ISO rises. At ISO 800, we start to see stronger luma noise, though it's very fine-grained and leaves most detail intact, while chroma noise is well-controlled. ISO 1,600 is similar, with just slightly higher luma noise and stronger noise reduction, but fine detail is still quite good. At ISO 3,200, luma noise is coarser, but chroma noise is still well under control, and detail is pretty good. Image quality drops of rapidly from here, though. ISO 6,400 shows a larger drop in quality with much stronger blurring and some chroma blotching in the shadows, but it's actually not bad for such a high ISO. ISO 12,800 is quite noisy with a peppered effect, leaving little fine detail. Chroma noise is also stronger, as you'd expect. ISO 25,600 shows a lot of luma noise for a stronger peppered effect, as well as cloudy chroma noise in the form of purple and green blotches, and there's a green cast as well. Still, very good high ISO performance for a camera its size, similar to its predecessor but with improved color.
Of course, the impact of noise and detail loss are highly dependent on the size the photos are printed at, and pixel-peeping on-screen has surprisingly little relationship to how the images look when printed: See the Print Quality section below for recommended maximum print sizes at each ISO.
A note about focus for this shot: We used to shoot this image at f/4, however depth of field became so shallow with larger, high-resolution sensors that it was difficult to keep important areas of this shot in focus, so we have since started shooting at f/8, the best compromise between depth of field and sharpness.
Extremes: Sunlit, dynamic range, and low light tests
High contrast and limited dynamic range in JPEGs. Excellent low-light performance, capable of capturing bright images in near darkness.


Sunlight:
As mentioned previously, the Ricoh GR II struggled with the deliberately harsh lighting in the above test. Default contrast is quite high and dynamic range is limited in JPEGs, making it difficult to capture the tonal range of this scene. As you can see, even the default exposure (0 EV) overexposed this shot resulting in a lot of blown highlights in the mannequin's shirt and flower, and we unfortunately neglected to take any with negative exposure compensation. Be sure to use fill flash in situations like the one shown above; it's better to shoot in the shade when possible.
Because digital cameras are more like slide film than negative film (in that they tend to have a more limited tonal range), we test them in the harshest situations to see how they handle scenes with bright highlights and dark shadows, as well as what kind of sensitivity they have in low light. The shot above is designed to mimic the very harsh, contrasty effect of direct noonday sunlight, a very tough challenge for most digital cameras. (You can read details of this test here.)
| Auto mode | |
|
 |
|
Aperture-priority 0 EV |
Full Auto mode 0 EV |
Here, we can see the effect of the GR II's full Auto mode which Ricoh says can recognise faces. Auto reduced the exposure slightly and selected f/4, ISO 100 and 1/100s versus our standard Aperture-priority shot at f/8, ISO 100 and 1/20s, producing a better overall exposure with less depth of field as well.
Dynamic Range Correction
The Ricoh GR II's Dynamic Range Correction feature attempts to preserve detail in both highlights and shadows in high-contrast situations. The series of shots below show the effect of the various Dynamic Range Correction settings available on the Ricoh GR II on our high-contrast "Sunlit" Portrait scene. Note that it affects only JPEG images though; Ricoh very properly doesn't apply tonal adjustments like this to RAW file data.
|
Dynamic Range Correction (0 EV)
|
|
 |
DRC Settings: Off (Default) ISO 100 Weak ISO 200 Medium ISO 200 Strong ISO 400 Auto ISO 400 |
 |
|
Mouse over the links to see how the various levels of Dynamic Range Correction affects our "Sunlit" Portrait shot with no exposure compensation. Click on a link to get to the full-res image. Note that minimum ISO is 200 (with 1 EV ISO step setting) when using DRC, part of how it works.
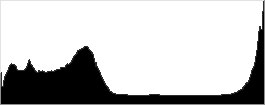
As you can see from the thumbnails and histograms, the Weak setting reduced the number of clipped highlights while leaving midtone and shadows roughly the same. The Medium setting reduced highlights even further so that almost none are blown, while the Strong setting simultaneously boosted shadows and reduced highlights. The Auto setting in this case behaved very similar to the Strong setting. Because of the boost in ISO, noise is more visible in the shadows, but remains low enough not to be much of a concern.
Above, you can see the effect of Dynamic Range Correction settings on our Far-field shot.
Dynamic Range Analysis (RAW mode)
While we once performed our own dynamic range measurements based on in-camera JPEGs as well as converted RAW images (when the camera was supported by Adobe Camera Raw), we've switched to using DxO Labs' results from their DxOMark website. As technology advanced, the dynamic range of modern high-end cameras in some cases exceeded the range of the Stouffer T4110 density scale that we used for our own measurements. DxO's approach based on RAW data before demosaicing is also more revealing, because it measures the fundamental dynamic range of the sensor, irrespective of whatever processing is applied to JPEGs, or to RAW data by off-the-shelf conversion software.
In the following, we use DxO's "Print" dynamic range results, which are scaled based on camera resolution. As the name suggests, this scaling corresponds to the situation in which you print at a given size, regardless of how many megapixels the camera might have. (In other words, if you've decided to make a 13x19 inch print, that's the size you're printing, whether the camera's resolution is 16 or 300 megapixels.) For the technically-minded, you can find a discussion of the reasoning behind this here on the DxOMark website. Also note that DxO Labs uses a signal-to-noise (SNR) threshold of 1 when defining the lower boundary of acceptable luminance noise in their dynamic range measurements, which corresponds to the "Low Quality" threshold of the Imatest software we used to use for this measurement.

Here we decided to compare the Ricoh GR II to its predecessor, as well as to its closest competitor, the Nikon Coolpix A. You can always compare to other models on dxomark.com.
As you can see from the above graph (click for a larger image) the Ricoh GR II performs very similarly to the GR up to ISO 400, with a maximum dynamic range of 13.7 EV at base ISO. However at higher ISOs, the new model offers improved dynamic range over its predecessor, by up to about 2/3 EV at the ISO 6400 setting.
The Nikon Coolpix A still does a bit better at base ISO (13.8 EV) and especially at ISO 6400 (8 vs 7.5 EV), however they are pretty closely matched otherwise, to the point where differences in dynamic range would likely be difficult to distinguish in real-world images.
Overall, excellent dynamic range for its class, with a slight improvement over its predecessor at higher ISOs. Click here to visit the DxOMark page for the Ricoh GR II for more of their test results and additional comparisons.
| 1 fc 11 lux |
1/16 fc 0.67 lux |
1/16 fc No NR |
|
|---|---|---|---|
| ISO 100 |
 2s, f2.8 |
 30s, f2.8 |
 30s, f2.8 |
| ISO 3200 |
 1/15s, f2.8 |
 1s, f2.8 |
 1s, f2.8 |
| ISO 25600 |
 1/125s, f2.8 |
 1/8s, f2.8 |
 1/8s, f2.8 |
Low Light. The Ricoh GR II performed well in terms of image quality in our low-light tests, capturing clean, well-exposed images at the lowest light level (1/16 foot-candle) with the lowest sensitivity setting (ISO 100). As you'd expect, noise is higher at ISO 3200 but it appears well-controlled and fine-grained. Unsurprisingly, the maximum ISO of 25,600 is quite noisy with noticeably less detail, and is probably best avoided except for small prints and in emergencies.
Color balance with Auto white balance was quite good which isn't always the case, with just a slightly cool bias. At the highest ISO tested (25,600), though, color balance in shadows and lower midtones shifts towards green.
There are a few hot pixels here and there but nothing to be concerned about, however there are some bright pixels in deep shadows which could be an issue if the shadows are raised significantly in post. We did not detect any significant fixed pattern noise or heat blooming.
The Ricoh GR II's contrast-detection autofocus system was able to focus on our test subject down to below the 1/16 foot-candle light level with its AF assist light turned off, which is excellent. And it was able to focus in complete darkness with the AF assist lamp enabled, however that will obviously vary depending on the subject and distance.
How bright is this? The one foot-candle light level that this test begins at roughly corresponds to the brightness of typical city street-lighting at night. Cameras performing well at that level should be able to snap good-looking photos of street-lit scenes.
NOTE: This low light test is conducted with a stationary subject, and the camera mounted on a sturdy tripod. Most digital cameras will fail miserably when faced with a moving subject in dim lighting. (For example, a child's ballet recital or a holiday pageant in a gymnasium.) Thanks to their phase-detect AF systems, digital SLRs tend to do much better than point & shoots, but you still shouldn't expect a quick autofocus lock with moving subjects. The Ricoh GR II uses contrast-detect autofocus, as is found in most point & shoot cameras, so its low-light focusing ability is less than that of most SLRs with phase-detect systems. That said, though, the larger, more sensitive pixels of the GR II's sensor do better under dim lighting than do the tiny pixels of most point & shoots, (A useful trick is to just prop the camera on a convenient surface, and use its self-timer to release the shutter. This avoids any jiggling from your finger pressing the shutter button, and can work quite well when you don't have a tripod handy.)
Output Quality
Print Quality
Very good 24 x 36 inch prints at ISO 100/200; ISO 1600 capable of a good 13 x 19; ISO 12,800 prints a nice 4 x 6.
 ISO 100/200 images are excellent at 24 x 36 inches, with good color rendition and rich detail. The only exception is a general loss of contrast in our rather tricky target red-leaf swatch. Wall display prints look great all the way up to 30 x 40 inches.
ISO 400 prints look quite good at 20 x 30 inches, crisp and clean, with wall display prints possible up to 24 x 36 inches.
ISO 800 yields a nice 16 x 20 inch print. All detail is lost in our target red-leaf swatch but the print is otherwise very good, even in shadowy areas prone to noise as ISO rises.
ISO 1600 is capable of a good 13 x 19 inch print. There is minor noise apparent in some shadowy areas, but a good print overall for this ISO.
ISO 3200 prints are good at 8 x 10 inches. 11 x 14s here are OK for less critical applications but have some blotchy areas from noise reduction in some spots.
ISO 6400 produces a nice 5 x 7. The 8 x 10s here are just a bit on the noisy side to merit our "good" ranking.
ISO 12,800 prints a reasonable 4 x 6. Colors are a bit on the muted side, but still a good performance for such a high ISO.
ISO 25,600 does not print a usable 4 x 6 and is best avoided.
The Ricoh GR II, like the original GR before it, lives up to its APS-C sensor in the print quality department, producing very nice prints at large sizes up to ISO 1600. Beyond this point, you'll need to sacrifice on print size for acceptable quality, but for a camera this compact, results are still very good as high as ISO 6400. ISO 12,800 is useful in a pinch, but we'd recommend giving the ISO 25,600 position a pass.
The images above were taken from our standardized test shots. For a collection of more pictorial photos, see our Ricoh GR II Photo Gallery .
Not sure which camera to buy? Let your eyes be the ultimate judge! Visit our Comparometer(tm) to compare images from the Ricoh GR II with those from other cameras you may be considering. The proof is in the pictures, so let your own eyes decide which you like best!
Performance
Timing and Performance
Very good performance overall, with some noteworthy improvements over its predecessor.
| Startup/Play to Record | ||
|---|---|---|
| Power on |
~1.3 seconds
|
Time it takes to turn on and capture a shot. |
|
Play to Record, |
~0.5 second
|
Time until first shot is captured. |
Startup time was much slower than most DSLRs, but not bad for a compact camera and improved over the GR's 1.9 seconds. Switching from Play to Record was quite fast, and about the same as the GR.
| Shutter Response (Lag Time) | ||
|---|---|---|
|
Full Autofocus, |
0.291 second
|
Time from fully pressing shutter button to image capture, with the lens already at the proper focal distance setting. |
|
Full Autofocus, |
0.450 second
|
Time from fully pressing shutter button to image capture, with the lens already at the proper focal distance setting, Auto flash enabled. |
| Manual Focus |
0.086 second
|
For most cameras, shutter lag is less in manual focus than autofocus, but usually not as fast as when the camera is "prefocused". |
|
Prefocused |
0.026 second
|
Time to capture, after half-pressing and holding shutter button. |
The Ricoh GR II's autofocus and shutter lag times were pretty fast, and similar to the GR's. Full autofocus shutter lag was about 0.29 second in Spot AF mode (center). With the flash enabled, the Ricoh GR II's full AF shutter lag increased to about 0.45s to account for the preflash metering.
When manually focused, the Ricoh GR II's shutter lag dropped to only 0.086 second which is quite fast, and when prefocused, shutter lag was a very quick 0.026 second.
| Cycle Time (shot to shot) | ||
|---|---|---|
| Single Shot mode |
< 0.30 second
|
Average time per shot. |
|
Single Shot mode |
0.45 second
|
Average time per shot. |
| Early shutter |
No
|
Some cameras don't snap another shot if you release and press the shutter too quickly in Single Shot mode, making "No" the preferred answer. |
|
Continuous Mode |
0.25 second (4.00 frames per second);
Unlimited (?) frames; 1 second to clear* |
Time per shot, averaged over 80 shots with no signs of slowing. |
| Continuous Mode |
0.16 second (6.08 frames per second);
10 frames total; 9 seconds to clear* |
Time per shot, averaged over buffer length of 10 frames, then stops. |
|
Continuous Mode |
0.16 second (6.08 frames per second);
10 frames total; 12 seconds to clear* |
Time per shot, averaged over buffer length of 10 frames, then stops. |
| Flash Recycling |
1.4 seconds
|
Flash at maximum output. |
|
*Note: Buffer clearing times measured with a SanDisk Extreme Pro 95 MB/sec UHS-I SDHC card. Slower cards will produce correspondingly slower clearing times. Slow cards may also limit length of bursts in continuous mode. ISO sensitivity and noise reduction settings can also affect cycle times and burst mode performance.
|
||
Single-shot cycle times were quite fast for a compact camera, and much improved over the GR. When shooting just JPEGs, it was so fast that we couldn't accurately measure it as it depends on the dexterity and rhythm of the user. When shooting RAW+JPEG files, cycle time was 0.45 second which is still very fast. The GR took about 0.9 and 2.0 seconds respectively. We no longer test just RAW file cycle time in single-shot mode, as it's usually somewhere in between JPEG and RAW+JPEG.
In Continuous mode, the GR II captured large JPEGs at 4.0 frames per second, exactly matching Ricoh's spec. That's the same speed as the GR and below average these days, though there doesn't appear to be a buffer limit, at least with a fast card. The GR II could capture RAW or RAW+L JPEG frames at about 6.1 frames per second, and the buffer depth has been increased to 10 frames, a welcome improvement over the GR's meager 4 frame buffer.
Buffer clearing was fast when shooting JPEGs at only about one second. The GR II did however take much longer with RAW files, at up to 12 seconds after a max-length burst of RAW+JPEG frames versus 4 seconds for the GR, but that's no surprise with the deeper buffer. The GR II won't let you take another shot or change any settings while the buffer is clearing, though.
The built-in flash took only 1.4 seconds on average to recycle after a full discharge, which is very fast.
Bottom line, the Ricoh GR Mark II's performance is generally very good with some nice improvements over its predecessor. Startup is still a bit sluggish compared to DSLRs but improved over the GR, single-shot cycle times are much improved, and autofocus and shutter lag remain fast. Burst speed with just JPEGs remains mediocre at 4 frames per second, though there doesn't appear to be a buffer limit. With RAW files, bursts still speed up to about 6.1 fps, but with an improved buffer depth of 10 shots. Buffer clearing is very fast with just JPEGs, but a little slow with RAW files.
Battery
Battery Life
Good battery life for its class, and improved over its predecessor.
| Operating Mode | Battery Life |
|---|---|
|
Still Capture,
(CIPA standard) |
320 shots
|
The Ricoh GR II uses a custom rechargeable DB-65 lithium-ion battery pack for power, which is charged in-camera via USB. (A dedicated BJ-6 battery charger is available for additional cost.) This is the same battery pack as the GR, but battery life has been improved from 290 to 320 shots per charge using the CIPA standard. Although battery life is pretty good for its class, we still recommend getting a second battery for your GR II if you plan any extended outings.
The table above shows the number of shots the camera is capable of (on a fully-charged rechargeable battery), based on CIPA battery-life and/or manufacturer standard test conditions.
(Interested readers can find an English translation of the CIPA DC-002 standards document here. (180K PDF document))
Image Quality
Below are crops from our laboratory Still Life target comparing the Ricoh GR II to its predecessor, the Ricoh GR, as well as to some other fixed-lens cameras: the Fuji X70, Nikon Coolpix A, Panasonic LX100 and Sigma DP1 Merrill. All cameras in this group have APS-C sized sensors except for the Panasonic LX100. That camera also has a 3.1x zoom instead of prime lens like the others, but we wanted to include a camera with a smaller sensor for comparison purposes. And we choose the Sigma DP1 Merrill over the newer Quattro series because the image size is much closer to that of the Ricoh GR II.
NOTE: These images are best quality JPEGs straight out of the camera, at default settings including noise reduction and using the camera's actual base ISO (not extended ISO settings). Clicking any crop will take you to a carrier page where you can click once again to access the full resolution image as delivered straight from the camera.
For those interested in working with the RAW files involved: click these links to visit each camera's respective sample image thumbnail page: Ricoh GR II, Ricoh GR, Fuji X70, Nikon Coolpix A, Panasonic LX100 and Sigma DP1 Merrill -- links to the RAW files appear beneath those for the JPEG images, wherever we have them. And remember, you can always go to our world-renowned Comparometer to compare the Ricoh GR II to any camera we've ever tested.
Ricoh GR II vs Ricoh GR at Base ISO
 |  |
 |  |
 |  |
Ricoh GR II at ISO 100 | Ricoh GR at ISO 100 |
As expected, very similar image quality from the two Ricohs, as they share the same or very similar sensor and processor. We do however see minor differences in color, contrast and noise processing which are likely the result of firmware tweaks. Color is better from the newer model, and while both cameras apply strong default noise reduction in the red channel, the older one does a bit better with fine detail in our tricky red-leaf fabric whereas the newer one produces better contrast in that swatch. Both show subtle moiré patterns in the red-leaf fabric and elsewhere, thanks to the lack of an anti-aliasing filter. | |
Ricoh GR II vs Fujifilm X70 at Base ISO
|  |
|  |
|  |
Ricoh GR II at ISO 100 | Fujifilm X70 at ISO 200 |
Here we compare the 16-megapixel Ricoh GR II with its traditional Bayer-filtered APS-C sensor to the 16-megapixel Fuji X70 which uses an X-Trans-filtered APS-C sensor. Both produce excellent quality images at base ISO, but there are obvious differences (and be aware that the Fuji's base ISO is higher). The Ricoh does a little better with fine detail in the mosaic crop as well as in the pink fabric, while the Fuji does better with fine detail in the red-leaf fabric and produces less obvious sharpening halos around high-contrast edges. Colors are also warmer and brighter from the Fuji X70. | |
Ricoh GR II vs Nikon Coolpix A at Base ISO
|  |
|  |
|  |
Ricoh GR II at ISO 100 | Nikon Coolpix A at ISO 100 |
These two rivals share the same sensor size and resolution, and similar lenses as well. The Ricoh however produces a sharper, crisper image, while the Nikon's is a little soft, with warmer colors as well. The Nikon however does much better with our tricky red-leaf swatch, and it produces fewer sharpening halos. | |
Ricoh GR II vs Panasonic LX100 at Base ISO
|  |
|  |
|  |
Ricoh GR II at ISO 100 | Panasonic LX100 at ISO 200 |
The Panasonic LX100 uses a smaller 16-megapixel 4/3"-type sensor, and on top of that, it doesn't use as much of its sensor area as most cameras at a given aspect ratio, yielding an effective resolution of only about 12.7 megapixels here. Thus, the Ricoh GR II is able to resolve a bit more detail. The Ricoh also produces slightly lower noise (but keep in mind the LX100's higher base ISO), as well as much better color. The LX100 does however do better with our tricky red-leaf swatch, smoothing out noise and fabric threads but retaining better contrast detail, and it produces lower sharpening artifacts. | |
Ricoh GR II vs Sigma DP1 Merrill at Base ISO
|  |
|  |
|  |
Ricoh GR II at ISO 100 | Sigma DP1 Merrill at ISO 100 |
At base ISO, the Sigma DP1 with its full color Foveon APS-C sensor produces phenomenal detail and crispness with no color interpolation artifacts, and the fine detail in our troublesome red-leaf fabric is outstanding. The Ricoh however produces slightly lower noise already here at base ISO, and its overall color is more accurate. | |
Ricoh GR II vs Ricoh GR at ISO 1600
 |  |
 |  |
 |  |
Ricoh GR II at ISO 1600 | Ricoh GR at ISO 1600 |
Again, very similar images from the two Ricohs at ISO 1600 with minor differences in color and contrast, but like we saw at base ISO, the older model does a bit better with fine detail in red-leaf swatch, though both blur much of it it away. | |
Ricoh GR II vs Fujifilm X70 at ISO 1600
|  |
|  |
|  |
Ricoh GR II at ISO 1600 | Fujifilm X70 at ISO 1600 |
At ISO 1600, the Fuji X70 produces slightly higher luminance noise but lower chrominance noise, yet it still manages to reproduce much better detail in our red-leaf fabric. The Fuji image is also brighter and crisper looking, with more "pop". | |
Ricoh GR II vs Nikon Coolpix A at ISO 1600
|  |
|  |
|  |
Ricoh GR II at ISO 1600 | Nikon Coolpix A at ISO 1600 |
The Nikon produces a much brighter-looking image at ISO 1600, but colors are warmer and details are fuzzier than the Ricoh GR II, except in the red-leaf swatch where the Coolpix A holds on to a lot more detail. | |
Ricoh GR II vs Panasonic LX100 at ISO 1600
|  |
|  |
|  |
Ricoh GR II at ISO 1600 | Panasonic LX100 at ISO 1600 |
The Ricoh GR II pulls further ahead of the Panasonic LX100 at ISO 1600, with lower noise levels as well as better detail and color in most areas, but the Panasonic arguably continues to deliver a better rendering of the red-leaf swatch, even though it is quite smudged. | |
Ricoh GR II vs Sigma DP1 Merrill at ISO 1600
|  |
|  |
|  |
Ricoh GR II at ISO 1600 | Sigma DP1 Merrill at ISO 1600 |
Here, we see the Achilles' heel of the Foveon full-color sensor: Very poor high ISO performance. While detail is still pretty good, noise is high and colors are drab with some odd discoloration at well. You can get much better results by processing the RAW file using Sigma's proprietary software, but noise is still quite a bit higher and colors muted compared to the Ricoh GR II. | |
Ricoh GR II vs Ricoh GR at ISO 3200
 |  |
 |  |
 |  |
Ricoh GR II at ISO 3200 | Ricoh GR at ISO 3200 |
Again, slightly better contrast, colors and detail from the Ricoh GR II versus slightly better rendering of our red-leaf fabric from the GR at ISO 3200. Noise in flatter areas also looks more even and natural from the GR II. | |
Ricoh GR II vs Fujifilm X70 at ISO 3200
|  |
|  |
|  |
Ricoh GR II at ISO 3200 | Fujifilm X70 at ISO 3200 |
The Fuji X70 produces a slightly cleaner image with brighter colors and much better detail in the red-leaf fabric, though the GR II arguably does a bit better with fine detail in the mosaic, while producing fewer demosaicing artifacts. | |
Ricoh GR II vs Nikon Coolpix A at ISO 3200
|  |
|  |
|  |
Ricoh GR II at ISO 3200 | Nikon Coolpix A at ISO 3200 |
The Ricoh produces a cleaner, sharper, more detailed image with more neutral colors while the Nikon produces warmer, brighter colors. The GR II blurs away almost all detail in our red-leaf fabric at this sensitivity, though, while the Nikon manages to produce a reasonable facsimile. | |
Ricoh GR II vs Panasonic LX100 at ISO 3200
|  |
|  |
|  |
Ricoh GR II at ISO 3200 | Panasonic LX100 at ISO 3200 |
Here at ISO 3200, the Ricoh is the clear winner with better detail and brighter, more accurate colors. The LX100's strong noise reduction produces a smoother image, but a lot of fine detail is lost or distorted as a result. | |
Ricoh GR II vs Sigma DP1 Merrill at ISO 3200
|  |
|  |
|  |
Ricoh GR II at ISO 3200 | Sigma DP1 Merrill at ISO 3200 |
Again, it's no contest between the traditional Bayer-sensored Ricoh GR II and the Foveon-sensored at ISO 3200. The Sigma just can't compete at high ISOs, producing very noisy images with terrible color. Even the RAW file conversion suffers from high noise and dreadful color reproduction. | |
Ricoh GR II vs. Ricoh GR, Fujifilm X70, Nikon Coolpix A, Panasonic LX100, Sigma DP1 Merrill
 |  |  |  |  |  |
 |  |  |  |  |  |
 |  |  |  |  |  |
| Ricoh GR II ISO 100 ISO 3200 ISO 6400 | Ricoh GR ISO 100 ISO 3200 ISO 6400 | Fujifilm X70 ISO 200 ISO 3200 ISO 6400 | Nikon Coolpix A ISO 100 ISO 3200 ISO 6400 | Panasonic LX100 ISO 200 ISO 3200 ISO 6400 | Sigma DP1 Merrill ISO 100 ISO 3200 ISO 6400 |
| Detail comparison. High-contrast detail is also important, pushing the camera in different ways, so we like to look at it, too. Here we see the Sigma DP1 Merrill is the clear winner at base ISO, easily crushing the others in contrast and fine detail at base ISO. The others do fairly similarly to each other, however you can see the Fuji X70 struggles to make out the small red text due to demosaicing errors, no doubt thanks to its unique X-Trans sensor. Contrast and detail drop-off gradually as ISO rises for the Bayer-filtered models, however you can see it more rapidly degrade from the Sigma. The Ricoh GR II performs about the same as its predecessor here in terms of detail, perhaps just a bit better, and colors are more saturated. | |||||
Ricoh GR II Print Quality
Very good 24 x 36 inch prints at ISO 100/200; ISO 1600 capable of a good 13 x 19; ISO 12,800 prints a nice 4 x 6.
ISO 100/200 images are excellent at 24 x 36 inches, with good color rendition and rich detail. The only exception is a general loss of contrast in our rather tricky target red-leaf swatch. Wall display prints look great all the way up to 30 x 40 inches.
ISO 400 prints look quite good at 20 x 30 inches, crisp and clean, with wall display prints possible up to 24 x 36 inches.
ISO 800 yields a nice 16 x 20 inch print. All detail is lost in our target red-leaf swatch but the print is otherwise very good, even in shadowy areas prone to noise as ISO rises.
ISO 1600 is capable of a good 13 x 19 inch print. There is minor noise apparent in some shadowy areas, but a good print overall for this ISO.
ISO 3200 prints are good at 8 x 10 inches. 11 x 14s here are OK for less critical applications but have some blotchy areas from noise reduction in some spots.
ISO 6400 produces a nice 5 x 7. The 8 x 10s here are just a bit on the noisy side to merit our "good" ranking.
ISO 12,800 prints a reasonable 4 x 6. Colors are a bit on the muted side, but still a good performance for such a high ISO.
ISO 25,600 does not print a usable 4 x 6 and is best avoided.
The Ricoh GR II, like the original GR before it, lives up to its APS-C sensor in the print quality department, producing very nice prints at large sizes up to ISO 1600. Beyond this point, you'll need to sacrifice on print size for acceptable quality, but for a camera this compact, results are still very good as high as ISO 6400. ISO 12,800 is useful in a pinch, but we'd recommend giving the ISO 25,600 position a pass.
Field Test
Big sensor, little camera: Ricoh's enthusiast compact is more connected than ever
By Mike Tomkins | Posted: 02/29/2016
 28mm-equivalent, 1/160 sec. @ f/5.6, ISO 100
In mid-2013, I was fortunate to be able to review the original Ricoh GR alongside its main rival, the Nikon Coolpix A. A couple of years down the road, the GR's successor is here in the form of the Ricoh GR II, and while this time there's no direct rival from Nikon -- the Coolpix A having been discontinued a year or so back -- I was nevertheless thrilled to get my hands on the new camera, and see how it compared to its predecessor.
Evolutionary rather than revolutionary
The Ricoh GR II is clearly very closely-related to its predecessor. In fact, the imaging pipeline is nearly untouched, with the same image sensor and processor used to shoot photos in the GR II as in the original GR.
It's so close that I'm only going to touch on handling, build and image quality very briefly in this field test, except as it pertains to the new features. You can read my Ricoh GR review for more detailed image quality analysis.
Fair ergonomics for such a relatively compact APS-C camera
In a nutshell, though, the Ricoh GR II's body is crafted from magnesium alloy, but in hand feels rather more like plastic with only a very slight amount of panel flex / creak noticeable. It's fairly light and comfortable in-hand, but lacks a true twin-dial design and has a rather cramped layout. The exposure compensation rocker control is also rather easy to bump, making accidentally-changed exposures a little too frequent.
There's no lens ring, so manual focus adjustment can be a bit tedious unless you can first use autofocus to get you in the ballpark. And the menu system could use larger fonts and fewer items per page, as it can be a bit tricky to read under harsh sunlight. Although with that said, if you forgo the default settings, the LCD monitor is pretty bright -- more so than was that in the Nikon Coolpix A -- making it better visible than some under these conditions.
And on the plus side, the Ricoh GR II is a very customizable camera indeed, and performance is for the most part fairly good for this class. It also has good image quality, especially if you can stay below ISO 3200-equivalent. The GR II's lens is really good, with with great sharpness and detail-gathering, good contrast, and minimal aberrations or distortion. There's some vignetting, but I didn't find this too obtrusive in real-world shooting, and it's easily corrected in post-processing. With no optical low-pass filter, it's occasionally prone to moiré and false color artifacts, but that's true of most cameras at this sensor size nowadays.
 28mm-equivalent, 1/125 sec. @ f/5.6, ISO 100
Of course, with a fixed prime lens, the Ricoh GR II does take some getting used to if you have a background shooting with zooms. You'll either need to zoom with your feet, or learn to look for photographic opportunities that are better-suited to a relatively wide 28mm focal length. But in a way, I've kind of come to see that as a positive thing: If the lens trains you to think more carefully about how to shoot your subjects, you start seeing framing possibilities you'd never have even given a second thought with a zoom lens.
A noticeably better raw-shooting experience
The only real change in imaging as compared to the earlier Ricoh GR is an improvement in the GR II's raw burst depth, something we've confirmed both in the lab and in the real world. The earlier camera was limited to just four raw frames, while the GR II can now manage around ten. That's a pretty significant difference, and should be more than ample in a camera that's unlikely to be used for sports shooting.
Of course, this change is only relevant if you are predominantly a raw shooter, as both cameras were capable of shooting unlimited bursts in JPEG mode. And there are a couple of other changes which will also affect only raw shooters.
Firstly, image quality on-screen when reviewing raw images is said to be better. As I said, I didn't have the original GR in-hand for a side-by-side comparison, but looking at raw images in comparison to JPEGs on the GR II's display, I was hard put to notice any difference in detail, sharpness and clarity. You should now be able to rely on the LCD to determine if your raw images are sharply-focused, and that's good news.
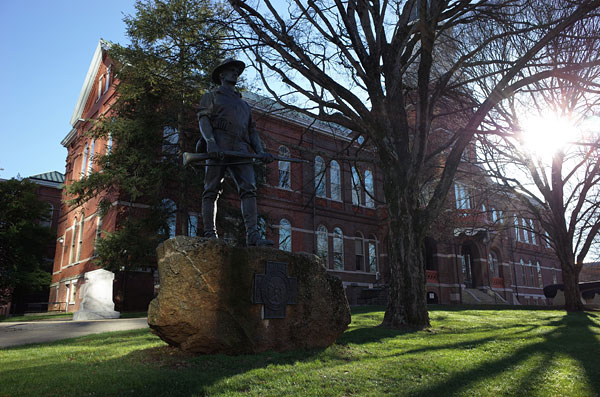
A more film-like digital look for raw shooters
There's also a somewhat-new raw file-related option which bears a little explanation. Rather vaguely named "ambient brightness" and providing options of "normal" or "original", this is said by Ricoh to render images "with the ambient light quantities comparable to those of the GR film cameras". That's a direct quote from the user manual, incidentally, and left me none the wiser.
Before our GR II review sample arrived, I speculated that this was perhaps a vignetting control, and that's indeed what it seems to be. After shooting a few side-by-side comparisons, the only difference I really noticed was that images with the "Original" setting showed a little bit of vignetting that wasn't noticeable in otherwise-identical images shot with the "Normal" setting. Presumably, the intent here is to provide an image without the auto-correction wizardry typical of modern digital cameras -- and thereby satisfy those who miss the uncorrected feel of their GR film camera shots.
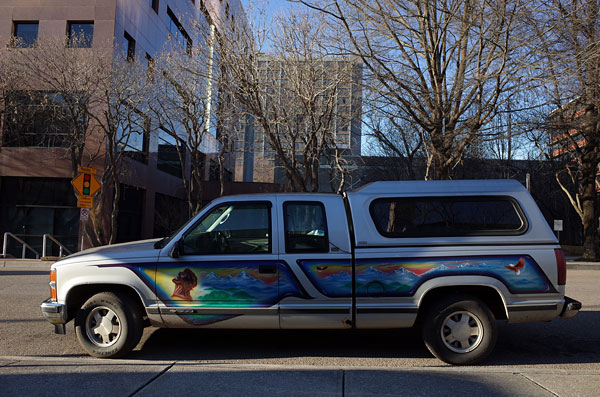
Frankly, I didn't really feel the slight vignetting added much to the image, but which option you choose pre-capture really doesn't matter terribly much anyway, as you can opt to process raw images in-camera using either "Original" or "Normal" settings, regardless of which was selected prior to shooting the image.
Oh, and why did I refer to this feature as "somewhat new"? Well, because it's already available to Ricoh GR owners too, courtesy of the version 3.00 firmware update which landed in January 2014.
 28mm-equivalent, 1/180 sec. @ f/5.6, ISO 100
In-camera Wi-Fi that's much more open than most
Without a doubt, the biggest change in the Ricoh GR II is its support of in-camera Wi-Fi. The manner in which this achieved is totally different to most Wi-Fi-capable cameras on the market though. That has its strengths and weaknesses.
Most Wi-Fi-equipped cameras rely on the user also owning a smart device on one of the two dominant mobile operating systems -- Google's Android, and Apple's iOS. That's all fine and dandy if you happen to own one of those devices, as many of us do these days, but what if you are on Windows Phone, Symbian, Blackberry, or something else entirely? Or what if you'd like to work with your camera remotely from a desktop or notebook computer? Well, with most cameras you're simply out of luck in this case.
Not so the Ricoh GR II! The Wi-Fi connectivity of this camera is as close to brand-agnostic as its possible to be. The camera really doesn't care much which device type and operating system you're using, so long as it offers up a reasonably fully-featured web browser.
Easy NFC pairing for Android; Not quite as seamless with Apple
Thanks to an NFC antenna in the handgrip of the camera, the Ricoh GR II can direct Android smartphones and tablets to the Google Play store to download Ricoh's Image Sync app with a simple bump of the two devices against each other, orienting their NFC antennas to come in close proximity. If the app is already installed, it will instead be opened automatically after an NFC bump.
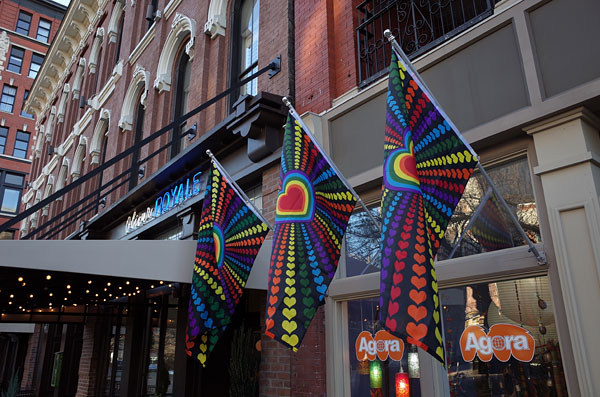
If the app is already running, a bump of the two devices will cause the connection to be established, although I did need to first manually enable Wi-Fi on the camera. (The other functions work without intervention on the camera -- in fact, the battery doesn't even need to be installed for the passive antenna to work.)
We'll come back to the app itself in a moment, but first let's look at the situation on Apple devices. Users of iOS will also find a version of the same app in the iTunes store, should they want to use it, but they won't be able to take advantage of the NFC pairing. That's not Ricoh's fault, though: Apple has thus-far refused to open up the NFC radio in its latest devices for third-party use.
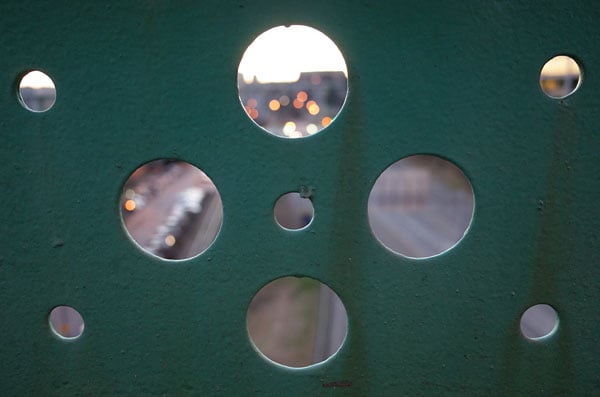
With that said, it's still pretty easy to pair with devices that lack NFC. Just press-and-hold the Effect button on the left side of the camera body, which doubles as a Wi-Fi button if long-pressed. A Wi-Fi hotspot will be created by the camera, and you simply connect to this from your iPhone, iPad, computer or other device. You'll need a password to complete the connection, but this can be found in the Wi-Fi Information page of the Setup menu.
 28mm-equivalent, 1/40 sec. @ f/2.8, ISO 400
Image Sync is clumsy, and not well-suited to this camera
Once paired, the Ricoh Image Sync app allows you to transfer images to your phone with a minimum of fuss. The app has a three-tab design, with the first tab showing images already on your smart device, the second showing those on the camera, and the third providing access to remote control functionality -- at least, in theory. (We'll return to that in a moment.)
The interface -- on Android, at least; I don't own an iOS device -- isn't really optimized for tablets, though. It's locked in portrait orientation, and shows three columns of tiny thumbnails presented in a narrow strip down the center of the screen, with loads of unused space on either side. Open an image, and unless it is also in portrait orientation, most of your screen space is again wasted, with the image shown in landscape-orientation in the middle of the display.
It's also a bit on the laggy side, taking a half-second or so to respond to a pinch-zoom gesture. And the interface for transferring images is rather bewildering. There's a button used to select or deselect images, and once you tap this, you can click on grey tick-marks that appear on each image, turning them blue to indicate that the image will be transferred. Nowhere, though, is there a button to start the transfer.
Two buttons which at first glance might appear to be intended to start the transfer will actually take you to the app's Wi-Fi connection dialog (even though you're already connected), or will take you out of image selection mode (and in the process, lose your selections). Instead of these buttons, what you're supposed to do -- with no guidance whatsoever -- is to long-press on a thumbnail after making your selections.
At this point, a circular array of eight buttons will appear, sometimes right under your finger, and other times in the middle of the screen. One of these buttons will delete images; another will transfer them. A third will set them up for transfer to Facebook immediately that they've been downloaded. The remainder of the buttons, in my setup at least, are completely blank. If you have certain social networking apps installed, these buttons will instead enable transfer to those networks -- but there's again nothing to tell you as much.
 28mm-equivalent, 1/25 sec. @ f/2.8, ISO 640
Perhaps the weakest point of the Image Sync experience with this particular camera, though, is the remote control tab. Switch to this, and you're simply shown a message stating that "This function is not supported". No explanation, no assistance of any kind -- and if you've bought the camera without cracking open the manual or reading a review, you might well now believe you've hit the end of the GR II's Wi-Fi features, when in actual fact you're not even close to seeing what's possible.
Image Sync is, frankly, a very obtuse and frustrating app to use, and I recommend skipping it entirely.
You'll want to skip NFC and apps; connecting can be a little complex but the result is going to be much more useful to you
Instead, what you want to do -- even though it may seem rather counterintuitive -- is to ignore the NFC antenna and Ricoh's provided app completely. There's a whole lot more that the Ricoh GR II can manage via Wi-Fi, but the app isn't going to get you any closer to it.
Instead, what you need to do is pair manually, just as I described above for Apple devices. Once paired, you'll want to switch to your web browser, from where you'll be controlling the camera.
But there's another small catch, I'm afraid. Before you can control the camera remotely, you'll have to prepare your web browser -- at least, unless your smart device is capable of connecting to a Wi-Fi network and continuing to use its mobile data connection for internet access, that is. You'll need to visit a URL which is a bit of a mouthful -- http://www.ricoh-imaging.co.jp/english/products/gr_remote/app/latest-appcache/index.html -- and allow it to cache itself on your smart device. Then you'll want to bookmark this page, so you don't have to type its address in manually next time around.
(My devices don't support simultaneous connection to Wi-Fi and mobile data, so I can't test this myself, but I believe that with these devices you can simply visit the GR Remote page on Ricoh's site after pairing, and then click on the link labeled "GR Remote Initial start-up button", which will download the remote control page without needing to disconnect your Wi-Fi first.)
Very comprehensive remote control, even from your laptop
The process of getting everything prepared and connected is perhaps a little unintuitive, but once you've achieved it all, the Ricoh GR II can do something few others can: Provide a remote live view, wirelessly, not just on your smart device but also on regular laptop or desktop computer. And not just to let you trip the shutter, either.
 28mm-equivalent, 1/40 sec. @ f/2.8, ISO 1600
In fact, it's surprising just how many features of the camera you can control remotely. Alongside a live view that's a duplicate of what is shown on the camera's own screen -- including all of the overlays -- the Ricoh GR II will allow your remote device to control most any feature from a distance. You can even enter the menu system remotely and change settings to your heart's content.
A huge live view, but a very complex, busy interface
And on a laptop screen, the remote live view can be absolutely huge. On the 16:9-aspect, HP ZBook 15 DreamColor, the live view is shown at around 11 inches across by 8.5 inches vertically. In fact, it's roomy enough that the entire live view won't fit on screen at once, with around 1-1.5 inches altogether cut off at the top and/or bottom.
This can be resolved by adjusting the browser's zoom control, making the right-column controls larger and thus forcing the live view window to shrink. The downside is that you end up with huge buttons for the controls, and have to scroll up and down a little to fit these in. That's just the price you pay for working in a browser, where a responsive design is a bit more challenging than in an app, though.
For some reason, as well as the whopping 35 buttons shown at the right of the screen by default, a further 12 controls are hidden beneath the "Settings" button -- and they're not necessarily things you'd consider to be settings. For example, ISO sensitivity, flash and metering controls can all be found here. And when this submenu is opened, the live view is pushed a couple of inches off the left side of the screen, so you can't really leave it open at all times.
The many, many controls on the right of the screen are, to say the least, a little disorganized. That makes them a little intimidating initially, especially because some have icons or names that don't exactly match those on-camera. Personally, I think it'd have been better to try and arrange these in the same basic arrangement that they share on the camera body, but with that said, you do get used to them reasonably quickly.
Wi-Fi range is fair, but not spectacular
And as I said, you've got a level of remote control far beyond what's possible with most cameras. Sadly, range was only around 40 feet or so with perhaps one wall in between camera and laptop, but third-party accessories should be able to increase this significantly. The remote live view feed has fair quality and is both fast and responsive when camera and laptop or smart device are near each other. (You do notice some compression artifacts, though, especially when using things like the menu system.)
As you near the limits of the camera's Wi-Fi range, the feed does become choppy, but it remains fairly usable right up to within a few feet of the feed stopping altogether. Once the feed stopped, I did have to reload the page in the browser to get it back running, though.
On-camera controls almost all keep working under remote control
Clicking or tapping on the live view feed sets focus, and this was the only feature I noticed where the on-camera control didn't keep working too. (That is to say that you can't tap on the camera's LCD to set focus when remote live view is active.) Other controls, though, all remain active on the camera body, letting you choose whether to control from the camera or the remote device.
 28mm-equivalent, 1/125 sec. @ f/4.6, ISO 6400
This can occasionally cause a little confusion, for example in that the Mode dial may not reflect what is shown on the live view feed if you change the mode remotely. If you spin the Mode dial after this, though, the physical dial takes over from the remotely-set value just fine.
Transferring images to your computer or phone is quick and easy
Once you're done shooting, getting your images onto the remote device is quick and easy. You can either hit the Quickview button to see the last shot (or optionally, the last nine shots) as small thumbnails, and clicking on these shows a mid-sized preview. Another click, and the image will transfer to your computer, even if it's a raw file or movie.
Alternatively, though, you can hit the menu icon at top left of the screen and switch to Viewer mode to review all content on the camera. These can be grouped by date, and transferred en masse if you want. The same menu also gives you access to options like syncing the camera's clock to the computer, checking on battery level, firmware version, storage status and more. You can even use tools like interval shooting, interval composite and slideshows from this menu, and put the camera to sleep, power it down or reboot it, all remotely.
The Ricoh GR II's Wi-Fi feature-set is impressive for its possibilities, if not its implementation
I find myself a little conflicted by the Ricoh GR II's Wi-Fi capabilities, if I'm honest. The interface and connection process is clumsy and feels rather rough around the edges, but once you get used to it, it does work. And I'm seriously impressed by the scope for remote control. It's near-unprecedented, especially in a camera this compact and affordable.
On balance, I think despite those rough edges, it's a pretty darned good system for what it allows you to do, and for the fact that it doesn't leave everyone except Android and iOS users out in the cold. I'd really like to see Ricoh put some thought into cleaning up the interface, though, and making it a bit easier to access -- if only by providing an app for the dominant mobile operating systems that will set everything up, cache the browser page and provide a home screen shortcut to the right web page automatically.
 28mm-equivalent, 1/60 sec. @ f/3.5, ISO 12,800
Wireless off-camera flash lets you control the light
In my review of the original Ricoh GR, I noted that the company had adopted some Pentax conventions in its new camera. (If you're not familiar with the companies' history, Pentax was acquired by Ricoh in late 2011, some 18 months or so before the original GR was announced.)
For an example of the link between Ricoh and Pentax, note that the GR and GR II both use Pentax parlance for the main shooting modes -- that is to say, P, Av, Tv, and M, instead of the more common P, A, S, and M. They also include Pentax's TAv mode, which allows you to dial in both shutter speed and aperture, then let the camera attain the metered exposure by adjusting the ISO sensitivity.
Now, the integration between the two brands has gone another step further with the introduction of support for Pentax's wireless remote flash system in the GR II. Of course, there was already a hot shoe for external strobes, but this change takes things a step further. Now you can position the flash right where you want it, and the system works just as it would on your Pentax SLR.
At least, it works almost identically; there is one slight difference. The Ricoh GR II doesn't let you choose whether or not the onboard flash should take part in the exposure. In a Pentax DSLR, you'd be able to select either to have the onboard flash used only for remote flash control, or to have it both control the remote strobe(s) and also take part in the exposure itself.
Color Temperature Enhancement is also a Pentax-derived feature
Another feature derived from Pentax is the Ricoh GR II's latest white balance mode. Dubbed "Color Temperature Enhancement", this debuted in early 2009 with the Pentax K-7 DSLR. In a nutshell, what this does is to intensify the dominant color in the scene, rather than neutralizing it. It's the exact opposite of what white balance is typically used for, and can make your sunsets richer or your blue-hour shots cooler, and so on.
Even more effect options than ever
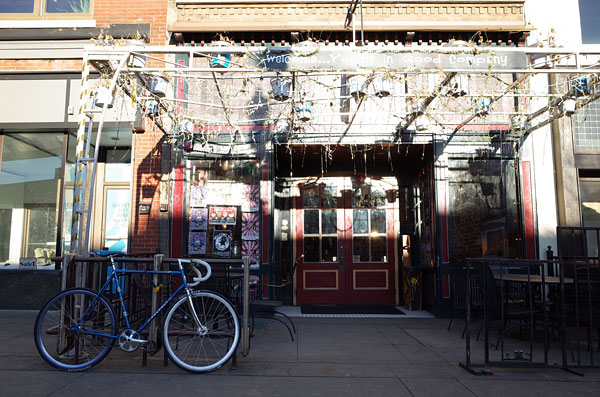
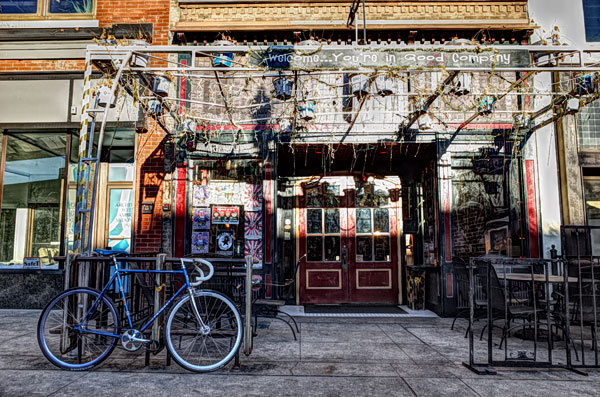
The original Ricoh GR offered quite a range of different image effects such as black and white, cross process, bleach bypass, and more. It started off with nine such effects, and was gifted two more -- slight and shift crop -- in firmware updates.
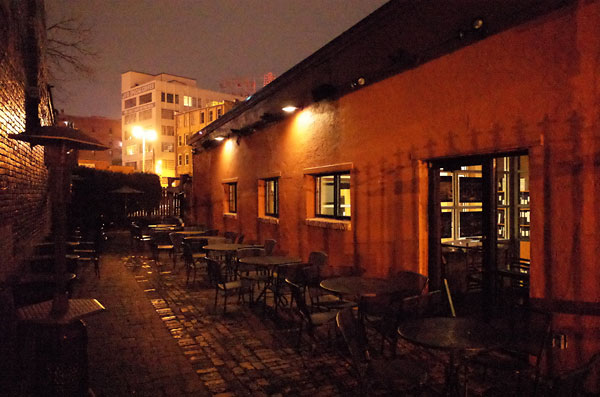
The GR II inherits all of these, along with six brand-new options: HDR Tone, Clarity, Brilliance, Vibrant, Bright and Portrait. They won't be for everybody's tastes, by any means, but they do increase the possibilities for artistic treatments you can apply to your images without the need for a computer. You can see examples of these below.
Adjust focus and exposure during movie capture
A couple more tweaks to the Ricoh GR II can be found in its movie capture capabilities. On paper at least, the most important of these is probably autofocus during movie capture.
The Ricoh GR II can now shoot video with continuous autofocus. As you can see in this clip, it sometimes takes a while to respond to a change in subject distance, though. Admittedly, this is an extreme example, requiring the camera to rack focus from a fairly distant subject to a macro in one go. Subjectively, though, the system is slower to respond and more prone to errors than is typical in many cameras these days.
|
Where its predecessor, the GR, allowed autofocus only before capture started, the Ricoh GR II will allow either continuous autofocus or single autofocus operations during movie capture. I found the latter more useful, personally, as the continuous autofocus system was sometimes slow to react to significant changes in focus distance, occasionally taking as long as two or three seconds before it even began to rack to the new focus position. It also had a tendency to suddenly lose focus when panning.
The Ricoh GR II can also offer single autofocus during video capture, and since this responds much more quickly -- and only when told to -- I found it to be more useful.
It's quite obtrusive, though.
|
The press of a thumbtip on the AE-L/AF-L/C-AF button was enough to prompt an immediate focus change when I specifically wanted it, though, and while the change in focus is very noticeable in the resulting video, it's still likely better than having to focus manually for consumer use.
As well as its new autofocus capabilities, the Ricoh GR II now boasts exposure compensation adjustment during video capture. You can hear the controls being pressed a bit, but otherwise the transition is relatively smooth, making it quite a useful feature. Note that I was adjusting the exposure compensation through a whole +/-2 EV here, making the effect more noticeable than need be in real-world usage.
|
Also new is the ability to adjust exposure compensation during movie capture, and this I found to be much more useful. The change in exposure happens gradually enough that it's not disconcerting, and the exposure compensation controls are perfectly positioned to make exposure changes without jostling the camera too much.
The videos above were all shot in the day, but of course night videos are important too. As you can see in this clip, continuous AF has a tendency to get confused during panning, something I also noticed in bright daylight.
|
Battery life has been improved, too
The last change of note in the Ricoh GR II is its improved battery life. According to Ricoh, you'll now get around 10% more frames on a charge than in the original GR. Unfortunately, as I've already said, I didn't have both cameras in-hand at once to make a precise comparison.
However, I'd say that the manufacturer-rated figure of 320 shots with 50% flash usage seems reasonable to me. The Ricoh GR II was able to get me through an afternoon's shooting most of the time, but I did run out the battery once or twice in a single afternoon's shooting, particularly when using Wi-Fi remote control extensively. That's pretty typical for cameras in this class, though, and if anything the GR II does a little better than most.
Grab an extra battery pack or two and you'll be just fine, although you will probably want to buy a standalone charger at the same time, since the GR II charges batteries in-camera by default.
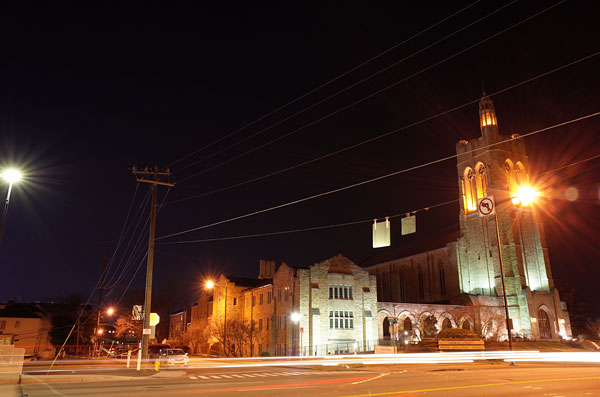
Flash
Ricoh GR II Flash

Built-in Flash Test Results
Coverage and Range
Good flash range for its size, but with somewhat narrow coverage.

Coverage. Flash coverage was rather uneven with dark corners and edges, though some of the corner darkening is caused by the lens itself.
| Manufacturer-Specified Flash Range |
|---|
 9.8 feet f/2.8, Auto ISO (1600) |
Manufacturer Specified Flash Test. The Ricoh GR II's flash guide number is 5.4 m / 17.7 ft at ISO 100, but oddly, Ricoh also rates the flash's effect range at 3.0 m or 9.8 ft using Auto ISO. In the shot above with Auto ISO selecting ISO 1600, the GR II appears to perform a bit better than Ricoh's specification, producing a slightly overexposed flash target at the rated distance.
Conclusion
by Mike Tomkins
In mid-2013, I was fortunate to review two very interesting cameras aimed at street shooters who wanted the pairing of excellent image quality and a compact, unassuming camera body. The Ricoh GR and Nikon Coolpix A had many similarities, as well as their own individual strengths and weaknesses. At the end of both reviews, though, I found it really hard to call one measurably better than the other, and both cameras scored Dave's Picks.
A follow-up camera with few if any direct rivals
Two years later, the Ricoh GR II replaces one of the pair, while the other has exited stage left. Nikon's entry was discontinued about a year ago, and the company has yet to field a successor model. Until very recently, that left the Ricoh GR II with this particular niche to itself, at least among the mainstream brands. The nearest rivals -- Sigma's dp Merrill and Quattro-series -- were much bigger, heavier cameras.
Recently, the Fuji X70 hit the market, and this represents a rather closer challenger, although it's almost a quarter thicker and a whopping 40% heavier. We've yet to review that camera, however, so can't make a real-world comparison between the two for the time being. But given the significant advantage for the Ricoh GR II in terms of weight and pocketability, it's perhaps still in a class of its own as of this writing anyway.
A relatively modest update over the original GR
The lack of direct rivals for the Ricoh GR II is probably a good thing for the company, because this followup model is realistically a fairly modest update. That's not necessarily a bad thing: As noted, the original Ricoh GR earned itself a Dave's Pick award, and in many ways it really impressed us, especially with the image quality it derived from its superb triplet of lens, sensor and processor. The Ricoh GR II retains all three unchanged, and still impresses us with its image quality all this time later. Still, with stronger competition Ricoh would have needed to field a more significant update than it was able to do this time around.
So what's new? Far and away the biggest change is the inclusion of in-camera Wi-Fi and NFC wireless networking connectivity. The GR II also adds support for Pentax's wireless flash system -- Pentax being a Ricoh brand these days, if you didn't already know -- and inherits the Color Temperature Enhancement white balance mode from Pentax cameras to boot. There's also a deeper buffer for raw burst shooting, and autofocus / exposure compensation during movie capture, as well as myriad smaller tweaks.
Still a very compact -- if somewhat cramped -- body
Like its predecessor, which it is only fractionally taller and heavier than, the Ricoh GR II is impressively compact for an APS-C camera with fixed lens, and pretty light too. Its generous selection of dedicated controls are perhaps a bit cramped, but that's not really too surprising (and is fairly easy to overlook) given its compact size and unassuming nature.
It's a shame that the GR II lacks true twin dials, though, with the rear "dial" actually being what rival Sony would refer to as a "jog dial" -- essentially a clickable rocker control. I'd also have liked to see a lens ring to make manual focus operation easier and more intuitive. And curiously, although it is actually crafted from magnesium alloy, the GR II feels more like it is made of plastic.
It makes up for these shortcomings by being a very customizable camera indeed, though. You can really hone its operation to your own tastes, and over time using it will become second nature.
A truly great optic for fans of prime lenses
But if there's one feature which makes me want to overlook the Ricoh GR II's occasional flaws, it is the lens. It's a truly great optic, with very low distortion even in uncorrected raw files, and -- save for some easily-corrected vignetting that's seldom troubling in the real world -- good image quality even in the corners, especially if stopped down.
Certainly, shooting with a fixed prime lens takes some getting used to. As I noted in my earlier Ricoh GR and Nikon Coolpix A reviews, though, it also makes you think outside of the box. When your feet are your only zoom control, you have to get creative in looking for interesting framing, and time and again I found myself coming up with pleasing photos that I'd never have considered, had there been the option to rely on the compositional crutch provided by a zoom lens.
Pretty good performance with one curious exception
It also helps that performance is, by and large, pretty good. The Ricoh GR II focuses very quickly, and while its burst performance isn't as fast as some interchangeable-lens or smaller-sensored cameras these days, it's certainly plenty fast enough for the kinds of subjects you're going to be shooting with this camera. (A fixed, relatively wide prime lens doesn't exactly lend itself to sports shooting.)
There's one proviso, here, though, and it's one which I find very curious. I'm used to bemoaning the fact that cameras sometimes shoot more slowly in raw format, but the Ricoh GR II flips that on its head. For a change, this is a camera which won't leave raw shooters feeling slighted, because it's actually in JPEG mode that burst capture performance is reduced. (And by quite some margin, too: Although raw or raw+JPEG shooting allows 6.1 frames per second, in JPEG-only mode you're limited to just four fps, fully one-third slower.)
I can't come up with any good theory as to why this would be the case, given that raw+JPEG capture doesn't similarly reduce performance. Clearly, the camera's JPEG engine is up to the task, and it's not a matter of throughput either if the camera actually performs better when flinging even more data towards the flash card. But the fact that raw+JPEG mode is faster than JPEG alone does give you a workaround, albeit a slightly clumsy one. If you're a JPEG-only shooter and need more speed, add raws and then discard them after the fact.
Excellent image quality for its class
With the good raw shooting performance and its newly-enlarged buffer, I found shooting with the Ricoh GR II to be a quite pleasant experience overall. And I was very pleased with its images, as well. They're packed with detail, and although moiré can occasionally rear its head thanks to the lack of an optical low-pass filter, that's true of most large-sensor cameras these days, so I'm not going to hold it against Ricoh.
And for a camera of its class, the Ricoh GR II offers very good high-sensitivity capabilities. If anything, it's just a touch better than its predecessor in this area, although not enough so to noticeably change the print sizes you can expect to manage. Personally, I found everything up to ISO 3200 offered sufficient image quality for regular usage, with the occasional ISO 6400 shot or perhaps even ISO 12,800 in a pinch. (The finer details do suffer a bit at these higher sensitivities, though.)
Color was largely accurate, just as in the earlier camera, but the default saturation has been pushed a little more for a punchier, more consumer-friendly look straight out of the box. Skin tones were pleasing, too. Perhaps the biggest issue in terms of image quality was a tendency towards rather warm white balance indoors, but that can easily be worked around with manual white balance control.
Good battery life, but get a second pack and charger
While it wouldn't compare to a DSLR in this area, the original Ricoh GR already offered pretty good battery life for such a small yet large-sensored camera. The Ricoh GR II builds on that with a further slight improvement, ensuring you should be able to get around 320 shots on a charge. Even a fairly vigorous shooter will likely get by just fine with an extra battery or two in their pocket or camera bag. You'll want to budget for an external charger, though, as by default batteries are charged in camera, meaning you can't be shooting and charging at the same time.
Wi-Fi is a mixed bag, but impressive for what it portends
As I said at the outset, the big news here relative to the original GR is the Ricoh GR II's new Wi-Fi and NFC wireless networking capability. Here, I feel that the GR II offers something of a mixed bag: The wireless connectivity is impressive in being essentially brand agnostic, but when controlling the camera through a web browser, it's a bit clumsy to get connected and suffers from a cluttered, complex user interface. Alternatively, you can use an Android / iOS app and pair very easily indeed, but the app itself has a totally unintuitive interface and doesn't allow remote control at all.
With all of that said, once you get used to it -- and particularly if you're just using it to transfer images rather than to control the camera remotely, as I'd imagine will typically be the case for most owners -- the Ricoh GR II's wireless networking capability has reasonable range, is fairly fast, and makes it pretty easy to get photos on your smartphone once you know what you're doing. And unlike almost every other camera out there, that's true even if you're using a less popular platform like a Blackberry, Windows Phone, Nokia's Symbian OS or most anything else which can offer up a fully-featured web browser.
In a world as polarized as ours, support for the little guy is quite refreshing to see. So on balance, even though I'd like to see the interface (and especially the Android / iOS app) improved significantly -- something which should be quite possible for Ricoh to achieve even now that the camera is already on the market -- I'd say that it's a worthwhile upgrade regardless. And it's doubly exciting because once those rough edges are smoothed out, it suggests we could see unusually capable, feature-rich Wi-Fi capabilities in future Pentax-branded cameras, too!
Not for everyone, but street shooters will love the Ricoh GR II
And so I come to the end of my review, and it's time to sum up. Clearly, with a fixed, wide prime lens, this was never going to be a camera for everyone. That's as true now as it was when the original Ricoh GR hit the market some years back, but the follow-up Ricoh GR II is certainly an even better camera than was its predecessor. And given that there's also no longer a direct rival for this camera, it stands alone in offering a truly pocket-friendly, portable and unassuming option for street shooters who want a really great fixed prime lens. Its predecessor earned a Dave's Pick, and with no close challenger to force a more significant overhaul of its design, so too does the Ricoh GR II!
Pros
- Pleasing image quality with brighter colors than predecessor
- Excellent hue accuracy when using Manual white balance
- Very good high ISO performance
- Excellent dynamic range in RAW files, improved over its processor at higher ISOs
- Fast autofocus
- Very low prefocused shutter lag
- Able to autofocus in very low light
- 6.1 fps burst mode for RAW and RAW+JPEG
- Improved RAW buffer depth (from 4 to 10 frames)
- Fairly good image quality in movie mode
- Allows full-time or single-servo autofocus during movie capture
- Gradual exposure compensation adjustment during movie capture gives a pleasing result
- Light and fairly comfortable body with a good grip
- Very customizable user interface
- Fixed prime lens forces you to reevaluate your shooting style and look for new photographic opportunities you might otherwise have missed
- Bright LCD monitor has fairly good daylight visibility
- Truly brand-agnostic Wi-Fi connectivity works with most any fully-featured web browser
- Wi-Fi pairing is easy with Android devices thanks to NFC connectivity
- Almost every feature of the camera can be controlled remotely, even the menu system, and on-camera controls also keep working
- Remote live view remains usable for most of the ~40-foot range
- Live view feed can potentially be huge on a laptop or tablet screen
- Image transfer is swift and easy
- Good battery life for its class, improved over predecessor
- Fantastic lens that's sharp across the frame even wide open
- Built-in ND filter
- Low geometric distortion (with no correction performed by processor)
- Supports wireless off-camera flash with recent Pentax-branded strobes
Cons
- Very warm Auto white balance in tungsten lighting
- Aperture priority AE tended to overexpose in the lab
- Lack of AA filter means sharp photos, but can be susceptible to moiré and other aliasing artifacts
- Limited dynamic range in default JPEGs
- Default noise reduction too strong in the red channel even at base ISO (lowest NR setting helps)
- Mediocre burst speed with JPEG (4 fps), but unlimited buffer with fast card
- No 4K or slow-motion capture
- Full-time autofocus adjustment can be rather slow to react
- Feels like plastic, even though it's magnesium-alloy construction
- Rather cramped control layout and not a true twin-dial design
- Exposure compensation buttons are too easily bumped
- Menu system is cramped and uses tiny, hard-to-read fonts
- Optional Android / iOS app is clumsy and doesn't work well with this camera (but you needn't use it)
- Web browser Wi-Fi interface is quite disorganized and cluttered and initial setup a bit complex
- Fixed focal-length lens
- Moderate corner shading in JPEGs, higher in RAW files
- Can't choose whether onboard flash should take part in wireless flash exposures