Nikon Sendai factory tour: A rare chance to see Z7 production up close and personal
posted Saturday, September 1, 2018 at 4:00 PM EDT
I recently had a chance to tour Nikon’s Sendai camera factory, as part of the festivities surrounding the launch of their new Z-series full-frame mirrorless line. While we couldn’t take any photos during the tour, it was nevertheless an interesting experience, and Nikon provided some photos themselves that had been thoroughly vetted as containing nothing proprietary.
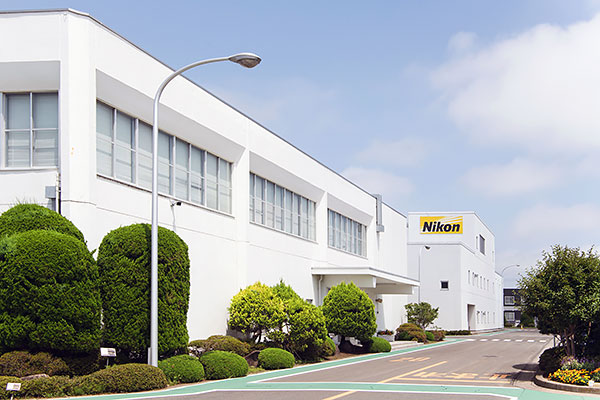
Nikon Sendai Corporation is a wholly-owned subsidiary of Nikon Corporation, and the manufacturing site for Nikon’s flagship cameras -- models like the D5, Df and D850. It also supports Nikon’s other manufacturing operations in Thailand and China with production engineering and automation design.
The tour was especially interesting to me personally, as I’d visited the same factory 11 years ago when Nikon launched the D3 and D300. It was fascinating to see how the production process had changed over the last decade, with automation having taken over more steps in the process, and Nikon’s understanding of what constituted the most efficient production methods having evolved as well.
Unfortunately, I can’t share any images with you other than the ones Nikon themselves provided, due to their concerns over proprietary information. (We weren’t even allowed to take handwritten notes during the tour, so all of what’s below is from memory!) Still, there’s a lot of interesting stuff to share – or at least I hope it’s as interesting to you as it was to me...
Nikon F- and Z-Mounts
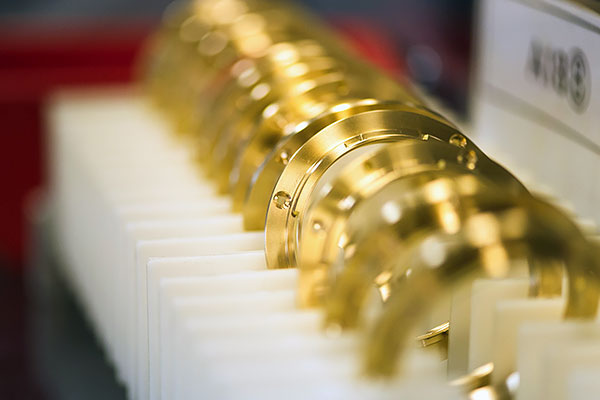
The whole process starts with the lens mounts, although our group actually saw them at the end of our tour. The mounts begin as die-cast blanks of either brass or stainless steel, although some less expensive F-mount lenses have precision-molded plastic flanges. A phalanx of automated machines take the raw blanks and step through a complex process of milling and turning them to the final dimensions.
These looked essentially like the same machines I saw when I last toured the factory in 2007, although I think that a couple of them are now automated CNC devices. One thing that I find incredible is that the earlier, non-CNC lathes could be automated to produce such complex and high-precision parts with purely mechanical "programming." (I'm not sure, but think that the oldest machines used some sort of a cam-based system to set dimensions and step through the process.)
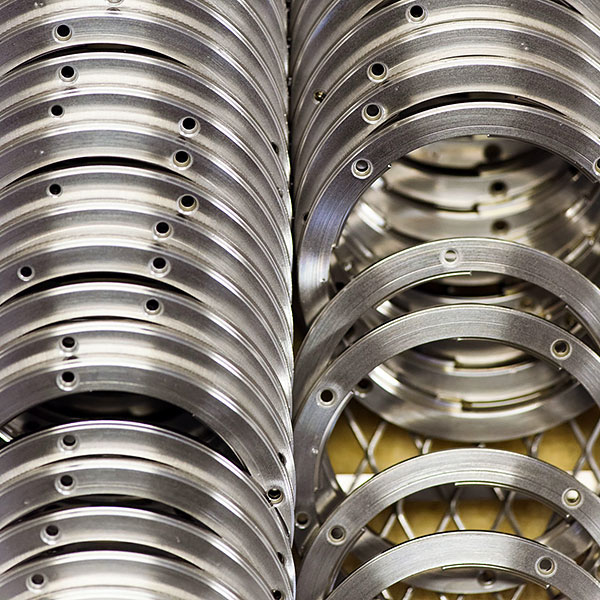
Whatever the case, it's incredible to think that this one group of machines created all of the (metal) Nikon lens and body flanges out there. They work pretty autonomously; I wouldn't be surprised if this was a part of the Sendai factory that runs 24 hours a day, as it doesn't seem to take much human attention to keep them cranking. All the operators seem to need to do is periodically stock the input racks with the raw die castings and empty the bins that the finished lens blanks tumble out into. (And of course change-out the coolant in the tanks, replace coolant filters and swap out worn tooling.) However many tens of millions of F-mount camera and lens flanges are out in the world; they all came from this compact group of machinery in Sendai.
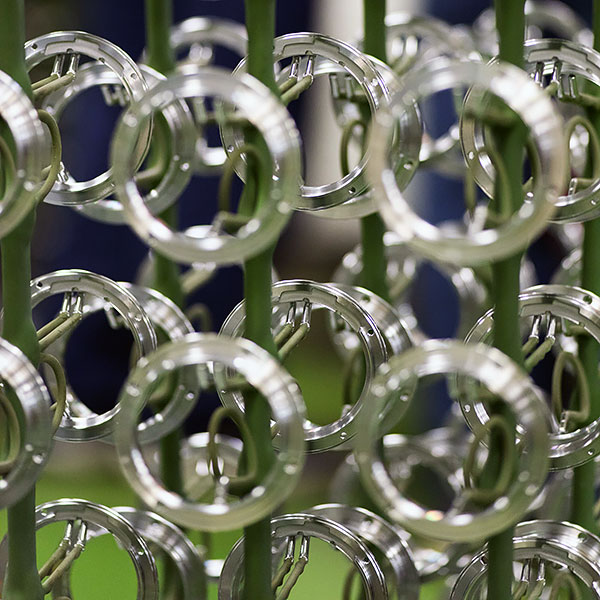
I mentioned that the flanges are made of both brass and stainless steel. The choice of metal has to do with the application; body flanges are generally made of stainless, for the sake of its greater stiffness and durability. Stainless, however, is harder to machine than brass, but a body flange will potentially have many lenses swapped on and off of it, whereas each lens just gets put on and taken off of a body occasionally (relatively speaking). Stainless was particularly important for the Z-series, given the large size of the mount and the need to hold absolute flatness across it. (Of course, any lens mount has to be absolutely flat, but when you reduce the flange-to-sensor spacing (flange depth) by almost a factor of three, tolerances just get that much tighter.)
The bulk of lens flanges are made from brass, though chrome-plated after they're machined, to give them a harder, more wear-resistant surface. Although the flange blanks are die-cast to something pretty close to their final dimensions, the final machining produces a lot of chips. Another journalist asked what happened to all the waste metal, to which Nikon staff replied that they contracted with an outside company to collect and recycle it.
The cell manufacturing system
Most of the Sendai factory floor is laid out in "cells" of workers, each cell dedicated to a particular part of the assembly process.
“Cell” manufacturing was a revolution when it was first introduced by the Japanese many years ago. Rather than parts simply moving along an assembly line, small groups of workers (“cells”) would work together to complete entire subassemblies. This not only made the overall production process more efficient, but the greater sense of ownership of a finished subassembly by the workers led to fewer mistakes and improved quality.
When I toured Nikon Sendai before, these cells were very obvious; with groups of workstations often arranged in a U-shape, and parts being passed from worker to worker within the cell.
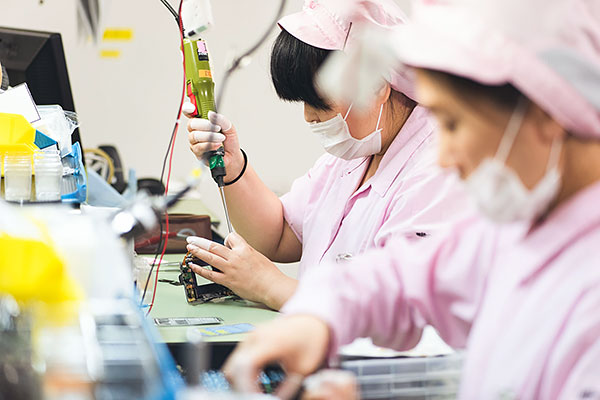
That basic system has evolved considerably now, with individual workers completing an entire subassembly by themselves. Today’s “cells” are often just groups of workers putting together the same subassemblies in parallel with each other.
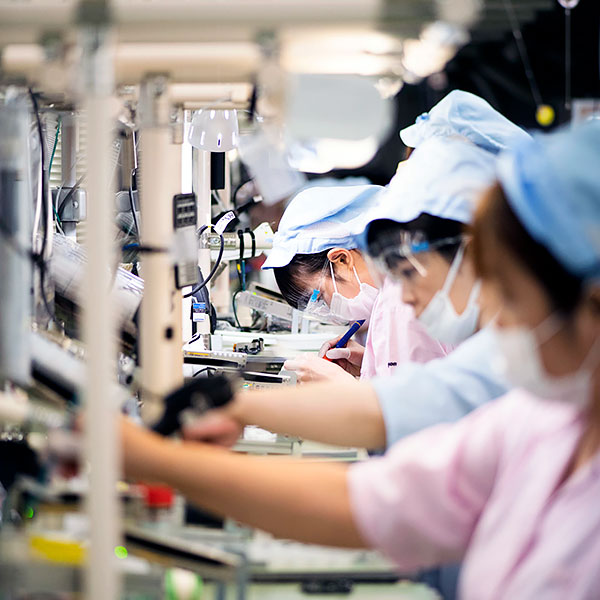
The Nikon factory staff explained that, while this has required higher skill levels from the workers, it’s also led to even further improved efficiency and quality levels. In particular, the new system requires far less storage space on the factory floor for partially-finished components, so it makes much more efficient use of available space.
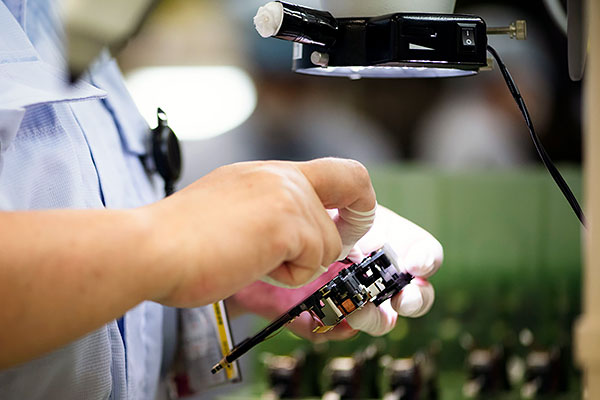
Human skills, machine coaching
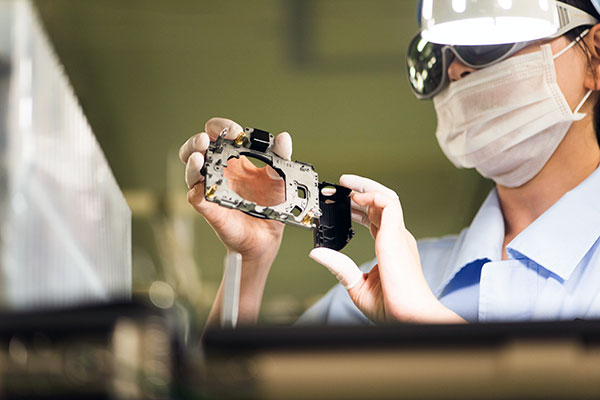
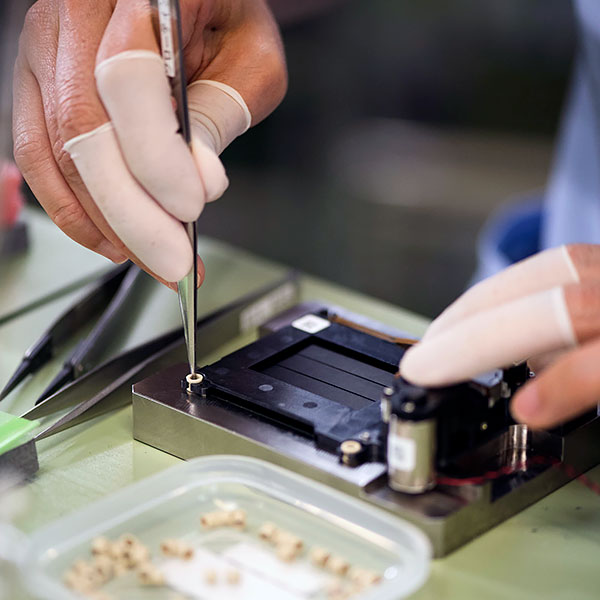
A minor point I hadn’t seen before was the use of computer screens and indicator lights to help guide the worker through the tasks for each subassembly. We saw the workers producing the front panel assemblies for the Z7, which consisted of more than a dozen parts and 4 or 5 different screw sizes that required the use of two different power screwdrivers.
A computer screen in front of each worker reminded them which part was needed next, and lights above the screw dispensers and screwdrivers indicated which was to be used for each operation.
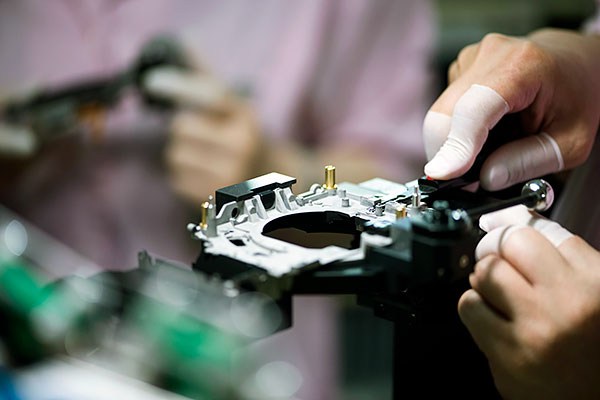
At each front-panel assembly station, the workpiece was held in a custom jig that could rotate about two axes (spin and flip the workpiece), so the worker didn’t have to contort themselves or lean over uncomfortably for any part of the operation. (The jigs themselves were beautiful pieces of engineering, all black-anodized aluminum, precision bearings, etc. I wondered how many person-hours went into designing and fabricating them.)
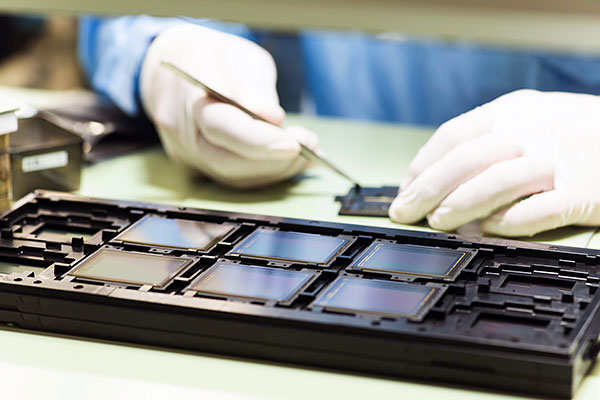
EVF assembly
The EVF is a key component of the Z7, one that’s stood out notably in my time with the camera; It’s just incredibly crisp and clear. It also has a comfortably high eyepoint and a wide field of view. This is all thanks to its sophisticated optics, composed of several elements, including an aspheric. Its assembly was our first contact with Nikon’s factory automation.
Our guide explained that the alignment of the different elements of the EVF optics had to be particularly precise, too much so for mere humans to execute it reliably.
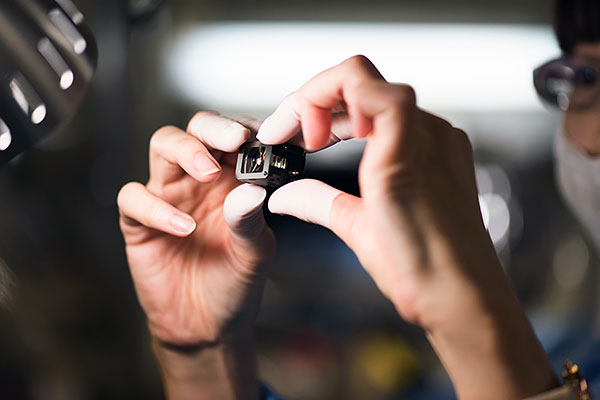
Nikon created a robotic system to align and bond together the most critical elements of the EVF optics. This system was housed in a large plastic box (maybe 1.5 x 1.5 x 2 meters) that had its own controlled atmosphere, to eliminate dust as a problem.
There were four robotic arms inside the box, if I recall correctly. One loaded and unloaded the individual lens elements and finished assemblies, two performed the alignment and assembly, and one carried a needle dispenser that applied bonding resin in precise locations and amounts.
The elements rotated through the process on a round carousel, in an intricate dance between the loader/unloader, working arms and resin dispenser.
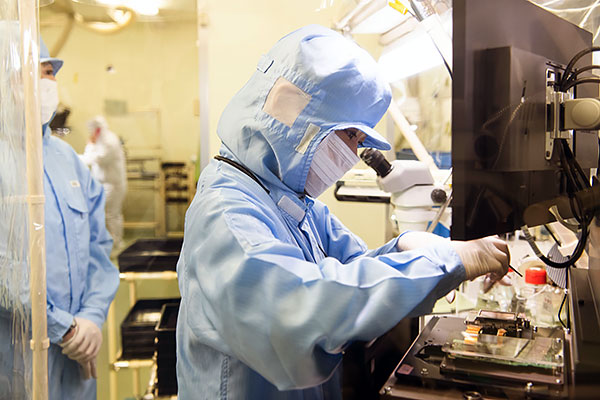
Once the critical elements were aligned and bonded, human workers assembled the rest of the viewfinder, and even the “dirty” human side of the process was housed in its own small glass-walled cleanroom, separate from the rest of the factory floor. (The entire assembly area is a cleanroom environment; we all had to don "bunny suits" and go through an “air shower” to blast away any loose dust particles we might be carrying before being allowed onto the floor.)
Automation, in a big way
Robots have also taken over a lot of the assembly process since the last time I visited. They didn’t take up a huge amount of space on the factory floor, so I was surprised to learn in a Q&A session later that robots fully do 75% of the Z7's assembly.
I’ve always found industrial robots fascinating to watch, but I gained a new appreciation for them after watching Nikon’s at work up close and personal.
The first thing that struck me was the sheer complexity of their operation: Who on earth programs all the actions they take, not to mention designs all the fixtures needed to accurately position the units being worked on as well as the trays of component parts that serve as the robots’ raw material? (Nikon’s production engineers, that’s who; more on them later.)
It's probably meaningless without knowing what the acronym stands for, but the assembly robots were frequently referred to as COROLs. I asked some of the engineering staff what that name stood for, but they couldn't tell me. (It's apparently just one of those things that has some particular genesis, but then assumes a life of its own, separate from whatever origin it had :-)
One thing that I’d never seen before: The robotic arms could change-out their end-effectors (“hands”), to perform operations that normally would have required two or three times as many robotic arms to execute. The end-effectors were positioned at the sides of the work envelope, so an arm could just park its current effector in a holder, and plug into a second. The robots I saw had two end effectors each, but I think our guide said they could have up to three.
The automated assembly stations integrated smoothly with the human-based parts of the process, the work distributed between the different stages so as to have no step waiting on the output from another.
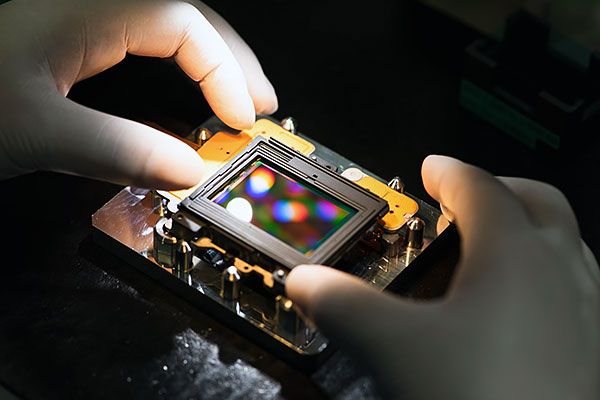
Shutter manufacture and testing
Unlike many companies who purchase their shutter mechanisms from third-party suppliers, Nikon makes the Z7 shutters from scratch themselves at the Sendai factory. I was surprised by how much floor space the shutter manufacturing and testing area took, compared to other parts of the camera. But then the shutter is probably the most mechanically complicated part of the camera, so it makes sense that there’d be a lot of steps involved in its construction.
The part of the shutter process we mainly saw was that involving the testing and calibration. Exposure time is a fundamental aspect of image capture, so it’s critical that the Z7’s shutter expose all parts of the frame equally. When I think about it, I’m a little surprised that focal-plane shutters were ever practical in the first place, given that the acceleration and speed of the first and second curtains have to match precisely.
While I don’t know the details, I think the Z7’s shutter is an electromechanical design, with the shutter blades actuated electronically, rather than via a spring mechanism. (We've added this point to a list of follow-up questions we'll be asking Nikon.)
As each shutter mechanism is completed, it’s first put on a test stand where it’s cycled rapidly for a while, apparently to work out any minor mechanical kinks before it goes for calibration.

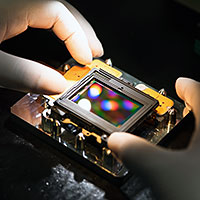
The calibration systems had a bright light source, a sensor of some sort (it was a little hard to see, but it looked like the sensors were just full-frame camera imagers), and a jig to hold a completed shutter assembly. A computer controlled the shutter’s operation, putting it through a range of behaviors while monitoring what the sensor was seeing behind it. I don’t know if there was any calibration data generated and used for each mechanism, or if this was just a basic accuracy test, to make sure that each shutter was performing within spec, without needing any calibration. We were told, though, that QC checking for the Z7 is 100%, meaning that every part built gets tested. (In the later Q&A session, a manager told us that while selected random samples are also taken and put through temperature and cycle-life tests, every camera was 100% tested for initial functionality.)
Final test and calibration
One of the more interesting parts of the assembly line was the last station, right before human QC. This is a step in which the bodies put through final tests and calibration data is loaded into the bodies. They declined to say just what sort of data was being loaded here. Shutter calibration? White balance, based on the characteristics of the RGB color filters? Exposure data, to compensate for minor differences from sensor to sensor? It would be interesting to know, but like so much else that we saw, "proprietary" was the answer to our questions.)
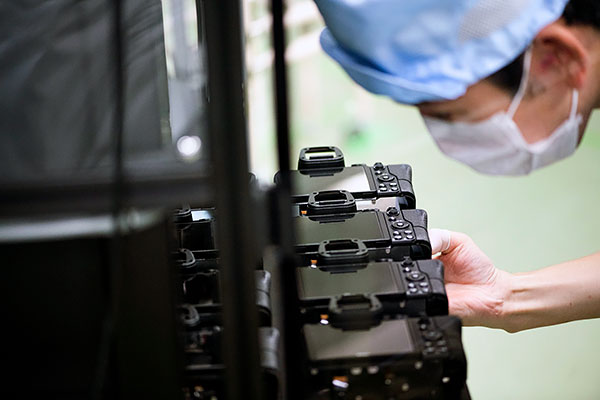
This step was pretty impressive, thanks to the much larger size of the robotic arms involved. (They have to be much larger, both to span the distances involved, as well as to be able to handle the loads required.)
Here, cameras emerged from somewhere to the left, already mounted to aluminum carrier jigs that not only held the bodies in place but also had electrical connections on them to interface with the test system.
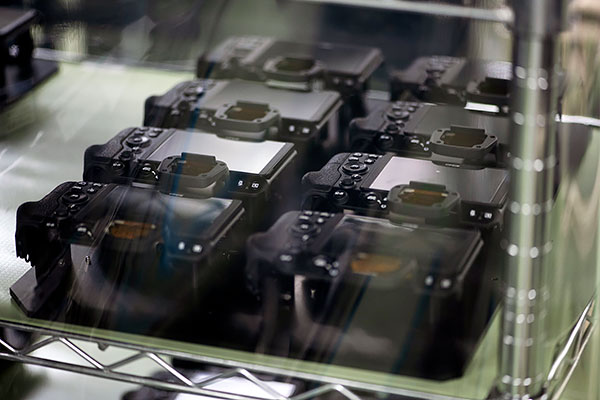
As they arrived, two large robotic arms would grab them and place them into one of 16 (I think; it might have been 20) different ports on the testing system. The test system was literally a black box (we could never see any light shining through the openings when cameras weren't mounted), with a total of 16 mounts on a large panel, arranged in two groups of eight each, in two rows. (This system took up quite a bit of space, being maybe 15-20 feet long overall. Whatever goes on on the other side of the test ports, it seemed like it needed quite a bit of space. Perhaps an optical testing range of some sort?)
The tests here seemed to take a little while, although I'd be hard-pressed to say just how long, given the constant activity between the two arms, incoming cameras and 16 test positions. The cameras had no lenses mounted on them, so presumably, the test stations had optics on the other side of them, to let the cameras "see" whatever the target was. (It's also possible that the other side just had a diffuser on it, to provide a uniform light source. It wasn't clear whether there was any imaging involved here, or just tonal adjustment.
Whatever was being tested for, we were told that this station wrote calibration data into each camera body. This was also the point in the process that our tour guide explained that all of the data from the entire assembly process is captured and stored for future reference, for every single camera body. That has to be a *lot* of data, since I assume it'll include not only test results, but also data on exactly which lot each component came from, from which supplier, etc. That way, if there's a problem of any sort with any component, Nikon can tell exactly which serial numbers might be affected by it.
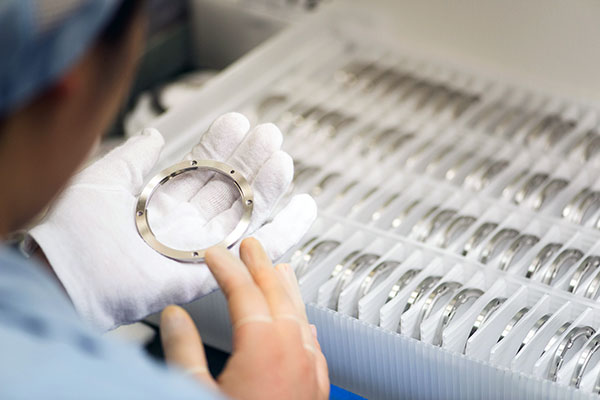
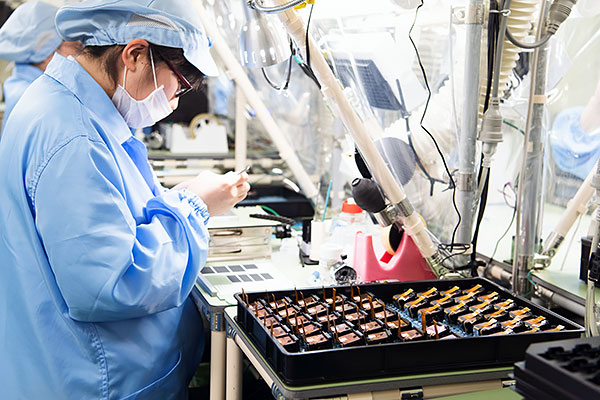
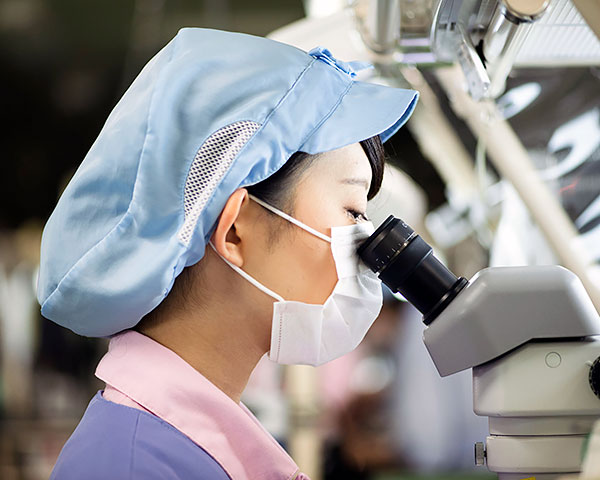
Final QC Check
QC seemed to be a huge focus (the presentation in this area was the longest of any that we heard). As with other parts of the process, individual workers now perform more operations than in the past. For the final QC, each worker performs all steps of the process, thanks to reconfigured test stations that let them execute all the steps at one station. We were told that there are over 100 separate quality checks per camera. That sounds like a lot, but given the amount of time and effort it seemed to take each operator to check just one camera, the 100-check number seems reasonable.
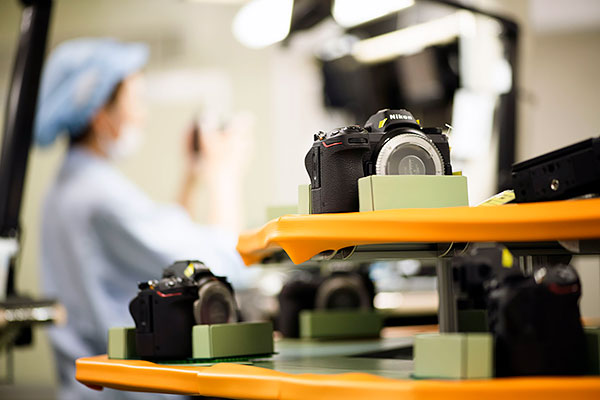
The quality check seemed pretty thorough, although it was hard to discern exactly what each operator was doing. Certainly, it seemed that every button was exercised, there was lots of visual inspection for fit, finish and dust, and the operators also seemed to do basic imaging checks, as each had a test target at their station that they took shots of.
The QC stations were arranged around a large, slowly rotating carousel, carrying camera bodies on two levels. Bodies awaiting testing were on the lower level, while ones that had passed testing were placed on the upper. The QC-testers' time was carefully conserved; they never had to leave their workstations to fetch or deliver a camera body. It seemed that there was one person whose sole task was to keep the carousel stocked with fresh bodies awaiting testing and to remove the ones that had been completed.
To the warehouse and out the door
Once they pass final QC, the bodies were taken elsewhere in the factory for packaging and shipment. We didn't see that part of the process, but I can assume it's pretty similar to what I've seen many times in the past: Finished cameras are placed in boxes, along with things like the battery and neckstrap, the manual is added, any localization of either printed instructions/manuals is taken care of (different languages for each market, probably different prongs for the power adapter, etc., etc.)
Summary and parting thoughts
While the severe restrictions resulting from proprietary concerns meant that I can't show you photos of some of the most interesting parts of the operation, I greatly appreciate the rare opportunity to see one of Nikon's production facilities up close like this. As I mentioned at the outset, it was especially interesting to me to see how much had changed from when I last saw this factory, producing D3 bodies back in 2007. While automation has taken over many previously human-performed tasks, watching the current workers at their tasks served to show me how far automation has yet to go, in order to replace many of these high-skill operations. An awful lot still depends on human vision, adaptability and dexterity; it's hard to imagine how some of the fine operations currently being done could be automated, even in 10 years or more time.
Two things were clear, namely that Nikon is both already producing substantial numbers of Z7 bodies, and has the space and capability to expand production in the future. (Although the availability of the aforementioned skilled workers may represent something of a pacing item.)
A couple of days before I'm posting this article, Nikon Japan announced (paraphrasing) that not all customers placing pre-orders would be able to receive their cameras when retail shipments are supposed to begin later this month. A reader comment on another of my articles about the Z7 asked how this could be, if Nikon is already cranking out Z7 bodies in large numbers. Since we're talking about Z7 production here, this seemed like a good place to address a question that I'm sure others have as well.
We'll see exactly what that announcement means, but we do know from the Tokyo shooting event that there's going to be at least one more firmware change before the cameras ship to retail. So the bodies that are being produced and stockpiled now almost certainly don't have the final firmware loaded on them yet. This is actually quite common in the camera world, with final firmware very often being written to the bodies just before shipment. I'm completely speculating here, but the continuing firmware refinement could be part of a delay in retail availability. Even if the firmware is finalized before the projected ship date, from the looks of it, Nikon will have a lot of bodies to update with it, only after which will they be able to be shipped.
As I said, we'll see how this plays out in practice, but I wanted to address a question I'm sure many readers have.
To conclude, I hope this inside peek into Nikon's production process for the Z7 was as interesting to read as it was to me to take the tour and write it. And of course, stay tuned for future coverage by us on the Z-series, including full lab and real-world tests just as soon as we can get our hands on a final production sample!
-----
Do you value what we do? Consider using our links to pre-order your Z7!
If you're planning to pre-order a Z7 (and from the note above about delayed availability, you'd be wise to do so, if you want to avoid a potentially long delay in getting one), would you consider using one of our affiliate links below?
The thing is, affiliate sales are incredibly important for us; one affilate sale can easily bring as much money as 5,000 -10,000 ad impressions, and we typically only get well-paying ads a couple of times a year. Using one of our affiliate links costs you nothing extra, but makes a huge difference in supporting our work.
So if you value our approach and the work we do to create articles like this one, would you consider using one of the links below to place any pre-orders or orders you might make? Believe me, it makes a huge difference for us!
-
Nikon Z7 body-only
(Preorder at Adorama, Amazon or B&H Photo Video) -
Nikon Z7 24-70 lens kit
(Preorder at Adorama or B&H Photo Video) -
Nikon Z7 FTZ mount adapter kit
(Preorder at Adorama or B&H Photo Video) -
Nikon Z7 24 - 70 + FTZ mount adapter kit
(Preorder at Adorama or B&H Photo Video) -
Nikkor Z 35 mm f/1.8 S lens
(Preorder at Adorama or B&H Photo Video)
Related IR content:
• Nikon Z7 Review (Hands-on preview stage)
• Nikon Z6 Review (Initial preview stage)
• Z7 Q&A with Nikon Engineers
(A deep dive on technical aspects)