PART I: 5300 DIARY
Kodak EasyShare 5300 Setup & Installation
 By MIKE PASINI
Editor
The Imaging Resource Digital Photography Newsletter
Review Date: June 2007
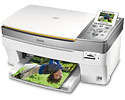
SAN FRANCISCO -- It's hard to believe that Kodak introduced its pigment-based all-in-one EasyShare printers in February. While more expensive than its competitors, our report at the time noted that the three printers use consumables that cost much less than the competition.
|
Part I Previously |
We'd been told to expect a review unit in April, checked out Kodak's 5300 at PMA in February and reported the exclusive launch at Best Buy in March. But it wasn't until today (June 15) that the mid-range $199.99 EasyShare 5300 arrived at our door.
With a dual-USB port, 3.0-inch LCD and card reader, it's the model that attracted us the most. The lower end 5100 has just the dual-USB port and the higher end 5500 adds a document feeder. They all include a scanner, hence the "All-in-One" tag.
Kodak is betting consumers will pay a $50 premium on the hardware to save money on the consumables. The pigment inks are sold as a $9.99 black ink cartridge and a $14.99 color cartridge. They print on the company's three-tiered porous paper line coded on the back with gold diagonal lines whose line weight and distance between lines tell the printer what kind of paper it's printing on. The cheapest paper makes a 10 cent 4x6 print, the tier-two paper a 15 cent print and the high-end paper a 25 cent 4x6.

The Box. The inside flap explains how to extricate the printer.
We plan to spend some time with the 5300, but don't want you to wait for the review. So we're starting another Diary, accompanied by a gallery of images documenting the installation here.
The inside flap of the shipping box tells you how to get the printer out, a nice touch. There's a cardboard tray full of accessories to remove first. Then you lie the box down and slide the printer out.
A large installation poster in the accessory box headlined "Start Here" takes it from there, starting with the box contents.
Inside the box are:
- The EasyShare 5300 All-in-One printer
- Two sample paper packs (Kodak Ultra Premium Photo Paper in both 4x6 and 8.5x11 sizes)
- A printhead in a foil packet
- A black ink cartridge and a color ink cartridge in clear packages
- The power supply and adapter
- Software CD and brochure
A control panel overlay was already on the printer control panel, but needed a little pressure to affix it properly.
The power supply is not just a brick, it's the size of a standard brick, the largest we've ever seen. Don't be alarmed.
You'll need to supply a couple of things yourself:
- A USB cable (none comes with the printer)
- Plain letter-sized paper
In addition, we always recommend visiting the company site to download the latest drivers. In this case the Mac driver on the CD was obsolete. A newer version was available online.
INSTALLATION | Back to Contents
The installation poster was helpful in putting together the 5300 in just half an hour. You can beat that time if you don't stop to take pictures of every step, as we did.
The poster warns not to connect a USB cable to the printer right away. If you just follow the instructions and don't improvise, you won't get in trouble. The installation proceeds from unpacking the printer to loading paper to installing the printhead and inks to powering it up and calibrating it.
Out of the Box. The orange tape protects moving parts during shipment.
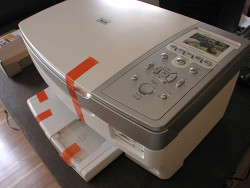
Unpacking the Printer. After getting the printer out of the box and slipping it out of the plastic bag it came in, we found a convenient place to set it up.
You can use the printer like any printer connected to a computer, of course, but as an All-in-One printer, it can also be used without a computer. You can copy documents (including prints), make prints from cards in the card reader or thumb drives inserted in the USB port and PictBridge compatible printers cabled directly to the printer. So find a place convenient for a copier and a computer printer both.
Movable parts are held in place with orange tape. It's easy to find (look on the back and inside, too) and remove.
Installing the Control Panel. The right top side of the printer is the control panel, filled with the LCD and buttons. The language used to identify these controls depends on the control panel overlay, a large piece of hard plastic that slips over the control panel. It itself has a smaller soft plastic insert that, in our case, needed to to affixed more firmly to the hard plastic. But both were already installed.
Letter Tray. Note the width and length guides.
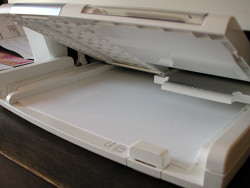
Loading the Paper. Next we made the acquaintance of the non-removable paper tray with its built-in 4x6 tray. We lifted the lid of the 4x6 tray on the right side and slipped some sample Kodak Ultra paper in with the glossy side down. The 4x6 tray holds a maximum of 20 sheets.
To activate 4x6 printing, instead of letter-sized printing, you push the 4x6 tray in until it clicks into place. If the power is on (which it isn't when you first install paper), a green light on the side of the tray indicates the 4x6 tray is active.
Then we lowered the lid on the 4x6 tray.
Next we loaded the main tray with letter-sized plain paper, also facing down.
A small insert on the tray lid slides out as the output tray extender. Pull it out far enough and it flips open.
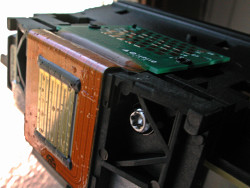
Printhead. Turned up so you can see the large nozzle end (left) and the contacts (top).
There are nice little notches on all the packages so you know exactly where to tear them. We can't be the only people in the world who appreciate this little touch.
More importantly, the delicate parts of the printhead are protected by orange plastic. Follow the installation poster to remove each in order carefully. Then place the printhead into its carriage and press it firmly forward until it clicks into place.
Let's repeat that: Press it until it clicks. Engineers take note. Usually, that's exactly how you break stuff. You press it until it clicks. Cracks, breaks. Generally, the installation was simple, but this step reminded us of a lot of other printer installations that require a lot of force to accomplish something. Yes, you should feel as if you're about to break the printhead. But you won't. It will click ... into place.
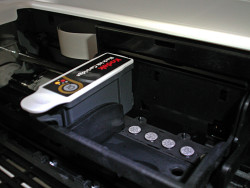
Black Installed. It just snaps into the installed printhead.
We found out a minute later why such a firm connection had to be made. When you install the ink cartridges in the printhead you have to press down on them. Were it not for the click that grabs the printhead securely, pressing down on an ink cartridge would dislodge the printhead.
Installing the Ink Cartridges. Ink cartridges are protected by an orange plastic cradle that comes off with a little exertion. But they do slip easily into place. Or should we say "click" into place.
When Susan H. Tousi, Kodak research and development director for inkjet products, showed us in February how easily the cartridges install we nearly cried. Most printers (Canon being the exception to all of our complaints) make this ridiculously difficult. Tousi said she actually tested it with her mother. And it is easy to click a cartridge in.

Control Panel. Pretty simple if you've ever seen a photocopier before.
Connect Power. The power brick connects to the wall and an adapter cable connects to the brick with a strange three-prong connector (no doubt a ground is the extra connection). The connection to the printer was strangely loose. We could wiggle the plug back and forth a little too freely for our taste. But the plug itself has a green LED to indicate it's working.
Next we removed the plastic film from the LCD, cranked it up so we could see it and went through the prompts for language and location.
Calibrating the Printer. The LCD will tell you the printer has to be calibrated and what to do about it (press the Start button). Oddly, the calibration image is printed on 4x6 photo paper.
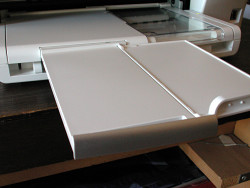
Output Tray. It's already flipped open.
Once printed, you place it face down, aligned to the front right corner of the scanner glass, and lower the scanner lid. Then press Start again to scan the target and calibrate the scanner.
If you don't want to print 4x6 photos, lift the 4x6 tray lid and slide the tray out toward you. The green light we mentioned above will turn off.
Installing the Software. Apparently the CD itself has a Web install option to get the latest software directly from the Web. Do that. We were alerted to the new version and had previously downloaded it, so we installed from that disk image, which required a restart.
And that was all it took: 30 minutes (with pictures). And, surprisingly, there's no scanner lock to fiddle with either.
TEST PRINTS | Back to Contents
How do you know you've done it right, if you don't make a test print or two?
This is where our uncanny ability to screw things up really shines. There was no printed manual included, we'd seen the printer demoed to death several times and if it's really easy, well, how hard could it be?
The easiest test, we thought, would be to pop a thumb drive into one of the USB connectors in front. We made sure there were some pictures on it and slipped it in.
The LCD told us to wait while the drive was being read. But we waited so long, we started doing a little housekeeping. Far too long, really. So we disconnected. We tried it a few times with a few drives and nothing ever got read.
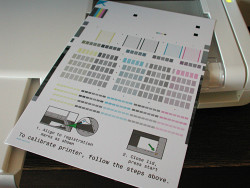
Calibration. Print this 4x6 and then scan it -- that's all there is to it.
Then we turned our talents to copying a picture. We'd seen that done at PMA on a 5300 and it really was hard to tell the original from the copy.
We put an old Kodak print (vintage 1970s) in the scanner (note that the top stays up only when it's at 90 degrees) and pressed the down key to go through the copy options (like Best quality and Fit to Page with the 4x6 tray engaged). Then we hit the Start button.
Well, that just crashed the printer. It screeched at us and restarted itself. Smart printer. It knew who it was dealing with.
Having not learned our lesson, we did the same thing. Went through the options and pressed the Start button. This time it worked. We got a print.
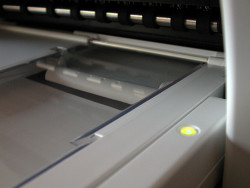
Photo Tray LED. Indicates you'll be printing 4x6 sheets.
We could tell the difference between the smaller, 30-year-old print and the copy. Even on the best paper, we could see the dots. And the color in the enlargement was a bit more washed out. Hmmm.
We wondered if we could improve the results printing from that thumb drive. So we popped it back in and it took only a couple of seconds (well, 10 seconds) to read it and display the first picture of 35 on the LCD. It even oriented the portrait image correctly (turning it around before our very eyes).
It turns out, however, that not all 35 images were ours. Some were Kodak's, apparently stored in the printer's internal memory. We skipped those, scrolling through the images until we found one we liked.
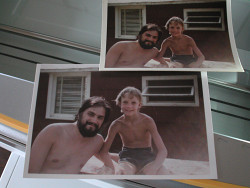
First Print. Just a copy scanned from the 30-year-old original above it.
The Photo button was illuminated, so we pressed that (we aren't dumb, just incredibly talented at screwing things up). The printer showed us the print options (we picked Best Quality again) and told us to press the Start button again. We did.
And out came our print. Nice saturated color. But we'd printed one of the ISO 1600 digicam images that was a nice picture of noise, really. Not a fair test.
So we popped in a different thumb drive and found a nice dSLR image taken at a reasonable ISO, clicked Photo, set Quality to Best, and hit the Start button. Quick learner.
Wow. Now that was a nice print. Sharp as a tack. No noticeable dots from the inkjet. Instant dry (porous paper but with pigment inks not dyes, so they're archival).
We couldn't resist printing a couple more. Very nice.
Now that the printer has us trained, we think we'll try to find that manual on the CD.
Continue to Part II of the Diary