Nikon CoolPix 4500Nikon updates the hugely successful Coolpix 995, adding a full 4.0-megapixel CCD!<<Shutter Lag & Cycle Time Tests :(Previous) | (Next): Camera Modes & Menus>> Page 8:Operation & User InterfaceReview First Posted: 5/29/2002 |
Operation and User Interface
Like the Coolpix 995 before it, the Coolpix 4500 has a straightforward and powerful user interface, but Nikon's made at least one move in the design that I think removes a lot of the speed and fluidity of the 995's UI design. On the 995, you could make many common settings changes by relying entirely on the camera's external controls, used in conjunction with the top-panel LCD data readout. On the 4500, perhaps to achieve a more svelte design, Nikon has dropped the data readout along with several of the external buttons found on the 995. The situation isn't quite as bad as thought when I first held the camera, since the LCD now stands in for the missing data readout panel in many instances. Even if the LCD viewfinder is turned off, pressing a control button and rotating the Command dial causes the LCD to illuminate and the status of the setting being changed to display. This takes a few moments though, so it's not quite as quick as on the 995 with the data display. The absence of at least one button found on the 995 also forces you to delve into the LCD menu system to change image size and quality.
My gripes about the missing data readout aside, the 4500's control system works well and is well thought out. Once you learn where the functions are, operation is quick and intuitive, thanks to the multiple control buttons and the Command dial. The inclusion of a programmable Function key adds flexibility, allowing you to customize the camera to your specific shooting needs by moving frequently-used settings up to the top-panel Function button. (This key is normally used to set exposure compensation though, so you'll have to delve deep into the LCD menus for exposure tweaks if you assign any other setting to the Function key.) Exposure compensation, exposure mode, ISO value, as well as focus controls (manual focus setting, macro, and infinity focus), and flash mode, can all be adjusted without having to enter the menu system. When you do have to deal with the LCD menus, navigation via the joystick-like Multi-Selector button is intuitive and quick. One quirk I found was entering the Setup menu: It wasn't at all obvious when I first looked at the camera and I kept looking for a Setup mode or option in the main menu. (I almost had to read the manual!) What you have to do is call up the Shooting menu, then push the Multi-Selector to the left. Once I figured it out, it became perfectly obvious that there was a Setup menu icon at the top of the screen. I do think the more familiar menu tab system used on previous Coolpix digicams was a better user interface though.
Control Enumeration

Shutter Button: Located on top of the camera and encircled by the Power dial, this button sets focus and exposure when halfway pressed and fires the shutter when fully pressed.
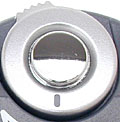
Power Dial: Surrounding the Shutter button on the camera's top panel, this dial turns the camera on or off.

Mode Button: Just below the Power dial on the top panel, this button selects the main exposure mode (Program, Shutter Priority, Aperture Priority, Manual, Auto, and Scene Mode) when used in conjunction with the Command dial. Hold down the Mode button while turning the Command dial while in capture mode, and the camera will cycle through its exposure mode options. In Manual exposure mode, a quick press of this button selects either the aperture or shutter speed setting, allowing you to change it by turning the Command dial. A second press toggles to the other exposure parameter.

Exposure Compensation / Function Button: Directly to the right of the Mode button, this button adjusts the amount of exposure compensation (from -2 to +2 exposure equivalents (EV) in one-third step increments) when held down while turning the Command dial. This button can also be programmed through the Setup menu to access other exposure settings instead of exposure compensation. (The other options are continuous shooting mode selection, image quality setting, white balance options, and metering pattern.)
Command Dial: Protruding slightly from the top right corner of the camera, this dial is used in conjunction with other buttons in Record mode to adjust exposure options. By itself, it will adjust the aperture or shutter speed settings in Aperture and Shutter Priority or Manual exposure modes.
In Playback mode, the dial cycles through the six information pages associated with each captured image, giving you an unparalleled amount of information about each photo (image information page, camera firmware page, image adjustment page, exposure histogram, and focus confirmation).
![]()
Monitor Button: Just above the top left corner of the LCD monitor, this button recalls or cancels the color LCD screen information display and viewfinder display.
![]()
Quick Review / Playback Button: To the right of the Monitor button, this
button drops you into playback mode temporarily so you can check your recent
shots. Pressed once, it calls up the most recently shot picture as a small thumbnail
in the upper left hand corner of the screen. Pressed a second time, it expands
the thumbnail to fill the whole display. You can navigate forward and back through
images on the card using the Multi controller joystick. A third press of this
button will return you to capture mode, as will pressing the shutter button.
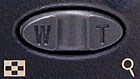
W and T Zoom Rocker Buttons: Directly to the right of the Quick Review / Playback button, this rocker button controls the optical zoom in all capture modes. When the digital telephoto option is enabled, it likewise controls the amount of digital zoom (from 1.1x to 4.0x).
In single-image playback mode, pressing the "T" button repeatedly zooms in on the image (you can scroll around in the enlarged image by using the Multi controller joystick control). Pressing the "W" button cancels zoomed playback. Continuing to press the "W" button accesses the four and nine-image index displays.

Focus Mode / Erase Button: The first button in a series directly beneath the LCD display, this button has several functions. When held down while turning the Command dial, it controls the manual focus setting in Record mode. Also in Record mode, pressing this button alone cycles through Infinity focus, Macro, and Self-Timer modes.
In Playback mode, this button acts as the Delete command for the currently
displayed image (indicated by the trash can symbol above it).
![]()
Menu Button: Adjacent to the Focus Mode / Erase button, this button calls
up the settings menu in all capture modes as well as in Playback mode. It also
cycles through individual menu pages and cancels the menu display.
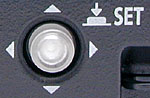
Multi-Selector Button: Just below the lower right corner of the LCD monitor,
this raised "joystick" button can rock up, down, left, and right.
Different menu items are selected via the up/down arrows. Pressing the lever
to the right selects an item, generally taking you into a sub-menu. Pressing
toward the left takes you back out again. Once in a sub-menu, the up/down arrows
again step between items, while a right-arrow selects. This process continues
until you arrive at the final point of selection, upon which pressing the center
of the button confirms the menu selection.
In Record mode, pressing the center of the button locks exposure and/or focus,
depending on what value is selected in the Setup menu. When Manual AF Area mode
is active, this button sets the current AF area (highlighted in red on the LCD
display).
In Playback mode, the right and left directions scroll through captured images
one at a time. In zoomed playback mode, you can use this control to pan around
within the enlarged image.

Flash/ISO Button: On top of the lens barrel, this button cycles through
the flash modes (Auto, On, Off, Red-Eye Reduction, and Slow-Sync). Holding this
button while turning the Command dial cycles through the variable ISO settings
(Auto, 100, 200, 400, and 800).
![]()
Diopter Adjustment Dial: Located directly beneath the optical viewfinder
eyepiece (on the underside of the lens half of the case), this small, black
dial adjusts the viewfinder to accommodate eyeglass wearers.

Follow Imaging Resource: