|
(Review first posted 28 April, 1999) |

 |
|
Inexpensive entry-level megapixel camera |
|
|
1152 x 864 resolution | |
|
|
LCD and optical viewfinders | |
|
|
Fixed focus, moderate wide-angle lens | |
|
|
Built-in flash | |
|
|
Bundled with "Picture Easy" software to use right out of the box. |
Preface
Long a "power player" in the world of digital cameras, Kodak has one
of the broadest product lines of anyone in the business, spanning the range
from inexpensive consumer units to high-end professional cameras used by commercial
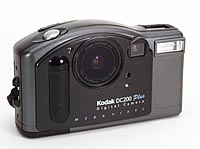
photographers and photojournalists. The DC200 Plus covered in this review is
an updated version of Kodak's entry-level offering, the DC200, with improved
battery life and faster response times. Providing full megapixel resolution,
with 1152x864 pixel files, it boasts excellent color, and pictures that can
be printed at sizes as large as 5x7 inches without image degradation. Consistent
with it's entry-level target, it's easy to use, presenting a "friendly"
face to even novice digital photographers.![]()
High Points
- Megapixel CCD sensor delivering up to 1152 x 872 pixel resolution
- Focus-free lens with 37mm threads to accept optional lenses
- 39mm equivalent lens focal length
- Focuses from 27 inches to infinity
- Auto exposure
- ISO 140 equivalent with f4.0 maximum lens aperture
- 1/4 to 1/362 second shutter speed
- Built-in flash with five settings: Auto, Auto Red-Eye, Fill, Red-Eye Fill, and Off settings
- 1.8 inch color LCD viewfinder for preview and review of images, as well as an optical viewfinder for framing and capturing images
- 4 MB CompactFlash memory card included for in-camera storage and for transferring images to PCs
- Transfer of images to PC through a standard RS-232 serial connection
- Produces photo-quality prints up to 5 inches by 7 inches
- Video out capability in either PAL or NTSC format
- Stores images in standard JPEG or FlashPix formats
- Easy-to-navigate menu system for setting camera preferences
- Lightweight, easy-to-handle design
- Includes Kodak Picture Easy software, as well as TWAIN acquire software for Windows '95, '98, and NT systems
- Includes 4 AA Alkaline batteries
EZ Print Link
Readers have requested free-formatted versions of our reviews (without the graphical
accouterments of our page design), to make printing easier. We are accommodating
this request with special copies of each review, formatted to allow the text
flow to be dictated by the browser window. Click here
for a print-optimized page.![]()
Camera Design
The Kodak DC200 Plus has the same ergonomic design as many of the more expensive
cameras in Kodak's digital camera line, but it still maintains the look and
feel of a traditional camera. At 11.6 ounces (330 g), it's relatively lightweight,
but at 5.2 x 1.9 x 3.2 inches (132 x 48 x 81 mm) doesn't quite pass the "shirt-pocket"
test. All-in-all, it's an easy-to-use design with a fair amount of flexibility.

The DC200's body is made of metallized plastic with a nice "grip"
area on the right side of the camera, and a small curvature in which to place
your thumb while snapping pictures. As do most cameras, whether conventional
or digital, the DC200 caters to right-handed users, with the major controls
located on the right-hand side of the unit. The power switch is easily activated
with your forefinger, as is the shutter button which sits just in front of the
power button on the top of the camera. The placement of these two buttons alone
makes one-handed image capture easy. The Mode Dial on the rear of the camera
is also easily rotated with the thumb of your right hand, reinforcing the one-hand
use paradigm. (Although we felt much more comfortable holding onto the camera
with both hands while rotating this control.) The picture card compartment is
easy to access on the left-hand side of the camera, allowing loading or ejection
of the standard 4 MB picture card even with the camera mounted on a tripod.
The lens is designed with 37mm internal threads meaning that it can be fitted
with optional accessories, such as close-up lenses, etc.![]()

The blue DO-IT button--which enables the LCD viewfinder in Capture Mode and
confirms highlighted menu options--is easily accessible just to the right of
the LCD on the back of the camera. The up/down and left/right buttons used for
setting preferences and for scrolling through images are also located on the
camera's back side next to the LCD. These buttons are equally easy to maneuver.
On top of the camera you'll find the Status display, which is small but easily
readable, as well as the Flash and the Self-Timer buttons, each of which are
functional, but on the small side.

Batteries load easily in the battery compartment in the bottom of the camera, and the AC adapter, video out, and serial ports are neatly tucked into the left-hand side of the camera, protected by small plastic flaps, but readily accessible.
Viewfinder
The DC200 Plus is equipped with both an optical viewfinder, and a color LCD
viewfinder on the rear of the camera. The optical viewfinder is clear and bright,
provides good "eye relief", making it easier to use with eyeglasses,
and is relatively unaffected by eye position. Our one gripe is that it is not
equipped with a Diopter Adjustment, a feature eyeglass-wearers like ourselves
miss when absent.![]()
The 1.8-inch LCD can be used to preview an image in Capture mode, or
review previously-captured images in Review mode. The LCD is equipped with a
brightness adjustment-accessed through the LCD menus in Preferences mode-to
adjust LCD viewing for your particular needs. (This is a "true" brightness
adjustment, varying the brightness of the LCD backlight, rather than just adjusting
the contrast of the LCD screen itself.) The "live" images on the LCD
are fairly sharp, although the panel clearly has a lower pixel-count than you'll
find on higher-end digital cameras. In "viewfinder mode", the display's
refresh rate is reasonably high, about typical for most cameras we've reviewed.
Like all LCDs, the one on the DC200 is quite prone to wash-out in direct sun,
meaning you'll doubtless want to use the optical viewfinder on sunny days.![]()
 When in Review mode, three icons appear on
the left of the LCD. You can select these icons to view the current image full-size,
delete images, or to turn the icon menu itself on and off. The Index screen
(our term for it) includes the three icons mentioned above, and smaller, thumbnail
versions of the stored images at the bottom. The left/right buttons under the
display screen allow you to scroll through the captured images. The image in
the center of the scroll area is the image that is displayed in larger view
on the LCD when you stop scrolling. The different icons displayed on the LCD
are easily viewable and easy to navigate. If you turn on the Template feature
in Preferences mode, the LCD itself is framed with the template you selected.
This is helpful when you want to add a template to an image, but you want to
make sure that the image looks good in the template before you capture it, or
need to make sure that no important subject matter is hidden by the template.
When in Review mode, three icons appear on
the left of the LCD. You can select these icons to view the current image full-size,
delete images, or to turn the icon menu itself on and off. The Index screen
(our term for it) includes the three icons mentioned above, and smaller, thumbnail
versions of the stored images at the bottom. The left/right buttons under the
display screen allow you to scroll through the captured images. The image in
the center of the scroll area is the image that is displayed in larger view
on the LCD when you stop scrolling. The different icons displayed on the LCD
are easily viewable and easy to navigate. If you turn on the Template feature
in Preferences mode, the LCD itself is framed with the template you selected.
This is helpful when you want to add a template to an image, but you want to
make sure that the image looks good in the template before you capture it, or
need to make sure that no important subject matter is hidden by the template.![]()
When in Capture mode, menu options on the LCD allow you to adjust the
camera's exposure value, or lock the exposure to capture a consistent exposure
for a sequence of shots.![]()
Like most other cameras, using the LCD for preview and review of images
uses up battery power fairly quickly. You should limit continuous use of the
LCD during your picture-taking sessions for this reason. For continuous preview
and review, power the camera with the optional AC adapter. ![]()
The optical viewfinder on the DC200 Plus is more accurate than most,
displaying about 90% of the actual image taken. The LCD viewfinder is 100% accurate,
a trait common among Kodak's digital cameras, but found only infrequently elsewhere.![]()
Optics
The DC200 uses a "focus-free" (fixed focus) optical-glass lens, with
a focal length equivalent to a 39mm lens on a 35mm camera (a slight wide-angle),
and a maximum aperture of f/4.0. The focus-free design provides good sharpness
from 27 inches (0.7m) to infinity. Although it lacks a "macro" mode
for shooting close-ups, the DC200 does sport 37mm filter threads, which can
be used to attach close-up lenses or other accessories. The lens aperture varies
from f/4.0 to f/13.5 under control of the autoexposure system.![]()
Exposure
Kodak rates the DC200 Plus at an equivalent ISO speed of 140, and the shutter
speed range is from 1/2 to 1/362 of a second. Combined with the f/4.0 to f/13.5
lens aperture range, this should result in a range of usable lighting from EV
9.5 to EV 20. This agreed fairly well with our own test results, although we
found that we could extend the lower end of the exposure range somewhat by using
the exposure-compensation adjustment (see below) to boost the camera's sensitivity
a bit. Using this method, we obtained a very good exposure at EV 9, and a passable
one at EV 8. (This would correspond to a fairly dim residential interior, although
our indoor portrait test results suggest that attempts to boost the exposure
too far will have only limited success under typical household incandescent
lighting, due to the strong color cast of that light source.)![]()
The DC200 has a fairly good automatic white-balance capability, allowing
it to function well under a wide variety of lighting conditions. In our tough
"indoor portrait" test shot, it did a good job of removing enough
of the yellowish cast of the lighting to produce natural-looking colors. ![]()
As mentioned above, an LCD menu option in Capture Mode allows you to
dial in exposure compensation from -2EV to +2EV in .5EV increments. The exposure
compensation adjustment essentially tells the camera to give the shot a little
more or a little less exposure than the automatic metering system calls for.
This is very handy if you have a backlit subject, or a small bright subject
against a dark background. (It's also the way to get good, bright white snow
in winter scenes: Dial in about +1.0 EV exposure compensation.)![]()
Another feature accessible via an LCD menu option in Capture mode is
the exposure lock function. This "locks" the exposure on the first
shot taken after the setting is made, and then keeps the same exposure setting
until the "lock" is reset. This is very useful for capturing sequences
of images to be used for stitching together into a wide (or tall) panorama.![]()
After an image is captured, the QuickView feature optionally displays
the image on the LCD for a few seconds. At that point, you can choose to delete
the image immediately and re-shoot, or do nothing, and let the image be stored
on the camera's picture card.![]()
Flash
The built-in flash of the DC200 Plus has an effective range from 2.2 feet to
9.8 feet, and has 5 available flash settings including Auto, Auto Red-Eye, Fill,
Red-Eye Fill, and Off. The flash settings are fairly flexible in that you can
choose a different setting for each shot using the small Flash button on the
top of the camera when in Capture mode. The camera automatically returns to
the default Auto flash setting when you turn it off.![]()
Shutter Lag Time/Cycle Times
When you press the shutter release on a camera, there's usually a lag time before
the shutter actually fires. This time is to allow the autofocus and autoexposure
mechanisms time to do their work, and can amount to a fairly long delay in some
situations. Since this number is almost never reported on, and can significantly
affect the picture-taking experience, we now routinely measure it, using a little
Windows utility developed by Digital
Eyes.![]()
We measured the DC200's shutter lag time at a rather speedy 0.35 seconds.
(Most cameras we've tested come out at around 0.7-0.9 seconds.) The speedy shutter
response of the DC200 is undoubtedly because there's no need to wait for an
autofocus mechanism to work. Half-pressing the shutter button to preset the
exposure further reduces the lag time to 0.2 seconds. On the DC200 Plus, the
shot-to-shot cycle time averages about 9.5 seconds in the highest resolution,
best quality capture mode, and about 8 seconds in standard resolution, good
quality mode.![]()
Camera startup time is fairly fast at about 5 seconds and shutdown is
just about a second. Switching from Capture to Review mode takes just under
2 seconds while switching back to Capture mode is instantaneous. (You won't
even know that time has gone by.) The DC200 Plus literature boasts much faster
response and cycle times for the camera than its predecessor, the DC200, and
we found operation to be quite fast, for such a low-cost camera.![]()
Operation and User Interface
For a low-cost, introductory digital camera, the DC200 Plus is easy-to-use and
should be quickly mastered by even novice digital photographers. If you are
at all familiar with digital cameras, it takes just a few short minutes to work
through the operation of the camera, and check out the available features and
options. If you've never used a digital camera before, you may find yourself
using the manual at first. Once you start experimenting, however, you'll see
how easy it is to teach yourself how to capture high-quality digital images.![]()
 The camera operates in one of four
different modes: Capture, Review, Connect, and Preferences. You select which
mode you want with the Mode Dial on the rear of the camera. Pressing the blue
DO-IT button or the left/right scroll buttons on the back of the camera displays
various picture-taking and camera set-up options on the LCD. Use the up/down
and left/right arrow buttons to scroll through the different menus and options,
and press the DO-IT button a second time to confirm and save your selections.
The camera operates in one of four
different modes: Capture, Review, Connect, and Preferences. You select which
mode you want with the Mode Dial on the rear of the camera. Pressing the blue
DO-IT button or the left/right scroll buttons on the back of the camera displays
various picture-taking and camera set-up options on the LCD. Use the up/down
and left/right arrow buttons to scroll through the different menus and options,
and press the DO-IT button a second time to confirm and save your selections.
![]()
The LCD doesn't automatically turn on when in Capture mode. You need
to turn it on manually using the DO-IT button. In contrast, the LCD is always
on in Review mode and you don't need to enable it. If you need to adjust the
LCD brightness, you can do it in Preferences mode through an LCD menu option.
The LCD shuts itself down after 60 seconds of inactivity to save battery power.![]()
While in Capture mode, available LCD menu options include Exposure Compensation
and Exposure Lock.![]()
Review mode provides you with a series of functions that you can perform
using images already captured and stored to the camera's picture card. By switching
from what we call Full-View mode to Index mode, you can view and scroll through
thumbnails of all the images stored to the camera card. Once in Index mode,
you can delete images, or expand them to full-screen for closer examination.
(The Index-mode screen was shown earlier.)![]()
Connect mode lets you connect the camera to a PC using the serial cable
packaged in the camera box. You can connect to Windows '95 or '98 computers
fairly quickly and easily. Before you can download images, however, you first
need to install the DC200 Plus software on your computer. The DC200 ships with
software only for the Windows platforms: An accessory kit is sold with cable
and software for connecting to Macintosh computers, as Kodak product number
1661552. The Mac interface kit costs $24.95, and may be ordered on-line from
Kodak, at their on-line
store.![]()

Other control buttons are placed very similarly to other cameras we've tested:
On the top of the camera, you'll find the Status Display which shows icons for
various camera settings. It's an easy reminder of which menu options you have
enabled, the battery power status, and pictures remaining on the picture card,
among other things. Also easily accessed atop the camera are the Shutter Button,
the Self-Timer Button, and the Flash Button to change flash settings for different
exposures. The left-hand side of the camera contains easily accessible ports
for the AC Adapter, Video Out, and Serial connections.![]()
Control Enumeration
Self-Timer Mode
![]() The Self-Timer mode has its own button on
the top of the camera. You can use the self-timer in conjunction with any of
the camera settings you've enabled. Depressing the self-timer button provides
a 10 second delay between when you press the shutter button and when the camera
fires.
The Self-Timer mode has its own button on
the top of the camera. You can use the self-timer in conjunction with any of
the camera settings you've enabled. Depressing the self-timer button provides
a 10 second delay between when you press the shutter button and when the camera
fires.
Capture Mode
With the Mode Dial set to Capture, pressing the DO-IT Button enables the LCD
for viewing. Pressing the right arrow button once displays the Exposure Compensation
option on the LCD, pressing it twice displays the Exposure Lock option:![]()
Exposure Compensation: Exposure adjustments range from +2 EV to
-2 EV, in .5 EV steps. Each +1 adjustment doubles the amount of light that comes
in contact with the LCD when capturing the image. Every -1 adjustment cuts the
amount of light in half. Use this control if your images appear too light or
too dark.
Exposure Lock: Lets you lock the exposure setting currently in effect when you
are capturing a series of images consecutively, where each requires the same
exposure setting. (This feature is useful for taking a sequence of shots that
will be stitched-together into a panorama later.)![]()
After you capture an image in Capture mode, the image appears briefly
in the LCD (if the QuickView feature is enabled). In the bottom left corner,
a trash can icon appears. Pressing the left arrow button displays the Delete
Picture screen where you can choose to delete the picture prior to it being
stored to the picture card.![]()
Review Mode
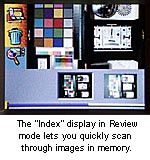
Use Review Mode after you capture images to review them. When you change from
Capture to Review Mode, the LCD automatically activates and displays your images.
When the LCD first turns on, the "Index" screen (our term) appears.
At the bottom of the LCD you'll see smaller versions of the images that you
have captured (if there's more than 1, of course). You can use the left/right
scroll buttons to quickly scroll through the images that you have captured to
find a particular image. Once you find it and center it, that image appears
larger in the LCD. In this "Index" mode, very rapid browsing of the
stored images is facilitated by the camera's initial display of only a very
low-resolution image. While very low res, it's generally enough to tell what
the content of the image is, and decide whether that's the one you're looking
for. If you linger on a given picture, it fills-in to a high-resolution version
in about two seconds. This approach makes it very easy to scroll through a large
number of pictures to find the one you want.![]()
To the left of the LCD is a set of
three icons. Each of these icons represents an operation that you can perform
on the selected image, as described below:

 Index/Full:
Lets you switch from the Index screen to the Full View screen.
 Delete:
Lets you delete the current image or all the images stored to the picture card.
 Magnify:
Lets you magnify and zoom in on a particular portion of a picture for closer examination. You can use the up/down and left/right scroll buttons to view different parts of the picture at the magnified level.
- Slide Show:
This review-mode option doesn't appear as an icon on the Index screen, but
is accessed by pressing the DO-IT button. The camera will cycle through all
the images stored in the memory card, one every 5 seconds, for 5 minutes,
or forever, if it's powered by the AC power adapter.
Connect Mode
When you want to connect the camera to a PC for downloading of images, you first
need to put the camera into Connect Mode. Connect Mode enables the different
ports on the side of the camera for image transfer. The ports include a standard
RS-232 connection for downloading images to Windows-based computers with an
available serial COM port.![]()
Preferences Mode
Preferences Mode offers a number of options you can use to customize the camera
for your own picture-taking needs. (Most of the camera's operating parameters
are set via the Preferences mode.)
 Picture
Quality:
Picture
Quality:
Select one of three settings: Good, Better, and Best. Of course, as you move from Good to Best, more space is needed on the picture card to store the image. The lower the quality setting, the more the image is compressed to fit on the picture card.- Best: Stores about 4 images per 1 MB of storage space with Resolution set to High.
- Better: Stores about 6 images per 1 MB of storage space with Resolution set to High.
- Good: Stores about 9 images per 1 MB of storage space
with Resolution set to High.
 Resolution:
Select the pixel dimensions of the image. Choose from one of two settings: High or Standard:- High: As expected, use this setting for images that you hope to print (up to 5 inches x 7 inches). The resolution of the image at this setting is 1152 x 864 pixels.
- Standard: Use this setting when capturing images for on-line
sharing. The resolution of the image at this setting is 640 x 480 pixels.
 Template:
Allows you to add borders or logos to your pictures. When you have enabled Template mode by selecting a border, the LCD automatically turns on and displays the chosen border so that you can see if the border matches well with your subject. The picture card included with the camera contains some pre-installed templates for your use. Note that formatting the picture card erases all the borders you've loaded: If you reformat, you'll need to reload.
 Date/Time
Stamp:
Date/Time
Stamp:
An option to record the date and time that the image is captured on the image itself.
 File
Type:
File
Type:
Choose between FlashPix and JPEG file format depending on how you want to save the image for future use.
 QuickView:
Optionally displays the image you just shot on the LCD for several seconds after capture. This is a nifty feature that lets you review the image and decide if you want to keep it and store it to the picture card. The Delete icon (trash can) appears on the image when viewing it. If you don't like the image, press the left scroll button to delete it. If you like it, do nothing and it will be stored automatically after a few seconds.
- Date
and Time:
Lets you set the month, date, and year.
 LCD
Brightness:
LCD
Brightness:
Lets you adjust the brightness of the LCD to suit your picture-taking needs.
 Format
Memory Card:
Format
Memory Card:
Lets you format picture cards for use with the DC200 Plus if they have a different format or have become corrupted in some way. Remember that formatting removes all information on the card including any borders or graphics you may have stored.
 Video
Out:
Video
Out:
Choose between NTSC for US and Canadian usage, or PAL for European usage.
 Language
Default:
Language
Default:
Choose from one of seven languages: English (normal default), Chinese, French, German, Portuguese, Spanish, or Italian.
 About
the Camera:
About
the Camera:
Provides you with information about your camera including the number of pictures captured and the number of flashes fired.
Memory and Interface
 The DC200 Plus comes equipped with an ATA-compatible
4MB CompactFlash memory card (which Kodak calls a "picture card"),
but can take cards up to 48MB in size. The picture card compartment is easily
accessible on the left-side of the camera. Open the compartment door, insert
the picture card into the slot, push it all the way in, and you're all set to
capture images. All images are captured and stored in standard JPEG format,
unless you've set a different file type in Preferences mode.
The DC200 Plus comes equipped with an ATA-compatible
4MB CompactFlash memory card (which Kodak calls a "picture card"),
but can take cards up to 48MB in size. The picture card compartment is easily
accessible on the left-side of the camera. Open the compartment door, insert
the picture card into the slot, push it all the way in, and you're all set to
capture images. All images are captured and stored in standard JPEG format,
unless you've set a different file type in Preferences mode.
When you first turn on the camera, the status display shows the number of pictures for which space remains on the picture card. This "Pictures Remaining" number is displayed in the upper-right hand corner of the status display. Of course, this number will vary depending on the Quality setting (Best, Better, Good), and the Resolution level setting (High, Standard). At the high-resolution level, images are stored at 1152 x 864 pixels. At the standard level, images are stored at 640 x 480 pixels. The following table shows the approximate number of images stored for each available camera setting, on the included 4 MB card:
|
High |
Standard |
|
| Best Quality |
12 images |
25 images |
| Better Quality |
18 images |
35 images |
| Good Quality |
28 images |
54 images |
Of course, as with all cameras, the number of images stored on each card may
vary depending on the density of the image being captured. At the high resolution,
best quality setting, the average file size is about 250K. At the high resolution,
good quality setting, the file size is about 94K, and at the standard resolution,
good quality setting, the average file size is about 48K.![]()
The DC200 Plus is equipped with an RS-232 serial adapter for transferring
images to Windows-based systems. A serial connection kit for Macintosh computers
is also available from Kodak for $24.95, as of this writing (April, 1999). Alternatively,
there are a number of third-party accessory card readers available on the market
that connect to either parallel, USB, or SCSI ports, which transfer image files
MUCH more rapidly. In our timings (on a 350 MHz PentiumII computer) transferring
a 305K "Best/High" (maximum-quality) file took 46 seconds using the
"Mounter" application, for a transfer rate of about 6.6 Kbytes/second.
Using the "TWAIN" driver supplied with the camera and Photoshop, the
transfer time for the same file dropped to 36 seconds, for a transfer rate of
about 8.4 Kbytes per second. This is about as fast as serial connections get
in practice, although the PC serial port should be able to support rates as
high as 11-12 Kbytes/second. Serial transfers are fine if you have the patience,
but anyone dealing with large quantities of pictures will probably find a parallel-port
card reader a useful addition.![]()
Video Out
The DC200 Plus supports playback of images to a television set through a video
out cable supplied with the camera. The video out port is easily located on
the left-hand side of the camera, hidden under a plastic flap. Both the NTSC
signal format for U.S. and Canadian use, and the PAL signal format for European
use are supported. A menu option in Preferences mode is available to switch
between these signal formats if needed.![]()
Power
The DC200 Plus is powered by a set of four AA batteries, 1.5v Alkaline or Lithium
batteries, or rechargeable 1.2v nickel metal hydride (NiMH) or nickel cadmium
(NiCd) batteries. Four AA 1.5v alkaline batteries are supplied with the camera.
The DC200 Plus literature boasts 20% more battery life than its predecessor,
the DC200. While we don't conduct explicit tests for battery life, we found
the DC200 Plus to be fairly efficient in its use of battery power. (With the
LCD turned off, batteries seemed to last a VERY long time.) Despite this, we
strongly recommend purchasing a set or two of rechargeable NiMH batteries and
a charger as standard equipment for any digital camera.![]()
When the camera is placed in Capture, Review, or Camera Set-Up Mode,
the Battery Status Symbol is displayed on the Control Panel on the top of the
camera to tell you how much battery power is remaining. The battery compartments
on the right side of the camera are easily accessible for battery changing.![]()
Besides battery power, the DC200 Plus can use an optional AC adapter
to power the camera from a common AC wall outlet. Simply plug the AC adapter
into the AC adapter connector under the connector cover on the left-side of
the camera and you're ready for extended operation.![]()
Use the Power Save feature on the camera to shorten the amount of time
that the camera stays on when not in use to save battery power. Kodak also recommends
that when you use the LCD on the camera, you should limit usage to less than
10 continuous minutes. Longer continuous usage places a severe strain on the
batteries, and will drastically shorten their useful life. If more than 10 minutes
is required, purchase the optional AC Adapter.![]()
Included Software
The DC200 Plus is packaged with a several different software packages for you
to use on your Windows-based PC. (As noted earlier, Mac users can purchase an
optional Mac connection kit, including software and cable, for $24.95.) The
furnished software is conveniently bundled on a single Installer CD: Simply
place the CD in the CD ROM drive of your computer and follow a few simple instructions
to install the software. Bundled software includes the following:![]()
Mounter Software: Lets you view pictures on the picture card and copy
selected pictures to your computer.
TWAIN Acquire Software: Lets you copy images from the picture card into TWAIN-compliant
software programs such as Adobe PhotoDeluxe, Adobe Photoshop, Corel PhotoPaint,
etc.![]()
Picture Easy Software: Lets you copy, edit and enhance, organize and
print pictures from your picture card.![]()
To keep the overall camera cost down, Kodak doesn't include any third-party
image-manipulation software with the DC200. The PictureEasy software provides
for basic image manipulation, albuming, and printing the photos from your camera.
If your needs don't include extensive image modifications, PictureEasy is probably
all the software you'll need.![]()
Test Results
In keeping with our standard policy, our comments here are rather condensed,
summarizing our key findings: For a full commentary on each of the test images,
see the DC 200 Plus' "pictures" page.![]()
As with all Imaging Resource camera tests, we encourage you to let your
own eyes be the judge of how well the devices performed: Explore the images
on the pictures page, to see how well the DC200 Plus performed, and how its
images compare to other cameras you may be considering buying.![]()
Overall, we were very impressed with the image quality from the DC200
Plus, particularly in light of its low price point: Exposure was consistently
accurate, with bright, clean colors, and good detail. "Kodak color"
has become a hallmark of the Kodak digital camera line, and the DC200 Plus shows
its heritage in this respect, having some of the best color we've found to date
in a digital camera, regardless of price. We also found the exposure metering
to be quite accurate at normal light levels, although it did underexpose somewhat
in very dim conditions.![]()
The DC200 Plus' resolution tested-out at a solid 600 lines per picture
height, a pretty typical value for cameras of this resolution level. We felt
it was a little bit "softer" shooting objects at infinity, as revealed
in the "far field" shot, but the loss of sharpness there is slight.![]()
The viewfinder systems are quite accurate, the optical viewfinder showing
fully 90% of the final image area, and the LCD finder exactly 100%. The optical
finder's view is well-centered in the final image area, particularly at moderate
distances.![]()
As you'd expect from a camera with a fixed-focus, slightly wide-angle
lens, the DC200 Plus doesn't excel at macro shooting (an understatement), but
the provision of 37mm filter threads makes adding accessory macro lenses a simple
affair.![]()
All in all, the DC200 Plus turned in a very respectable performance,
despite it's "low end" cost and feature set.![]()
Conclusion
In the DC200, Kodak has created a simple, easy-to-use megapixel-class digital
camera with excellent color and good image quality. By foregoing more-elaborate
features such as autofocus and zoom lens, it offers both simplicity and long
battery life (provided you minimize use of the LCD display). While not up to
the resolution levels of the latest 2 megapixel cameras, it's quite able
to create good-looking images up to 5x7 inches with a minimum of hassle. We
expect it to find a ready market among people looking for a basic digital camera
at a bargain price.
Reader Sample Images!
Do you have a DC200 camera? If you'll post an album of your samples
on one of the photo-sharing services and email us at [email protected],
we'll list the album here for others to see!
For More Info:
View the data sheet for the DC200![]()
View the test images from the DC200![]()

Follow Imaging Resource: