HP PhotoSmart 618HP's capable mid-level model offers 2.1 megapixels, an optical zoom lens, and ease-of-use.<<Operation & User Interface :(Previous) | (Next): Image Storage & Interface>> Page 9:Camera Modes & MenusReview First Posted: 03/19/2001 |
Camera Modes and Menus
Capture (Record) Mode: Accessed by turning the Mode dial to the green camera symbol, the Capture mode sets up the camera for recording images. The following exposure modes and options are available through the settings menus:
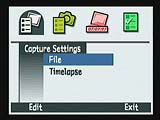 Capture Settings:
- File: Pulls up a submenu of file settings:
- File Type: Sets the file format to JPEG or TIFF.
- Quality Level: Determines the amount of JPEG compression, with options of Best (least compression), Better, and Good (highest compression).
- Resolution: Establishes the pixel resolution size of the image. Options are Full (1,600 x 1,200 pixels) and 1/4 Size (800 x 600 pixels).
- Color: Enables the Full Color, Black and White, or Sepia capture modes.

- Time-Lapse: Allows you to establish the number of Time-Lapse images to be recorded (from two to 1,000) and the interval between shots (20 options from 15 seconds to 24 hours).
- File: Pulls up a submenu of file settings:
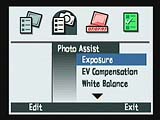 Photo Assist:
- Exposure: Places the camera into Auto, Landscape, Portrait, Action, Aperture Priority, or Shutter Priority exposure modes.
- EV Compensation: Adjusts the exposure compensation from -2 to +2 exposure equivalents (EV) in one-half-step increments.
- White Balance: Sets the white balance to Auto, Daylight, Tungsten, or Fluorescent to match a variety of light sources.
- Focus: Places the camera in Auto or Manual focus modes.
- AE Metering: Selects the camera's metering system. Choices are Average, Center-Weighted, and Spot.
- ISO Speed: Available in Aperture Priority and Automatic exposure modes only, ISO Speed adjusts the camera's light sensitivity to Auto, 100, or 200 ISO equivalents.
- Exposure: Places the camera into Auto, Landscape, Portrait, Action, Aperture Priority, or Shutter Priority exposure modes.
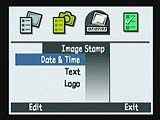 Image Stamp: Designates the type of image stamp recorded on each image, with the following submenus:
- Date & Time: Places the date and/or time that the image was recorded on the image, with options to select the Placement (one of four corners or center of the image), Transparency Level (clear, opaque, or semiopaque), Text Color (white, red, green, blue, turquoise, purple, yellow, or black), and background color (same as text).
- Text Stamp: Once enabled, allows you to create your own text message, then determine the placement, transparency level, text color, and background color.
- Logo: Prints a logo on the captured image, with five placement options. A set of downloadable logo files are available from the PhotoSmart website (www.hp.com/photosmart).
- Date & Time: Places the date and/or time that the image was recorded on the image, with options to select the Placement (one of four corners or center of the image), Transparency Level (clear, opaque, or semiopaque), Text Color (white, red, green, blue, turquoise, purple, yellow, or black), and background color (same as text).
 Preferences:
- Display: Pulls up a submenu of LCD display options:
- Brightness Level: Adjusts the brightness of the LCD monitor in values from one to seven.
- Instant Review: Turns off the Instant Review function, or sets the amount of time for the review display (from one to 30 seconds).
- Live View: Turns the Live View function on or off, which controls whether or not the LCD monitor automatically displays the image view when the camera is powered on. Turning this setting off reduces the amount of battery power consumption.
- Sleep Timeout: Sets the period of inactivity before the camera shuts itself off. Times range from 30 seconds to five minutes.
- Sound: Allows you to set the playback volume level and turn the camera's beep sound on or off.
- Format Card: Formats the memory card, erasing all files (even write-protected ones).
- PC Connect Mode: Establishes the type of connection to a computer, either a USB Disk Drive or Digita Device. (Digita devices, such as other HP digicams, use the infrared interface on the front of the camera to exchange images.)
- Date and Time: Sets the camera's internal calendar and clock, with various format options.
- Image Counter: Continuous Counter continues file numbering from one memory card to another; while Reset When Empty resets file numbering with each new card.
- Camera Name: Allows you to edit the camera's name by scrolling through and selecting letters from the alphabet.
- Language: Changes the LCD menu language to English, French, Italian, Spanish, German, or Japanese.
- Reset Settings: Resets all the camera settings to the factory defaults (except for language, date and time, PC connect mode, and video settings).
- Display: Pulls up a submenu of LCD display options:
Playback Mode: The traditional playback symbol (a rectangle surrounding an arrow) designates Playback mode on the Mode dial. Here, you can scroll through captured images, play them back in an automated slideshow, or enlarge captured images to 2x. Pressing the menu button displays the following Play Settings options:
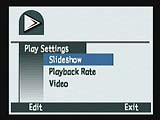 Slideshow:
- Content: Selects which images to include in the slideshow, all images or those grouped into a category.
- Duration: Sets the time interval that each image is displayed, from one to 10 seconds.
- Sound: Turns playback sound on or off (for sound clips recorded with images).
- Loop: Sets the slideshow to loop or play only once.
- Content: Selects which images to include in the slideshow, all images or those grouped into a category.
- Playback Rate: Allows you to set playback rates for time-lapse and grouped images, from one to 10 seconds.
- Video: Establishes the A/V Out signal as NTSC or PAL.
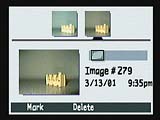 Review Mode: This mode is indicated on the Mode dial by a rectangular box with smaller boxes inside, representing the index view format that it employs. In Review mode, images can be viewed, edited, and organized. The Review settings menu offers the following options:
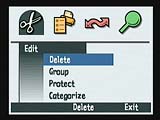 Edit: Offers the following edit tools:
- Delete: Deletes the current image, with an option to cancel.
- Group: Manages image groups. You can establish new groups and give them individual text names. Once a group is established, you simply select another image, and "Add" it to the group (by selecting Group and hitting the Add soft key). Groups can also be dissolved or deleted. When images are grouped together, a chain link connects the images on the index display.
- Protect: Write-protects individual images from accidental erasure or manipulation, except from card formatting. Protected images will be marked "Read Only" when transferred to a Windows computer.
- Categories: Assigns images to particular categories. The 618 has several preset categories, including Scenery, Vacation, Friends, Family, Pets, Work, and Circle. Assigning images to categories makes them easier to sort and play back in a slideshow. Unlike grouped images, categorized images are not linked together.
- Delete: Deletes the current image, with an option to cancel.
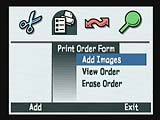 Print Order Form: Creates a DPOF file for printing images on compatible devices, with the following settings:
- Add Images: Adds selected images to the file, letting you choose the number of copies to be printed (from one to 999) and the print size (Standard or Index).
- View Order: Allows you to double check the DPOF file and verify the print number and size settings.
- Erase Order: Deletes the entire DPOF file.
- Add Images: Adds selected images to the file, letting you choose the number of copies to be printed (from one to 999) and the print size (Standard or Index).
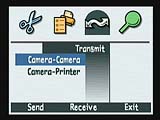 Transmit: Sets up the camera for transmitting images:
- Camera-to-Camera: Allows you to send or receive images from another Digita (HP) camera, via the infrared interface.
- Camera-to-Printer: Uses the JetSend infrared interface to send images to a JetSend printer.
- Camera-to-Camera: Allows you to send or receive images from another Digita (HP) camera, via the infrared interface.
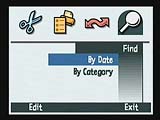 Find: Searches images on the memory card, either by date of capture or category.
PC Mode: This mode enables the camera to connect to a computer via the USB interface.

Follow Imaging Resource: