Nikon Coolpix 5000Nikon moves into the 5 megapixel era with a new chip, new lens, and new body, but no retreat from the legendary Nikon feature set!<<Shutter Lag & Cycle Time Tests :(Previous) | (Next): Camera Modes & Menus>> Page 8:Operation & User InterfaceReview First Posted: 9/18/2001 |
Operation and User Interface
The user interface on the Coolpix 5000 is very similar to that found in other Nikon Coolpix models, most notably the recent 995. The LCD menu system is available for novices, and for less commonly used controls, but experienced users will find they can make virtually all of the necessary adjustments for routine shooting without resorting to the LCD screen. Once you learn where the functions are, operation is quick and intuitive, thanks to the multiple control buttons and the excellent use Nikon makes of the black/white LCD readout and the Command dial. (Big kudos to Nikon on this point, it'll go a long ways toward conserving battery life.) The inclusion of programmable Function keys adds flexibility, allowing you to customize the camera to your specific shooting needs by moving frequently-used settings up to the two top-panel function buttons. Exposure compensation, exposure mode, ISO value, image quality and size, as well as focus controls (manual focus setting, macro, and infinity focus) and flash mode can all be adjusted without the LCD. The small monochrome LCD status display panel provides clear feedback for all these settings as well. When you do have to delve into the (very extensive!) LCD menu system, navigation via the Arrow rocker control is intuitive and quick. In Record mode, the menu system is split into 3 pages of options, with the nice touch is a tabbed interface, by which you can jump between pages with only a few clicks of the rocker button, rather than scrolling through every option on each screen. In normal operation, most of the camera's functions are controlled by a combination of hitting a button and turning the Command wheel, which makes it very fast and efficient to change settings without eating up battery power for the large LCD or wasting time scrolling through endless menu screens. Control layout is also very logical, allowing one-handed operation for commonly changed functions, requiring a two-handed approach only for manual focus setting, ISO, flash mode, and size/quality adjustment.
Control Enumeration
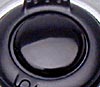
Shutter Button: Located on top of the camera (on the sloping front) and encircled by the Power switch, this button sets focus and exposure when halfway pressed and fires the shutter when fully pressed.
Power Switch: Surrounding the shutter button on the camera's top panel, this dial just turns the camera on or off.

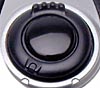
Mode/Func.1 Button: Just behind the Power switch on the top panel, this button selects the exposure system mode (Program, Shutter Priority, Aperture Priority, and Manual) when held down while turning the Command dial. In Manual exposure mode (meaning manual control over both aperture and shutter speed settings), a quick press of this button selects either the aperture or shutter speed setting, allowing you to change it by turning the Command dial. A second press selects the other exposure parameter. This button can also be programmed through the Setup menu to access various exposure functions with a single button actuation. (Exposure mode, landscape/macro/self timer, flash mode, white balance, exposure compensation, metering pattern.)

+/- / Func.2 Button: Directly to the right of the Mode button, this button adjusts the amount of exposure compensation (from -2 to +2 exposure equivalents (EV) in one-third step increments) when held down while turning the Command dial. This button can also be programmed through the Setup menu to access various exposure functions, the same as the Func. 1 button.
![]()
Func. Button: Just to the left of the Mode and +/- buttons, this button let you switch between any of four preprogrammed camera setups. You can set up the camera for three completely different shooting scenarios (or leave it in "auto" mode), and then switch quickly between them by pressing this button and rotating the command wheel. Menu items programmable via the user setups include white balance, metering pattern, continuous-shooting modes, Best Shot Selector, image adjustment (brightness/contrast), color saturation control, and adapter lens setting. Also memorized within each user mode are non-menu items such as exposure mode settings, flash mode settings, and exposure compensation adjustments. NOTE: I was puzzled by this until I read the manual. - None of the advanced features of the 5000 are available to you until you take the camera out of Auto mode via this button (or the menu system). (There! I just saved you reading the manual! ;-) The function controlled by the Func. button can be changed by a LCD menu option, to include user mode, focus setting, flash mode, white balance, or metering pattern. Very handy!
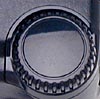
Command Wheel: Located in the far rear, righthand corner of the top of the camera, this rotary control is used in conjunction with many of the other buttons on the camera to change camera settings. Pressing the appropriate button and rotating this wheel one way or the other steps through the options available for the option in question. In programmed exposure mode, rotating this wheel at any time (e.g., with no button pressed) varies the exposure program, biasing it toward larger or smaller aperture settings. (A very handy way to control depth of field in your photos, without having to bother with the aperture priority exposure mode.)
![]()
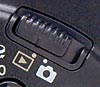
Diopter Adjustment Slider: Located directly beneath the optical viewfinder, this small, black slide control adjusts the viewfinder to accommodate eyeglass wearers.

Quick Review Button: With the LCD screen flipped around to face the user, the three buttons associated with it are arranged across the bottom. The leftmost of these buttons is the Quick Review button. Pressed once, this button calls up a thumbnail sized display of the most recently captured image while in either record mode, appearing in the upper left-hand corner. The left and right arrow keys scroll through the remaining captured images on the memory card. Pressed a second time, it expands the thumbnail view to a full-screen display of the captured images on the card, complete with an image information overlay. The Quick Review mode is canceled by pressing the button a third time, or by pressing the shutter button.
Menu Button: Located directly to the right of the Quick Review button, this button brings up the settings menu in all capture modes as well as in Playback mode. Pressing it a second time either switches to a second menu screen (if one exists for the mode you happen to be in) or cancels the menu.
Monitor Button: The rightmost of the three buttons beneath the LCD screen, this button recalls or cancels the color LCD screen information display and viewfinder display. Pressing the button multiple times steps you through a normal LCD display (with information overlay), a display of the image alone, with no overlay, or no display, with the LCD display turned off.

W/T Rocker Control: Located at the upper right hand corner to the right of the Menu button, these buttons control the optical zoom in all capture modes. Likewise, when the digital telephoto option is enabled, these buttons control the amount of digital zoom (from 1.1x to 4.0x). In single-image playback mode, pressing the "T" button repeatedly zooms in on the image (you can scroll around in the zoomed image by using the Arrow Rocker control). Pressing the "W" side of the control cancels zoomed playback. Pressing it again switches to 4-image thumbnail view, and another press switches to 9-image thumbnail view. Pressing the "T" side of the control steps back through the sequence in the other direction.
Play/Record Switch: Just under the W/T zoom control, this control switches between playback and record modes. (You can also enter playback mode by hitting the Quick Review button twice.)

Flash/ISO: This button is just below and to the left of the Play/Record switch. (Whoops! I need to reshoot this product shot, the labeling changed from the prototype that the photo at left was shot from - This button was apparently intended to control the thumbnail display in Playback mode, but that function is handled by the zoom lever on the production units.) Pressing this button in record mode sequentially steps you through the various flash modes available. (Auto, off, auto red-eye reduction, forced on ("fill"), forced on w/slow shutter). Pressing this button while rotating the command dial selects from among the ISO options. (Auto, 100, 200, 400, 800)
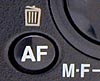
AF/MF/Trash Button: In record mode, pressing this button steps you through the various programmed focus modes (normal autofocus, landscape mode (infinity focus), macro mode, macro with self-timer). Note that the combined Macro/Self Timer isn't a problem, since the camera can focus all the way to infinity when in "macro" mode. - Macro mode simply allows the lens to traverse a greater range when focusing. Pressing this button while rotating the command wheel switches you to manual focus mode and sets the focus distance. In playback mode, this is the "trash" button, which calls up a confirmation dialog, asking if you want to delete the current image.

Quality/Size Button: Located at the bottom of the rear panel, this button cycles between image quality options (Basic, Normal, Fine, and Hi) in all record modes. (Although Hi (uncompressed) is only available for full-sized images.) In any record mode, holding this button down while rotating the Command Dial cycles through the image size settings [2,560 x 1,920, (UXGA)1,600 x 1,200, (SXGA) 1,280 x 960, (XGA) 1,024 x 768, (VGA) 640 x 480, (3:2) 2,560 x 1,704]. In Playback mode, if the currently selected picture is a movie sequence, this button initiates playback of it.
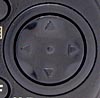
Arrow Rocker Toggle: Situated on the far right of the rear panel, this control features four arrows that allow the user to navigate through the LCD menu system and make selections in Record and Playback modes. Different menu items are selected via the up/down arrows. Pressing the right arrow selects the item, generally taking you into a sub-menu. Pressing the left arrow takes you back out again. Once in a sub-menu, the up/down arrows again step between items, while a right-arrow selects. This process continues until you arrive at the final point of selection, upon which another right-arrow actuation makes that selection and returns you to the main menu. (This is a very nice user interface implementation, with no need to switch to another button to make the selection itself: The Arrow Rocker both navigates and selects.) I was also pleased to see that I could left-arrow from the initial screen, to go to a set of tabs that let you quickly jump from menu screen one to two, or to the setup screen very quickly, without scrolling through all the menu entries first.

Follow Imaging Resource: