


Overview
Olympus E-PL2 Overview
The fifth model in the Olympus Pen series is a much simplified version of last year's consumer mirrorless model, with a new lens and a no-nonsense design. Where the E-PL1 had a more modern, artistic appearance, the E-PL2 would fit in well with the company's line of E-series digital SLRs. Along with the new body style comes a redesigned kit lens with fewer moving parts and a new twist: a bayonet mount on the front that accepts accessory lenses. The lens has the same focal range of 14-42mm (28-84mm equivalent), but with a quieter MSC ("Movie and Still Compatible") focus motor, more compact dimensions and a more solid retraction mechanism.
The Olympus PEN PL2 differs from the previous PL1 model in a number of important ways. The body styling has been adjusted, providing a more comfortably sized grip, and features a recessed power button, direct movie button, and the familiar rear-panel control wheel seen on the P1 and P2 models.
The rear-panel LCD display on the Olympus PL2 has been upgraded to a larger 3.0-inch type with double the resolution of that on the PL1, at some 460,000 dots. There's a new Live Guide function demonstrating the effect of adjustments to shutter speed, aperture, exposure compensation, white balance, and saturation adjustments during composition, and this now works not only for stills, but also for movie capture. A new Dramatic Tone art filter has been added, simulating the look of a contrasty HDR image, and there are now post-capture filter variations available to tweak the look of any particular filter effect. Filter effects can also now be combined, for example to use both pin hole and soft focus effects on a single image.
The fastest shutter speed on the Olympus PL2 has been boosted from 1/2,000 to 1/4,000 second, making it easier to freeze fast subject motion, and the maximum ISO sensitivity doubled from ISO 3,200 to ISO 6,400 equivalent, though base ISO has also doubled to 200. Maximum flash sync with the built-in flash has also been increased from 1/160 to 1/180 second. There's a new cable release option, and the accessory port above the LCD display has been upgraded to provide for new accessory types not compatible with previous PEN cameras. This includes the new PP-1 PENpal Bluetooth accessory which allows wireless image transfer to other Bluetooth devices.
Face detection in the Olympus E-PL2 has also been upgraded, and now ensures that the camera will set focus specifically on your subject's nearest eye, rather than possibly focusing on a different area of the face, leaving the eyes unfocused. This should yield more pleasing results, since your subject's eyes are generally the most important part of the scene.
Other changes in the Olympus PL2 include support for the latest generation SDXC cards, as well as the previous SD and SDHC types, plus three added background music choices for slideshows (nostalgic, love, and beat), three new scene select modes, and a new battery pack type, the BLS-5 lithium-ion pack which is CIPA rated at 280 shots per charge.
The Olympus PEN E-PL2 is available now for around US$600 with the new 14-42mm kit lens. New accessories for the PL2 will include a PT-EP03 underwater housing for use at up to 40 meters (130 feet), Fish-eye Lens Converter (FCON-P01), Wide-angle Lens Converter (WCON-P01), Macro Lens Converter (MCON-P01), Macro Arm Light (MAL-1), and PENpal PP-1 Communication Device.
Olympus E-PL2 User Report
by Shawn Barnett
Olympus has revamped its consumer Pen compact system camera (CSC), or mirrorless camera, with a simpler design and a new, smaller kit lens that also allows mounting of relatively inexpensive accessory lenses. While it's arguable that the black version of the E-PL2 has lost some of the E-PL1's unique flair, those looking for uniqueness can choose from among the silver, red, and white versions.

Major physical changes to the E-PL2 include a better-sculpted grip with a leather-like rubber texture, and the noticeably smaller barrel on the kit lens. Though all features of the outer body are completely resculpted, the dimensions of the E-PL2 are almost exactly the same. An unfortunate change for video is the switch to strap lugs, which require noisy D-rings to attach a camera strap, while the E-PL1 was the only Pen to have larger steel lugs that connected directly to a cloth strap. Since I carry these cameras without straps, I just remove the D-rings and move on.
The most encouraging sign with the new lens design is that while it still compresses down for easier carry, it now consists of only one major moving barrel element when the lens is deployed for use. The original 14-42mm kit lens deployed three barrels, resulting in noticeable looseness that ultimately translated into image blur at certain shutter speeds, something we detailed extensively in the E-P1 writeup. This new lens design is much tighter, though we have not yet tested to see whether it causes image blur. The old 14-42mm lens design also focused externally, with the last element moving in and out as well as rotating while focusing, whereas the new design focuses internally. All of these are encouraging improvements.

Another prominent feature of the new kit lens is the bayonet mount on the front, which sticks out noticeably even with the lens fully retracted. Here's where users can attach three newly announced accessory lenses: the Fisheye (FCON-P01), Wide-angle (WCON-P01), and Macro (MCON-P01) lens converters. The 14-150mm and 40-150mm lenses can also accept the Macro conversion lens, though there must be some kind of step-down adapter for the 14-42mm lens to work with it, as the bayonet mount on the latter two telephoto lenses are larger, at 58mm, while the mount on the kit lens is spec'd at 37mm (that's actually the measurement of the internal diameter, but apparently it's close enough).
At right is the silver model of the E-PL2, which includes a silver-barrelled kit lens to match the body. The Wide-angle converter is shown attached to the 14-42mm kit lens. With the Wide-angle converter, it changes the minimum focal length to 10mm on the kit lens.
Also new to the kit lens is its MSC designation, which stands for Movie & Still Compatible. Each lens with this designation has a silent focus motor that is faster than past designs, and better for movie recording. Olympus says it makes the lenses "exceptionally fast and nearly silent" when recording movies.

The Olympus E-PL2, like its predecessors, employs the Supersonic Wave Filter dust-removal system which vibrates the coverglass over the sensor at 30,000 times per second to shake off dust. All lenses are also stabilized thanks to the E-PL2's integrated sensor-shift image stabilization.

The top view shows the E-PL2's new lens in its retracted position. Simply rotate the barrel to the left to deploy the lens, and slide the lock switch forward to retract it again. The pop-up flash is released manually with the slider on the back of the camera, where it swings up and forward. Just right of the hot shoe are two holes for the microphone, the Mode dial, the Shutter button, and the Power button. A small blue LED just to its left lights up when the Olympus E-PL2 is powered on.


PP-1 PENpal Communication Device
A few minor improvements to the consumer Pen design are found on the back, making some controls better conform with the rest of the Pen-series cameras. Covered in this shot is the new Accessory Port, which enables use with a couple of new accessories, and the port is labeled AP2 to indicate this broader compatibility. The PP-1 PENpal Communication Device is a Bluetooth accessory which allows the E-PL2 to transfer pictures wirelessly to other Bluetooth devices, such as cell phones, printers, other E-PL2 bodies with the PENpal attached to them, and even to your computer, so long as it has Bluetooth support.

MAL-1 Macro Arm Light
Another new accessory compatible with the AP2 accessory port (as well as the older port found on the E-P2 and E-PL1) is the MAL-1 Macro Arm Light, which includes two daylight-balanced LED lamps on the end of flexible arms that are a little over 6 inches long. Perfect for illuminating macro subjects such as auction items, the MAL-1 lets you preview its illumination on the camera's LCD display, since the LEDs are permanently illuminated. That makes it rather easier for amateurs to use, compared to traditional strobes used for macro photography. The lamp at the end of each arm can be enabled or disabled separately, and its brightness adjusted to one of two intensity levels.
Four round buttons now line the right side of the display, reminiscent of the E-P2's controls, except that they don't have the same functions as that model. Info and Menu buttons appear above and below the new control wheel. The E-PL1 had a four-way navigator, but the E-PL2's control wheel serves as both a four-way and a dial, again like those of the earlier two Pens. The upper right corner has the Record button, and just left of that are eight holes for the speaker. Another upgrade is the new 3-inch LCD with 460,000 dots, the highest resolution on a Pen camera yet, and also larger than the E-PL1's 2.7-inch display.
Overall, the E-PL2 seems like a more mature offering, and though it's lost some of its visual appeal (at least, for the black model), it's gained in utility and portability, thanks to the smaller kit lens, better grip, and higher resolution LCD. The display alone is a noticeable improvement over all of its predecessors, offering better manual focusing and image review. The other improvements are just icing on the cake.
Shooting with the Olympus E-PL2
by Dan Havlik

There are some out there who may think I've been too hard on Olympus's Pen cameras in the past. In my defense, I would say my basic criteria for a good compact camera are actually not that high: I need it to feel comfortable in my hand; it should operate fairly quickly; and it should be relatively easy to use. And while I liked the style and features of the Olympus Pen EP-1 and EP-2, I found them to be awkward, slow, and, at times, unnecessarily complex cameras to shoot with. They did sport a very cool retro look but I just couldn't depend on them for quick, candid shooting in variable lighting conditions.
Released last year, the Olympus E-PL1 was an arguably less stylish camera for consumers but one I found to be much more photographer-centric. Some additions to that camera I liked included faster autofocus, improved noise control when shooting at high ISOs, a built-in flash, and a camera build that while not as sexy as its predecessors, was lighter and more portable. Sure, the E-PL1 was aimed at consumers, but photographers looking for an affordable compact system camera would probably enjoy that less expensive model more than its fancier predecessors.
With the new 12.3-megapixel Olympus E-PL2, which like its predecessors uses a Micro Four Thirds sensor, the Pen line has been improved even further, offering a host of upgrades in a very enjoyable picture-taking package. While I still have some quibbles with its user-interface -- particularly its antiquated and confusing menu system -- the E-PL2 is another step in the right direction for Olympus' Pen line of cameras.
Black Adder. After getting a black-colored test sample of the Pen E-PL2, my initial impression was that Olympus had dulled down the appearance of the camera. But after shooting with it for over a month, I've come to like the less flashy exterior of the Olympus E-PL2 because it's much more functional. And, as noted earlier in this review, if you're looking for a more chic camera, the silver, red, or white versions of the E-PL2 should turn some heads.
Olympus has beefed up the textured faux-leather handgrip on the E-PL2 without adding extra bulk to the camera. There's more of a lineage to digital SLR cameras with the E-PL2 than rangefinders and, from a usability standpoint, that's a wise move. The Olympus E-PL2 is comfortable to hold, has good balance, and feels serious but not pretentious. There's a simplicity to the design of the camera and several small but important changes such as the recessed on/off button, a new dedicated movie button, and a control wheel on back instead of a circle of buttons as on the previous model.

A word about the buttons in general on Olympus E-PL2. They're frightfully tiny and while that is either an aesthetic choice or because Olympus' designers thought it might prevent accidental camera alterations, they really are too small for a western man's hands. The rear panel control wheel and its center OK button, is also miniscule and easy to fumble over when trying to make adjustments. (The discreet pop-up flash is also tiny but worked surprisingly well in actual use, though it didn't perform well in our tests.) On the other hand, the three most important controls -- the shutter button, the knurled control dial, and the direct movie button are larger and easy to use on the fly.
Also bigger and better is the Olympus E-PL2's 3-inch LCD screen on back which has 460,000 dots of resolution for image playback that is sharper and brighter than any of the previous Pens, which were limited to 230,000 dots. The increased resolution also helps compose images in live view on the rear display. Like the previous model, the Olympus E-PL2 has no built-in optical viewfinder, though Olympus offers an electronic viewfinder (VF-2, $249) as an optional accessory. I find the optional EVF, which slides into the accessory port on the rear of the camera below the hotshoe, makes the otherwise svelte camera too clunky.

New lens. The Olympus E-PL2's new 14-42 kit lens had better edge-to-edge sharpness, which is ideal for wide-angle shots.
Lens Upgrade. One "smaller-is-better" change I liked is the new and improved 14-42mm f/3.5-5.6 (28-84mm equivalent) "mark II" kit lens. As with the previous kit lens -- which had the same basic specs -- you can compress this one down, making it more portable. When it telescopes out to its full zoom length, though, it uses only one major moving barrel element rather than three as on the previous version. The benefit is twofold: it has a shallower profile, and it doesn't loosen up like the previous kit lens, which resulted in image blur at certain shutter speeds. (This problem was detailed, at length, in our review of the E-P1 from last year.)

Macro. The new kit lens also did a pretty decent job capturing Macro shots of icicles.
In my testing of the Olympus E-PL2, the tighter lens produced generally sharper results than the previous model. Along with locking in (and staying locked) on moving subjects, the kit lens gave me better sharpness in the corners in wide shots I captured of the George Washington Bridge. I also liked some of the versatility Olympus has added to the 14-42mm lens, in particular the bayonet mount on front which pairs with three new accessory lenses: Fisheye, Wide-Angle, and Macro lens converters. I didn't get a chance to play with any of these converters but I like having them as an option. The bayonet mount on the front does make the lens a little longer, by about 6mm, but the circumference of the lens is reduced, along with the weight.

Video. HD video from the E-PL2 is a little soft, whether in bright daylight or at night. We can only suspect noise suppression is at work, as the files are quite large. (Click to download 65.4MB AVI file.)
Making Movies. Olympus calls the 14-42mm an MSC Lens, as in Movie & Still Compatible. That's mostly because it's designed to be quieter (and faster) when you focus in on a subject so no distracting focusing sounds are picked during HD (720p) video capture. In my testing this was fairly effective, though, as Shawn mentioned earlier in the User Report, the chattering metal D-rings that tie in the neck strap can get picked up in your video footage if you're not careful. Like its predecessor, there's only a monaural microphone built-in for recording sound. If you plan on recording a lot of video with the Olympus E-PL2, I highly recommend purchasing the optional SEMA-1 stereo microphone accessory ($65) but, like the EVF, it makes the camera slightly bulkier.
Overall, I was quite happy with the new lens, which benefits from the Olympus E-PL2's integrated sensor-shift image stabilization to help decrease blur. And like the previous models, the camera employs Olympus's Supersonic Wave Filter dust-removal system which vibrates the coverglass over the sensor at 30,000 times per second to shake off dust.

Night. Whereas the E-PL1's video was very noisy, the E-PL2's is much less so, though it's also quite a bit softer overall in low light. (Click to download 52.1MB AVI file.)
As an HD movie camera, the Olympus E-PL2 fared well in my testing, about on par with its predecessor which had the same 720p, 30 fps specs. As mentioned already, though, the direct movie button on back of the Olympus E-PL2 adds a lot to the user experience with this camera. If you want to shoot a movie, just hit the button and you're rolling; no need to touch the Mode dial. Of course, if you want to shoot video in Program, Aperture, Shutter speed, or any of six ART filters, you'll need to engage the Movie mode.
Speed Boost. When it comes to operational speed, the Olympus E-PL2 is significantly bumped up from previous models. I experienced no evidence of the sluggish (and nauseating) wobble on the LCD screen when the camera employed its contrast-detection autofocus system. That annoying AF jiggle on the screen, which marred previous Pen models, was not only distracting, I found myself often missing candid shots because of the wonky focusing.
With the E-PL2, I didn't have to even think while taking the camera on a stroll through my neighborhood in upper Manhattan on a snowy winter day. See an interesting scene, press the shutter, take the picture. I know that doesn't sound that complicated but when your camera is not cooperating, it can be very frustrating.

Diorama. The Diorama filter produces a look that's similar to a tilt-shift lens, making these people look miniature. For the best result, shoot from a high place looking down.
Full AF shutter lag was considerably better on the Olympus E-PL2 compared to its predecessor: 0.43s at wide-angle in single-area mode, compared to 0.95s. Very nice! While that may be slower than the average DSLR, it's still faster than most point-and-shoot cameras with contrast-detection autofocus. Our lab calculated the E-PL2's cycle time at 1.03 seconds per shot in single-shot JPEG mode, which is better than the E-PL1's 1.60 seconds per shot speed. In continuous mode, the Olympus E-PL2 is capable of three frames per second.
Even when photographing people, in particular fidgety small children, the Olympus E-PL2 did a good job keeping with the action. Speaking of photographing children, there's actually a Children mode in the Scene modes setting, which automatically increases the ISO and shutter speed to help freeze the action in photos when kids are running around. Another important bump up is the Olympus E-PL2's new maximum shutter speed of 1/4,000 second (from 1/2,000 second on the E-PL1.) For shooting sports or any kind of intense action, that faster shutter speed makes a difference in good light.

Dramatic Tone. We were also big fans of the new Dramatic Tone filter which simulates a crunchy HDR style. It worked great on overcast days, creating ominous looking clouds.
Getting Artsy. Admittedly, it took me a while to warm to Olympus' in-camera art filters on its Pen models but with the E-PL2, I'm really loving them. I think what really sealed the deal for me with these filters -- selectable in the menu system when you turn to the Art setting on the mode dial -- is the new Dramatic Tone function. The Dramatic Tone effect has been compared to HDR (High Dynamic Range) photography but it's done in one shot, not by combining a series of three. I'm actually not much of an HDR fan -- especially when it's done to create very surreal effects -- but Dramatic Tone has me hooked. When shooting with it on an overcast wintery day in New York City the effect was, um, quite dramatic. Dramatic Tone does a great job with adding darkness and contrast to clouds, making them seem particularly ominous. I captured brooding shots of the GW bridge, the surrounding waterfront, and nearby train tracks using this filter.

Moody. Art filters abound on the E-PL2. We liked the B&W Grainy Film filter for gritty street shots.
Some other camera companies have also adopted art-filter-like effects in their cameras but I think Olympus's are the best. I also liked the grainy B&W effect, the pinhole effect, and the pop art effect. Here's a suggestion for Olympus, though: I'd love to see an art filter that adds a blurry background to a portrait, similar to the creamy "bokeh" effect you get with a professional lens with a fast aperture. There's a way to create this effect using the E-PL2's Live Guide II system (more about Live Guide II below), but I think it'd be easier just to have it as a filter.

Pop! Colors really zing with the Olympus' Pop Art filter, brightening the graffiti on this wall.
Another nice bonus with its latest art filters: Olympus now allows you to combine two of them together and make other enhancements so you can, for instance, shoot a grainy B&W image and then overlay a pinhole effect for a very old-timey look. There's also a way to capture a Dramatic Tone image and then put an art frame around it. One knock against combining filters is it's not clear how to create the effect via the camera menus and the Olympus E-PL2's manual does a poor job of explaining it.

Live Guide II. Finding Live Guide II was a little frustrating at first, and then using it seemed cumbersome as well. It's designed to be easy, so you can only do one modification at a time, while experienced photographers will wonder why you can't do several things at once.
Live Guide II & Menu System. This is a good place to segue into my biggest criticism of the Olympus E-PL2: it's still unnecessarily complicated. A good example is the revamped Live Guide II, which offers in-camera adjustments and tips when shooting stills or movies. It's the one feature that shouldn't be complicated. While I can see some benefits to offering this sort of thing to beginners, users will have a hard time even finding the feature in the camera. I know I did, and I've been reviewing photo gear for quite some time.
I had to dig through the manual to find out that I had to be in the iAuto mode and then press the OK button to call up the Live Guide II. Then if you scroll down and pick one of the various options -- Change Color Saturation, Change Color Image, Change Brightness, etc. -- you can't go directly back to the choices, instead you have to go to the main menu and start all over again. Also, some of the Shooting Tips seem to suffer from a poor translation from Japanese, such as this advice for shooting flowers: "Shade of cloud or parasol makes shadow of flowers softer."

Grainy. Here's an interesting effect made with the Grainy Film Art Filter. Frame rate is reduced noticeably. (Click to download 25.2MB AVI file.)
Some of the menu system choices while in iAuto mode seem baffling as well. For example, when you press the menu button, the first thing that pops up is "Card Set-up" and the first option is "All Erase." For novices, this is playing with fire. I was also irked that there was no way to adjust ISO in this mode.

Live Control Menu. Scrolling through options is easy with the Live Control Menu; up and down arrows allow you to select what you want, while left and right select among options. The optional Super Control Panel brings up a grid that's also easy to adjust with the control wheel.
Adjustments. Making adjustments to the controls is cumbersome if you continually go back to the menu, because it's fairly antiquated, but thankfully Olympus has provided two options for quick access to most of the items you'd want to adjust on the fly, via the Live Control Menu, with the option of the Super Control Panel that appears on Olympus' digital SLRs. Activated via the Control Settings option in the Custom Menus (yes, you have to dig for it), the Super Control Panel is preferred by some, while the Live Control Menu serves just fine for others.
High ISO. When I saw that the Olympus E-PL2 can shoot up to ISO 6,400, I was a little uneasy. My experience with Pen cameras in that past was that despite the Micro Four Thirds chip, which is close in size to what you'd find in most digital SLRs, they struggled when shooting at above ISO 1,600 in low light. Yet even ISO 6,400 produces a decent 5x7-inch print. Unfortunately, though the E-PL2 performs admirably at all its ISO settings, its default noise suppression is more aggressive than past models, reducing detail a little when compared to the E-PL1. As a result, we recommend that those who want to get more detail out of their prints later should shoot RAW files. They'll get even greater low-light performance than our JPEG crops and printed results indicate.
In decent light at ISO 800 and below, the Olympus E-PL2 produces excellent photos. As mentioned earlier, the kit lens had solid corner sharpness at wide-angle and telephoto. There was very minor Chromatic aberration at telephoto, but at wide-angle it was a little more noticeable. There was very little, if any, geometric distortion at telephoto, and some at wide-angle. Overall, though, the Olympus E-PL2 produces very high quality photos in a range of lighting conditions, which is why you'd want a compact system camera to begin with.
For more about the E-PL2's image quality see our ISO 1,600 crops below, as well as the Print Quality, then visit the Image Quality and Optics pages, as well as the Performance pages.
Olympus E-PL2 Image Quality
Most digital SLRs will produce a reasonable ISO 100 shot, so we like to push them and see what they can do at ISO 1,600. Recent advances in sensor technology have made ISO 1,600 look a lot more like ISO 100, but there are still cameras whose quality starts to fall apart at this setting. I also choose 1,600 because I like to be able to shoot at least at this level when indoors and at night.
Olympus E-PL2 versus Olympus E-PL1 at ISO 1,600
 |
 |
 |
 |
 |
 |
|
Olympus E-PL2 at ISO 1,600
|
Olympus E-PL1 at ISO 1,600
|
|
Two aspects seem to have changed between the Olympus E-PL2 and E-PL1: Default noise suppression is stronger in the E-PL2, and sharpening has been turned down. There is slightly less chroma and luminance noise in the shadows in the E-PL2's images, and sharpening halos are less prominent. Detail in the mosaic image is also less distinct. The red leaf swatch is darker and less detailed, and the pink fabric beneath does not show the weave pattern that we see in the E-PL1. We can only imagine that you could approximate the results from the E-PL1 by reducing noise suppression strength and increasing sharpening.
|
|
Olympus E-PL2 versus Panasonic GF2 at ISO 1,600
|
 |
|
 |
|
 |
|
Olympus E-PL2 at ISO 1,600
|
Panasonic GF2 at ISO 1,600
|
|
Despite the reduction in sharpness and greater noise suppression, the E-PL2 still manages to edge out the Panasonic GF2 in overall JPEG performance. Shadows are a little less noisy, while detail is slightly sharper at ISO 1,600. Color is muted in the GF2 shots, and yellows especially have a green cast. The E-PL2 even does a little better with the red leaf swatch.
|
|
Olympus E-PL2 versus Samsung NX100 at ISO 1,600
|
 |
|
 |
|
 |
|
Olympus E-PL2 at ISO 1,600
|
Samsung NX100 at ISO 1,600
|
The E-PL2 does a better job with shadow noise, but it stomps on low-contrast detail in the mosaic image a bit more than the NX100. The E-PL2 does a little better with the red leaf swatch, though, and the pink swatch beneath it is more true to the color of the original swatch, even if detail is less pronounced. |
|
Olympus E-PL2 versus Sony NEX-5 at ISO 1,600
|
 |
|
 |
|
 |
|
Olympus E-PL2 at ISO 1,600
|
Sony NEX-5 at ISO 1,600
|
The Sony NEX-5 does a little better overall, but its rendering of the background in the top crop shows considerably more aggressive noise suppression, making the background look out of focus. Even the gold bottle seems a little blurry, until you get to the letters, which are slightly oversharpened compared to the E-PL2. The NEX-5 retains more information in the mosaic file, though, and gives a little more character to the red leaf swatch. |
|
Olympus E-PL2 versus Nikon D5000 at ISO 1,600
|
 |
|
 |
|
 |
|
Olympus E-PL2 at ISO 1,600
|
Nikon D5000 at ISO 1,600
|
|
The E-PL2's more aggressive noise suppression manages to clean up more luminance noise than the Nikon D5000 does, yet the label text is cleaner. Detail in the mosaic image is soft in the D5000 shot, but there's still more to work with when sharpening afterward. Among the cameras we've looked at here, the Nikon D5000 also does the best with the red leaf swatch.
|
|
Detail: Olympus E-PL2 versus Panasonic GF2, Olympus E-PL2, Samsung NX100, Sony NEX-5, Nikon D5000
 |
 |
 |
 |
 |
 |
 |
 |
 |
 |
 |
 |
|
Olympus
E-PL2 ISO 200 ISO 3,200 |
Olympus
E-PL1 ISO 100 ISO 3,200 |
Panasonic
GF2 ISO 100 ISO 3,200 |
Samsung
NX100 ISO 100 ISO 3,200 |
Sony
NEX-5 ISO 200 ISO 3,200 |
Nikon
D5000 ISO 100 ISO 3,200 |
|
Detail comparison. Looking at high-contrast detail can also be informative, so we prepare these crops from the lowest ISO and ISO 3,200 in this case. There's a stand-out difference between the E-PL2 and the E-PL1, the latter having greater contrast overall between the white label and black letters, while the E-PL2 looks more like the competition: more true to life, but less punchy overall. The E-PL2 does better than the GF2 at ISO 3,200, and retains the red better as well. Likewise with the Samsung NX100. The Sony NEX-5, however, does better than the E-PL2 at ISO 3,200. The E-PL2 also seems to produce sharper image quality than the Nikon D5000 at both settings.
|
|||||
Overall, this is a little less than we expected from the E-PL2 at ISO 1,600. We were similarly disappointed with the Panasonic GF2's ISO 1,600 performance when compared to others, so be aware that raising ISO to 1,600 will cost you some detail when compared to the E-PL1 and E-P2, at least at default settings. We think the E-PL2 edges the GF2 at 1,600, but we'd still recommend capturing a RAW image for important shots so you can get as much detail as possible. As it is, though, the Olympus E-PL2's ISO 1,600 images look pretty good printed at 13x19 inches. Not bad for ISO 1,600 from a such a small camera.
Olympus Pen E-PL2 Print Quality
 Peeping at pixels onscreen is only worth so much. It's when we print the images that we get to the relevant performance of a camera's lens and sensor.
ISO 200 shots appear a little soft on close inspection when printed at 20x30 inches, which is about right for a 12-megapixel image. A better starting point is 16x20 inches, where detail is crisp, and color excellent.
ISO 400 shots also look quite good at 16x20, with great color and detail.
ISO 800 images are surprisingly good at 16x20 inches, still. Only a slight bit of noise starting to appear in the shadows, while color and detail remain strong; naturally, reducing to 13x19 inches really tightens everything up.
ISO 1,600 are quite usable at 13x19, with softness only in the red leaf swatch.
Luminance noise starts to creep in more at ISO 3,200, making a somewhat noisy 13x19-inch print, but one that's still usable. Reduction to 11x14 leaves the feel of graininess in the shadows, but color and detail are quite good.
ISO 6,400 images are grainier still, and both color and contrast suffer at 11x14. Detail comes back to a usable level at 8x10, but color's still quite faded. At 5x7, though, the prints look pretty good. Reds are still soft and muted, but it makes a decent print nonetheless.
All told, prints from the Olympus E-PL2 look great. It's an impressive performance that a camera this small with a smaller sensor than most SLRs can produce 16x20-inch prints from ISO 200 to ISO 800 with only minor degradation in quality. And making a 5x7 from an ISO 6,400 print is also quite good. Last year's E-PL1 didn't offer ISO 6,400, but its prints were a little more comfortable being printed at 20x30 inches.
In the Box
The Olympus E-PL2 ships with the following items in the box:
- E-PL2 body
- 14-42mm II lens (if purchased as a kit)
- Body cap
- Lens cap (if purchased as a kit)
- Accessory port cover
- Lithium-ion battery BLS-5
- Battery charger BCS-5
- AV Cable
- USB cable
- Shoulder strap
- Olympus [ib] CD-ROM
- Instruction manual
- Warranty card
Recommended Accessories
- Extra battery pack for extended outings
- Large capacity SDHC/SD memory card. These days, 4-8GB cards are inexpensive.
- Camera case for outdoor and in-bag protection
Olympus Pen E-PL2 Conclusion
| Pro: | Con: |
|---|---|
|
|
Though I've admired Olympus' Pen-series compact system cameras in the past for their stylish designs and bounty of features, I didn't find them to be particularly enjoyable to shoot with. Until now. With the 12.3MP Olympus Pen E-PL2, the company has gone a long way to correcting many of the problems that have plagued this line in the past. In particular, the Olympus E-PL2 is a faster and more enjoyable camera to use all around; starting up quicker, focusing quicker, and capturing images quicker. Where the Contrast detection-based autofocus system on past models was slow and produced an annoying wobble on the LCD screen, the AF on the E-PL2 is smooth, fast, and responsive. The revamped and tighter 14-42mm kit lens that comes with the Olympus E-PL2 uses fewer moving parts, which prevents some of the problems with image blur that occurred at certain shutter speeds with the previous lens. Though it may not be as stylish looking as other Pen cameras, we came to really like the understated and more ergonomic design of the Olympus E-PL2, which reminded us more of a DSLR than a rangefinder. From a practicality standpoint, this is a good thing. Most importantly, image quality is still excellent and high ISO images remain quite usable, with even ISO 6,400 images producing a good 5x7-inch print.
The Olympus E-PL2 is not without a few issues, however, including a confusing menu system that doesn't seem like it's been updated in over a decade. Live Guide II, a menu-based system that's supposed help novices take better and more interesting photos, is difficult to access and some of the shooting tips suffer from a bad translation. Also, we weren't so keen on the small buttons on the camera or on the fact that there's no dedicated ISO button. (Note: you can program the four-way controller's down or right arrow pad to be ISO among other things, but then you lose its default function.) Of course, you can use the Live Control Menu or Super Control Panel to make quick onscreen adjustments with a press of the (tiny) OK button.
Overall, we were extremely pleased with the Olympus E-PL2's performance in most of the important picture-taking areas, and we're happy to name it a Dave's Pick.
Optics
Olympus E-PL2 Optics
Olympus M.ZUIKO Lenses
 The Olympus E-PL2 is compatible with any Micro Four Thirds lens, with Olympus and Panasonic together having shipped a total of seventeen lens models at the time of writing (February 2011), eighteen if you include Panasonic's 12.5mm f/12 3D lens. Olympus has designated their Micro Four Thirds lenses "M.ZUIKO," and so far seven M.ZUIKO lenses have been released.
The Olympus E-PL2 ships with a new, smaller kit lens than the E-PL1 shipped with. The new lens is dubbed M.ZUIKO 14-42mm f/3.5-5.6 II. Click on the link to see the full review of this lens on our sister site, SLRgear.com. Compared to the previous 14-42mm M.Zuiko, this new lens features an updated design for its optics, autofocus drive, and barrel. In our testing of the previous lens, we found that its collapsing design induced some issues with vertical blurring in images shot at shutter speeds of between around 1/100 and 1/200 second. We're happy to report the new lens seems to have solved this issue. (More on this when we post the full review.)
Focal range and maximum aperture are unchanged from the previous lens, but the previous model's collapsing mechanism has been replaced with a new two-stage design. A change in optical formula for the new lens allows a reduction in weight of some 25%, which falls from 150g in the old model to 112g in the new one. Where the previous lens had nine elements in eight groups, including two aspheric lenses, one extra-low dispersion lens, and one high refractive lens, the new model has an updated optical formula with one less element. With eight elements in seven groups, the new design has no ED or HR elements, but adds one additional aspheric element, for a total of three. The new lens also has a smaller barrel diameter of 56.5mm (down from 62mm), but increases the collapsed length from 43.5mm to 50mm. Filter size has been reduced from 40.5mm to 37mm, which should somewhat reduce the cost of filters.
Another significant change in the new lens design is the adoption of Olympus' MSC (Movie & Still Compatible) design, as seen previously in the M. Zuiko Digital ED 9-18mm F4.0-5.6 and M. Zuiko Digital ED 14-150mm F4.0-5.6 lenses. Olympus MSC lenses have autofocus motors which are tuned to focus quickly and accurately, as well as silently, making them better-suited for high-definition movie recording. The new design also focuses internally, whereas the old 14-42mm lens design focused externally, with the last element moving in and out as well as rotating while focusing. All of these are encouraging improvements. Minimum focusing distance is unchanged at 25cm, but the maximum magnification is now 0.19x (equivalent to 0.38x on a 35mm camera), versus 0.24x (0.48x equivalent) in the previous design. As with the old design, the new lens has a seven-bladed circular aperture.
Another prominent feature of the new kit lens is the bayonet mount on the front, which sticks out noticeably even with the lens fully retracted. Here's where users can attach three newly announced accessory lenses: the Fisheye (FCON-P01), Wide-angle (WCON-P01), and Macro (MCON-P01) lens converters. The 14-150mm and 40-150mm lenses can also accept the Macro conversion lens, though there must be some kind of step-down adapter for the 14-42mm lens to work with it, as the bayonet mount on the latter two telephoto lenses are larger, at 58mm.
In addition, no less than nine different adapters make it possible to mount a wide selection of current and historic glass on a Micro Four Thirds camera. Lenses that can be adapted include certain standard Four Thirds, Olympus OM, Leica M / R, Voigtlander VM / Ai-S / PK-A/R / KA, and Carl Zeiss ZM / ZF / ZK types. These adapters generally have some limitations as to compatibility and available features, which will depend on the specific model being used.
Because the E-PL2 features in-body image stabilization, Olympus' M.ZUIKO lenses do not themselves incorporate optical image stabilization.
Some Panasonic Micro Four Thirds lenses offer image stabilization and work with the Olympus E-PL2, but
note that you have to disable one or the other image stabilization system.
Olympus E-PL2 Sensor Cleaning
The Olympus E-PL2 features an ultrasonic dust-reduction system, especially important since the E-PL2's shutter is normally open for full-time Live View. The system automatically runs at power-up, and unfortunately, there is no option to disable it or run it manually, as it does contribute to startup time.
We have found that in-camera dust-removal systems are less than perfectly effective. You're still going to need to use a sensor-cleaning kit fairly often, so the advantage of in-body dust removal is perhaps less than it might seem. If you've got dust specks on your sensor (and sooner or later you will), you're going to need to clean it. There are a lot of products out there intended to address this need, but a distressing number of them work poorly (if at all), and many are grossly overpriced. Advertising hype is rampant, with bogus pseudo-scientific jargon and absurd product claims. And prices -- Did I mention prices? How about $100 for a simple synthetic-bristle brush?
So how do you know what product to use?
We don't pretend to have used everything currently on the market, but we can tell you about one solution that worked very well for us. The "Copper Hill" cleaning method is straightforward and safe, and in our routine usage here at Imaging Resource, highly effective. Better yet, the products sold by Copper Hill Imaging are very reasonably priced. Best of all, Nicholas R (proprietor of Copper Hill) has put together an amazingly detailed tutorial on sensor cleaning, free for all.
Sensor cleaning is one of the last things people think about when buying a DSLR or SLD, but it's vital to capturing the best possible images. Take our advice and order a cleaning kit from Copper Hill right along with your DSLR/SLD, so you'll have it close at hand when you need it: You'll be glad you did!
(While they've advertised on our sister site SLRgear.com from time to time, we receive no promotional consideration from Copper Hill for this note. We just think their sensor cleaning products are among the best on the market, and like their way of doing business. -- We think you will too. Click here to check them out.)
Kit Lens Test Results
Zoom
Above average performance with the 14-42mm II kit lens.


As mentioned previously, the Olympus E-PL2 is available bundled with a redesigned "II" version of the Olympus 14-42mm f/3.5-5.6 Micro Four Thirds lens. See above for details on the changes over the prior model. The kit lens possesses a very typical optical zoom range of 3x, and the 35mm equivalent focal range is about 28-84mm, because of the E-PL2's 2x "crop factor." Results were very good at 14mm, with only some slight softness in the corners and strong detail throughout the rest of the frame. Coma distortion in the trees was low, and chromatic aberration well controlled, though a hint of flare is visible around some of the white trim. At 25mm, results were also very good, just slightly softer than our reference OLYMPUS 14-54mm F2.8-3.5 II lens which is a much more expensive optic (~$550). Results were again very good at the 42mm setting, with just a hint of corner softness and flare, and very little chromatic aberration. Overall, well above average performance here for an inexpensive kit lens.
Macro
An average sized minium area, with very good detail. Flash did a good job throttling down.


As with zoom performance, the Olympus E-PL2's macro performance will depend entirely on the lens in use. However, with the 14-42mm II kit lens set to 42mm, the Olympus E-PL2 captured a fairly average minimum area measuring 2.78 x 2.09 inches (71 x 53 millimeters). Resolution and detail were very good, with only a hint of softening in the extreme corners. (Most lenses have some softening in the corners at macro distances, the Olympus E-PL2's kit lens has much less than most.) Extreme corners showed some light falloff, though that's not unusual. The built-in flash did a good job throttling down at such a close distance, resulting in a well-exposed image, though its narrow coverage left the corners a bit darker. Still, very good performance here as well.
Geometric Distortion
Low to moderate geometric distortion with the 14-42mm II kit lens in JPEGs, much higher than average distortion in uncorrected RAW files.
| In-Camera JPEG: Barrel distortion at 14mm is 0.7 percent |
 |
| In-Camera JPEG: Barrel distortion at 42mm is practically nonexistent |
 |
| Uncorrected RAW: Barrel distortion at 14mm is 2.7 percent |
 |
| Uncorrected RAW: Barrel distortion at 42mm is is practically nonexistent |
 |
When shooting JPEGs, the Olympus E-PL2's 14-42mm kit lens produced about 0.7 percent barrel distortion at wide-angle, which is just slightly better than average and noticeable in some of its images. At the telephoto end, there was almost no distortion, practically imperceptible. This is the tendency for the lens to bend straight lines outward (like a barrel -- usually at wide-angle) or inward (like a pincushion -- usually at telephoto).
To see how much correction is taking place in the camera, we converted RAW files from the above shots with dcraw, which does not correct for distortion. As you can see, at wide-angle, the barrel distortion is very high at about 2.7%, though pincushion distortion at telephoto is very low, at less than 0.1%. We expect this for smaller interchangeable lenses though, so it's nothing to be concerned about unless you are using a RAW converter which does not understand the embedded "opcodes" to perform distortion corrections automatically. Most RAW converters these days are capable of applying distortion correction automatically, as specified by the manufacturer. (There's going to be some loss of resolution as a result of such correction, because pixels in the corners of the frame are being "stretched" to correct for the distortion. Obviously, a lens that doesn't require such correction, and is also sharp in the corners to begin with would be preferable, but relaxing constraints on barrel and pincushion distortion likely brings other benefits in the lens design, such as cost, size and weight.)
Chromatic Aberration and Corner Sharpness
Moderately low chromatic aberration at wide-angle with the 14-42mm II kit lens; lower levels at full telephoto. Some minor corner softening at full telephoto.
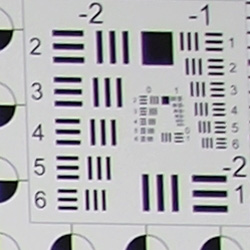

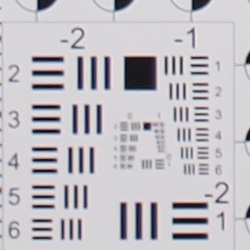
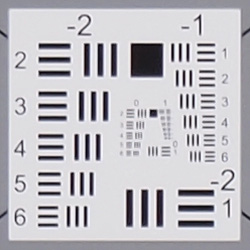
Chromatic Aberration. Chromatic aberration in the corners with the E-PL2's 14-42mm II kit lens was moderately low and just slightly noticeable at wide-angle (14mm) when wide-open. At full telephoto (42mm), C.A. was even lower, and not as noticeable. In both cases, the color fringing gradually reduces in brightness and width as it approaches the center of the image, where it is practically nonexistent. The Olympus E-PL2 does not appear to be correcting for C.A., as similar amounts are found in uncorrected RAW files, so this is very good performance.
Corner Softness. The Olympus E-PL2's 14-42mm kit lens produced some soft corners at full telephoto. At full wide-angle corners were reasonably sharp, with the top corners being just slightly soft, though they are pretty sharp for corners wide-open. The bottom corners and the center of the image were very sharp. At full telephoto the left corners showed some moderate blurring, but corners on the right were sharper. The center was not as sharp as wide-angle, with slightly lower contrast as well. There was very little noticeable corner shading ("vignetting"), which is better than average, and that was with the E-PL2's Shading Compensation feature turned off. Again, very good performance for a kit lens here, especially considering the lens was wide-open for these shots. (Corner sharpness generally improves when a lens is "stopped-down" a couple of f-stops below full aperture.)
OlympusE-PL2 Viewfinder
Viewfinder Test Results
Accuracy
Very good accuracy from the LCD monitor.

The Olympus E-PL2's LCD monitor proved very accurate, showing about 101% coverage with our Olympus Zuiko Digital 50mm f/2.0 low distortion prime. Very good results here. Since the electronic viewfinder is optional, we didn't test its accuracy with the E-PL2. However, it tested just as accurate as the LCD on the E-P2, so we'd expect the same on the E-PL2.
The images above were taken from our standardized test shots. For a collection of more pictorial photos, see our Olympus PEN E-PL2 Photo Gallery .
Exposure
Olympus E-PL2 Exposure
Olympus E-PL2 Capture Modes
 When powered on, the camera is automatically placed into Record mode. The Exposure Mode dial on top of the camera sets the main shooting mode, with the following options:
 Program AE (Program Shift): This mode places the camera in control over both aperture and shutter speed, while the user has access to all other menu functions. Pressing the Exposure Compensation (Up Arrow) button once readies the camera for Program Shift mode, indicated by a Ps icon on the LCD display or EVF. Subsequent Up or Down arrow presses step through a range of equivalent exposure settings, while Left or Right arrow presses adjust exposure compensation. Program Shift is cleared by adjusting the exposure back to the values originally selected by the camera.
 Aperture Priority: Puts the user in control of the aperture setting while the camera selects the best shutter speed. (The aperture range varies with the lens in use.)
 Shutter Priority: The opposite of Aperture Priority, this mode allows the user to set the shutter speed, from 1/4,000 to 60 seconds, while the camera selects the most appropriate aperture setting.
 Manual: Provides complete user control over the exposure, including both aperture and shutter speed settings. A Bulb shutter setting also becomes available in this mode, allowing variable length exposures for as long as you hold down the shutter button, up to a maximum of 30 minutes.
 Movie Mode: Used for shooting HD (1,280 x 720) or SD (640 x 480) movies at 30 frames per second with monaural sound (unless using the optional stereo microphone jack adapter). A menu allows Program, Aperture Priority or Manual modes to be used, as well as the one of the six available Art Filters. Most of the art filters reduce the capture frame rate, causing the live preview and captured video to appear jerky. The Diorama art filter is particularly strongly affected, and curiously, is played back at roughly 15x realtime speed. Hence audio recording is disabled when using this filter.

 Scene Mode:This mode provides access to the 19 preset shooting modes via a scene menu. Scene modes available are: Portrait, e-Portrait, Landscape, Landscape + Portrait, Sport, Night Scene, Night + Portrait, Children, High Key, Low Key, DIS Mode, Macro, Nature Macro, Candle, Sunset, Documents, Panorama, Fireworks, and Beach & Snow. Three additional settings are available for optional Fisheye, Wide-angle, and Macro accessory lenses.

 Art Filters: This mode accesses the six available Art Filter modes: Pop Art, Soft Focus, Grainy Film, Pin Hole, Diorama and Dramatic Tone. As in movie-mode, frame rate is adversely impacted when using most art filters, and the diorama effect in particular causes a very slow refresh rate for live view.

 Intelligent Auto: This mode gives the camera control over most exposure variables: The Olympus E-PL2 analyses the scene and automatically selects from Portrait, Landscape, Macro, Sports, Night Scene, and Night Scene Portrait exposure modes. The user can still adjust image resolution / compression, aspect ratio, drive mode, image stabilizer, focus mode / point, and whether the flash should fire automatically, or be suppressed
A Live Guide function accessed by pressing the Start / OK button allows 15-step control over saturation, hue, brightness, aperture, and shutter speed -- all accomplished with vertical sliders and "friendlier" terminology. For example, instead of Aperture, we have a "Blur Background" slider, labeled "Blur" at the top, and "Sharp" at the bottom. There's also a separate section of Shooting Tips, with advice on how to capture attractive images.
 Movie Record Button: Pressing this dedicated movie record button will start and stop movie recording. Confusingly, in all but two exposure modes, the movies will be recorded using Program autoexposure, regardless of what modes are currently selected on the Mode dial, and in the Custom menu's Movie Mode setting. The sole exceptions are the Art Filter and Movie mode positions on the Mode dial. In the Art Filter mode, the movie will be recorded with the same art filter type as used for still images, overriding the Custom menu Movie Mode setting. In Movie mode, the custom menu setting will determine which exposure mode to use. The Movie Record button can be enabled or disabled, or used for something other than movie recording, via a Custom menu setting. (It's also possible to use the Function button as a Movie Record button, if the function of the Movie Record button itself has been changed.) If the Movie Record button is disabled and movie recording not assigned to the Function button instead, then the Shutter Release button initiates movie recording in the PL2's Movie mode, and movie recording becomes impossible in all other modes.
In Playback mode, the Movie Record button serves as a dedicated Protect button, marking images to be protected from deletion, or clearing the protection marker. (This doesn't protect images from deletion if the flash card is formatted, however.)
 Playback Mode: The Playback button on the rear panel accesses Playback mode, where you can review captured images. The left and right arrow keys scroll forward and backward one image at a time, while the up and down keys scroll ten images at a time. You can enlarge captured images or display them in an index format for quick viewing. It's also possible to convert Raw images to JPEGs, perform basic editing functions such as cropping and red-eye fix, view a slideshow, and protect or delete images.
Olympus E-PL2 Metering
| Metering, Exposure compensation, and Bracketing | |
 |
 |
|
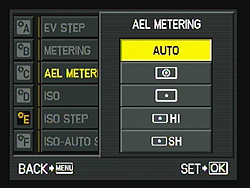
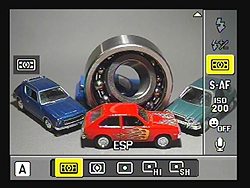
Metering. In the default Digital ESP setting, the Olympus E-PL2 uses a 324 segment meter. Available metering options are Auto, Center-Weighted, Spot, Spot HI (highlights), and Spot SH (shadows). The latter two modes, bias toward bright and dark images, respectively.
|
Metering options can also be set more quickly with the Live Control Menu (above) or the optional Super Control Panel.
|
 |
 |
|
EV Compensation. Pressing the top button on the four-way controller activates the EV area of the screen, and left and right arrows adjust the compensation up and down, while the onscreen display changes to show the difference.
|
EV compensation can be previewed live by pressing the Info button repeatedly until the multi-view display appears. Toggling left and right moves through +/- 3 stops of compensation.
|
 |
 |
|
Tone control is a surprisingly obscure option for a consumer camera, one that allows you to brighten or darken highlights and shadows. First pressing the EV button, followed by a first and second press of the Info button, you access a very small curves box that can be adjusted in seven steps in either direction.
|
Exposure bracketing allows capture of from 2 to 7 images in 0.3, 0.5, or 1 EV units. Also available are White balance, Flash, and ISO bracketing.
|
Olympus E-PL2 White Balance
| White balance options | |
 |
 |
|
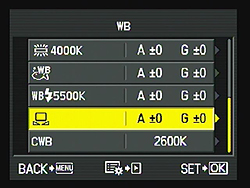
White balance options include Auto, Sunny, Shadow, Cloudy, Incandescent (Tungsten), Fluorescent 1, Fluorescent 2, Fluorescent 3, Flash, One-Touch, and Custom, to accommodate a variety of lighting situations. You can also adjust the white balance, controlling the amount of amber-blue and green-magenta bias in the color balance, in any of the selected modes, in +/- 7 steps.
|
White balance can also be adjusted in the Super Control Menu or the Live Control Menu. You can also set the Fn button to activate One-Touch White Balance. Just aim the camera at something white and press the shutter button while holding the function button, and Custom White Balance records a new setting.
|
 |
 |
|
The user can also specify a color temperature using the Kelvin temperature scale, from 2,000K to 14,000K.
|
The E-PL2 also features white balance bracketing. If activated, the camera will write three separate images for each press of the shutter button, either biasing between amber and blue or green and magenta. You can set the images to vary by two, four, or six arbitrary adjustment steps.
|
Olympus E-PL2 ISO Sensitivity
| ISO and noise reduction options | |
 |
 |
|
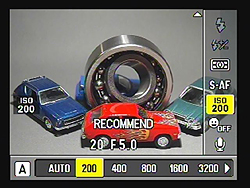
The Olympus E-PL2 lets you adjust its light sensitivity in either 1 or 1/3 EV steps, within a range of ISO 200 to 6,400 ISO equivalents. There's also an Auto mode in which the camera selects an ISO sensitivity automatically.
|
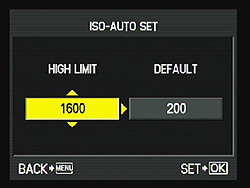
To keep noise and shutter speeds inside your desired range, you can set both maximum and minimum ISO limits for the Auto mode, within a range of 200 to 6,400.
|
 |
 |
|
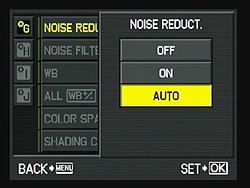
Noise Reduction reduces noise in long exposures by capturing a second exposure containing only the dark current noise, then subtracting this from the image.
|
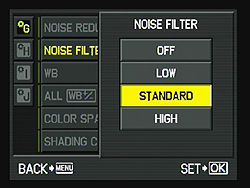
The E-PL2's Custom menu offers a variable high-ISO noise reduction function with options of either Off, Low, Standard, or High.
|
Olympus E-PL2 Picture modes
| Picture modes and PASM Art filters | |
 |
 |
|
As well as Vivid, Natural, Muted, Portrait, Monotone, and Custom options, there's the i-Enhance option that automatically detects the main subject in any scene, then boosts brightness and saturation to draw your attention to the subject. Each mode can be adjusted to tweak Contrast, Sharpness, and Saturation, as well as apply color filters to the Monotone setting.
|
Though the six Art filters are available in Auto mode via the Mode dial, you can also apply them to PASM modes through the same Picture mode menu item, or via the Exposure mode Live Control menu item in Movie mode (not shown).
|
Olympus E-PL2 Multiple exposure mode
| Multiple exposure modes | |
 |
 |
|
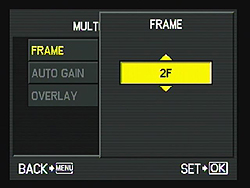
The Olympus E-PL2 supports multiple exposures overlaid as one image. You can overlay two subsequent images while they are being taken and save the result as a JPEG or Raw file.
|
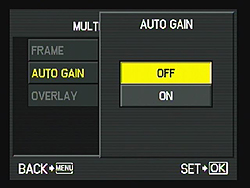
By enabling the Auto Gain feature, the camera can automatically adjust the gain so that the resulting image is averaged from the source images. The result is additive if auto gain is left disabled.
|
 |
 |
|
The E-PL2 offers one further method of creating multiple exposures through its Playback menu Image Overlay function.
|
This allows selection of either two or three Raw images which are then combined into a single image, which is saved as a new Raw file.
|
Olympus E-PL2 Other items
| Other details | |
 |
 |
|
Drive modes offered include Single, Sequential, 12 second self-timer, 2 second self-timer, 2 second Anti-shock self-timer, 12 second Anti-shock self-timer, Sequential Anti-shock, Single Anti-shock. (Anti-shock activates the first curtain before the exposure to reduce shake.)
|
Toggling the up and down arrows while in the Multi-view display mode changes to the White Balance preview mode, where you can see how all of the standard presets and your custom setting, would look with the current lighting.
|
 |
|
|
The E-PL2 has Shading Compensation to reduce vignetting in the corners. It's not clear whether the camera applies fixed compensation based on lens type, or by analyzing the actual light fall-off in the corners of captured images.
|
|
The images above were taken from our standardized test shots. For a collection of more pictorial photos, see our Olympus PEN E-PL2 Photo Gallery .
Not sure which camera to buy? Let your eyes be the ultimate judge! Visit our Comparometer(tm) to compare images from the Olympus PEN E-PL2 with those from other cameras you may be considering. The proof is in the pictures, so let your own eyes decide which you like best!
Performance
Olympus E-PL2 Performance
Timing and Performance
Good speed for a compact system camera.
| Startup/Shutdown |
||
| Power on |
~1.3 seconds
|
Time it takes to turn on and capture a shot. |
| Shutdown |
~0.9 second
|
How long it takes camera to turn off before you can remove the memory card. |
|
Buffer clearing time
|
5 seconds after 14 large/superfine JPEGs*
|
Worst case buffer clearing time. -- This is the delay after a set of shots before you can remove the card.
|
|
11 seconds after 10 RAW files*
|
||
|
18 seconds after 9 RAW+ LSF JPEG files*
|
||
|
*Note: Buffer clearing times measured with a SanDisk Extreme III 30MB/sec 8GB SDHC card. Slower cards will produce correspondingly slower clearing times. Slow cards may also limit length of bursts in continuous mode. ISO sensitivity and noise reduction settings can also affect cycle times and burst mode performance.
|
||
Startup and shut-down times were slower than those for most SLRs, but fairly typical for a compact system camera. Startup was noticeably faster than the E-PL1 which took 2.2 seconds. Buffer clearing time depends on the quality and number of shots, and on the speed of the SD card. With a fast SDHC card, the E-PL2's buffer clearing times were good; slightly faster than the E-PL1.
| Mode Switching | ||
|---|---|---|
| Play to Record, |
~0.8 second
|
Time until first shot is captured.
|
| Record to Play |
~1.8 seconds
|
Time to display a large/superfine JPEG file immediately after capture.
|
| Display |
~0.2 second
|
Time to display a large/superfine JPEG file already on the memory card.
|
Mode switching was pretty fast, except for Record to Play. The E-PL2 was faster than the E-PL1 in the first two metrics (approx. 0.8s vs 1.1s and approx.1.8s vs 3.7s), and about the same for the last (approx. 0.2 second).
| Shutter Response (Lag Time) | ||
|---|---|---|
|
Full Autofocus,
Single-area AF mode |
0.434 second
|
Time from fully pressing shutter button to image capture, with the lens already at the proper focal distance setting. (All AF timing performed with the new Olympus 14-42mm II kit lens at about 14mm.)
|
|
Full Autofocus,
Multi-area AF mode |
0.461 second
|
Time from fully pressing shutter button to image capture, with the lens already at the proper focal distance setting.
|
|
Full Autofocus,
Single-area AF mode Wide Angle Auto Flash Enabled |
0.620 second
|
Time from fully pressing shutter button to image capture, with the lens already at the proper focal distance setting, TTL Auto flash enabled.
|
| Prefocused |
0.068 second
|
Time to capture, after half-pressing and holding shutter button.
|
|
Continuous AF |
0.287 second
|
This mode usually shows no speed increase with our static subject; we have no way to measure performance with moving subjects.
|
|
Manual Focus |
0.248 second
|
For most cameras, shutter lag is less in manual focus than autofocus, but usually not as fast as when the camera is "prefocused".
|
The Olympus E-PL2 showed full-autofocus shutter lag in single-area AF mode (center AF position) of 0.434 second with the 14-42mm II kit lens. That's a bit slower than most SLRs, but pretty good for a compact system camera, and much faster than the E-PL1's 0.820 second result. In 11-point "All Targets" AF mode, this time increased just slightly to 0.461 second, also much faster than the E-PL1's 0.938 second.
Full autofocus shutter lag increased to 0.620 second with the flash enabled, which includes an additional delay for the preflash metering. This too was faster than the E-PL1's 1.13 seconds. Continuous AF mode resulted in a shutter lag of 0.287 second which is slightly faster than the E-PL1's 0.293 second. When manually focused, the E-PL2's lag time was 0.248 second, which oddly, is slightly slower than the E-PL1's 0.202 second. The E-PL2's prefocused lag time of 0.068 second is faster than many SLRs, and slightly faster than the E-PL1's 0.070 second.
While autofocus is still slower than most SLRs, the Olympus E-PL2 coupled with the new kit lens really made quite an improvement in AF speed over the E-PL1 and other previous PEN models. Though autofocus speed still slightly lags its chief rival, the Panasonic GF2, it's at least in the same ballpark. Unfortunately, we didn't have the GF2 long enough to compare AF speeds with the same lens, so we're not sure if the GF2 is slightly faster because of the lens or the body.
To minimize the effect of different lens' focusing speed, we test AF-active shutter lag with the lens already set to the correct focal distance. We also use the same Sigma 70mm f/2.8 macro with every camera (on all platforms except Four Thirds/Micro Four Thirds and Nikon consumer models lacking an in-body focus motor), to further reduce variation, and because our tests showed that focus-determination time with this lens was close to the fastest, across multiple camera bodies from different manufacturers. Being an older design with a non-ultrasonic motor, it wouldn't be the fastest at slewing from one focus setting to another, but that's exactly the reason we measure focus determination speed, which is primarily a function of the camera body, vs focus adjustment speed, which is primarily a function of the lens.
| Cycle Time (shot to shot) | ||
|---|---|---|
| Single Shot mode |
1.03 seconds
|
Time per shot, averaged over 20 shots, 2 seconds to clear*. |
|
Single Shot mode |
1.01 seconds
|
Time per shot, averaged over 20 shots, 9 seconds to clear*. |
|
Single Shot mode
RAW + LSF JPEG |
0.88 seconds
|
Time per shot, averaged over 9 shots, 17 seconds to clear*. |
| Early shutter |
No
|
Some cameras don't snap another shot if you release and press the shutter too quickly in Single Shot mode, making "No" the preferred answer. |
|
Continuous Mode |
0.33 second (3.04 frames per second);
14 frames total; 5 seconds to clear* |
Time per shot, averaged over 14 shots, then slows to an average of about 0.49s or 2.02 fps when buffer is full. |
| Continuous Mode |
0.33 second (3.03 frames per second);
10 frames total; 11 seconds to clear* |
Time per shot, averaged over buffer length of 10 frames, then slows to an average of about 1.13s or 0.88 fps when buffer is full. |
|
Continuous Mode |
0.33 second (3.04 frames per second);
9 frames total; 18 seconds to clear* |
Time per shot, averaged over buffer length of 9 frames, then slows to 2.04s or 0.49 fps when buffer is full. |
| Flash Recycling |
2.7 seconds
|
Flash at maximum output. |
|
*Note: Buffer clearing times measured with a SanDisk Extreme III 30 MB/sec 8GB SDHC card. Slower cards will produce correspondingly slower clearing times. Slow cards may also limit length of bursts in continuous mode. ISO sensitivity and noise reduction settings can also affect cycle times and burst mode performance.
|
||
Single-shot cycle times are a bit sluggish, at about one second for JPEGs or RAWs, and (surprisingly) a bit faster at 0.9 second for RAW + large/superfine JPEGs, however this is an improvement compared to the E-PL1's 1.6 seconds for all quality types. Continuous mode was very similar to the E-PL1, at about 3 frames per second no matter what image size or quality before the buffer filled. Buffer depth was also quite good for its class, at 14 frames for large/superfine JPEGs, 10 for RAW and 9 for RAW + large/superfine JPEG, about the same as the E-PL1. Note that our test target for this was designed to be difficult to compress, so JPEG burst lengths should be longer with typical subjects. (Particularly in the case of buffer depths, we're careful to test under worst-case conditions.) Flash recycle time was pretty good, at 2.7 seconds after a full power discharge, though not a surprise given the small flash. Still, that's quite an improvement over the 4.2 seconds the E-PL1 took.
| Download Speed | ||
|---|---|---|
| Windows Computer, USB 2.0 |
9,383 KBytes/sec
|
Typical Values: |
Download speeds were fast, quick enough that you probably won't feel the need for a separate card reader, even with large memory cards. (Note that this test was performed with a SanDisk Extreme III 30 MB/sec SD card: Slower cards would likely show slower transfer times.)
Bottom line, the Olympus E-PL2's performance has improved over the E-PL1 and is more in-line with the competition from Panasonic and others. Burst speed remains about average, but buffer size is pretty good. If you prefocus, you can capture some action shots, but the E-PL2 is best suited for relatively static subjects.
Battery and Storage Capacity
Battery
Below average battery life, but not atypical of SLR-style cameras operating in Live View mode.
| Operating Mode | Number of Shots |
|---|---|
|
Still Capture,
(CIPA standard) |
280
|
The Olympus E-PL2 uses a custom rechargeable lithium-ion battery pack for power, and comes with both a single battery and charger. The rated 280 shots per charge is a bit lower than the E-PL1's 290 shots, and below the capacity of most SLRs and Point & Shoots. But this relatively short battery life isn't atypical of SLR-style cameras being used in Live View mode: Live View operation burns a fair bit of power. We do recommend getting a second battery for your E-PL2 if you plan any extended outings.
The table above shows the number of shots the camera is capable of (on a fully-charged rechargeable battery), based on CIPA battery-life and/or manufacturer standard test conditions.
(Interested readers can find an English translation of the CIPA DC-002 standards document here. (180K PDF document))
Storage
The Olympus E-PL2 accepts SD/SDHC/SDXC memory cards, and does not ship with a card. Olympus recommends a Class 6 or faster card for recording video.
| Image Capacity with 1GB Memory Card |
Super Fine |
Fine | Normal | Basic | RAW | RAW + SF JPEG |
|
|---|---|---|---|---|---|---|---|
|
4,032 x 3,024 |
Images (Avg Size) |
101
10.1 MB |
145
7.0 MB |
320
3.2 MB |
477
2.1 MB |
54
19 MB |
35
29 MB |
|
Approx.
Comp. |
4:1
|
5:1
|
11:1
|
17:1
|
1:1
|
-
|
|
|
3,200 x 2,400 |
Images (Avg Size) |
154
6.6 MB |
255
4.0 MB |
504
2.0 MB |
747
1.4 MB |
-
|
-
|
|
Approx.
Comp. |
4:1
|
6:1
|
11:1
|
17:1
|
-
|
-
|
|
|
2,560 x 1,920 |
Images (Avg Size) |
269
3.8 MB |
395
2.6 MB |
776
1.3 MB |
1,143
896 KB |
-
|
-
|
|
Approx.
Comp. |
4:1
|
6:1
|
11:1
|
17:1
|
-
|
-
|
|
|
1,920 x 1,044 |
Images (Avg Size) |
473
2.2 MB |
696
1.5 MB |
1,346
761 KB |
1,954
524 KB |
-
|
-
|
|
Approx.
Comp. |
4:1
|
6:1
|
11:1
|
16:1
|
-
|
-
|
|
|
1,600 x 1,200 |
Images (Avg Size) |
673
1.5 MB |
993
1.0 MB |
1,893
541 KB |
2,753
372 KB |
-
|
-
|
|
Approx.
Comp. |
4:1
|
6:1
|
11:1
|
16:1
|
-
|
-
|
|
|
1,280 x 960 |
Images (Avg Size) |
1,044
981 KB |
1,514
676 KB |
2,884
355 KB |
4,038
254 KB |
-
|
-
|
|
Approx.
Comp. |
4:1
|
6:1
|
10:1
|
15:1
|
-
|
-
|
|
|
1,024 x 768 |
Images (Avg Size) |
1,594
642 KB |
2,243
457 KB |
4,038
254 KB |
5,507
186 KB |
-
|
-
|
|
Approx.
Comp. |
4:1
|
5:1
|
9:1
|
13:1
|
-
|
-
|
|
|
640 x 480 |
Images (Avg Size) |
3,563
287 KB |
5,048
203 KB |
8,654
118 KB |
10,096
101 KB |
-
|
-
|
|
Approx.
Comp. |
3:1
|
5:1
|
8:1
|
9:1
|
-
|
-
|
|
We strongly recommend buying a large capacity SD/SDHC/SDXC memory card at least a 2GB card, preferably a 4 or 8GB one, to give yourself extra space for extended outings, or when shooting RAW or video files. -- If you're going to shoot much video, you'll definitely want a large, fast card; look for a card with "class 6" speed or better. (Check the shopping link above, memory cards are really cheap these days, so no reason to skimp.)
Imaging
Olympus E-PL2 Image Quality
Color
Saturation & Hue Accuracy
Good color and very good hue accuracy, though most colors are slightly undersaturated.
 |
| In the diagram above, the squares show the original color, and the circles show the color that the camera captured. More saturated colors are located toward the periphery of the graph. Hue changes as you travel around the center. Thus, hue-accurate, highly saturated colors appear as lines radiating from the center. Click for a larger image. |
Saturation. The Olympus E-PL2 pushes reds and dark brown a bit, but undersaturates most other colors. Default saturation is only 97.37% (2.63% undersaturated), which is still quite accurate, but somewhat muted overall. You can always boost saturation, or select a different picture mode if the default color is too dull for your tastes. Most consumer digital cameras produce color that's more highly saturated (more intense) than found in the original subjects. This is simply because most people like their color a bit brighter than life.
Skin tones. Here, the Olympus E-PL2 did well, producing natural-looking skin tones, just slightly on the pinkish side. Where oversaturation is most problematic is on Caucasian skin tones, as it's very easy for these "memory colors" to be seen as too bright, too pink, too yellow, etc.
Hue. The Olympus E-PL2 did push cyan toward blue and red toward orange, but shifts were relatively minor to moderate. (The cyan to blue shift is very common among the digital cameras we test; we think it's a deliberate choice by camera engineers to produce better-looking sky colors.) Overall hue accuracy was very good with a Delta-C color error of only 4.57, which is better than average. Hue is "what color" the color is.
Color Modes
The Olympus E-PL2 offers twelve preset "Picture modes", including six "Art Filters". You can tweak contrast, saturation, gradation and other parameters (depending on the mode). Changes to each picture mode are saved separately, and you can define your own Custom setting as well. See the E-PL2 user manual for details.
| Preset "Picture Modes" | |||||
 |
|||||
Mouse over the links above to see the effect of the presets on our Still Life target. You can click on a link to load the full resolution image.
Saturation Adjustment
The Olympus E-PL2 lets you adjust the image saturation, contrast, and sharpness in five steps each. As can be seen below, the saturation adjustment was quite effective, covers a useful range, and does a good job of not impacting contrast.
| Saturation Adjustment Examples | ||
 |
 |
 |
| -2 | 0 | +2 |
The table above shows results with the default as well as the two extreme saturation settings. Click on any thumbnail above, then click again to see the full-sized image.


Sensor
Exposure and White Balance
Indoors, incandescent lighting
Very warm cast with Auto White Balance, but good color with the Incandescent and Manual settings. Average exposure compensation required.


Indoors, under normal incandescent lighting, color balance was very warm with the Auto white balance setting. Results with the Incandescent setting were quite good and just a touch warmer than the Manual setting, which was the most accurate. The 2,600 Kelvin setting was quite cool with a blue-green tint. The Olympus E-PL2 required an average amount of positive exposure compensation here, at +0.3 EV. (Our test lighting for this shot is a mixture of 60 and 100 watt household incandescent bulbs, a pretty yellow light source, but a very common one in typical home settings here in the U.S.)
Outdoors, daylight
Natural looking colors overall, with good use of available dynamic range. Very good exposure accuracy in our Far-field House shot, but our "Sunlit" Portrait shot required slightly higher than average exposure compensation.
Outdoors, the Olympus E-PL2 performed well, with good color and good exposure in the outdoor Far-field House shot. The Olympus E-PL2 required an above average amount of positive exposure compensation (+1.0 EV) to keep facial tones bright on the "Sunlit" Portrait test. Default contrast was slightly high, but despite the bright appearance, there weren't as many blown highlights in her shirt, pendant and flowers as we normally see. The Far-field House shot had a few blown highlights along the edges of the white trim, but also less than we are accustomed to seeing. Shadow detail was pretty good as well, though there is quite a bit of noise lurking in the very deep shadows. Overall, better than average results here, with the base ISO of 200 helping to maximize dynamic range (over previous PEN models at ISO 100).
See full set of test images with explanations
See thumbnails of all test and gallery images
Resolution
High resolution, 1,600 lines of strong detail in JPEGs with a bit more from processed RAW files.
In camera JPEGs our laboratory resolution chart revealed sharp, distinct line patterns down to about 1,600 lines per picture height in both the horizontal and vertical direction. Complete extinction of the pattern didn't occur until about 2,700 to 2,800 lines. We were able to extract a bit more resolution by processing the E-PL2's ORF files using Adobe Camera Raw 6.3, up to 1,800 lines in the horizontal direction and perhaps 1,700 in the vertical, but ACR produced some strong color moiré and maze patterns (see the full image by clicking on the crops above). (Note: Adobe Camera Raw 6.3 does not officially support the E-PL2 at the time of writing and we got identical results from ACR 6.4rc.) Use these numbers to compare with other cameras of similar resolution, or use them to see just what higher resolution can mean in terms of potential detail.
See full set of test images with explanations
See thumbnails of all test and gallery images
Sharpness & Detail
Good sharpness overall, though edge-enhancement artifacts on high-contrast subjects are visible. Mild noise suppression visible in the shadows.


Sharpness. The Olympus E-PL2 captures fairly sharp images overall, though edge enhancement artifacts are visible on high-contrast subjects such as the branches, roof and trim in the crop above left. (Most noticeable on edges of white trim against the brick; note light halo there.) Edge enhancement creates the illusion of sharpness by enhancing colors and tones right at the edge of a rapid transition in color or tone.
Detail. The crop above right shows some mild noise suppression artifacts in the darkest areas of the model's hair, smudging individual strands together, though quite a few strands are visible. Overall detail is better than average for a Four-Thirds model, and better than a few APS-C models as well. Noise-suppression systems in digital cameras tend to flatten-out detail in areas of subtle contrast. The effects can often be seen in shots of human hair, where the individual strands are lost and an almost "watercolor" look appears.
RAW vs In-Camera JPEGs
As noted above, the Olympus E-PL2 produces fairly sharp in-camera JPEGs. As is almost always the case, though, more detail can be obtained from carefully processing RAW files than can be seen in the in-camera JPEGs. The Olympus E-PL2's JPEGs are very good straight from the camera, but it's surprising how much more detail is visible after processing in a good RAW converter. Take a look below, to see what we mean:

In the table above, mousing over a link at the bottom will load the corresponding crop in the area above, and clicking on the link will load the full resolution image.
As you can see, the Olympus Master 2.3 conversion resulted in an image very similar to the in-camera JPEG in terms of detail, color and contrast. The Adobe Camera Raw (version 6.3) conversion however contains more fine detail than the camera SuperFine JPEG or Olympus Master conversion at default settings, which is especially noticeable in the pine needles, though it does leave quite a bit more noise. (Default noise reduction settings were used, but ACR 6.3 doesn't officially support the E-PL2 yet and we got identical results from ACR 6.4rc, so future versions may still tweak default processing.) Nevertheless, like previous Olympus PEN cameras, the E-PL2 rewards RAW shooters with really excellent detail when using a good quality RAW converter.
ISO & Noise Performance
Low noise and very good detail up to ISO 400, moderate to high noise at higher ISOs, but good performance from a Four-Thirds sensor.
|
Default High ISO Noise Reduction
|
 |
 |
 |
| ISO 200 | ISO 400 | ISO 800 |
 |
 |
 |
| ISO 1,600 | ISO 3,200 | ISO 6,400 |
The Olympus E-PL2's images are quite clean and detailed at ISO 200, the base ISO. The E-PL2 performed the same or slighter better at ISO 200 than the E-PL1 did here. Detail is still very good at ISO 400, with just a bit more blurring and a hint more chroma noise creeping into the shadows. ISO 800 is quite a bit softer with more smudging due to stronger noise reduction, but detail is still pretty good for a Four Thirds sensor. At ISO 1,600, we see additional detail loss, as well as more obvious purple and yellow blotches in shadow areas. At ISO 3,200, noise grain is more visible blurring fine detail even further despite the weaker noise reduction. Noise and the effects of noise reduction are quite obvious ISO 6,400, obscuring almost all fine detail and making shadows quite purplish while lighter tones have yellow blotching. Overall color balance also became cooler, and colors less saturated at ISO 6,400. As always, see the Print Quality section below for maximum recommended print sizes at each ISO.
A note about focus for this shot: We shoot this image at f/4, using one of three very sharp reference lenses (70mm Sigma f/2.8 macro for most cameras, 60mm f/2.8 Nikkor macro for Nikon bodies without a drive motor, and Olympus Zuiko 50mm f/2.0 for Four Thirds and Micro Four Thirds bodies). To insure that the hair detail we use for making critical judgements about camera noise processing and detail rendering is in sharp focus at the relatively wide aperture we're shooting at, the focus target at the center of the scene is on a movable stand. This lets us compensate for front- or back-focus by different camera bodies, even those that lack micro-focus adjustments. This does mean, though, that the focus target itself may appear soft or slightly out of focus for bodies that front- or back-focused with the reference lens. If you click to view the full-size image for one of these shots and notice that the focus target is fuzzy, you don't need to email and tell us about it; we already know it. :-) The focus target position will simply have been adjusted to insure that the rest of the scene is focused properly.
Extremes: Sunlit and low light tests
High resolution with good overall detail. The E-PL2's Auto Gradation feature resulted in good dynamic range, with few blown highlights. Good low-light performance, but metering struggled a bit at lower light levels.


Sunlight. The Olympus E-PL2 did fairly well with this shot, though more than the average amount of exposure compensation was required. The E-PL2 required +1.0 EV exposure compensation, and even then, the mannequin's face looks slightly dim and ruddy. Most cameras we've tested require about +0.7 EV for this "Sunlit" Portrait shot, so the E-PL2 required slightly higher than average positive compensation here. Dynamic range was actually pretty good with very few clipped highlights or lost shadows, though shadow noise was a bit high. (Compared some other cameras including earlier Olympus models, we prefer seeing a bit of noise in the shadows to the alternative of lots of detail lost due to noise suppression.) The good JPEG dynamic range performance was in part due to the camera overriding our Normal (default) Gradation setting to Auto in the above shots. We're not sure why this happened, but after resetting the camera, the Auto override was no longer occurring. (Auto Gradation divides the image into regions and performs local contrast adjustments to reduce brightness in areas that are too bright or increase brightness in areas that are too dark.)
Because digital cameras are more like slide film than negative film (in that they tend to have a more limited tonal range), we test them in the harshest situations to see how they handle scenes with bright highlights and dark shadows, as well as what kind of sensitivity they have in low light. The shot above is designed to mimic the very harsh, contrasty effect of direct noonday sunlight, a very tough challenge for most digital cameras. (You can read details of this test here. In actual shooting conditions, be sure to use fill flash in situations like the one shown here; it's better to shoot in open shade whenever possible.)
Contrast Adjustment
The camera's contrast adjustment was some help in handling the harsh lighting in our Sunlit" Portrait and Far-field House shots.
|
Minimum Contrast
|
|
 |
 |
| Contrast set to lowest, +1.0 EV |
Contrast set to lowest, Auto Exposure |
At its lowest contrast setting, the Olympus E-PL2 did a better job of preserving highlight detail and holding more in the shadows, while maintaining fairly natural-looking skin tones. There were just a few blown highlights to begin with in both these shots so the decreased contrast setting left most highlights alone, but it did bring out more shadow and darker midtone detail.
| "Sunlit" Portrait Contrast Adjustment Examples | ||
|
|
 |
| -2 | 0 | +2 |
The shots above show the results of the minimum, default and maximum contrast settings. While you can see the extremes, it's pretty hard to evaluate small differences in contrast on small thumbnails like these, click on any thumbnail to go to the full-size image. As you can see with the lowest contrast setting, highlights were toned-down a bit, while shadows and mid-tones were boosted. Good results here, though we wish the range at the low end was a little greater on the contrast setting.
|
Outdoor Portrait Gradation Comparison
|
|
 |
Gradation Setting: Normal (Default) Low Key Auto High Key |
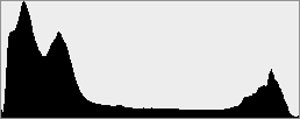 |
|
Gradation
Similar to dynamic range optimization systems from other manufacturers, the Olympus E-PL2's Gradation setting applies local contrast adjustments in an attempt to preserve shadow detail and prevent highlight clipping with the Auto setting. Above are examples of the Normal (default), Low Key, Auto and High Key settings applied to our "Sunlit" Portrait shot. Mouse over the links to load the associated thumbnail and histogram, and click on the links to visit the full resolution image. As you can see, the Low Key setting applies Gradation for making subjects darker (in the thumbnail and histogram above, you can see that the camera shifted levels to the left, darkening the image dramatically), while the High Key setting does the opposite for brighter subjects (shifting levels to the right so that lighter tones are blown, but darker ones are opened up). The Auto setting did a good job at toning down highlights and bringing up darker midtones without making the image too flat-looking or washed-out.
| Face Detection | ||
 |
 |
|
| Off at 0 EV | On at 0 EV | |
Face Detection
Like most Point & Shoot cameras these days (and some DSLRs in Live View mode), the Olympus E-PL2 has the ability to detect faces, and adjust exposure and focus accordingly. The E-PL2 does it automatically in iAuto mode, when a Portrait scene mode is selected, or when Face Detection AF mode is selected. As you can see from the examples above, it really works, as the image with face detection enabled is much better exposed for the face without having to use exposure compensation. An excellent performance under very difficult lighting such as this.
Because digital cameras are more like slide film than negative film (in that they tend to have a more limited tonal range), we test them in the harshest situations to see how they handle scenes with bright highlights and dark shadows, as well as what kind of sensitivity they have in low light. The shot above is designed to mimic the very harsh, contrasty effect of direct noonday sunlight, a very tough challenge for most digital cameras. (You can read details of this test here.)
| 1 fc 11 lux |
1/2 fc 5.5 lux |
1/4 fc 2.7 lux |
1/8 fc 1.3 lux |
1/16 fc 0.67 lux |
1/16fc No NR |
|
|---|---|---|---|---|---|---|
| ISO 200 |
 1 sec f2.8 |
 2 sec f2.8 |
 4 sec f2.8 |
 8 sec f2.8 |
 15 sec f2.8 |
 15 sec f2.8 |
| ISO 400 |
 0.5 sec f2.8 |
 1 sec f2.8 |
 2 sec f2.8 |
 4 sec f2.8 |
 8 sec f2.8 |
 8 sec f2.8 |
| ISO 800 |
 1/4 sec f2.8 |
 0.5 sec f2.8 |
 1 sec f2.8 |
 2 sec f2.8 |
 4 sec f2.8 |
 4 sec f2.8 |
| ISO 1600 |
 1/8 sec f2.8 |
 1/4 sec f2.8 |
 0.5 sec f2.8 |
 1 sec f2.8 |
 2 sec f2.8 |
 2 sec f2.8 |
| ISO 3200 |
 1/15 sec f2.8 |
 1/8 sec f2.8 |
 1/4 sec f2.8 |
 0.5 sec f2.8 |
 1 sec f2.8 |
 1 sec f2.8 |
| ISO 6400 |
 1/30 sec f2.8 |
 1/15 sec f2.8 |
 1/8 sec f2.8 |
 1/4 sec f2.8 |
 0.5 sec f2.8 |
 0.5 sec f2.8 |
Low light. The Olympus E-PL2 exposure metering struggled a bit in our low light test. We had to resort to trial and error in manual mode to get the exposure right at the dimmest light level, then adjusted shutter speed to match the increase in light at successively higher levels. Noise is well controlled up to ISO 800, though there are a few hot pixels visible here and there. (The PEN E-PL2 does offer pixel mapping, so hot/dead pixels can be mapped out without a trip to a service center.) A lot of bright pixels (we wouldn't call them "hot") are however visible when long exposure noise reduction is turned off at lower ISOs, but they blend into the noise "grain" at ISOs above 800. (Note: we've reshot these with Normal Gradation, as the previous set with Auto Gradation produced bright noise pixels at some lower ISOs with NR On, similar to what we still see with NR set to Off.) White balance is fairly neutral, with a slightly warm, reddish cast. There doesn't appear to be any significant banding at any ISO when properly exposed.
The camera's autofocus system was able to focus on the subject down to below the 1/16 foot-candle light level unassisted, which is very good for a camera using contrast-detect autofocus. The Olympus E-PL2 unfortunately does not have a built-in focus assist lamp.
How bright is this? The one foot-candle light level that this test begins at roughly corresponds to the brightness of typical city street-lighting at night. Cameras performing well at that level should be able to snap good-looking photos of street-lit scenes.
NOTE: This low light test is conducted with a stationary subject, and the camera mounted on a sturdy tripod. Most digital cameras will fail miserably when faced with a moving subject in dim lighting. (For example, a child's ballet recital or a holiday pageant in a gymnasium.) Thanks to their phase-detect AF systems, digital SLRs tend to do much better than point & shoots, but you still shouldn't expect a quick autofocus lock with moving subjects. The E-PL2 uses contrast-detect autofocus, as is found in most point & shoot cameras, so its low-light focusing ability is less than that of most SLRs with phase-detect systems. That said, though, the larger, more sensitive pixels of the E-PL2's sensor do better under dim lighting than do the tiny pixels of most point & shoots, (A useful trick is to just prop the camera on a convenient surface, and use its self-timer to release the shutter. This avoids any jiggling from your finger pressing the shutter button, and can work quite well when you don't have a tripod handy.)
Output Quality
Print Quality
Great 16x20 inch prints; ISO 1,600 prints look good at 13x19 inches; ISO 6,400 images print well at 5x7.
 ISO 200 shots appear a little soft on close inspection when printed at 20x30 inches, which is about right for a 12-megapixel image. A better starting point is 16x20 inches, where detail is crisp, and color excellent.
ISO 400 shots also look quite good at 16x20, with great color and detail.
ISO 800 images are surprisingly good at 16x20 inches, still. Only a slight bit of noise starting to appear in the shadows, while color and detail remain strong; naturally, reducing to 13x19 inches really tightens everything up.
ISO 1,600 are quite usable at 13x19, with softness only in the red leaf swatch.
Luminance noise starts to creep in more at ISO 3,200, making a somewhat noisy 13x19-inch print, but one that's still usable. Reduction to 11x14 leaves the feel of graininess in the shadows, but color and detail are quite good.
ISO 6,400 images are grainier still, and both color and contrast suffer at 11x14. Detail comes back to a usable level at 8x10, but color's still quite faded. At 5x7, though, the prints look pretty good. Reds are still soft and muted, but it makes a decent print nonetheless.
All told, prints from the Olympus E-PL2 look great. It's an impressive performance that a camera this small with a smaller sensor than most SLRs can produce 16x20-inch prints from ISO 200 to ISO 800 with only minor degradation in quality. And making a 5x7 from an ISO 6,400 print is also quite good. Last year's E-PL1 didn't offer ISO 6,400, but its prints were a little more comfortable being printed at 20x30 inches.
Testing hundreds of digital cameras, we've found that you can only tell just so much about a camera's image quality by viewing its images on-screen. Ultimately, there's no substitute for printing a lot of images and examining them closely. For this reason, we now routinely print sample images from the cameras we test on our Canon Pro9000 Mark II studio printer, and the Canon Pixma MP610 here in the office. (See the Canon Pixma Pro9000 Mark II review for details on that model.)
Flash
Olympus E-PL2 Flash

The Olympus E-PL2 is the second PEN series digital camera to feature a built-in, pop-up flash, with the E-PL1 being the first. Available flash modes are: Auto, Fill-in, Off, Red-eye reduction, Slow synchronization (1st curtain), Red-eye reduction slow synchronization (1st curtain), Slow synchronization (2nd curtain), and Manual. Flash control modes for the internal flash consist of TTL Auto (TTL pre-flash mode) and Manual (with full, 1/4, 1/16, 1/64 power output settings). To release the flash from its compartment, slide the flash switch on the rear panel behind the flash housing. Close it again by pushing the flash head back down. This flash does not auto-deploy.
The Olympus E-PL2's built-in flash has a Guide Number (GN) of 10 meters or 32.8 feet at ISO 200, which is the same as the E-PL1's GN of 7 at ISO 100. That's pretty weak, but understandable given its miniscule size. Still, it's quite useful as a fill flash, or when ambient lighting is too low for near-by subjects. Maximum sync speed has increased to 1/180s vs 1/160s for the E-PL1. Super FP shooting with shutter speeds up to 1/4,000s is available with Olympus FL-50R, FL-36R, FL-50, and FL-36 external flash units.
Like the Olympus E-PL1 and unusual for its class, the E-PL2's built-in flash can act as a wireless controller to remote slave flashes with wireless capability, specifically the Olympus FL-50R and FL-36R. Four separate control channels are available for wireless operation, to allow multiple photographers to work wirelessly in the same area without interfering with each other. There is also support for controlling three separate groups with individual control for flash mode and flash intensity per group.
 The E-PL2 also has a dedicated hot shoe for mounting external flash units (shown to the left with the included cover installed), like Olympus's compact FL-14 flash. Other Olympus flash units such as the FL-50R, FL-36R and FL-20 also work, and non-dedicated units can also be used provided they have a compatible trigger voltage and polarity. (Olympus hasn't stated the trigger voltage or polarity, though they do warn against using older flashes with trigger voltages higher than about 24v.)
The advantages of a good external flash are many: more power for increased range, faster recycle times, longer battery life, reduced red-eye, auto zoom to match coverage to the current focal length, and the ability to adjust the tilt and swivel of the head to allow light from the flash to be bounced off nearby surfaces such as a ceiling, for a diffuse effect. (The FL-14 does not, however, tilt for bounce-flash operation.) Many external flash units have a powerful AF assist illuminator, and other useful features such as modeling flash and high-speed focal plane (FP) sync mode are common on higher end models.
The Olympus E-PL2 allows you to adjust flash and ambient exposure independently of each other, by providing flash exposure compensation between -1 and +1 EV in one-third EV increments. An option in the Custom menu also allows for flash exposure compensation to be independent or additive to ambient exposure compensation. Flash exposure bracketing is also supported, where three shots can be taken at one-third, two-thirds, or one EV of positive and negative flash exposure compensation.
Flash Test Results
Coverage and Range
A very weak flash, with somewhat narrow coverage. Our standard flash shots were underexposed despite using +1.0 EV flash exposure compensation.


Coverage and Exposure. Flash coverage was uneven at wide-angle (14mm), but much more uniform (albeit dim) at full telephoto (42mm). In our Indoor Portrait flash test, the Olympus E-PL2's flash underexposed our subject. Increasing flash exposure compensation above +0.3 EV did not improve exposure, so even +1.0 EV shown above was dim. The average amount of flash exposure compensation needed for this shot is +0.7 EV. The camera's Slow-Sync flash mode produced much better results, aided by the slow 1/8 second shutter speed, though with a stronger pinkish-orange cast from the ambient room lighting.
| Flash Range: Wide Angle | |||||
|---|---|---|---|---|---|
| 6 ft | 7 ft | 8 ft | 9 ft | 10 ft | 11 ft |
 1/60 sec f3.5 ISO 200 |
 1/60 sec f3.5 ISO 200 |
 1/60 sec f3.5 ISO 200 |
 1/60 sec f3.5 ISO 200 |
 1/60 sec f3.5 ISO 200 |
 1/60 sec f3.5 ISO 200 |
| 12 ft | 13 ft | 14 ft | 15 ft | 16 ft | |
 1/60 sec f3.5 ISO 200 |
 1/60 sec f3.5 ISO 200 |
 1/60 sec f3.5 ISO 200 |
 1/60 sec f3.5 ISO 200 |
 1/60 sec f3.5 ISO 200 |
|
| Flash Range: Telephoto | |||||
|---|---|---|---|---|---|
| 6 ft | 7 ft | 8 ft | 9 ft | 10 ft | 11 ft |
 1/80 sec f5.6 ISO 200 |
 1/80 sec f5.6 ISO 200 |
 1/80 sec f5.6 ISO 200 |
 1/80 sec f5.6 ISO 200 |
 1/80 sec f5.6 ISO 200 |
 1/80 sec f5.6 ISO 200 |
| 12 ft | 13 ft | 14 ft | 15 ft | 16 ft | |
 1/80 sec f5.6 ISO 200 |
 1/80 sec f5.6 ISO 200 |
 1/80 sec f5.6 ISO 200 |
 1/80 sec f5.6 ISO 200 |
 1/80 sec f5.6 ISO 200 |
|
ISO 200 Range. Flash exposure started out dim at 6 feet at wide-angle, got a little brighter at 7 feet, then became dimmer as distance increased. At telephoto, flash exposures were even dimmer at 6 feet than they were at wide-angle, and gradually became dimmer as distance increased. Poor results here, but not surprising given the tiny flash.
| Manufacturer-Specified Flash Range | |
|---|---|
| Wide Angle | Telephoto |
 9.4 feet ISO 200 |
 5.9 feet ISO 200 |
Manufacturer Specified Flash Test. The Olympus E-PL2's built-in flash has a Guide Number (GN) of 10 meters at ISO 200. That works out to about 9.4 feet at f/3.5 and 5.9 feet at f/5.6, the maximum aperture of the kit zoom lens at wide-angle and telephoto respectively. In both the wide-angle and telephoto shots above, the E-PL2 did not perform as Olympus says it will, producing dim exposures at the rated distances. At wide-angle (14mm), the flash target was underexposed by just over 1/2 EV. At full telephoto (42mm), the target was underexposed almost by a full stop. Our standard test method for flash range uses a fixed setting of ISO 100 (when supported), to provide a fair basis of comparison between cameras. We've now also begun shooting two shots using the manufacturer-specified camera settings, at the range the company claims for the camera, to assess the validity of the specific claims.
High ISO Noise Reduction
Olympus E-PL2 Noise Reduction
The Olympus E-PL2 offers four levels of noise-reduction, which gives good control in choosing how you want to make the trade-off between subject detail and noise level. The E-PL2 applies NR to its JPEGs at all ISOs, so we've included crops at all ISOs in the tables below. The combination of shooting with NR turned down to the lowest setting and using a good noise-filtering program after the fact can produce very clean images with lots of fine detail in them.
See for yourself how the noise reduction works under daylight-balanced lighting. Click on any of the crops below to see the corresponding full-sized image.
| Noise Reduction Comparison In-camera JPEGs Daylight-balanced illumination |
||||
|
NR= Off
|
NR = Low
|
NR = Standard
|
NR = High
|
|
| I S O 2 0 0 |
 |
 |
 |
 |
 |
 |
 |
 |
|
 |
 |
 |
 |
|
|
NR = Off
|
NR = Low
|
NR = Standard
|
NR = High
|
|
| I S O 4 0 0 |
 |
 |
 |
 |
 |
 |
 |
 |
|
 |
 |
 |
 |
|
|
NR = Off
|
NR = Low
|
NR = Standard
|
NR = High
|
|
| I S O 8 0 0 |
 |
 |
 |
 |
 |
 |
 |
 |
|
 |
 |
 |
 |
|
|
NR = Off
|
NR = Low
|
NR = Standard
|
NR = High
|
|
| I S O 1 6 0 0 |
 |
 |
 |
 |
 |
 |
 |
 |
|
 |
 |
 |
 |
|
|
NR = Off
|
NR = Low
|
NR = Standard
|
NR = High
|
|
| I S O 3 2 0 0 |
 |
 |
 |
 |
 |
 |
 |
 |
|
 |
 |
 |
 |
|
|
NR = Off
|
NR = Low
|
NR = Standard
|
NR = High
|
|
| I S O 6 4 0 0 |
 |
 |
 |
 |
 |
 |
 |
 |
|
 |
 |
 |
 |
|
The above crops show the effects of the four available noise reduction settings, under the studio HMI lighting we use to simulate daylight. To our eyes, the default (Standard) level of noise reduction is a little heavy-handed, blurring fine detail already at the base ISO of 200. The Off noise reduction setting leaves a lot of luminance noise in the image, but still removes a lot of chrominance noise impacting detail in the red fabric. You'll be able to do better working from RAW files.
How does the Olympus E-PL2's high ISO JPEGs compare to other compact Micro Four-Thirds models? See the following table which compares at the default Noise Reduction setting at ISO 800 and above.
| High ISO Comparison with Olympus E-PL1, Olympus E-P2 and Panasonic GF2 (In-camera JPEGs, all default NR) Daylight-balanced illumination |
||||
|
Olympus E-PL2
|
Olympus E-PL1
|
Olympus E-P2
|
Panasonic GF2
|
|
| I S O 8 0 0 |
|
 |
 |
 |
|
 |
 |
 |
|
|
 |
 |
 |
|
|
Olympus E-PL2
|
Olympus E-PL1
|
Olympus E-P2
|
Panasonic GF2
|
|
| I S O 1 6 0 0 |
|
 |
 |
 |
|
 |
 |
 |
|
|
 |
 |
 |
|
|
Olympus E-PL2
|
Olympus E-PL1
|
Olympus E-P2
|
Panasonic GF2
|
|
| I S O 3 2 0 0 |
|
 |
 |
 |
|
 |
 |
 |
|
|
 |
 |
 |
|
|
Olympus E-PL2
|
Olympus E-PL1
|
Olympus E-P2
|
Panasonic GF2
|
|
| I S O 6 4 0 0 |
|
N/A
ISO 6400 not supported |
 |
 |
|
N/A
ISO 6400 not supported |
 |
 |
|
|
N/A
ISO 6400 not supported |
 |
 |
|
Here, we can see the E-PL2 appears to be applying more noise reduction by default than the other two PEN models, which is most noticeable in the red fabric. Both the E-PL2 and E-PL1 show less noise than the E-P2.The Panasonic GF2 takes a slightly different approach to noise reduction, leaving more luminance noise than the Olympus models. This leads to some un-natural looking sharpening artifacts at higher ISOs, and its ISO 6,400 image quality is markedly worse that the others.
Let's see how the Olympus E-PL2's high ISO JPEGs compare to compact system cameras with APS-C sensors:
| High ISO Comparison with Sony NEX-5, Sony NEX-3 and Samsung NX100 (In-camera JPEGs, all default NR) Daylight-balanced illumination |
||||
|
Olympus E-PL2
|
Sony NEX-5
|
Sony NEX-3
|
Samsung NX100
|
|
| I S O 8 0 0 |
|
 |
 |
 |
|
 |
 |
 |
|
|
 |
 |
 |
|
|
Olympus E-PL2
|
Sony NEX-5
|
Sony NEX-3
|
Samsung NX100
|
|
| I S O 1 6 0 0 |
|
 |
 |
 |
|
 |
 |
 |
|
|
 |
 |
 |
|
|
Olympus E-PL2
|
Sony NEX-5
|
Sony NEX-3
|
Samsung NX100
|
|
| I S O 3 2 0 0 |
|
 |
 |
 |
|
 |
 |
 |
|
|
 |
 |
 |
|
|
Olympus E-PL2
|
Sony NEX-5
|
Sony NEX-3
|
Samsung NX100
|
|
| I S O 6 4 0 0 |
|
 |
 |
 |
|
 |
 |
 |
|
|
 |
 |
 |
|
|
Olympus E-PL2
|
Sony NEX-5
|
Sony NEX-3
|
Samsung NX100
|
|
| I S O 1 2 8 0 0 |
N/A
ISO 12800 not supported |
 |
 |
N/A
ISO 12800 not supported |
|
N/A
ISO 12800 not supported |
 |
 |
N/A
ISO 12800 not supported |
|
|
N/A
ISO 12800 not supported |
 |
 |
N/A
ISO 12800 not supported |
|
As you can see, the two Sony NEX models have arguably the best high ISO performance of the group, though noise reduction is pretty hard at work. The Samsung NX100 shows a lot more luminance noise as well as chroma noise, but holds onto more detail in some areas, and less in others.
Keep in mind that each camera manufacturer makes somewhat different trade-offs between noise and image detail, compounded by the number of different NR settings each offers. Be sure check out our RAW crops, to see how sensor output compares without NR or other in-camera processing.
RAW Files
Olympus E-PL2 High ISO RAW Image Quality
We've recently started looking at RAW files converted with dcraw, an excellent freeware raw converter. dcraw usually offers timely support for the latest cameras, but more importantly, it does not apply any noise-reduction, sharpening or other corrections such as geometric distortion correction to the output files. (We found that Adobe Camera Raw still applies some limited noise-reduction when its NR settings are set to zero, and it also applies other corrections depending on the make and model of the camera). There will always be differences between RAW converters, in terms of the sort of demosaicing algorithms they use (the processes by which they convert the separate Red, Green, and Blue data sets to an array of full-color RGB pixels), but dcraw seems to use a fairly generic algorithm that delivers good sharpness with relatively few artifacts, and can be counted on to not apply any noise reduction if you don't want it to.
Below are crops from Olympus E-PL2 high ISO RAW files compared to RAW files from other Micro Four-Thirds models: the Olympus E-PL1, Olympus E-P2 and the Panasonic GF2. All were converted with dcraw with no noise reduction or sharpening.
| High ISO RAW Image Quality Olympus E-PL2 vs E-PL1, E-P2, and Panasonic GF2 RAW files converted with dcraw, no NR, no sharpening Simulated Daylight |
||||
|
|
Olympus E-PL2
|
Olympus E-PL1
|
Olympus E-P2
|
Panasonic GF2
|
I
S O 8 0 0 |
 |
 |
 |
 |
 |
 |
 |
 |
|
 |
 |
 |
 |
|
|
|
Olympus E-PL2
|
Olympus E-PL1
|
Olympus E-P2
|
Panasonic GF2
|
|
I
S 0 1 6 0 0 |
 |
 |
 |
 |
 |
 |
 |
 |
|
 |
 |
 |
 |
|
|
|
Olympus E-PL2
|
Olympus E-PL1
|
Olympus E-P2
|
Panasonic GF2
|
I
S O 3 2 0 0 |
 |
 |
 |
 |
 |
 |
 |
 |
|
 |
 |
 |
 |
|
|
|
Olympus E-PL2
|
Olympus E-PL1
|
Olympus E-P2
|
Panasonic GF2
|
|
I
S 0 6 4 0 0 |
 |
N/A
ISO 6400 not supported |
 |
 |
 |
N/A
ISO 6400 not supported |
 |
 |
|
 |
N/A
ISO 6400 not supported |
 |
 |
|
To our eyes, the new Olympus E-PL2 has very similar high ISO noise performance compared to the E-PL1 (if not slightly better), and both do slightly better than the E-P2. The Panasonic GF2 comes in last in this group, especially at higher ISOs.
Let's see how the Olympus E-PL2's high ISO RAW files compare to compact system cameras with APS-C sensors:
| High ISO RAW Image Quality Olympus E-PL2 vs Sony NEX-5, Sony NEX-3 and Samsung NX100 RAW files converted with dcraw, no NR, no sharpening Simulated Daylight |
||||
|
Olympus E-PL2
|
Sony NEX-5
|
Sony NEX-3
|
Samsung NX100
|
I
S O 8 0 0 |
|
 |
 |
 |
|
 |
 |
 |
|
|
 |
 |
 |
|
|
Olympus E-PL2
|
Sony NEX-5
|
Sony NEX-3
|
Samsung NX100
|
|
|
I
S 0 1 6 0 0 |
|
 |
 |
 |
|
 |
 |
 |
|
|
 |
 |
 |
|
|
Olympus E-PL2
|
Sony NEX-5
|
Sony NEX-3
|
Samsung NX100
|
I
S O 3 2 0 0 |
|
 |
 |
 |
|
 |
 |
 |
|
|
 |
 |
 |
|
|
Olympus E-PL2
|
Sony NEX-5
|
Sony NEX-3
|
Samsung NX100
|
|
|
I
S 0 6 4 0 0 |
|
 |
 |
 |
|
 |
 |
 |
|
|
 |
 |
 |
Olympus E-PL2
|
Sony NEX-5
|
Sony NEX-3
|
Samsung NX100
|
| I S 0 1 2 8 0 0 |
N/A
ISO 12800 not supported |
 |
 |
N/A
ISO 12800 not supported |
|
N/A
ISO 12800 not supported |
 |
 |
N/A
ISO 12800 not supported |
|
|
N/A
ISO 12800 not supported |
 |
 |
N/A
ISO 12800 not supported |
|
It's a little difficult to compare chroma noise because of the different color balance and saturation levels rendered by dcraw, but the Olympus E-PL2 actually does surprisingly well here compared to compact system cameras with APS-C sensors, especially considering its smaller photosites. (The 14.2-megapixel Sonys and 14.6-megapixel Samsung have more photosites, but the 12.3-megapixel E-PL2's pixel density is higher because the sensor area is smaller.)
Press Release
Powerfully Simple Olympus Pen® System Grows With Intelligent Enhancements And Bluetooth® Capability: The Olympus Pen E-PL2 Camera
Enhance Your High Definition Videos and Stills with Movie and Still Compatible Lens Technology, New Live Guide II, More Robust Art Filter Effects and a New Range of Accessories
CENTER VALLEY, Pa., January 5, 2011 – Today Olympus announces the new powerfully simple PEN E-PL2, the fourth generation of the award-winning and pioneering Olympus PEN family of compact interchangeable lens digital cameras. Known for pro quality, point-and-shoot simplicity and high-definition video, the PEN E-PL2 continues the PEN family’s legacy of simple design, intuitive interface and Digital Single Lens Reflex (DSLR) image quality. The new camera also expands your creative potential with Live Guide II, new in-camera creative features, new auxiliary lenses, a new Close-Up Spotlight accessory (MAL-1) and the new Olympus PENPal™ Bluetooth accessory. Capturing amazing still images and HD video just got a lot more fun. Further proof that Olympus lets you capture it all.
Outstanding Features:
-
MSC Lens - the new Movie & Still Compatible (MSC) ED m14-42mm f3.5/5.6 zoom lens (28mm-84mm equivalent) features a high-speed, silent autofocus during still shooting and high definition (HD) video capture;
-
New 3” 460,000 dot LCD - for bright and easy image composition;
-
Live Guide II - preview HD video and still image effects on the E-PL2’s high-resolution LCD screen to achieve the perfect result effortlessly;
-
Art Filter Variations and Enhancements --choose from different art filter looks to expand your creative horizons or overlay different art filters to create something new, now with full manual control;
-
ISO 6400 -take great low-light photos with the camera’s increased ISO sensitivity;
-
New Ergonomic Body Design - shoot stills and videos comfortably with a more ergonomic grip and updated button placement and functionality for ease of use; and
Face Detection with iDetect - an amazing new function makes it easier to capture the spirit of your subject, automatically making a person’s eye the focus point of the image. The E-PL2 further reduces the chance of blurred subjects in images by recognizing up to eight faces, tracking them within the image area, and automatically focusing and optimizing exposure for sharp portraits.
At an affordable $599.99 with the new MSC ED m14-42mm f3.5/5.6 zoom lens (28mm-84mm equiv.), the 12.3 megapixel ergonomically-designed E-PL2 is perfect for everyone from beginners, who want to expand their creative horizons, to experienced photographers who desire high-quality results without the size and weight of a traditional DSLR.
“The innovative PEN E-PL2 is designed to go with you and grow with you – it’s the total compact multimedia package,” said Katie Roseman, product manager, Olympus Imaging America Inc. “We’ve expanded everything but the size of the camera. Live Guide II, new art filter variations and enhancements for instant gratification, three converter lenses and MAL-1 close-up spotlight will all help grow your creative potential, while the Olympus PENPal lets you send images straight from the camera to your smart phone for social sharing.”
New Lens Optimized for Video and Image Stabilization for Every Lens
The E-PL2 comes with the new Movie & Still Compatible (MSC) ED m14-42mm f3.5/5.6 zoom lens. This new kit lens has a smooth, silent and uses a quick inner focus mechanism to make it exceptionally fast and nearly silent when recording high-definition movie. The M.Zuiko Digital MICRO Four Thirds® lenses are designed to be more compact and portable, just like the E-PL2 itself. In addition to the kit lens, choose from the ED m17mm f2.8 lens (34mm equivalent), the super wide-angle zoom ED m9-18mm f4.0-5.6 lens (18-36mm equivalent), the high-power wide to telephoto zoom ED m14-150mm f4.0-5.6 lens (28-300mm equivalent), the wide zoom ED m40-150mm F4.0-5.6, or the super telephoto ED m75-300mm f4.8-5.6 (35mm equivalent 150–600mm).
If you’re looking for even more options, the MMF-2 Four Thirds™ System Lens Adapter makes the E-PL2 compatible with all Olympus Zuiko® Digital Specific lenses and other Four Thirds System lenses from Sigma, Panasonic and Leica. Olympus OM film-based lenses can be attached to the E-PL2 with the MF-2 OM Lens Adapter, and third-party adapters have been developed for lenses from most other manufacturers.
New Live Guide II for Stills and Movies
The PEN E-PL2’s Live Guide II takes the E-PL1’s popular Live Guide interface for stills and expands it to preview effects for HD videos. Live Guide takes the guesswork out of great photography and videography by previewing effects at the touch of a button. Want more vivid or muted color in your shot? Want warmer or cooler color? Want a brighter or darker subject, or a sharper or softer background? Or maybe you want to capture the fast-moving action of your subject with a little artistic blur, or perhaps freeze the action? Simply select Live Guide and turn the wheel on the back of the camera to slide through numerous photographic and videographic effects. Make adjustments and watch the LCD as the effects are made live – before the image is captured! Don’t worry about learning technical things like f-stops, shutter speed and white balance; jump right in by composing, adjusting exposure and more before the shot is taken.
Seeing the results before snapping the image or shooting a video ensures you are getting the results you want, and it will change the way you use your camera. Shooting Tips are also available with Live Guide, so you can leave the manual at home.
Limitless Creativity with New Art Filter Variations and Enhancements
Olympus pioneered easy-to-use in-camera art filters for still images captured inside its E-System DSLRs and was the first company to offer the ability to apply art filters to HD video recordings captured with the PEN E-P1 camera. The E-PL2 features six art filters: Pop Art, Soft Focus, Grainy Film, Pin Hole, Diorama, and Dramatic Tone. For the first time, the E-PL2 also features art filter variations and enhancements to maximize your creativity and expand the potential results. Give your images a different look by choosing from six art filters. Overlay an art effect over an original image with or without an art filter. Shoot a sunset with Pop Art and then add the Pin Hole Effect. Take a portrait in Grainy Film and then add a funky art frame. The possibilities are limitless.
Whatever you create, it will be easy to display on the big screen. When you’re ready to share your work, just plug the E-PL2’s camera into any high definition television (HDTV) using the camera’s HDMI output with an optional HDMI cable (sold separately) and show it off from the comfort of your living room.
HD Videos and HDMI Control for a Home Theater Experience
The E-PL2 shoots gorgeous 720p HD video, so you’ll always capture the moments you cherish in clear, crisp high-definition at the touch of a button. With HDMI Control, playback is also a breeze. You’ll be the hit of the party or any family event when you proudly display your brilliant images and movies on HDTVs. Simply connect the camera to an HDTV with an optional HDMI cable. With HDMI Control, you can use your HDTV’s remote to control playback functions and navigate the camera’s menus from the comfort of your couch.
New Optional Accessories for Every Shooting Challenge
Along with the E-PL2, Olympus unveils five new accessories to further expand what you can do with PEN cameras.
-
Add-on Conversion Lenses -Olympus has three new affordable and compact conversion lenses that mount on the new MSC ED m14-42mm f3.5/5.6 zoom lens to further expand what you can do with the E-PL2:
-
Fish-eye Lens Converter (FCON-P01): captures a distorted hemispherical image covering 120° - to generate dramatic shots and edges that wrap around the frame of your image;
-
Wide-angle Lens Converter (WCON-P01): enables the user to capture a broader shot, for example, to include more people in a photograph. It dramatically alters the proportions of close and distant subjects. Subjects close to the lens appear much larger, while subjects in the background appear smaller – creating a dynamic sense of depth; and
-
Macro Lens Converter (MCON-P01): Enables the user to capture fascinating close-ups from as little as 24cm. away from the subject (depending upon the lens in use). The MCON-P01 is also compatible with the ED m14-150mm f4.0-5.6 lens (28-300mm equivalent), ED m40-150mm F4.0-5.6, and ED m75-300mm f4.8-5.6 (35mm equivalent 150–600mm) for close focusing shots.
-
Macro Arm Light (MAL-1) -Not one, but two bright LED lights – each on the end of its own fully flexible metal arm and powered by the camera. Both arms extend up to 17cm. from a sleek and slender unit mounted on the camera’s Accessory Port. For macro shots or attractive close-ups of small items or for online auctions, the MAL-1 is ideal for getting the lighting just right.
-
PENPal -A sleek communication unit for storing up to 2600 images and transferring them via wireless Bluetooth to other Bluetooth-enabled devices, such as a mobile phone, PC or even another PENPal-equipped camera. From there it’s easy to share them with friends in online communities or via e-mail.
In addition to these accessories, the E-PL2 is compatible with the optional VF-2 detachable electronic viewfinder, which provides 1.15x magnification and a 100 percent field of view with sharp resolution, brightness and contrast, and the optional SEMA-1 external microphone adapter set for those who want to capture enhanced audio with any microphone that has a 3.5mm plug. These optional accessories easily slide into the camera’s accessory port and hot shoe.
In-camera Image Stabilization that Supports a Wide Range of Lenses
Olympus has Image Stabilization built right into the body of the E-PL2. This means that any lens (MICRO Four Thirds, Four Thirds and any third-party lens) attached to the E-PL2 will deliver blur-free images thanks to three modes of in-body Image Stabilization that automatically compensate for camera shake, including in low-light situations or when shooting without a tripod.
Achieve More with Automatic Features Including New iDetect
The E-PL2 features Face Detection with a new Eye Detection function called iDetect to make it easier to capture the spirit of your subject. This feature automatically makes a person’s eye the focus point of the image. The E-PL2 further reduces the chance of blurred subjects in images by recognizing up to eight faces, tracking them within the image area, and automatically focusing and optimizing exposure for sharp portraits. In addition, the E-PL2 has a variety of automated technologies to free you up to focus on your subject instead of the camera settings.
-
22 Scene-Select Modes --from portraits to sunset shots, the E-PL2 is equipped with 22 Scene-Select modes for effortless picture taking, including Fireworks, Sunset, Children, Macro and Panorama, to name a few. Capturing beautiful portraits is easy with the ePortrait mode that enables you to smooth your subject’s complexion. There are even three scene modes that are specific to shooting with the new conversion lenses to optimize the performance of those lenses;
-
Intelligent Auto (iAuto) Mode --when you don’t want to use the scene-select modes, the iAuto mode automatically identifies what you’re shooting and adjusts settings to ensure you capture the best result for each situation you encounter;
-
In-Camera Panorama -- capture three images and stitch them together to create one amazing, seamless panoramic picture. Or use the included OLYMPUS [ib] software to stitch up to 10 images together for the ultimate panorama; and
-
iEnhance -- with this mode the warm yellow and orange colors of a sunset are heightened to a dramatically lifelike color that’s truer to what you see with the naked eye. iEnhance is available in any mode, and automatically engages when using iAuto to enrich color in any subject.
Large Sensor for Excellent Image Quality
The E-PL2 features a large image sensor similar to the one inside the top of the line Olympus E-System cameras. The only difference between this sensor and what the pros use is that this big sensor is inside the much smaller body of the E-PL2. This high-performance 12.3-megapixel Live MOS Sensor (eight times larger than the average point-and-shoot camera sensor) delivers excellent dynamic range, accurate color fidelity, and a state-of-the-art amplifier circuit to reduce noise and capture fine image details in both highlight and shadow areas.
True-to-Life Color
The E-PL2’s Live MOS image sensor is complemented by Olympus’ TruePic™ V Image Processor, which produces clear and colorful photos using all the pixel information for each image to provide the best digital images possible. The image processor is noted for accurate natural color, true-to-life flesh tones, brilliant blue skies and precise tonal expression; it also offers a maximum ISO sensitivity of 6400, to reduce image noise in photos shot at higher ISO settings, enabling great results in low-light situations.
World-renowned Dust Reduction System
The Olympus dust reduction system is an industry first and a proven technology. You don’t have to worry about dust spots on your sensor ruining the perfect image every time you change lenses. Spend more time shooting with the E-PL2 and less time worrying about dust with the superior dust reduction system producing spot-free photos with the exclusive Supersonic Wave Filter, a patented ultrasonic technology that silently vibrates to remove dust and other particles from the front of the image sensor. Dust will no longer get between you and a great shot.
Flash Alternatives for Everyone
For low-light shooting situations photographers can select the built-in flash or choose an optional external unit. Wireless flash control is also possible with the E-PL2, making customized lighting set-ups an easy reality.
Underwater Housing for Aquatic Adventures
The new camera’s compact design makes it the perfect companion for all of your dive trips. Olympus has designed a custom underwater case for the PEN E-PL2, the PT-EP03, which is waterproof to a depth of 40 meters (approximately 130 feet). With its durable, high-quality polycarbonate construction, this Olympus housing protects the camera from water while also cushioning it from knocks and bumps on land. The housing enables viewing from either the camera’s LCD screen or an optional electronic viewfinder. Use up to two UFL-2 underwater flash units via fiber optic cable with the case’s flash connectors. A non-removable front lens port accommodates multiple MICRO Four Thirds lenses.
Availability
The Olympus E-PL2 Kit will be available in January 2011. It includes the E-PL2 Body, M. ZUIKO MSC DIGITAL ED m14-42mm f3.5/5.6 Zoom, USB Cable, Video Cable, Li-Ion Battery Pack (BLS-5), Li-Ion Battery Charger (BCS-1), Shoulder Strap, OLYMPUS [ib] software CD-ROM, Manuals and Registration card.
U.S. Pricing / Product Configurations
E-PL2 Body with MSC M. ZUIKO DIGITAL ED m14-42mm f3.5/5.6 Zoom Lens
Estimated Street Price: $599.99
ABOUT OLYMPUS IMAGING AMERICA INC.
Olympus Imaging America Inc. is a precision technology leader, designing and delivering award-winning products for consumer and professional markets.
Olympus Imaging America Inc. works collaboratively with its customers and its ultimate parent company, Olympus Corporation, to develop breakthrough technologies with revolutionary product design and functionality that enhances people’s lives every day. These include:
-
Digital Cameras
-
Professional and Interchangeable Lens System Cameras
-
Related Underwater Products and Accessories
-
Digital and Microcassette Recorders
-
Digital Media
-
Binoculars
*Specifications and design are subject to change without any notice or obligation on the part of the manufacturer. All trademarks and registered trademarks listed herein are the property of their respective holders, in the US and/or other countries.
© 2011 Olympus Imaging America Inc.
# # #
Olympus Imaging America Inc. is responsible for sales in the United States, Canada, Mexico, the Caribbean, and Central and South America. For more information, visit: www.olympusamerica.com.