Panasonic Lumix DMC-FZ8 Design
Available in matte black or silver, the Panasonic DMC-FZ8 is styled like a digital SLR, but without the bulk or weight. The FZ8 measures 4.8 x 2.8 x 3.5 inches (121.5 x 72.4 x 90.5mm) and weighs approximately 12.6 oz. (358g) with an SD/SDHC card and battery installed. The lens barrel protrudes just enough to help steady the camera with your left hand, while a high profile grip combined with the camera's light weight makes one-hand shooting easy. Overall, the control layout is logical and convenient and photographers with larger hands will feel comfortable holding and operating the FZ8. Not surprisingly, you won't be able to fit this camera into most pockets, but a deep jacket pocket or small camera bag will easily hold the camera when you're out in the field or on vacation. You'll need some extra space for the lens hood, though, which attaches with an adapter, adding a little more than 3 inches to the lens barrel.
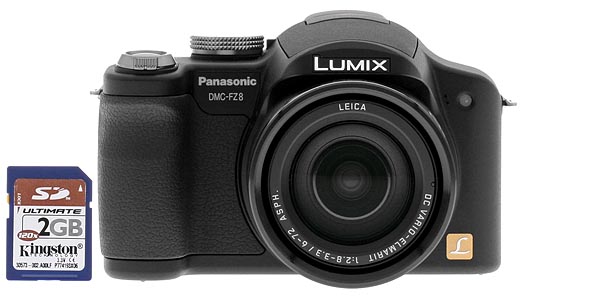
A substantial grip on the front of the camera provides a solid and comfortable handhold, especially with its small indentation for resting your middle finger. A tiny Microphone sits next to the Self-timer indicator light/AF assist lamp on the right.
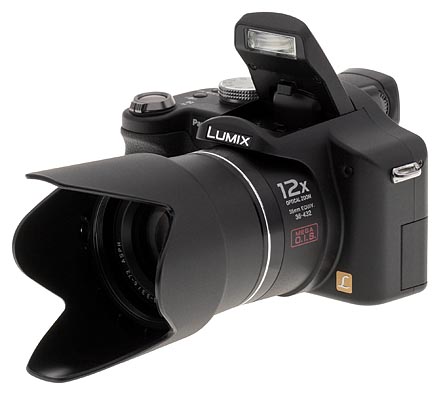
In order to use the lens hood, accessory lenses or filters, you need to attach a screw-on adapter, which comes with the camera. The lens hood, with a petal design, attaches with a single turn-screw and can be rotated to ensure that the lens hood doesn't cause vignetting. However, no matter which way the lens hood is rotated, vignetting will occur when you use the flash at wide angle. The good news is that the spring-loaded lens cap fits onto the lens snugly even with the lens hood attached.
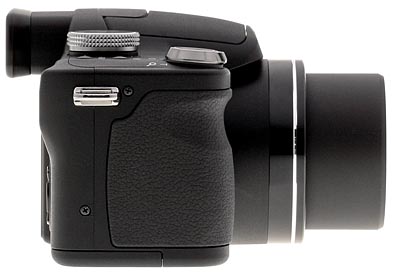
On the right you can see the camera strap lug and the textured rubber grip.

On the left side of the camera (as viewed from the rear) you'll find the second strap lug, as well as a small hinged hard plastic door that covers the Digital/AV Out and DC-In sockets for attaching the USB cable, optional AC adapter or AV cable. Here you can also see the diopter adjustment dial on the left of the electronic viewfinder.
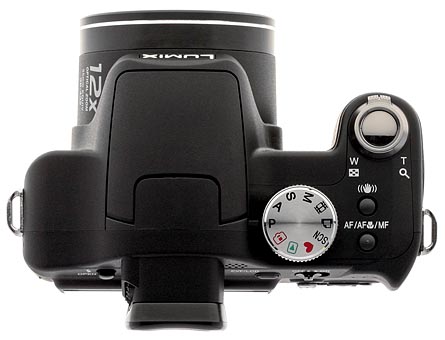
The camera's top panel is home to the built-in pop-up flash as well as a mode dial, shutter button and zoom lever combo, the optical image stabilization button, and focus mode button.
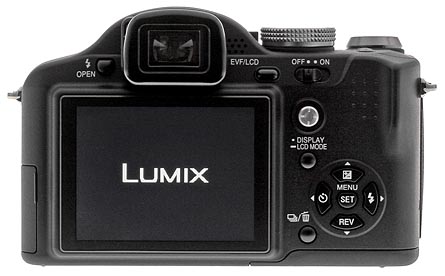
The Panasonic DMC-FZ8's rear panel features the remainder of the camera's external features and controls including the LCD and EVF (Electronic Viewfinder). To the left of the EVF is a button to pop up the flash. To the right of the EVF, you'll see a tiny speaker next to the EVF/LCD selection button. Next is the Off/On switch, a Joystick for direct access to AF Area points, Exposure Compensation adjustments, and a quick access onscreen menu. The button below the joystick and to the right of the 2.5-inch LCD controls the monitor's Display Information as well as the LCD Mode. Four-way arrow keys surround the Menu/Set button. And, finally, there's a button that does double-duty as a Delete button and to access/select the camera's Burst Mode options.
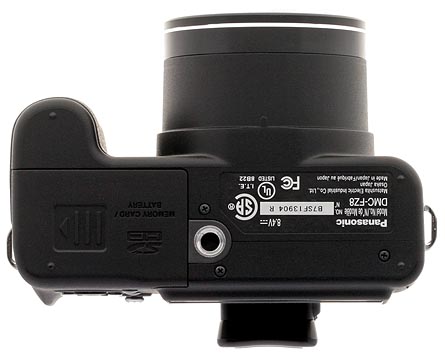
The battery/SD/SDHC card compartment is located on the bottom of the camera, protected by a sturdy hinged door. The adjacent tripod mount is metal but its close proximity to the compartment prevents battery and media card changes when using a tripod.
Panasonic Lumix DSC-FZ8 External Controls
Shutter Button: Positioned atop the camera's grip, the Shutter button sets focus and exposure when halfway pressed, and fires the shutter when fully pressed.
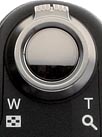
Zoom Lever (see above image): The Zoom Lever surrounds the Shutter button and controls the zoom in Record mode. Pull the lever right for telephoto; push the lever left to zoom to wide angle. In Playback mode, the Zoom lever is used to zoom in to see the details of an image or to display multiple images at the same time. You can also use the Zoom lever to access the camera's Calendar view, which allows you to locate images by date.
![]()
Image Stabilizer Button: Located near the Shutter button/Zoom lever, this button activates the FZ8's MEGA O.I.S. (Optical Image Stabilization) and calls ups a menu to turn Off the O.I.S. or set it to Mode 1 (for continuous stabilization) or Mode 2 (for stabilization only when the Shutter is pressed; Mode 2 is the more effective method).

Focus Switch Button: Directly behind the Image Stabilizer button, press and hold the Focus Switch button to reveal the camera's focus options: Autofocus (AF), AF Macro, and Manual Focus. You can scroll through the list by pressing the Focus Switch button repeatedly or by using the up/down Four-way arrows.
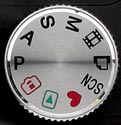
Mode Dial: Also positioned atop the camera's grip, the Mode dial changes the modes between Program AE, Aperture-priority, Shutter-priority and full Manual. Other options include the Motion Picture mode, Print mode (for direct printing), Scene mode, Simple (automatic) mode, Playback and Intelligent ISO.
![]()
Diopter Adjustment Dial: On the left side of the viewfinder eyepiece, this dial adjusts the optical viewfinder's optics to accommodate eyeglass wearers.
![]()
Power Switch: This sliding switch turns the camera on and off.
![]()
EVF/LCD: This button switches between the Electronic Viewfinder and the LCD monitor. Only one or the other can be used at any given time.

Joystick: The multi-functional Joystick is operational in all modes except for the Simple mode. It can be used to select the Autofocus Area from among 11 points (squares), adjust EV (Exposure Compensation), and is used to change Aperture and Shutter Speed settings when using any one of the manual exposure modes (Exposure Compensation is not available in full Manual exposure mode). Press and hold the center of the Joystick to call up an on-screen menu to change the AF mode, Metering mode, White Balance, ISO, Picture Quality (file size) and Compression settings. The Joystick can also be used to navigate all menu systems and, in Playback, it can be jogged left or right to scroll through images.

Display/LCD Mode: Using this button you can cycle through various Display options including: no shooting information, full shooting information (such as shooting mode, flash mode, ISO, image resolution and compression settings, battery life, number of shots remaining, etc.), full shooting information plus live Histogram, full shooting information with live Histogram and a Grid overlay, or basic shooting information displayed on the side and bottom of the LCD. Note: The Histogram and Grid Overlay must first be turned on via the Menu. Simple mode reduces these options to two: a limited information display of Flash mode, Picture mode, battery status, remaining images, and card status; or no information at all. Hold the Display/LCD button to access the LCD mode options which include Power LCD (which brightens the screen), High Angle LCD (which sets an extreme level of brightness so the LCD can be viewed at certain angles), or Off.
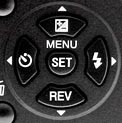
4-Way Arrow Keys/Set Button: These four Arrows provide navigational control for scrolling through menus in Record and Playback modes.
When capturing images, press the up Arrow Key to access and adjust Exposure Compensation settings (Backlight when the mode dial is set to Simple), Exposure Bracketing, and Flash power. Exposure Compensation is not available in full Manual exposure and may not be available in some Scene modes.
The right Arrow Key goes to the Flash mode menu (but only when the flash unit is popped open); settings include Auto, Auto/Red-Eye, Forced Flash On, and Slow Synchro/Red-Eye. Available options vary depending on the selected capture mode.
The down Arrow Key puts the camera into Quick Review, which allows you to scroll through, zoom in on, and delete images, but the Playback menu is not available. For full Playback options, the Mode dial must be moved to Playback.
The left Arrow Key activates the Self-Timer which can be set to 2 seconds, 10 seconds, and a special 10S/3Pictures option, which takes a series of three pictures at about 2 second intervals but is limited to Off and 10 seconds in Simple mode.
In Playback mode, the Arrow Keys are used to scroll through images and navigate within the image when using the Zoom function.
Menu/Set Button (see above image): Surrounded by the 4-way Arrow Keys, the Menu/Set button opens the full set of Menus for the current mode (Record or Playback) and is pressed to Set or okay a changed Menu option.

Burst Mode/Delete Button: Use this button to access the camera's Burst modes when shooting or to delete an image when reviewing your pictures in Playback.
 Fujifilm GFX 50S Review
 Fujifilm X-T3 Review
 Olympus E-M5 III Review

Follow Imaging Resource