Sony A7 II Review – Test Shots

Digital Cameras – Sony Alpha ILCE-A7 II Test Images

Not sure which camera to buy? Let your eyes be the ultimate judge!
Visit our Comparometer(tm)
to compare images from the Sony Alpha ILCE-A7 II with those from other
cameras you may be considering. The proof is in the pictures, so let
your own eyes decide which you like best!

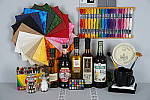
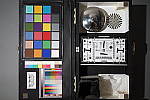
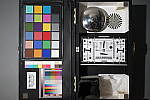
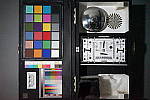
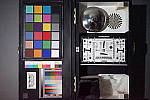
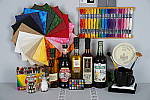
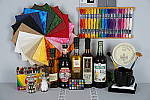
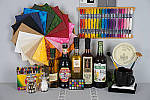
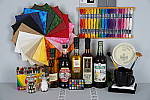
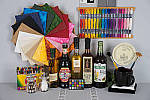
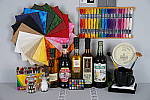
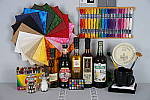
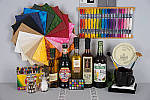
Still LifeA7 II Sample images image 1

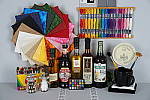
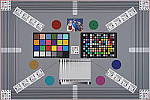
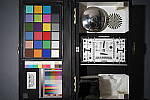
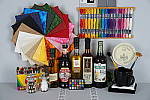
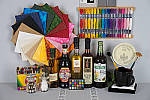
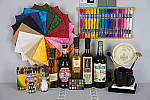
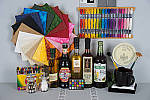
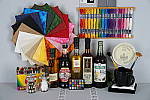
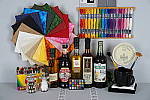
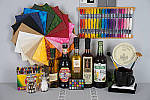
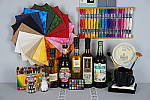
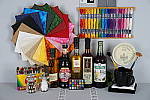
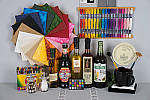
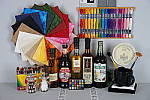
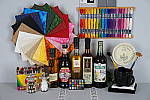
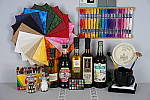
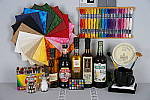
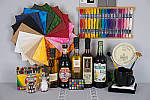
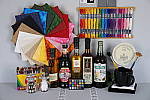
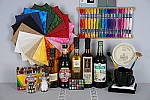
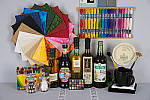
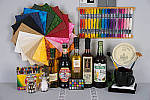
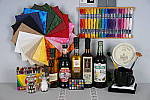
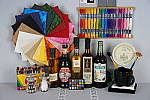
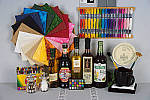
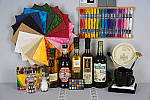
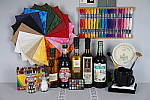
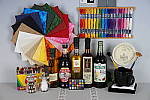
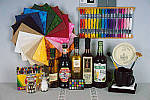
This is our new “Still Life” test target. We’re combining
some of the elements from previous shots (DaveBox and Res Chart) into
this and the “Multi Target” shot below, plus added a number
of elements that are very revealing of various camera characteristics
and foibles.

Here’s what to look for in this target:

  • Tone-on-tone detail & noise suppression:
    The cloth swatches in the pinwheel were chosen because they show a lot
    of tone-on-tone detail, across a broad range of colors. This is just
    the sort of detail that noise suppression processing tends to flatten
    out. If you look at the detail in these swatches as the ISO increases,
    you’ll see just where different cameras start to lose subtle detail.
    — The white and tan swatches and the dark swatches tend to be particularly
    revealing of this. The label of the vinegar bottle (second from the
    right) is another great place to look for lost detail from noise suppression,
    as the image of the person at the top of the label is actually a depiction
    of a mosaic. The dark colors in the background and in the figure’s clothes
    contain detail that’s very quickly lost when a camera’s noise suppression
    system kicks in. Cameras with really high-quality, low-noise sensors
    that require little noise suppression will be able to hold onto the
    detail in these areas, many others will show only a uniform swath of
    smudged color.

    Another place where you’ll quickly see the effects of over-aggressive
    noise suppression is in the white salt grains of the salt grinder in
    lower left. Cameras are often more conservative about suppressing noise
    in highlight areas (because our eyes tend to see less of it there),
    but many cameras seem to have a hard time holding onto the subtle shadings
    that distinguish the salt grains from each other, particularly at higher
    ISO levels.

  • Fine Detail: You’ll find a lot of fine detail
    in the label of the beer bottle on the right, in its fine cursive text,
    but the other bottle labels hold a lot of fine detail as well. Fine
    text is often a good visual indicator of resolution, because our brains
    have an excellent idea of what the text should look like, so
    are very quick to notice even minor loss of detail.

    For really fine detail, look to the circular scale/calculator on the
    right side of the scene. Some of the fine lines there are extremely
    fine indeed. Looking at results from many different cameras with this
    target, we found that camera noise-suppression systems often confuse
    the fine lines with image noise, and so flatten them out. There’s also
    a nice range of fine text sizes in this chart as well, once again great
    visual cues for resolution and detail.

  • Highlight Detail: Three elements in this scene
    show off (or show up) a camera’s ability to hold onto highlight detail.
    As mentioned above, the salt grains (and reflections of the studio lights)
    in the salt mill are examples of fairly subtle highlight detail that
    cameras’ anti-noise processing sometimes obliterate. The folded white
    cloth under the mug on the right side of the frame likewise shows a
    lot of white-on-white detail that is easy to lose, particularly if a
    camera’s tone curve is too contrasty. As it turns out though, the most
    sensitive test of a camera’s highlight abilities seems to be the hank
    of white embroidery thread in the upper right corner. These fibers are
    unusually bright and reflective, so its easy for a camera to blow out
    detail in them.

  • Shadow Detail: Several elements of this subject
    are useful for evaluating shadow detail, particularly the black mug
    and the pieces of folded black velvet, both under and inside the mug.
    The bottoms of the beer bottles also provide some gradations of deep
    shadow, and the clump of peppers in the bottom of the pepper oil bottle
    had a fair bit of detail that’s far down at the shadow end of the tone
    curve.

    We were actually surprised when we constructed this scene just how dark
    the velvet and sides of the beer bottles ended up being. Even with the
    bright studio lights shining directly on it, the velvet in particular
    stays way, way down at the shadow end of the tone curve. With most cameras
    and on most monitors, the velvet will simply appear as an unrelieved
    swatch of black. To see whether it contains deep detail or not, in most
    cases you’ll have to open the file in an image editor and boost the
    brightness dramatically, to bring the detail up into a visible range.

  • Preservation of “Shape” in Strong Colors:
    As you approach the extremes of a camera’s color gamut (its range of
    recordable colors), it becomes more and more difficult for the camera
    to show fine gradations of tone, because one or more of the RGB color
    channels are close to saturation. It’s not uncommon to see a brightly
    colored piece of clothing or a vibrant flower appear in digicam photos
    as just a blob of color, because the camera ran up against the limits
    of its color gamut. The brightly colored embroidery threads in the upper
    right portion of the Still Life target are good examples of situations
    where this might happen. Pay particular attention to the bright red
    and dark blue colors here, as these are both colors near the edge of
    the typical sRGB color gamut.

  • Color accuracy and white balance: It’s pretty
    small in there, but we’ve included a mini-MacBeth chart, which displays
    very carefully controlled color swatches. Our Multi Target (see below)
    sports a full-sized MacBeth chart, but the one here serves as a good
    check of color balance and rendition, and is also useful for checking
    white balance on this particular shot.

  • Image noise and detail vs ISO: As mentioned above,
    this target contains many elements useful for evaluating detail loss
    to anti-noise processing. We’ll therefore always shoot a full set of
    test images of this target across each camera’s ISO range, for every
    camera we test. (See below.)
ISO Series, NR = Normal
50 100 200 400 800
1600 3200 6400 12.8K 25.6K
ISO Series, NR = Lowest
50 100 200 400 800
1600 3200 6400 12.8K 25.6K

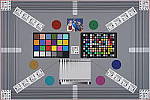
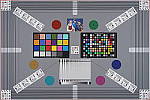
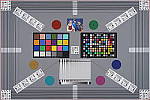
Multi TargetA7 II Sample images image 2

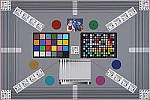
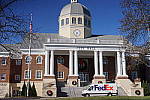
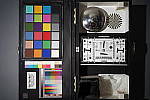
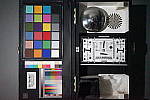
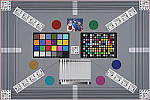
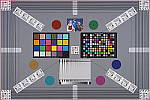
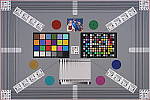
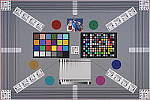
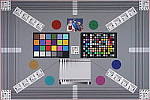
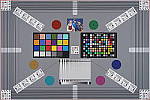
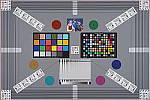
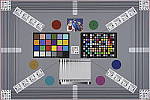
Our new “Multi Target” was first put into use in April, 2009, replacing the earlier “interim” design. This target incorporates a number of elements that combine aspects of the previous Multi target, as well as the previous Viewfinder Accuracy or “VFA” chart. Here’s some of what you’ll find in this target:

Framing marks: This chart evolved from the earlier Viewfinder Accuracy chart, so one of its major uses is to measure viewfinder accuracy. (See notes in the Viewfinder Accuracy section, at the bottom of this page, for more information on this.)

USAF resolution targets: An important use of this target is in evaluating lens quality, looking how well sharpness holds up as you move from the center to the corners of the frame. The little “USAF” resolution targets arranged at the center, in the corners, and along the diagonals are very useful for making fine judgements about blur, flare and aberrations in the image. We generally show crops of a USAF chip from a corner of the target and from the center, to show how lenses hold sharpness at wide and telephoto focal lengths.

Alignment “bullseyes:” We find these graphics from the graphic arts world (used to align sheets of film in the old film-based prepress days) very useful for seeing chromatic aberration in lenses. The bold black/white elements are good for seeing the colored fringes caused by CA in the corners of the frame.

MacBeth ColorChecker Chart: This is about as common a color standard as you can get these days, very widely available for only mildly exorbitant cost, and quite well controlled in its production. It thus serves as a good basis of comparison between cameras and between test setups. Imatest also understands the MacBeth colors very well, and uses them to produce its color accuracy map that we feature in all our reviews.

MacBeth ColorChecker SG Chart: The ColorChecker SG chart provides a wider range of colors, to give a more detailed map of a camera’s color handling. We haven’t begun using this chart in the color-accuracy graphs we routinely offer, but expect to do so at some point in the future. In the meantime, we sometimes refer to this chart internally, to get a more complete idea of what a camera’s color map looks like.

Log C/F Target: The progressive resolution pattern located just below the center of the target is a Log C/F (logarithmic contrast vs spatial frequency) chart. Digital camera noise reduction routines work by looking at levels of local contrast, flattening-out detail at progressively lower spatial frequencies as the local contrast decreases. (This is very commonly seen in human hair, grass, foliage, and other subjects with subtly-contrasting fine detail.) This chart lets Imatest analyze just how a camera makes the tradeoff between contrast, detail, and image noise.

Color Starbursts: The six circular starburst elements arranged around the target are intended to reveal de-mosaicing artifacts and color-dependent resolution issues. The six starbursts provide examples of each combination of RGB colors intersecting each other. (That is, red, green, and blue against black, plus red against green, green against blue, and blue against red.) Given that the most common sensor RGB color filter pattern (the so-called Bayer) pattern has twice as many green pixels as red or blue, you’ll generally see that the green/black starburst shows the best resolution, while the blue/red one shows the worst. The effects of different sensor geometries and color filter array patterns will be revealed here.

Musicians Image: Synthetic test patterns only tell you so much. While we have a lot of pictorial images in our other test targets, we thought it would be useful to include a small “natural” image here as well.

ISO Series
50 100 200 400 800
1600 3200 6400 12.8K 25.6K

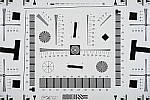
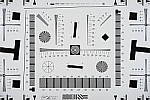
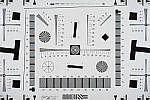
Resolution TargetA7 II Sample images image 3

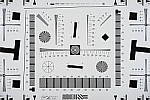
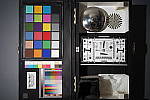
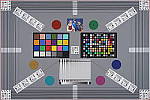
Part of the impetus in developing the new Multi Target in April 2009 was to switch to using a new 2x target for the resolution measurements, since the original ISO 12233 chart we’d used since the site first began in 1998(!) had become inadequate for testing the highest-resolution cameras. We’d for quite some time had a “homemade” 2x target, employing a shrunk version of the ISO 12233 chart, shot at 1/2 size. The resolution numbers on that chart all needed to be doubled to convert to the actual values, though, so we decided to go with a commercial 2x target to eliminate possible confusion on the part of our readers. Numbers on this new 2x resolution chart now read directly in hundreds of lines/picture height. (Because almost all of the area of this new resolution chart is now meaningful for resolution measurements, there was no longer space on it to overlay the MacBeth and other color targets on our prior Multi chart; hence the simultaneous change in our Multi target.)

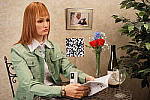
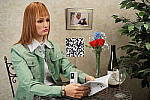
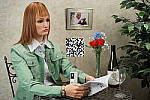
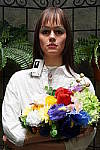
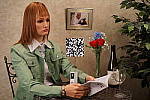
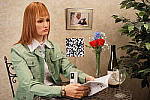
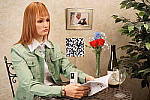
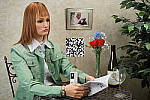
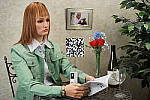
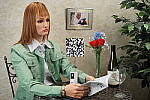
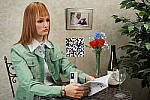
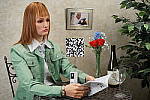
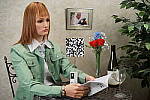
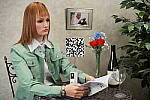
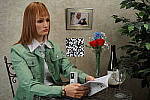
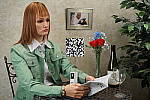
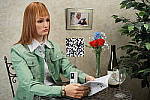
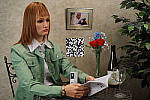
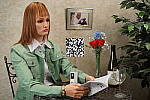
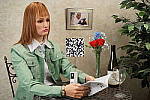
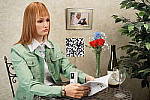
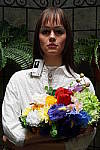
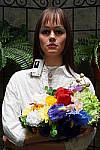
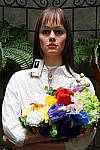
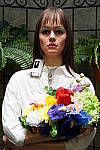
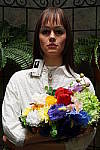
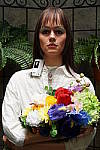
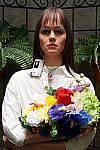
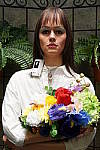
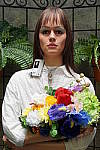
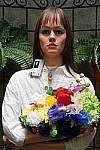
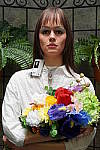
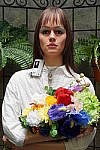
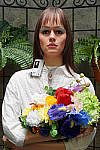
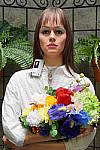
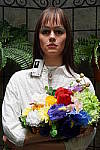
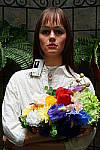
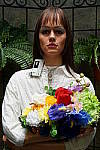
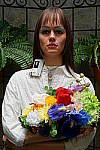
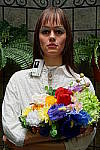
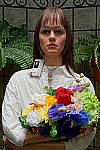
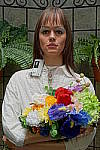
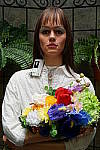
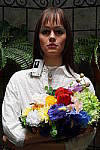
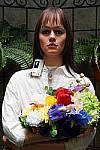
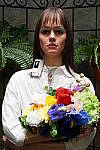
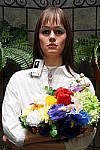
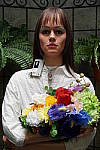
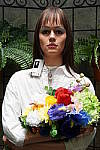
“Sunlit” Portrait:
(This is our “Outdoor” Portrait test – read more about it
here.)

A7 II Sample images image 4

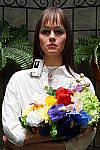
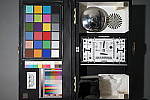
The lighting in this shot is deliberately awful, about what you’d expect from noontime sunshine here in the Atlanta, GA area. (In fact, the color balance has been chosen to pretty well match the hazy sunshine here in mid-August.)

The reason for the harsh lighting is to provide a real “torture
test” of how cameras handle conditions of extreme contrast; and in
particular, how well they do holding onto highlight detail.

Look for:

  • Overall color: Matching summer sunlight here in the South,
    the lighting in this scene is a bit more yellow-tinged than that in
    many parts of the country, or in the fall or winter. – So there may
    be an overall warm cast to the color. That said though, there’s a fair
    range of color represented in the bouquet, presenting a tough challenge
    for the cameras. For some reason, the blue flowers seem particularly
    hard to handle, with many cameras rendering them as purple. (In real
    life, they’re a light shade of navy blue, with just a bit of purple
    in them.)
  • Skin tones: The overall slight warm cast will tend to leave
    the model’s skin tones a bit on the warm side as well. Nonetheless,
    look to see if her skin seems overly pink or if they have a too-bright
    tinge of yellow: Some cameras oversaturate skin tones (make their color
    too intense), leading to an almost sunburned look. A little oversaturation
    can make for a more “healthy-looking” complexion, but it doesn’t
    take much variation for skin tones to look unnatural.
  • Highlight detail: When the model’s skin tones are at a more
    or less normal level of brightness, how much detail can you see in her
    shirt? Does it blow out entirely to white, or can you still see the
    creases and folds in the fabric?
  • Overall contrast: Most consumer digital cameras produce bright,
    contrasty images, because that’s what most consumers like. Unfortunately,
    under bright sunlit conditions, many such cameras produce images with
    little or no highlight detail, and dark, plugged-up looking shadows.
  • Shadow detail: The area under the flower bouquet is in quite deep shadow. Does the camera in question retain good detail here, with low image noise? To see, you may need to download the image and play with it in Photoshop(tm) or another imaging program. Brighten the image, and see how far detail extends into the shadows. Photo printers are generally much better at showing shadow detail than are CRTs or LCDs, so you’ll want a camera that preserves good detail here. The ability to boost brightness without encountering too much image noise is important if you ever have to “rescue” an underexposed image on the computer.
  • Detail in areas of subtle contrast: Most digital cameras employ
    some sort of noise-suppression to remove electronic noise from their
    images. Noise suppression is a good thing, but only if it’s not overdone.
    Too much noise suppression will “flatten out” subtle detail
    in areas of reduced contrast. You can often see this in hair, where
    the individual strands become blurred, and the image takes on an almost
    watercolor effect. Look at the detail in the model’s hair, and compare
    how it looks with different cameras in the Comparometer.

To view the entire exposure series from zero to +1.0 EV, see files A7M2OUTMP0.HTM through A7M2OUTBMP3.HTM on the thumbnail
index page
.

DRO Series
Off
A7 II Sample images image 5
1
A7 II Sample images image 6
2
A7 II Sample images image 7
3
A7 II Sample images image 8
4
A7 II Sample images image 9
5
A7 II Sample images image 10
Auto
A7 II Sample images image 11
HDR Series
1 EV
A7 II Sample images image 12
2 EV
A7 II Sample images image 13
3 EV
A7 II Sample images image 14
4 EV
A7 II Sample images image 15
5 EV
A7 II Sample images image 16
6 EV
A7 II Sample images image 17
Auto
A7 II Sample images image 18

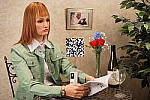
Indoor Portrait, No Flash:

Auto
White Balance
A7 II Sample images image 19
Incandescent
White Balance
A7 II Sample images image 20
Manual
White Balance
A7 II Sample images image 21

The incandescent lighting used in most US homes actually has a very
strong yellow color to it. Our eyes have an amazing ability to ignore
color casts like this, something digital cameras struggle to emulate.

The incandescent lighting used for this shot is thus not only very common
here in the US, but also very difficult for most digital cameras to deal
with. While we probably want a little yellow color to remain in
the image (to convey some of the mood of the original scene), too much
will look unnatural and distort colors.

Most cameras’ auto white balance systems have a great deal of difficulty
with this shot, but many incandescent white balance settings struggle
as well. (It seems that many cameras’ incandescent settings are actually
calibrated to the tungsten lighting used in professional studio systems,
which isn’t nearly as warm-toned as typical household lighting.)

If you intend to do much shooting indoors after dark, pay careful attention
to this test, as cameras vary widely in this regard.

To view the entire exposure series from zero to +1.0 EV, see files A7M2INBMP0.HTM through A7M2INBMP3.HTM on the thumbnail
index page
.

ISO Series:
“ISO equivalent” refers to a camera’s light sensitivity. ISO
200 represents twice the sensitivity of ISO 100, meaning that you can
use a shutter speed that’s twice as fast. Higher ISO settings are often
required to get any picture at all when shooting after dark, but even
in full daylight, using a higher ISO can help you freeze fast action.
The problem is, increasing a digital camera’s ISO also increases image
noise. In practical terms, this means that higher-ISO images often can’t
be used to produce prints as large as lower-ISO ones. The tricky thing
here is that high-ISO images often look much different when printed at
various sizes than they do when viewed on-screen. In particular, for any
level of image noise, you’ll often find that while noise is quite evident
at larger print sizes, as you reduce the size of the prints, there will
come a point where it suddenly ceases to be an issue. We routinely print
high-ISO photos from the cameras we test on our studio printer (currently
a Canon i9900) at a range of sizes, and report our findings. If you’re
interested in investigating the effect of image noise for yourself, don’t
judge cameras’ performance by how their images look on your CRT, viewed
pixel-for-pixel. Rather, download the test shots linked in the table below
and output them on your own printer, so you can see how prints of various
sizes will actually look.

One additional note about this particular test series though: Because
these images are shot under household incandescent lighting, the camera
has to boost its blue-channel signal quite a bit to get back to a neutral
color balance. Since the blue channel is generally the one with the most
noise, this makes this shot a real acid test of noise performance. Noise
levels in high-ISO shots taken under daylight conditions usually won’t
show as much noise. (See the “Far Field” test for examples of
high ISO shots captured in daylight.)

ISO
Series
50 100 200 400 800
1600 3200 6400 12.8K 25.6K

House Shot:

A7 II Sample images image 22

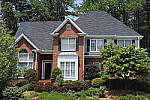
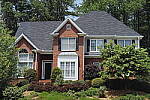
Like several of our tests, these images are actually photos of a high-resolution poster, shot under studio lighting. The shots for this camera were captured with our third-generation House poster, which was assembled from 45 separate 11-megapixel images, shot with a very high-quality lens, and then stitched together into a single image. The resulting image amounts to about 450 very high-quality megapixels. This should have sufficient detail to comfortably challenge cameras up to at least 80-100 megapixels. (And even with higher-resolution cameras, we believe that the camera lenses themselves would be more likely to limit resolution than would the detail in the poster.)

Why did we choose to shoot a picture of a picture? The idea was to show a typical subject (a house and surrounding foliage) in a way that would be absolutely consistent from camera to camera. Any outdoor subject is going to vary considerably from day to day, as the lighting changes with the weather, atmospheric conditions, and season. Shooting a poster lets us compare images from cameras shot weeks, months, or even years apart, with the sure knowledge that nothing has changed from one shot to another.

Things to look for here are fine detail, as seen in the foliage and tree limbs against the sky, sharpness in the corners, and the preservation of subtle detail in the shaded brick patterns. – Many cameras with overactive noise suppression severely blur the brick patterns that are in shadow.

Far-Field Test 2A7 II Sample images image 23

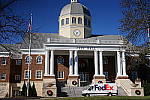
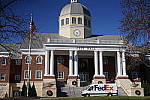
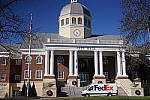
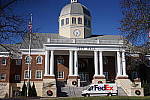
While the House poster in the shot above provides absolute repeatability from test to test, it doesn’t offer the range of brightness (dynamic range) that the original scene had, nor does it contain the nearly infinite range of fine detail found in nature. For these reasons, we shoot an outdoor photo of a building, to provide a more challenging (if more variable) subject for the cameras. Until Summer of 2011, we used the original house from the House poster for this “Far Field” shot, but the ever-encroaching trees made it less and less useful. The coup de grace for that subject was when the neighbor across the street relandscaped his yard so we could no longer shoot from our original position.

In place of the original house, we’ve switched to using the Roswell, GA City Hall building, which offers many of the elements of the original Far Field subject, but in a setting where we’re guaranteed access into the future, and without the threat of trees eventually obscuring the building. In this shot, we look at how the camera handles rendering of subtle detail (the bricks, both in the sunlight and in the deep shadows under the entryway roof), how it handles bright highlights (the white columns and reflections from the dome), and shadow detail (in the dark areas beneath the shrubs on either side of the steps).

Note though, that because this is shot outdoors, the character of the light is unavoidably going to change quite a bit, depending on the atmospheric humidity and the time of year. – You thus shouldn’t rely on it for absolute comparisons between cameras, since it’s unlikely that conditions will be exactly the same from one test to the next.

ISO
Series
ISO 100 ISO 200 ISO 400 ISO 800 ISO 1600 ISO 3200 ISO 6400
DRO Series
Off
A7 II Sample images image 24
1
A7 II Sample images image 25
2
A7 II Sample images image 26
3
A7 II Sample images image 27
4
A7 II Sample images image 28
5
A7 II Sample images image 29
Auto
A7 II Sample images image 30
HDR Series
1 EV
A7 II Sample images image 31
2 EV
A7 II Sample images image 32
3 EV
A7 II Sample images image 33
4 EV
A7 II Sample images image 34
5 EV
A7 II Sample images image 35
6 EV
A7 II Sample images image 36
Auto
A7 II Sample images image 37

“Davebox” Test Target

Because most of its various elements are now contained or represented in the combination of the Still Life and Multi Target shots, we no longer routinely shoot the Davebox by itself, as would normally appear in this space. (We do however, still use it for our low light test below.)

Low-Light Tests

Low light photography is an area where there are really enormous differences between digital camera models. We used to shoot this test at all ISOs (in one EV steps) and five light levels but because cameras now often offer over a dozen ISO settings, the number of shots required was becoming unreasonable. So, this test is now shot at only three ISO settings (low, medium and high) and at the highest and lowest light levels we used to test at (a light level about equivalent to typical city street lighting at night (one foot-candle), and at 1/16 foot-candle where many cameras struggle). Shots in the rightmost column of the table below are taken with long exposure noise reduction disabled and high ISO noise reduction minimized. You may also see the effect of poor low-light autofocus in some of these shots, although we use a different test setup to check autofocus performance more directly. (The results of which are reported on in the main Test Results section.) Things to look for here include:

  • Exposure limit: What’s the darkest level a camera can handle at each ISO setting? If the leftmost images are reasonably bright, the camera should do fine with typical city night scenes. If you’re shooting in dimmer light, you may need a camera that can produce good images down to 1/16 foot-candle.
  • Autofocus Limit: How dark can you shoot and still get well-focused
    pictures?
  • White Balance: Does the camera’s white balance suffer at low
    light levels? (Many do.)
  • Noise Levels: Look at the photos, print them on your own photo
    printer. How large a print can you make at acceptable quality levels,
    at various ISO settings and light levels?
  • Detail loss to anti-noise processing?: Do details in the white
    gauze and even in the lettering on the test targets suffer at lower
    light levels?

(Note: If you’d like to use a light meter to check light levels
for subjects you might be interested in shooting, a light level of one
foot-candle corresponds to a normal exposure of two seconds at f/2.8 and
ISO 100.)


1 fc
11 lux
1/16 fc
0.67 lux
1/16fc
No NR
ISO
100
A7 II Sample images image 38
2 s
f2.8
A7 II Sample images image 39
30 s
f2.8
A7 II Sample images image 40
30 s
f2.8
ISO
3200
A7 II Sample images image 41
1/15 s
f2.8
A7 II Sample images image 42
1 s
f2.8
A7 II Sample images image 43
1 s
f2.8
ISO
25600
A7 II Sample images image 44
1/125 s
f2.8
A7 II Sample images image 45
1/8 s
f2.8
A7 II Sample images image 46
1/8 s
f2.8

Viewfinder Accuracy

Viewfinder accuracy is an important parameter, especially for shots
where framing is critical. The optical viewfinders on most digital cameras
match the (poor) accuracy of those on film cameras, typically showing
only about 85% of the actual final frame area. It’s likely that this is
a deliberate design choice by the camera engineers, to help avoid users
accidentally cutting off the heads of their subjects. We disagree with
this approach, or at least feel that it should be mitigated a bit, perhaps
by increasing the accuracy to 90 to 95%.

Unlike the optical viewfinders, the LCD viewfinders on most digital
cameras tend to be quite accurate. There are exceptions though, and it’s
unfortunately not uncommon to find an LCD monitor that only shows 90%
or less of the final frame.

Things to look for on this test chart are:

  • Optical/Electronic viewfinder accuracy: When we shoot this target in the studio, we line things up so the center of the bright red outline on the target is just visible at the edges of the viewfinder frame. The resulting photo then very directly shows how accurate the viewfinder is. The fine black lines mark progressive increments of 1% of increased or decreased frame area. The bold black lines mark 5% increments. The lines let you get an approximate idea of frame accuracy visually, but we measure the actual pixel dimensions to derive the accuracy numbers we report in our reviews.
  • LCD monitor accuracy: This is the same test, but framed with the LCD monitor instead of the optical viewfinder. As mentioned above, LCD monitors are usually more accurate than optical viewfinders, especially in point & shoot digicams.

Digital Cameras – Sony Alpha ILCE-A7 II Test Images

Not sure which camera to buy? Let your eyes be the ultimate judge!
Visit our Comparometer(tm)
to compare images from the Sony Alpha ILCE-A7 II with those from other
cameras you may be considering. The proof is in the pictures, so let
your own eyes decide which you like best!

Still LifeA7 II Test Shots image 1

This is our new “Still Life” test target. We’re combining
some of the elements from previous shots (DaveBox and Res Chart) into
this and the “Multi Target” shot below, plus added a number
of elements that are very revealing of various camera characteristics
and foibles.

Here’s what to look for in this target:

  • Tone-on-tone detail & noise suppression:
    The cloth swatches in the pinwheel were chosen because they show a lot
    of tone-on-tone detail, across a broad range of colors. This is just
    the sort of detail that noise suppression processing tends to flatten
    out. If you look at the detail in these swatches as the ISO increases,
    you’ll see just where different cameras start to lose subtle detail.
    — The white and tan swatches and the dark swatches tend to be particularly
    revealing of this. The label of the vinegar bottle (second from the
    right) is another great place to look for lost detail from noise suppression,
    as the image of the person at the top of the label is actually a depiction
    of a mosaic. The dark colors in the background and in the figure’s clothes
    contain detail that’s very quickly lost when a camera’s noise suppression
    system kicks in. Cameras with really high-quality, low-noise sensors
    that require little noise suppression will be able to hold onto the
    detail in these areas, many others will show only a uniform swath of
    smudged color.

    Another place where you’ll quickly see the effects of over-aggressive
    noise suppression is in the white salt grains of the salt grinder in
    lower left. Cameras are often more conservative about suppressing noise
    in highlight areas (because our eyes tend to see less of it there),
    but many cameras seem to have a hard time holding onto the subtle shadings
    that distinguish the salt grains from each other, particularly at higher
    ISO levels.

  • Fine Detail: You’ll find a lot of fine detail
    in the label of the beer bottle on the right, in its fine cursive text,
    but the other bottle labels hold a lot of fine detail as well. Fine
    text is often a good visual indicator of resolution, because our brains
    have an excellent idea of what the text should look like, so
    are very quick to notice even minor loss of detail.

    For really fine detail, look to the circular scale/calculator on the
    right side of the scene. Some of the fine lines there are extremely
    fine indeed. Looking at results from many different cameras with this
    target, we found that camera noise-suppression systems often confuse
    the fine lines with image noise, and so flatten them out. There’s also
    a nice range of fine text sizes in this chart as well, once again great
    visual cues for resolution and detail.

  • Highlight Detail: Three elements in this scene
    show off (or show up) a camera’s ability to hold onto highlight detail.
    As mentioned above, the salt grains (and reflections of the studio lights)
    in the salt mill are examples of fairly subtle highlight detail that
    cameras’ anti-noise processing sometimes obliterate. The folded white
    cloth under the mug on the right side of the frame likewise shows a
    lot of white-on-white detail that is easy to lose, particularly if a
    camera’s tone curve is too contrasty. As it turns out though, the most
    sensitive test of a camera’s highlight abilities seems to be the hank
    of white embroidery thread in the upper right corner. These fibers are
    unusually bright and reflective, so its easy for a camera to blow out
    detail in them.

  • Shadow Detail: Several elements of this subject
    are useful for evaluating shadow detail, particularly the black mug
    and the pieces of folded black velvet, both under and inside the mug.
    The bottoms of the beer bottles also provide some gradations of deep
    shadow, and the clump of peppers in the bottom of the pepper oil bottle
    had a fair bit of detail that’s far down at the shadow end of the tone
    curve.

    We were actually surprised when we constructed this scene just how dark
    the velvet and sides of the beer bottles ended up being. Even with the
    bright studio lights shining directly on it, the velvet in particular
    stays way, way down at the shadow end of the tone curve. With most cameras
    and on most monitors, the velvet will simply appear as an unrelieved
    swatch of black. To see whether it contains deep detail or not, in most
    cases you’ll have to open the file in an image editor and boost the
    brightness dramatically, to bring the detail up into a visible range.

  • Preservation of “Shape” in Strong Colors:
    As you approach the extremes of a camera’s color gamut (its range of
    recordable colors), it becomes more and more difficult for the camera
    to show fine gradations of tone, because one or more of the RGB color
    channels are close to saturation. It’s not uncommon to see a brightly
    colored piece of clothing or a vibrant flower appear in digicam photos
    as just a blob of color, because the camera ran up against the limits
    of its color gamut. The brightly colored embroidery threads in the upper
    right portion of the Still Life target are good examples of situations
    where this might happen. Pay particular attention to the bright red
    and dark blue colors here, as these are both colors near the edge of
    the typical sRGB color gamut.

  • Color accuracy and white balance: It’s pretty
    small in there, but we’ve included a mini-MacBeth chart, which displays
    very carefully controlled color swatches. Our Multi Target (see below)
    sports a full-sized MacBeth chart, but the one here serves as a good
    check of color balance and rendition, and is also useful for checking
    white balance on this particular shot.

  • Image noise and detail vs ISO: As mentioned above,
    this target contains many elements useful for evaluating detail loss
    to anti-noise processing. We’ll therefore always shoot a full set of
    test images of this target across each camera’s ISO range, for every
    camera we test. (See below.)
ISO Series, NR = Normal
50 100 200 400 800
1600 3200 6400 12.8K 25.6K
ISO Series, NR = Lowest
50 100 200 400 800
1600 3200 6400 12.8K 25.6K

Multi TargetA7 II Test Shots image 2

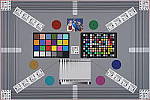
Our new “Multi Target” was first put into use in April, 2009, replacing the earlier “interim” design. This target incorporates a number of elements that combine aspects of the previous Multi target, as well as the previous Viewfinder Accuracy or “VFA” chart. Here’s some of what you’ll find in this target:

Framing marks: This chart evolved from the earlier Viewfinder Accuracy chart, so one of its major uses is to measure viewfinder accuracy. (See notes in the Viewfinder Accuracy section, at the bottom of this page, for more information on this.)

USAF resolution targets: An important use of this target is in evaluating lens quality, looking how well sharpness holds up as you move from the center to the corners of the frame. The little “USAF” resolution targets arranged at the center, in the corners, and along the diagonals are very useful for making fine judgements about blur, flare and aberrations in the image. We generally show crops of a USAF chip from a corner of the target and from the center, to show how lenses hold sharpness at wide and telephoto focal lengths.

Alignment “bullseyes:” We find these graphics from the graphic arts world (used to align sheets of film in the old film-based prepress days) very useful for seeing chromatic aberration in lenses. The bold black/white elements are good for seeing the colored fringes caused by CA in the corners of the frame.

MacBeth ColorChecker Chart: This is about as common a color standard as you can get these days, very widely available for only mildly exorbitant cost, and quite well controlled in its production. It thus serves as a good basis of comparison between cameras and between test setups. Imatest also understands the MacBeth colors very well, and uses them to produce its color accuracy map that we feature in all our reviews.

MacBeth ColorChecker SG Chart: The ColorChecker SG chart provides a wider range of colors, to give a more detailed map of a camera’s color handling. We haven’t begun using this chart in the color-accuracy graphs we routinely offer, but expect to do so at some point in the future. In the meantime, we sometimes refer to this chart internally, to get a more complete idea of what a camera’s color map looks like.

Log C/F Target: The progressive resolution pattern located just below the center of the target is a Log C/F (logarithmic contrast vs spatial frequency) chart. Digital camera noise reduction routines work by looking at levels of local contrast, flattening-out detail at progressively lower spatial frequencies as the local contrast decreases. (This is very commonly seen in human hair, grass, foliage, and other subjects with subtly-contrasting fine detail.) This chart lets Imatest analyze just how a camera makes the tradeoff between contrast, detail, and image noise.

Color Starbursts: The six circular starburst elements arranged around the target are intended to reveal de-mosaicing artifacts and color-dependent resolution issues. The six starbursts provide examples of each combination of RGB colors intersecting each other. (That is, red, green, and blue against black, plus red against green, green against blue, and blue against red.) Given that the most common sensor RGB color filter pattern (the so-called Bayer) pattern has twice as many green pixels as red or blue, you’ll generally see that the green/black starburst shows the best resolution, while the blue/red one shows the worst. The effects of different sensor geometries and color filter array patterns will be revealed here.

Musicians Image: Synthetic test patterns only tell you so much. While we have a lot of pictorial images in our other test targets, we thought it would be useful to include a small “natural” image here as well.

ISO Series
50 100 200 400 800
1600 3200 6400 12.8K 25.6K

Resolution TargetA7 II Test Shots image 3

Part of the impetus in developing the new Multi Target in April 2009 was to switch to using a new 2x target for the resolution measurements, since the original ISO 12233 chart we’d used since the site first began in 1998(!) had become inadequate for testing the highest-resolution cameras. We’d for quite some time had a “homemade” 2x target, employing a shrunk version of the ISO 12233 chart, shot at 1/2 size. The resolution numbers on that chart all needed to be doubled to convert to the actual values, though, so we decided to go with a commercial 2x target to eliminate possible confusion on the part of our readers. Numbers on this new 2x resolution chart now read directly in hundreds of lines/picture height. (Because almost all of the area of this new resolution chart is now meaningful for resolution measurements, there was no longer space on it to overlay the MacBeth and other color targets on our prior Multi chart; hence the simultaneous change in our Multi target.)

“Sunlit” Portrait:
(This is our “Outdoor” Portrait test – read more about it
here.)

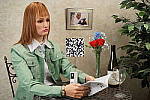
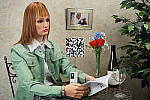
A7 II Test Shots image 4

The lighting in this shot is deliberately awful, about what you’d expect from noontime sunshine here in the Atlanta, GA area. (In fact, the color balance has been chosen to pretty well match the hazy sunshine here in mid-August.)

The reason for the harsh lighting is to provide a real “torture
test” of how cameras handle conditions of extreme contrast; and in
particular, how well they do holding onto highlight detail.

Look for:

  • Overall color: Matching summer sunlight here in the South,
    the lighting in this scene is a bit more yellow-tinged than that in
    many parts of the country, or in the fall or winter. – So there may
    be an overall warm cast to the color. That said though, there’s a fair
    range of color represented in the bouquet, presenting a tough challenge
    for the cameras. For some reason, the blue flowers seem particularly
    hard to handle, with many cameras rendering them as purple. (In real
    life, they’re a light shade of navy blue, with just a bit of purple
    in them.)
  • Skin tones: The overall slight warm cast will tend to leave
    the model’s skin tones a bit on the warm side as well. Nonetheless,
    look to see if her skin seems overly pink or if they have a too-bright
    tinge of yellow: Some cameras oversaturate skin tones (make their color
    too intense), leading to an almost sunburned look. A little oversaturation
    can make for a more “healthy-looking” complexion, but it doesn’t
    take much variation for skin tones to look unnatural.
  • Highlight detail: When the model’s skin tones are at a more
    or less normal level of brightness, how much detail can you see in her
    shirt? Does it blow out entirely to white, or can you still see the
    creases and folds in the fabric?
  • Overall contrast: Most consumer digital cameras produce bright,
    contrasty images, because that’s what most consumers like. Unfortunately,
    under bright sunlit conditions, many such cameras produce images with
    little or no highlight detail, and dark, plugged-up looking shadows.
  • Shadow detail: The area under the flower bouquet is in quite deep shadow. Does the camera in question retain good detail here, with low image noise? To see, you may need to download the image and play with it in Photoshop(tm) or another imaging program. Brighten the image, and see how far detail extends into the shadows. Photo printers are generally much better at showing shadow detail than are CRTs or LCDs, so you’ll want a camera that preserves good detail here. The ability to boost brightness without encountering too much image noise is important if you ever have to “rescue” an underexposed image on the computer.
  • Detail in areas of subtle contrast: Most digital cameras employ
    some sort of noise-suppression to remove electronic noise from their
    images. Noise suppression is a good thing, but only if it’s not overdone.
    Too much noise suppression will “flatten out” subtle detail
    in areas of reduced contrast. You can often see this in hair, where
    the individual strands become blurred, and the image takes on an almost
    watercolor effect. Look at the detail in the model’s hair, and compare
    how it looks with different cameras in the Comparometer.

To view the entire exposure series from zero to +1.0 EV, see files A7M2OUTMP0.HTM through A7M2OUTBMP3.HTM on the thumbnail
index page
.

DRO Series
Off
A7 II Test Shots image 5
1
A7 II Test Shots image 6
2
A7 II Test Shots image 7
3
A7 II Test Shots image 8
4
A7 II Test Shots image 9
5
A7 II Test Shots image 10
Auto
A7 II Test Shots image 11
HDR Series
1 EV
A7 II Test Shots image 12
2 EV
A7 II Test Shots image 13
3 EV
A7 II Test Shots image 14
4 EV
A7 II Test Shots image 15
5 EV
A7 II Test Shots image 16
6 EV
A7 II Test Shots image 17
Auto
A7 II Test Shots image 18

Indoor Portrait, No Flash:

Auto
White Balance
A7 II Test Shots image 19
Incandescent
White Balance
A7 II Test Shots image 20
Manual
White Balance
A7 II Test Shots image 21

The incandescent lighting used in most US homes actually has a very
strong yellow color to it. Our eyes have an amazing ability to ignore
color casts like this, something digital cameras struggle to emulate.

The incandescent lighting used for this shot is thus not only very common
here in the US, but also very difficult for most digital cameras to deal
with. While we probably want a little yellow color to remain in
the image (to convey some of the mood of the original scene), too much
will look unnatural and distort colors.

Most cameras’ auto white balance systems have a great deal of difficulty
with this shot, but many incandescent white balance settings struggle
as well. (It seems that many cameras’ incandescent settings are actually
calibrated to the tungsten lighting used in professional studio systems,
which isn’t nearly as warm-toned as typical household lighting.)

If you intend to do much shooting indoors after dark, pay careful attention
to this test, as cameras vary widely in this regard.

To view the entire exposure series from zero to +1.0 EV, see files A7M2INBMP0.HTM through A7M2INBMP3.HTM on the thumbnail
index page
.

ISO Series:
“ISO equivalent” refers to a camera’s light sensitivity. ISO
200 represents twice the sensitivity of ISO 100, meaning that you can
use a shutter speed that’s twice as fast. Higher ISO settings are often
required to get any picture at all when shooting after dark, but even
in full daylight, using a higher ISO can help you freeze fast action.
The problem is, increasing a digital camera’s ISO also increases image
noise. In practical terms, this means that higher-ISO images often can’t
be used to produce prints as large as lower-ISO ones. The tricky thing
here is that high-ISO images often look much different when printed at
various sizes than they do when viewed on-screen. In particular, for any
level of image noise, you’ll often find that while noise is quite evident
at larger print sizes, as you reduce the size of the prints, there will
come a point where it suddenly ceases to be an issue. We routinely print
high-ISO photos from the cameras we test on our studio printer (currently
a Canon i9900) at a range of sizes, and report our findings. If you’re
interested in investigating the effect of image noise for yourself, don’t
judge cameras’ performance by how their images look on your CRT, viewed
pixel-for-pixel. Rather, download the test shots linked in the table below
and output them on your own printer, so you can see how prints of various
sizes will actually look.

One additional note about this particular test series though: Because
these images are shot under household incandescent lighting, the camera
has to boost its blue-channel signal quite a bit to get back to a neutral
color balance. Since the blue channel is generally the one with the most
noise, this makes this shot a real acid test of noise performance. Noise
levels in high-ISO shots taken under daylight conditions usually won’t
show as much noise. (See the “Far Field” test for examples of
high ISO shots captured in daylight.)

ISO
Series
50 100 200 400 800
1600 3200 6400 12.8K 25.6K

House Shot:

A7 II Test Shots image 22

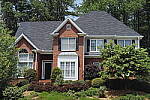
Like several of our tests, these images are actually photos of a high-resolution poster, shot under studio lighting. The shots for this camera were captured with our third-generation House poster, which was assembled from 45 separate 11-megapixel images, shot with a very high-quality lens, and then stitched together into a single image. The resulting image amounts to about 450 very high-quality megapixels. This should have sufficient detail to comfortably challenge cameras up to at least 80-100 megapixels. (And even with higher-resolution cameras, we believe that the camera lenses themselves would be more likely to limit resolution than would the detail in the poster.)

Why did we choose to shoot a picture of a picture? The idea was to show a typical subject (a house and surrounding foliage) in a way that would be absolutely consistent from camera to camera. Any outdoor subject is going to vary considerably from day to day, as the lighting changes with the weather, atmospheric conditions, and season. Shooting a poster lets us compare images from cameras shot weeks, months, or even years apart, with the sure knowledge that nothing has changed from one shot to another.

Things to look for here are fine detail, as seen in the foliage and tree limbs against the sky, sharpness in the corners, and the preservation of subtle detail in the shaded brick patterns. – Many cameras with overactive noise suppression severely blur the brick patterns that are in shadow.

Far-Field Test 2A7 II Test Shots image 23

While the House poster in the shot above provides absolute repeatability from test to test, it doesn’t offer the range of brightness (dynamic range) that the original scene had, nor does it contain the nearly infinite range of fine detail found in nature. For these reasons, we shoot an outdoor photo of a building, to provide a more challenging (if more variable) subject for the cameras. Until Summer of 2011, we used the original house from the House poster for this “Far Field” shot, but the ever-encroaching trees made it less and less useful. The coup de grace for that subject was when the neighbor across the street relandscaped his yard so we could no longer shoot from our original position.

In place of the original house, we’ve switched to using the Roswell, GA City Hall building, which offers many of the elements of the original Far Field subject, but in a setting where we’re guaranteed access into the future, and without the threat of trees eventually obscuring the building. In this shot, we look at how the camera handles rendering of subtle detail (the bricks, both in the sunlight and in the deep shadows under the entryway roof), how it handles bright highlights (the white columns and reflections from the dome), and shadow detail (in the dark areas beneath the shrubs on either side of the steps).

Note though, that because this is shot outdoors, the character of the light is unavoidably going to change quite a bit, depending on the atmospheric humidity and the time of year. – You thus shouldn’t rely on it for absolute comparisons between cameras, since it’s unlikely that conditions will be exactly the same from one test to the next.

ISO
Series
ISO 100 ISO 200 ISO 400 ISO 800 ISO 1600 ISO 3200 ISO 6400
DRO Series
Off
A7 II Test Shots image 24
1
A7 II Test Shots image 25
2
A7 II Test Shots image 26
3
A7 II Test Shots image 27
4
A7 II Test Shots image 28
5
A7 II Test Shots image 29
Auto
A7 II Test Shots image 30
HDR Series
1 EV
A7 II Test Shots image 31
2 EV
A7 II Test Shots image 32
3 EV
A7 II Test Shots image 33
4 EV
A7 II Test Shots image 34
5 EV
A7 II Test Shots image 35
6 EV
A7 II Test Shots image 36
Auto
A7 II Test Shots image 37

“Davebox” Test Target

Because most of its various elements are now contained or represented in the combination of the Still Life and Multi Target shots, we no longer routinely shoot the Davebox by itself, as would normally appear in this space. (We do however, still use it for our low light test below.)

Low-Light Tests

Low light photography is an area where there are really enormous differences between digital camera models. We used to shoot this test at all ISOs (in one EV steps) and five light levels but because cameras now often offer over a dozen ISO settings, the number of shots required was becoming unreasonable. So, this test is now shot at only three ISO settings (low, medium and high) and at the highest and lowest light levels we used to test at (a light level about equivalent to typical city street lighting at night (one foot-candle), and at 1/16 foot-candle where many cameras struggle). Shots in the rightmost column of the table below are taken with long exposure noise reduction disabled and high ISO noise reduction minimized. You may also see the effect of poor low-light autofocus in some of these shots, although we use a different test setup to check autofocus performance more directly. (The results of which are reported on in the main Test Results section.) Things to look for here include:

  • Exposure limit: What’s the darkest level a camera can handle at each ISO setting? If the leftmost images are reasonably bright, the camera should do fine with typical city night scenes. If you’re shooting in dimmer light, you may need a camera that can produce good images down to 1/16 foot-candle.
  • Autofocus Limit: How dark can you shoot and still get well-focused
    pictures?
  • White Balance: Does the camera’s white balance suffer at low
    light levels? (Many do.)
  • Noise Levels: Look at the photos, print them on your own photo
    printer. How large a print can you make at acceptable quality levels,
    at various ISO settings and light levels?
  • Detail loss to anti-noise processing?: Do details in the white
    gauze and even in the lettering on the test targets suffer at lower
    light levels?

(Note: If you’d like to use a light meter to check light levels
for subjects you might be interested in shooting, a light level of one
foot-candle corresponds to a normal exposure of two seconds at f/2.8 and
ISO 100.)


1 fc
11 lux
1/16 fc
0.67 lux
1/16fc
No NR
ISO
100
A7 II Test Shots image 38
2 s
f2.8
A7 II Test Shots image 39
30 s
f2.8
A7 II Test Shots image 40
30 s
f2.8
ISO
3200
A7 II Test Shots image 41
1/15 s
f2.8
A7 II Test Shots image 42
1 s
f2.8
A7 II Test Shots image 43
1 s
f2.8
ISO
25600
A7 II Test Shots image 44
1/125 s
f2.8
A7 II Test Shots image 45
1/8 s
f2.8
A7 II Test Shots image 46
1/8 s
f2.8

Viewfinder Accuracy

Viewfinder accuracy is an important parameter, especially for shots
where framing is critical. The optical viewfinders on most digital cameras
match the (poor) accuracy of those on film cameras, typically showing
only about 85% of the actual final frame area. It’s likely that this is
a deliberate design choice by the camera engineers, to help avoid users
accidentally cutting off the heads of their subjects. We disagree with
this approach, or at least feel that it should be mitigated a bit, perhaps
by increasing the accuracy to 90 to 95%.

Unlike the optical viewfinders, the LCD viewfinders on most digital
cameras tend to be quite accurate. There are exceptions though, and it’s
unfortunately not uncommon to find an LCD monitor that only shows 90%
or less of the final frame.

Things to look for on this test chart are:

  • Optical/Electronic viewfinder accuracy: When we shoot this target in the studio, we line things up so the center of the bright red outline on the target is just visible at the edges of the viewfinder frame. The resulting photo then very directly shows how accurate the viewfinder is. The fine black lines mark progressive increments of 1% of increased or decreased frame area. The bold black lines mark 5% increments. The lines let you get an approximate idea of frame accuracy visually, but we measure the actual pixel dimensions to derive the accuracy numbers we report in our reviews.
  • LCD monitor accuracy: This is the same test, but framed with the LCD monitor instead of the optical viewfinder. As mentioned above, LCD monitors are usually more accurate than optical viewfinders, especially in point & shoot digicams.

All test shots

Sony Alpha ILCE-A7 II Thumbnails

Not sure which camera to buy? Let your eyes be the ultimate judge!
Visit our Comparometer(tm)
to compare images from the Sony Alpha ILCE-A7 II with those from other
cameras you may be considering. The proof is in the pictures, so let
your own eyes decide which you like best!

This page may take a long time to load, due to the many thumbnails!

All images copyright © 2015 by The Imaging Resource. All rights reserved.

A7 II All test shots image 1
A7M2FAR2DRO1.JPG
17,367,040 bytes
6000×4000
1/8000 sec
f18.0
0.0 EV
55.0 mm focal length
ISO 6400

A7 II All test shots image 2
A7 II All test shots image 3
A7M2FAR2DRO2.JPG
17,629,184 bytes
6000×4000
1/8000 sec
f18.0
0.0 EV
55.0 mm focal length
ISO 6400
A7 II All test shots image 4
A7 II All test shots image 5
A7M2FAR2DRO3.JPG
17,891,328 bytes
6000×4000
1/8000 sec
f18.0
0.0 EV
55.0 mm focal length
ISO 6400
A7 II All test shots image 6
A7 II All test shots image 7
A7M2FAR2DRO4.JPG
18,087,936 bytes
6000×4000
1/6400 sec
f18.0
0.0 EV
55.0 mm focal length
ISO 6400
A7 II All test shots image 8
A7 II All test shots image 9
A7M2FAR2DRO5.JPG
18,546,688 bytes
6000×4000
1/8000 sec
f18.0
0.0 EV
55.0 mm focal length
ISO 6400
A7 II All test shots image 10
A7 II All test shots image 11
A7M2FAR2DROA.JPG
16,482,304 bytes
6000×4000
1/6400 sec
f18.0
0.0 EV
55.0 mm focal length
ISO 6400
A7 II All test shots image 12
A7 II All test shots image 13
A7M2FAR2HDR1.JPG
15,695,872 bytes
6000×4000
1/8000 sec
f18.0
0.0 EV
55.0 mm focal length
ISO 6400
A7 II All test shots image 14
A7 II All test shots image 15
A7M2FAR2HDR2.JPG
15,892,480 bytes
6000×4000
1/6400 sec
f18.0
0.0 EV
55.0 mm focal length
ISO 6400
A7 II All test shots image 16
A7 II All test shots image 17
A7M2FAR2HDR3.JPG
15,925,248 bytes
6000×4000
1/8000 sec
f18.0
0.0 EV
55.0 mm focal length
ISO 6400
A7 II All test shots image 18
A7 II All test shots image 19
A7M2FAR2HDR4.JPG
16,482,304 bytes
6000×4000
1/6400 sec
f18.0
0.0 EV
55.0 mm focal length
ISO 6400
A7 II All test shots image 20
A7 II All test shots image 21
A7M2FAR2HDR5.JPG
16,318,464 bytes
6000×4000
1/8000 sec
f18.0
0.0 EV
55.0 mm focal length
ISO 6400
A7 II All test shots image 22
A7 II All test shots image 23
A7M2FAR2HDR6.JPG
16,515,072 bytes
6000×4000
1/6400 sec
f18.0
0.0 EV
55.0 mm focal length
ISO 6400
A7 II All test shots image 24
A7 II All test shots image 25
A7M2FAR2HDRA.JPG
15,663,104 bytes
6000×4000
1/8000 sec
f18.0
0.0 EV
55.0 mm focal length
ISO 6400
A7 II All test shots image 26
A7 II All test shots image 27
A7M2FAR2I0050.JPG
A7M2FAR2I0050.ARW
18,841,600 bytes
6000×4000
1/320 sec
f8.0
0.0 EV
55.0 mm focal length
ISO 50
A7 II All test shots image 28
A7 II All test shots image 29
A7M2FAR2I0100.JPG
A7M2FAR2I0100.ARW
19,333,120 bytes
6000×4000
1/500 sec
f8.0
0.0 EV
55.0 mm focal length
ISO 100
A7 II All test shots image 30
A7 II All test shots image 31
A7M2FAR2I0200.JPG
A7M2FAR2I0200.ARW
19,660,800 bytes
6000×4000
1/1000 sec
f8.0
0.0 EV
55.0 mm focal length
ISO 200
A7 II All test shots image 32
A7 II All test shots image 33
A7M2FAR2I0400.JPG
A7M2FAR2I0400.ARW
19,333,120 bytes
6000×4000
1/2500 sec
f8.0
0.0 EV
55.0 mm focal length
ISO 400
A7 II All test shots image 34
A7 II All test shots image 35
A7M2FAR2I0800.JPG
A7M2FAR2I0800.ARW
17,301,504 bytes
6000×4000
1/4000 sec
f8.0
0.0 EV
55.0 mm focal length
ISO 800
A7 II All test shots image 36
A7 II All test shots image 37
A7M2FAR2I1600.JPG
A7M2FAR2I1600.ARW
16,285,696 bytes
6000×4000
1/6400 sec
f9.0
0.0 EV
55.0 mm focal length
ISO 1600
A7 II All test shots image 38
A7 II All test shots image 39
A7M2FAR2I3200.JPG
A7M2FAR2I3200.ARW
16,220,160 bytes
6000×4000
1/6400 sec
f13.0
0.0 EV
55.0 mm focal length
ISO 3200
A7 II All test shots image 40
A7 II All test shots image 41
A7M2FAR2I6400.JPG
A7M2FAR2I6400.ARW
16,384,000 bytes
6000×4000
1/8000 sec
f18.0
0.0 EV
55.0 mm focal length
ISO 6400
A7 II All test shots image 42
A7 II All test shots image 43
A7M2INBAP0.JPG
13,991,936 bytes
6000×4000
1/4 sec
f4.0
0.0 EV
55.0 mm focal length
ISO 100
A7 II All test shots image 44
A7 II All test shots image 45
A7M2INBAP1.JPG
14,254,080 bytes
6000×4000
0.3 sec
f4.0
+0.3 EV
55.0 mm focal length
ISO 100
A7 II All test shots image 46
A7 II All test shots image 47
A7M2INBAP2.JPG
14,352,384 bytes
6000×4000
0.4 sec
f4.0
+0.7 EV
55.0 mm focal length
ISO 100
A7 II All test shots image 48
A7 II All test shots image 49
A7M2INBAP3.JPG
14,319,616 bytes
6000×4000
0.5 sec
f4.0
+1.0 EV
55.0 mm focal length
ISO 100
A7 II All test shots image 50
A7 II All test shots image 51
A7M2INBI00050.JPG
A7M2INBI00050.ARW
13,959,168 bytes
6000×4000
0.8 sec
f4.0
+0.7 EV
55.0 mm focal length
ISO 50
A7 II All test shots image 52
A7 II All test shots image 53
A7M2INBI00100.JPG
A7M2INBI00100.ARW
14,352,384 bytes
6000×4000
0.4 sec
f4.0
+0.7 EV
55.0 mm focal length
ISO 100
A7 II All test shots image 54
A7 II All test shots image 55
A7M2INBI00200.JPG
A7M2INBI00200.ARW
14,843,904 bytes
6000×4000
1/5 sec
f4.0
+0.7 EV
55.0 mm focal length
ISO 200
A7 II All test shots image 56
A7 II All test shots image 57
A7M2INBI00400.JPG
A7M2INBI00400.ARW
14,024,704 bytes
6000×4000
1/10 sec
f4.0
+0.7 EV
55.0 mm focal length
ISO 400
A7 II All test shots image 58
A7 II All test shots image 59
A7M2INBI00800.JPG
A7M2INBI00800.ARW
12,681,216 bytes
6000×4000
1/20 sec
f4.0
+0.7 EV
55.0 mm focal length
ISO 800
A7 II All test shots image 60
A7 II All test shots image 61
A7M2INBI01600.JPG
A7M2INBI01600.ARW
12,222,464 bytes
6000×4000
1/40 sec
f4.0
+0.7 EV
55.0 mm focal length
ISO 1600
A7 II All test shots image 62
A7 II All test shots image 63
A7M2INBI03200.JPG
A7M2INBI03200.ARW
12,746,752 bytes
6000×4000
1/80 sec
f4.0
+0.7 EV
55.0 mm focal length
ISO 3200
A7 II All test shots image 64
A7 II All test shots image 65
A7M2INBI06400.JPG
A7M2INBI06400.ARW
13,959,168 bytes
6000×4000
1/160 sec
f4.0
+0.7 EV
55.0 mm focal length
ISO 6400
A7 II All test shots image 66
A7 II All test shots image 67
A7M2INBI12800.JPG
A7M2INBI12800.ARW
15,269,888 bytes
6000×4000
1/320 sec
f4.0
+0.7 EV
55.0 mm focal length
ISO 12800
A7 II All test shots image 68
A7 II All test shots image 69
A7M2INBI25600.JPG
A7M2INBI25600.ARW
15,826,944 bytes
6000×4000
1/640 sec
f4.0
+0.7 EV
55.0 mm focal length
ISO 25600
A7 II All test shots image 70
A7 II All test shots image 71
A7M2INBMP0.JPG
13,926,400 bytes
6000×4000
1/4 sec
f4.0
0.0 EV
55.0 mm focal length
ISO 100
A7 II All test shots image 72
A7 II All test shots image 73
A7M2INBMP1.JPG
14,221,312 bytes
6000×4000
0.3 sec
f4.0
+0.3 EV
55.0 mm focal length
ISO 100
A7 II All test shots image 74
A7 II All test shots image 75
A7M2INBMP2.JPG
14,352,384 bytes
6000×4000
0.4 sec
f4.0
+0.7 EV
55.0 mm focal length
ISO 100
A7 II All test shots image 76
A7 II All test shots image 77
A7M2INBMP3.JPG
14,352,384 bytes
6000×4000
0.5 sec
f4.0
+1.0 EV
55.0 mm focal length
ISO 100
A7 II All test shots image 78
A7 II All test shots image 79
A7M2INBTP0.JPG
13,926,400 bytes
6000×4000
1/4 sec
f4.0
0.0 EV
55.0 mm focal length
ISO 100
A7 II All test shots image 80
A7 II All test shots image 81
A7M2INBTP1.JPG
14,221,312 bytes
6000×4000
0.3 sec
f4.0
+0.3 EV
55.0 mm focal length
ISO 100
A7 II All test shots image 82
A7 II All test shots image 83
A7M2INBTP2.JPG
14,319,616 bytes
6000×4000
0.4 sec
f4.0
+0.7 EV
55.0 mm focal length
ISO 100
A7 II All test shots image 84
A7 II All test shots image 85
A7M2INBTP3.JPG
14,319,616 bytes
6000×4000
0.5 sec
f4.0
+1.0 EV
55.0 mm focal length
ISO 100
A7 II All test shots image 86
A7 II All test shots image 87
A7M2LL001003.JPG
A7M2LL001003.ARW
12,713,984 bytes
6000×4000
2 sec
f2.8
0.0 EV
35.0 mm focal length
ISO 100
A7 II All test shots image 88
A7 II All test shots image 89
A7M2LL001007.JPG
A7M2LL001007.ARW
12,812,288 bytes
6000×4000
30 sec
f2.8
0.0 EV
35.0 mm focal length
ISO 100
A7 II All test shots image 90
A7 II All test shots image 91
A7M2LL001007XNR.JPG
13,500,416 bytes
6000×4000
30 sec
f2.8
0.0 EV
35.0 mm focal length
ISO 100
A7 II All test shots image 92
A7 II All test shots image 93
A7M2LL032003.JPG
A7M2LL032003.ARW
12,353,536 bytes
6000×4000
1/15 sec
f2.8
0.0 EV
35.0 mm focal length
ISO 3200
A7 II All test shots image 94
A7 II All test shots image 95
A7M2LL032007.JPG
A7M2LL032007.ARW
13,008,896 bytes
6000×4000
1 sec
f2.8
0.0 EV
35.0 mm focal length
ISO 3200
A7 II All test shots image 96
A7 II All test shots image 97
A7M2LL032007XNR.JPG
21,463,040 bytes
6000×4000
1 sec
f2.8
0.0 EV
35.0 mm focal length
ISO 3200
A7 II All test shots image 98
A7 II All test shots image 99
A7M2LL256003.JPG
A7M2LL256003.ARW
15,794,176 bytes
6000×4000
1/125 sec
f2.8
0.0 EV
35.0 mm focal length
ISO 25600
A7 II All test shots image 100
A7 II All test shots image 101
A7M2LL256007.JPG
A7M2LL256007.ARW
15,663,104 bytes
6000×4000
1/8 sec
f2.8
0.0 EV
35.0 mm focal length
ISO 25600
A7 II All test shots image 102
A7 II All test shots image 103
A7M2LL256007XNR.JPG
21,004,288 bytes
6000×4000
1/8 sec
f2.8
0.0 EV
35.0 mm focal length
ISO 25600
A7 II All test shots image 104
A7 II All test shots image 105
A7M2OUTBAP0.JPG
A7M2OUTBAP0.ARW
13,627,814 bytes
4000×6000
1/40 sec
f8.0
0.0 EV
55.0 mm focal length
ISO 100
A7 II All test shots image 106
A7 II All test shots image 107
A7M2OUTBAP1.JPG
A7M2OUTBAP1.ARW
13,808,458 bytes
4000×6000
1/40 sec
f8.0
+0.3 EV
55.0 mm focal length
ISO 100
A7 II All test shots image 108
A7 II All test shots image 109
A7M2OUTBAP2.JPG
A7M2OUTBAP2.ARW
13,823,705 bytes
4000×6000
1/30 sec
f8.0
+0.7 EV
55.0 mm focal length
ISO 100
A7 II All test shots image 110
A7 II All test shots image 111
A7M2OUTBAP3.JPG
A7M2OUTBAP3.ARW
13,925,035 bytes
4000×6000
1/25 sec
f8.0
+1.0 EV
55.0 mm focal length
ISO 100
A7 II All test shots image 112
A7 II All test shots image 113
A7M2OUTBDP0.JPG
13,738,948 bytes
4000×6000
1/40 sec
f8.0
0.0 EV
55.0 mm focal length
ISO 100
A7 II All test shots image 114
A7 II All test shots image 115
A7M2OUTBDP1.JPG
13,872,029 bytes
4000×6000
1/30 sec
f8.0
+0.3 EV
55.0 mm focal length
ISO 100
A7 II All test shots image 116
A7 II All test shots image 117
A7M2OUTBDP2.JPG
13,965,465 bytes
4000×6000
1/30 sec
f8.0
+0.7 EV
55.0 mm focal length
ISO 100
A7 II All test shots image 118
A7 II All test shots image 119
A7M2OUTBDP3.JPG
14,005,347 bytes
4000×6000
1/25 sec
f8.0
+1.0 EV
55.0 mm focal length
ISO 100
A7 II All test shots image 120
A7 II All test shots image 121
A7M2OUTBDRO.JPG
15,481,183 bytes
4000×6000
1/40 sec
f8.0
0.0 EV
55.0 mm focal length
ISO 100
A7 II All test shots image 122
A7 II All test shots image 123
A7M2OUTBDRO1.JPG
14,867,882 bytes
4000×6000
1/40 sec
f8.0
0.0 EV
55.0 mm focal length
ISO 100
A7 II All test shots image 124
A7 II All test shots image 125
A7M2OUTBDRO2.JPG
15,172,566 bytes
4000×6000
1/40 sec
f8.0
0.0 EV
55.0 mm focal length
ISO 100
A7 II All test shots image 126
A7 II All test shots image 127
A7M2OUTBDRO3.JPG
15,481,183 bytes
4000×6000
1/40 sec
f8.0
0.0 EV
55.0 mm focal length
ISO 100
A7 II All test shots image 128
A7 II All test shots image 129
A7M2OUTBDRO4.JPG
15,742,193 bytes
4000×6000
1/40 sec
f8.0
0.0 EV
55.0 mm focal length
ISO 100
A7 II All test shots image 130
A7 II All test shots image 131
A7M2OUTBDRO5.JPG
15,953,827 bytes
4000×6000
1/40 sec
f8.0
0.0 EV
55.0 mm focal length
ISO 100
A7 II All test shots image 132
A7 II All test shots image 133
A7M2OUTBDROA.JPG
14,326,099 bytes
4000×6000
1/40 sec
f8.0
0.0 EV
55.0 mm focal length
ISO 100
A7 II All test shots image 134
A7 II All test shots image 135
A7M2OUTBHDR1.JPG
12,543,569 bytes
4000×6000
1/40 sec
f8.0
0.0 EV
55.0 mm focal length
ISO 100
A7 II All test shots image 136
A7 II All test shots image 137
A7M2OUTBHDR2.JPG
13,048,153 bytes
4000×6000
1/40 sec
f8.0
0.0 EV
55.0 mm focal length
ISO 100
A7 II All test shots image 138
A7 II All test shots image 139
A7M2OUTBHDR3.JPG
13,485,101 bytes
4000×6000
1/40 sec
f8.0
0.0 EV
55.0 mm focal length
ISO 100
A7 II All test shots image 140
A7 II All test shots image 141
A7M2OUTBHDR4.JPG
14,265,932 bytes
4000×6000
1/40 sec
f8.0
0.0 EV
55.0 mm focal length
ISO 100
A7 II All test shots image 142
A7 II All test shots image 143
A7M2OUTBHDR5.JPG
14,580,068 bytes
4000×6000
1/40 sec
f8.0
0.0 EV
55.0 mm focal length
ISO 100
A7 II All test shots image 144
A7 II All test shots image 145
A7M2OUTBHDR6.JPG
14,827,407 bytes
4000×6000
1/40 sec
f8.0
0.0 EV
55.0 mm focal length
ISO 100
A7 II All test shots image 146
A7 II All test shots image 147
A7M2OUTBHDRA.JPG
13,516,288 bytes
4000×6000
1/40 sec
f8.0
0.0 EV
55.0 mm focal length
ISO 100
A7 II All test shots image 148
A7 II All test shots image 149
A7M2OUTBMP0.JPG
13,654,690 bytes
4000×6000
1/40 sec
f8.0
0.0 EV
55.0 mm focal length
ISO 100
A7 II All test shots image 150
A7 II All test shots image 151
A7M2OUTBMP1.JPG
13,756,921 bytes
4000×6000
1/30 sec
f8.0
+0.3 EV
55.0 mm focal length
ISO 100
A7 II All test shots image 152
A7 II All test shots image 153
A7M2OUTBMP2.JPG
13,824,327 bytes
4000×6000
1/30 sec
f8.0
+0.7 EV
55.0 mm focal length
ISO 100
A7 II All test shots image 154
A7 II All test shots image 155
A7M2OUTBMP3.JPG
13,874,497 bytes
4000×6000
1/25 sec
f8.0
+1.0 EV
55.0 mm focal length
ISO 100
A7 II All test shots image 156
A7 II All test shots image 157
A7M2OUTB_AUTO.JPG
13,888,894 bytes
4000×6000
1/100 sec
f5.0
0.0 EV
55.0 mm focal length
ISO 100
A7 II All test shots image 158
A7 II All test shots image 159
A7M2OUTB_FACE.JPG
13,694,193 bytes
4000×6000
1/25 sec
f8.0
0.0 EV
55.0 mm focal length
ISO 100
A7 II All test shots image 160
A7 II All test shots image 161
A7M2hHOUSE.JPG
A7M2hHOUSE.ARW
21,299,200 bytes
6000×4000
1/30 sec
f5.6
+0.3 EV
55.0 mm focal length
ISO 100
A7 II All test shots image 162
A7 II All test shots image 163
A7M2hRES.JPG
A7M2hRES.ARW
9,732,096 bytes
6000×4000
1/30 sec
f5.6
0.0 EV
55.0 mm focal length
ISO 100
A7 II All test shots image 164
A7 II All test shots image 165
A7M2hRES_ACRu200r03.JPG
7,607,297 bytes
6000×4000
1/30 sec
f5.6
0.0 EV
55.0 mm focal length
ISO 100
A7 II All test shots image 166
A7 II All test shots image 167
A7M2hSLI00050NR0.JPG
17,465,344 bytes
6000×4000
1/8 sec
f8.0
0.0 EV
55.0 mm focal length
ISO 50
A7 II All test shots image 168
A7 II All test shots image 169
A7M2hSLI00050NR2D.JPG
A7M2hSLI00050NR2D.ARW
16,744,448 bytes
6000×4000
1/8 sec
f8.0
0.0 EV
55.0 mm focal length
ISO 50
A7 II All test shots image 170
A7 II All test shots image 171
A7M2hSLI00050_ACR.JPG
14,259,198 bytes
6000×4000
1/8 sec
f8.0
0.0 EV
55.0 mm focal length
ISO 50
A7 II All test shots image 172
A7 II All test shots image 173
A7M2hSLI00100NR0.JPG
17,629,184 bytes
6000×4000
1/15 sec
f8.0
0.0 EV
55.0 mm focal length
ISO 100
A7 II All test shots image 174
A7 II All test shots image 175
A7M2hSLI00100NR2D.JPG
A7M2hSLI00100NR2D.ARW
16,809,984 bytes
6000×4000
1/15 sec
f8.0
0.0 EV
55.0 mm focal length
ISO 100
A7 II All test shots image 176
A7 II All test shots image 177
A7M2hSLI00100_ACR-12MP.JPG
8,487,624 bytes
4240×2827
1/15 sec
f8.0
0.0 EV
55.0 mm focal length
ISO 100
A7 II All test shots image 178
A7 II All test shots image 179
A7M2hSLI00100_ACR.JPG
14,936,765 bytes
6000×4000
1/15 sec
f8.0
0.0 EV
55.0 mm focal length
ISO 100
A7 II All test shots image 180
A7 II All test shots image 181
A7M2hSLI00100_ACRu200r03.JPG
14,654,546 bytes
6000×4000
1/15 sec
f8.0
0.0 EV
55.0 mm focal length
ISO 100
A7 II All test shots image 182
A7 II All test shots image 183
A7M2hSLI00200NR0.JPG
18,251,776 bytes
6000×4000
1/30 sec
f8.0
0.0 EV
55.0 mm focal length
ISO 200
A7 II All test shots image 184
A7 II All test shots image 185
A7M2hSLI00200NR2D.JPG
A7M2hSLI00200NR2D.ARW
17,072,128 bytes
6000×4000
1/30 sec
f8.0
0.0 EV
55.0 mm focal length
ISO 200
A7 II All test shots image 186
A7 II All test shots image 187
A7M2hSLI00200_ACR.JPG
16,123,823 bytes
6000×4000
1/30 sec
f8.0
0.0 EV
55.0 mm focal length
ISO 200
A7 II All test shots image 188
A7 II All test shots image 189
A7M2hSLI00400NR0.JPG
20,086,784 bytes
6000×4000
1/60 sec
f8.0
0.0 EV
55.0 mm focal length
ISO 400
A7 II All test shots image 190
A7 II All test shots image 191
A7M2hSLI00400NR2D.JPG
A7M2hSLI00400NR2D.ARW
16,580,608 bytes
6000×4000
1/60 sec
f8.0
0.0 EV
55.0 mm focal length
ISO 400
A7 II All test shots image 192
A7 II All test shots image 193
A7M2hSLI00400_ACR.JPG
17,850,254 bytes
6000×4000
1/60 sec
f8.0
0.0 EV
55.0 mm focal length
ISO 400
A7 II All test shots image 194
A7 II All test shots image 195
A7M2hSLI00800NR0.JPG
20,840,448 bytes
6000×4000
1/125 sec
f8.0
0.0 EV
55.0 mm focal length
ISO 800
A7 II All test shots image 196
A7 II All test shots image 197
A7M2hSLI00800NR2D.JPG
A7M2hSLI00800NR2D.ARW
15,106,048 bytes
6000×4000
1/125 sec
f8.0
0.0 EV
55.0 mm focal length
ISO 800
A7 II All test shots image 198
A7 II All test shots image 199
A7M2hSLI00800_ACR.JPG
20,374,658 bytes
6000×4000
1/125 sec
f8.0
0.0 EV
55.0 mm focal length
ISO 800
A7 II All test shots image 200
A7 II All test shots image 201
A7M2hSLI01600NR0.JPG
21,200,896 bytes
6000×4000
1/250 sec
f8.0
0.0 EV
55.0 mm focal length
ISO 1600
A7 II All test shots image 202
A7 II All test shots image 203
A7M2hSLI01600NR2D.JPG
A7M2hSLI01600NR2D.ARW
14,516,224 bytes
6000×4000
1/250 sec
f8.0
0.0 EV
55.0 mm focal length
ISO 1600
A7 II All test shots image 204
A7 II All test shots image 205
A7M2hSLI01600_ACR.JPG
23,495,700 bytes
6000×4000
1/250 sec
f8.0
0.0 EV
55.0 mm focal length
ISO 1600
A7 II All test shots image 206
A7 II All test shots image 207
A7M2hSLI03200NR0.JPG
22,970,368 bytes
6000×4000
1/500 sec
f8.0
0.0 EV
55.0 mm focal length
ISO 3200
A7 II All test shots image 208
A7 II All test shots image 209
A7M2hSLI03200NR2D.JPG
A7M2hSLI03200NR2D.ARW
14,745,600 bytes
6000×4000
1/500 sec
f8.0
0.0 EV
55.0 mm focal length
ISO 3200
A7 II All test shots image 210
A7 II All test shots image 211
A7M2hSLI03200_ACR.JPG
27,155,191 bytes
6000×4000
1/500 sec
f8.0
0.0 EV
55.0 mm focal length
ISO 3200
A7 II All test shots image 212
A7 II All test shots image 213
A7M2hSLI06400NR0.JPG
20,054,016 bytes
6000×4000
1/1000 sec
f8.0
0.0 EV
55.0 mm focal length
ISO 6400
A7 II All test shots image 214
A7 II All test shots image 215
A7M2hSLI06400NR2D.JPG
A7M2hSLI06400NR2D.ARW
15,138,816 bytes
6000×4000
1/1000 sec
f8.0
0.0 EV
55.0 mm focal length
ISO 6400
A7 II All test shots image 216
A7 II All test shots image 217
A7M2hSLI06400_ACR-12MP.JPG
16,273,700 bytes
4240×2827
1/1000 sec
f8.0
0.0 EV
55.0 mm focal length
ISO 6400
A7 II All test shots image 218
A7 II All test shots image 219
A7M2hSLI06400_ACR.JPG
31,778,392 bytes
6000×4000
1/1000 sec
f8.0
0.0 EV
55.0 mm focal length
ISO 6400
A7 II All test shots image 220
A7 II All test shots image 221
A7M2hSLI12800NR0.JPG
22,020,096 bytes
6000×4000
1/2000 sec
f8.0
0.0 EV
55.0 mm focal length
ISO 12800
A7 II All test shots image 222
A7 II All test shots image 223
A7M2hSLI12800NR2D.JPG
A7M2hSLI12800NR2D.ARW
15,859,712 bytes
6000×4000
1/2000 sec
f8.0
0.0 EV
55.0 mm focal length
ISO 12800
A7 II All test shots image 224
A7 II All test shots image 225
A7M2hSLI12800_ACR-12MP.JPG
18,734,715 bytes
4240×2827
1/2000 sec
f8.0
0.0 EV
55.0 mm focal length
ISO 12800
A7 II All test shots image 226
A7 II All test shots image 227
A7M2hSLI12800_ACR.JPG
37,261,525 bytes
6000×4000
1/2000 sec
f8.0
0.0 EV
55.0 mm focal length
ISO 12800
A7 II All test shots image 228
A7 II All test shots image 229
A7M2hSLI25600NR0.JPG
21,037,056 bytes
6000×4000
1/4000 sec
f8.0
0.0 EV
55.0 mm focal length
ISO 25600
A7 II All test shots image 230
A7 II All test shots image 231
A7M2hSLI25600NR2D.JPG
A7M2hSLI25600NR2D.ARW
16,056,320 bytes
6000×4000
1/4000 sec
f8.0
0.0 EV
55.0 mm focal length
ISO 25600
A7 II All test shots image 232
A7 II All test shots image 233
A7M2hSLI25600_ACR.JPG
40,709,188 bytes
6000×4000
1/4000 sec
f8.0
0.0 EV
55.0 mm focal length
ISO 25600
A7 II All test shots image 234
A7 II All test shots image 235
A7M2hVFAI00050.JPG
A7M2hVFAI00050.ARW
13,959,168 bytes
6000×4000
1/8 sec
f8.0
0.0 EV
55.0 mm focal length
ISO 50
A7 II All test shots image 236
A7 II All test shots image 237
A7M2hVFAI00100.JPG
A7M2hVFAI00100.ARW
14,090,240 bytes
6000×4000
1/15 sec
f8.0
0.0 EV
55.0 mm focal length
ISO 100
A7 II All test shots image 238
A7 II All test shots image 239
A7M2hVFAI00200.JPG
A7M2hVFAI00200.ARW
14,843,904 bytes
6000×4000
1/30 sec
f8.0
0.0 EV
55.0 mm focal length
ISO 200
A7 II All test shots image 240
A7 II All test shots image 241
A7M2hVFAI00400.JPG
A7M2hVFAI00400.ARW
14,286,848 bytes
6000×4000
1/60 sec
f8.0
0.0 EV
55.0 mm focal length
ISO 400
A7 II All test shots image 242
A7 II All test shots image 243
A7M2hVFAI00800.JPG
A7M2hVFAI00800.ARW
13,238,272 bytes
6000×4000
1/125 sec
f8.0
0.0 EV
55.0 mm focal length
ISO 800
A7 II All test shots image 244
A7 II All test shots image 245
A7M2hVFAI01600.JPG
A7M2hVFAI01600.ARW
13,303,808 bytes
6000×4000
1/250 sec
f8.0
0.0 EV
55.0 mm focal length
ISO 1600
A7 II All test shots image 246
A7 II All test shots image 247
A7M2hVFAI03200.JPG
A7M2hVFAI03200.ARW
14,319,616 bytes
6000×4000
1/500 sec
f8.0
0.0 EV
55.0 mm focal length
ISO 3200
A7 II All test shots image 248
A7 II All test shots image 249
A7M2hVFAI06400.JPG
A7M2hVFAI06400.ARW
15,269,888 bytes
6000×4000
1/1000 sec
f8.0
0.0 EV
55.0 mm focal length
ISO 6400
A7 II All test shots image 250
A7 II All test shots image 251
A7M2hVFAI12800.JPG
A7M2hVFAI12800.ARW
16,384,000 bytes
6000×4000
1/2000 sec
f8.0
0.0 EV
55.0 mm focal length
ISO 12800
A7 II All test shots image 252
A7 II All test shots image 253
A7M2hVFAI25600.JPG
A7M2hVFAI25600.ARW
16,908,288 bytes
6000×4000
1/4000 sec
f8.0
0.0 EV
55.0 mm focal length
ISO 25600
A7 II All test shots image 254
A7 II All test shots image 255
A7M2hVFAL.JPG
14,090,240 bytes
6000×4000
1/15 sec
f8.0
0.0 EV
55.0 mm focal length
ISO 100
A7 II All test shots image 256
A7 II All test shots image 257
A7M2hVFAO.JPG
14,090,240 bytes
6000×4000
1/15 sec
f8.0
0.0 EV
55.0 mm focal length
ISO 100
A7 II All test shots image 258
A7 II All test shots image 259
A7M2hVFA_ADOBE.JPG
13,664,256 bytes
6000×4000
1/15 sec
f8.0
0.0 EV
55.0 mm focal length
ISO 100
A7 II All test shots image 260

All images copyright © 2015 by The Imaging Resource. All rights reserved.