
Digital Cameras – Sony Alpha SLT-A77 Test Images
Not sure which camera to buy? Let your eyes be the ultimate judge!
Visit our Comparometer(tm)
to compare images from the Sony Alpha SLT-A77 with those from other
cameras you may be considering. The proof is in the pictures, so let
your own eyes decide which you like best!
|
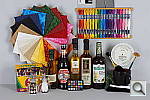
This is our new “Still Life” test target. We’re combining Here’s what to look for in this target:
|
||||||||||||||||||||||||||||||||||||||||||||||||||||||||||||||||||||||||||||||||||||||||||||||||||||||||||||||||||||||||||||||||||
|
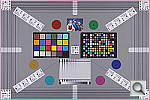
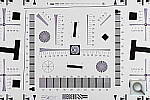
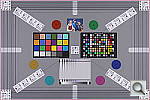
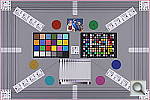
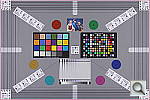
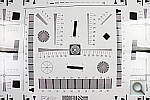
Our new “Multi Target” was first put into use in April, 2009, replacing the earlier “interim” design. This target incorporates a number of elements that combine aspects of the previous Multi target, as well as the previous Viewfinder Accuracy or “VFA” chart. Here’s some of what you’ll find in this target: Framing marks: This chart evolved from the earlier Viewfinder Accuracy chart, so one of its major uses is to measure viewfinder accuracy. (See notes in the Viewfinder Accuracy section, at the bottom of this page, for more information on this.) USAF resolution targets: An important use of this target is in evaluating lens quality, looking how well sharpness holds up as you move from the center to the corners of the frame. The little “USAF” resolution targets arranged at the center, in the corners, and along the diagonals are very useful for making fine judgements about blur, flare and aberrations in the image. We generally show crops of a USAF chip from a corner of the target and from the center, to show how lenses hold sharpness at wide and telephoto focal lengths. Alignment “bullseyes:” We find these graphics from the graphic arts world (used to align sheets of film in the old film-based prepress days) very useful for seeing chromatic aberration in lenses. The bold black/white elements are good for seeing the colored fringes caused by CA in the corners of the frame. MacBeth ColorChecker Chart: This is about as common a color standard as you can get these days, very widely available for only mildly exorbitant cost, and quite well controlled in its production. It thus serves as a good basis of comparison between cameras and between test setups. Imatest also understands the MacBeth colors very well, and uses them to produce its color accuracy map that we feature in all our reviews. MacBeth ColorChecker SG Chart: The ColorChecker SG chart provides a wider range of colors, to give a more detailed map of a camera’s color handling. We haven’t begun using this chart in the color-accuracy graphs we routinely offer, but expect to do so at some point in the future. In the meantime, we sometimes refer to this chart internally, to get a more complete idea of what a camera’s color map looks like. Log C/F Target: The progressive resolution pattern located just below the center of the target is a Log C/F (logarithmic contrast vs spatial frequency) chart. Digital camera noise reduction routines work by looking at levels of local contrast, flattening-out detail at progressively lower spatial frequencies as the local contrast decreases. (This is very commonly seen in human hair, grass, foliage, and other subjects with subtly-contrasting fine detail.) This chart lets Imatest analyze just how a camera makes the tradeoff between contrast, detail, and image noise. Color Starbursts: The six circular starburst elements arranged around the target are intended to reveal de-mosaicing artifacts and color-dependent resolution issues. The six starbursts provide examples of each combination of RGB colors intersecting each other. (That is, red, green, and blue against black, plus red against green, green against blue, and blue against red.) Given that the most common sensor RGB color filter pattern (the so-called Bayer) pattern has twice as many green pixels as red or blue, you’ll generally see that the green/black starburst shows the best resolution, while the blue/red one shows the worst. The effects of different sensor geometries and color filter array patterns will be revealed here. Musicians Image: Synthetic test patterns only tell you so much. While we have a lot of pictorial images in our other test targets, we thought it would be useful to include a small “natural” image here as well.
|
||||||||||||||||||||||||||||||||||||||||||||||||||||||||||||||||||||||||||||||||||||||||||||||||||||||||||||||||||||||||||||||||||
|
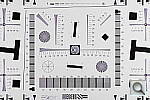
Part of the impetus in developing the new Multi Target in April 2009 was to switch to using a new 2x target for the resolution measurements, since the original ISO 12233 chart we’d used since the site first began in 1998(!) had become inadequate for testing the highest-resolution cameras. We’d for quite some time had a “homemade” 2x target, employing a shrunk version of the ISO 12233 chart, shot at 1/2 size. The resolution numbers on that chart all needed to be doubled to convert to the actual values, though, so we decided to go with a commercial 2x target to eliminate possible confusion on the part of our readers. Numbers on this new 2x resolution chart now read directly in hundreds of lines/picture height. (Because almost all of the area of this new resolution chart is now meaningful for resolution measurements, there was no longer space on it to overlay the MacBeth and other color targets on our prior Multi chart; hence the simultaneous change in our Multi target.)
|
||||||||||||||||||||||||||||||||||||||||||||||||||||||||||||||||||||||||||||||||||||||||||||||||||||||||||||||||||||||||||||||||||
|
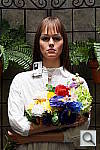
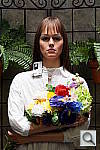
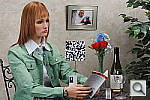
“Sunlit” Portrait: The lighting in this shot is deliberately awful, about what you’d expect from noontime sunshine here in the Atlanta, GA area. (In fact, the color balance has been chosen to pretty well match the hazy sunshine here in mid-August.) The reason for the harsh lighting is to provide a real “torture Look for:
To view the entire exposure series from zero to +1.0 EV, see files AA77OUTAP0.HTM through AA77OUTBAP3.HTM on the thumbnail
|
||||||||||||||||||||||||||||||||||||||||||||||||||||||||||||||||||||||||||||||||||||||||||||||||||||||||||||||||||||||||||||||||||
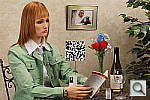
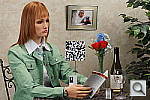
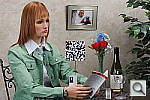
Indoor Portrait, Flash:
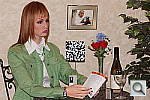
This shot duplicates indoor shooting conditions in most US homes, with Finally, exposure is important here, and frequently a tough challenge Note too, that the normal flash shot (as opposed to the slow sync one, To view the exposure series from zero to +1.0 EV in the normal flash mode, see files AA77INBFP0.HTM through AA77INBFP3.HTM on the thumbnail To view the same series in the Slow-Sync flash mode, see files /cameras/sony-a77-review/image/948079?section=samples through AA77INBFSP3.HTM on the thumbnail index |
||||||||||||||||||||||||||||||||||||||||||||||||||||||||||||||||||||||||||||||||||||||||||||||||||||||||||||||||||||||||||||||||||
Indoor Portrait, No Flash:
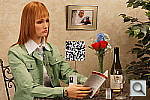
The incandescent lighting used in most US homes actually has a very The incandescent lighting used for this shot is thus not only very common Most cameras’ auto white balance systems have a great deal of difficulty If you intend to do much shooting indoors after dark, pay careful attention To view the entire exposure series from zero to +1.0 EV, see files AA77INBMP0.HTM through AA77INBMP3.HTM on the thumbnail ISO Series: One additional note about this particular test series though: Because
|
||||||||||||||||||||||||||||||||||||||||||||||||||||||||||||||||||||||||||||||||||||||||||||||||||||||||||||||||||||||||||||||||||
House Shot:
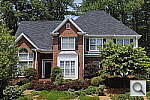
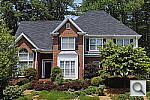
Like several of our tests, these images are actually photos of a high-resolution poster, shot under studio lighting. The shots for this camera were captured with our third-generation House poster, which was assembled from 45 separate 11-megapixel images, shot with a very high-quality lens, and then stitched together into a single image. The resulting image amounts to about 450 very high-quality megapixels. This should have sufficient detail to comfortably challenge cameras up to at least 80-100 megapixels. (And even with higher-resolution cameras, we believe that the camera lenses themselves would be more likely to limit resolution than would the detail in the poster.) Why did we choose to shoot a picture of a picture? The idea was to show a typical subject (a house and surrounding foliage) in a way that would be absolutely consistent from camera to camera. Any outdoor subject is going to vary considerably from day to day, as the lighting changes with the weather, atmospheric conditions, and season. Shooting a poster lets us compare images from cameras shot weeks, months, or even years apart, with the sure knowledge that nothing has changed from one shot to another. Things to look for here are fine detail, as seen in the foliage and tree limbs against the sky, sharpness in the corners, and the preservation of subtle detail in the shaded brick patterns. – Many cameras with overactive noise suppression severely blur the brick patterns that are in shadow. |
||||||||||||||||||||||||||||||||||||||||||||||||||||||||||||||||||||||||||||||||||||||||||||||||||||||||||||||||||||||||||||||||||
Far-Field Test 2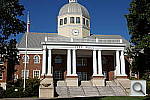
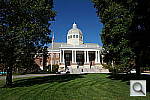
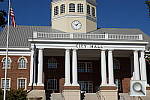
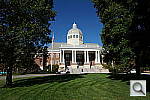
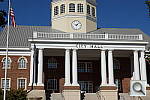
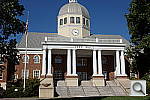
While the House poster in the shot above provides absolute repeatability from test to test, it doesn’t offer the range of brightness (dynamic range) that the original scene had, nor does it contain the nearly infinite range of fine detail found in nature. For these reasons, we shoot an outdoor photo of a building, to provide a more challenging (if more variable) subject for the cameras. Until Summer of 2011, we used the original house from the House poster for this “Far Field” shot, but the ever-encroaching trees made it less and less useful. The coup de grace for that subject was when the neighbor across the street relandscaped his yard so we could no longer shoot from our original position. In place of the original house, we’ve switched to using the Roswell, GA City Hall building, which offers many of the elements of the original Far Field subject, but in a setting where we’re guaranteed access into the future, and without the threat of trees eventually obscuring the building. In this shot, we look at how the camera handles rendering of subtle detail (the bricks, both in the sunlight and in the deep shadows under the entryway roof), how it handles bright highlights (the white columns and reflections from the dome), and shadow detail (in the dark areas beneath the shrubs on either side of the steps). Note though, that because this is shot outdoors, the character of the light is unavoidably going to change quite a bit, depending on the atmospheric humidity and the time of year. – You thus shouldn’t rely on it for absolute comparisons between cameras, since it’s unlikely that conditions will be exactly the same from one test to the next.
|
||||||||||||||||||||||||||||||||||||||||||||||||||||||||||||||||||||||||||||||||||||||||||||||||||||||||||||||||||||||||||||||||||
Pine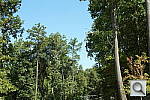
Our current Far-Field shot lacks one feature that we found invaluable in the original one; namely the pine foliage that was in the background of the old subject. The pine foliage provided very fine detail that we could also count on being the same year-round. No other shots we capture provided this combination of fine detail at a distance, so we added a new shot (“PINE” in all the filenames) of a large pine tree near our office, shot at roughly the same scale as the pines in the old Far-Field shot, so comparisons can still be made against older images. Use this shot to see how well each camera handles really fine detail, both in high-contrast situations (the needles against the sky) and in low-contrast ones (the needles against each other). The tangles of small branches against the sky are also very revealing. The combination of the FAR2 and PINE shots provide a wealth of information about cameras’ image-rendering prowess with natural subjects shot at “infinity,” filling testing needs that can’t be entirely met with studio shots alone. |
||||||||||||||||||||||||||||||||||||||||||||||||||||||||||||||||||||||||||||||||||||||||||||||||||||||||||||||||||||||||||||||||||
|
Lens Zoom Range Simply reading “3x zoom range” doesn’t do a lot to help you visualize what that means. It also says nothing regarding just how wide the wide-angle end of that range is. To give you an idea of exactly what each camera’s zoom lens does, we shoot this series of images, showing results at maximum wide angle, maximum telephoto, and telephoto with “digital zoom” enabled. (Note of course though, that so-called “digital zoom” just crops out and enlarges the central pixels of the image, achieving increased size at the cost of reduced resolution.)
|
||||||||||||||||||||||||||||||||||||||||||||||||||||||||||||||||||||||||||||||||||||||||||||||||||||||||||||||||||||||||||||||||||
|
“Davebox” Test Target
Because most of its various elements are now contained or represented in the combination of the Still Life and Multi Target shots, we no longer routinely shoot the Davebox by itself, as would normally appear in this space. (We do however, still use it for our low light test below.) |
||||||||||||||||||||||||||||||||||||||||||||||||||||||||||||||||||||||||||||||||||||||||||||||||||||||||||||||||||||||||||||||||||
Macro Shot
Many are interested in close-up or “macro” photography. This test shows the best results we could obtain using each camera’s macro mode. What to look for:
|
||||||||||||||||||||||||||||||||||||||||||||||||||||||||||||||||||||||||||||||||||||||||||||||||||||||||||||||||||||||||||||||||||
|
Low-Light Tests Low light photography is an area where there are really enormous differences
(Note: If you’d like to use a light meter to check light levels
|
||||||||||||||||||||||||||||||||||||||||||||||||||||||||||||||||||||||||||||||||||||||||||||||||||||||||||||||||||||||||||||||||||
|
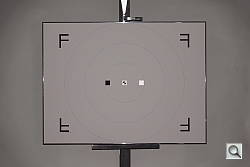
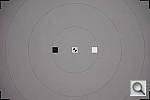
Flash Range Tests Digital camera makers have gotten better with their flash-range ratings. The test target here is our “new” flash range/uniformity target, first put into service in April, 2009. To avoid potential exposure problems caused by the target itself, we’ve gone to a mostly blank grey target, with a reflectance of 18% (matching the theoretical level that most exposure metering systems assume for average scene reflectance). The white and black chips let us check white and black points in addition to the mid-grey of the target itself. The concentric circles are a visual guide for flash falloff, marking points 25%, 50%, and 75% of the way from the center to the corners of the target. The bold black framing marks indicate the corners of either a 4:3 or 3:2 aspect ratio, for those shots in which we’re checking flash uniformity. (See below.) For consistency of exposure, the target is mounted in front of backdrop paper that also approximates a 18% grey.
Manufacturer-Specified Flash Range Lately, many manufacturers specify flash range with the camera set to Auto mode, in which the camera is free to boost its ISO setting to help increase the flash range. This does increase the range, but it’s easy to have too much of a good thing: Too high an ISO can leave you with too much image noise. The variable ISO setting also means that there isn’t an easy way to compare the range with the fixed-ISO shots in our standard flash range series. So now, we also test the flash under the manufacturer-specified conditions (whatever they may be, but frequently with the camera set to Auto mode), and the look at both how brightly the scene is lit, and how much image noise is present in the resulting images. Flash range for SLRs will vary with the lens used (depending on the maximum aperture), so their flash range is commonly expressed as a Guide Number, or GN for short. The guide number is a distance, in either feet or meters, at a given ISO. To find the maximum flash range at a given aperture, just divide the guide number by the aperture. For instance, a guide number of 56 feet would translate to a range of 10 feet with a lens set to an aperture of f/5.6. The range would be twice that if you had an f/2.8 lens (56/2.8 = 20).
Flash Uniformity The flash units on many digital cameras don’t illuminate the scene very evenly, especially at wide angle focal lengths, so the photos here shows how uniform the flash coverage is. As noted earlier, this test uses the same target as our flash range test, but for the uniformity tests, we take care to frame the target the same from camera to camera. The concentric circles on the target mark distances 25%, 50%, and 75% of the way from the center to the corners. (Approximate, they roughly split the difference between the 4:3 and 3:2 aspect ratios.)
|
||||||||||||||||||||||||||||||||||||||||||||||||||||||||||||||||||||||||||||||||||||||||||||||||||||||||||||||||||||||||||||||||||
|
Viewfinder Accuracy Viewfinder accuracy is an important parameter, especially for shots Unlike the optical viewfinders, the LCD viewfinders on most digital Things to look for on this test chart are:
|
||||||||||||||||||||||||||||||||||||||||||||||||||||||||||||||||||||||||||||||||||||||||||||||||||||||||||||||||||||||||||||||||||












Digital Cameras – Sony Alpha SLT-A77 Test Images
Not sure which camera to buy? Let your eyes be the ultimate judge!
Visit our Comparometer(tm)
to compare images from the Sony Alpha SLT-A77 with those from other
cameras you may be considering. The proof is in the pictures, so let
your own eyes decide which you like best!
|
This is our new “Still Life” test target. We’re combining Here’s what to look for in this target:
|
||||||||||||||||||||||||||||||||||||||||||||||||||||||||||||||||||||||||||||||||||||||||||||||||||||||||||||||||||||||||||||||||||
|
Our new “Multi Target” was first put into use in April, 2009, replacing the earlier “interim” design. This target incorporates a number of elements that combine aspects of the previous Multi target, as well as the previous Viewfinder Accuracy or “VFA” chart. Here’s some of what you’ll find in this target: Framing marks: This chart evolved from the earlier Viewfinder Accuracy chart, so one of its major uses is to measure viewfinder accuracy. (See notes in the Viewfinder Accuracy section, at the bottom of this page, for more information on this.) USAF resolution targets: An important use of this target is in evaluating lens quality, looking how well sharpness holds up as you move from the center to the corners of the frame. The little “USAF” resolution targets arranged at the center, in the corners, and along the diagonals are very useful for making fine judgements about blur, flare and aberrations in the image. We generally show crops of a USAF chip from a corner of the target and from the center, to show how lenses hold sharpness at wide and telephoto focal lengths. Alignment “bullseyes:” We find these graphics from the graphic arts world (used to align sheets of film in the old film-based prepress days) very useful for seeing chromatic aberration in lenses. The bold black/white elements are good for seeing the colored fringes caused by CA in the corners of the frame. MacBeth ColorChecker Chart: This is about as common a color standard as you can get these days, very widely available for only mildly exorbitant cost, and quite well controlled in its production. It thus serves as a good basis of comparison between cameras and between test setups. Imatest also understands the MacBeth colors very well, and uses them to produce its color accuracy map that we feature in all our reviews. MacBeth ColorChecker SG Chart: The ColorChecker SG chart provides a wider range of colors, to give a more detailed map of a camera’s color handling. We haven’t begun using this chart in the color-accuracy graphs we routinely offer, but expect to do so at some point in the future. In the meantime, we sometimes refer to this chart internally, to get a more complete idea of what a camera’s color map looks like. Log C/F Target: The progressive resolution pattern located just below the center of the target is a Log C/F (logarithmic contrast vs spatial frequency) chart. Digital camera noise reduction routines work by looking at levels of local contrast, flattening-out detail at progressively lower spatial frequencies as the local contrast decreases. (This is very commonly seen in human hair, grass, foliage, and other subjects with subtly-contrasting fine detail.) This chart lets Imatest analyze just how a camera makes the tradeoff between contrast, detail, and image noise. Color Starbursts: The six circular starburst elements arranged around the target are intended to reveal de-mosaicing artifacts and color-dependent resolution issues. The six starbursts provide examples of each combination of RGB colors intersecting each other. (That is, red, green, and blue against black, plus red against green, green against blue, and blue against red.) Given that the most common sensor RGB color filter pattern (the so-called Bayer) pattern has twice as many green pixels as red or blue, you’ll generally see that the green/black starburst shows the best resolution, while the blue/red one shows the worst. The effects of different sensor geometries and color filter array patterns will be revealed here. Musicians Image: Synthetic test patterns only tell you so much. While we have a lot of pictorial images in our other test targets, we thought it would be useful to include a small “natural” image here as well.
|
||||||||||||||||||||||||||||||||||||||||||||||||||||||||||||||||||||||||||||||||||||||||||||||||||||||||||||||||||||||||||||||||||
|
Part of the impetus in developing the new Multi Target in April 2009 was to switch to using a new 2x target for the resolution measurements, since the original ISO 12233 chart we’d used since the site first began in 1998(!) had become inadequate for testing the highest-resolution cameras. We’d for quite some time had a “homemade” 2x target, employing a shrunk version of the ISO 12233 chart, shot at 1/2 size. The resolution numbers on that chart all needed to be doubled to convert to the actual values, though, so we decided to go with a commercial 2x target to eliminate possible confusion on the part of our readers. Numbers on this new 2x resolution chart now read directly in hundreds of lines/picture height. (Because almost all of the area of this new resolution chart is now meaningful for resolution measurements, there was no longer space on it to overlay the MacBeth and other color targets on our prior Multi chart; hence the simultaneous change in our Multi target.)
|
||||||||||||||||||||||||||||||||||||||||||||||||||||||||||||||||||||||||||||||||||||||||||||||||||||||||||||||||||||||||||||||||||
|
“Sunlit” Portrait: The lighting in this shot is deliberately awful, about what you’d expect from noontime sunshine here in the Atlanta, GA area. (In fact, the color balance has been chosen to pretty well match the hazy sunshine here in mid-August.) The reason for the harsh lighting is to provide a real “torture Look for:
To view the entire exposure series from zero to +1.0 EV, see files AA77OUTAP0.HTM through AA77OUTBAP3.HTM on the thumbnail
|
||||||||||||||||||||||||||||||||||||||||||||||||||||||||||||||||||||||||||||||||||||||||||||||||||||||||||||||||||||||||||||||||||
Indoor Portrait, Flash:
This shot duplicates indoor shooting conditions in most US homes, with Finally, exposure is important here, and frequently a tough challenge Note too, that the normal flash shot (as opposed to the slow sync one, To view the exposure series from zero to +1.0 EV in the normal flash mode, see files AA77INBFP0.HTM through AA77INBFP3.HTM on the thumbnail To view the same series in the Slow-Sync flash mode, see files /cameras/sony-a77-review/image/947734?section=test through AA77INBFSP3.HTM on the thumbnail index |
||||||||||||||||||||||||||||||||||||||||||||||||||||||||||||||||||||||||||||||||||||||||||||||||||||||||||||||||||||||||||||||||||
Indoor Portrait, No Flash:
The incandescent lighting used in most US homes actually has a very The incandescent lighting used for this shot is thus not only very common Most cameras’ auto white balance systems have a great deal of difficulty If you intend to do much shooting indoors after dark, pay careful attention To view the entire exposure series from zero to +1.0 EV, see files AA77INBMP0.HTM through AA77INBMP3.HTM on the thumbnail ISO Series: One additional note about this particular test series though: Because
|
||||||||||||||||||||||||||||||||||||||||||||||||||||||||||||||||||||||||||||||||||||||||||||||||||||||||||||||||||||||||||||||||||
House Shot:
Like several of our tests, these images are actually photos of a high-resolution poster, shot under studio lighting. The shots for this camera were captured with our third-generation House poster, which was assembled from 45 separate 11-megapixel images, shot with a very high-quality lens, and then stitched together into a single image. The resulting image amounts to about 450 very high-quality megapixels. This should have sufficient detail to comfortably challenge cameras up to at least 80-100 megapixels. (And even with higher-resolution cameras, we believe that the camera lenses themselves would be more likely to limit resolution than would the detail in the poster.) Why did we choose to shoot a picture of a picture? The idea was to show a typical subject (a house and surrounding foliage) in a way that would be absolutely consistent from camera to camera. Any outdoor subject is going to vary considerably from day to day, as the lighting changes with the weather, atmospheric conditions, and season. Shooting a poster lets us compare images from cameras shot weeks, months, or even years apart, with the sure knowledge that nothing has changed from one shot to another. Things to look for here are fine detail, as seen in the foliage and tree limbs against the sky, sharpness in the corners, and the preservation of subtle detail in the shaded brick patterns. – Many cameras with overactive noise suppression severely blur the brick patterns that are in shadow. |
||||||||||||||||||||||||||||||||||||||||||||||||||||||||||||||||||||||||||||||||||||||||||||||||||||||||||||||||||||||||||||||||||
Far-Field Test 2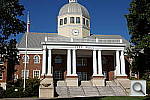
While the House poster in the shot above provides absolute repeatability from test to test, it doesn’t offer the range of brightness (dynamic range) that the original scene had, nor does it contain the nearly infinite range of fine detail found in nature. For these reasons, we shoot an outdoor photo of a building, to provide a more challenging (if more variable) subject for the cameras. Until Summer of 2011, we used the original house from the House poster for this “Far Field” shot, but the ever-encroaching trees made it less and less useful. The coup de grace for that subject was when the neighbor across the street relandscaped his yard so we could no longer shoot from our original position. In place of the original house, we’ve switched to using the Roswell, GA City Hall building, which offers many of the elements of the original Far Field subject, but in a setting where we’re guaranteed access into the future, and without the threat of trees eventually obscuring the building. In this shot, we look at how the camera handles rendering of subtle detail (the bricks, both in the sunlight and in the deep shadows under the entryway roof), how it handles bright highlights (the white columns and reflections from the dome), and shadow detail (in the dark areas beneath the shrubs on either side of the steps). Note though, that because this is shot outdoors, the character of the light is unavoidably going to change quite a bit, depending on the atmospheric humidity and the time of year. – You thus shouldn’t rely on it for absolute comparisons between cameras, since it’s unlikely that conditions will be exactly the same from one test to the next.
|
||||||||||||||||||||||||||||||||||||||||||||||||||||||||||||||||||||||||||||||||||||||||||||||||||||||||||||||||||||||||||||||||||
Pine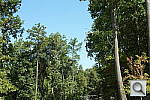
Our current Far-Field shot lacks one feature that we found invaluable in the original one; namely the pine foliage that was in the background of the old subject. The pine foliage provided very fine detail that we could also count on being the same year-round. No other shots we capture provided this combination of fine detail at a distance, so we added a new shot (“PINE” in all the filenames) of a large pine tree near our office, shot at roughly the same scale as the pines in the old Far-Field shot, so comparisons can still be made against older images. Use this shot to see how well each camera handles really fine detail, both in high-contrast situations (the needles against the sky) and in low-contrast ones (the needles against each other). The tangles of small branches against the sky are also very revealing. The combination of the FAR2 and PINE shots provide a wealth of information about cameras’ image-rendering prowess with natural subjects shot at “infinity,” filling testing needs that can’t be entirely met with studio shots alone. |
||||||||||||||||||||||||||||||||||||||||||||||||||||||||||||||||||||||||||||||||||||||||||||||||||||||||||||||||||||||||||||||||||
|
Lens Zoom Range Simply reading “3x zoom range” doesn’t do a lot to help you visualize what that means. It also says nothing regarding just how wide the wide-angle end of that range is. To give you an idea of exactly what each camera’s zoom lens does, we shoot this series of images, showing results at maximum wide angle, maximum telephoto, and telephoto with “digital zoom” enabled. (Note of course though, that so-called “digital zoom” just crops out and enlarges the central pixels of the image, achieving increased size at the cost of reduced resolution.)
|
||||||||||||||||||||||||||||||||||||||||||||||||||||||||||||||||||||||||||||||||||||||||||||||||||||||||||||||||||||||||||||||||||
|
“Davebox” Test Target
Because most of its various elements are now contained or represented in the combination of the Still Life and Multi Target shots, we no longer routinely shoot the Davebox by itself, as would normally appear in this space. (We do however, still use it for our low light test below.) |
||||||||||||||||||||||||||||||||||||||||||||||||||||||||||||||||||||||||||||||||||||||||||||||||||||||||||||||||||||||||||||||||||
Macro Shot
Many are interested in close-up or “macro” photography. This test shows the best results we could obtain using each camera’s macro mode. What to look for:
|
||||||||||||||||||||||||||||||||||||||||||||||||||||||||||||||||||||||||||||||||||||||||||||||||||||||||||||||||||||||||||||||||||
|
Low-Light Tests Low light photography is an area where there are really enormous differences
(Note: If you’d like to use a light meter to check light levels
|
||||||||||||||||||||||||||||||||||||||||||||||||||||||||||||||||||||||||||||||||||||||||||||||||||||||||||||||||||||||||||||||||||
|
Flash Range Tests Digital camera makers have gotten better with their flash-range ratings. The test target here is our “new” flash range/uniformity target, first put into service in April, 2009. To avoid potential exposure problems caused by the target itself, we’ve gone to a mostly blank grey target, with a reflectance of 18% (matching the theoretical level that most exposure metering systems assume for average scene reflectance). The white and black chips let us check white and black points in addition to the mid-grey of the target itself. The concentric circles are a visual guide for flash falloff, marking points 25%, 50%, and 75% of the way from the center to the corners of the target. The bold black framing marks indicate the corners of either a 4:3 or 3:2 aspect ratio, for those shots in which we’re checking flash uniformity. (See below.) For consistency of exposure, the target is mounted in front of backdrop paper that also approximates a 18% grey.
Manufacturer-Specified Flash Range Lately, many manufacturers specify flash range with the camera set to Auto mode, in which the camera is free to boost its ISO setting to help increase the flash range. This does increase the range, but it’s easy to have too much of a good thing: Too high an ISO can leave you with too much image noise. The variable ISO setting also means that there isn’t an easy way to compare the range with the fixed-ISO shots in our standard flash range series. So now, we also test the flash under the manufacturer-specified conditions (whatever they may be, but frequently with the camera set to Auto mode), and the look at both how brightly the scene is lit, and how much image noise is present in the resulting images. Flash range for SLRs will vary with the lens used (depending on the maximum aperture), so their flash range is commonly expressed as a Guide Number, or GN for short. The guide number is a distance, in either feet or meters, at a given ISO. To find the maximum flash range at a given aperture, just divide the guide number by the aperture. For instance, a guide number of 56 feet would translate to a range of 10 feet with a lens set to an aperture of f/5.6. The range would be twice that if you had an f/2.8 lens (56/2.8 = 20).
Flash Uniformity The flash units on many digital cameras don’t illuminate the scene very evenly, especially at wide angle focal lengths, so the photos here shows how uniform the flash coverage is. As noted earlier, this test uses the same target as our flash range test, but for the uniformity tests, we take care to frame the target the same from camera to camera. The concentric circles on the target mark distances 25%, 50%, and 75% of the way from the center to the corners. (Approximate, they roughly split the difference between the 4:3 and 3:2 aspect ratios.)
|
||||||||||||||||||||||||||||||||||||||||||||||||||||||||||||||||||||||||||||||||||||||||||||||||||||||||||||||||||||||||||||||||||
|
Viewfinder Accuracy Viewfinder accuracy is an important parameter, especially for shots Unlike the optical viewfinders, the LCD viewfinders on most digital Things to look for on this test chart are:
|
||||||||||||||||||||||||||||||||||||||||||||||||||||||||||||||||||||||||||||||||||||||||||||||||||||||||||||||||||||||||||||||||||












All test shots
Sony Alpha SLT-A77 Thumbnails
Not sure which camera to buy? Let your eyes be the ultimate judge!
Visit our Comparometer(tm)
to compare images from the Sony Alpha SLT-A77 with those from other
cameras you may be considering. The proof is in the pictures, so let
your own eyes decide which you like best!
This page may take a long time to load, due to the many thumbnails!
All images copyright © 2011 by The Imaging Resource. All rights reserved.
 AA77FAR2CON1.JPG 16,646,144 bytes 6000×4000 1/640 sec f8.0 0.0 EV 35.0 mm focal length ISO 100 |
 AA77FAR2CON2.JPG 16,777,216 bytes 6000×4000 1/640 sec f8.0 0.0 EV 35.0 mm focal length ISO 100 |
 AA77FAR2CON3.JPG 16,842,752 bytes 6000×4000 1/640 sec f8.0 0.0 EV 35.0 mm focal length ISO 100 |
 AA77FAR2CON4D.JPG 16,875,520 bytes 6000×4000 1/640 sec f8.0 0.0 EV 35.0 mm focal length ISO 100 |
 AA77FAR2CON5.JPG 16,842,752 bytes 6000×4000 1/640 sec f8.0 0.0 EV 35.0 mm focal length ISO 100 |
 AA77FAR2CON6.JPG 16,809,984 bytes 6000×4000 1/640 sec f8.0 0.0 EV 35.0 mm focal length ISO 100 |
 AA77FAR2CON7.JPG 16,777,216 bytes 6000×4000 1/640 sec f8.0 0.0 EV 35.0 mm focal length ISO 100 |
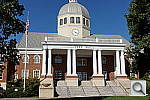 AA77FAR2DRO1.JPG 17,727,488 bytes 6000×4000 1/640 sec f8.0 0.0 EV 35.0 mm focal length ISO 100 |
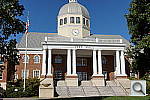 AA77FAR2DRO2.JPG 18,022,400 bytes 6000×4000 1/640 sec f8.0 0.0 EV 35.0 mm focal length ISO 100 |
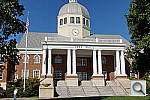 AA77FAR2DRO3.JPG 18,251,776 bytes 6000×4000 1/640 sec f8.0 0.0 EV 35.0 mm focal length ISO 100 |
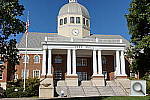 AA77FAR2DRO4.JPG 18,448,384 bytes 6000×4000 1/640 sec f8.0 0.0 EV 35.0 mm focal length ISO 100 |
 AA77FAR2DRO5.JPG 18,546,688 bytes 6000×4000 1/640 sec f8.0 0.0 EV 35.0 mm focal length ISO 100 |
 AA77FAR2DROA.JPG 17,956,864 bytes 6000×4000 1/640 sec f8.0 0.0 EV 35.0 mm focal length ISO 100 |
 AA77FAR2HDR1.JPG 15,892,480 bytes 6000×4000 1/640 sec f8.0 0.0 EV 35.0 mm focal length ISO 100 |
 AA77FAR2HDR2.JPG 16,318,464 bytes 6000×4000 1/640 sec f8.0 0.0 EV 35.0 mm focal length ISO 100 |
 AA77FAR2HDR3.JPG 16,809,984 bytes 6000×4000 1/640 sec f8.0 0.0 EV 35.0 mm focal length ISO 100 |
 AA77FAR2HDR4.JPG 17,825,792 bytes 6000×4000 1/640 sec f8.0 0.0 EV 35.0 mm focal length ISO 100 |
 AA77FAR2HDR5.JPG 18,087,936 bytes 6000×4000 1/640 sec f8.0 0.0 EV 35.0 mm focal length ISO 100 |
 AA77FAR2HDR6.JPG 18,219,008 bytes 6000×4000 1/640 sec f8.0 0.0 EV 35.0 mm focal length ISO 100 |
 AA77FAR2HDRA.JPG 17,072,128 bytes 6000×4000 1/640 sec f8.0 0.0 EV 35.0 mm focal length ISO 100 |
 AA77FAR2I0050.JPG 16,154,624 bytes 6000×4000 1/320 sec f8.0 0.0 EV 35.0 mm focal length ISO 50 |
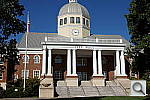 AA77FAR2I0100.JPG AA77FAR2I0100.ARW 17,006,592 bytes 6000×4000 1/640 sec f8.0 0.0 EV 35.0 mm focal length ISO 100 |
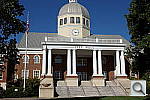 AA77FAR2I0200.JPG AA77FAR2I0200.ARW 15,368,192 bytes 6000×4000 1/1250 sec f8.0 0.0 EV 35.0 mm focal length ISO 200 |
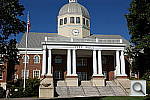 AA77FAR2I0400.JPG AA77FAR2I0400.ARW 13,893,632 bytes 6000×4000 1/2500 sec f8.0 0.0 EV 35.0 mm focal length ISO 400 |
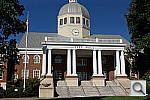 AA77FAR2I0800.JPG AA77FAR2I0800.ARW 14,188,544 bytes 6000×4000 1/5000 sec f8.0 0.0 EV 35.0 mm focal length ISO 800 |
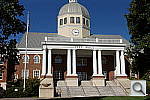 AA77FAR2I1600.JPG AA77FAR2I1600.ARW 13,369,344 bytes 6000×4000 1/5000 sec f11.0 0.0 EV 35.0 mm focal length ISO 1600 |
 AA77FAR2I3200.JPG AA77FAR2I3200.ARW 14,647,296 bytes 6000×4000 1/5000 sec f16.0 0.0 EV 35.0 mm focal length ISO 3200 |
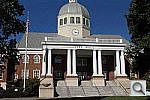 AA77FAR2I6400.JPG AA77FAR2I6400.ARW 14,155,776 bytes 6000×4000 1/5000 sec f22.0 0.0 EV 35.0 mm focal length ISO 6400 |
 AA77FAR2WTDT14.JPG 7,634,944 bytes 4240×2832 1/640 sec f8.0 0.0 EV 50.0 mm focal length ISO 100 |
 AA77FAR2WTDT20.JPG 4,030,464 bytes 3008×2000 1/640 sec f8.0 0.0 EV 50.0 mm focal length ISO 100 |
 AA77FAR2WTM.JPG AA77FAR2WTM.ARW 16,187,392 bytes 6000×4000 1/640 sec f8.0 0.0 EV 35.0 mm focal length ISO 100 |
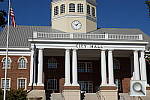 AA77FAR2WTT.JPG AA77FAR2WTT.ARW 14,581,760 bytes 6000×4000 1/640 sec f8.0 0.0 EV 50.0 mm focal length ISO 100 |
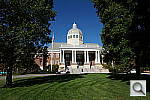 AA77FAR2WTW.JPG AA77FAR2WTW.ARW 18,808,832 bytes 6000×4000 1/400 sec f8.0 0.0 EV 16.0 mm focal length ISO 100 |
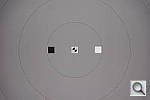 AA77FL06.JPG 11,534,336 bytes 6000×4000 1/60 sec f2.8 0.0 EV 50.0 mm focal length ISO 100 |
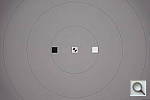 AA77FL07.JPG 11,304,960 bytes 6000×4000 1/60 sec f2.8 0.0 EV 50.0 mm focal length ISO 100 |
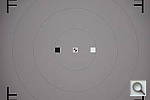 AA77FL08.JPG 11,599,872 bytes 6000×4000 1/60 sec f2.8 0.0 EV 50.0 mm focal length ISO 100 |
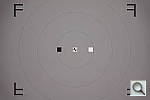 AA77FL09.JPG 11,599,872 bytes 6000×4000 1/60 sec f2.8 0.0 EV 50.0 mm focal length ISO 100 |
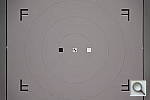 AA77FL10.JPG 11,468,800 bytes 6000×4000 1/60 sec f2.8 0.0 EV 50.0 mm focal length ISO 100 |
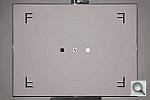 AA77FL11.JPG 11,108,352 bytes 6000×4000 1/60 sec f2.8 0.0 EV 50.0 mm focal length ISO 100 |
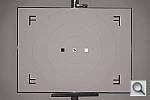 AA77FL12.JPG 11,436,032 bytes 6000×4000 1/60 sec f2.8 0.0 EV 50.0 mm focal length ISO 100 |
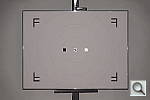 AA77FL13.JPG 11,632,640 bytes 6000×4000 1/60 sec f2.8 0.0 EV 50.0 mm focal length ISO 100 |
 AA77FL14.JPG 11,829,248 bytes 6000×4000 1/60 sec f2.8 0.0 EV 50.0 mm focal length ISO 100 |
 AA77FL15.JPG 11,829,248 bytes 6000×4000 1/60 sec f2.8 0.0 EV 50.0 mm focal length ISO 100 |
 AA77FL16.JPG 11,665,408 bytes 6000×4000 1/60 sec f2.8 0.0 EV 50.0 mm focal length ISO 100 |
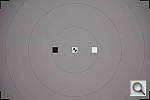 AA77FLFCT.JPG 11,632,640 bytes 6000×4000 1/60 sec f2.8 0.0 EV 50.0 mm focal length ISO 100 |
 AA77FLFCW.JPG 12,058,624 bytes 6000×4000 1/60 sec f2.8 0.0 EV 16.0 mm focal length ISO 100 |
 AA77FL_MFR140M0100.JPG 11,862,016 bytes 6000×4000 1/60 sec f2.8 0.0 EV 50.0 mm focal length ISO 100 |
 AA77INBAP0.JPG 14,647,296 bytes 6000×4000 1/5 sec f4.0 0.0 EV 70.0 mm focal length ISO 100 |
 AA77INBAP1.JPG 14,843,904 bytes 6000×4000 1/4 sec f4.0 +0.3 EV 70.0 mm focal length ISO 100 |
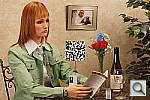 AA77INBAP2.JPG 14,909,440 bytes 6000×4000 0.3 sec f4.0 +0.7 EV 70.0 mm focal length ISO 100 |
 AA77INBAP3.JPG 14,811,136 bytes 6000×4000 0.3 sec f4.0 +1.0 EV 70.0 mm focal length ISO 100 |
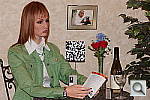 AA77INBFP0.JPG 15,171,584 bytes 6000×4000 1/60 sec f4.0 0.0 EV 70.0 mm focal length ISO 100 |
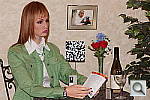 AA77INBFP1.JPG 15,171,584 bytes 6000×4000 1/60 sec f4.0 0.0 EV 70.0 mm focal length ISO 100 |
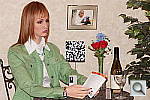 AA77INBFP2.JPG 15,007,744 bytes 6000×4000 1/60 sec f4.0 0.0 EV 70.0 mm focal length ISO 100 |
 AA77INBFP3.JPG 15,073,280 bytes 6000×4000 1/60 sec f4.0 0.0 EV 70.0 mm focal length ISO 100 |
 AA77INBFSM1.JPG 14,352,384 bytes 6000×4000 1/5 sec f4.0 0.0 EV 70.0 mm focal length ISO 100 |
 AA77INBFSM2.JPG 14,417,920 bytes 6000×4000 1/5 sec f4.0 0.0 EV 70.0 mm focal length ISO 100 |
 AA77INBFSP0.JPG 14,385,152 bytes 6000×4000 1/5 sec f4.0 0.0 EV 70.0 mm focal length ISO 100 |
 AA77INBFSP1.JPG 14,548,992 bytes 6000×4000 1/5 sec f4.0 0.0 EV 70.0 mm focal length ISO 100 |
 AA77INBFSP2.JPG 13,991,936 bytes 6000×4000 1/5 sec f4.0 0.0 EV 70.0 mm focal length ISO 100 |
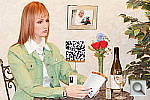 AA77INBFSP3.JPG 13,893,632 bytes 6000×4000 1/5 sec f4.0 0.0 EV 70.0 mm focal length ISO 100 |
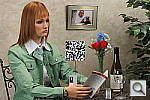 AA77INBI00050.JPG AA77INBI00050.ARW 13,697,024 bytes 6000×4000 0.5 sec f4.0 +0.7 EV 70.0 mm focal length ISO 50 |
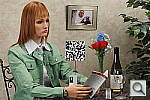 AA77INBI00100.JPG AA77INBI00100.ARW 14,680,064 bytes 6000×4000 1/4 sec f4.0 +0.7 EV 70.0 mm focal length ISO 100 |
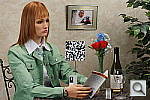 AA77INBI00200.JPG AA77INBI00200.ARW 13,172,736 bytes 6000×4000 1/8 sec f4.0 +0.7 EV 70.0 mm focal length ISO 200 |
 AA77INBI00400.JPG AA77INBI00400.ARW 12,189,696 bytes 6000×4000 1/15 sec f4.0 +0.7 EV 70.0 mm focal length ISO 400 |
 AA77INBI00800.JPG AA77INBI00800.ARW 12,812,288 bytes 6000×4000 1/30 sec f4.0 +0.7 EV 70.0 mm focal length ISO 800 |
 AA77INBI01600.JPG AA77INBI01600.ARW 11,829,248 bytes 6000×4000 1/60 sec f4.0 +0.7 EV 70.0 mm focal length ISO 1600 |
 AA77INBI03200.JPG AA77INBI03200.ARW 13,664,256 bytes 6000×4000 1/125 sec f4.0 +0.7 EV 70.0 mm focal length ISO 3200 |
 AA77INBI06400.JPG AA77INBI06400.ARW 13,303,808 bytes 6000×4000 1/250 sec f4.0 +0.7 EV 70.0 mm focal length ISO 6400 |
 AA77INBI12800.JPG AA77INBI12800.ARW 14,843,904 bytes 6000×4000 1/500 sec f4.0 +0.7 EV 70.0 mm focal length ISO 12800 |
 AA77INBI16000.JPG AA77INBI16000.ARW 14,352,384 bytes 6000×4000 1/640 sec f4.0 +0.7 EV 70.0 mm focal length ISO 16000 |
 AA77INBK26P0.JPG 14,614,528 bytes 6000×4000 1/5 sec f4.0 0.0 EV 70.0 mm focal length ISO 100 |
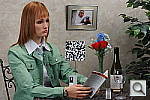 AA77INBK26P1.JPG 14,876,672 bytes 6000×4000 1/4 sec f4.0 +0.3 EV 70.0 mm focal length ISO 100 |
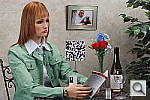 AA77INBK26P2.JPG 14,942,208 bytes 6000×4000 0.3 sec f4.0 +0.7 EV 70.0 mm focal length ISO 100 |
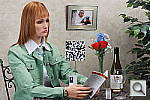 AA77INBK26P3.JPG 14,909,440 bytes 6000×4000 0.3 sec f4.0 +1.0 EV 70.0 mm focal length ISO 100 |
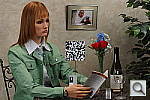 AA77INBMP0.JPG 14,581,760 bytes 6000×4000 1/5 sec f4.0 0.0 EV 70.0 mm focal length ISO 100 |
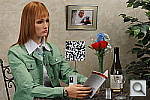 AA77INBMP1.JPG 14,843,904 bytes 6000×4000 1/4 sec f4.0 +0.3 EV 70.0 mm focal length ISO 100 |
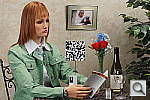 AA77INBMP2.JPG 14,942,208 bytes 6000×4000 0.3 sec f4.0 +0.7 EV 70.0 mm focal length ISO 100 |
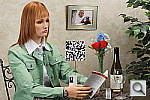 AA77INBMP3.JPG 14,614,528 bytes 6000×4000 0.3 sec f4.0 +1.0 EV 70.0 mm focal length ISO 100 |
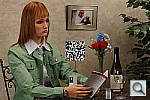 AA77INBTP0.JPG 14,548,992 bytes 6000×4000 1/5 sec f4.0 0.0 EV 70.0 mm focal length ISO 100 |
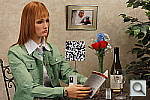 AA77INBTP1.JPG 14,843,904 bytes 6000×4000 1/4 sec f4.0 +0.3 EV 70.0 mm focal length ISO 100 |
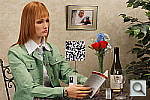 AA77INBTP2.JPG 14,876,672 bytes 6000×4000 0.3 sec f4.0 +0.7 EV 70.0 mm focal length ISO 100 |
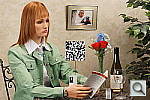 AA77INBTP3.JPG 14,843,904 bytes 6000×4000 0.4 sec f4.0 +1.0 EV 70.0 mm focal length ISO 100 |
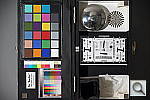 AA77LL000503.JPG AA77LL000503.ARW 5,046,272 bytes 6000×4000 3.2 sec f2.8 0.0 EV 50.0 mm focal length ISO 50 |
 AA77LL000504.JPG AA77LL000504.ARW 5,013,504 bytes 6000×4000 6 sec f2.8 0.0 EV 50.0 mm focal length ISO 50 |
 AA77LL000505.JPG AA77LL000505.ARW 5,013,504 bytes 6000×4000 13 sec f2.8 0.0 EV 50.0 mm focal length ISO 50 |
 AA77LL000506.JPG AA77LL000506.ARW 5,046,272 bytes 6000×4000 25 sec f2.8 0.0 EV 50.0 mm focal length ISO 50 |
 AA77LL000507.JPG AA77LL000507.ARW 4,751,360 bytes 6000×4000 30 sec f2.8 0.0 EV 50.0 mm focal length ISO 50 |
 AA77LL000507XNR.JPG AA77LL000507XNR.ARW 4,915,200 bytes 6000×4000 30 sec f2.8 0.0 EV 50.0 mm focal length ISO 50 |
 AA77LL001003.JPG AA77LL001003.ARW 5,668,864 bytes 6000×4000 1.6 sec f2.8 0.0 EV 50.0 mm focal length ISO 100 |
 AA77LL001003MFNRHH.JPG 3,801,088 bytes 6000×4000 1.3 sec f2.8 +1.0 EV 50.0 mm focal length ISO 100 |
 AA77LL001004.JPG AA77LL001004.ARW 5,668,864 bytes 6000×4000 3.2 sec f2.8 0.0 EV 50.0 mm focal length ISO 100 |
 AA77LL001005.JPG AA77LL001005.ARW 5,668,864 bytes 6000×4000 6 sec f2.8 0.0 EV 50.0 mm focal length ISO 100 |
 AA77LL001006.JPG AA77LL001006.ARW 5,668,864 bytes 6000×4000 13 sec f2.8 0.0 EV 50.0 mm focal length ISO 100 |
 AA77LL001007.JPG AA77LL001007.ARW 5,701,632 bytes 6000×4000 25 sec f2.8 0.0 EV 50.0 mm focal length ISO 100 |
 AA77LL001007MFNR.JPG 4,915,200 bytes 6000×4000 25 sec f2.8 0.0 EV 50.0 mm focal length ISO 100 |
 AA77LL001007XNR.JPG AA77LL001007XNR.ARW 5,931,008 bytes 6000×4000 25 sec f2.8 0.0 EV 50.0 mm focal length ISO 100 |
 AA77LL002003.JPG AA77LL002003.ARW 5,406,720 bytes 6000×4000 0.8 sec f2.8 0.0 EV 50.0 mm focal length ISO 200 |
 AA77LL002003MFNRHH.JPG 3,637,248 bytes 6000×4000 0.6 sec f2.8 +1.0 EV 50.0 mm focal length ISO 200 |
 AA77LL002004.JPG AA77LL002004.ARW 5,439,488 bytes 6000×4000 1.6 sec f2.8 0.0 EV 50.0 mm focal length ISO 200 |
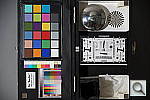 AA77LL002005.JPG AA77LL002005.ARW 5,439,488 bytes 6000×4000 3.2 sec f2.8 0.0 EV 50.0 mm focal length ISO 200 |
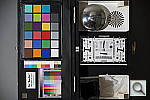 AA77LL002006.JPG AA77LL002006.ARW 5,406,720 bytes 6000×4000 6 sec f2.8 0.0 EV 50.0 mm focal length ISO 200 |
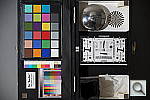 AA77LL002007.JPG AA77LL002007.ARW 5,439,488 bytes 6000×4000 13 sec f2.8 0.0 EV 50.0 mm focal length ISO 200 |
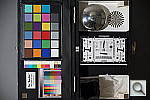 AA77LL002007MFNR.JPG 4,718,592 bytes 6000×4000 13 sec f2.8 0.0 EV 50.0 mm focal length ISO 200 |
 AA77LL002007XNR.JPG AA77LL002007XNR.ARW 5,472,256 bytes 6000×4000 13 sec f2.8 0.0 EV 50.0 mm focal length ISO 200 |
 AA77LL004003.JPG AA77LL004003.ARW 5,079,040 bytes 6000×4000 0.4 sec f2.8 0.0 EV 50.0 mm focal length ISO 400 |
 AA77LL004003MFNRHH.JPG 3,866,624 bytes 6000×4000 0.3 sec f2.8 +1.0 EV 50.0 mm focal length ISO 400 |
 AA77LL004004.JPG AA77LL004004.ARW 5,079,040 bytes 6000×4000 0.8 sec f2.8 0.0 EV 50.0 mm focal length ISO 400 |
 AA77LL004005.JPG AA77LL004005.ARW 5,111,808 bytes 6000×4000 1.6 sec f2.8 0.0 EV 50.0 mm focal length ISO 400 |
 AA77LL004006.JPG AA77LL004006.ARW 5,079,040 bytes 6000×4000 3.2 sec f2.8 0.0 EV 50.0 mm focal length ISO 400 |
 AA77LL004007.JPG AA77LL004007.ARW 5,111,808 bytes 6000×4000 6 sec f2.8 0.0 EV 50.0 mm focal length ISO 400 |
 AA77LL004007MFNR.JPG 4,620,288 bytes 6000×4000 6 sec f2.8 0.0 EV 50.0 mm focal length ISO 400 |
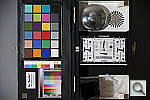 AA77LL004007XNR.JPG AA77LL004007XNR.ARW 5,242,880 bytes 6000×4000 6 sec f2.8 0.0 EV 50.0 mm focal length ISO 400 |
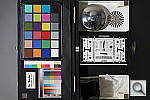 AA77LL008003.JPG AA77LL008003.ARW 5,570,560 bytes 6000×4000 1/5 sec f2.8 0.0 EV 50.0 mm focal length ISO 800 |
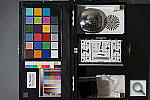 AA77LL008003MFNRHH.JPG 4,456,448 bytes 6000×4000 1/6 sec f2.8 +1.0 EV 50.0 mm focal length ISO 800 |
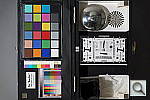 AA77LL008004.JPG AA77LL008004.ARW 5,570,560 bytes 6000×4000 0.4 sec f2.8 0.0 EV 50.0 mm focal length ISO 800 |
 AA77LL008005.JPG AA77LL008005.ARW 5,537,792 bytes 6000×4000 0.8 sec f2.8 0.0 EV 50.0 mm focal length ISO 800 |
 AA77LL008006.JPG AA77LL008006.ARW 5,668,864 bytes 6000×4000 1.6 sec f2.8 0.0 EV 50.0 mm focal length ISO 800 |
 AA77LL008007.JPG AA77LL008007.ARW 5,701,632 bytes 6000×4000 3.2 sec f2.8 0.0 EV 50.0 mm focal length ISO 800 |
 AA77LL008007MFNR.JPG 4,980,736 bytes 6000×4000 3.2 sec f2.8 0.0 EV 50.0 mm focal length ISO 800 |
 AA77LL008007XNR.JPG AA77LL008007XNR.ARW 5,799,936 bytes 6000×4000 3.2 sec f2.8 0.0 EV 50.0 mm focal length ISO 800 |
 AA77LL016003.JPG AA77LL016003.ARW 5,537,792 bytes 6000×4000 1/10 sec f2.8 0.0 EV 50.0 mm focal length ISO 1600 |
 AA77LL016003MFNRHH.JPG 4,980,736 bytes 6000×4000 1/13 sec f2.8 +1.0 EV 50.0 mm focal length ISO 1600 |
 AA77LL016004.JPG AA77LL016004.ARW 5,537,792 bytes 6000×4000 1/5 sec f2.8 0.0 EV 50.0 mm focal length ISO 1600 |
 AA77LL016005.JPG AA77LL016005.ARW 5,537,792 bytes 6000×4000 0.4 sec f2.8 0.0 EV 50.0 mm focal length ISO 1600 |
 AA77LL016006.JPG AA77LL016006.ARW 5,537,792 bytes 6000×4000 0.8 sec f2.8 0.0 EV 50.0 mm focal length ISO 1600 |
 AA77LL016007.JPG AA77LL016007.ARW 5,832,704 bytes 6000×4000 1.6 sec f2.8 0.0 EV 50.0 mm focal length ISO 1600 |
 AA77LL016007MFNR.JPG 5,144,576 bytes 6000×4000 1.6 sec f2.8 0.0 EV 50.0 mm focal length ISO 1600 |
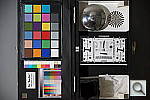 AA77LL016007XNR.JPG AA77LL016007XNR.ARW 5,570,560 bytes 6000×4000 1.6 sec f2.8 0.0 EV 50.0 mm focal length ISO 1600 |
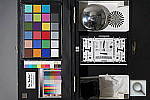 AA77LL032003.JPG AA77LL032003.ARW 7,372,800 bytes 6000×4000 1/20 sec f2.8 0.0 EV 50.0 mm focal length ISO 3200 |
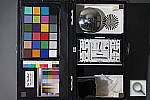 AA77LL032003MFNRHH.JPG 5,767,168 bytes 6000×4000 1/25 sec f2.8 +1.0 EV 50.0 mm focal length ISO 3200 |
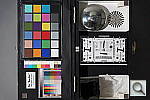 AA77LL032004.JPG AA77LL032004.ARW 7,372,800 bytes 6000×4000 1/10 sec f2.8 0.0 EV 50.0 mm focal length ISO 3200 |
 AA77LL032005.JPG AA77LL032005.ARW 7,372,800 bytes 6000×4000 1/5 sec f2.8 0.0 EV 50.0 mm focal length ISO 3200 |
 AA77LL032006.JPG AA77LL032006.ARW 7,372,800 bytes 6000×4000 0.4 sec f2.8 0.0 EV 50.0 mm focal length ISO 3200 |
 AA77LL032007.JPG AA77LL032007.ARW 7,372,800 bytes 6000×4000 0.8 sec f2.8 0.0 EV 50.0 mm focal length ISO 3200 |
 AA77LL032007MFNR.JPG 5,931,008 bytes 6000×4000 0.8 sec f2.8 0.0 EV 50.0 mm focal length ISO 3200 |
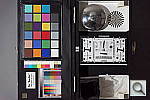 AA77LL032007XNR.JPG AA77LL032007XNR.ARW 7,667,712 bytes 6000×4000 0.8 sec f2.8 0.0 EV 50.0 mm focal length ISO 3200 |
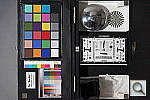 AA77LL064003.JPG AA77LL064003.ARW 7,700,480 bytes 6000×4000 1/40 sec f2.8 0.0 EV 50.0 mm focal length ISO 6400 |
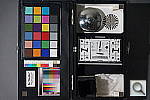 AA77LL064003MFNRHH.JPG 5,570,560 bytes 6000×4000 1/50 sec f2.8 +1.0 EV 50.0 mm focal length ISO 6400 |
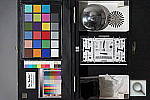 AA77LL064004.JPG AA77LL064004.ARW 7,700,480 bytes 6000×4000 1/20 sec f2.8 0.0 EV 50.0 mm focal length ISO 6400 |
 AA77LL064005.JPG AA77LL064005.ARW 7,733,248 bytes 6000×4000 1/10 sec f2.8 0.0 EV 50.0 mm focal length ISO 6400 |
 AA77LL064006.JPG AA77LL064006.ARW 7,733,248 bytes 6000×4000 1/5 sec f2.8 0.0 EV 50.0 mm focal length ISO 6400 |
 AA77LL064007.JPG AA77LL064007.ARW 7,667,712 bytes 6000×4000 0.4 sec f2.8 0.0 EV 50.0 mm focal length ISO 6400 |
 AA77LL064007MFNR.JPG 5,636,096 bytes 6000×4000 0.4 sec f2.8 0.0 EV 50.0 mm focal length ISO 6400 |
 AA77LL064007XNR.JPG AA77LL064007XNR.ARW 8,028,160 bytes 6000×4000 0.4 sec f2.8 0.0 EV 50.0 mm focal length ISO 6400 |
 AA77LL128003.JPG AA77LL128003.ARW 9,207,808 bytes 6000×4000 1/80 sec f2.8 0.0 EV 50.0 mm focal length ISO 12800 |
 AA77LL128003MFNRHH.JPG 6,717,440 bytes 6000×4000 1/100 sec f2.8 +1.0 EV 50.0 mm focal length ISO 12800 |
 AA77LL128004.JPG AA77LL128004.ARW 9,207,808 bytes 6000×4000 1/40 sec f2.8 0.0 EV 50.0 mm focal length ISO 12800 |
 AA77LL128005.JPG AA77LL128005.ARW 9,207,808 bytes 6000×4000 1/20 sec f2.8 0.0 EV 50.0 mm focal length ISO 12800 |
 AA77LL128006.JPG AA77LL128006.ARW 9,240,576 bytes 6000×4000 1/10 sec f2.8 0.0 EV 50.0 mm focal length ISO 12800 |
 AA77LL128007.JPG AA77LL128007.ARW 9,207,808 bytes 6000×4000 1/5 sec f2.8 0.0 EV 50.0 mm focal length ISO 12800 |
 AA77LL128007MFNR.JPG 6,586,368 bytes 6000×4000 1/5 sec f2.8 0.0 EV 50.0 mm focal length ISO 12800 |
 AA77LL128007XNR.JPG AA77LL128007XNR.ARW 9,535,488 bytes 6000×4000 1/5 sec f2.8 0.0 EV 50.0 mm focal length ISO 12800 |
 AA77LL160003.JPG AA77LL160003.ARW 9,076,736 bytes 6000×4000 1/100 sec f2.8 0.0 EV 50.0 mm focal length ISO 16000 |
 AA77LL160004.JPG AA77LL160004.ARW 9,043,968 bytes 6000×4000 1/50 sec f2.8 0.0 EV 50.0 mm focal length ISO 16000 |
 AA77LL160005.JPG AA77LL160005.ARW 9,076,736 bytes 6000×4000 1/25 sec f2.8 0.0 EV 50.0 mm focal length ISO 16000 |
 AA77LL160006.JPG AA77LL160006.ARW 9,076,736 bytes 6000×4000 1/13 sec f2.8 0.0 EV 50.0 mm focal length ISO 16000 |
 AA77LL160007.JPG AA77LL160007.ARW 9,043,968 bytes 6000×4000 1/6 sec f2.8 0.0 EV 50.0 mm focal length ISO 16000 |
 AA77LL160007XNR.JPG AA77LL160007XNR.ARW 9,338,880 bytes 6000×4000 1/6 sec f2.8 0.0 EV 50.0 mm focal length ISO 16000 |
 AA77LL256003MFNRHH.JPG 7,045,120 bytes 6000×4000 1/200 sec f2.8 +1.0 EV 50.0 mm focal length ISO 25600 |
 AA77LL256007MFNR.JPG 6,750,208 bytes 6000×4000 1/10 sec f2.8 0.0 EV 50.0 mm focal length ISO 25600 |
 AA77MAC.JPG 18,448,384 bytes 6000×4000 1/60 sec f8.0 0.0 EV 45.0 mm focal length ISO 100 |
 AA77MACFL.JPG 18,120,704 bytes 6000×4000 1/60 sec f8.0 0.0 EV 45.0 mm focal length ISO 100 |
 AA77OUTBAP0.JPG 13,855,754 bytes 4000×6000 1/50 sec f8.0 0.0 EV 70.0 mm focal length ISO 100 |
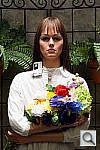 AA77OUTBAP1.JPG 14,104,650 bytes 4000×6000 1/40 sec f8.0 +0.3 EV 70.0 mm focal length ISO 100 |
 AA77OUTBAP2.JPG 14,215,103 bytes 4000×6000 1/30 sec f8.0 +0.7 EV 70.0 mm focal length ISO 100 |
 AA77OUTBAP3.JPG 14,248,648 bytes 4000×6000 1/30 sec f8.0 +1.0 EV 70.0 mm focal length ISO 100 |
 AA77OUTBCON1.JPG 5,960,709 bytes 4000×6000 1/50 sec f8.0 0.0 EV 70.0 mm focal length ISO 100 |
 AA77OUTBCON2.JPG 6,005,638 bytes 4000×6000 1/50 sec f8.0 0.0 EV 70.0 mm focal length ISO 100 |
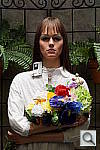 AA77OUTBCON3.JPG 6,068,676 bytes 4000×6000 1/50 sec f8.0 0.0 EV 70.0 mm focal length ISO 100 |
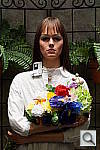 AA77OUTBCON4D.JPG 6,011,694 bytes 4000×6000 1/50 sec f8.0 0.0 EV 70.0 mm focal length ISO 100 |
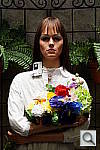 AA77OUTBCON5.JPG 6,027,064 bytes 4000×6000 1/50 sec f8.0 0.0 EV 70.0 mm focal length ISO 100 |
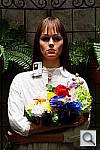 AA77OUTBCON6.JPG 5,964,356 bytes 4000×6000 1/50 sec f8.0 0.0 EV 70.0 mm focal length ISO 100 |
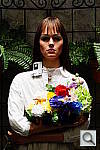 AA77OUTBCON7.JPG 5,821,984 bytes 4000×6000 1/50 sec f8.0 0.0 EV 70.0 mm focal length ISO 100 |
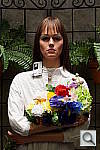 AA77OUTBDP0.JPG 13,882,523 bytes 4000×6000 1/50 sec f8.0 0.0 EV 70.0 mm focal length ISO 100 |
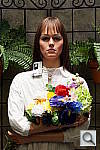 AA77OUTBDP1.JPG 14,121,322 bytes 4000×6000 1/40 sec f8.0 +0.3 EV 70.0 mm focal length ISO 100 |
 AA77OUTBDP2.JPG 14,242,505 bytes 4000×6000 1/30 sec f8.0 +0.7 EV 70.0 mm focal length ISO 100 |
 AA77OUTBDP3.JPG 14,289,044 bytes 4000×6000 1/30 sec f8.0 +1.0 EV 70.0 mm focal length ISO 100 |
 AA77OUTBDRO1.JPG 6,734,947 bytes 4000×6000 1/50 sec f8.0 0.0 EV 70.0 mm focal length ISO 100 |
 AA77OUTBDRO2.JPG 6,993,139 bytes 4000×6000 1/50 sec f8.0 0.0 EV 70.0 mm focal length ISO 100 |
 AA77OUTBDRO3.JPG 7,172,445 bytes 4000×6000 1/50 sec f8.0 0.0 EV 70.0 mm focal length ISO 100 |
 AA77OUTBDRO4.JPG 7,291,831 bytes 4000×6000 1/50 sec f8.0 0.0 EV 70.0 mm focal length ISO 100 |
 AA77OUTBDRO5.JPG 7,387,539 bytes 4000×6000 1/50 sec f8.0 0.0 EV 70.0 mm focal length ISO 100 |
 AA77OUTBDROAD.JPG 7,018,238 bytes 4000×6000 1/50 sec f8.0 0.0 EV 70.0 mm focal length ISO 100 |
 AA77OUTBHDR1.JPG 12,607,343 bytes 4000×6000 1/50 sec f8.0 0.0 EV 70.0 mm focal length ISO 100 |
 AA77OUTBHDR2.JPG 13,074,690 bytes 4000×6000 1/50 sec f8.0 0.0 EV 70.0 mm focal length ISO 100 |
 AA77OUTBHDR3.JPG 13,148,368 bytes 4000×6000 1/50 sec f8.0 0.0 EV 70.0 mm focal length ISO 100 |
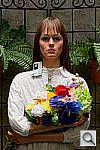 AA77OUTBHDR4.JPG 14,599,338 bytes 4000×6000 1/50 sec f8.0 0.0 EV 70.0 mm focal length ISO 100 |
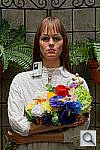 AA77OUTBHDR5.JPG 14,883,064 bytes 4000×6000 1/50 sec f8.0 0.0 EV 70.0 mm focal length ISO 100 |
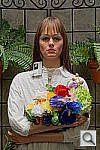 AA77OUTBHDR6.JPG 15,024,999 bytes 4000×6000 1/50 sec f8.0 0.0 EV 70.0 mm focal length ISO 100 |
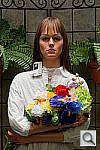 AA77OUTBHDRA.JPG 14,476,786 bytes 4000×6000 1/50 sec f8.0 0.0 EV 70.0 mm focal length ISO 100 |
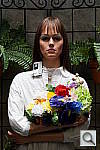 AA77OUTBK49P0.JPG 13,816,747 bytes 4000×6000 1/50 sec f8.0 0.0 EV 70.0 mm focal length ISO 100 |
 AA77OUTBK49P1.JPG 14,065,135 bytes 4000×6000 1/40 sec f8.0 +0.3 EV 70.0 mm focal length ISO 100 |
 AA77OUTBK49P2.JPG 14,184,387 bytes 4000×6000 1/30 sec f8.0 +0.7 EV 70.0 mm focal length ISO 100 |
 AA77OUTBK49P3.JPG 14,239,849 bytes 4000×6000 1/30 sec f8.0 +1.0 EV 70.0 mm focal length ISO 100 |
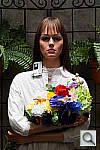 AA77OUTBMP0.JPG 13,879,635 bytes 4000×6000 1/50 sec f8.0 0.0 EV 70.0 mm focal length ISO 100 |
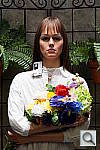 AA77OUTBMP1.JPG 14,090,606 bytes 4000×6000 1/40 sec f8.0 +0.3 EV 70.0 mm focal length ISO 100 |
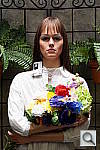 AA77OUTBMP2.JPG 14,194,243 bytes 4000×6000 1/30 sec f8.0 +0.7 EV 70.0 mm focal length ISO 100 |
 AA77OUTBMP3.JPG 14,265,070 bytes 4000×6000 1/25 sec f8.0 +1.0 EV 70.0 mm focal length ISO 100 |
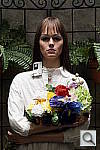 AA77OUTBSAT1.JPG 5,706,778 bytes 4000×6000 1/50 sec f8.0 0.0 EV 70.0 mm focal length ISO 100 |
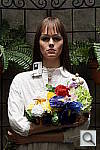 AA77OUTBSAT2.JPG 5,805,741 bytes 4000×6000 1/50 sec f8.0 0.0 EV 70.0 mm focal length ISO 100 |
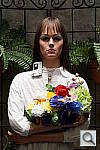 AA77OUTBSAT3.JPG 5,884,819 bytes 4000×6000 1/50 sec f8.0 0.0 EV 70.0 mm focal length ISO 100 |
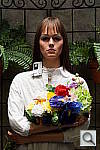 AA77OUTBSAT4D.JPG 6,000,678 bytes 4000×6000 1/50 sec f8.0 0.0 EV 70.0 mm focal length ISO 100 |
 AA77OUTBSAT5.JPG 6,095,755 bytes 4000×6000 1/50 sec f8.0 0.0 EV 70.0 mm focal length ISO 100 |
 AA77OUTBSAT6.JPG 6,233,732 bytes 4000×6000 1/50 sec f8.0 0.0 EV 70.0 mm focal length ISO 100 |
 AA77OUTBSAT7.JPG 6,362,565 bytes 4000×6000 1/50 sec f8.0 0.0 EV 70.0 mm focal length ISO 100 |
 AA77OUTB_FACE.JPG 6,062,027 bytes 4000×6000 1/50 sec f8.0 0.0 EV 70.0 mm focal length ISO 100 |
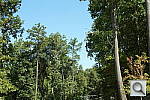 AA77PINE.JPG AA77PINE.ARW 21,528,576 bytes 6000×4000 1/100 sec f8.0 +0.7 EV 35.0 mm focal length ISO 100 |
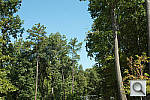 AA77PINE_ACRu150r06.JPG 25,120,796 bytes 6000×4000 1/125 sec f8.0 +0.7 EV 35.0 mm focal length ISO 100 |
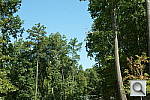 AA77PINE_IDCdefaults.JPG 26,600,449 bytes 6000×4000 1/125 sec f8.0 +0.7 EV 35.0 mm focal length ISO 100 |
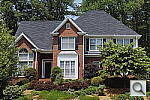 AA77hHOUSE.JPG AA77hHOUSE.ARW 22,872,064 bytes 6000×4000 1/50 sec f5.6 0.0 EV 70.0 mm focal length ISO 100 |
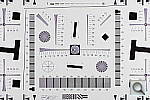 AA77hRES3008.JPG 3,702,784 bytes 3008×2000 1/50 sec f5.6 0.0 EV 70.0 mm focal length ISO 100 |
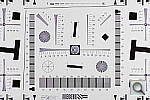 AA77hRES4240.JPG 6,356,992 bytes 4240×2832 1/50 sec f5.6 0.0 EV 70.0 mm focal length ISO 100 |
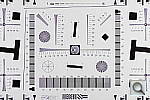 AA77hRES6000E.JPG 3,178,496 bytes 6000×4000 1/50 sec f5.6 0.0 EV 70.0 mm focal length ISO 100 |
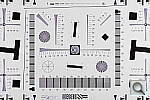 AA77hRES6000F.JPG AA77hRES6000F.ARW 11,173,888 bytes 6000×4000 1/50 sec f5.6 0.0 EV 70.0 mm focal length ISO 100 |
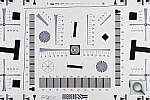 AA77hRES6000F_ACRu200r06.JPG 11,586,804 bytes 6000×4000 1/50 sec f5.6 0.0 EV 70.0 mm focal length ISO 100 |
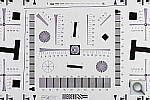 AA77hRES6000N.JPG 4,882,432 bytes 6000×4000 1/50 sec f5.6 0.0 EV 70.0 mm focal length ISO 100 |
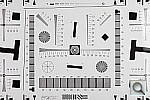 AA77hRESM.JPG AA77hRESM.ARW 10,911,744 bytes 6000×4000 1/40 sec f5.6 0.0 EV 35.0 mm focal length ISO 100 |
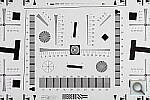 AA77hREST.JPG AA77hREST.ARW 10,846,208 bytes 6000×4000 1/40 sec f5.6 0.0 EV 50.0 mm focal length ISO 100 |
 AA77hRESW.JPG AA77hRESW.ARW 10,682,368 bytes 6000×4000 1/40 sec f5.6 0.0 EV 16.0 mm focal length ISO 100 |
 AA77hSLCOL_BNW.JPG 9,764,864 bytes 6000×4000 1/20 sec f8.0 0.0 EV 70.0 mm focal length ISO 100 |
 AA77hSLCOL_CLEAR.JPG 7,766,016 bytes 6000×4000 1/15 sec f8.0 0.0 EV 70.0 mm focal length ISO 100 |
 AA77hSLCOL_LNDS.JPG 16,187,392 bytes 6000×4000 1/20 sec f8.0 0.0 EV 70.0 mm focal length ISO 100 |
 AA77hSLCOL_NEUT.JPG 14,286,848 bytes 6000×4000 1/20 sec f8.0 0.0 EV 70.0 mm focal length ISO 100 |
 AA77hSLCOL_NIGHT.JPG 7,405,568 bytes 6000×4000 1/15 sec f8.0 0.0 EV 70.0 mm focal length ISO 100 |
 AA77hSLCOL_PORT.JPG 15,597,568 bytes 6000×4000 1/20 sec f8.0 0.0 EV 70.0 mm focal length ISO 100 |
 AA77hSLCOL_STD.JPG 15,433,728 bytes 6000×4000 1/20 sec f8.0 0.0 EV 70.0 mm focal length ISO 100 |
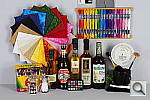 AA77hSLCOL_VIVID.JPG 15,892,480 bytes 6000×4000 1/20 sec f8.0 0.0 EV 70.0 mm focal length ISO 100 |
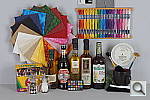 AA77hSLCON1.JPG 14,843,904 bytes 6000×4000 1/20 sec f8.0 0.0 EV 70.0 mm focal length ISO 100 |
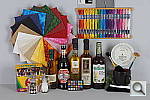 AA77hSLCON2.JPG 15,073,280 bytes 6000×4000 1/20 sec f8.0 0.0 EV 70.0 mm focal length ISO 100 |
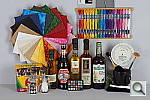 AA77hSLCON3.JPG 15,400,960 bytes 6000×4000 1/20 sec f8.0 0.0 EV 70.0 mm focal length ISO 100 |
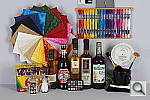 AA77hSLCON4D.JPG 15,564,800 bytes 6000×4000 1/20 sec f8.0 0.0 EV 70.0 mm focal length ISO 100 |
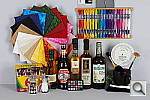 AA77hSLCON5.JPG 15,761,408 bytes 6000×4000 1/20 sec f8.0 0.0 EV 70.0 mm focal length ISO 100 |
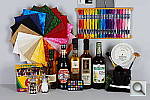 AA77hSLCON6.JPG 15,990,784 bytes 6000×4000 1/20 sec f8.0 0.0 EV 70.0 mm focal length ISO 100 |
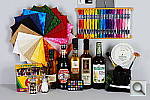 AA77hSLCON7.JPG 15,925,248 bytes 6000×4000 1/20 sec f8.0 0.0 EV 70.0 mm focal length ISO 100 |
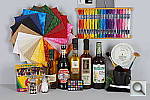 AA77hSLDRO1.JPG 15,597,568 bytes 6000×4000 1/20 sec f8.0 0.0 EV 70.0 mm focal length ISO 100 |
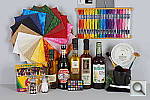 AA77hSLDRO2.JPG 15,695,872 bytes 6000×4000 1/20 sec f8.0 0.0 EV 70.0 mm focal length ISO 100 |
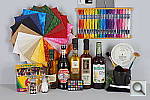 AA77hSLDRO3.JPG 15,728,640 bytes 6000×4000 1/20 sec f8.0 0.0 EV 70.0 mm focal length ISO 100 |
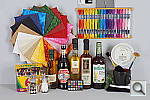 AA77hSLDRO4.JPG 15,532,032 bytes 6000×4000 1/20 sec f8.0 0.0 EV 70.0 mm focal length ISO 100 |
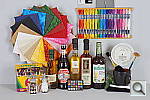 AA77hSLDRO5.JPG 15,532,032 bytes 6000×4000 1/20 sec f8.0 0.0 EV 70.0 mm focal length ISO 100 |
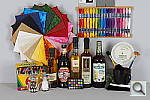 AA77hSLDROA.JPG 7,405,568 bytes 6000×4000 1/15 sec f8.0 0.0 EV 70.0 mm focal length ISO 100 |
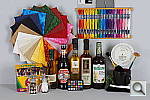 AA77hSLDROAD.JPG 15,630,336 bytes 6000×4000 1/20 sec f8.0 0.0 EV 70.0 mm focal length ISO 100 |
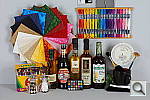 AA77hSLHDR1.JPG 14,745,600 bytes 6000×4000 1/20 sec f8.0 0.0 EV 70.0 mm focal length ISO 100 |
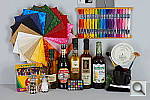 AA77hSLHDR2.JPG 14,876,672 bytes 6000×4000 1/20 sec f8.0 0.0 EV 70.0 mm focal length ISO 100 |
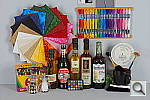 AA77hSLHDR3.JPG 15,138,816 bytes 6000×4000 1/20 sec f8.0 0.0 EV 70.0 mm focal length ISO 100 |
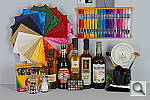 AA77hSLHDR4.JPG 16,351,232 bytes 6000×4000 1/20 sec f8.0 0.0 EV 70.0 mm focal length ISO 100 |
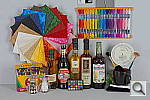 AA77hSLHDR5.JPG 16,318,464 bytes 6000×4000 1/20 sec f8.0 0.0 EV 70.0 mm focal length ISO 100 |
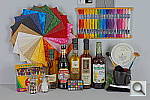 AA77hSLHDR6.JPG 16,023,552 bytes 6000×4000 1/20 sec f8.0 0.0 EV 70.0 mm focal length ISO 100 |
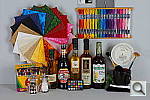 AA77hSLHDRA.JPG 14,745,600 bytes 6000×4000 1/20 sec f8.0 0.0 EV 70.0 mm focal length ISO 100 |
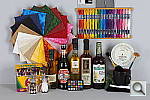 AA77hSLI00050NR1.JPG AA77hSLI00050NR1.ARW 15,499,264 bytes 6000×4000 1/10 sec f8.0 0.0 EV 70.0 mm focal length ISO 50 |
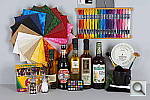 AA77hSLI00050NR2D.JPG AA77hSLI00050NR2D.ARW 15,073,280 bytes 6000×4000 1/10 sec f8.0 0.0 EV 70.0 mm focal length ISO 50 |
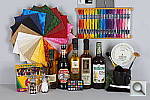 AA77hSLI00050NR3.JPG AA77hSLI00050NR3.ARW 14,909,440 bytes 6000×4000 1/10 sec f8.0 0.0 EV 70.0 mm focal length ISO 50 |
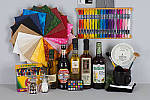 AA77hSLI00050_ACR.JPG 14,375,077 bytes 6000×4000 1/10 sec f8.0 0.0 EV 70.0 mm focal length ISO 50 |
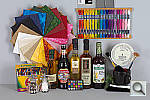 AA77hSLI00050_DCR.JPG 17,008,758 bytes 6024×4024 1/10 sec f8.0 Unreported EV 70.0 mm focal length ISO 50 |
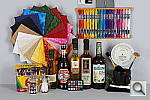 AA77hSLI00100NR1.JPG AA77hSLI00100NR1.ARW 16,121,856 bytes 6000×4000 1/20 sec f8.0 0.0 EV 70.0 mm focal length ISO 100 |
 AA77hSLI00100NR2D.JPG AA77hSLI00100NR2D.ARW 15,728,640 bytes 6000×4000 1/20 sec f8.0 0.0 EV 70.0 mm focal length ISO 100 |
 AA77hSLI00100NR3.JPG AA77hSLI00100NR3.ARW 15,335,424 bytes 6000×4000 1/20 sec f8.0 0.0 EV 70.0 mm focal length ISO 100 |
 AA77hSLI00100_ACR.JPG 16,153,555 bytes 6000×4000 1/20 sec f8.0 0.0 EV 70.0 mm focal length ISO 100 |
 AA77hSLI00100_DCR.JPG 19,446,415 bytes 6024×4024 1/20 sec f8.0 Unreported EV 70.0 mm focal length ISO 100 |
 AA77hSLI00200NR1.JPG AA77hSLI00200NR1.ARW 14,647,296 bytes 6000×4000 1/40 sec f8.0 0.0 EV 70.0 mm focal length ISO 200 |
 AA77hSLI00200NR2D.JPG AA77hSLI00200NR2D.ARW 14,417,920 bytes 6000×4000 1/40 sec f8.0 0.0 EV 70.0 mm focal length ISO 200 |
 AA77hSLI00200NR3.JPG AA77hSLI00200NR3.ARW 14,188,544 bytes 6000×4000 1/40 sec f8.0 0.0 EV 70.0 mm focal length ISO 200 |
 AA77hSLI00200_ACR.JPG 18,212,420 bytes 6000×4000 1/40 sec f8.0 0.0 EV 70.0 mm focal length ISO 200 |
 AA77hSLI00200_DCR.JPG 22,478,181 bytes 6024×4024 1/40 sec f8.0 Unreported EV 70.0 mm focal length ISO 200 |
 AA77hSLI00400NR1.JPG AA77hSLI00400NR1.ARW 13,664,256 bytes 6000×4000 1/80 sec f8.0 0.0 EV 70.0 mm focal length ISO 400 |
 AA77hSLI00400NR2D.JPG AA77hSLI00400NR2D.ARW 13,238,272 bytes 6000×4000 1/80 sec f8.0 0.0 EV 70.0 mm focal length ISO 400 |
 AA77hSLI00400NR3.JPG AA77hSLI00400NR3.ARW 12,812,288 bytes 6000×4000 1/80 sec f8.0 0.0 EV 70.0 mm focal length ISO 400 |
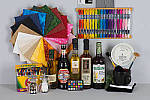 AA77hSLI00400_ACR.JPG 20,205,872 bytes 6000×4000 1/80 sec f8.0 0.0 EV 70.0 mm focal length ISO 400 |
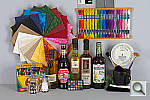 AA77hSLI00400_DCR.JPG 25,774,541 bytes 6024×4024 1/80 sec f8.0 Unreported EV 70.0 mm focal length ISO 400 |
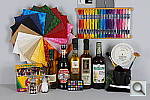 AA77hSLI00800NR1.JPG AA77hSLI00800NR1.ARW 14,483,456 bytes 6000×4000 1/160 sec f8.0 0.0 EV 70.0 mm focal length ISO 800 |
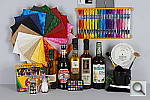 AA77hSLI00800NR2D.JPG AA77hSLI00800NR2D.ARW 13,893,632 bytes 6000×4000 1/160 sec f8.0 0.0 EV 70.0 mm focal length ISO 800 |
 AA77hSLI00800NR3.JPG AA77hSLI00800NR3.ARW 13,533,184 bytes 6000×4000 1/160 sec f8.0 0.0 EV 70.0 mm focal length ISO 800 |
 AA77hSLI00800_ACR.JPG 23,489,036 bytes 6000×4000 1/160 sec f8.0 0.0 EV 70.0 mm focal length ISO 800 |
 AA77hSLI00800_DCR.JPG 30,387,985 bytes 6024×4024 1/160 sec f8.0 Unreported EV 70.0 mm focal length ISO 800 |
 AA77hSLI01600NR1.JPG AA77hSLI01600NR1.ARW 13,467,648 bytes 6000×4000 1/320 sec f8.0 0.0 EV 70.0 mm focal length ISO 1600 |
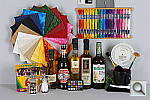 AA77hSLI01600NR2D.JPG AA77hSLI01600NR2D.ARW 13,008,896 bytes 6000×4000 1/320 sec f8.0 0.0 EV 70.0 mm focal length ISO 1600 |
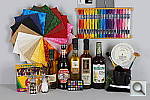 AA77hSLI01600NR3.JPG AA77hSLI01600NR3.ARW 12,550,144 bytes 6000×4000 1/320 sec f8.0 0.0 EV 70.0 mm focal length ISO 1600 |
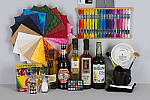 AA77hSLI01600_ACR.JPG 27,842,891 bytes 6000×4000 1/320 sec f8.0 0.0 EV 70.0 mm focal length ISO 1600 |
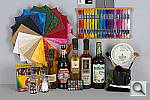 AA77hSLI01600_DCR.JPG 34,764,773 bytes 6024×4024 1/320 sec f8.0 Unreported EV 70.0 mm focal length ISO 1600 |
 AA77hSLI03200NR1.JPG AA77hSLI03200NR1.ARW 14,614,528 bytes 6000×4000 1/640 sec f8.0 0.0 EV 70.0 mm focal length ISO 3200 |
 AA77hSLI03200NR2D.JPG AA77hSLI03200NR2D.ARW 14,417,920 bytes 6000×4000 1/640 sec f8.0 0.0 EV 70.0 mm focal length ISO 3200 |
 AA77hSLI03200NR3.JPG AA77hSLI03200NR3.ARW 14,123,008 bytes 6000×4000 1/640 sec f8.0 0.0 EV 70.0 mm focal length ISO 3200 |
 AA77hSLI03200_ACR.JPG 34,060,786 bytes 6000×4000 1/640 sec f8.0 0.0 EV 70.0 mm focal length ISO 3200 |
 AA77hSLI03200_DCR.JPG 39,653,009 bytes 6024×4024 1/640 sec f8.0 Unreported EV 70.0 mm focal length ISO 3200 |
 AA77hSLI06400NR1.JPG AA77hSLI06400NR1.ARW 14,319,616 bytes 6000×4000 1/1250 sec f8.0 0.0 EV 70.0 mm focal length ISO 6400 |
 AA77hSLI06400NR2D.JPG AA77hSLI06400NR2D.ARW 13,991,936 bytes 6000×4000 1/1250 sec f8.0 0.0 EV 70.0 mm focal length ISO 6400 |
 AA77hSLI06400NR3.JPG AA77hSLI06400NR3.ARW 13,762,560 bytes 6000×4000 1/1250 sec f8.0 0.0 EV 70.0 mm focal length ISO 6400 |
 AA77hSLI06400_ACR.JPG 37,951,842 bytes 6000×4000 1/1250 sec f8.0 0.0 EV 70.0 mm focal length ISO 6400 |
 AA77hSLI06400_DCR.JPG 42,727,194 bytes 6024×4024 1/1252 sec f8.0 Unreported EV 70.0 mm focal length ISO 6400 |
 AA77hSLI12800NR1.JPG AA77hSLI12800NR1.ARW 15,466,496 bytes 6000×4000 1/2500 sec f8.0 0.0 EV 70.0 mm focal length ISO 12800 |
 AA77hSLI12800NR2D.JPG AA77hSLI12800NR2D.ARW 15,106,048 bytes 6000×4000 1/2500 sec f8.0 0.0 EV 70.0 mm focal length ISO 12800 |
 AA77hSLI12800NR3.JPG AA77hSLI12800NR3.ARW 14,843,904 bytes 6000×4000 1/2500 sec f8.0 0.0 EV 70.0 mm focal length ISO 12800 |
 AA77hSLI12800_ACR.JPG 45,814,604 bytes 6000×4000 1/2500 sec f8.0 0.0 EV 70.0 mm focal length ISO 12800 |
 AA77hSLI12800_DCR.JPG 48,742,444 bytes 6024×4024 1/2506 sec f8.0 Unreported EV 70.0 mm focal length ISO 12800 |
 AA77hSLI16000NR1.JPG AA77hSLI16000NR1.ARW 15,073,280 bytes 6000×4000 1/3200 sec f8.0 0.0 EV 70.0 mm focal length ISO 16000 |
 AA77hSLI16000NR2D.JPG AA77hSLI16000NR2D.ARW 14,811,136 bytes 6000×4000 1/3200 sec f8.0 0.0 EV 70.0 mm focal length ISO 16000 |
 AA77hSLI16000NR3.JPG AA77hSLI16000NR3.ARW 14,516,224 bytes 6000×4000 1/3200 sec f8.0 0.0 EV 70.0 mm focal length ISO 16000 |
 AA77hSLI16000_ACR.JPG 47,995,686 bytes 6000×4000 1/3200 sec f8.0 0.0 EV 70.0 mm focal length ISO 16000 |
 AA77hSLI16000_DCR.JPG 50,111,448 bytes 6024×4024 1/3205 sec f8.0 Unreported EV 70.0 mm focal length ISO 16000 |
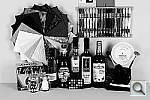 AA77hSLPEFF_HCBW.JPG 5,898,240 bytes 6000×4000 1/15 sec f8.0 0.0 EV 70.0 mm focal length ISO 100 |
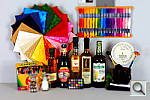 AA77hSLPEFF_MINI.JPG 3,407,872 bytes 6000×4000 1/15 sec f8.0 0.0 EV 70.0 mm focal length ISO 100 |
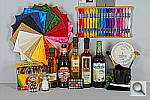 AA77hSLPEFF_PAINTING.JPG 8,290,304 bytes 6000×4000 1/15 sec f8.0 0.0 EV 70.0 mm focal length ISO 100 |
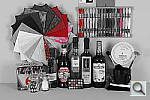 AA77hSLPEFF_PARTIALRED.JPG 5,931,008 bytes 6000×4000 1/15 sec f8.0 0.0 EV 70.0 mm focal length ISO 100 |
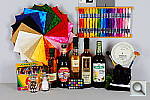 AA77hSLPEFF_POP.JPG 8,290,304 bytes 6000×4000 1/15 sec f8.0 0.0 EV 70.0 mm focal length ISO 100 |
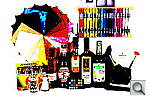 AA77hSLPEFF_POS.JPG 6,979,584 bytes 6000×4000 1/15 sec f8.0 0.0 EV 70.0 mm focal length ISO 100 |
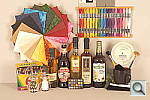 AA77hSLPEFF_RETRO.JPG 6,225,920 bytes 6000×4000 1/15 sec f8.0 0.0 EV 70.0 mm focal length ISO 100 |
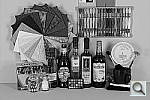 AA77hSLPEFF_RICHBW.JPG 5,996,544 bytes 6000×4000 1/15 sec f8.0 0.0 EV 70.0 mm focal length ISO 100 |
 AA77hSLPEFF_SOFT.JPG 3,964,928 bytes 6000×4000 1/15 sec f8.0 0.0 EV 70.0 mm focal length ISO 100 |
 AA77hSLPEFF_SOFTHIKEY.JPG 5,963,776 bytes 6000×4000 1/15 sec f8.0 0.0 EV 70.0 mm focal length ISO 100 |
 AA77hSLPEFF_TOY.JPG 7,176,192 bytes 6000×4000 1/15 sec f8.0 0.0 EV 70.0 mm focal length ISO 100 |
 AA77hSLSAT1.JPG 14,745,600 bytes 6000×4000 1/20 sec f8.0 0.0 EV 70.0 mm focal length ISO 100 |
 AA77hSLSAT2.JPG 14,974,976 bytes 6000×4000 1/20 sec f8.0 0.0 EV 70.0 mm focal length ISO 100 |
 AA77hSLSAT3.JPG 15,237,120 bytes 6000×4000 1/20 sec f8.0 0.0 EV 70.0 mm focal length ISO 100 |
 AA77hSLSAT4D.JPG 15,564,800 bytes 6000×4000 1/20 sec f8.0 0.0 EV 70.0 mm focal length ISO 100 |
 AA77hSLSAT5.JPG 15,794,176 bytes 6000×4000 1/20 sec f8.0 0.0 EV 70.0 mm focal length ISO 100 |
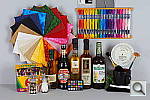 AA77hSLSAT6.JPG 16,187,392 bytes 6000×4000 1/20 sec f8.0 0.0 EV 70.0 mm focal length ISO 100 |
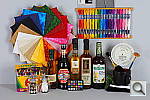 AA77hSLSAT7.JPG 16,416,768 bytes 6000×4000 1/20 sec f8.0 0.0 EV 70.0 mm focal length ISO 100 |
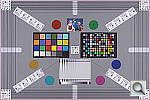 AA77hVFAI00050.JPG AA77hVFAI00050.ARW 13,697,024 bytes 6000×4000 1/20 sec f5.6 0.0 EV 70.0 mm focal length ISO 50 |
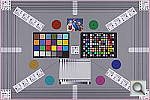 AA77hVFAI00100.JPG AA77hVFAI00100.ARW 14,712,832 bytes 6000×4000 1/40 sec f5.6 0.0 EV 70.0 mm focal length ISO 100 |
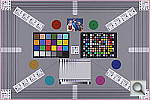 AA77hVFAI00200.JPG AA77hVFAI00200.ARW 13,893,632 bytes 6000×4000 1/80 sec f5.6 0.0 EV 70.0 mm focal length ISO 200 |
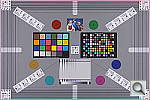 AA77hVFAI00400.JPG AA77hVFAI00400.ARW 12,877,824 bytes 6000×4000 1/160 sec f5.6 0.0 EV 70.0 mm focal length ISO 400 |
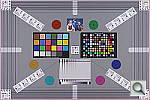 AA77hVFAI00800.JPG AA77hVFAI00800.ARW 14,057,472 bytes 6000×4000 1/320 sec f5.6 0.0 EV 70.0 mm focal length ISO 800 |
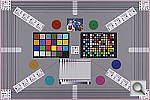 AA77hVFAI01600.JPG AA77hVFAI01600.ARW 13,598,720 bytes 6000×4000 1/640 sec f5.6 0.0 EV 70.0 mm focal length ISO 1600 |
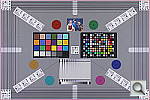 AA77hVFAI03200.JPG AA77hVFAI03200.ARW 14,974,976 bytes 6000×4000 1/1250 sec f5.6 0.0 EV 70.0 mm focal length ISO 3200 |
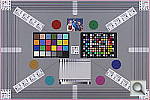 AA77hVFAI06400.JPG AA77hVFAI06400.ARW 14,483,456 bytes 6000×4000 1/2500 sec f5.6 0.0 EV 70.0 mm focal length ISO 6400 |
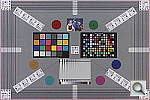 AA77hVFAI12800.JPG AA77hVFAI12800.ARW 15,761,408 bytes 6000×4000 1/5000 sec f5.6 0.0 EV 70.0 mm focal length ISO 12800 |
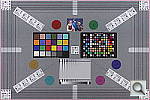 AA77hVFAI16000.JPG AA77hVFAI16000.ARW 15,302,656 bytes 6000×4000 1/6400 sec f5.6 0.0 EV 70.0 mm focal length ISO 16000 |
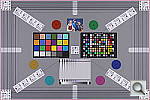 AA77hVFAL.JPG AA77hVFAL.ARW 14,680,064 bytes 6000×4000 1/40 sec f5.6 0.0 EV 70.0 mm focal length ISO 100 |
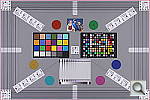 AA77hVFAO.JPG AA77hVFAO.ARW 14,712,832 bytes 6000×4000 1/40 sec f5.6 0.0 EV 70.0 mm focal length ISO 100 |
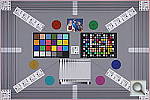 AA77hVFATB.JPG AA77hVFATB.ARW 14,090,240 bytes 6000×4000 1/125 sec f2.8 0.0 EV 50.0 mm focal length ISO 100 |
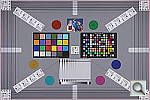 AA77hVFATB_CA_OFF.JPG AA77hVFATB_CA_OFF.ARW 14,548,992 bytes 6000×4000 1/125 sec f2.8 0.0 EV 50.0 mm focal length ISO 100 |
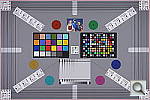 AA77hVFATB_DISTORT_OFF.JPG AA77hVFATB_DISTORT_OFF.ARW 6,586,368 bytes 6000×4000 1/125 sec f2.8 0.0 EV 50.0 mm focal length ISO 100 |
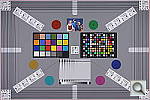 AA77hVFATB_SHADING_ON.JPG AA77hVFATB_SHADING_ON.ARW 6,520,832 bytes 6000×4000 1/125 sec f2.8 0.0 EV 50.0 mm focal length ISO 100 |
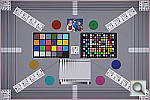 AA77hVFATB_SH_OFF.JPG AA77hVFATB_SH_OFF.ARW 14,057,472 bytes 6000×4000 1/125 sec f2.8 0.0 EV 50.0 mm focal length ISO 100 |
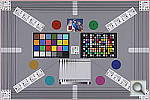 AA77hVFATS.JPG AA77hVFATS.ARW 14,155,776 bytes 6000×4000 1/15 sec f8.0 0.0 EV 50.0 mm focal length ISO 100 |
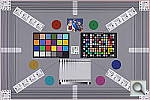 AA77hVFATS_DC_ON.JPG AA77hVFATS_DC_ON.ARW 13,795,328 bytes 6000×4000 1/15 sec f8.0 0.0 EV 50.0 mm focal length ISO 100 |
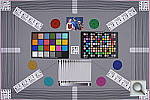 AA77hVFAWB.JPG AA77hVFAWB.ARW 14,680,064 bytes 6000×4000 1/125 sec f2.8 0.0 EV 16.0 mm focal length ISO 100 |
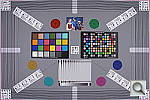 AA77hVFAWB_CA_OFF.JPG AA77hVFAWB_CA_OFF.ARW 15,171,584 bytes 6000×4000 1/125 sec f2.8 0.0 EV 16.0 mm focal length ISO 100 |
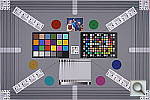 AA77hVFAWB_SHADING_ON.JPG AA77hVFAWB_SHADING_ON.ARW 6,750,208 bytes 6000×4000 1/125 sec f2.8 0.0 EV 16.0 mm focal length ISO 100 |
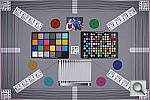 AA77hVFAWB_SH_OFF.JPG AA77hVFAWB_SH_OFF.ARW 14,614,528 bytes 6000×4000 1/125 sec f2.8 0.0 EV 16.0 mm focal length ISO 100 |
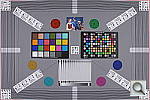 AA77hVFAWS.JPG AA77hVFAWS.ARW 14,483,456 bytes 6000×4000 1/15 sec f8.0 0.0 EV 16.0 mm focal length ISO 100 |
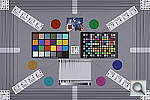 AA77hVFAWS_DC_ON.JPG AA77hVFAWS_DC_ON.ARW 13,926,400 bytes 6000×4000 1/15 sec f8.0 0.0 EV 16.0 mm focal length ISO 100 |
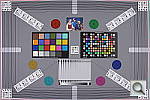 AA77hVFAWS_DISTORT_OFF.JPG AA77hVFAWS_DISTORT_OFF.ARW 6,881,280 bytes 6000×4000 1/15 sec f8.0 0.0 EV 16.0 mm focal length ISO 100 |
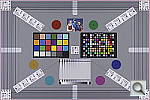 AA77hVFA_ADOBE.JPG 7,045,120 bytes 6000×4000 1/40 sec f5.6 0.0 EV 70.0 mm focal length ISO 100 |
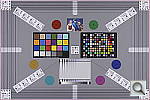 AA77hVFA_ADOBE2.JPG 14,352,384 bytes 6000×4000 1/40 sec f5.6 0.0 EV 70.0 mm focal length ISO 100 |
All images copyright © 2011 by The Imaging Resource. All rights reserved.