PART I: 5300 DIARY
Kodak EasyShare 5300 Setup & Installation
By MIKE PASINI
Editor
The Imaging Resource Digital Photography Newsletter
SAN FRANCISCO — It’s hard to believe that Kodak introduced its pigment-based all-in-one EasyShare printers in February. While more expensive than its competitors, our report at the time noted that the three printers use consumables that cost much less than the competition.
|
Part I Previously |
We’d been told to expect a review unit in April, checked out Kodak’s 5300 at PMA in February and reported the exclusive launch at Best Buy in March. But it wasn’t until today (June 15) that the mid-range $199.99 EasyShare 5300 arrived at our door.
With a dual-USB port, 3.0-inch LCD and card reader, it’s the model that attracted us the most. The lower end 5100 has just the dual-USB port and the higher end 5500 adds a document feeder. They all include a scanner, hence the “All-in-One” tag.
Kodak is betting consumers will pay a $50 premium on the hardware to save money on the consumables. The pigment inks are sold as a $9.99 black ink cartridge and a $14.99 color cartridge. They print on the company’s three-tiered porous paper line coded on the back with gold diagonal lines whose line weight and distance between lines tell the printer what kind of paper it’s printing on. The cheapest paper makes a 10 cent 4×6 print, the tier-two paper a 15 cent print and the high-end paper a 25 cent 4×6.
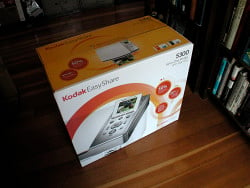
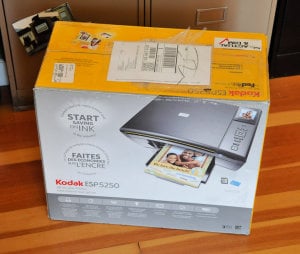
The Box. The inside flap explains how to extricate the printer.
We plan to spend some time with the 5300, but don’t want you to wait for the review. So we’re starting another Diary, accompanied by a gallery of images documenting the installation here.
IN THE BOX
The inside flap of the shipping box tells you how to get the printer out, a nice touch. There’s a cardboard tray full of accessories to remove first. Then you lie the box down and slide the printer out.
A large installation poster in the accessory box headlined “Start Here” takes it from there, starting with the box contents.
Inside the box are:
- The EasyShare 5300 All-in-One printer
- Two sample paper packs (Kodak Ultra Premium Photo Paper in both 4×6 and 8.5×11 sizes)
- A printhead in a foil packet
- A black ink cartridge and a color ink cartridge in clear packages
- The power supply and adapter
- Software CD and brochure
A control panel overlay was already on the printer control panel, but needed a little pressure to affix it properly.
The power supply is not just a brick, it’s the size of a standard brick, the largest we’ve ever seen. Don’t be alarmed.
You’ll need to supply a couple of things yourself:
- A USB cable (none comes with the printer)
- Plain letter-sized paper
In addition, we always recommend visiting the company site to download the latest drivers. In this case the Mac driver on the CD was obsolete. A newer version was available online.
INSTALLATION
The installation poster was helpful in putting together the 5300 in just half an hour. You can beat that time if you don’t stop to take pictures of every step, as we did.
The poster warns not to connect a USB cable to the printer right away. If you just follow the instructions and don’t improvise, you won’t get in trouble. The installation proceeds from unpacking the printer to loading paper to installing the printhead and inks to powering it up and calibrating it.

Out of the Box. The orange tape protects moving parts during shipment.
Unpacking the Printer. After getting the printer out of the box and slipping it out of the plastic bag it came in, we found a convenient place to set it up.
You can use the printer like any printer connected to a computer, of course, but as an All-in-One printer, it can also be used without a computer. You can copy documents (including prints), make prints from cards in the card reader or thumb drives inserted in the USB port and PictBridge compatible printers cabled directly to the printer. So find a place convenient for a copier and a computer printer both.
Movable parts are held in place with orange tape. It’s easy to find (look on the back and inside, too) and remove.
Installing the Control Panel. The right top side of the printer is the control panel, filled with the LCD and buttons. The language used to identify these controls depends on the control panel overlay, a large piece of hard plastic that slips over the control panel. It itself has a smaller soft plastic insert that, in our case, needed to to affixed more firmly to the hard plastic. But both were already installed.

Letter Tray. Note the width and length guides.
Loading the Paper. Next we made the acquaintance of the non-removable paper tray with its built-in 4×6 tray. We lifted the lid of the 4×6 tray on the right side and slipped some sample Kodak Ultra paper in with the glossy side down. The 4×6 tray holds a maximum of 20 sheets.
To activate 4×6 printing, instead of letter-sized printing, you push the 4×6 tray in until it clicks into place. If the power is on (which it isn’t when you first install paper), a green light on the side of the tray indicates the 4×6 tray is active.
Then we lowered the lid on the 4×6 tray.
Next we loaded the main tray with letter-sized plain paper, also facing down.
A small insert on the tray lid slides out as the output tray extender. Pull it out far enough and it flips open.
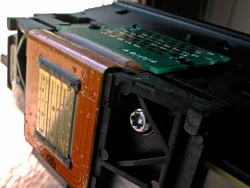
Printhead. Turned up so you can see the large nozzle end (left) and the contacts (top).
Installing the Printhead. While the lid on the scanner obviously is designed to open, so is the top couple of inches of the printer. Opening the printer access door, as it’s called, reveals the printhead carriage. Remove the orange tape.
There are nice little notches on all the packages so you know exactly where to tear them. We can’t be the only people in the world who appreciate this little touch.
More importantly, the delicate parts of the printhead are protected by orange plastic. Follow the installation poster to remove each in order carefully. Then place the printhead into its carriage and press it firmly forward until it clicks into place.
Let’s repeat that: Press it until it clicks. Engineers take note. Usually, that’s exactly how you break stuff. You press it until it clicks. Cracks, breaks. Generally, the installation was simple, but this step reminded us of a lot of other printer installations that require a lot of force to accomplish something. Yes, you should feel as if you’re about to break the printhead. But you won’t. It will click … into place.

Black Installed. It just snaps into the installed printhead.
We found out a minute later why such a firm connection had to be made. When you install the ink cartridges in the printhead you have to press down on them. Were it not for the click that grabs the printhead securely, pressing down on an ink cartridge would dislodge the printhead.
Installing the Ink Cartridges. Ink cartridges are protected by an orange plastic cradle that comes off with a little exertion. But they do slip easily into place. Or should we say “click” into place.
When Susan H. Tousi, Kodak research and development director for inkjet products, showed us in February how easily the cartridges install we nearly cried. Most printers (Canon being the exception to all of our complaints) make this ridiculously difficult. Tousi said she actually tested it with her mother. And it is easy to click a cartridge in.

Control Panel. Pretty simple if you’ve ever seen a photocopier before.
Connect Power. The power brick connects to the wall and an adapter cable connects to the brick with a strange three-prong connector (no doubt a ground is the extra connection). The connection to the printer was strangely loose. We could wiggle the plug back and forth a little too freely for our taste. But the plug itself has a green LED to indicate it’s working.
Next we removed the plastic film from the LCD, cranked it up so we could see it and went through the prompts for language and location.
Calibrating the Printer. The LCD will tell you the printer has to be calibrated and what to do about it (press the Start button). Oddly, the calibration image is printed on 4×6 photo paper.

Output Tray. It’s already flipped open.
Once printed, you place it face down, aligned to the front right corner of the scanner glass, and lower the scanner lid. Then press Start again to scan the target and calibrate the scanner.
If you don’t want to print 4×6 photos, lift the 4×6 tray lid and slide the tray out toward you. The green light we mentioned above will turn off.
Installing the Software. Apparently the CD itself has a Web install option to get the latest software directly from the Web. Do that. We were alerted to the new version and had previously downloaded it, so we installed from that disk image, which required a restart.
And that was all it took: 30 minutes (with pictures). And, surprisingly, there’s no scanner lock to fiddle with either.
TEST PRINTS
How do you know you’ve done it right, if you don’t make a test print or two?
This is where our uncanny ability to screw things up really shines. There was no printed manual included, we’d seen the printer demoed to death several times and if it’s really easy, well, how hard could it be?
The easiest test, we thought, would be to pop a thumb drive into one of the USB connectors in front. We made sure there were some pictures on it and slipped it in.
The LCD told us to wait while the drive was being read. But we waited so long, we started doing a little housekeeping. Far too long, really. So we disconnected. We tried it a few times with a few drives and nothing ever got read.

Calibration. Print this 4×6 and then scan it — that’s all there is to it.
Then we turned our talents to copying a picture. We’d seen that done at PMA on a 5300 and it really was hard to tell the original from the copy.
We put an old Kodak print (vintage 1970s) in the scanner (note that the top stays up only when it’s at 90 degrees) and pressed the down key to go through the copy options (like Best quality and Fit to Page with the 4×6 tray engaged). Then we hit the Start button.
Well, that just crashed the printer. It screeched at us and restarted itself. Smart printer. It knew who it was dealing with.
Having not learned our lesson, we did the same thing. Went through the options and pressed the Start button. This time it worked. We got a print.

Photo Tray LED. Indicates you’ll be printing 4×6 sheets.
We could tell the difference between the smaller, 30-year-old print and the copy. Even on the best paper, we could see the dots. And the color in the enlargement was a bit more washed out. Hmmm.
We wondered if we could improve the results printing from that thumb drive. So we popped it back in and it took only a couple of seconds (well, 10 seconds) to read it and display the first picture of 35 on the LCD. It even oriented the portrait image correctly (turning it around before our very eyes).
It turns out, however, that not all 35 images were ours. Some were Kodak’s, apparently stored in the printer’s internal memory. We skipped those, scrolling through the images until we found one we liked.

First Print. Just a copy scanned from the 30-year-old original above it.
The Photo button was illuminated, so we pressed that (we aren’t dumb, just incredibly talented at screwing things up). The printer showed us the print options (we picked Best Quality again) and told us to press the Start button again. We did.
And out came our print. Nice saturated color. But we’d printed one of the ISO 1600 digicam images that was a nice picture of noise, really. Not a fair test.
So we popped in a different thumb drive and found a nice dSLR image taken at a reasonable ISO, clicked Photo, set Quality to Best, and hit the Start button. Quick learner.
Wow. Now that was a nice print. Sharp as a tack. No noticeable dots from the inkjet. Instant dry (porous paper but with pigment inks not dyes, so they’re archival).
We couldn’t resist printing a couple more. Very nice.
Now that the printer has us trained, we think we’ll try to find that manual on the CD.
Continue to Part II of the Diary
Kodak EasyShare 5300 All-in-One Printer
PART II: 5300 DIARY
Getting Down to Business
By MIKE PASINI
Editor
The Imaging Resource Digital Photography Newsletter
SAN FRANCISCO — If our first full week with Kodak’s Easyshare 5300 All-in-One wasn’t a honeymoon, at least we got acquainted.
|
Part II Previously |
One thing that surprised us was the color scheme. After years slaving behind beige boxes, we expected to feel some aversion to the white, silver, gray, beige, whatever-it-is color. But we kind of like it. It’s not going to win any industrial design awards, but it strikes a friendlier tone than we expected. You might even say it’s relaxing on the eyes.
Of course, when you open the scanner top, you’re greeted by a very large “Kodak” behind the glass. Modesty was never one of the company’s strengths.
A TOUR OF THE HARDWARE
Our installation photo gallery probably revealed enough details about the 5300’s hardware, but here’s the big picture.
There’s nothing of note on either the left or right sides of the printer. We’ll skip the bottom, too (no tripod socket or battery compartment).
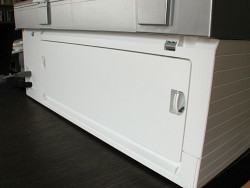

Back. The Rear Access Door lets you clear paper jams or install the optional duplexer for double-sided printing.
The very back of the printer has the USB-to-computer port and the power connection along with a removable panel, no doubt to get at paper jams, officially called the Rear Access Door. Actually, it has a higher calling. Remove it and you can install the optional duplexer (Kodak EasyShare 5000 Series Two-Sided Printing Accessory) that enables printing on both sides of the paper. Automatically detected by the printer, it’s limited to plain paper, so it won’t print on the back of photo paper. It accepts sheet sizes from 6.9 to 8.5 inches wide and from 9.8 to 11.7 inches long.
We’ve bemoaned printers that don’t build duplexing into the printer (like Canon’s PIXMA printers) and we are bemoaning again. But at least Kodak makes it an option. If you print a lot of Web pages or text documents, it’s a bright idea.

Card Reader. Only two slots but they’re versatile. Green lamp indicates the reader is accessing the card.
The front of the unit is dominated by the dual but not removable (easily anyway) paper tray at the bottom. You can get 100 sheets of ordinary copy paper in the letter-size tray and 20 sheets of photo paper in the 4×6 photo tray. A small drawer on the front edge of the tray slides out and flips open to catch the output of letter-sized sheets. To the right of the tray is the dual USB port, two USB ports for PictBridge or Bluetooth connections as well as thumbdrives. Above that is the card reader, which handles an xD Picture card, Memory Stick, Memory Stick Pro, Secure Digital/MultiMediaCard and Compact Flash Type I and II (including microdrives). With an adapter, you can also use a Memory Stick Duo, miniSD and MicroSD (TransFlash).
Above the card reader is the Printer Access Door. In fact, the whole top lifts up when you raise this door. That’s how we got inside to install the print head and the two ink cartridges, in fact.

Expandable Lid. We’ve got a book in there.
On the very top of the printer is the scanner lid (which lifts about an inch to accommodate thick material like books) and the LCD display to its right with the Control Panel. The Control Panel has a row of small operation buttons (Rotate, Zoom Minus, Zoom Plus, Proofsheet, Transfer) and set of three mode buttons (Scan, Photo, Copy). A set of four arrow buttons surrounds an OK button. To the left of that is a Menu button and to the right of the arrows a Help button. At the bottom of the Control Panel the Start buttons is surrounded by a Cancel button to its left, an On/Off button (startup takes about 30 seconds) to its right and an Attention light below it which flashes when the printer needs attention.
As we mentioned in our first report, the power brick is really brick size, the largest we’ve ever seen.
PHOTOCOPIES
It so happened that after our installation and test prints, the first real task we threw at the 5300 was a pretty simple one. We had a library book due that day and wanted to copy a few pages from the otherwise unavailable book.

Sharp Text. But even the gray looks good.
Kodak claims the 5300 can print 32 pages a minute in black (22 in color), but that’s the same page over and over. We had about 35 pages to scan and print. So we weren’t expecting to match that pace.
The first mistake we made was printing our black and white image in color. The original wasn’t quite neutral, but the copy had a yellow glare to it, an overreaction to the cream colored sheet, apparently. But the LCD menu let us switch easily to black and white mode.
That made very nice, crisp copies. We were able to see the scanner finish scanning the page, so we opened the lid all the way up to perpendicular so it would stay up and loaded our next page as the current scan was printing. By the time we got the lid back down, it was time to scan the next sheet. Pretty efficient.
Scans were excellent quality. Sharp and uniformly dark. It’s almost a luxury to use an inkjet all-in-one as a photocopier (instead of using less expensive toner-based copiers) because the ink is so expensive. But Kodak’s low-priced pigment inks promise to let you copy guilt-free. In fact, our black cartridge hardly showed a hit after we finished copying.

Inexpensive Ink. Made in China, BTW.
We did notice the printer doing a little maintenance on the printheads every dozen pages or so. We weren’t used the color cartridge at all, but that doesn’t mean it doesn’t have to be flushed. Same with the black cartridge, even though we were using it. Neither cartridge showed much usage, though.
One other oddity was an occasional mark across the sheet as if it had been scuffed. We couldn’t find any reason for it and it came and went as it pleased. We saw it twice in our 35 pages.
We noticed our black and whites also had a nice gray to them. At our introduction to the line, we observed that plain black text was printed not just with the black cartridge but also with the photo gray of the color cartridge (you can see this when you interrupt a sheet in the middle of printing). The gray adds some richness to the black. While not strictly necessary for our photocopy, it was a nice touch.
The whole thing took about half an hour to copy. About a minute a page, really, including refilling the 100 sheet tray (which seems a bit parsimonious). We weren’t hustling very much, but that was a comfortable pace.
PAPERS
The inks are the part of the story making the most noise because 1) they’re inexpensive and 2) they’re pigments, not dyes.

Where’s Waldo. The Ultras are to the left, the Premiums in the middle and the least expensive Photo papers to the right.
But Kodak’s harnessed the other half of the cost-per-print formula: the paper. We used our own stock to do the photocopy, but as soon as we started printing photos, we started using the three new lines of Kodak photo paper introduced with this printer.
Unfortunately it’s very hard to keep these three lines straight. Not only are the names confusing, but they come in various surfaces (like glossy or matte). So pay close attention.

Barcoded Backs. Three different sheets in several surfaces each with different codes on the back (note the thickness of lines and distance between them).
The main difference between the sheets is the cost (the lighter the less expensive) and the surface (glossy, matte or luster — but not all options at every level). They run from a very lightweight sheet to a heavy sheet. And the printer knows which sheet you’ve loaded because on the back side, they have a series of gold lines that identify them.
The three lines — all of which are porous, instant dry sheets — are:
- You can get a 10 cent 4×6 photo by printing on the lightweight Kodak Photo Paper with a glossy surface. It’s a 44 lb. stock (6 mil.) A matte surface that is 39 lb. (7 mil.) is also available.
- A 15 cent 4×6 print can be achieved on the medium weight Kodak Premium Photo Paper which is offered in both a matte and glossy surface. It’s a 64 lb. stock (9 mil.).
- Finally, the heavy-weight Kodak Ultra Premium Photo Paper is available in a high gloss and what Kodak calls a Studio Gloss finish. Studio Gloss is more of semi-gloss or lustre finish on a 76 lb. (10.5 mil) sheet. High Gloss is a glossy surface on a 74 lb. (10 mil) surface.
We plan to print on all of them. If we can tell them apart.
PHOTOSHOPPING
When we print photos, we usually print from Photoshop after optimizing the image in one way or another. So naturally, we launched Photoshop and opened an image we thought would make a nice 4×6 on the stock included with the printer. And that stock is Ultra (five sheets each of High Gloss and five of Studio Gloss).
Since the printer knows all about the paper (it even turns itself on when you engage the 4×6 tray), there really aren’t many options in the printer dialogs. It can’t tell you what’s been loaded, unfortunately, because it hasn’t looked yet. And how Photoshop can manage the color give that the surface isn’t known is a mystery to us.

Photoshop Print Dialog. We’re all set to print a 4×6.
Our landscape image had an Adobe RGB ICC profile attached to it rather than the more common sRGB most cameras assign. We set our page for a borderless 4×6, then set the Photoshop print dialog to let Photoshop manage the color (as we always do), set the profile to Adobe RGB and intent to Perceptual. Our standard approach.
That took us to the printer dialog box. The options there are very spare with no paper type to identify. All we had to do was tell it to make its Best print. That was it.

Printer Dialog. Just pick the quality (Best).
The print came out just seconds later (Kodak says 28 seconds and we won’t argue).
Kodak calls its porous papers “Instant Dry.” The ink is absorbed into the pores of the surface much like butter into those nooks and crannies of an English muffin.
The alternative, for inkjets, is a swellable sheet that swells up when the ink hits it, encapsulating the dye as the vehicle evaporates and the surfaces returns to its normal size. You can’t touch a swellable sheet when it comes out of the printer (as you probably know) without ruining it. After all, it’s still working.
But a porous sheet can be touched immediately, although you may see marks from your fingers. Those marks, we’ve been told, are actually the moisture of your fingers being sucked into the sheet. They disappear, unlike the ink.
The rap on instant dry, porous papers is that when you print them with dye inks they really don’t last very long. Swellable sheets with the same inks last significantly longer, in fact.
But remember that Kodak isn’t using dye-based inks. It’s using pigment inks. So you get both instant dry performance and archival quality.
There’s one more aspect of this ink-paper combination worth mentioning. Kodak claims its color gamut exceeds that of pigments like Vivera, not just its own chromogenic dye prints from film. That’s in the order of several hundred years, so it’s noteworthy.
More noteworthy, though, is how our landscape print looked. Sorry for keeping you in suspense. With all our ducks in a row, the print was an excellent match with what we were working with on screen. Among the best we’ve seen, period.

Widest Gamut. The 4×6 print is from the 5300, a pigment print from the HP B9180 is above it, a dye print from the Canon Pro9000 below it. Note that the 5300 print is achieved with only three colors.
But we had a test we were dying to try: a sunset we’d printed on both the Canon Pro9000 and the HP 9180. We liked it better on the dye-based Canon than on the pigment HP. The saturation of the sky and the deeper blacks of the Canon won us over. How would the Kodak fare with its wide-gamut pigments?
Well, it was a very interesting comparison. The blacks (silhouetted trees) are darker and glossier on the Kodak than on the HP, but the Canon beats them both. The saturated reds of the sunset sky are more saturated on the larger 13×19 prints than on the 4×6 Kodak. There is nothing really wrong with the Kodak print, but this image simply printed better on the other two printers.
Of the three printers, the dye-based Canon, not the Kodak, evidenced the larger color gamut. But the Canon had the advantage of quite a few more inks.
SETTINGS
Notice we still hadn’t opened (or found for that matter) the manual. But there is one: 5300_AiO_MacUG_EN.pdf. This PDF is how we found out about AiO Home Center, tucked away in a subfolder of the folder our applications are housed.
AHC isn’t really a scanning or printing application itself, so it’s not for nothing it was stored in our Utilities folder. It has three panels: Select, Setup (for stand-alone Print or Scan settings) and Maintenance.
AiO Home Center

Select

Setup

Maintenance
Select is pretty simple. You point AHC to your AiO printer (no need when it’s the only one online) and see its ink levels. Kodak makes much of the low price of its ink cartridges, but we have to say you won’t be buying many unless you print for the neighborhood. Our ink levels dropped very, very slowly.
Setup lets you configure the printer or scanner part of the 5300 for stand-alone use (see the Scan setup options below).
Maintenance offers calibration and printhead cleaning. And all of these options are clearly explained with a sentence or two of text.
Setup: Scan

General

Pictures
Two buttons are always available at the bottom of the screen: Order Supplies and View Status. View Status just queries the printer and reports the configuration (accessories installed), last paper used and ink levels.
DOCUMENT SCANNING
So if there’s no application to run the thing, how do you scan documents, say? Back to Photoshop, apparently.
One day perhaps VueScan will know about this little box, but in the meantime, your options are limited to what you already have. You are simply stuck if you want to do any optical character recognition. None is provided. This is a real pity for a machine that can scan documents because with the right software, you can create fully formatted PDFs with live HTML links automatically.

Color Scan. Just a crop at full size.
We had a few old handwritten letters we wanted to scan. Four pages on two sheets complete with folds and colored ink.
We opened up Photoshop’s Import flyout menu and saw the 5300 listed, so we engaged the driver. To our delight we saw one option was to scan a Color Document, so we selected that. When we clicked the Preview button, we saw the first page of our letter. When we hit the Scan button, it crashed.
Next time we launched Photoshop and brought up the Import dialog we left the setting on Color Photo, the default. No crash. We scanned four JPEGs of our four pages and used Acrobat to resize them into one four-page PDF, cropped to the size of the letter. We didn’t see a way to do that in the 5300, although there must be one.
The quality of the scans was excellent. The scan dialog did confirm that the scanner’s resolution maxes out at 1200 dpi, presumably optical, but that’s all you really need for scanning reflective material. Maybe, though, that’s why Kodak didn’t bother with a transparency adapter on any of these AiOs, even with all those Kodak negatives out there.
That’s something to think about while you’re waiting for our next installment.
Continue to Part III of the Diary
Kodak EasyShare 5300 All-in-One Printer
PART III: 5300 DIARY
Display Prints, Batch Printing, Bluetooth & More
By MIKE PASINI
Editor
The Imaging Resource Digital Photography Newsletter
SAN FRANCISCO — The first two installments in our Kodak EasyShare 5300 All-in-One Printer diary rolled right off our fingertips. There was a lot to say right away. But this one has taken a while. You might say it’s been stuck in the mud of reality.
|
Part III Previously |
The last two weeks we’ve used the 5300 in a few different ways, printing some letter-sized images intended for frames, batch printing 4×6 prints of event photos, printing from Bluetooth devices and scanning to memory cards rather than just using the 5300 as a photocopier.
It was quite an adventure, but now that the dust has settled, here’s our report.
DISPLAY PRINTS
After an anniversary brunch recently, we thought we’d send a few 8.5×11 enlargements to the charming couple. We’d all gone outside to take photos in the wonderfully diffuse light of the summer fog. We had a Nikon Coolpix P5000 with us.
There’s nothing like the diffused light of an overcast sky. No harsh contrast, no blown highlights, no oversaturated color. So we got some great shots.
Back at the bunker, we dropped some Ultra Gloss in the 5300 and opened the images in Photoshop. We really liked what we saw on the screen so we printed a few of them without any editing. With the 5300, there’s no need to specify paper or surface, since that’s all encoded on the back of the paper. Very simple.
But you do have to tell the printer driver that you want the Best quality it can produce. Every time.
The prints came out on paper just as nicely as they appeared on the screen.
We didn’t really have to let them dry like ordinary inkjet prints because the instant dry porous paper just sucks the pigment ink right in. Unlike a swellable sheet, the ink doesn’t wet the paper, make it swell up and encapsulate the dyes. Instead, the pigments just sink into the surface of the sheet.
They do feel a little tacky at first, however. We’re told that’s the moisture of your skin being sucked into the print. Urban myth, we suspect. We think it’s more likely the damp ink at the surface of the paper. But no harm done to the image.
And these pigment images are designed to last, remember. Just what you want in a display print.
BATCH PRINTING
The next week we came back from a wedding with two cameras full of pictures. We copied them to our hard disk and then to our backup external drive as we always do. Then we copied them to a thumbdrive.
We put a slide show up on our Web site right away but wanted a set of 4×6 prints to give the participants when we next saw them. But why tie up our computer when we could just pop a thumbdrive into the 5300 and use it as kiosk to print the 4x6s.
We took the thumbdrive to the 5300 and inserted it into the 5300’s dual USB port in front. In a flash, so to speak, it read the drive and displayed our last shot.
We wanted to print everything in just one folder on the drive, but we couldn’t tell the 5300 to look at just one folder. So when we pressed the Proofsheet button, it made a proofsheet of several hundred images. Everything on the card.
And do make sure you have the right paper (the letter-sized sheet) engaged first. That is the one thing you have to do yourself with this printer and it’s easy to forget. Only one paper size option is available at a time.
The 5300 prints a proofsheet of 25 images max. You fill in an oval under each image you want to print (or the one under Select All Pictures). Then you fill in an oval for the layout (borderless, bordered, two up, three up, four up, nine up — and you can designate the same image for all slots in the layout). Next you scan the proofsheet (make sure you have the right paper engaged first) and sit back as the 5300 prints your order.
Not.
Kodak supplied the paper and ink for this review, but even so, we were hopping mad at the printer. It simply failed — repeatedly — to print what we’d ordered and made us start from scratch each time, wasting paper and ink on duplicate images.
MEA CULPA
We had not engaged the 4×6 photo paper tray before printing, so it started printing 8.5×11 images. We had pushed the small photo paper tray in before the 5300 actually started printing, but it went ahead with the larger sheet and jammed. So we unjammed it by taking off the back and pressed OK to resume printing at the right size.
Not so simple.
The 5300 was connected via USB to my PowerBook which, at that moment, happpened to be running Classic. Clearing the paper jam crashed the program we had been running in Classic.
So we shut down Classic, restarted it and finished my task while the 5300 resumed printing. But when we quit Classic, printing stopped. Was it done already?
Nope.
UNCONFUSION
Maybe the printer was confused. Trying to serve two masters: USB and thumbdrive. To unconfuse the printer, we shut it down, disconnected the USB cable to the PowerBook and restarted it.
Our thumbdrive was still connected. So when the 5300 finished initializing itself, it read the drive and displayed the last image again. Back to normal.
Uh, no.
When we tried to scan the proofsheet again to print my images on the thumbdrive, the printer insisted the proofsheet was invalid. “Invalid proofsheet scanned. Press OK.” Big blue screen, too. Nothing I could do (Cancel, Proofsheet, OK, Start) made any difference. Invalid proofsheet. Period.
So we just returned to my last image and told the 5300 to print it. And it did. It was as if the proofsheet was only valid immediately after you printed it. Could that be true?
No.
TILING JOB
We were back at my keyboard typing up my notes when the print we selected came out of the printer. Instead of idling there, waiting for the next print command, the printer resumed printing. But not the 4×6 prints we had expected. Instead, it was tiling the last image lettersize on 4×6 photo paper. Sheet after sheet came out until we canceled printing again.
How, we wondered, were we going to get our prints?
Nothing we tried to get the proofsheet to scan worked. The 5300 just kept complaining that it was invalid.
We went back to square one. Computer disconnected. Thumbdrive with just the images we wanted to print on it. New proofsheet. On the big paper, yes.
We’re no fan of filling in the ovals with a dark pen. Our pens are fine point to conserve ink. We had to scribble a long time to even fill out the minimum two ovals.
This time the 5300 scanned the proofsheet with no problem and, with the small tray engaged, started printing my pictures.
OVER AND OUT
Until the small tray (just 16 sheets) ran out of paper. Then the job just canceled on us, even though we filled the tray and pressed OK. It returned to the Scan Proofsheet menu. No, I really didn’t want to start over — we just wanted to resume printing.
Our only alternative was to scan the proofsheet again. This time, it didn’t complain about an invalid sheet and started the process again. But with 25 images on a sheet and a capacity of only 16 sheets in the tray, we weren’t going to get our images printed using the proofsheet. It failed again after we ran out of paper.
THE CAVALRY
We went through our normal trench-coated contacts to see if there was some resolution to this issue. They asked us not to name names.
They tried to duplicate our problem from both the card reader and the USB port. But they had no problem.
One of them was astute enough to figure out why, too. They were using a later version of the AiO firmware for the 5300.
But when we looked on the Kodak 5300 page under Downloads and Upgrades, we weren’t able to find the firmware update. Why? Because we were accessing the site from a Mac and only the Windows version had been released. “The Mac firmware updater should be released shortly,” they told us.
Why are there separate versions? The actual firmware isn’t any different, of course, but the utility to send the firmware to the printer is operating system dependent. So, you know, this is for your own good. Ahem.
We downloaded the Windows version but you have to be on a Windows computer to do it.
INVALID PROOFSHEET EXPLAINED
Our helpful contact also illuminated our problem with the invalid proofsheet.
Several situations invalidate the current proofsheet:
- The printer enters standby mode
- The printer powers off
- You remove the memory card
- You detach the camera or USB device
In any of those cases the proofsheet session number becomes invalid and you have to reprint the proofsheet.
We had been connected via USB at the time and indeed, we’d cycled the power to get out of the paper jam problem. So our proofsheet was no longer valid.
BLUETOOTH
We were pretty jazzed about PictBridge printing through a WiFi USB adapter when both Canon and Nikon came up with one. Either one works on any PictBridge printer, but the things cost about $90, greatly inhibiting our glee.
A little less expensive an alternative if Bluetooth connectivity. Especially if you have a camphone with BT built-in and a camera. But if your laptop has BT, it can be one less USB cable to fool around with, too.
BT runs in a rather slow 1.0 version and a version 2.0 that’s about three times faster. Kodak even makes a BT digicam we really enjoyed pairing to our Mac PowerBook with BT 2.0.

A Bluetooth USB Adapter. The D-Link BT-120 plugs right in.
The 5300 support BT connectivity but we weren’t able to get our hands on an adapter through our usual sources. Or any source, in fact. It’s not a big deal. Just a little USB dongle. So we took the streetcar downtown and found a place that had them. With a $10 rebate, the whole deal was about $25 for a D-Link BT-120. It has BT 2.0 rather than 1.x, so it’s as fast as it gets.
Our helpful Kodak tech had warned us, “There are special requirements for BlueTooth connectivity. The only BlueTooth adapter that we officially support is the Kodak USB Bluetooth Adapter.” But you know, that’s why reviewers get the big bucks.
We popped the thing on the 5300. Its little LED turned green.
The 5300 names itself for BT but the name isn’t pretty, using the model name and four digits from the serial number. So we just renamed the 5300 using the AiO Home Center utility. We called it Pleasanton.

Finding Pleasanton. The Razr finds the printer.
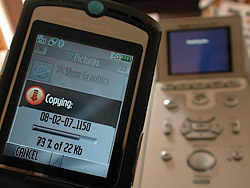
Copying. The Razr copies a picture to the printer.
Then we got out our Razr, turned on BT and found a picture we liked. We pulled up the utility menu for pictures and selected Copy. The Object Exchange menu came up and we selected Look For Devices. Pleasanton came right up, so we selected it and the Razr and 5300 connected. Then the Razr sent the picture to the printer and the printer printed it.
We’d pushed the 4×6 tray in and that’s exactly what came out. The 5300 sizes BT prints for you.
Very nice implementation. It worked, in short.
But when we tried to print from our Bluetooth PowerBook, we had a different reaction to our experience. While the PowerBook could find the printer Pleasanton, it couldn’t find a printer driver for it. So using the Print command from applications wasn’t going to work (at least with the D-Link adapter).
What did work, however, was using the same technique we used with the phone. Just copy a file to the printer.
We got a complaint from the printer that it couldn’t handle JPEGs. But we knew that wasn’t true, so we sent the file anyway. And the printer produced a handsome 4×6 print of our image, just as we expected.

A Bluetooth Print. The D-Link BT-120 beams while the print comes out.
Seems like there’s a little more work to do there in the firmware.
THE FIRMWARE?
So what about that firmware update?
It’s a 3.25-MB Windows download. We downloaded it with the printer connected via USB but it didn’t update the firmware. We hadn’t bothered to install the printer first. So we popped in the installation CD and went through that process, too.
At least the installation CD asks you if it can look on the Web for a more recent version of itself. We always recommend looking for more recent versions of printer drivers before installing what came in the box. It’s a grief saver.
That took quite a while, in fact. Downloading Microsoft’s .NET Framework 2.0 was involved. Of course every Windows application that scans the drive for images kept popping up asking us if we want to catalog them and every Windows application that scans the USB port for a device kept thinking it was their turn on stage, too. We shouldn’t have connected the printer with the cable yet.
One restart later, we tried to update the firmware again.
After EasyShare updated its library and the Home Center popped up, we finally got to download and run the updater again.
This time it found the printer and reported our firmware version (70.640762) and the latest version (71.650786) and asked if we’d like to upgrade. Uh, yeah. A red line of type warned us, “The printer must be idle before flashing.” After that installation, it was idle, no question about it.
Off it went, “Loading printer firmware…” and warning us not to turn off or disconnect the printer until the upgrade was complete.
It seemed to hang, though. Hmm. We looked at the screen and it was still waiting to copy something. Not exactly idle, apparently. So we pulled the BT connector off and the screen went dark.
Seconds later all our Windows utilities recognized a new device on the USB port and asked if we wanted to do this or that with it again. We canceled them all and the firmware update utility got control of the port again and finished the job.
How could we tell?

Diagnostic Sheet. Read the fine print. It tells you how many prints we got from the color cartridge.
Well, you print the Diagnostic Sheet. Press Menu and scroll down to the last option on the second page. Then press Start. The firmware version is printed at the top. And the various mileages are also there, including the drops of ink printed.
We thought we’d scan the Diagnostic Sheet for you since it tallies about what the color cartridge can print. And we thought we’d just scan that to a thumbdrive.
But here again, the 5300 balked. It only offered us the option of scanning to a Memory Card, but when we inserted one, it complained there were too many (the thumbdrive it refused to write to was still connected). In fact, inserting a card at the prompt just canceled the scan (much like our out-of-paper problem). We had to insert the card and then scan to get the scan on our card.
What it scans is a JPEG. Which would be fine, really, except we’ve grown fond of programs that scan documents as PDFs, complete with hyperlinks.
BACK TO THE PROBLEM
Everyone told us the firmware update would address the problem, but did it?
To find out, we pulled a little trick you might find handy. On the Mac, we deleted the images we had already printed, but didn’t empty the Trash. That makes them invisible but leaves them on the disk. That way we can restore them from the Trash when we plug the thumbdrive back into the Mac.
Then we plugged it into the USB port and printed a proofsheet (or two). This time we used a Sharpie to make quick work of marking the ovals. We scanned the proofsheet and — to our horror — realized we forgot to switch trays again.
After the first letter-sized image came out, we canceled printing and pushed the tray in. Then we scanned the proofsheet again and watched six prints come out until the printer ran out of paper.
We put new paper in and pressed OK, just like the LCD told us to and — nope, it did not resume printing. Instead, it spit out a blank 4×6 and showed us the Proofsheet menu again.
When we scanned the proofsheet, it didn’t complain that it was invalid, but it did start printing from scratch. So again, we were simply not able to print all the images on a proofsheet.
On the second run, the printer beeped and told us the color cartridge needed to be replaced. When the print came out, we popped the hood open and swapped out the color cartridge. When we closed the hood, the cartridge primed and printing resumed.
Moments later, we ran out of paper. We loaded more, reinserted the tray and pressed OK again. This time the printer resumed printing where it left off.
Was it a miracle?
Apparently, because the next time it happened, we got the menu again. The only difference was that we’d switched to a lighter Kodak paper. Which is not one of the conditions that invalidates a proofsheet.
The troubling thing about this is that there’s no way to recover from the problem. You have to start from scratch, printing another proofsheet and, instead of marking the Print All option, mark every image that didn’t print. But once you’ve hung on that proofsheet, you can’t reuse it or you’ll get the same prints. So you have to print another one and mark that.
MEANWHILE
Meanwhile we received the 5500 for review. This model adds a document tray on top for multipage faxing. Let’s just hope the firmware is up-to-date. The stuff we’re stumbling over is all addressable by a nice, warm firmware update.
Kodak EasyShare 5300 All-in-One Printer
PART IV: 5300 DIARY
Final Thoughts
By MIKE PASINI
Editor
The Imaging Resource Digital Photography Newsletter
SAN FRANCISCO — I’ve rolled up my sleeves at the keyboard here not to bury Kodak’s All-in-One printers but to praise them. “The stuff we’re stumbling over is all addressable by a nice, warm firmware update,” I concluded the last diary installment.
|
Part IV Previously |
And guess what? Kodak has released a firmware update for all three of its 5000 Series All-in-One printers. Unlike the previous update, the Mac updater was released at the same time as the Windows updater.
But Kodak didn’t release a change log with the update, so we have no idea what the update fixes.
In our routine use, we haven’t noticed any improvement.
THE 5300, THE 5500
We returned the 5300 a few weeks ago, preferring to concentrate on the 5500. We were concerned about being outnumbered.
But inside they’re the same machine. Same printheads, same inks, same feed mechanism (although the 5500 included a duplex attachment to print on both sides of the sheet).
Our experience with the 5500 was as dismal as our experience with the 5300, though. We never did figure out how to get the automatic document feeder to believe a single sheet of bond paper was not photo paper. Even after the firmware update, it continued to warn us against putting photo paper in the ADF.
You can read <A HREF=”http://www.imaging-resource.com/PRINT/K5500/K5500.HTM” TARGET=”_new”>our 5500 review</A> if you want to commiserate.
But before we grappled with the 5500, we took a little trip across the country to Rochester, N.Y. where, at Canal Ponds, we learned a good deal more about the technology behind these printers.
That, to our mind, is the real story.
THE REAL STORY
As disappointing as the 5000 Series has been, the disappointment remains an issue of firmware. Even though the recent release hasn’t addressed our concerns, the fact that an updater was released simultaneously for both platforms gives us reason to hope that Kodak will eventually improve these otherwise impressive products.
What’s so impressive about them?
In a nutshell, it’s the inks and the printhead design. While our 5500 review revealed all we learned at Canal Ponds, we’ve decided to conclude our 5300 diary with a recap. The 5000 Series won’t be last Kodak printers to use this exciting new technology that promises to bring an unparalleled level of quality and permanence to the humble home print.
INK CARTRIDGE
Before we had a chance to do any serious printing, however, we flew off to Rochester where we snuck around the labs to see what was going on. We ended our tour at Canal Ponds wearing safety goggles and walking through the custom cartridge assembly line with Diana, who put together a cartridge from scratch for us. It’s an interesting process.
The various brews of ink formulations had to be packaged in cartridges for testing, of course, and this is where it happened. The custom built equipment, each module of which went through wooden prototypes before the final metal versions, was designed to build and fill the cartridge tanks.
It may not look like much from the outside, but the plastic wrapped cartridge is actually enclosed in Argon gas which is pumped into the bag with the full cartridge before it’s sealed. The Argon gas blocks contaminants from entering and cushions the cartridge, which will last up to 18 months stored in the bag.
Under the paper label with the color information is a mylar label that seals the top of the gray vent cap’s vent system. It takes both labels to seal against evaporation. The vent cap itself is welded to the black tank using high speed vibration that melts it on in a very precise operation.
Inside, the tank is filled by a large felt that absorbs the ink. No mystery there. Except it would seem to make it difficult to prep the ink by shaking the cartridge.
We asked Diana if she recommended the cartridge be shaken before it’s installed (which we do with every cartridge anyway). You do have to shake non-stabilized inks, she said, but Kodak’s inks are stable. You don’t need to shake them.
Installing a Kodak ink cartridge in the printer is really one of the most pleasant experiences we’ve had. Just snap it in. It makes contact at six points to stabilize the cartridge as the printhead rapidly moves over the sheet.
But one of our pet peeves about the printhead installation process is just how hard you have to press the delicate printhead to get it seated in the printer. How come is that? Again, it’s a hedge against the high velocity at which the head will be traveling. It’s secure, no doubt about it.
THE INK
Earlier Dr. John Reczek proudly showed off the pigment ink technology used in the new system. We’ve reported on this extensively, beginning with the product introduction announcements (http://www.imaging-resource.com/PRINT/KAO/KAO.htm), because it’s really the key to the system. Without these inks, there wouldn’t be a Kodak inkjet. So we’ll summarize here.
They are pigments not dyes, to begin with. But they are unlike other pigments because they are quite small. Kodak drew on pigment grinding patents going back to its X-ray film emulsion technology to develop its miniscule 20 nanometer ink pigments with polymer binders. The X-ray project was an attempt to replace a dye interlayer designed to prevent color contamination that scattered too much light with a pigment layer that would scatter less light and therefore avoid losing sharpness.
The exceptionally small size of the pigments provides two key benefits, John told us. First, because they scatter less light, they provide a larger gamut than normal size pigments. Second, they increase printhead reliability, clogging the nozzles less frequently.
The color gamut issue is a confusing one. Kodak actually claims their pigment set has a larger gamut than dye-based ink sets, not just other pigments. But in our tests back at the bunker, Canon’s dyes exceeded the Kodak pigment gamut, as we reported in our 5300 review (http://www.imaging-resource.com/PRINT/K5300/K5300.HTM). We asked John about that.
The Canon print, he pointed out, has the advantage of having been made with a high fidelity ink set. While the Kodak print relied on a set of just three color inks plus black, the Canon had the advantage of a set of eight inks. As a former pressman, I can vouch for that explanation. And in fact, when you compare the output of an HP three-ink print like those from the A626 we reviewed (http://www.imaging-resource.com/PRINT/HPA626/HPA626.HTM) to the Kodak prints, the Kodak has deeper shadows and more contrast. No doubt using a black ink helps Kodak here, too.
The smaller particles also improve gloss performance, John said. In fact, the clear ink in the color cartridge is not a gloss optimizer (as you might find in an Epson inkset). Instead, it’s a polymer coating that is designed to seal the ink in the porous papers Kodak uses. Kodak’s papers are not the swellable sheets typically used with dye-based inks to encapsulate the dye in a gelatin layer. They are porous sheets that suck in the liquid vehicle that delivers the pigments to the surface of the sheet. The clear coat seals those pigments on the paper and provides instant-dry handling. That slight tackiness you feel when you touch a print fresh from the printer is that coating. It extends over the full width of the image, we noted, regardless of the printed image size.
One of the more interesting stories in the development of Kodak’s pigments involves what they early observed as a haze that would form over the image in some places. The effect was the result of subsequent drops of ink physically distorting the drops of ink that had been previously laid down on the sheet. Light was being scattered by the distortion, forming the haze.
Because Kodak developed every ingredient in the ink, it could optimize the formula to defeat this effect rather than merely find some compromise. There were many variables to working this out, John told us, including hue.
That prompted us to ask if the technology was restricted to a three-hue set of inks. Not at all, John answered enthusiastically, without giving any further details.
Anyone who has used an Epson pigment printer knows about clogged printheads. It’s revealing that in our inconstant usage over several weeks, neither Kodak clogged.
THE PRINTHEAD
Cathie Burke referred somewhat shyly to the Kodak printhead as “permanent.” Nothing, of course, is permanent. But what Kodak has achieved in the printhead will pass for permanent.
Cathie explained that the Kodak drop ejector is designed so the heater will never be “attacked mechanically.” To eject a drop, a heater in the firing chamber is pulsed on, forming a vapor bubble in the ink. As the bubble expands, surface tension pulls the ink into a droplet. After the heater is pulsed off, in many designs, the vapor bubble collapses onto the heater with significant force, and over time will damage the heater. In the Kodak design, the vapor bubble vents to the atmosphere, and the chamber refills with ink. Fire it as many times as you like, the heating element remains untouched.
That wasn’t easy to achieve, she pointed out, even though Kodak had printhead technology from earlier projects. She credited the companies superb fluidic, electrical, and Micro Electro Mechanical Systems or MEMS simulation capabilities, which provide the ability to mimic the real world consequences of a design before it escapes the computer. That saves a lot of time, she said.
Early in development, she confided, they witnessed what seemed to be random early failures of some heating elements. Diagnosing the cause of the problem wasn’t simple. But Kodak isn’t your average home improvement show. It’s more like a collaboration of crack CSI investigators with red ink on their gloves. They investigated the problem using microscopic images of cross sections of the printhead. And that revealed the cause of the problem. An otherwise undetectable variation on the surface over which the ink had to travel was the culprit.
Firing the printhead requires electricity and we were amused to learn how Kodak determined the power consumption had to be 35 volts. In some countries, Cathie said, special permits are required to operate equipment at voltages above 40. Keeping it at 35 volts meant it qualified as an appliance worldwide.
The printhead’s quick-firing nozzles operate at 24 kHz, whereas the competition runs between six and 12 kHz. That delivers faster prints and consistent laydown.
But it also illustrates how Kodak’s control of the entire design — ejectors, ink, media — lets them optimize instead of compromise. And from our chat with John and Cathie it was clear that’s something they really love to do.
CONCLUSION
The jury is still out on the 5000 Series. But not on Kodak’s inkjet technology. They’re winners. And we look forward to perhaps simpler printers that make them available to do what they do best: produce excellent quality prints that last forever for much less money than competing products.