Canon A640 Design
A bit larger than palm size, the Canon A640 has an attractive plastic black shell with chrome highlights. It doesn't pretend to be jewelry. It's a camera and proud to be one. The grip and lens predominate from the front and the LCD and controls dominate the back. Simple as that. At 11.89 ounces (337 grams) it is neither heavy nor light, and its measurements of 4.31 x 2.60 x 1.93 inches (109 x 66 x 49 millimeters) are large; but it should fit into larger coat pockets and purses. The good news is that you won't induce camera shake merely by pressing the Shutter button, as you do with featherweight digicams. But you won't need a massage after carrying it around all afternoon, either. It's a well-balanced design.
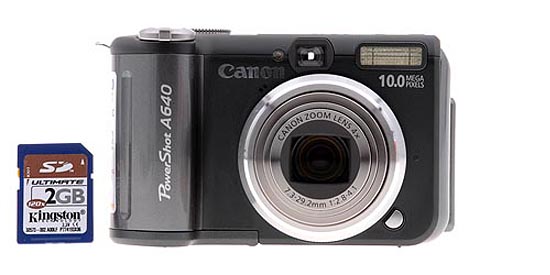
The front panel is composed of the grip on the left and the telescoping lens to the right of it. At the bottom right of the lens is a small Ring Release button that allows you to replace the plastic ring around the lens with a lens adapter that can mount a conversion lens on the Canon A640 body. At the top left of the lens is a grill of two small holes for the microphone. Almost directly above the lens is the Viewfinder Window, to the left of which is the AF-assist/Red-Eye Reduction/Self-Timer lamp. In the top right corner is the Flash.
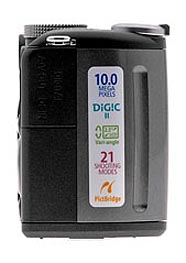
The right side of the A640 has a small chrome eyelet for the wrist strap at the top. Under that is the flexible rubber cover to the USB, DC In, and AV Out ports.
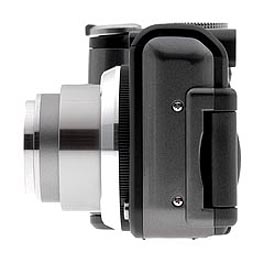
The left side of the Canon A640 has no functional parts except for the LCD hinge.
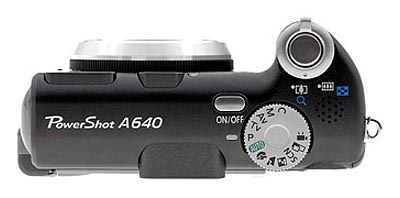
The Canon A640's top panel has the Shutter button surrounded by the Zoom lever on the top of the protruding handgrip. Behind those to the right is the speaker grill. Just left and rear of that is the Mode dial with 12 shooting positions divided into three basic categories: Auto Exposure, Image Zone, and Creative Zone. The elongated Power button is just left and forward of that.
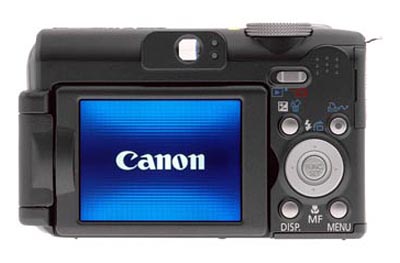
 The Canon A640's rear panel is dominated by the 2.5-inch LCD housing that flips away from the back. Once opened all the way, the LCD monitor can swivel around to face the front of the camera, or point toward the bottom panel. What's nice about this design is that you can turn the LCD monitor in toward the camera back and close it, thereby protecting it from scratches and smudges when not in use. The eye-level optical viewfinder features two LED lamps that report camera status. To the right of the LCD are the main controls. At the top, just left of the thumb grip, is the Mode switch (with Record or Playback options). Below that are the Exposure Compensation/Erase and Print/Share buttons. The larger control just below these is the navigator ring, which rocks up and down, left and right. The up button cycles through the Flash modes in Record mode or displays the Jump menu in Playback mode. The down button cycles through the focusing modes of Macro, Manual, or Auto. The left and right buttons adjust parameters depending on the shooting mode. In the middle of the navigator is the Func./Set button that confirm menu choices and calls up the Function menu in Record mode. Below the controller are the Display and Menu buttons.

The bottom panel of the Canon A640 is flat with small feet to stabilize it when you set it down. The plastic tripod mount is in the center of the camera adjacent to the hinge of the battery/memory card compartment. A slide switch releases the catch on the cover to reveal the four AA batteries and memory card slot.
Canon A640 External Controls
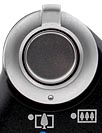
Shutter Button: Positioned far forward on the Canon A640's top panel, this button sets focus and exposure when halfway pressed, and fires the shutter when fully pressed.
Zoom Lever (see image above): Surrounding the Shutter button on the top panel, this lever controls the optical and digital zoom while in Record mode. In Playback mode, the wide setting displays a nine-image index display of all images on the memory card, and accesses a Jump function that lets you scroll through index display screens quickly. Alternatively, the telephoto position enlarges the currently displayed image as much as 10x, so that you can check on fine details.
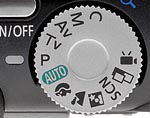
Mode Dial: Also on the Canon A640's top panel, this large, notched dial is used to select the camera's shooting modes. Canon divides these functions into three categories: Auto, Image Zone, and Creative Zone. The options are as follows:
 Auto: The camera controls everything about the exposure, except for Flash and Macro modes, image size, and quality settings. Shutter speeds range from 1/2,000 to 1/8 second in Auto mode.
 Program AE (P): Places the camera in control of
shutter speed and lens aperture, while you maintain control over everything
else (i.e., white balance, ISO, metering, exposure compensation, flash, etc.).
Shutter speeds range from 1/2,500 to one second.
Program AE (P): Places the camera in control of
shutter speed and lens aperture, while you maintain control over everything
else (i.e., white balance, ISO, metering, exposure compensation, flash, etc.).
Shutter speeds range from 1/2,500 to one second. Shutter-Speed Priority AE (Tv): Allows you to control
the shutter speed settings from 1/2,500 to 15 seconds, while the camera controls
the aperture. All other exposure settings are available.
Shutter-Speed Priority AE (Tv): Allows you to control
the shutter speed settings from 1/2,500 to 15 seconds, while the camera controls
the aperture. All other exposure settings are available. Aperture Priority AE (Av): Allows you to set the lens aperture from f/2.8 to f/8.0, while the camera controls the shutter speed, over a range from 1/2,500 to 15 seconds. The maximum aperture depends on the zoom setting, ranging from f/2.8 at the wide angle end to f/4.1 at the telephoto position. In this mode, you maintain control over all other exposure variables.
 Manual (M): Provides complete control over all exposure settings, including shutter speed and lens aperture. As with aperture-priority mode, the maximum aperture varies with the zoom setting from f/2.8 at wide angle to f/4.1 at telephoto. The fastest shutter speed varies with the aperture and zoom setting:
- 1/1,250 at f/2.8-3.2 (wide) or f/4.1-4.5 (tele)
- 1/1,600 at f/3.5-4.0 (wide) or f/5.0-6.3 (tele)
- 1/2,000 at f/4.5 (wide)
- 1/2,500 at f/5.0-8.0 (wide) or f/7.1-8.0 (tele)
 Custom (C): This position recalls exposure settings previously-saved via the Menu system.
  Portrait: Uses a large aperture setting to blur the background while
keeping the primary subject in sharp focus.
Portrait: Uses a large aperture setting to blur the background while
keeping the primary subject in sharp focus.
 Landscape: Employs a small aperture setting to keep both the background,
and foreground in focus. (May use a slower shutter speed, so a tripod is recommended.)
Landscape: Employs a small aperture setting to keep both the background,
and foreground in focus. (May use a slower shutter speed, so a tripod is recommended.) Night Scene: Uses slower shutter speeds, and flash to even out nighttime
exposures. The slow shutter speed allows more ambient light to be recorded
in the low-light areas, while the flash freezes the subject. The Red-Eye Reduction
mode can be used with this exposure mode to eliminate Red-Eye in night portraits.
Night Scene: Uses slower shutter speeds, and flash to even out nighttime
exposures. The slow shutter speed allows more ambient light to be recorded
in the low-light areas, while the flash freezes the subject. The Red-Eye Reduction
mode can be used with this exposure mode to eliminate Red-Eye in night portraits. Scene: Accesses more specific preset shooting modes, including Night
Snapshot, Kids & Pets, Indoor, Foliage, Snow, Beach, Fireworks, Underwater,
Color Accent, and Color Swap. (Color accent lets you dim, or brighten a specific
color in the scene, while color swap lets you pick a color in the scene, and
another color you want to swap it with in your photos. The results can be
pretty bizarre, but could be a lot of fun if you're creatively-minded.)
Scene: Accesses more specific preset shooting modes, including Night
Snapshot, Kids & Pets, Indoor, Foliage, Snow, Beach, Fireworks, Underwater,
Color Accent, and Color Swap. (Color accent lets you dim, or brighten a specific
color in the scene, while color swap lets you pick a color in the scene, and
another color you want to swap it with in your photos. The results can be
pretty bizarre, but could be a lot of fun if you're creatively-minded.) Stitch-Assist: Allows you to record a series of images, either horizontally,
vertically, to be "stitched" together into one large image, or panorama on
a computer.
Stitch-Assist: Allows you to record a series of images, either horizontally,
vertically, to be "stitched" together into one large image, or panorama on
a computer. Movie: Records up to 640x480-pixel 30-fps moving images with sound
while space remains on the storage card.
Movie: Records up to 640x480-pixel 30-fps moving images with sound
while space remains on the storage card.

Power Button: To the left of the Mode dial, this button turns the camera
on, or off.

Mode Switch: In the top right corner of the rear panel, this switch
selects between Record and Playback modes.
Multi-Controller Rocker Button: This four-way rocker button actuates
left, right, up, and down, simulating arrow keys to navigate through settings
menus. In Record mode, the left and right buttons adjust available exposure
settings, as well as manual focus, when enabled. The up button controls flash
mode, while the down button accesses Macro and Manual Focus modes. In Playback
mode, the left and right buttons scroll through captured images, while the up
button accesses the Jump menu. When an image has been enlarged, all four arrows
pan within the view.
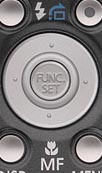
Function/Set Button (see image above): In the center of the Multi-Controller, this button confirms menu selections. It also switches between available exposure adjustments in Manual mode. It also displays the following Function menu while in Record mode:
 ISO Speed: Sets the camera's sensitivity to Auto, or Auto Hi (except
in Manual), or to 80, 100, 200, 400, or 800 ISO equivalents.
ISO Speed: Sets the camera's sensitivity to Auto, or Auto Hi (except
in Manual), or to 80, 100, 200, 400, or 800 ISO equivalents.- White Balance: Controls the color balance of images. Options are Auto, Daylight, Cloudy, Tungsten, Fluorescent, Fluorescent H, Underwater, and Custom (manual setting).
- Drive Mode: Accesses Continuous Shooting and High Speed Continuous Shooting modes, and the three Self-Timer modes (a two-, or 10-second delay, or the adjustable timer, which lets you program both the delay, from zero to 30 seconds, and the number of shots to be taken once the delay expires from one to 10).
- My Colors: Enables Vivid Color, Neutral Color, Sepia, Black-and-White, Positive Film, Lighter Skin Tone, Darker Skin Tone, Vivid Blue, Vivid Green, Vivid Red, or Custom Color picture effects. Custom effects include five-step adjustments for Contrast, Sharpness, Saturation, Red, Green & Blue hues, and Skin Tone.
- Flash Output: Adjusts the overall flash intensity from -2 to +2 EV in one-third step increments. In Manual mode, the flash fires only a single pulse, handy when you want to use the A640 with conventional slave triggers for external flash units.
- Metering System: Sets the metering mode to Evaluative, Center-Weighted Average, or Spot.
- Compression (Still): Quality options are Superfine, Fine, or Normal.
- Frame Rate (Movie): Sets movie frame rate to 30 or 15 frames per second.
- Resolution: Specifies the image resolution, and quality settings. Still image resolutions are 3,648 x 2,736, 2,816 x 2,112, 2,272 x 1,704, 1,600 x 1,200, and 640 x 480 pixels. Postcard mode also offers 1,600 x 1,200 pixel resolution but greys out a portion of the screen top, and bottom, showing the part of the image that won't fit on a standard 4x6 print. Wide Screen mode captures 3,648 x 2,048. Movie resolutions are 640 x 480 or 320 x 240 pixels.
![]()
Exposure Compensation/Erase Button: Directly above left of the Multi-Controller,
this button lets you increase or decrease the exposure from -2 to +2 EV in one-third-step
increments in Record mode. Not available in either Auto or in Manual mode since
the user controls the exposure variables directly there. In Playback mode, it
displays the single-image erase menu.
![]()
Print/Share Button: To the right of the Canon A640's Exposure Compensation/Erase button, is the Print/Share button. When connected to a printer, or Windows computer, this button lights up, indicating that sync, or printing is one button away.
While the PowerShot A640 will work with any PictBridge-enabled printer, when connected to a Canon-brand printer, printing options are particularly robust. With a Canon-brand printer, options include print quality, selection of paper type, a range of paper sizes, and borderless, or bordered page layouts. You can also crop images for printing directly from the camera, to improve their composition. Finally, you can choose to have the camera boost the color saturation, and/or apply noise reduction to the image as it's printed.
![]()
Display Button: Below left of the Multi-Controller, and adjacent to
the lower right corner of the LCD monitor, this button controls the information
and image display modes in Record and Playback modes.
![]()
Menu Button: Left of the Exposure Compensation/Erase button, this button
calls up the settings menu in Record and Playback modes. It also dismisses the
menu screen, and backs out of menu selections.

Battery Compartment Latch: Nestled in the center of the battery compartment
door on the bottom of the camera, this sliding switch unlocks the door, so that
it can slide forward to open.
![]()
Lens Ring Release Button: Tucked under the lens on the camera's front panel, this button releases the lens ring. Once unlocked, the lens ring can then be turned, and removed to accommodate the accessory lens adapter.
 Fujifilm GFX 50S Review
 Fujifilm X-T3 Review
 Olympus E-M5 III Review

Follow Imaging Resource