Nikon D200 Operation
Overview
If the D200 is your first approach to a digital SLR, its bounty of buttons and dials could appear daunting at first look. After only a short time working with it though, the control layout becomes quite intuitive and very fast to navigate. The D200 offers a few changes in its control and menu layouts relative to previous Nikon digital SLRs. We were particularly happy to see Nikon drop the awkward mode dial of the D100 design in favor of the combination of a Mode-select button positioned next to the shutter button and a 3-button control for selecting White Balance, Quality and ISO, on top of the mode dial on the left side of the camera. This combination of mode button and 3-button control layout have been common on Nikon's higher-end models for some time now, and it strikes us as much more efficient than the all-in-one mode dial design of their consumer cameras and the previous D100 model. The collection of functions assigned to the three-button controller is different than that of the D2x, and several of the functions have been moved around on the camera body.
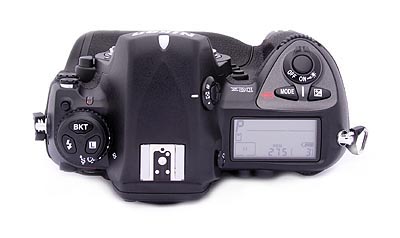
| Top Panel Comparison |
|---|
| D2X |
 |
| D200 |
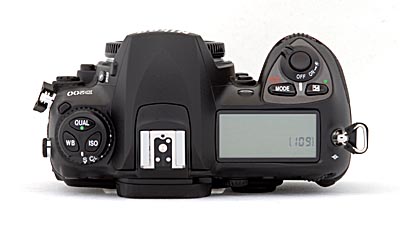 |
One force driving these changes was the need to make room for the large LCD display on the camera's back, which was done by moving the aforementioned WB, Quality, and ISO buttons to the top panel, and dispensing with the monochrome data-readout LCD that was below the LCD on the D2x's body. Relative to the D2x, the Bracket function has been moved from the top of the camera body to the upper left corner of the rear panel, within easy reach of your left thumb in some grip positions. The displaced playback button has been moved down to the top left corner of the LCD screen, also a good place for it. Other controls are in more or less the same positions, but the awkward door latch protector scheme of the D2x has been replaced by a neat rotating lever on the D200.
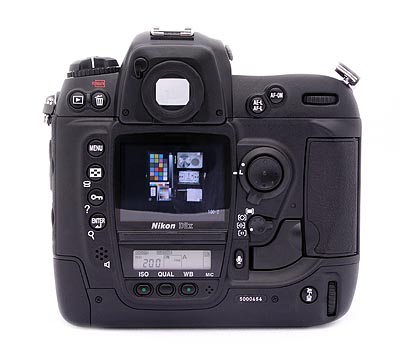
| Back Panel Comparison |
|---|
| D2X |
 |
| D200 |
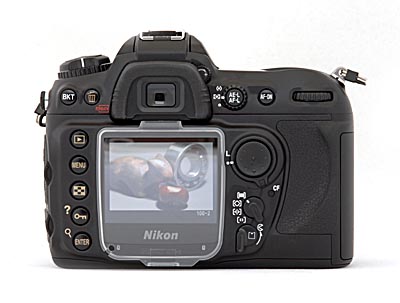 |
Overall, the control layout places the main shooting controls on top of the camera and the rest on the back panel, for ease of use. Changing shutter speed, aperture, metering mode, etc. is quick and simple, with changes shown on the small black & white data readout on the top panel of the camera, and some of them in the viewfinder readout display as well.
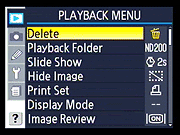 The main LCD menu system itself is well-organized and simple to navigate, with five main menu pages. The Custom Settings menu has been reorganized into banks of settings, for a bit tidier appearance and easier navigation, a very welcome change. For example, the Autofocus bank relates to focus settings only, so you can quickly change a focus operation without having to fish through several screens of options. There's also a new menu page that holds the most recently set options, useful if you're not sure about a setting change recently made, or if you want to return to one very quickly, without having to page through the main menu system. When shooting, the detailed information display in the viewfinder window does a good job of communicating current camera settings. Anyone already familiar with Nikon's SLRs, whether film or digital, will have no trouble operating the D200. For less experienced users, an hour or two spent with the manual and camera together should be enough to get comfortable. (This is definitely a camera that you'll want to spend some time shooting with though, before going on a trip or taking it on a critical shoot.)
As with most Nikon DSLRs, the top-panel data readout LCD communicates a lot of information about current camera settings, and provides an interface for setting many camera functions, when used in conjunction with the various buttons and Command Dials. The illustrations below show the meaning of the various icons and readouts in this display.
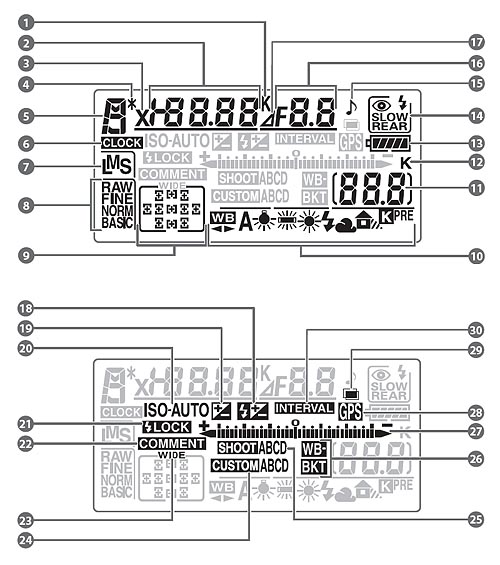
1 |
Color temperature indicator
|
15 |
"Beep" indicator
|
2 |
Shutter speed
|
16 |
Aperture (f/-number)
|
|
Exposure compensation value
|
Aperture (number of stops)
|
||
|
Flash compensation value
|
Bracketing increment
|
||
|
Sensitivity (ISO equivalency)
|
Number of shots per interval
|
||
|
White balance fine-tuning, color temperature, or preset number
|
Maximum aperture (non-CPU lens)
|
||
|
Number of shots in bracketing sequence
|
PC connection indicator
|
||
|
Number of intervals
|
17
|
Aperture stop indicator
|
|
|
Focal length (non-CPU lens)
|
18
|
Flash compensation indicator
|
|
3 |
Flash sync indicator
|
19
|
Exposure compensation indicator
|
4 |
Flexible program indicator
|
20
|
Auto ISO sensitivity indicator
|
5 |
Exposure mode
|
21
|
Flash value (FV) lock indicator
|
6 |
"Clock not set" indicator
|
22
|
Image comment indicator
|
7 |
Image size
|
23
|
Wide-frame focus area indicator
|
8 |
Image quality
|
24
|
Custom menu bank
|
9 |
Focus area
|
25
|
Shooting menu bank
|
|
AF-area mode
|
26
|
Bracketing Indicator
|
|
10 |
White balance mode
|
27
|
Electronic analog exposure display
|
11 |
Number of exposures remaining
|
Exposure compensation
|
|
|
Number of shots remaining before buffer fills
|
Bracketing progress indicator
|
||
|
PC mode indicator
|
PC connection indicator
|
||
|
Preset white balance recording indicator
|
28 |
GPS connection indicator
|
|
12 |
"K" (appears when memory remains for over 1000 exposures)
|
29
|
Multiple exposure indicator
|
|
13
|
Battery indicator
|
30
|
Interval timer indicator
|
|
14
|
Flash sync mode
|
Click on the other sub-tabs above or below to read about the Nikon D200's Viewfinder, Controls, and Menu system.
 Fujifilm GFX 50S Review
 Fujifilm X-T3 Review
 Olympus E-M5 III Review

Follow Imaging Resource