Canon EOS 1Ds Mark III Image Quality
Color
Saturation & Hue Accuracy
Excellent saturation and color accuracy.
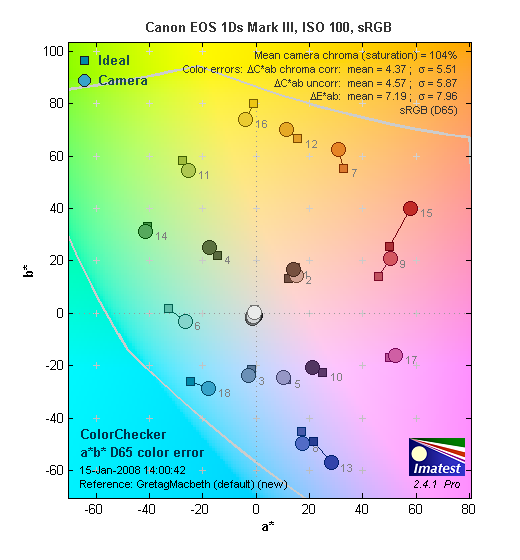 |
| In the diagram above, the squares show the original color, and the circles show the color that the camera captured. More saturated colors are located towards the periphery of the graph. Hue changes as you travel around the center. Thus, hue-accurate, highly saturated colors appear as lines radiating from the center. Click for a larger image. |
Saturation. The Canon EOS 1Ds Mark III's saturation levels are very accurate, only oversaturating reds, blues and some greens a tiny bit, and actually undersaturating yellow and cyans. Some may find overall saturation somewhat subdued (only 4% oversaturation), but this is what you'd expect from a professional model. As you'll see below, the 1Ds Mark III's saturation adjustment gives good control, if you'd like a brighter color. Most consumer digital cameras produce color that's more highly saturated (more intense) than found in the original subjects. This is simply because most people like their color a bit brighter than life.
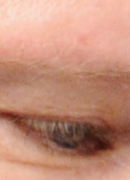
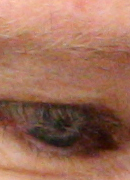
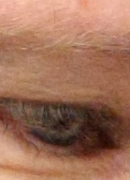
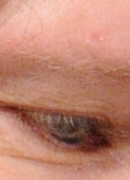
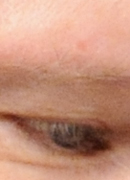
Skin tones. In this case, the 1Ds Mark III did render skin tones slightly on the pink side in most cases. Still, results are quite good, well within an acceptable range. Where oversaturation is most problematic is on Caucasian skin tones, as it's very easy for these "memory colors" to be seen as too bright, too pink, too yellow, etc.
Hue. Overall results here are also pretty accurate, though some reds are pushed toward orange, oranges towards yellow and cyan towards blue. Still, overall color is quite good, with an average hue error after correction for saturation variation of only 4.37 delta-C units. This is closer to accurate than many DSLRs on the market. The other important part of color rendition is hue accuracy. Hue is "what color" the color is.
 |
 |
 |
| See full set of test images
with explanations See thumbnails of all test and gallery images |
||
Saturation Adjustment
The Canon EOS 1Ds Mark III lets you adjust the image saturation, contrast, and sharpness in nine steps each. As can be seen below, the saturation adjustment worked very well, providing a reasonably fine-grained adjustment over a useful range of control. The saturation adjustment also has almost no impact on contrast. That's how it should work, but we've often found interactions between saturation and contrast (and vice versa) on the cameras we test.
| Saturation Adjustment Examples | ||
 -4 |
 -3 |
 -2 |
 -1 |
 Default |
 +1 |
 +2 |
 +3 |
 +4 |
Sensor
Exposure and White Balance
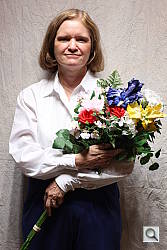
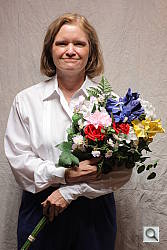
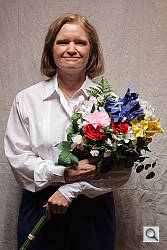
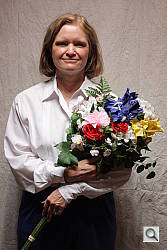
Indoors, incandescent lighting
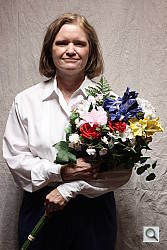
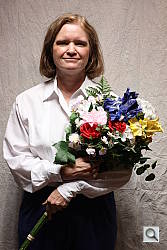
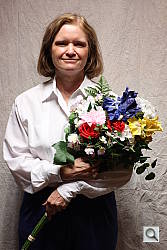
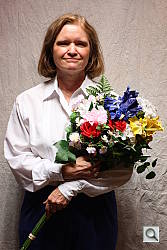
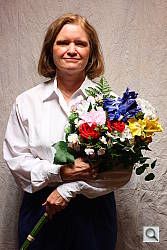
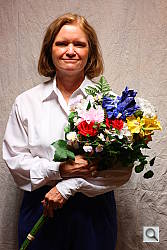
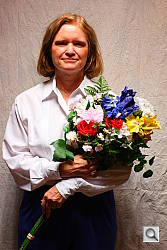
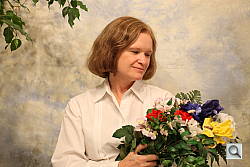
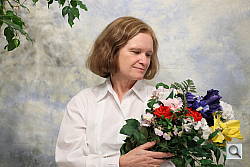
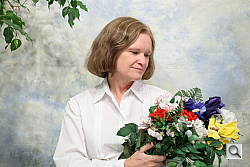
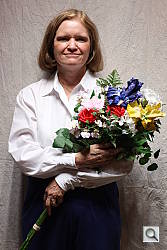
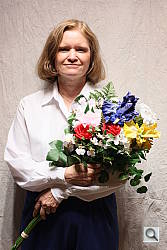
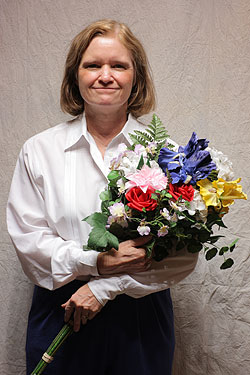
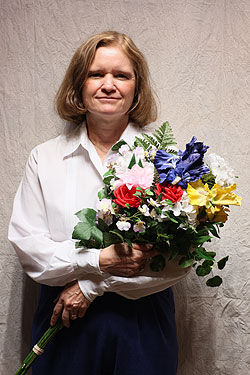
Auto and Incandescent white balance settings were quite warm, but Manual white balance setting produced very good color; slightly less than average positive exposure compensation required.
 |
 |
| Auto WB +0.7 EV |
Incandescent WB +0.7 EV |
 |
 |
| 2,700 Kelvin +0.7 EV |
Manual WB +0.7 EV |
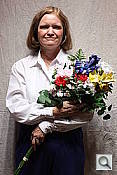
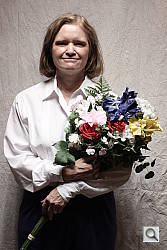
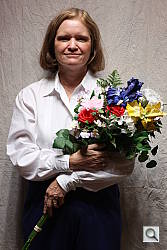
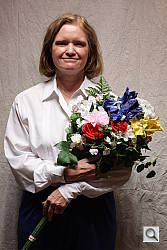
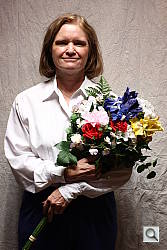
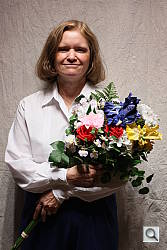
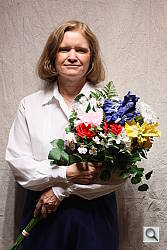
Color balance indoors under incandescent lighting was very warm with the Auto white balance setting, with a strong yellow cast. The Incandescent setting was a bit better, but still quite warm. The 2,700 Kelvin setting wasn't far off the mark, but produced a hint of a magenta cast. I felt the Manual setting had the most pleasing overall results. The Canon EOS 1Ds Mark III required slightly less than average amount of positive exposure compensation here, at +0.7 EV. Overall color is quite good, Marti's white shirt is almost perfectly neutral, although her face is a little pink, and the blue flowers looked purplish as they often do with this shot. Our test lighting for this shot is a mixture of 60 and 100 watt household incandescent bulbs, a very yellow light source, but a very common one in typical home settings here in the U.S.
Outdoors, daylight
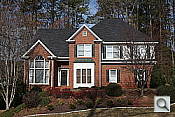
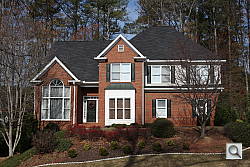
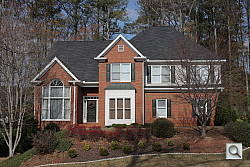
Good color overall, though a tendency toward a warm cast. Slightly high contrast under harsh lighting, but good highlight/shadow detail preservation. Better than average exposure accuracy outdoors.
 |
 |
| Auto White Balance, +0.3 EV |
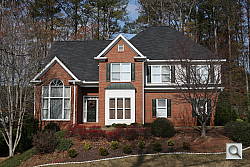
Auto White Balance, Auto Exposure |
In the "Sunlit" test shot above, the Canon EOS 1Ds Mark III tended to lose a bit of highlight detail under harsh lighting while requiring a less than average amount of positive exposure compensation of +0.3 EV. Contrast was slightly high, resulting in rather dark shadows when the highlights were well exposed, but the 1Ds Mark III does better than most in this regard, with almost no loss of detail in the strong highlights, and good detail present pretty far into the shadows. The outdoor house shot is just slightly overexposed at default exposure, but with natural looking color.
See full set of test images with explanations
See thumbnails of all test and gallery images
Resolution
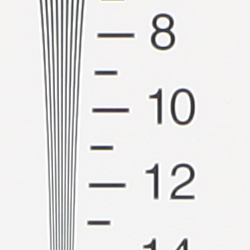
Very high resolution, 2,000 ~ 2,100 lines of strong detail.
 |
 |
| Strong detail to 2,000 lines horizontal |
Strong detail to 2,100 lines vertical |
Our laboratory resolution chart revealed sharp, distinct line patterns down to about 2,000 lines per picture height in the horizontal direction, and about 2,100 lines per picture height in the vertical direction. Extinction of the pattern occurred between 3,000 and 3,200 lines. Note: the above graph taken at 2x distance, so results are multiplied by 2x.
Use these numbers to compare with other cameras of similar resolution, or use them to see just what higher resolution can mean in terms of potential detail. Our interpretation of this standard is somewhat conservative. We watch for artifacts and color fringing then move back to the nearest pure part of the scale. In our opinion, detail with artifacts shouldn't be considered detail. You may see other numbers quoted elsewhere, but across the site, our reviews judge this parameter by the same conservative standard.
See full set of test images with explanations
See thumbnails of all test and gallery images
Sharpness & Detail
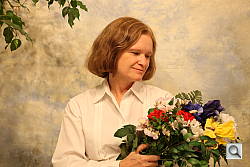
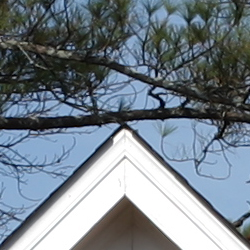
Sharp images overall, with excellent detail. Minimal noise suppression visible in the deep shadows at low ISOs.
 |
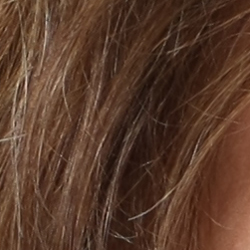 |
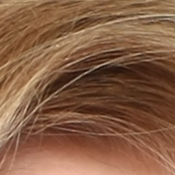
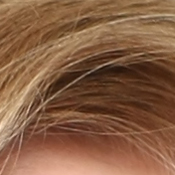
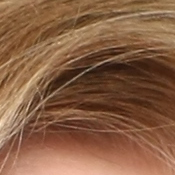
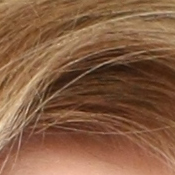
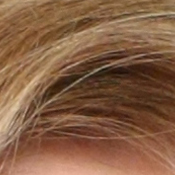
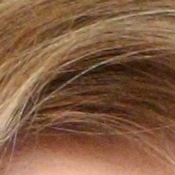
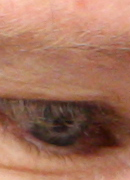
| Excellent detail overall, though slight evidence of edge enhancement visible. | Subtle detail: Hair Noise suppression tends to blur detail in areas of subtle contrast, as in the darker parts of Marti's hair here. |
Sharpness. The Canon EOS 1Ds Mark III captured fairly sharp images, though details tend to be just slightly soft overall. In the high contrast shot above, there's only slight edge enhancement visible along the edges of the white house trim and roof, as well as some of the larger branches This means that, while the 1Ds Mark III's JPEGs are a little soft straight from the camera, they tend to take sharpening in image editing applications pretty well. There are some minor artifacts from the in-camera sharpening though: Sharpening on the computer does tend to bring out the slight halos that are present in the original images, but generally not noticeable unless additional sharpening is applied. (Edge enhancement creates the illusion of sharpness by enhancing colors and tones right at the edge of a rapid transition in color or tone.)
Detail & Noise suppression. The crop above right shows very little visible noise suppression in the shadows, with quite a bit of fine detail in the strands of hair visible. Noise-suppression systems in digital cameras tend to flatten-out detail in areas of subtle contrast. The effects can often be seen in shots of human hair, where the individual strands are lost and an almost "watercolor" look appears.
JPEG vs RAW
JPEG vs RAW Comparison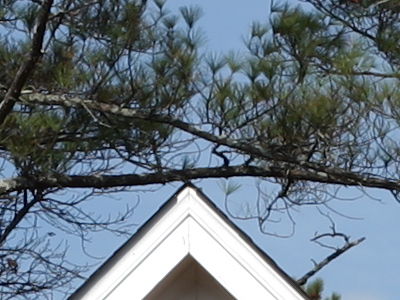 |
|
Mouse over the links in the box above to compare the difference in sharpness and detail from camera JPEG versus a 14-bit RAW file processed with Adobe Camera Raw 4.3.1. Camera settings for the JPEG settings were the defaults.
In our testing of many DSLRs, we're finding that there is often more detail locked up a the camera's RAW files than makes it out in the camera-produced JPEGs. This once again seems to be the case for the 1Ds Mark III. Its in-camera JPEG processing is actually pretty competent, but you can nonetheless produce a sharper, more finely-rendered image by manipulating the RAW files in a good third-party RAW converter.
ISO & Noise Performance
Low noise up to ISO 800 sensitivity, moderate noise at ISOs 3,200 and 6,400.
 |
 |
 |
| ISO 50 | ISO 100 | ISO 200 |
 |
 |
 |
| ISO 400 | ISO 800 | ISO 1,600 |
 |
These crops taken from shots with High ISO NR set to "On", the default. |
|
| ISO 3,200 | ||
Noise levels are remarkably low at the Canon EOS 1Ds Mark III's lower sensitivity settings, with buttery smooth images up to ISO 800, where there is only a slight hint of "grain" visible in darker shadows. At ISO 1600, noise is still very low with very little loss in fine detail. We start to see some minor loss of detail at ISO 1,600 where high ISO noise reduction is smoothing away fine detail along with noisy pixels. At ISO 3,200, we see further loss of detail along with more visible "grain" and chroma noise creeping in. Still, very good performance, especially considering a 21 megapixel sensor. I'm surprised there is no ISO 6,400 setting.
| Canon EOS 1Ds Mark III vs Nikon D3 High ISO Noise Reduction | ||||
| 1Ds Mk3 NR Off | 1Ds Mk3 NR On | D3 NR Off | D3 NR Normal | Incandescent Light |
| I S O 1 6 0 0 |
 |
 |
 |
D3 does not perform High ISO NR at ISO 1600 |
| I S O 3 2 0 0 |
 |
 |
 |
 |
|
||||
| Simulated Daylight | ||||
| I S O 1 6 0 0 |
 |
 |
 |
D3 does not perform High ISO NR at ISO 1600 |
 |
 |
 |
D3 does not perform High ISO NR at ISO 1600 |  |
 |
 |
D3 does not perform High ISO NR at ISO 1600 |
|
||||
| I S O 3 2 0 0 |
 |
 |
 |
 |
 |
 |
 |
 |
 |
 |
 |
 |
The comparison table above shows crops from the Canon EOS 1Ds Mark III next to some from the Nikon D3, comparing the Off and On settings of the 1Ds Mark III to the NR Off and Normal settings on the D3. Apart from the obvious differences in resolution, saturation and tone curves, we can see the D3 exhibits a bit less noise even with NR off than the 1Ds Mark III has with its high ISO NR on (which does a good job at removing chroma noise, but does very little to remove luminance noise). No real surprise here, since the Mark III's sensor has nearly twice as many pixels as the D3's in roughly the same total area.
Extremes: Sunlit and low light tests
High resolution with good detail in both the highlights and shadows. Excellent low-light performance, capable of capturing bright images under average city street lighting and much darker conditions.
 |
|
 |
| Default | +0.3 EV | +0.7 EV |
Sunlight. The Canon EOS 1Ds Mark III performed well under the deliberately harsh lighting in the test above, and captured bright midtones without sacrificing too much detail in the highlights or shadows. Though Marti's face still looks a little dark at +0.3 EV, I preferred it to the image at +0.7 EV, which had a few too many blown highlights for my preference. That said though, even the +0.7 EV example did an very good job of preserving highlight detail, in that only a few areas were completely blown out. Shadow detail was also exemplary, there's very good detail there, surprisingly far into the deep shadows. (In "real life" though, be sure to use fill flash in situations like the one shown above; it's better to shoot in the shade when possible.)
| Contrast Adjustment Examples | ||
 -4 |
 -3 |
 -2 |
 -1 |
 Default |
 +1 |
 +2 |
 +3 |
 +4 |
The series of shots above show the results of the different contrast settings, all shots captured at an exposure setting of +0.7 EV. While it can be difficult to evaluate small differences in contrast on small thumbnails like these, it's pretty easy to see the impact of the Contrast adjustment in the images above. At its lower settings, the Canon 1Ds Mark III did a really excellent job of handling the deliberately horrific lighting of this shot.
| Highlight Tone Priority Examples | ||
|
+0.3 EV |
+0.7 EV |
 +1.0 EV |
 +0.3 EV Highlight Tone Priority |
 +0.7 EV Highlight Tone Priority |
 +1.0 EV Highlight Tone Priority |
As can be seen from the second set of images here, Highlight Tone Priority mode was able to hold onto significantly more highlight and shadow detail, but limits the ISO to 200-1,600; and, like the reduced contrast setting, HTP mode resulted in a very slightly warmer overall tone.
| Low Contrast vs Highlight Tone Priority Outdoor Portrait (Same exposure setting in both images, +0.7 EV) |
|
 Lowest Contrast Setting |
 HTP Setting |
| Far-Field House (Same exposure setting in both images, default exposure) |
|
 Lowest Contrast Setting |
 HTP Setting |
Note: Because digital cameras are more like slide film than negative film (in that they tend to have a more limited tonal range), we test them in the harshest situations to see how they handle scenes with bright highlights and dark shadows, as well as what kind of sensitivity they have in low light. The shot above is designed to mimic the very harsh, contrasty effect of direct noonday sunlight, a very tough challenge for most digital cameras. (You can read details of this test here.)
| 1 fc 11 lux |
1/2 fc 5.5 lux |
1/4 fc 2.7 lux |
1/8 fc 1.3 lux |
1/16 fc 0.67 lux |
1/16fc No NR |
|
|---|---|---|---|---|---|---|
| ISO 50 |
2.6 sec f2.8 |
5.2 sec f2.8 |
10.4 sec f2.8 |
20.7 sec f2.8 |
32 sec f2.8 |
32 sec f2.8 |
| ISO 100 |
1.3 sec f2.8 |
2.6 sec f2.8 |
5.2 sec f2.8 |
10.4 sec f2.8 |
20.7 sec f2.8 |
20.7 sec f2.8 |
| ISO 200 |
0.6 sec f2.8 |
1.3 sec f2.8 |
2.6 sec f2.8 |
5.2 sec f2.8 |
10.4 sec f2.8 |
10.4 sec f2.8 |
| ISO 400 |
0.3 sec f2.8 |
0.6 sec f2.8 |
1.3 sec f2.8 |
2.6 sec f2.8 |
5.2 sec f2.8 |
5.2 sec f2.8 |
| ISO 800 |
1/6 sec f2.8 |
0.3 sec f2.8 |
0.6 sec f2.8 |
1.3 sec f2.8 |
2.6 sec f2.8 |
2.6 sec f2.8 |
| ISO 1600 |
1/12 sec f2.8 |
1/6 sec f2.8 |
0.3 sec f2.8 |
0.6 sec f2.8 |
1.3 sec f2.8 |
1.3 sec f2.8 |
| ISO 3200 |
1/25 sec f2.8 |
1/12 sec f2.8 |
1/6 sec f2.8 |
0.3 sec f2.8 |
0.6 sec f2.8 |
0.6 sec f2.8 |
Low light. The Canon EOS 1Ds Mark III performed extremely well here, able to capture usable images down to the 1/16 foot-candle light level (about 1/16 as bright as average city street lighting at night), at all ISO settings. Color was very good, using the EOS 1Ds Mark III's auto white balance setting. Noise is almost nonexistent up to ISO 800, and remains low at ISO 1,600, and 3,200. Turning NR off reveals some chroma noise which is filtered out with it on. Some minor horizontal banding can be seen in dark areas at high ISOs and low light levels. The EOS 1Ds Mark III's autofocus system also performed well here, able to focus on the subject down to below the 1/16 foot-candle light level without the aid of an AF assist light. Keep in mind that the longer shutter speeds here demand the use of a tripod to prevent any blurring from camera movement. (A useful trick is to just prop the camera on a convenient surface, and use its self-timer to release the shutter. This avoids any jiggling from your finger pressing the shutter button, and can work quite well when you don't have a tripod handy.)
How bright is a foot-candle? The one foot-candle light level that this test begins at roughly corresponds to the brightness of typical city street-lighting at night. Cameras performing well at that should be able to snap good-looking photos of street-lit scenes.
NOTE: This low light test is conducted with a stationary subject, and the camera mounted on a sturdy tripod. Most digital cameras will fail miserably when faced with a moving subject in dim lighting. (For example, a child's ballet recital or a holiday pageant in a gymnasium.) Digital SLRs like the Canon EOS 1Ds Mark III do much better than point & shoots, but you still shouldn't expect a quick autofocus lock with moving subjects.
 Fujifilm GFX 50S Review
 Fujifilm X-T3 Review
 Olympus E-M5 III Review

Follow Imaging Resource