Fuji X-T2 Field Test Part I
Taking the new flagship Fuji into the eye of the storm
By Dave Pardue | Posted: 09/15/2016
They were calling it Tropical Depression 9, and it was already starting to intimidate the Gulf of Mexico. I was packing for the Atlantic Coast to try out the new Fuji X-T2, the highest-end camera I'd yet to have the privilege of Field Testing, and was feeling a bit intimidated myself. The X-T2 is reportedly sporting a hugely improved C-AF system complete with new custom presets, and I wanted to try and bring our readers the full picture.
I'd shot extensively with the predecessor X-T1, primarily for gallery samples of many of the recent Fujinon XT lenses that have come our way, including the latest long zooming XT 100-400mm f/4-5.6. I've grown to very much love the X-T1, have learned to utilize most of its capabilities as well as dodge some of its quirks, but I knew that it wasn't quite up to fully competing against enthusiast DSLRs in the C-AF world of sports and wildlife. It was good, but simply not as good as the best in that class.
With that in mind, I got the nod to head to an area deep in the Carolina low country, replete with a wealth of National Wildlife Refuge sanctuaries, with the goal of putting the X-T2 through its paces in a real-world and challenging environment. But a funny thing happened on the way to the Atlantic Coast, as TD-9 morphed into Hurricane Hermine, and the eye of the storm took a path towards me.
 |
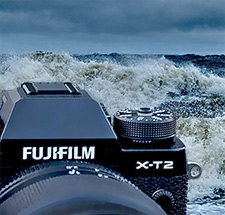
1/1000s / f/4.5 / ISO 200 / 210mm eq. (XT 50-140mm f/2.8 WR lens) |
(Images have been resized to fit this page, and some have been cropped and/or adjusted in post-production, primarily to balance shadows and highlights when needed. Clicking any image will take you to a carrier page with access to the unedited full resolution image, as well as access to EXIF data. RAW files for most images are available for download and personal use from our Fuji X-T2 gallery page.)
Thursday September 1st, early evening: I arrived at the coast in somewhat ominous weather conditions. The winds were not yet overly strong but were building steadily, and the air was laced with that expectant feel of something coming in. Before the winds get any stronger, let's take a brief look around at the look and feel of this new Fuji and some of the ergonomic changes and additions to the exterior and the various controls.
Fuji X-T2 - Initial impressions on handling and feel
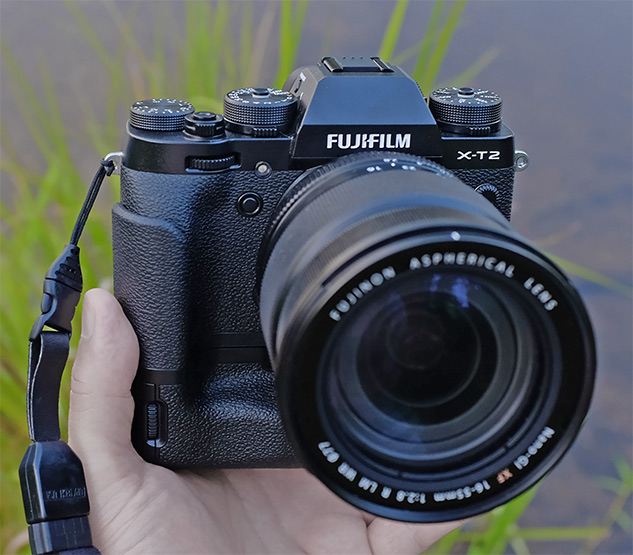 |
The Fuji X-T2 shown here with the optional portrait grip, which can hold not one but two additional batteries! Attached is the new Fujinon XF 16-55mm f/2.8 WR, making the entire rig weather-resistant. The optional grip is simply a must for the type shooting this camera is designed for, a point we'll explore more in just a bit. [All product shots in this report were taken with a Fuji X-100S.] |
Beginning with a bit of lineage, the first time I held a Fuji X100 in my hands several years ago I just stood there in awe. After wondering why there was no mode dial for a few minutes (where is it?) and then realizing the incredible simplicity of the retro-inspired but logical formula of simple shutter speed, aperture and ISO dials, I was hooked and reeled right in. The X-Pro series followed suit, and then the DSLR-styled X-T series, too. All eschewing the mode dial for an even simpler old-school analogue feel. Some turned up their noses, while others fell in love, and I was among the latter.
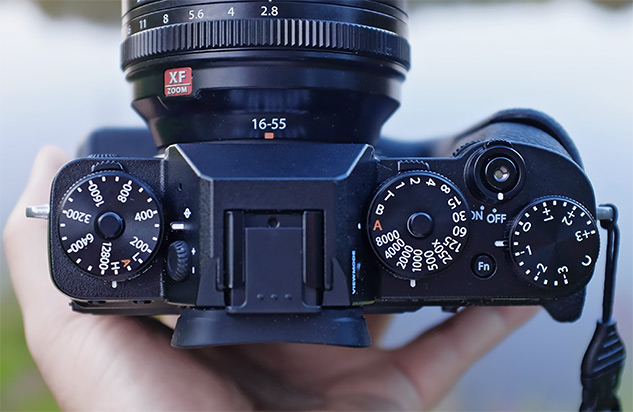 |
If you're new to the Fuji X-series, feast your eyes on old-school analogue meets the digital realm. The exposure triangle is all in view (aperture on the lens) and all three have an auto setting. Your modes therefore come by deciding which dials are in auto, and which are not, while the EV dial to the right works on your behalf as a quick change operator unless all three exposure dials are set to manual settings. Under the ISO dial is the drive dial (shown below), and under the shutter speed dial is the metering dial. Most of your shooting parameters can indeed be controlled from this top deck alone, with the turn of a few knobs. |
Fuji X-T1 vs Fuji X-T2
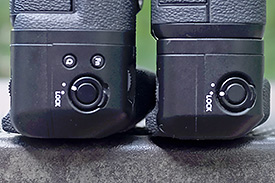
At first glance the X-T2 doesn't look all that different then the X-T1, but it is. It's thicker and beefier, more stable and comfortable to hold, without being too far down the beefy road. It's taller as well with the new battery grip on-board, and makes a much more stable companion to the larger lenses such as the 50-140mm f/2.8 or the new 100-400mm long zoom. The battery grip also extends the front hand grip, which the previous battery grip didn't do. In addition, both the ISO and shutter dials are larger and taller, and have more firmness at the detent positions and thus are less likely to be bumped while not locked. Lastly, the locking mechanisms are improved as well.
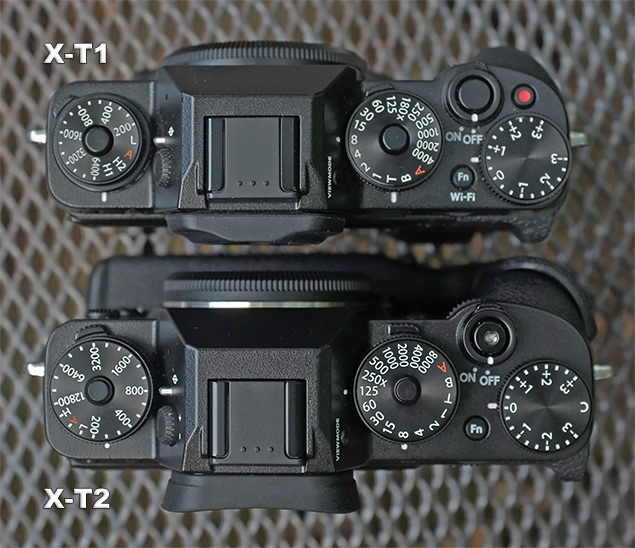 |
Beefier and bolder: A similar form factor but taller and thicker, with a more pronounced eye piece and a battery grip that extends the hand grip. Larger shutter speed and ISO dials also add to the refinement, in addition to an old-school shutter with a manual release connection. The lack of a dedicated movie button is also in line with the retro feel, as a movie setting has now been added to the drive dial. Just set it to movie mode and use the shutter button to start rolling. This top deck is simple, elegant, and most definitely refined. |
My least favorite thing about the X-T1 has also been improved. The 4-way directional buttons were simply too shallow and sparse, something I'm sure most X-T1 owners would concur on, and this makes them difficult to operate. Those on the X-T2 protrude substantially more, and have a much more reassuring "click" when depressed. I would actually love to have a little more protrusion from these buttons, but for now, this improvement is a notable and welcome one for me.
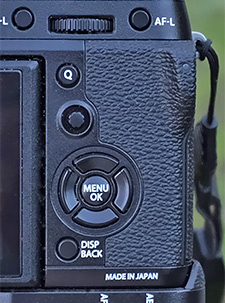
The EVF eye piece also protrudes and surrounds the eye much more effectively than the one on the X-T1, and you can imagine the difference this makes in gale-force winds and blowing sand. Once again, I wouldn't mind even more of a protrusion, but this one is enough to make a big difference in the elements, and even in harsh sunlight.
Then, of course, there's one quite significant addition to the line in the form of an AF joystick, seen just below the "Q" button (quick menu for common settings adjustments). This joystick is handily located near your thumb and can adjust the AF point or points as your eye is nestled snugly in the EVF. Once I used it for the first time it became an absolute necessity, and I can't imagine going back, especially while out shooting fast-moving wildlife. I'll talk much more about that in my next Field Test, but for many wildlife sequences I kept it in 9-point zone AF and used the joystick to move the zone around as needed -- what a simple and effective experience that is!
Fujifilm X-T2 - Sub-dials and Advanced modes
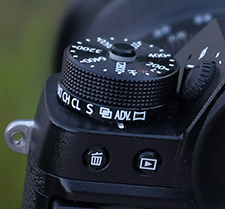
As mentioned earlier, the ISO and shutter speed dials sit atop two additional physical dials in the form of the drive mode and the metering mode, respectively. For the X-T2, each dial has one additional setting compared to the X-T1, adding "movie" to the drive dial and one additional metering setting -- center-weighted -- to that dial. I find the drive dial to be the most frustrating mechanism on the X-T2, as it's simply clumsy to rotate in my opinion. The metering dial is also a bit clumsy, but because I use the drive dial often, it's the one that's most annoying to me.
I'm not sure what to suggest as a better option, but these two dials could use some additional engineering. When turned all the way to the left or right, other obstacles make it hard to access the lever, and I find it hard to get them locked into their desired location. This is not a huge gripe nor a deal breaker for me, and perhaps it's simply paying the price for having so many dials at our disposal in one area, but I'm guessing that if the levers used to turn the dials were perhaps a bit thicker and a bit more extended, and the dials perhaps a bit stiffer to turn, then this gripe would be all but remedied.
I do, though, love the settings themselves as well as the physical access to them, and as mentioned, I use the drive dial often. The most common three for me are Still, Continuous Low and Bracketing (usually for Film Simulation Bracketing for certain subjects like portraits - more on that in the second Field Test). But for this storm shoot, I also found myself using the Advanced setting in order to access the Dynamic Tone Curve. Yes, anyone who abhors filters will turn up your nose at this idea, but for this shooting situation I found it quite useful. The light was ebbing and flowing as fog and rain bands came and went, and in order to capture certain shots that "felt" like the way it felt in that moment, I found the Dynamic setting to be just the trick. I'll discuss this a bit more in several shots below.
Additional ergonomic and functional enhancements
Returning to the new and improved battery grip, the addition of both a function button and a Q button (quick info) near the portrait shutter release are hugely welcome additions. Because your thumb is still within easy reach of the (also improved) 4-way control buttons, pressing Q here allows very quick access to common settings, and the programmable function button allows for even faster on-the-fly adjustments while in portrait orientation. The grip also allows for the new "boost" mode which can draw energy from more than one battery and increase overall performance in several key areas. (More on that in Field Test Part II!)
I prefer the SD card cover on the X-T1 for its simplicity and easy opening, and have gotten rather used to it over the past few years, but the one on the X-T2 is more secure. You can't just slide the door and easily open it, but must engage a little latch, which I find clumsy since I don't have finger nails to speak of. I suppose after shooting in a storm I can allow myself to get used to the new one, being not quite as easy to access but most likely better at protecting the valuable SD cards and card slots in heavy winds and spitting rain!
Fuji X-T2 - Newly designed menu system
As with the X-Pro2, Fuji has redesigned the menu system for the X-T2. In many ways it seems a step up for organization, grouping things like IQ and AF into their own categories, but I do have a few reservations. For one, it took me forever just to find "format" for the memory cards! On virtually every camera made (including the X-T1) you simply go to "tools" and then find "format" (or similarly named). On the X-T2, I finally had to push *every single button in the menu system* in order to find it (remember, we reviewers often don't yet have the manuals, as they aren't yet written). It's located under tools (good) but then under "User Settings". (Hmmm... I don't find formatting a memory card to be the least bit related to "user settings" myself.)
Next, should you want to have access to the highest extended ISO of 51,200 you will need to tell the camera that "H" (high) on the ISO dial is 51,200 instead of the default 25,600. I have no problem with this, but it sure was hard to find that setting. I expected to find it somewhere near the rest of the ISO settings, right? Wrong... it's down in tools under "Button/Dial Setting". I also found it cumbersome to find the Film Simulation Bracketing settings, as for me it would be intuitive if they were housed with the "Film Simulation" menu, but they're to be found under the "Shooting Settings" menu in "Drive Setting" (this is also where you assign the "Advanced" setting on the dial, which is a bit more intuitive). Perhaps one or more of these gripes will be remedied with a firmware upgrade.
Dawn and the storm arriving
Friday September 2nd, dawn: After I arrived at the South Carolina coast on Thursday evening, the wind continued to build through the night. By morning the storm had made landfall along the Florida gulf, and was beginning to show its teeth along the Atlantic side as well. Shortly after dawn the sky actually started to darken, the winds started lashing and rain was coming in brief spurts. With that in mind, and before we brave the elements, let's take a closer look at one of the most critical components of this system.
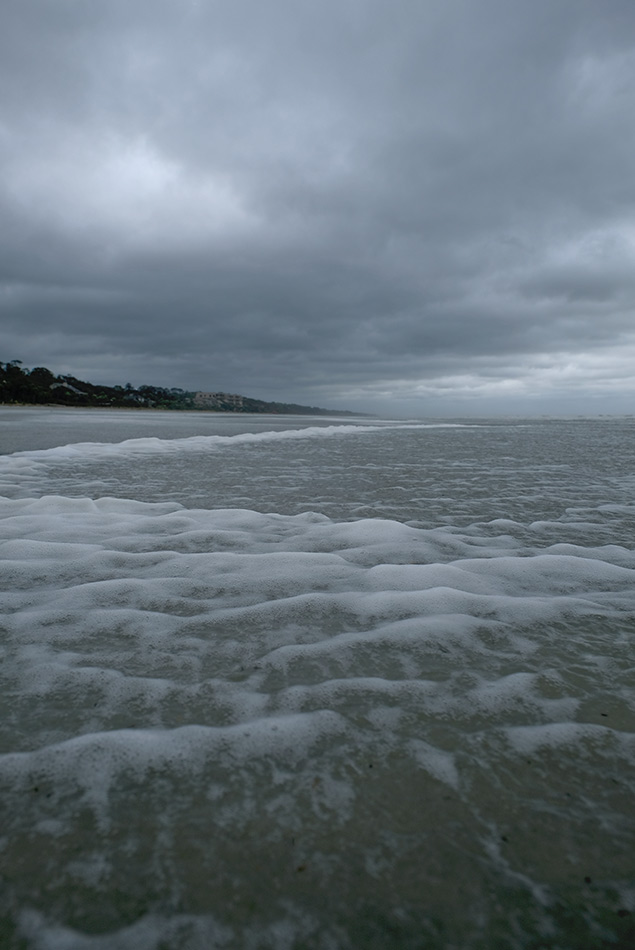 |
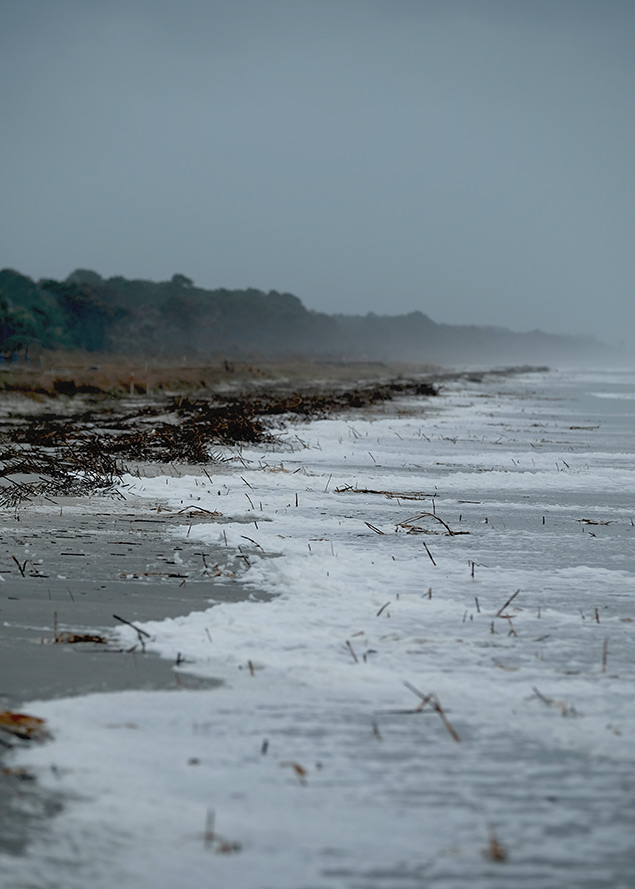
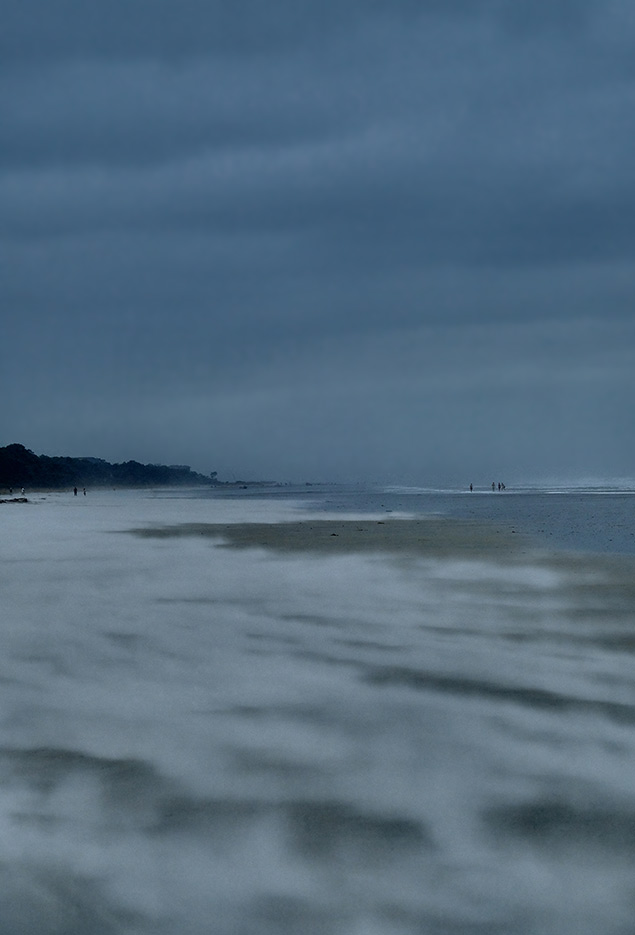
1/500s / f/8 / ISO 200 / 24mm eq. (XT 16-55mm f/2.8 WR lens) |
Just after dawn, before the sky started to darken from the heavier storm bands. This tidal foam usually heads towards the shoreline, but in this case the strong southerly winds were pushing it sideways towards the north. |
What exactly is weather resistance?
There's an international standard in order to closely specify just how dust and/or splash-proof any given device is rated to be, dubbed as an 'IP' code in much of the world, and yet there are no direct measurements as yet for actual IP ratings for cameras. Due to this unfortunate lack of a standardized test, each camera company is more or less free to claim some form of "weather resistance" or similar term if they choose, whether they actually provide gaskets and seals or not, and then it's up to us camera reviewers and you enthusiastic buyers out there to report what we find in our own experiences to the camera community at large.
Given our own experiences at IR, and those of some of our trusted colleagues and readers, I already felt a high degree of trust in Fuji's weather resistant claims for the X-T2. It sports 63 points of weather sealing, and they rate the camera as "ready for anything," which is certainly a bold statement. I've certainly had the X-T1 out in small showers on occasion, with no hitch whatsoever, and of course the WR lenses are also similarly sealed (as are the most recent battery grips and teleconverters). It was with this level of confidence that I decided to brave this tropical system, which was still a powerful storm by the time it reached my locale and still packing sustained winds varying between 30 and 50mph, (and even higher gusts) along with all the sand and salt and spray that comes with it along the coast.
Friday September 2nd, mid-morning: I finally had the chance to shoot a tropical storm system up close and personal, but the wind was exceptonally loud and I was so nervous about the whole thing (for myself and the camera) that I wasn't thinking about that at the time, only about the elements and how to get the shots without fouling the lens and overly exposing the camera to damage. Fortunately, the eye of the storm was still south by at least 100 miles and predicted to steer west of my general area. It was time to head out and start firing.
 |
1/1000s / f/11 / ISO 640 / 202mm eq. (XT 50-140mm f/2.8 WR lens) |
Alien world: This is not sea foam but sand blowing at 35+ mph. Advanced mode on the dial was set to the Dynamic Tone Curve employed to create a look more closely resembling the way the scene "felt" at the time. A word of caution though, as you're unable to save a RAW file while in this mode, and it also tends to create a somewhat or stippled or mottled look in some areas of the image such as the clouds. |
Friday September 2nd, late-morning: I headed inside for a quick rest stop and one last cup of needed coffee, but saw on the NOAA hurricane advisory that the eye had turned easterly and was heading my way. I guessed I had perhaps an hour left before it was on top of my position.
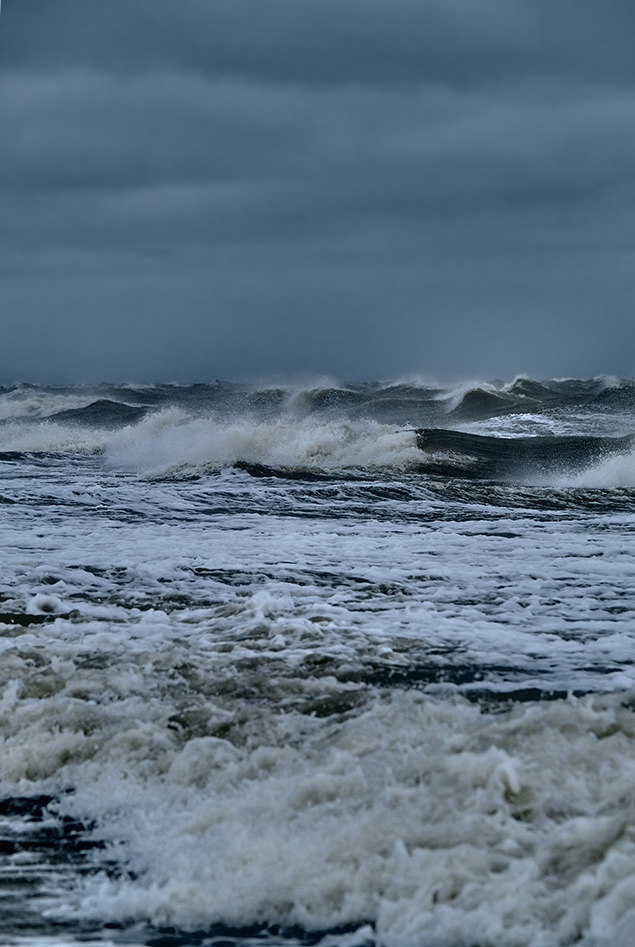 |
1/1000s / f/8 / ISO 320 / 210mm eq. (XT 50-140mm f/2.8 WR lens) |
Angry seas: Facing east towards the incoming waves, but the gusts are blowing them towards the north. I was in knee-deep water here, the deepest I felt comfortable going. The camera did get splashed on occasion, especially if I was looking through the EVF and a rogue wave caught me from the blind side. This image once again used the Dynamic Tone Curve in order to impart a look similar to the feel of the scene at the time. |
Friday September 2nd, early afternoon: After a few hours shooting on the beach in intermittent wind-blown sand and rain, the conditions changed radically in what felt like less than a minute. The wind speed doubled as the heavy rains and gusts came in, and I headed behind the dunes with the X-T2 tucked under my shirt. From the relative shelter under a black pine I grabbed a quick series of shots including this one below, and then turned and ran for better shelter.
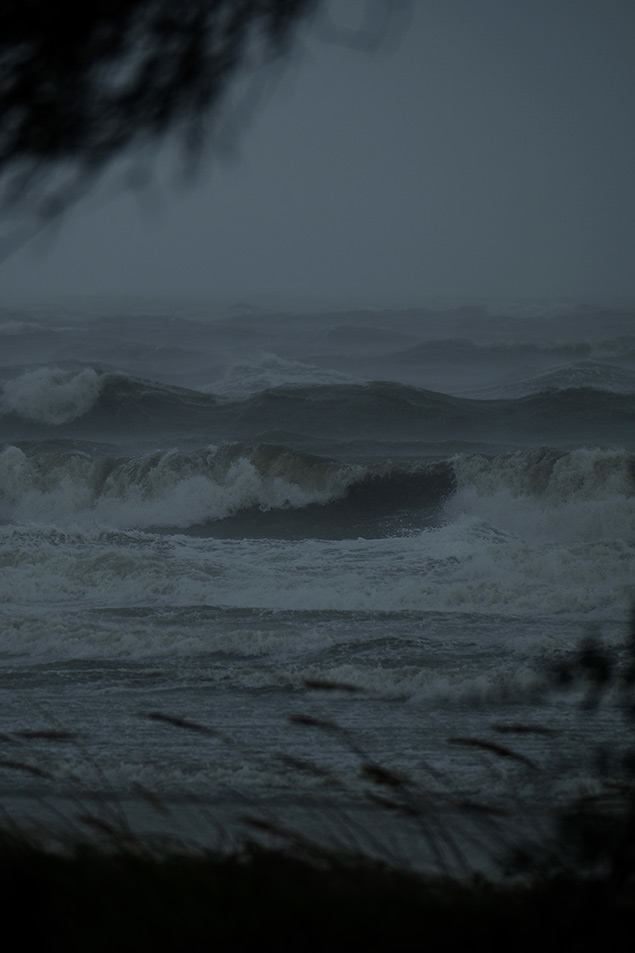 |
1/1250s / f/5 / ISO 200 / 392mm eq. (XT 100-400mm f/4-5.6 WR lens) |
The Storm: When tropical storm force winds turn into hurricane force gusts, the sea looks like this. |
Within minutes of the winds increasing, the power went out, even before I was able to get the batteries onto a charger. Did the extra two batteries in the grip matter to me then? Who knew how long the power would be out? I'd never been so relieved by a camera feature before, as I knew those extra batteries might need to carry me not only through the evening but possibly even into the next day. Again, if you opt for this camera system, go ahead and treat yourself to the additional portrait grip and that third spare battery. The first time you need it, you'll be awfully glad you did.
Aftermath
Hurricane Hermine headed north along the Atlantic coastline, and the Fuji X-T2 and I headed back out to capture the aftermath. There was still a great deal of steady wind as well as some blowing sand and spray, but the rain and the heavier gusts had passed. For some time there were only a few other people out there, and we looked at each other like shipwreck survivors as we passed, that haunted, bonded-by-survival look. There was a surreal feeling of still being in fairly strong winds, while knowing that the worst had passed. It's something I'll never forget, but am glad to have these images to remind me.
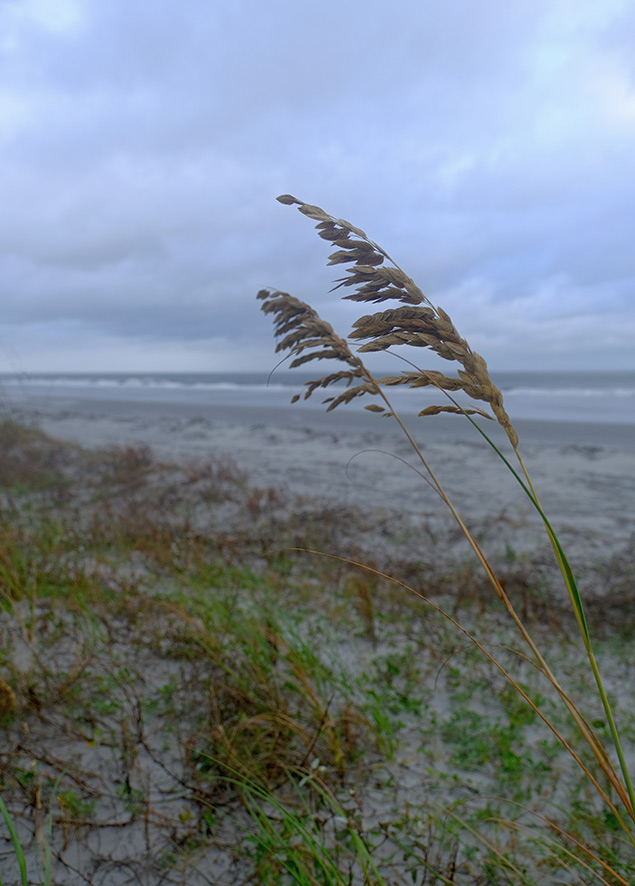 |
1/500s / f/2.8 / ISO 200 / 24mm eq. (XT 16-55mm f/2.8 WR lens) |
That which survives: Even after 36 hours of heavy and relentless wind most of the local fauna was still in tact. There was scattered debris, but no larger branches that I saw, and it gave me a new appreciation for the adaptation needed to survive on the coast. |
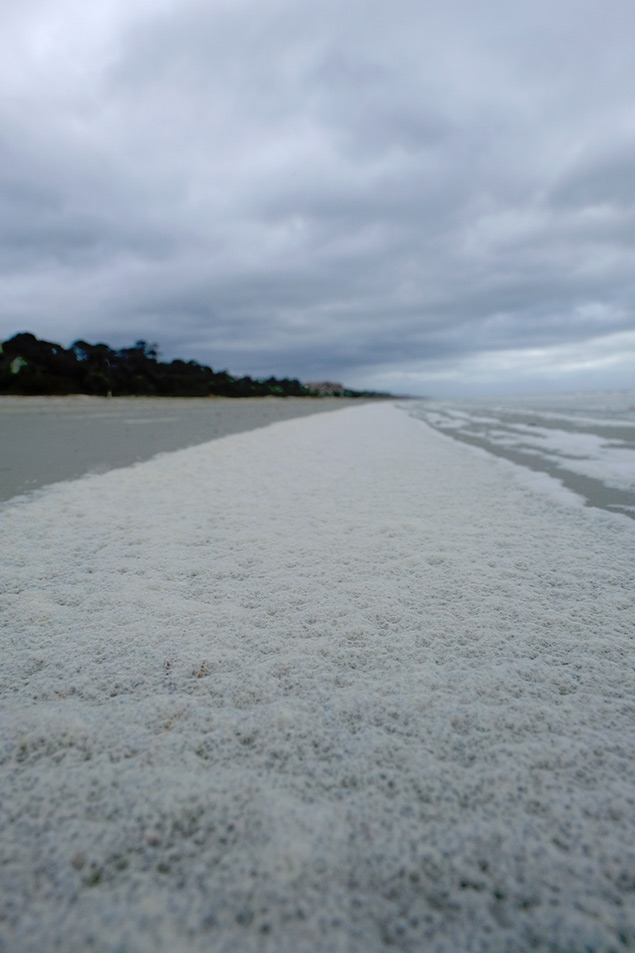 |
1/1000s / f/8 / ISO 200 / 24mm eq. (XT 16-55mm f/2.8 WR lens) |
Oddities: In all my years of going to the coast I've never seen anything quite like this. The extreme winds had flattened and sculpted the tidal foam into a 3-foot-wide carpet that extended for as fas as the eye could see. |
 |
1/1000s / f/8 / ISO 400 / 24mm eq. (XT 16-55mm f/2.8 WR lens) |
Storm relics: The 16-55mm f/2.8 assisted in the ability to showcase this additional interesting find. |
Fujifilm X-T2 - Simply wonderful colors
Let the debate rage on regarding the merits of Fuji's capturing and rendering of colors. Perhaps without being in the same location shooting the same scene with competing systems, no two people can accurately judge and argue the differences. All I can tell you is that Fuji's colors are the most pleasing to my eye, and that different film simulation modes offer an incredible palette of color and tonal options for various scenes and subject types. To put it simply, there's no other system that offers more pleasing colors in various situations for my personal taste than does the Fuji X-Trans sensor in combination with its Film Simulation modes.
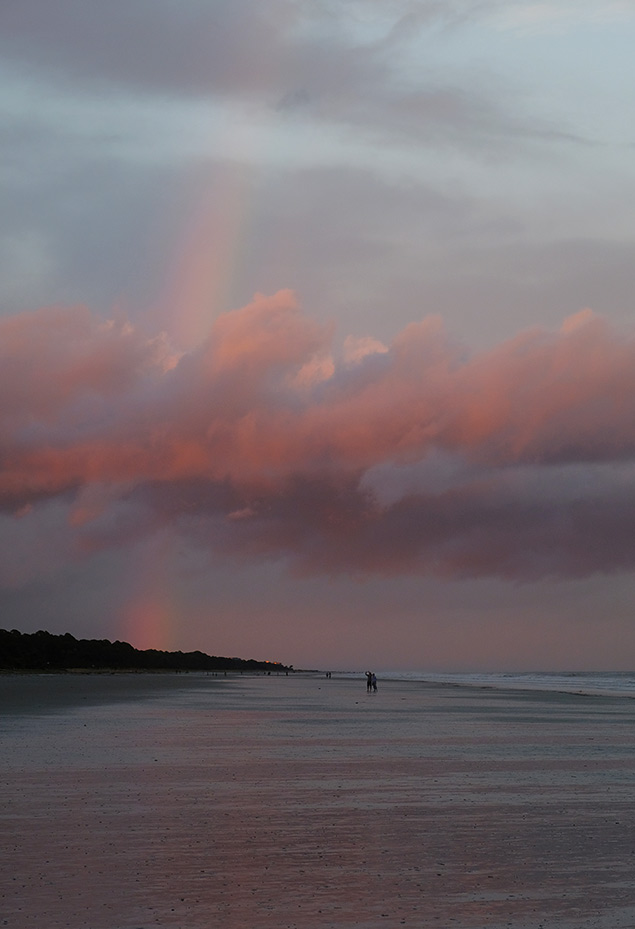 |
1/250s / f/5.6 / ISO 500 / 83mm eq. (XT 16-55mm f/2.8 WR lens) |
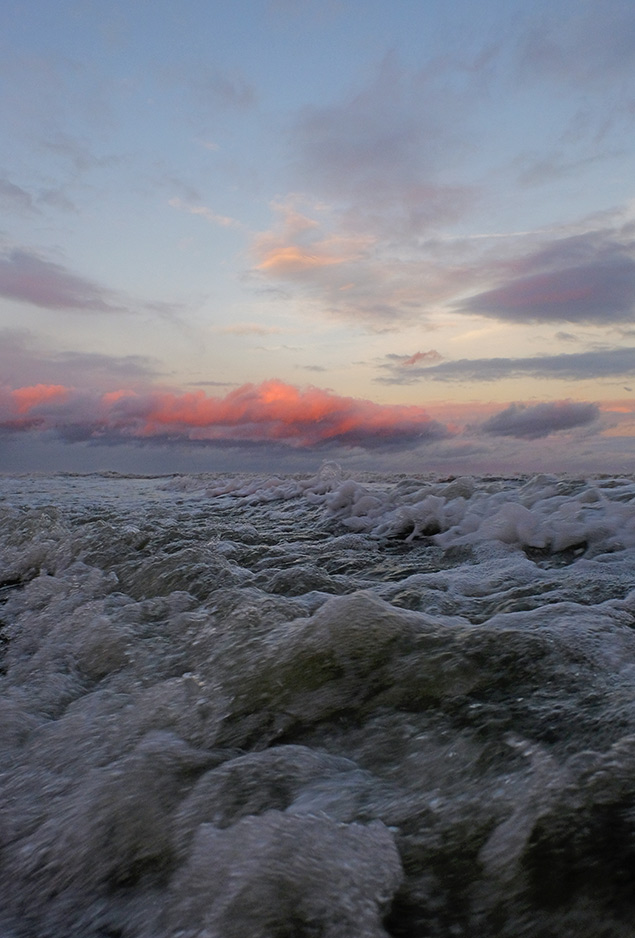 |
1/250s / f/8 / ISO 800 / 24mm eq. (XT 16-55mm f/2.8 WR lens) |
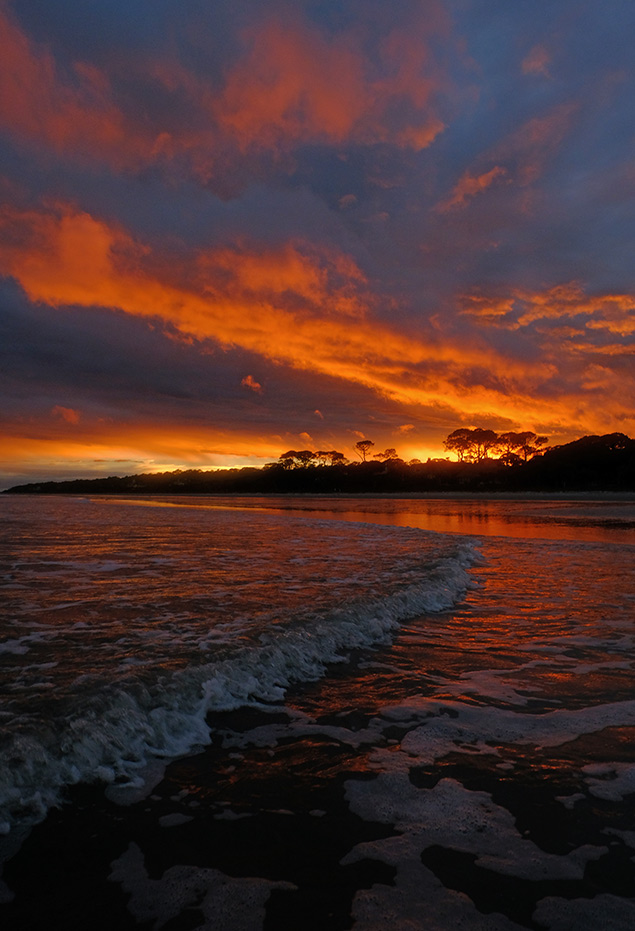 |
1/250s / f/8 / ISO 800 / 24mm eq. (XT 16-55mm f/2.8 WR lens) |
The sky's on fire: While I did have Velvia film simulation engaged for this shot, I actually reduced a bit of saturation for this edit. The sky looked like this to the eye, and I like the contrast of the orange and blue near the top of the image. |
 |
1/60s / f/9 / ISO 800 / 83mm eq. (XT 16-55mm f/2.8 WR lens) |
The End: One of the last storm bands to pass overhead, near the last light of a very long day. |
Fuji X-T2 - Part I Summary
Is the Fuji X-T2 in fact weather-resistant? I took it into a tropical storm on the Atlantic Coast and while I did my best to protect it, shielding it with my body or a shirt when I was on the move, in the actual shooting it got lashed by strong winds, spurting rain, sea spray and blowing sand. If these sound like an exaggeration, just walk onto any beach in a tropical storm and try to stand or keep your eyes open. (Those of you who've done it already know well what I mean.)
There are only a handful of camera bodies I've shot with that I'd feel comfortable taking into that environment, and even less so for most complete rigs that include the accompanying lenses and peripherals like battery grips. This X-T2 rig proved a beast, shrugging off the worst of Hermine and continuing to fire with unabated reliability. And when the power died in my dwelling, that third battery in the grip became a comforting safety net indeed. In addition, improved ergonomics and the new AF joystick are welcome features, and the camera is simply beefier and more stable than its predecessor, especially when supporting longer lenses.
Part II of this report is now complete, centering around the following day, after the storm had passed well clear, when all the wildlife returned and the nature preserves opened back up. In other words... C-AF time!
Fuji X-T2 Field Test Pt II • Gallery • Lab Samples
(Special note: My apologies on having almost all portrait-orientation images for this Field Test! I was focused so much on the storm that I wasn't thinking the usual thoughts about variety, and I kept my hands tightly wound on the portrait battery grip and shutter. Not to worry, as there are some landscape shots in the X-T2 gallery, and I shot plenty of landscape orientation the following day for the C-AF testing and Field Test Part II, coming soon.)
 Fujifilm GFX 50S Review
 Fujifilm X-T3 Review
 Olympus E-M5 III Review

Follow Imaging Resource