


Overview
Sony A900 Overview
Review by Dave Etchells, Shawn Barnett, Zig Weidelich, and Stephanie Boozer
Overview by Mike Tomkins
Review Posted: 09/09/08
Update 09/22/08: Added dynamic range analysis from ACR 4.6 beta processed RAW file to Imatest Results. The Sony A900 did exceptionally well!
Update 12/11/08: Added RAW crops/files with no NR to Hi ISO NR page. You can also download the ISO 1600-6400 Still Life RAW files with NR turned Off from the thumbnails page.
The Sony A900 has to rank among the most anticipated digital SLRs in recent memory. The company first showed an early version of its upcoming flagship design at the Photo Marketing Association tradeshow in the spring of 2007, and at the following year's show Sony revealed a few more details about the image sensor and stabilization mechanism it would use. With the Alpha A900 featuring a full 35mm frame-sized image sensor, Sony has joined a rather exclusive club. To date only four companies have offered full-frame digital SLRs. Of these, two - Contax and Kodak - have since left the digital SLR market altogether.
That leaves Sony in a head-to-head battle with the two giants of the photographic industry - Canon and Nikon. Each rival offers two full-frame digital SLRs - a mid-range model at around $3000 MSRP, and a pro model for double to triple as much. Sony looks to have rather stirred up the status quo by pricing its flagship at around the same as its competitors' mid-range models, but offering a specification that seems to lie somewhere in between the competing mid-range and pro models -- and in some cases such as sensor resolution, actually leads the field. The Sony Alpha A900 has a whopping 24.6-megapixel resolution from its full-frame Exmor CMOS image sensor -- the highest sensor resolution of any 35mm digital SLR yet announced. To handle all the data produced by the high-resolution imager, the Sony DSLR-A900 uses dual Bionz image processors, and this allows for five frames-per-second shooting for up to 11 JPEG or 13 RAW frames.
The sensor is mounted on a moving platter that allows for in-camera image stabilization, branded as SteadyShot Inside. That's another world's first for a full-frame digital SLR, and it's no mean feat when you consider that the sensor shift mechanism has to deal with the extra weight of a full-frame sensor. The various DSLRs seen to date that feature sensor shift stabilization all have significantly smaller 1.6x crop sensors. Sony rose to the challenge by designing a new more powerful sensor shift mechanism, and rates the Alpha DSLR-A900 as good for a 2.5 to 4-stop improvement.
The Sony DSLR-A900's body is constructed from five main magnesium alloy sections, and includes sealing to reduce ingress of moisture between the body panels, as well as at the various control dials and buttons. The Sony A900 has a Sony Alpha lens mount that also accepts Konica and Konica Minolta glass. A large pentaprism sits above the lens mount, both dictating the camera body's workmanlike visual aesthetic, and providing a very large and bright TTL optical viewfinder with 0.74x magnification. The rear panel features a large 3-inch LCD display with 921,600 dot resolution, equating to VGA (640 x 480) pixel with three R, G and B dots per pixel. This is used solely for reviewing of images, as well as for menus and status display; the Sony Alpha DSLR-A900 doesn't offer live view capability. There's also a small top-panel status LCD which indicates remaining shots and battery life, as well as the basic exposure variables.
 The Sony Alpha A900 offers ISO sensitivity from 200 to 3,200 equivalent, but is expandable to ISO 100 to 6,400 equivalent. Shutter speeds range from 30 to 1/8000 second, plus a bulb setting, and x-sync is 1/250 second (or 1/200 second when SteadyShot is enabled). Metering is achieved by a 40-segment honeycomb sensor, and you can also choose from center-weighted or spot metering modes. Focusing is achieved courtesy of a a nine-point phase detection autofocus system with f/2.8 dual center cross sensor, and there are also ten supplemental AF-assist points arranged adjacent to the main AF points. There's no built-in flash in the Sony A900, with the design instead offering a hot shoe and PC flash sync terminal to cater for external flash strobes and lighting setups.
The Sony Alpha DSLR-A900 has dual flash card slots, and hence can store images on either CompactFlash Type-I or Type-II cards (including Microdrives), or on Memory Stick Duo cards. The Sony A900 draws its power from a proprietary NP-FM500H InfoLithium rechargeable battery that's rated for about 880 shots per charge, to CIPA testing standards. Connectivity options include both USB 2.0 High Speed for computer connection, and both standard and high definition video. For standard-def, there's NTSC / PAL switchable composite video output, while high-def is achieved via an HDMI connection.
Sony A900 Pricing and Availability
Pricing for the Sony Alpha A900 is set at about US$3,000, with availability slated for November 2008. Pre-orders will be accepted online from September 10th. The product bundle includes the camera body, battery and charger, wireless remote commander, and eyepiece cup. There's also a range of software in the bundle: Image Data Converter SR, Image Data Lightbox SR, Remote Camera Control, and Picture Motion Browser. This last application is Windows-only, while the remainder are included in both Windows and MacOS versions.
Sony A900 User Report
by Shawn Barnett
It takes but a glance to see that the Sony Alpha A900 is unique among modern digital SLR cameras. The large, pyramidal shape behind the SONY logo suggests that a very large pentaprism glass element lies underneath. A quick glance through the viewfinder completes the impression: it's like a room in there, into which it seems you might fall if you're not careful. 35mm camera owners from the last century will find the Sony A900's viewfinder comforting, then quickly forget about it and begin composing with an impressive photographic tool.
Like its predecessor the Sony A700, the Sony Alpha A900 is big and boxy, not attempting to appear sleek, it looks more like a big industrial device, as cameras once did. Yet it fits well in the hand: a machine to the eye that is nevertheless well crafted for the human intended to use it.
Its weight is substantial, at 2.07 pounds (939g) without a lens, but with a battery and CF card (that's lighter than the Nikon D700 and just a little heavier than the Canon 5D); and it measures 6.1 x 4.6 x 3.2 inches (156 x 117 x 82mm). Add the Zeiss 24-70 f/2.8 zoom lens and the Sony A900 really gets heavy, coming in at 4.17 pounds (1,894g).

The Sony A900's front panel looks a lot like the A700, though the handgrip bulges a bit more into the hand, and the Mode dial is positioned straight and level, while the A700's was mounted at a slant. Missing from the front of the grip is the Grip-sensor that was part of the Eye-start AF system.
Just under the bright orange Alpha logo is the PC flash sync terminal, covered with a rubber flap. Like all other rubber flaps on the Sony A900, this terminal cover swings open and stays open, as it's hinged to the camera, rather than the rubber itself serving as a hinge. That means you don't have to fight with it as you make your connection.
The Sony A900's grip has a comfortable finger groove for the middle finger, in which the infrared Remote Commander sensor is nestled. The inside of the grip is indented for a better finger grip, as is the front of the camera between the grip and lens, which is fairly obvious in the photo above: a very nice touch that those with long fingers will appreciate. Textured rubber surrounds the grip areas both left and right of the lens. The bottom of the body on the left (on the right side in this image) is tapered to allow a more comfortable fit into your palm as you reach your fingers around to the lens barrel.

The rear of the Sony A900 is laid out identically to the Sony A700. Positions are slightly different, with the LCD taking up less of the overall space, mostly because there's more width overall. The left side tapers away just left of the LCD, somewhat minimizing the bulk of the bulge at the left, giving your nose a little break as well, as you move your right eye up to the viewfinder.

Shutter. Just left of the optical viewfinder, you can barely see a latch for the viewfinder shutter, which is wise to close when shooting on a tripod.
The Sony A900's LCD is the same resolution as was on the A700, with 921,600 pixels, and a transflective (both transmissive and reflective) design, meaning that in bright daylight you can still frame images. Checking exposure accurately is a little harder, but that's what histograms are for. Note that though it's a hot feature on many of the latest digital SLRs, the Sony A900 has no live view mode; however, there is a new Intelligent Preview mode that can serve on occasion, and do a few tricks. More on that later.
Note that though there are still infrared sensors beneath the optical viewfinder, these are only for turning off the LCD when you put the camera up to your eye; Eye-start AF is no longer a feature on the Sony A900.
The rear Status display also opens up the option to change many settings right on the screen. Just press the Fn (function) button and use the joystick above it to navigate around the screen. Pressing down on the joystick activates your selection, which you can modify with one or the other control wheel (the rear or front wheel). It'll take a little time to figure out which wheel is necessary for each item, unfortunately. Some use only the front, others use both.

Shown here with the big, beautiful Zeiss 24-70 f/2.8 zoom lens, the Sony A900 has a fitting, if high-dollar, mate. We shot extensively with this lens, and found it to be better than satisfactory, worthy of the A900. It also balances out the A900's big body. See our review of this $1,800 lens on SLRgear.com.

Body. The Sony A900's body is magnesium alloy, with large openings for the LCD and lens mount, as well as a cutout for the card door. The battery grip is also magnesium alloy, as shown here. The overall feel is quite solid. The body is sealed against moisture, as are the buttons and dials.
Now's a good time to point out that there is no pop-up flash on the Sony A900, due partly to the very large pentaprism inside. I think many of the Sony A900's intermediate owners will miss the convenience of a pop-up flash, as an external flash unit significantly raises the weight of an already large and heavy camera.
The Mode dial on the left has only full Auto, Program, Aperture, Shutter, and Manual modes, plus three user-programmable Custom modes; there are no Scene modes. To the right there's a new top status display, one that's very simple compared to most high-end digital SLR cameras. It displays only numbers, usually the shutter speed and aperture values, along with remaining frames available.

Top buttons. Buttons for White balance and ISO are harder to reach with your hand on the grip.
The other four buttons on the top control Exposure Compensation, Drive mode, White balance, and ISO, working in concert with the rear control dial. While the front buttons for Exposure compensation and Drive mode are easy to press, we found the other two a little harder, comfortable with neither the thumb nor forefinger without removing your hand from the grip.

Quality port doors.
The Sony A900's rubber doors are the best-behaved doors we've seen on any camera, swinging open and staying put, rather than flapping shut when you let them go. In clockwise order from the top left, they are Remote, HDMI, USB/Video out, and DC In.

Two card formats.
Sony A900 owners will have the option of using CompactFlash or Sony Memory Stick Pro Duo format. Unfortunately, switching between cards is not automatic when one fills up, as is common on other dual-card digital cameras; still, you can access it on the rear Status display, which turns into an onscreen menu when you press the Fn (Function) button.
Steady there, big boy. Though it's big, Sony managed to stabilize their 35.9 x 24mm, 24.6-megapixel imager. Click the icons in the lower left corner to see animation. Animation courtesy Sony Electronics.
SteadyShot INSIDE. Sony says many experts thought adding sensor-shift image stabilization to a full-frame digital SLR would be impossible, but they managed to get it done nevertheless. They're moving a very large sensor at high speeds, so it is quite an achievement. We haven't tested it in the SLRgear.com lab yet, but in casual shooting it seemed to work quite well. Sony expects it offer from 2.5 to 4 stops of exposure latitude.
Though all of us like seeing the stabilizing effects of Canon and Nikon's optical image stabilization through the viewfinder, we also like the five-bar meter that appears in the optical viewfinder to tell you just how much the SteadyShot system has to work.
The same mechanism activates at startup and shutdown to shake dust from the sensor, and a new anti-static coating has been applied to the outermost glass to reduce the amount of dust that can stick to the sensor.
Improved EV bracketing. Recent Sony digital SLR cameras were limited to only two automatic bracketing settings: +/- 0.3 EV or +/- 0.7 EV. The Sony A900 allows a full spread of EV options, up to +/- 2.0 EV, a more useful spread.
Interchangeable screens. The Sony A900 comes with a Type G focusing screen, but two additional screens are available: Type M and Type L. Type M, called Super Spherical Acute Matte is superior for discriminating between in-focus and out-of-focus objects, but unfortunately it dims the view somewhat, enough that it's only usable with lenses with maximum apertures of f/2.8 or more. Type L is the same as the very bright Type G, but with a grid for alignment or applying the rule of thirds. As with other digital SLRs that have interchangeable screens, the user has to set the type of screen in Settings menu 3.

Sensor. Sony's Exmor CMOS sensor is what gives the Sony A900 its magic. Above you can see how the A900's size compares to the Sony APS-C-sized sensor. Its pixels are actually larger than the Sony A700's 10-megapixel sensor, which should make for greater ISO sensitivity. The 24.6-megapixel sensor is more than just a sensor, however, as it includes the analog to digital (A/D) conversion circuitry right on board the chip. Over 6,000 A/D converters work in parallel to convert the image data before electronic noise can take hold. That makes for fast data acquisition too.
Processors. From there, the dual Bionz processors take the large files and crank them through fast enough to allow up to five frames per second capture, even in RAW + JPEG capture.
Power like that also allows for sophisticated functions like Peripheral Illumination correction, which fixes vignetting problems in many situations.

AF Sensor array. Blue points are the main AF points, oriented in the direction shown. The green blocks are the supplemental AF points.
AF system. The Sony A900 has a new autofocus system with nine primary autofocus points, and ten supplemental AF points. The user can select the nine AF points, but the ten additional points are used by the system to enhance the performance of the others when the Sony A900 is set to wide-area AF mode. A larger sensor in the center of the frame switches on when lenses of f/2.8 or larger are attached, allowing the system to take advantage of the larger aperture.
If you choose to use the Local AF mode, you can select from the nine AF points in the viewfinder with the joystick on the rear panel. Choose Wide, and the Sony A900 will choose for you. Choose Spot and the Sony A900 uses the more accurate center AF point. See the Optics section for a more detailed discussion of the Sony A900's AF system.
Lens compatibility. While the Sony A900 is compatible with the company's DT-series lenses, many of them, if not most, will vignette significantly with the full frame camera, since they were designed to deliver a smaller image circle to the company's APS-C format cameras. When a DT lens is mounted, the camera automatically captures an APS-C sized frame. Only four thin brackets inside the viewfinder indicate where the cropping will occur; it does not gray-out as seen on the Nikon D3. Incidentally, you can choose to shoot an APS-C sized image when a full-frame lens is mounted in Settings menu 4. The image captured is 11 megapixels maximum in that mode.
Storage and battery. The Sony A900 uses CompactFlash and MemoryStick Pro Duo cards, and the battery pack is the now-standard InfoLITHIUM NP-FM500H, a 7.2V 11.8Wh lithium-ion design.
An optional battery grip is available for the Sony A900, the Sony VG-C90AM, which is light in weight, but increases the height of the overall camera to exceed the height of the Canon 1D-series and Nikon D3.
Still, the battery grip has a few interesting features, including the full array of buttons on the rear that duplicate the controls accessible by the right hand on the camera itself. The Sony Alpha system also uniquely has the unusual second shutter release location that is positioned slightly down from the right corner of the grip, which changes the balance dynamic of the camera. It puts the lens in the same plane with the shutter whether you shoot vertically or horizontally, and does distribute the weight more evenly in both hands if you keep the camera upright and use a lighter lens. The downside is that with a heavy lens, like the Sony 24-70mm f/2.8, most of that weight rests in your left hand.
Physical Comparisons
Sony A900 vs Canon EOS 1Ds Mark III


Pro configuration: If you're going to be shooting for long periods, a battery grip is a good idea, but it makes the A900 bigger than the comparable EOS 1Ds Mark III. Naturally, you don't have to use the battery grip to enjoy all the quality and speed that the A900 offers.
Sony A900 vs Canon EOS 5D


New vs Old: The Sony A900 is a little bigger than the original Canon EOS 5D, now three years old. Both are large and deliver excellent images, but the Sony Alpha A900 captures quite a bit more detail.
Sony A900 vs Canon Rebel XSi

Big vs Small: Just for good measure, I thought I'd throw in the A900 next to a popular small digital SLR. The Sony A900 is a lot larger than the Canon Rebel XSi.
Using the Sony A900
Though the Sony A900 is large and heavy with the Carl Zeiss 24-70mm f/2.8 mounted, I quickly came to accept that burden and just enjoyed shooting with the camera. It's a little like moving from driving a nice car to driving a big truck. Handling is different, somewhat unfamiliar at first, even a little ungainly, but soon you're tooling along like you've been driving a big truck for years.
The big Carl Zeiss optic is beautiful, and both looks and feels terribly precise. Focus and zoom rings are tight and smooth. Even the metal and plastic lens shade is perfection. It mounts to the machined bayonet slot tighter than a piston ring and snaps briskly into place.
Its bulkiness almost makes the Sony A900 look a little more primitive, like some kind of early digital SLR design, or else a film camera from an earlier era. It certainly looks different from other cameras on the market, to be sure.
That big optical viewfinder is wonderful, and it does indeed seem to show 100 percent of the frame, to my surprise. Sometimes it was an unwelcome surprise, because I'm used to framing with tighter, less accurate viewfinders. Often when I thought I'd get away without stepping back to include just a little more of the subject's boundaries in a tight shot, I found that the Sony A900 was instead quite faithful to what I saw in the viewfinder. Gone was the slop I had come to count on from other digital SLRs, whose viewfinders seldom show more than 95 percent of the frame.
Controls. Most controls are well-placed, and the dials and wheels have the appropriate resistance. They're not too firm and not too light, and they don't feel cheap. The mode dial is also quite firm, locking into position well. Though I seldom expect much from joystick controls, the Sony A900's joystick is just right. You can toggle in four directions, and press down to activate many controls. It's especially useful for moving the focus point around in a hurry, as well as for navigating the Function menu.
Two controls are not perfectly placed, though. One is the Function button itself. It's a long reach from the joystick to the button, making the onscreen menu more difficult to use than it should be. Also vexing is how after making a change to a menu item, you're not returned to the Function menu display to make another selection; instead you're dropped back into the Status display. If you want to change more than one item, you'll have to make that reach to the Fn button again.
The other occasional problem control is the Depth-of-field preview button, which I have set to serve as the Intelligent Preview button. I too frequently press this button when shifting the heavy A900 from hand to hand, or while turning it to shoot in vertical format. Intelligent preview exposures take a few seconds to expose and appear, meaning that the camera is occupied for those seconds; more dangerous is that the camera will continue to display the image for some time, waiting for input, thus draining the battery without my knowledge.

Intelligent preview. Sony's innovative use of a limited RAW file to create the A900's Intelligent preview is useful in a number of ways. Though it's meant to be used to subtly tweak a sample image before making the real exposure, I found myself using it more often as a substitute for Live View mode when I couldn't get my eye to the viewfinder. I just pressed the Depth-of-field button to make sample exposure after sample exposure until it was framed just right, then pressed the shutter release. Intelligent preview is really better used for tripod work, where your framing is already set. It's designed to let you pick just the right white balance, exposure compensation, or DRO mode. If you're in Aperture priority mode, you can also adjust your aperture -- though you won't see a depth-of-field change; it's not that good. Similarly, you can adjust Shutter speed if in Shutter priority mode. Of course in Manual mode, you can adjust everything. Intelligent preview is pretty useful.
Many Sony A900 users will wonder why they can't just save the image they've tweaked, rather than take another exposure. The simple answer is that the A900 only captures a very limited-resolution RAW file to make quick, on-camera processing easier, thus delivering an adjusted image to the LCD as fast as you need it. If you accidentally captured that perfect smile when you pressed the Intelligent preview button, though, you'll just have to say goodbye to perfection and try again.

Small AF area.
Shooting. Despite its size, the Sony A900 is really fun to shoot. The big viewfinder makes looking around in your potential image more like detail work than a rough framing job, as it is with most digital SLRs. You can carefully consider what's in focus, and select another focus point by moving the joystick (provided you've chosen to use Local AF area mode) to another position. As with the Canon 5D, the diamond-shaped AF array is small for the overall viewfinder area, which isn't as good for portrait compositions as you'll find in the A700 or Canon 40D, for example, as it's harder to get an AF point close to one of the subject's eyes in a head-and-shoulders shot.
The shutter sound tells of a very large mirror, one moving as fast as its large size will allow. We're told that the mirror is extra large not just for the full frame, but also to deliver that 100% viewfinder area.
Mirror. The Sony A900's mirror lifts rather than swings up thanks to a special hinge. Click the small mirror icon in the lower left corner to see animation. Animation courtesy Sony Electronics.
The mirror lifts, rather than flips up. It's a pretty cool compromise, necessary to accommodate the large SteadyShot engine, we're told, while still allowing that large mirror. The sound is just a simple click-click, with no winding sound, so it feels nostalgic and does the job without a lot of fanfare. Viewfinder blackout time is supposed to be improved, but it's still a little slower than I like. Again, it's a big mirror.
The Sony A900 is also able to shoot up to five frames per second, quite a feat for a 24.6-megapixel camera with a full-frame sensor. Its 1/8,000 second shutter speed makes it an impressive action camera, rivaling its more expensive high-res competition, the Canon EOS 1Ds Mark III, which also captures five frames per second. The shutter mechanism is rated for 100,000 cycles.
Checking. Seeing whether you got the shot after capture is key, and of course the Sony A900's high-res 3-inch LCD really helps on that score. You always have to be careful with transflective displays, however, especially in sunlight. This can be complicated by using DRO modes, which, combined with the transflective display's metallic look, can make you think a shot is washed out more than it is. You can get used to this, and adjust accordingly, as I have, but checking the histogram is also a good habit, as is taking a few extra shots or shooting RAW when the work is critical.
Touching the Custom button (marked with a C) toggles on the Histogram screen, along with most of the exposure data. You get not just a luminance histogram, but red, green, and blue as well to help you gauge color casts.
You can zoom in by pressing the AF/MF button and turning the rear command dial. Zoom level starts at 1.2x and goes to 19x.
One disadvantage to the Playback system on a 24.6-megapixel camera is that it's very slow to bring an image up, especially if it's still writing to the card. I've pressed the Playback button a second time, and then a third, only to have the image finally flash to the screen after three seconds, then disappear for another two seconds, then reappear. Sometimes it gets even worse before I remember to just wait five or six seconds to see where the camera is in the cycle.
Once images are saved to the card, flipping between them is easy, and very fast. Just don't get stuck in Index mode, activated with the Display button. It takes some time to bring up those five thumbnails across the top. It's convenient if you have time, but not if you don't.

Tricked out. Thought I'd include a little eye candy, with the Sony A900 outfitted with a Sony 70-200mm f/2.8 G, the Sony HVL-F58AM flash, and the VG-C90AM battery grip. With two batteries in the grip, the combination weighs 7.63 pounds (3,464g).
The function of the front and rear control dials varies from menu to menu, which can often leave you spinning the dial in vain waiting for something to happen. Sometimes it's one dial, sometimes it's the other, and sometimes it's both. In cases where only one dial controls a given function, it would make more sense for Sony to allow both dials to control the function.
Size has a price. There are those who go for the biggest and the best, and they're likely to slap down their largest credit card on the Sony A900 for 24.6 million little reasons. But while they're at it, I suggest they check their computer hardware and either upgrade or at least invest in redundant, multi-terabyte disks, because the Sony A900's files are huge. A typical outing for me is filling a 4GB card in a hot hurry. Some of that's shooting RAW, some of it is just the JPEGs I shoot, which average from 7 to 18MB each. Yes, I said 18MB.
Thankfully, Sony at least planned for the larger files and created a USB download pathway that is probably the fastest we've ever tested, moving 12,928KBytes per second. Still, when you take as many test shots as we do, it's a huge ordeal to move all these images around. The sample photos we've posted total almost 4GB of data.
Sony A900 Image Quality
I shot the Sony A900 for about two weeks, and some of that time I shot the Canon 1Ds Mark III, it's only resolution rival in this format, alongside. I don't need to tell those who've used a heavy pro camera what an investment that is in time and exertion. But I love cameras, so I'm not complaining.
Before I continue my simple analysis, which is bolstered by the other, more in-depth tabs to this review, remember that the Sony A900 is a $3,000 digital SLR intended for both pros and enthusiasts, while the Canon 1Ds Mark III is an $8,000 camera really only meant for pros.
First, the Sony A900's image quality is truly awe-inspiring. Opening a file in Photoshop and hitting Command + to get to 100% reminds me of that scene in Blade Runner when Deckard uses the Esper photoanalysis machine. If you know the film, you'll remember that he finds tremendous detail in the print photograph from the year 2019: "Enhance 57 to 19. Track 45 left. Stop. Enhance 15 to 23. Give me a hard copy right there." In the end, he's found a reflection in the mirror that gives him an important clue.
While I'm not doing my searching via voice command (that old technology that didn't take hold for most), it takes six enlargements to make it from 12.5 percent in portrait orientation to the 100 percent I need to check focus. The image is 4,032 x 6,048, for goodness sake.

Wide detail.
Most astonishing was to take a 24mm wide-angle photo of the World of Coke in Atlanta from across a large field and be able to almost recognize faces standing near the building. You'd actually be able to recognize them, I'm convinced, had I not focused on the buildings in the background. And look at the detail in those buildings! Take anything to 100 percent, and it doesn't seem like a big deal, of course, but start dragging around in the frame once you're there, and you start to appreciate just how much the Sony A900 has captured.
Now let's compare the Sony A900 to the Canon 1Ds Mark III. I shot both with a Sigma 70mm f/2.8, the lab lenses we use for SLRgear.com testing to get more reliable results. In terms of JPEG shots, the Sony produces larger images that are sharper, especially with the defaults from both cameras, but if you bring both to 100 percent and move around in the images, you'll find they're nearly the same. After all, it's only 3.5 million pixels between the two, and when you get out to 21 megapixels, adding a few more doesn't have that large of an effect. Detail is detail, though, and the Sony does appear to give you more at low ISOs. Some of the difference in the images below is in the sharpness, heavily dependent on the default sharpening, and the presence of luminance and red channel noise from the Sony A900, where the Canon 1Ds Mark III does a little better with those artifacts.
Here are a few samples to get you started, but be sure to explore the full test results on the other tabs, where we go into much greater depth.
Sony A900 Detail vs Canon 1Ds Mark III


Sony A900 High-contrast detail vs Canon 1Ds Mark III


Sony A900 ISO series vs Canon 1Ds Mark III


Analysis. Does the superior resolution of the A900 overcome some of the noise issues we see? Yes and no, but what makes a bigger difference is turning down the A900's sharpening all the way and sharpening later in Photoshop, where you have greater control, something the 1Ds's defaults are already tuned for. Of course, you can also shoot RAW and process those for greater quality from either camera.

ISO 800. To put the above shots in perspective, ISO 800 didn't hurt this shot much, taken handheld in low light. Had I not looked at the EXIF header, I wouldn't know it was ISO 800. Taken at 24mm f/2.8 at 1/30 second, it's also testament to the high quality of the Sony Carl Zeiss 24-70mm f/2.8.
We've done a more extensive analysis with comparison shots in the Exposure section, and delved deeper into the Sony A900's High ISO noise reduction versus that of the 1Ds under the sub-tab titled High ISO NR. Overall, the 1Ds comes out on top with greater detail, but it's darn close.
What's sure is that the Sony A900 is a fit rival for Canon's best camera, which costs $5,000 more. I had a great time shooting with the camera, and almost as fun looking at the images afterward. The Sony A900 is the current resolution leader in 35mm-equivalent digital SLR cameras, and it doesn't look like that's going to change soon. We'll have to see whether the competition has anything else up its sleeve to beat this. As the last set of pictures above shows, it's not all about resolution, but high ISO performance is a very important factor as well.
What will be interesting is seeing the photos people will be able to make with such a high resolution digital camera.
As I've said of other Sony digital SLRs, what's nice about them is that they're relatively easy to use, and simple to learn as well. A well designed menu system, along with the Quick Navi screen make tweaking settings fast and clear, and now the new Intelligent Preview mode makes short work of complicated shots, making it a little easier to pay attention to the small details as you set up a shot.
Shooting with the Sony Alpha A900 can be summed up in one word: Satisfying.
Sony A900 Conclusion
| Pro: | Con: |
|---|---|
|
|
Sony started the year promising a lot for their flagship camera. We didn't have a name, nor a long list of features, but we did know that the sensor would be a 24.6-megapixel design that was expected to impress. It certainly has done that.
The Sony A900 is a formidable camera. It's big, which won't work for everyone, but I found it more than bearable with my medium-sized hands, and even my daughter had no trouble hefting the A900 with the 24-70mm f/2.8 attached and firing off a few frames.
If you want the most pixels in a small package, the Sony A900 is where you'll find it. It's bulky, but less so than the more expensive 1Ds Mark III, and that makes it easier to bring along. I enjoyed shooting with the 24-70mm f/2.8 Carl Zeiss so much that I recommend it if you can afford it. I recently attached the 18-70mm kit lens that comes with the A200, and the A900 felt quite a bit more bearable, though I can only imagine that high-res sensor would reveal all the flaws in that less-expensive lens.
Image quality is Sony's best so far; not just in terms of resolution, but also in controlling their impulse to squelch all noise at the expense of detail. You can even turn off the high-ISO noise suppression that was once inaccessible.
Not only is the viewfinder so big and beautiful that you think you might fall in, the image quality has the same effect when you view the images on your computer. With the ability to capture full frame images at a high clip, the Sony A900 is one impressive image maker, and a certain Dave's Pick.

Design
Sony Alpha A900 Design
Roll-over the various controls and features with your mouse for a brief description.

Sony A900 Front View

Sony A900 Left Side
(Shown here with the excellent Carl Zeiss 24-70mm f/2.8 Vario-Sonnar lens.)

Sony A900 Right Side

Sony A900 Top View

Sony A900 Back View

Sony A900 Bottom View
Operation
Sony A900 Operation
Sony A900 Top Panel Status LCD
 The Alpha A900 is the first Sony SLR with a top panel status LCD. This rather small, monochrome LCD displays basic status information such as the current Shutter Speed, Aperture, Exposure Compensation, Battery Status, etc. We like these displays as they give a quick overview of the camera's settings without having to refer to the larger, more power-hungry main LCD when trying to conserve battery life. They also come in handy while adjusting settings when the camera is below eye-level, such as on a tripod. See the illustration below for details on the information displayed.
|
Sony A900 Top Panel LCD Display Info
|
|
|---|---|
 |
|

|

|
Sony A900 Record Mode Displays
 The Sony A900's rear-panel, 3.0-inch, 921,600 pixel TFT color LCD monitor is for image review, status display, and menu display. Unlike the A300 and A350, the Alpha A900 doesn't offer any form of live view mode, so the LCD can't be used to frame shots. We do really like the wealth of camera information that the A900 makes available on its rear screen, especially since the top panel status LCD is so small and basic.
|
Sony A900 Main LCD Display Screen Info
|
|
|---|---|
 |
|
|
1 - Shutter Speed |
14 - Aperture Value |
Large- and Small-Type Options
Sometimes you don't need to see every last detail about the camera's operation, but rather prefer to concentrate on just the most important settings. Like other Sony SLRs, the Sony A900 has two different display options, that apply to both the horizontal and vertical formatted data screens. The large-type/low-density option drops the details on Flash mode, Metering mode, AF mode, Card type, Creative Style, and Contrast, Saturation, Sharpness, Brightness and Zone settings.


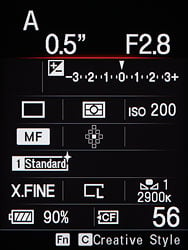
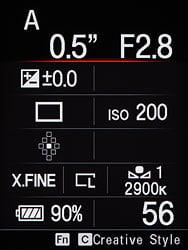
Sony A900 Intelligent Preview
 New for the Alpha 900 is what Sony calls "Intelligent Preview", which simulates the results of changes in settings in real-time, on an pre-capture image that isn't stored on the memory card. It can simulate the effects of white-balance adjustment, exposure, DRO settings, etc. The animation to the right shows the effect on exposure of changing the shutter speed, for example. Some things it can't simulate however is the blurring effect of a slow shutter speed with a moving subject, or the depth-of-field change when adjusting aperture.
Sony A900 Playback Mode Displays
 The Playback button on the rear panel accesses Playback mode, where you can review captured images. Pressing the DISP button cycles through displays with information overlay on or off. The Histogram button displays a RGB+L histogram along with recording data and any areas with lost highlights or shadows are illuminated. Pressing the Index button cycles through 25, 9 or 4 frame index views and individual images can be selected using the multi-selector joystick. Images can be zoomed by using the Enlarge button, and magnification can be adjusted up to 19x (depending on image size) using the rear control dial, or a zoom box can be defined using the multi-selector joystick. Enlarged images can also be scrolled in the X or Y direction using the joystick.
Optics
Sony A900 Optics

Alpha lens mount. The Sony A900's Alpha lens mount is compatible with the full array of Alpha lenses, both screw-drive and electronic autofocus models. A crop mode is available for DT lenses designed for APS-C sized sensors, but the manual cautions that exposure accuracy may suffer with DT lenses.
The Sony A900 features a bayonet lens mount, which accommodates a wide range of Sony and Konica Minolta lenses. The Sony A900 is sold body-only, so no kit lens is offered. A small button on the front of the camera releases the lens from its mount, so it can be turned and removed.
All current Sony lenses may be used with the A900, but DT (sub-frame) lenses may require exposure adjustments due to the corner darkening produced by their sub-frame image circles. (The camera does support an APS-C exposure mode, that crops a sub-frame area from the larger sensor, but be prepared for possible exposure issues.) All Konica-Minolta lenses are compatible with the Sony A900 as well, but note that the 1x-3x Macro Zoom lens isn't compatible with the A900's Super SteadyShot image stabilization: Turn that feature off when using one of these lenses.
The Sony A900's CMOS sensor is the same size as 35mm film, so the angle of view at any given focal length will be the same as on a 35mm camera.
Sony Alpha 900: Upgraded Autofocus System
The Sony A900 marks a new level of autofocus sophistication for Sony. At first glance, the viewfinder might look like a step backwards, as there are fewer AF points visible in the viewfinder than we've seen in previous Sony SLRs like the A700. It turns out though, that there are now two classes of AF points: Nine Primary AF points are marked in the viewfinder and illuminate to show subject acquisition. In addition, 10 new "Supplemental" AF points are arranged between and/or around the Primary points,. As their name suggests, the Supplemental AF points assist with autofocus operation, but aren't selectable under user control, and don't illuminate in the viewfinder when they've locked onto a subject. The Sony A900's sensor pattern is shown in the illustration below.

In the diagram above, the blue rectangles with black marks in their centers are the Primary AF points, while the green rectangles mark the Supplemental points. Sony's been a little cryptic about the function of the Supplemental AF points, but the way they surround and fill in between the Primary ones suggest that they can provide additional position and velocity data for dynamic AF tracking.
It's not entirely clear, though, how the two types of AF points interact during autofocus operation: For instance, if the closest/most prominent subject detail falls under a secondary AF point, will it lock focus on it? Or, are the Primary AF points the only ones that can initially lock focus, with the Secondary AF points only helping with subject tracking during continuous AF operation? (Note that the Sony A900's manual points out that the Supplemental AF points are only active in wide-area AF mode.)
When it comes to subject tracking, more AF points are definitely a good thing, as they give the camera's autofocus system a much more comprehensive view of subject distance across the frame. On the other hand, as we've seen in the case of Nikon's D300 and D700 SLR models (which have no less than 51 AF points), a large number of AF points can actually slow shutter response in dynamic-area AF mode.
The cluster of AF points right at the center of the frame is typical of most SLRs, but Sony packs more in than many systems do. There's a "dual cross" array, a group of four sensors that create an expanded area of AF sensitivity, responding to both horizontally- and vertically-oriented subject detail. There's also a single, large, horizontally-oriented sensor that provides significantly greater AF accuracy, but only for lenses having maximum apertures of f/2.8 or larger.
As is often the case with full-frame SLRs though, the Sony A900's AF array covers a bit less of the total frame area than those of the A700 and other Sony sub-frame DSLRs, so subjects will need to be closer to the center to be covered by the AF system.
Sony A900 Autofocus Area Options
 Autofocus Area also has three options available through the Function or Record menu: Wide, Spot, and Local (manual setting). The default option is a nine-point Wide Focus area, indicated on the Quick Menu display by an array of dashes inset within four widely-spaced brackets in the viewfinder image. You can override the chosen AF mode by pressing the Spot AF / OK button in the center of the Multi-controller, which defaults to the more accurate center AF point (the latter indicated by a target box in the center of the viewfinder). Wide AF bases its focus on the most prominent subject detail in the portion of the image that falls within the AF brackets. Spot mode bases its focus on the very center of the frame, where the square target resides. The Local setting is Sony's terminology for a manual AF area selection, and lets you manually set the main AF point by using the Multi-controller to highlight one of the nine Primary AF points. The active AF area is briefly illuminated in the viewfinder. New for the A900 is autofocus micro adjustment, which offers +/-20 step adjustments for up to 30 lenses to address front- and back-focus issues. (Big kudos on that feature. We're seeing it on more and more SLRs, the A900 marks the first time we've seen this in a Sony camera.)
Sony A900 Autofocus Modes
The Sony A900 has three main focusing modes, namely Single-shot, Continuous, and Automatic. In single shot mode, focus is set when you initially half-press the shutter button (or trigger focus via the AF/MF button, if you've configured it to act as a focus lock control via the AF/MF option on Custom Settings Menu 1). When focus lock is achieved, a viewfinder indicator illuminates, and the camera beeps to let you know that the subject is in focus. In Wide Area mode, the AF point selected illuminates briefly as well, so you tell what the camera has locked onto.
In single-shot mode, if the subject moves, the focus won't shift to track it. Conversely, in Continuous AF mode, when the shutter button is half-pressed and held, the camera automatically switches to Wide Area AF (if it wasn't already in that mode), and will continuously adjust both the focus setting and its choice of AF points to follow the subject. In this mode though, the selected AF points won't illuminate, and there's no audio signal to let you know when the subject is in focus.
Auto AF mode lets the camera start out in single-shot AF, but then switches to Continuous AF if it detects subject movement after the initial focus lock. When using the A900's continuous shooting option in conjunction with Auto AF mode, the first shot of a series will be captured in single-shot AF mode, but the camera will automatically switch to Continuous AF mode for the second and subsequent frames in the sequence.
Sony A900 AF Assist
Like the A700, the A900 has a very bright LED built into the body, that projects a pattern onto the subject for better focusing in dim light. The pattern projected by the LED is a significant help when dealing with low-contrast subjects. Thanks to the projected pattern, the Sony A900 can focus on a blank wall in total darkness. (Not that a blank wall would make a particularly interesting subject, but if it can handle that, it can probably handle most any normal subject.)
SteadyShot INSIDE: Sony A900 Anti-Shake
 The Sony A900 also employs Sony's SteadyShot INSIDE (their latest branding; previously referred to as Super SteadyShot) anti-shake technology, which uses a highly sensitive angular rotation sensor and Smooth Impact Drive Mechanism (SIDM) to move the sensor assembly itself to counteract camera movement, rather than the conventional approach of moving an optical element inside the lens. This body-based anti-shake approach is based on technology Sony acquired from Konica Minolta, but Sony claims that it has been improved significantly since that time.
Sony claims that the SteadyShot INSIDE anti-shake system in the A900 provides a 2.5 to 4-stop reduction in the blurring produced by camera shake. Translating that into real-world shutter speeds, a two-stop improvement means that a shutter speed of 1/30 second would give you the same resistance to blur from camera shake that a speed of 1/120 would without anti-shake. A 4-stop improvement would mean you could shoot as slow as 1/8 second and get the same results (blur-wise) as when shooting at 1/120 second unaided. Even the lower end of the specified range of effectiveness means a pretty significant improvement in one's ability to hand-hold long exposures.
When SteadyShot INSIDE is activated, the SteadyShot scale on the right side of the viewfinder display indicates the degree of stabilization. A downside to Sony's body-based SteadyShot approach is that while you can see the results of stabilization on competing lens-based designs, you have only this scale to tell you how the A900's SteadyShot mechanism is doing. SteadyShot minimizes the effect of blurring caused by slight camera movement, which is more noticeable at long focal lengths.
Sony A900 Anti-Dust Technology
To help combat dust particles on the imaging sensor from changing lenses, Sony included both an anti-static coating on the sensor filter and an anti-dust vibration to automatically shake the sensor each time the camera is shut off. The anti-static coating may be of some benefit, but we frankly don't expect much from the A900's vibration cycle: It uses the same motion actuators as the image stabilization system. This means that the peak vibration frequency is probably on the order of a few hundred hertz (cycles per second). That's not nearly fast enough to produce strong enough g-forces to shake loose most dust particles; only the very largest pieces are likely to be dislodged by the SteadyShot system's relatively leisurely vibration. (Other vibration-based dust removal systems use frequencies in the tens of kilohertz: 20,000 to 50,000 cycles per second.)
Lens
The Sony Alpha A900 does not come with a kit lens, and since optical performance varies with the lens used, this section is intentionally left blank.
The images above were taken from our standardized test shots. For a collection of more pictorial photos, see our Sony Alpha DSLR-A900 Photo Gallery .
Exposure
Sony A900 Exposure Options
The Sony A900 offers all the exposure options you'd expect in a high-end prosumer SLR, plus a few Sony-specific options, and some nice increases in control over previous models. Available exposure modes include Program AE, Manual, Aperture Priority, and Shutter Priority modes with shutter speeds from 1/8,000 to 30 seconds available, as well as a Bulb setting for longer exposures. The x-sync speed for flash photography is also an impressive 1/250 second with the SteadyShot image stabilization disabled, or 1/200 second with it activated.
A very nice touch that's common on a lot of SLRs these days, yet welcome nonetheless, is that, while in Program AE mode, you can rotate either the front or rear control dials to select different combinations of aperture and shutter speed settings than those normally chosen by the autoexposure system. (That is, if the automatic program would have chosen 1/125 second and f/5.6, you could instead direct the camera to use 1/60 at f/8 or 1/30 at f/11, to get greater depth of field.) This is a very handy option for those times when you need some measure of increased control, but still want the camera to do most of the work for you. We personally use this capability more than Aperture- or Shutter-priority metering in our own shooting. An added wrinkle in the Sony A900 is that turning the front control dial sets the mode indicator to PS (program shift/shutter priority), while turning the rear control dial sets the indicator to PA (program shift/aperture priority), so you can take control of either shutter speed or aperture, letting the camera make the appropriate choice for the other variable.
Another feature that's also pretty common, but still very welcome is the electronic analog exposure display visible in the optical viewfinder data readout as well as on the rear-panel shooting display when the camera is in Manual exposure mode. This shows the amount the camera thinks an image will be over- or underexposed, based on the settings you have selected, and helps you find the best exposure for the subject.
Sony A900 ISO Range
ISO sensitivity ranges from 100 to 6,400, adjustable by pressing the ISO button on the right side of the top panel of the camera and then using the up/down arrow directions of the Multi-Selector, or either the front or rear control dial to select values from those shown on the rear display panel. The front control dial increments the ISO number in one-stop increments (a factor of two between readings), while the rear control dial adjusts in increments of 1/3-stop. The native ISO of the Sony A900's sensor is 200, but an ISO 100 option is available as a range extension for times when you need the slower shutter speeds ISO 100 would provide. Expect poorer tonality at ISO 100 though. Likewise, the maximum "normal" ISO on the A900 is 3,200, but an extended value of 6,400 is available, albeit with significantly higher levels of image noise.
At ISO settings of 1,600 and above, the Sony A900 gives you four choices for high-ISO noise reduction. This setting defaults to Normal; options of Low, High, and Off are also available. - And big kudos to Sony for listening to owners (and reviewers) and letting the Off option actually turn off noise reduction, at least in the RAW files (and apparently in the JPEGs as well). This is a huge benefit for those who want to use third-part noise reduction software on the A900's RAW file output, and brings the A900's RAW files in line with the philosophy of RAW files containing truly "Raw" data. For more discussion of this refer to the Sony A900 Noise Reduction tab of this review.
Sony A900 White Balance Options
White balance modes on the Sony A900 include Auto (usable from roughly 3,000K to 7,500K), Daylight (5,300K), Shade (5,300K), Cloudy (7,500K), Tungsten (2,800K), Fluorescent (no color temperature listed, since fluorescent light spectra don't translate well into Kelvin temperatures), and Flash (6,500K). Direct Kelvin temperature settings are also available, as is a Custom white balance option, for setting white balance from a white or grey card.
In most of the white balance modes, you can fine-tune the color in steps of about 10 mireds. You can use either the left/right arrow directions of the Multi Selector, or the rear control dial to make these adjustments. Adjustments in the + direction make the image more reddish; those in the - direction make it more bluish. We like this feature a lot, as we often wish we could use one of a camera's standard white-balance settings, but tweak it to be just a bit warmer or cooler than the default. To be sure, some experimentation is required to familiarize yourself with the impact of these "tweaked" white balance settings, but having them available is a big plus. In Fluorescent mode, the left/right arrows select between different types of fluorescent lighting, and no fine-tuning is available within each type.
In Kelvin white balance mode, the up/down directions on the Multi Selector adjust the Kelvin temperature, while the left/right directions step through simulated color filters, covering a range equivalent to that from Magenta 9 to Green 9 in the CC (Color Correcting) filter scale. Increments between steps are roughly equivalent to a CC number 5 filter.
As usual, Custom white balance is set by selecting Set from the Custom White Balance dialog screen, pointing the camera at a neutral white or grey card under the lighting you'll be shooting in, and then pressing the shutter button. If the white balance you've captured is good (the camera will warn you if it isn't), you'll be given an option to store it in one of three Custom White Balance registers.
You can also bracket white balance exposures (see the Autobracketing discussion below). Two options are available; Hi which shoots with steps of approximately 20 mireds between shots, or Lo, which shoots with steps of 10 mireds.
Sony A900 Metering Options
The Sony A900 offers three metering modes, selected via the Metering Mode lever on the back of the camera: Multi-segment, Center-Weighted, and Spot. The default Multi-segment metering mode takes readings throughout the image to determine exposure, using an array of 39 hexagonal segments covering the bulk of the frame, and one large 'segment' that covers the rest of the surrounding area. Center-Weighted gives precedence to the center of the image while reading the whole frame. Spot metering, useful for high-contrast subjects, bases the exposure reading on the very center of the image, letting you set the exposure based on a small portion of your subject. You can lock an exposure reading by pressing the AE Lock button on the back panel. Halfway pressing the Shutter button also locks both exposure and focus, but only in autofocus mode.
The A900's Exposure Compensation adjustment increases or reduces the overall exposure from -3 to +3 exposure equivalents (EV) in one-half or one-third step increments, in all exposure modes. An Auto Bracketing feature captures multiple shots with different exposure, white balance, or other parameters: See the section on Bracketing below for more details.
Sony A900 Drive Modes
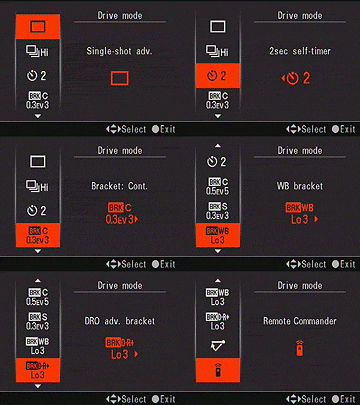 The Sony A900 offers a variety of shooting modes via the Drive button on the right side of the camera's top panel. Pressing this control brings up the Drive mode setup display on the camera's LCD, after which you can use the left/right and up/down arrows of the Multi Selector or the front and back control dials to make selections. The front control dial steps through the main modes, the rear control dial selects options within each mode.
Drive options include single shot, continuous shooting (high or low speed), self timer (options of 2 or 10 seconds), Continuous bracketing, Single Shot bracketing, White Balance bracketing, DRO mode bracketing, Mirror Lockup, and Remote Commander.
Sony A900 Bracketing Options
The Sony A900 offers an unusually wide range of bracketing options. There's of course the exposure bracketing found on most cameras, but the A900 goes a bit further than many. It offers step sizes of 0.3, 0.5, and 0.7 EV with either three or five shots in the bracket, but also offers a step size of 2.0 EV, with three shots in the bracket, for users interested in HDR (High Dynamic Range) photography. The A900 offers separate settings for continuous-mode exposure bracketing or single-shot bracketing. In both modes, the fact that you're bracketing is indicated in the viewfinder by a "br" indication, and by lines above the exposure scale showing what exposure biases are going to be used. In single-shot mode, each line disappears when its corresponding exposure has been captured. (Nice, you always know where you're at in an exposure series, if you get interrupted for any reason.) Bracketing order can be changed via an option on the Setup menu, the default being 0 > - > +, with an option to make it - > 0 - +.
White balance bracketing always involves 3 shots, one at the default white balance setting, one with the white balance "tweak" set to a more blue color cast, one with it set to a more reddish color cast. The WB Lo bracket option uses step sizes of 10 mireds, the WB Hi option uses steps of 20 mireds. White balance bracketing occurs only in single-shot mode, and there's no indication in the viewfinder where you are in the sequence. (That we could see, anyway.) The white balance bracketing is a nice feature, but we'd like to see more options for step size and (particularly) number of shots in the series. It'd be nice to be able to shoot a bracket of 5 shots in situations with tricky lighting. (And would be nice to do it in continuous drive mode too - see the parenthetical note two paragraphs down.)
The A900 also lets you bracket the effects of the Dynamic Range Optimizer (DRO) function, in three steps. As with the WB bracketing, Hi and Lo options provide greater or lesser amounts of bracketing, but it isn't clear how the steps compare to the manual adjustments available via the Quick Menu. As with WB bracketing, DRO bracketing is only available in single step mode, and there's no indication of where you are in the sequence.
(As a side note, we really wish that the single/continuous option could somehow be set up in parallel with WB and DRO bracketing: It'd be so much easier if you could just press the shutter and have the camera fire off 3 shots. Some cameras set bracketing separately from drive mode; we think that's the right way to do it: Let the user decide whether they want to shoot continuously or one shot at a time separately from the type of bracketing they're wanting to do.)White balance bracketing can occur in the same 3 or 5-shot brackets, with the step size between shots being either 1, 2, or 3 of the white balance "fine tuning" steps. (As noted above, each such step corresponds to 10 mireds of color-temperature adjustment except when in Fluorescent mode, which offers larger steps.) Normal white balance bracketing can thus cover a range from +/- 10 mireds (3 shots, 1 step each ) to +/- 60 mireds (5 shots, 3 steps of variation each).
Sony A900 Creative Style Options
The Creative Style menu has been a fixture on Sony SLRs for a while now, but the A900 takes the feature a couple of steps forward. The Creative Style option found on either the Quick menu (accessed via the Fn button and multi selector, or via the C (custom) button if the Creative Style menu has been assigned to it) or on the first screen of the Record menus offers a selection of presets for varying subjects, including Standard (faithful color reproduction), Vivid (increased contrast, saturation and sharpness), Neutral (reduced contrast and saturation), Portrait (optimized skin tones), Landscape (optimized daytime outdoor scenery), and Black & White.
 The six options just mentioned are available by default in the main Creative Style list. There are another seven options though, that can be swapped in for any of the six defaults. The screen shot at right shows this being done, the "Clear" style being substituted for the Standard one. With the Creative Style menu up, you can use either the multi selector or the control dials to move right (selecting the name of the style at the bottom of the right pane), then move up or down to step through the full list of creative styles available. Exit the Creative Style menu or just press the shutter button, and whatever choice was selected will remain.
The full list of Creative Styles is quite extensive. Besides the six named above, there are Clear (for "capturing images in a clear tone with limpid colors, suitable for capturing radiant light"), Deep (for "capturing images with deep and dense color expressions"), Light (for "capturing images with bright and uncomplicated color expressions, suited to capturing refreshingly light ambience"), Sunset (emphasizing the red colors of sunsets), Night View (reducing contrast to render night scenes more faithfully to the way our eyes see them), Autumn Leaves (highlighting red and yellow tones), and Sepia (monochrome, but with a brownish "sepia" color cast).
Within each Creative Style, you can adjust a number of imaging parameters, including contrast, saturation, sharpness, brightness, and something Sony calls "Zone". All the options seem pretty self-explanatory, but Zone is a little odd, and Sony doesn't give much of an explanation. The range of settings for Zone run from -1 to +2. It seems that Zone adjusts the A900's tone curve: Higher settings shift the image's histogram to the left, to prevent overexposure of highlights, while lower numbers seem to push it to the right, to prevent shadows from plugging.
Interesting to note is the way the Sony A900 lets you arbitrarily assign Creative Style options to the 6 preset "slots" is that you can have more than one of the slots occupied with the same basic preset, but with different tweaks applied to it. For instance, you could have two versions of Standard programmed into slots 1 and 2, with the first being the camera's default, but the second having contrast and saturation boosted one notch each, and sharpness dialed down. This makes it easy to create a number of different presets that uniquely suit your shooting style and subject matter, and be able to switch between them rapidly while shooting.
 Sony A900 Flash
Thanks to its huge pentaprism, the Sony A900 has no built-in flash. (Sony felt it simply would have added too much bulk to an already large bulge on the camera's top. Plus, with some of the large full-frame lenses is likely A900 to be used with, a built-in flash would be bound to have problems with shadowing.) So the only option for flash on the Sony A900 is an external unit.
In that, you'll largely be restricted to Sony-brand flashes, at least if you want an intelligent flash that interacts with the camera's exposure system. (Although there are third-party units offering varying degrees of compatibility.) The Sony flash shoe is a proprietary design unlike the common hot shoe seen on other camera brands.
The good news though, is that Sony offers a good range of dedicated flash units, from the top of the line HVL-F58AM (seen at right, mounted on top of the A900) down to the entry-level HVL-F36AM (still not cheap at $199 list). Even better news is that all current Sony flash units have wireless capability, so you can combine them into complex lighting setups, with multiple off-camera flashes all controlled from the camera.
One of the more interesting design aspects of the new HVL-F58AM deserves mention. The heads on most external flash units tilt up and down for bounce operation off the ceiling for even illumination and also swivel to let you bounce the flash off a side or back wall for special lighting effects. But what about when you're holding the camera in portrait (vertical) orientation? The head that would previously tilt up to bounce off the ceiling will now only point to the side. You might be able to swivel it to point back up at the ceiling, but your control over the bounce angle won't be as good as when in normal landscape mode.

As shown above, the new Sony HVL-F58AM swivels in an entirely different way, with the whole head rotating in a plane parallel to the back of the camera. This lets it work the same way for normal ceiling-bounce operation, regardless of whether the camera is in landscape or portrait mode. Slick! (We expect to see other flashes copy this design at some point.)
The images above were taken from our standardized test shots. For a collection of more pictorial photos, see our Sony Alpha DSLR-A900 Photo Gallery .
Not sure which camera to buy? Let your eyes be the ultimate judge! Visit our Comparometer(tm) to compare images from the Sony Alpha DSLR-A900 with those from other cameras you may be considering. The proof is in the pictures, so let your own eyes decide which you like best!
Performance
Sony A900 Performance
Timing and Performance
The A900's timing performance is about average for a semi-pro SLR.
|
Startup/Shutdown
|
||
|
Power on
to first shot |
0.5 second
|
Time it takes for camera to turn on and take a shot.
|
|
Shutdown
|
0.5 second
|
How long it takes to turn off.
|
|
(Timings with SanDisk Extreme III Pro Duo Card)
|
||
|
Buffer clearing time
Large Extra Fine JPEG |
28 seconds*
(after 11 LEF JPEGs) |
Worst case buffer clearing time. -- This is the delay after a set of shots before you can remove the card. Some cameras won't shut down until the buffer is cleared.
|
|
Buffer clearing time
Small Basic JPEG |
5 seconds*
(after 20 SB JPEGs) |
|
|
Buffer clearing time
RAW |
31 seconds*
(after 13 RAW frames) |
|
|
Buffer clearing time
RAW + LF JPEG |
35 seconds*
(after 11 RAW + LF JPEG frames) |
|
|
*Note: Buffer clearing times measured with a SanDisk Extreme III Pro Duo Memory Stick card. Slower cards will produce correspondingly slower clearing times. Slow cards may also limit length of bursts in continuous mode. Settings such as ISO sensitivity can also affect cycle times and burst mode performance, with higher ISOs generally increasing JPEG cycle times and reducing burst performance.
|
||
Startup and shut-down times are quite fast, difficult to measure. Buffer clearing time depends on the image size and quality, burst length and the speed of memory card used.
|
Mode Switching
|
||
|
Play to Record,
first shot |
0.3 second
|
Time until first shot is captured.
|
|
Record to Play
|
1.2 seconds
|
Time to display a large/extra fine file immediately after capture.
|
|
Display
recorded image |
0.5 second
|
Time to display a large/extra fine file already on the memory card.
|
Mode switching is reasonably fast, except for Record to Play, which is notably slower than average. (Slow enough to be an annoyance; this bothered us a fair bit as we shot with our test sample.)
|
Shutter Response (Lag Time)
|
||
|
Full Autofocus
Optical Viewfinder |
0.183 second
|
Time from fully pressing shutter button to image capture using optical viewfinder, with the lens already at the proper focal distance setting. (all AF timing done with Sigma 70mm f/2.8 Macro lens).
|
|
Prefocused
Optical Viewfinder |
0.072 second
|
Time to capture, after half-pressing and holding shutter button.
|
|
Continuous AF
Optical Viewfinder |
0.181 second
|
This mode usually shows no speed increase with our static subject; we have no way to measure performance with moving subjects.
|
|
Manual focus
Optical Viewfinder |
0.153 second
|
For most cameras, shutter lag is less in manual focus than autofocus, but usually not as fast as when the camera is "prefocused".
|
In terms of the A900's ability to determine that it's properly focused when shooting the same target multiple times, its speed is about average for a semi-pro SLR. The A900 required about 0.183 second for full AF. Continuous autofocus mode lag time was about the same at 0.181 second, and manual focus was slightly faster at about 0.153 second. When prefocused, shutter lag dropped to 0.072 second. This is slightly faster than Sony's consumer SLRs, but slightly slower than some competing prosumer models.
|
Cycle Time (shot to shot)
|
||
|
Single Shot mode
Large Extra Fine JPEG |
0.40 second
|
Time per shot, averaged over 20 shots, 27 seconds to clear.*
|
|
Single Shot mode
Small Basic JPEG |
036 second
|
Time per shot, averaged over 20 shots, 1.5 seconds to clear.*
|
|
Single Shot mode
RAW |
0.41 second
|
Time per shot, averaged over 15 shots, 30 seconds to clear.*
|
|
Single Shot mode
RAW + LF JPEG |
0.34 second
|
Time per shot, averaged over 11 shots, 35 seconds to clear.*
|
|
Single Shot mode
APS-C Extra Fine JPEG |
0.51 second
|
Time per shot, averaged over 20 shots, 12 seconds to clear.*
|
|
Single Shot mode
APS-C Small Basic JPEG |
0.50 second
|
Time per shot, averaged over 20 shots, 1.5 seconds to clear.*
|
|
Single Shot mode
APS-C RAW |
0.47 second
|
Time per shot, averaged over 20 shots, 14.5 seconds to clear.*
|
|
Single Shot mode
APS-C RAW + Fine JPEG |
0.43 second
|
Time per shot, averaged over 13 shots, 18.5 seconds to clear.*
|
|
Early shutter
penalty? |
No
|
Some cameras refuse to snap another shot if you release and press the shutter too quickly in Single Shot mode, making "No" the preferred answer.
|
|
Continuous mode
Large Extra Fine JPEG |
0.20 second
(4.98 frames/sec); 11 frames total; 28 seconds to clear* |
Time per shot, averaged over 11 shots. Then slows to about 0.43 seconds per frame or 2.33 fps.
|
|
Continuous mode
Small Basic JPEG |
0.20 second
(4.99 frames/sec); 20+ frames total; 5 seconds to clear* |
Time per shot, averaged over 20 shots, with no signs of slowing down.
|
|
Continuous mode
RAW |
0.20 second
(5.00 frames/sec); 13 frames total; 31 seconds to clear* |
Time per shot, averaged over 13 shots. Then slows to about 2.14 seconds or 0.47 fps.
|
|
Continuous mode
RAW+ LF JPEG |
0.20 second
(5.00 frames/sec); 11 frames total; 35 seconds to clear* |
Time per shot, averaged over 11 shots. Then slows to about 3.31 seconds or 0.30 fps.
|
|
Continuous mode
APS-C Extra Fine JPEG |
0.20 second
(4.99 frames/sec); 20+ frames total; 18 seconds to clear* |
Time per shot, averaged over 20 shots, with no signs of slowing down.
|
|
Continuous mode
APS-C Small Basic JPEG |
0.20 second
(4.99 frames/sec); 20+ frames total; 3 seconds to clear* |
Time per shot, averaged over 20 shots, with no signs of slowing down.
|
|
Continuous mode
APS-C RAW |
0.20 second
(4.91 frames/sec); 14 frames total; 15 seconds to clear* |
Time per shot, averaged over 14 shots. Then slows to about 1.03 seconds or 0.97 fps.
|
|
Continuous mode
APS-C RAW + Fine JPEG |
0.20 second
(5.00 frames/sec); 11 frames total; 18 seconds to clear* |
Time per shot, averaged over 11 shots. Then slows to about 1.70 seconds or 0.59 fps.
|
|
Flash recycling
|
n/a
|
(No built-in flash.)
|
|
*Note: Buffer clearing times measured with a SanDisk Extreme III Pro Duo Memory Stick card. Slower cards will produce correspondingly slower clearing times. Slow cards may also limit length of bursts in continuous mode. Settings such as ISO sensitivity can also affect cycle times and burst mode performance, with higher ISOs generally increasing JPEG cycle times and reducing burst performance.
|
||
Single-shot cycle time performance is also about average for a semi-pro SLR, at about 0.4 second between shots in large/extra fine JPEG quality or RAW mode. Buffer depth is quite good (particularly for a camera with such exceptional resolution) at over 20 frames for JPEGs and 15 frames for RAW. Continuous mode is also about average among high-end prosumer SLR models at 5 frames per second in all modes, with good buffer depth at 11 frames for large/extra fine JPEGs and 13 for RAW files. (Remember, though, that these are very large, 25-megapixel files, and our test target when doing timing is designed to be difficult to compress to deliver results from a worst-case scenario.)
Switching to APS-C crop mode did not improve cycle-time or burst rate, which implies the sensor interface is the bottleneck, but it did improve burst length and/or buffer clearing time.
|
Download Speed
|
||
|
Windows Computer, USB 2.0
|
12,928 KBytes/sec
|
Typical Values:
Less than 600=USB 1.1; 600-770=USB 2.0 Low; More than 770=USB 2.0 High |
Download speeds were extremely quick, fast enough that you probably won't feel the need for a separate card reader, even with the A900's huge files. (Note that this test was performed with a SanDisk Extreme III CF card: Slower cards would likely show slower transfer times.)
Battery and Storage Capacity
Battery
Good battery life for a full-frame DSLR.
| Test Conditions | Number of Shots |
|
Lithium-ion rechargeable battery,
(CIPA standard) |
880 |
The Sony A900 uses a custom rechargeable lithium-ion battery pack for power, and comes with both a single battery and charger. The rated 880 shots per charge is above average for an SLR, but don't forget, the A900 does not have a built-in flash which is normally fired for 50% of the shots during CIPA standard testing. We recommend getting a second battery and/or the optional battery grip for extended outings.
The table above shows the number of shots the camera is capable of on fully-charged battery, based on CIPA battery-life and/or manufacturer standard test conditions.
(Interested readers can find an English translation of the CIPA DC-002 standards document here. (180K PDF document))
Storage
The Sony A900 stores its photos on CompactFlash or Memory Stick Duo memory cards, and no card is included with the camera. The chart below shows approximately how many images can be stored on a 2GB card at each size/quality setting.
|
Image Capacity vs Resolution/Quality 2GB Memory Card |
Extra Fine | Fine | Normal |
RAW
|
RAW
+ LF JPEG |
|
| 6,048 x 4,032 |
Images
(Avg size) |
87 23.5 MB |
201 10.2 MB |
302 6.8 MB |
54 37.9 MB |
42 48.8 MB |
|
Approx.
Comp. |
3:1 | 7:1 | 11:1 | 1:1 | - | |
| 4,400 x 2,936 |
Images
(Avg size) |
157 13.0 MB |
344 6.0 MB |
491 4.2 MB |
- | - |
|
Approx.
Comp. |
3:1 | 7:1 | 9:1 | - | - | |
| 3,024 x 2,016 |
Images
(Avg size) |
283 7.2 MB |
599 3.4 MB |
789 2.6 MB |
- | - |
|
Approx.
Comp. |
3:1 | 5:1 | 7:1 | - | - | |
We strongly recommend buying a fast, high-capacity CompactFlash or Memory Stick Pro Duo card. The A900's files are huge, so you should probably consider at least a 4GB card, if not an 8GB one, to give yourself extra space for extended outings, especially if you plan on doing a lot of RAW shooting. (Check the shopping link above, cards are cheap these days, so there's no reason to skimp -- But do consider faster cards for this camera, to reduce buffer clearing times.)
Imaging
Sony A900 Exposure
Color
Saturation & Hue Accuracy
Accurate color and saturation, with only minor shifts in hue and intensity.
 |
| In the diagram above, the squares show the original color, and the circles show the color that the camera captured. More saturated colors are located toward the periphery of the graph. Hue changes as you travel around the center. Thus, hue-accurate, highly saturated colors appear as lines radiating from the center. Click for a larger image. |
Saturation. At its default settings, the Sony A900 pushes strong reds and blues just a little, but actually undersaturates bright yellows, some greens, and cyan tones very slightly. Thus, color saturation is a little truer to life than many current SLR cameras. Most digital cameras produce color that's more highly saturated (more intense) than found in the original subjects. This is simply because most people like their color a bit brighter than life.
Skin tones. Here, with the color balanced properly for the light source, the Alpha A900's skin tones looked natural, but perhaps just slightly on the warm side. Where oversaturation is most problematic is on Caucasian skin tones, as it's very easy for these "memory colors" to be seen as too bright, too pink, too yellow, etc.
Hue. The Alpha 900 showed only a few small color shifts relative to the correct mathematical translation of colors in its subjects, but had pretty good accuracy overall. Most noticeable was a shift in reds toward orange, and yellow toward green, with some shifts in cyans and blues as well, but overall hue accuracy was very good. Hue is "what color" the
color is.
Saturation Adjustment
The Sony A900 has a total of seven saturation settings available (only five are shown below), three above and three below the default saturation. This covers a pretty wide range of saturation levels, about as wide a range as you're likely to find photographically relevant, apart from special effects that are arguably better achieved in software. The fine steps between settings mean you can program the camera to just the level of saturation you prefer. (So if you find the A900's default color rendering a little understated for your tastes, it will be quite easy to boost it one or two notches to better match your personal preferences.)
| Saturation Adjustment Examples | ||||
 |
 |
 |
 |
 |
| -3 | -1 | 0 | +1 | +3 |
The table above shows results with several saturation settings, see the Thumbnails index page for more (look for the files named A900OUTBSATx.JPG). Click on any thumbnail above to see the full-sized image.


Sensor
Exposure and White Balance
Indoors, incandescent lighting
Good color with both the Manual and 2,600 Kelvin white balance settings, but very warm results with Auto and slightly warm with Incandescent. Slightly above average positive exposure compensation required.


Indoors, under normal incandescent lighting, the Sony Alpha 900 produced very warm color with its Auto white balance setting. (This isn't the first camera we've said this about: We expect better automatic white balance handling in a $3,000 camera.) The Incandescent setting wasn't too far off the mark; just warm enough to suggest the color of the original light source, without seeming overdone. Both the Manual and 2,600-degree Kelvin settings produced more accurate results. It was a bit of a toss-up between them, as the Manual setting was a hint warm and the Kelvin option a little more true to white value. Though the Manual setting did preserve a touch of the original mood, the 2,600-degree Kelvin mode produced the most accurate overall color. The +0.7 EV positive exposure compensation required for this shot was slightly above average. (This new indoor scene usually requires about +0.3 EV exposure compensation.) Color looks good throughout the frame, with only the slightest purplish tints in the blue flowers. (Many digital cameras reproduce these flowers with a dark, purplish tint, so the Alpha 900 actually performs a little better than average here.) Our test lighting for this shot is a mixture of 60 and 100 watt household incandescent bulbs, a pretty yellow light source, but a very common one in typical home settings here in the U.S.
Outdoors, daylight
Very good results under harsh lighting, with good handling of contrast, detail, and color.
Outdoors, the Sony Alpha A900 performed well, but at its default contrast setting required +1.3 EV exposure compensation for the Portrait to avoid rendering the model's face too dark. Even with that much positive exposure compensation though, the A900 did a surprisingly good job of holding onto highlight detail: While the highlights in the mannequin's shirt will appear blown on many computer monitors, close inspection in Photoshop or other editing software reveals that very few areas are actually blown out. Despite the high contrast (as you might expect under such harsh lighting), the camera did a better than average job of holding onto detail in both the deep shadows and bright highlights. The Sony A900 nailed the exposure in the House shot, and managed not to blow out many highlights at all, or lose shadow detail in the process. Color balance is good as well, with good saturation considering the bright lighting. The camera's contrast adjustment did a very nice job of toning down the exposure without creating any strong color variations in the skin (though skin tone does change slightly). Overall, a very good performance.
See full set of test images with explanations
See thumbnails of all test and gallery images
Resolution
Extremely high resolution, 2,200 lines of strong detail.


Our laboratory resolution chart revealed sharp, distinct line patterns down to about 2,200 lines per picture height in the horizontal direction as well as in the vertical direction. Complete extinction didn't occur within 4,000 line limit of our 2x chart, but lines began to merge at about 2,800 lines per picture height. Use these numbers to compare with other cameras of similar resolution, or use them to see just what higher resolution can mean in terms of potential detail.
See full set of test images with explanations
See thumbnails of all test and gallery images
Sharpness & Detail
Sharp, very detailed images, though minor edge-enhancement artifacts visible on high-contrast subjects. Minor noise suppression visible at low ISO.


Sharpness. The Sony Alpha 900 produced amazingly detailed images, with good sharpness. Some slight edge enhancement artifacts are visible on high-contrast subjects such as the crop above left, but overall results are still very good. Edge enhancement creates the illusion of sharpness by enhancing colors and tones right at the edge of a rapid transition in color or tone.
Detail. The crop above right shows only minor noise suppression artifacts, as the darker areas of the model's hair show a lot of detail. Individual strands are still distinguishable even in the lighter shadows, though they begin to merge as shadows deepen. Still, good performance here, especially considering the 25-megapixel sensor. Noise-suppression systems in digital cameras tend to flatten-out detail in areas of subtle contrast. The effects can often be seen in shots of human hair, where the individual strands are lost and an almost "watercolor" look appears.
RAW vs In-Camera JPEGs
As noted above, the Sony A900 does a pretty good job at balancing between sharpness and visible sharpening artifacts in its in-camera JPEGs. You can often find a fair bit more detail in carefully-processed RAW files than is evident in the camera-generated JPEGs. Take a look below, to see what we mean:
 |
|||
In the table above, mousing over a link at the bottom will load the corresponding crop in the area above. Examples include in-camera Extra-Fine JPEG, a RAW file processed through Sony's Image Data Converter SR version 3 software at default settings, another IDC version converted at lowest sharpening, then sharpened in Photoshop, and finally an Adobe Camrea Raw 4.6 beta version, then sharpened in Photoshop. (When shooting RAW+JPEG, the A900 will only save a Fine JPEG, which is why the Extra Fine JPEG and RAW crops aren't identical.) As we've seen in the past, Image Data Converter SR doesn't extract a whole lot more detail than the camera itself does, but we see a bit more detail from an Adobe Camera Raw converted file, though noise is also more visible.
ISO & Noise Performance
Low noise at ISO 100 through 400. Effects of noise reduction visible from ISO 800 up.


The Sony Alpha A900 produced low noise at its lower sensitivity settings, however we start to see some slight smudging and loss of detail already at ISOs as low as 400. As you'd expect, noise and loss of detail becomes more apparent at ISO 800, with noise "grain" becoming increasingly courser, along with some chroma noise in the shadows. At ISO 1,600, along with increased detail loss, the chroma noise becomes more obvious and no longer relegated to just deep shadows. ISO 3,200 continues this trend with even more detail loss and blotchiness, and ISO 6,400 is quite noisy with chroma noise and blurring almost entirely obliterating fine detail. There is also a slight desaturation of images at ISOs 3,200 and 6,400. Keep in mind that these are 25-megapixel files, though, so detail loss won't be nearly as apparent at normal print sizes. See the Print Quality section to find out what the recommended maximum size print is at each ISO setting.
Extremes: Sunlit and low light tests
High resolution and good shadow detail. Very good low-light performance, capable of capturing bright images in near darkness.


Sunlight. The Sony Alpha A900 handled the deliberately harsh lighting in the test above pretty well. Though contrast is a little high, highlight detail is good and shadow detail very good. The camera's contrast adjustment also did a good job of decreasing overall contrast without producing strong color variations. A higher-than-average +1.3 EV exposure compensation was required to keep the model's face from looking too dark, as the +1.0 EV exposure was a touch too dim. This resulted in a few lost highlights in the model's shirt and in some of the flowers, but not as much as we're accustomed to seeing. Be sure to use fill flash in situations like the one shown above; it's better to shoot in the shade when possible.
Because digital cameras are more like slide film than negative film (in that they tend to have a more limited tonal range), we test them in the harshest situations to see how they handle scenes with bright highlights and dark shadows, as well as what kind of sensitivity they have in low light. The shot above is designed to mimic the very harsh, contrasty effect of direct noonday sunlight, a very tough challenge for most digital cameras. (You can read details of this test here.)
Contrast Adjustment
We really like it when a camera gives us the ability to adjust contrast and saturation to our liking. It's even better when those adjustments cover a useful range, in steps small enough to allow for precise tweaks. Just as with its saturation adjustment, the Sony A900's contrast setting meets both challenges.
| Minimum Contrast, normal D-R setting (Off) | |
 |
 |
| Contrast set to lowest, +1.3 EV |
Contrast set to lowest, Auto Exposure |
At its lowest contrast setting, the A900 did an excellent job of preserving highlight detail, maintaining natural-looking skin tones, and holding nice detail in the shadows. The A900 captures good color outdoors, though just slightly on the warm side. Overall, very good results here, especially when the contrast setting is tweaked.
| Contrast Adjustment Examples | ||||
|
 |
 |
 |
 |
| -3 | -1 | 0 | +1 | +3 |
The series of shots above shows results with several different contrast adjustment settings, showing the minimum step size around the default, as well as both extremes. While you can see the extremes, it's hard to really evaluate contrast on small thumbnails like these, click on any thumbnail to go to the full-size image.
One very nice feature of Sony's contrast adjustment is that it has very little effect on color saturation. Contrast and saturation are actually fairly closely coupled, it's a good trick to be able to vary one with out the other changing as well. Sony did a good job here.
Sony's DRO (Dynamic Range Optimization)
Sony's Dynamic Range Optimization system analyzes the range of brightness of each image, and adjusts the camera's image processing parameters accordingly, to try make the best use of the available dynamic range. Three options are available on the A900: DRO Off, Standard DRO, and Advanced DRO+. Unlike lesser Sony SLRs, the A900's default for DRO is Off. The A900 also allows you choose the strength for the Advanced DRO+ effect, from level 1 to 5. Standard DRO looks at the entire image and effectively adjusts contrast and brightness across the entire image for best effect. Advanced DRO+ analyzes everything, but makes local adjustments to bring out shadow detail and preserve highlights.
|
DRO Examples
|
|||
 |
 |
 |
 |
| DRO Off | DRO Standard | DRO+ Advanced Auto |
DRO+ Advanced Level 5 |
 |
 |
 |
 |
|
Highlights
|
|||
 |
 |
 |
 |
|
Shadows
|
|||
The crops above show the results of three DRO settings. As you can see, the bulk of the difference between different levels of DRO is found in the shadow areas, though the Advanced setting with its localized adjustments also improved highlight preservation. By default, the Sony A900 shoots with DRO set to Off. (Previous models defaulted to DRO Standard mode.) Interestingly, there's a pretty pronounced difference between DRO Standard or Advanced Level 5 and Off, in terms of exposure. We confirmed that the shots above were all captured with the same aperture and shutter speed settings, but the DRO Standard version is 2/3 of a stop or so lighter than the shot with DRO turned off entirely, a behavior we saw with the A200, A350 and A700 as well. Still, the DRO-enabled shots have fewer clipped highlights than the DRO Off shot with a simple exposure boost applied to bring the shadows up to the same level.
| 1 fc 11 lux |
1/2 fc 5.5 lux |
1/4 fc 2.7 lux |
1/8 fc 1.3 lux |
1/16 fc 0.67 lux |
1/16fc No NR |
|
|---|---|---|---|---|---|---|
| ISO 100 |
 0.8 sec f2.8 |
 1.6 sec f2.8 |
 3.2 sec f2.8 |
 6 sec f2.8 |
 10 sec f2.8 |
 10 sec f2.8 |
| ISO 200 |
 0.4 sec f2.8 |
 0.8 sec f2.8 |
 1.6 sec f2.8 |
 3.2 sec f2.8 |
 5 sec f2.8 |
 5 sec f2.8 |
| ISO 400 |
 1/5 sec f2.8 |
 0.4 sec f2.8 |
 0.8 sec f2.8 |
 1.6 sec f2.8 |
 2.5 sec f2.8 |
 2.5 sec f2.8 |
| ISO 800 |
 1/10 sec f2.8 |
 1/5 sec f2.8 |
 0.4 sec f2.8 |
 0.8 sec f2.8 |
 1.3 sec f2.8 |
 1.3 sec f2.8 |
| ISO 1600 |
 1/20 sec f2.8 |
 1/10 sec f2.8 |
 1/5 sec f2.8 |
 0.4 sec f2.8 |
 0.6 sec f2.8 |
 0.6 sec f2.8 |
| ISO 3200 |
 1/40 sec f2.8 |
 1/20 sec f2.8 |
 1/10 sec f2.8 |
 1/5 sec f2.8 |
 0.3 sec f2.8 |
 0.3 sec f2.8 |
| ISO 6400 |
 1/80 sec f2.8 |
 1/40 sec f2.8 |
 1/20 sec f2.8 |
 1/10 sec f2.8 |
 1/6 sec f2.8 |
 1/6 sec f2.8 |
Low light. The Sony A900 performed very well on the low-light test, capturing usable images at the lowest light level even at the lowest sensitivity setting (ISO 100). The above images are all a little dim at the default exposure, but consistently so, allowing the use of exposure compensation or manual mode to brighten them up by using longer shutter speeds. Color balance looked quite good with the Auto white balance. Noise was fairly low up to ISO 400, but as expected, became more noticeable with higher ISOs, especially with noise reduction turned off. There were also hot pixels visible at ISO 1,600 and above at lower light levels. The camera's autofocus system was able to focus on the subject almost down to the 1/16 foot-candle light level unassisted (and in complete darkness with the AF assist enabled). Keep in mind that the longer shutter speeds here demand the use of a tripod to prevent any blurring from camera movement. (A useful trick is to just prop the camera on a convenient surface, and use its self-timer to release the shutter. This avoids any jiggling from your finger pressing the shutter button, and can work quite well when you don't have a tripod handy.)
How bright is this? The one foot-candle light level that this test begins at roughly corresponds to the brightness of typical city street-lighting at night. Cameras performing well at that level should be able to snap good-looking photos of street-lit scenes.
NOTE: This low light test is conducted with a stationary subject, and the camera mounted on a sturdy tripod. Most digital cameras will fail miserably when faced with a moving subject in dim lighting. (For example, a child's ballet recital or a holiday pageant in a gymnasium.) Digital SLRs like the Sony A900 do much better than point & shoots, but you still shouldn't expect a quick autofocus lock with moving subjects.
Output Quality
Print Quality
Great print quality, good color, sharp 20x30-inch prints from RAW files, usable ones from in-camera JPEGs.
 The Sony A900's printed output was quite impressive, able to output sharp 20 x 30 inch prints from its RAW files at ISO 200, and good-looking ones that size from its in-camera JPEGs. As of this writing in early September, 2008, the only RAW converter that can read the A900's images is Sony's own Image Data Converter. We processed the RAW images in that, but with the sharpening set to zero, then transferred the 16-bit TIFF image into Photoshop, where we applied unsharp masking at 250% and 0.3 pixel radius. The result was a good bit sharper detail than that in the camera-generated JPEGs, but we suspect we'll see more yet once Adobe Camera RAW and other third-party RAW converters can read the Sony A900's files.
With 25 megapixels of resolution, there's plenty of detail in the Sony A900's images to go larger than 20x30 inches: We tried outputting a part of our Far Field test image at the equivalent of 30 x 40 inches. Even with the careful unsharp masking in Photoshop, the result was a little soft looking, but would absolutely be suitable for display at typical viewing distances for prints that large. (It looked quite sharp when viewed at any distance greater than two to three feet.) What actually limited the usable print size more than detail was image noise: At 30x40 inches (which is really pretty huge), noise in the sky and flat shadow areas was quite visible, even at ISO 200, the camera's native sensitivity.
As noted elsewhere in this review, the Sony A900 has higher resolution than any other 35mm format DSLR, but the Canon EOS-1D Mark III wins handily in terms of image noise. We're reluctant to refer to this as the A900's "Achilles heel," particularly in light of the fact that the 1Ds Mark III sells for 2.6x the price of the A900. It is, though, one of the most noticeable areas in which the A900 falls short of its much more expensive competitor, so deserves mentioning.
Checking print quality at higher ISOs, we found that the Sony A900's images produced good-looking 13x19 inch prints up to about ISO 400 or 800: Minor chroma noise began to appear at ISO 400, and became more prominent at ISO 800, although many users would probably find the ISO 800 results at 13x19 inches suitable for wall display. At 5x7 inches, images looked good to ISO 1,600 and usable to ISO 3,200.
Color-wise, we found the Sony A900's images very appealing. Given the relatively understated color handling we observed in the Imatest results, we somewhat expected to find the printed output a little dull-looking, but this wasn't the case: Colors looked plenty bright, but never unnatural. Very nice color, overall.
Bottom line, the Sony A900 is a camera that can deliver incredible resolution under good to moderate lighting, and as such should find application for commercial work, portraits, landscapes, architectural and fine art photography and similar applications. At the highest magnifications though, some noise is visible even at its default ISO 200 sensitivity, and this steadily increases as you go up the ISO scale. As always, the obtrusiveness of its image noise varies inversely with the size of the print you're making. If all you care about is 8x11 output, you'll probably find the Sony A900 usable up to ISO 1,600 and possibly higher. On the other hand, we expect that a large part of the reason many people will plunk down $3,000 for this camera is because they want to exploit its extraordinary resolution by making really large prints. If that's your application, then the maximum useful ISO drops quite a bit, to the extent that ISO 800 is really pushing it, even for 13x19 inch prints. We say "even for 113x19 inch prints" because, while that size is about as large as most prosumer inkjet printers go, it's not that big compared to the A900's 25 megapixel resolution. (At 300 pixels/inch, the A900's output would measure 13.4x20.2 inches.)
While we haven't been able to test one yet, a good third-party RAW converter and aftermarket noise-processing software package could give you considerably more ISO headroom. Barring that, the A900 is really best used at ISO 400 and under, at least for those times when you'll want to print to 13x19 inches or larger.
Testing hundreds of digital cameras, we've found that you can only tell just so much about a camera's image quality by viewing its images on-screen. Ultimately, there's no substitute for printing a lot of images and examining them closely. For this reason, we now routinely print sample images from the cameras we test on our Canon Pro9000 studio printer, and on the Canon iP5200 here in the office. (See the Canon PIXMA Pro9000 review for details on that model.)
Viewfinder
Sony A900 Viewfinder (It's big, bright and accurate)
 The Sony A900 is of course, an SLR, so the optical viewfinder offers a true, through-the-lens display. A dioptric adjustment dial accommodates eyeglass wearers, letting them adjust the viewfinder optics between -3.0 and +1.0 diopters. Specified at 20mm from the eyepiece, the eyepoint is good, but not quite as high as those of some other cameras, so eyeglass-wearer Dave found he had to press the lenses of his glasses pretty firmly against the A900's eyecup in order to see the full frame area.
If you're accustomed to shooting with sub-frame SLRs, the first thing you'll notice when looking into the Sony A900's viewfinder is how huge it is. When we first shot with it, one of the Sony staff in attendance joked that we'd need to hold onto the edges of the viewfinder bezel, to keep from falling into it: He wasn't far wrong. Viewfinder specifications commonly include things like eyepoint height and magnification ratio, but don't address how much of your apparent field of view the viewfinder image covers. If they did, the A900 would come out somewhere very high on the list. In practice, a much larger viewfinder like this does a lot to connect you with your subjects: You have much more of a sense of just looking at the subjects, rather than peering down a tunnel at them.
In terms of specs, the Sony A900's viewfinder has an optical magnification of 0.74x when using it with a 50mm lens focused at infinity and the dioptric adjustment set to -1 diopter. This is the same magnification as the A350's viewfinder, a bit more than that of the Nikon D700 (0.72x), a bit less than that of the Canon EOS-1Ds Mark III (0.76x). What the viewfinder magnification factor means in practice is that objects seen through the Sony A900's viewfinder when using a 50mm lens will be about 74% as large as they'd appear to your unaided eye; with a 70mm lens, they'd appear just slightly larger than normal size. The benefit of having a high magnification number is that it makes it easier to shoot with both eyes open, as the view through the viewfinder will be close to what your other eye is seeing, unaided. Having both eyes open when shooting greatly improves your situational awareness, making it much easier to acquire and track quickly moving objects. At least for lenses in the roughly 50 - 90 mm focal length range, the Sony A900 makes two-eyed shooting relatively easy.
Besides the huge view it gives you, the Sony A900's viewfinder also sports two other desirable characteristics. First, the 100% internal reflection of its true pentaprism optical design makes for a very bright image. Secondly, the A900's viewfinder offers true 100% frame coverage, making it easy to frame subjects very precisely. (Our lab measurement put the Sony A900's viewfinder accuracy at 99% on our test sample, within the margin of testing error of the claimed 100%.)
Sony A900 Viewfinder Information Display

The illustration above shows the information that's displayed in the Sony A900's optical viewfinder. There are the usual autofocus area markers, but also marks that delineate the 16:9 aspect ratio shooting area and the corners of the APS-C shooting area, for when you're running the camera in that mode, when using a sub-frame lens.
Along the bottom of the display are the usual indicators for shutter speed, aperture, exposure compensation and shots remaining in continuous mode. There's an unusual number of indicators associated with flash operation, thanks to the sophistication of Sony's flash offerings. There's the usual flash exposure compensation and flash-charging indicators, but also icons showing wireless flash (WL) and high-speed sync (H) operation. Since the Sony A900 has no internal flash, all flash functions require the use of an external flash, with a number of Sony models to choose from. To use the wireless flash triggering and control option, you need to have one of the top-end HVL-58AM models mounted on the camera to control the remote units, but all currently-manufactured Sony flash units can work as wireless remotes. All current Sony flash units are also capable of high-speed (also called "FP") synchronization, allowing flash exposures at any shutter speed the camera is capable of.
There's one additional indicator in the Sony A900's viewfinder that we particularly like: In the lower right-hand corner, there's what amounts to a little bar graph that's active whenever the SteadyShot image stabilization is in use. This shows how much camera shake the SteadyShot system is currently seeing. By waiting for the fewest bars to be displayed, you can pick a moment when shake is at its minimum, giving the SteadyShot system the best chance at completely compensating for it. This strikes us as quite handy, and is a feature we wish were available with lens-based IS systems. We'd wager that intelligent use of this display could add a good stop or so to minimum shooting speed, and could help the effective performance of the Sony A900's IS system.
User-Interchangeable Focusing Screens
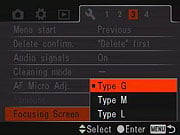 While some previous Sony DSLR models had interchangeable focusing screens, this has always in the past been an option that could only be performed by a Sony service center. The reason for this was that the camera's exposure system would have to be adjusted for the focusing screen being swapped in. In the Sony A900 though, a Focusing Screen option on the Setup menu lets you specify which screen is in use, so the camera can adjust its exposure metering as needed.
There are three different focusing screens available for the Sony A900:
- Type G - The default screen, a good trade-off between brightness and focus discrimination
- Type M - A "Super Spherical Acute Matte" screen. This screen provides much sharper discrimination between in-focus and out-of-focus conditions, but at the cost of some brightness. It's only intended for use with lenses having maximum apertures of f/2.8 or greater.
- Type L - This screen is the same brightness as the default Type G type, but provides a grid to help with horizontal/vertical alignment or rule-of-thirds composition.
Viewfinder Test Results
Coverage
Very good accuracy from the optical viewfinder. The A900 does not support Live View on the LCD.

The Sony Alpha A900's optical viewfinder showed about 99 percent coverage accuracy with our Sigma 70mm f/2.8 prime lens. This is very good for a semi-pro digital SLR, just slightly below Sony's 100% specification. Sony chose not to offer a Live View mode on the A900, since Sony's Live View system would require a smaller, dimmer pentamirror design.
High ISO Noise Reduction
Sony A900 High ISO Image Quality
As noted elsewhere in this review, the Sony A900 offers four high-ISO noise-reduction settings, allowing you quite a bit of flexibility in choosing how you want to make the trade-off between subject detail and noise levels. Sony tells us that the "OFF" setting eliminates all inter-pixel NR processing, but the per-pixel NR that occurs on the sensor itself is always active. (See the Sony A900 Noise Reduction tab of this review for a detailed discussion of the two types of noise reduction processing.) We won't be able to independently confirm that the OFF setting really does turn off the High-ISO NR in the A900's RAW files until third-party RAW processing software is available that can process these files.
See for yourself how the noise reduction works under daylight lighting. Click on any of the crops below to see the corresponding full-sized image. Note that the A900 only starts applying High ISO NR at ISO 1,600, but we have included crops from lower ISOs as a reference.
| Sony A900 ISO Noise Comparison Simulated Daylight (Note that High ISO Noise Reduction does not apply to this range) |
|||
|
ISO 100
|
ISO 200
|
ISO 400
|
ISO 800
|
 |
 |
 |
 |
 |
 |
 |
 |
 |
 |
 |
 |
The above table shows noise and detail levels at ISO 100 through 800, where the Sony A900 does not apply any High ISO Noise Reduction.
| Sony A900 High ISO Noise Reduction Comparison Simulated Daylight |
||||
|
High ISO Noise Reduction Setting
|
||||
|
HINR=Off
|
HINR=Low
|
HINR=Normal
|
HINR=High
|
|
| I S O 1 6 0 0 |
 |
 |
 |
 |
 |
 |
 |
 |
|
 |
 |
 |
 |
|
|
HINR=Off
|
HINR=Low
|
HINR=Normal
|
HINR=High
|
|
| I S O 3 2 0 0 |
 |
 |
 |
 |
 |
 |
 |
 |
|
 |
 |
 |
 |
|
|
HINR=Off
|
HINR=Low
|
HINR=Normal
|
HINR=High
|
|
| I S O 6 4 0 0 |
 |
 |
 |
 |
 |
 |
 |
 |
|
 |
 |
 |
 |
|
The above crops show the effects of the four levels of High ISO Noise Reduction available on the Sony A900. Discussions with Sony engineers suggest that the "OFF" setting for High ISO NR does in fact disable all inter-pixel NR processing. As discussed on the Sony A900 Noise Reduction tab, the per-pixel NR processing is still applied.
| Sony A900 High ISO compared to Canon 1Ds Mark III Simulated Daylight |
||||
|
|
Sony A900
|
Canon 1Ds Mark III
|
High ISO Noise Reduction Setting
|
|
|
HINR=Off
|
HINR=Normal
|
HINR=Off
|
HINR=On
|
|
| I S O 8 0 0 |
|
n/a - no High ISO NR applied
|
 |
 |
|
n/a - no High ISO NR applied
|
 |
 |
|
|
n/a - no High ISO NR applied
|
 |
 |
|
|
|
Sony A900
|
Canon 1Ds Mark III
|
||
|
HINR=Off
|
HINR=Normal
|
HINR=Off
|
HINR=On
|
|
| I S O 1 6 0 0 |
|
|
 |
 |
|
|
 |
 |
|
|
|
 |
 |
|
|
|
Sony A900
|
Canon 1Ds Mark III
|
||
|
HINR=Off
|
HINR=Normal
|
HINR=Off
|
HINR=On
|
|
| I S O 3 2 0 0 |
|
|
 |
 |
|
|
 |
 |
|
|
|
 |
 |
|
The crops above compare the Sony A900's JPEG High ISO performance (ISO 800 through 3,200) to that of the Canon EOS 1Ds Mark III, the previous, full-frame resolution king (21-megapixels). The Sony A900 may have bested it in terms of number of pixels, but it's clear that the 1Ds Mark III still holds a marked edge on high ISO performance. Note however that the Canon 1Ds Mark III does not offer ISO 6,400. (Also note that the Sony A900 is significantly less than half the cost of the 1Ds Mark III.)
| Sony A900 vs Canon 1Ds Mark III RAW (via dcraw), no Noise Reduction, no Sharpening Simulated Daylight |
||
|
|
Sony A900
|
Canon 1Ds Mark III
|
| I S O 5 0 |
N/A,
ISO 50 not supported. |
 |
 |
||
| I S O 1 0 0 |
 |
 |
 |
 |
|
| I S O 2 0 0 |
 |
 |
 |
 |
|
| I S O 4 0 0 |
 |
 |
 |
 |
|
| I S O 8 0 0 |
 |
 |
 |
 |
|
| I S O 1 6 0 0 |
 |
 |
 |
 |
|
| I S O 3 2 0 0 |
 |
 |
 |
 |
|
| I S O 6 4 0 0 |
 |
N/A, ISO 6,400 not supported. |
 |
The crops in the above table compare the Sony A900's RAW noise performance to that of the Canon 1Ds Mark III, across their entire ISO ranges. Click on the image to download the converted RAW file. These files were converted using dcraw, an excellent freeware RAW converter which applies no noise reduction or sharpening. (We found that Adobe Camera Raw still applies some limited noise-reduction when its NR settings are set to zero). The Sony RAW files were shoot with High ISO NR turned Off (and it goes without saying that the Canon RAW files are also without noise reduction). As you can see, the 1Ds Mark III has about a one-stop advantage in noise versus the Sony A900. That is, the Canon's noise at ISO 3200 is similar to the Sony's at ISO 1600, and so on. The Canon images also seem slightly more detailed at all ISOs. Both series were shot with the very sharp Sigma 70mm F2.8 EX DG Macro lens at f/8, using the same shutter speeds.
Imatest Results
Sony A900 Imatest Results
We routinely use Norman Koren's excellent "Imatest" analysis program for quantitative, thoroughly objective analysis of digicam test images. I highly recommend it to our technically-oriented readers, as it's far and away the best, most comprehensive analysis program I've found to date.
My comments below are just brief observations of what we see in the Imatest results. A full discussion of all the data Imatest produces is really beyond the scope of this review: Visit the Imatest web site for a full discussion of what the program measures, how it performs its computations, and how to interpret its output.
Here's some of the results produced by Imatest for the Sony A900:
| sRGB Accuracy Comparison |
||||
The Sony A900 showed very good color accuracy overall. Hue accuracy was quite good, with most of the hue shift occurring in the cyans, sky blues, reds and oranges. Average saturation was 105% (oversaturated by 5%, mostly in the deep blues and reds and some greens). Average "delta-C" color error was only 5.27 after correction for saturation, which is quite low, albeit very slightly higher than some of the competition. All in all, a very good color response for an SLR. Mouse over the links below the illustration above to compare results with competing models.
Adobe RGB Accuracy Comparison |
||||
Using the Adobe RGB color space (which provides a much wider gamut, or range of colors that can be expressed), the Sony A900 delivers more highly saturated color, with an average saturation of 108% and average saturation-corrected hue error of 5.08 "delta-C" units, which in this case is slightly more accurate than the competition. Again, mouse over the links below the illustration above to compare results with competing models.
Color Analysis

This image shows how the Sony A900 actually rendered the colors of the MacBeth chart, compared to a numerically ideal treatment. In each color swatch, the outer perimeter shows the color as actually captured by the camera, the inner square shows the numerically ideal color, after correcting for the luminance of the photographed chart (as determined by a second-order curve fit to the values of the gray swatches), and the small rectangle inside the inner square shows the numerically ideal color, without any luminance correction. This image shows the A900's very good hue accuracy, as well as a gamma curve that results in an overexposure of some colors, notably cyans, reds, orange and some greens. (We've seen this in most cameras, increasing the "punch" of images by brightening saturated colors a little, while actually keeping both the hue and saturation level very close to technically accurate values.)
Noise Analysis

There's a lot in this particular graph, a lot more than we have room to go into here. (This set of plots has also changed a little in the more recent versions of Imatest. Some of the plots that were shown here previously are now shown in other Imatest output. Since we largely focus on the Noise Spectrum plot, we'll only show the graphic above, which includes that plot.)
In comparing these graphs with those from competing cameras, I've found that the Noise Spectrum graph at lower right is the most important. Cameras that manage to shift their noise spectrum to higher frequencies have much finer-grained noise structures, making their noise less visually objectionable. In the graph above, this would show up as a noise spectrum curve that remained higher on the right side, representing higher noise frequencies. The champion at this was (and still is) the Canon EOS-1Ds Mark II, which produced remarkably fine-grained image noise, even at very high ISOs.
Here, we see the results at ISO 100, which is as a low extension of the normal ISO range for the A900. The luminance curve is quite flat (meaning luminance noise is very fine-grained), however the color channels exhibit higher noise values, especially at lower frequencies. We also see the now familiar spikes (though to a much lesser degree), which are a result of how Sony's JPEG engine processes and assembles each block of the image (see the Sony A200 or A350 review for details). This graph reinforces our own visual observations of the A900's images, in which we saw that the luminance noise was relatively low, but that the chroma noise was much higher.

Here are the results at the A900's base ISO?of 200. Again, the luminance curve is quite flat and the A900 does a good job of keeping plenty of the noise energy at high frequencies. The blue and green channels follow the luminance channel more closely than at ISO 100, but the red channel still shows quite a bit more noise energy at lower frequencies. Bottom line, the Sony A900 noise levels are low at low ISO, with a frequency spectrum that has more energy on the higher frequency (right-hand) side of the curve than do many cameras in the blue, green and luminance signals, but less so in the red. This blotchiness in the red channel can be seen in the sky area of our Far-Field shot of the house. In that same shot, you can also see some red noise in the shingles of the roof that doesn't correspond to their actual color.

Above is the same set of noise data at ISO 3,200. Here, the Noise Spectrum graph has a dramatic shift toward the left-hand, lower-frequency side than at ISO 200, coarsening the "grain" of the image noise patterns. The red channel also continues to have dramatically more noise energy at lower frequencies than the others. This can be seen in the A900's ISO 3,200 images as very noticeable blotches of chroma noise.

Here's the same set of noise data at ISO 6,400. Very similar to ISO 3,200, with slightly more shift to the left indicating even coarser "grain" caused by the A900's noise reduction attempts to blur out the noise. Again, the red channel continues to have much more noise energy at lower frequency than the others. This seems a little odd, as most noise reduction algorithms reduce noise in all channels at high ISOs.

This chart compares the Sony A900's noise performance over a range of ISOs against that of other current, full frame cameras, using default settings. While we continue to show noise plots of this sort because readers ask for them, we each time point out that the noise magnitude is only a small part of the story, the grain pattern being much more important. Also, this is a plot of luminance magnitudes, where the A900 does relatively well: A plot of chrominance noise would tell a different story. In the case of the Sony A900, the magnitude of the image noise starts out slightly above most of the competition at ISO 100, and remains higher at all ISOs until the A900's high ISO?noise reduction kicks in aggressively at ISO 1,600. This brings the curve back down to the A900's ISO?800 level, and in-line with the Canons, but higher than the Nikons, which are "only" 12-megapixels. There's quite a large difference at ISO 6,400, but still a pretty good performance for a camera with 24-megapixels. Keep in mind these are at default settings, so the shape and positions of the curves will be influenced by your settings.
As evidence of the difference between what these graphs show and the appearance of actual images, check out the Sony A900 High-ISO NR page of this review for direct comparisons against the Canon EOS-1Ds Mark III.
Sony A900 Dynamic Range Analysis
A key parameter in a digital camera is its Dynamic Range, the range of brightness that can be faithfully recorded. At the upper end of the tonal scale, dynamic range is dictated by the point at which the RGB data "saturates" at values of 255, 255, 255. At the lower end of the tonal scale, dynamic range is determined by the point at which there ceases to be any useful difference between adjacent tonal steps. Note the use of the qualifier "useful" in there: While it's tempting to evaluate dynamic range as the maximum number of tonal steps that can be discerned at all, that measure of dynamic range has very little relevance to real-world photography. What we care about as photographers is how much detail we can pull out of the shadows before image noise becomes too objectionable. This, of course, is a very subjective matter, and will vary with the application and even the subject matter in question. (Noise will be much more visible in subjects with large areas of flat tints and subtle shading than it would in subjects with strong, highly contrasting surface texture.)
What makes most sense then, is to specify useful dynamic range in terms of the point at which image noise reaches some agreed-upon threshold. To this end, Imatest computes a number of different dynamic range measurements, based on a variety of image noise thresholds. The noise thresholds are specified in terms of f-stops of equivalent luminance variation in the final image file, and dynamic range is computed for noise thresholds of 1.0 (low image quality), 0.5 (medium image quality), 0.25 (medium-high image quality) and 0.1 (high image quality). For most photographers and most applications, the noise thresholds of 0.5 and 0.25 f-stops are probably the most relevant to the production of acceptable-quality finished images, but many noise-sensitive shooters will insist on the 0.1 f-stop limit for their most critical work.
The image below shows the test results from Imatest for an in-camera JPEG file from the Sony A900 with a nominally-exposed density step target (Stouffer 4110), and the A900's settings at their default positions, where Dynamic Range Optimization is set to Off.

These are good results for in-camera JPEGs, near the results of other recent Sony SLRs we've tested, but not as good as recent results from other manufacturers. The tone curve shows excellent gradation in highlights, but the shadow end trails off a bit more abruptly.

Interestingly, the results with DRO set to Off were slightly better at the highest quality level (7.31 f-stops), however overall dynamic range remained the same at 10.6 f-stops. This is likely due to the fact that DRO standard increases shadow levels, which also makes noise slightly more evident, knocking the highest quality level down a bit to 7.26 f-stops.

Selecting DRO Plus (Auto) didn't have much of a result on the dynamic range numbers either, and also resulted in a warning about "indistinct steps" from Imatest.

Our standard RAW converter (Adobe Camera Raw, version 4.6 beta) was able to extract quite a bit more dynamic range (over 2 full stops), with a score of 9.36 f-stops at the highest quality level. These are excellent results, as the Sony A900's dynamic range score really benefits from ACR's default noise reduction. (Do note though, that the level of manipulation done to achieve the results above will result in severe color artifacts on color images: This level of dynamic range is really only achievable on monochrome images.)
Dynamic Range, the bottom line:
The net result was that the A900 JPEGs came in below those from most other DSLR models we've tested recently, but results from ACR processed RAW files were much better, only surpassed by the Nikon D700 at the highest quality level. An excellent performance.
To get some perspective, here's a summary of the Sony A900's dynamic range performance, and how it compares to other digital SLRs that we also have Imatest dynamic range data for. (Results are arranged in order of decreasing dynamic range at the "High" quality level.):
| Dynamic Range (in f-stops) vs Image Quality (At camera's base ISO) |
||||
| Model | 1.0 (Low) |
0.5 (Medium) |
0.25 (Med-High) |
0.1 (High) |
| Nikon D700 (Adobe Camera Raw 4.5) |
12.1 | 11.6 | 10.6 | 9.51 |
| Sony A900 (Adobe Camera Raw 4.6 beta) |
-- | 12.1 | 10.7 | 9.36 |
| Fujifilm S3 Pro (Adobe Camera Raw 2) |
12.1 | 11.7 | 10.7 | 9.0 |
| Nikon D40x (Adobe Camera Raw 4.1) |
12.0 | 10.9 | 10.3 | 8.9 |
| Canon EOS-1Ds Mark III (Adobe Camera Raw 4.5) |
11.5 | 10.7 | 9.96 | 8.84 |
| Nikon D3 (Adobe Camera Raw 4.5) |
11.7 | 11.0 | 10.0 | 8.75 |
| Canon EOS-1D Mark III (Adobe Camera Raw 4.5) |
11.7 | 10.7 | 9.99 | 8.73 |
| Nikon D300 (Adobe Camera Raw 4.3.1) |
11.4 | 10.9 | 9.87 | 8.45 |
| Sony A200 (Adobe Camera Raw 4.3.1) |
11.6 | 10.4 | 9.82 | 8.43 |
| Nikon D60 (Adobe Camera Raw 4.4.1) |
11.6 | 10.5 | 9.74 | 8.31 |
| Nikon D40 (Adobe Camera Raw 4.1) |
11.9 | 10.9 | 9.89 | 8.3 |
| Canon EOS-1Ds Mark III (Camera JPEG) |
10.9 | 10.2 | 9.71 | 8.23 |
| Pentax K100D (Adobe Camera Raw 3.6) |
11.3 | 10.3 | 9.51 | 8.23 |
| Pentax K200D (Adobe Camera Raw 4.4.1) |
-- | 10.5 | 9.54 | 8.19 |
| Pentax K10D (Adobe Camera Raw 3.7) |
10.6 | 10.0 | 9.29 | 8.19 |
| Sony A100 (Adobe Camera Raw 3.4) |
11.3 | 10.5 | 9.69 | 8.16 |
| Canon EOS-1Ds Mark II (Adobe Camera Raw 3) |
11.2 | 10.3 | 9.4 | 8.14 |
| Nikon D40x (Camera JPEG) |
10.8 | 10.0 | 9.42 | 8.04 |
| Canon Rebel XSi (Camera JPEG) (ALO on by default) |
11.3 | 10.1 | 9.34 | 8.01 |
| Fujifilm S3 Pro (Camera JPEG) |
-- | 9.9 | 9.4 | 7.94 |
| Sony A350 (Adobe Camera Raw 4.4) |
11.6 | 10.5 | 9.61 | 7.89 |
| Canon EOS-1D Mark III (Camera JPEG) |
-- | 10.2 | 9.7 | 7.88 |
| Nikon D3 (Camera JPEG) |
-- | -- | -- | 7.87 |
| Canon Digital Rebel XTi (Adobe Camera Raw 3.6) |
10.8 | 9.88 | 9.18 | 7.84 |
| Canon EOS-5D (Adobe Camera Raw 3) |
11.0 | 10.4 | 9.21 | 7.83 |
| Canon EOS-40D (Adobe Camera Raw 4.2) |
11.2 | 10.1 | 9.26 | 7.72 |
| Canon Rebel XSi (Adobe Camera Raw 4.4.1) |
10.6 | 9.95 | 9.1 | 7.68 |
| Nikon D700 (Camera JPEG) |
-- | -- | 9.05 | 7.67 |
| Canon EOS-5D (Camera JPEG) |
10.2 | 9.68 | 8.82 | 7.65 |
| Olympus E-3 (Adobe Camera Raw 4.3) |
10.3 | 10.1 | 9.29 | 7.64 |
| Nikon D60 (Camera JPEG) |
10.5 | 9.62 | 8.89 | 7.62 |
| Nikon D200 (Adobe Camera Raw 3) |
10.6 | 9.65 | 8.96 | 7.61 |
| Nikon D80 (Adobe Camera Raw 3.6) |
11.1 | 10.4 | 9.42 | 7.51 |
| Olympus E-500 (Adobe Camera Raw 3) |
10.7 | 9.97 | 8.90 | 7.46 |
| Olympus E-510 (Adobe Camera Raw 4.1) |
10.0 | 9.43 | 8.64 | 7.46 |
| Pentax K10D (Camera JPEG) |
-- | 9.49 | 8.88 | 7.44 |
| Nikon D300 (Camera JPEG) |
-- | -- | 8.70 | 7.44 |
| Nikon D2Xs (Adobe Camera Raw 3.6) |
10.6 | 9.9 | 8.93 | 7.42 |
| Canon EOS-40D (Camera JPEG) |
10.6 | 9.52 | 8.78 | 7.42 |
| Nikon D50 (Camera JPEG) |
10.7 | 9.93 | 8.70 | 7.36 |
| Sony A900 (Camera JPEG) (DRO off by default ) |
10.2 | 9.75 | 8.49 | 7.31 |
| Sony A200 (Camera JPEG) (DRO on by default) |
10.4 | 9.43 | 8.91 | 7.29 |
| Canon EOS 20D (Camera JPEG) |
10.3 | 9.66 | 8.85 | 7.29 |
| Canon EOS 30D (Camera JPEG) |
10.3 | 9.5 | 8.57 | 7.29 |
| Nikon D40 (Camera JPEG) |
10.4 | 9.8 | 8.89 | 7.28 |
| Sony A900 (Camera JPEG) (DRO on) |
10.1 | 9.76 | 8.47 | 7.26 |
| Sony A350 (Camera JPEG) (DRO on by default) |
10.3 | 9.55 | 8.85 | 7.19 |
| Nikon D80 (Camera JPEG) |
10.1 | 9.43 | 8.48 | 7.12 |
| Canon Digital Rebel XT (Camera JPEG) |
10.3 | 9.51 | 8.61 | 7.11 |
| Nikon D200 (Camera JPEG) |
-- | 9.07 | 8.36 | 7.11 |
| Olympus E-300 (Camera JPEG) |
10.8 | 9.26 | 8.48 | 7.07 |
| Olympus E-410 (Adobe Camera Raw 4.1) |
10.2 | 9.4 | 8.24 | 7.05 |
| Olympus E-500 (Camera JPEG) |
10 | 9.14 | 8.16 | 7.05 |
| Canon Digital Rebel XTi (Camera JPEG) |
9.83 | 9.10 | 8.27 | 7.04 |
| Canon EOS-1Ds Mark II (Camera JPEG) |
10.3 | 9.38 | 8.6 | 7.04 |
| Pentax K200D (Camera JPEG) |
-- | 9.5 | 8.3 | 7.01 |
| Canon Digital Rebel (Camera JPEG) |
10.1 | 9.11 | 8.47 | 6.97 |
| Nikon D2Xs (Camera JPEG) |
9.82 | 8.98 | 8.23 | 6.97 |
| Panasonic DMC-L10 (Adobe Camera Raw 4.2) |
10.4 | 9.34 | 8.48 | 6.91 |
| Sigma DP1 (Camera JPEG) |
-- | 8.95 | 8.13 | 6.91 |
| Pentax *istDs (Camera JPEG) |
10.2 | 10 | 8.87 | 6.9 |
| Sony A100 (Camera JPEG) |
10.2 | 9.24 | 8.39 | 6.89 |
| Pentax K100D (Camera JPEG) |
10.3 | 9.3 | 8.39 | 6.73 |
| Nikon D2x (Camera JPEG) |
-- | 8.93 | 7.75 | 6.43 |
| Olympus E-3 (Camera JPEG) |
9.32 | 9.06 | 8.5 | 6.42 |
| Panasonic DMC-L10 (Camera JPEG) |
-- | 8.94 | 8.00 | 6.38 |
| Olympus E-420 (Camera JPEG) |
9.18 | 8.82 | 7.93 | 6.37 |
| Olympus E-410 (Camera JPEG) |
-- | -- | 7.60 | 5.99 |
| Nikon D70s (Camera JPEG) |
9.84 | 8.69 | 7.46 | 5.85 |
| Nikon D70 (Camera JPEG) |
9.81 | 8.76 | 7.58 | 5.84 |
| Olympus E-510 (Camera JPEG) |
7.70 | 7.16 | 5.87 | 3.55 |
The results shown in the table are interesting. One of the first things that struck me when I initially looked at test data for a wide range of d-SLRs, was that here again, purely analytical measurements don't necessarily correlate all that well with actual photographic experience. There's no question that the Fuji S3 Pro deserves its place atop the list, as its unique "SR" technology does indeed deliver a very obvious improvement in tonal range in the highlight portion of the tonal scale. I was surprised to see the analytical results place the Olympus E-300 as highly as they did, given that our sense of that camera's images was that they were in fact noisier than those of many other d-SLRs that we looked at. In the other direction, I was quite surprised to see the Nikon D2x place as low on the listings as it did, given that we found that camera's shadow detail to be little short of amazing.
One thing that's going on here though, is that we tested each camera at its lowest (base) ISO setting, which should produce best-case noise levels. This is in fact what many photographers will be most interested in, but it does perhaps place some of the Nikons (like the D40) at a disadvantage, as their lowest ISO setting is 200, as compared to the ISO 100 settings available on most other models.
Sony A900 Resolution Chart Test Results

The chart above shows consolidated results from spatial frequency response measurements in both the horizontal and vertical axes. The "MTF 50" numbers tend to correlate best with visual perceptions of sharpness, so those are what I focus on here. The uncorrected resolution figures are 2,340 line widths per picture height in the horizontal direction (corresponding to the vertically-oriented edge), and 2,298 lines along the vertical axis (corresponding to the horizontally-oriented edge), for a combined average of 2,319 LW/PH. Correcting to a "standardized" sharpening with a one-pixel radius increased both vertical and horizontal resolution significantly, resulting in an average of 3,397 LW/PH, one of the highest resolutions we've seen yet.
To see what's going on, refer to the plots below, which show the actual edge profiles for both horizontal and vertical edges, in both their original and corrected forms. Here, you can see that there is fairly conservative in-camera sharpening applied (only slight bumps at the top ends, and no noticeable bumps at the bottom ends of the black edge profile curves). Imatest reports that the horizontal direction (vertical edge) is "undersharpened" by 15.4% while the vertical direction (horizontal edge) is undersharpened by 14.5%. Professionals and serious amateurs prefer this to oversharpening, and the A900's images respond very well to the use of strong/tight sharpening post-exposure in Photoshop or some other image editor. (That said, you should be able to extract still more fine detail if you begin with a RAW file, rather than a JPEG.)
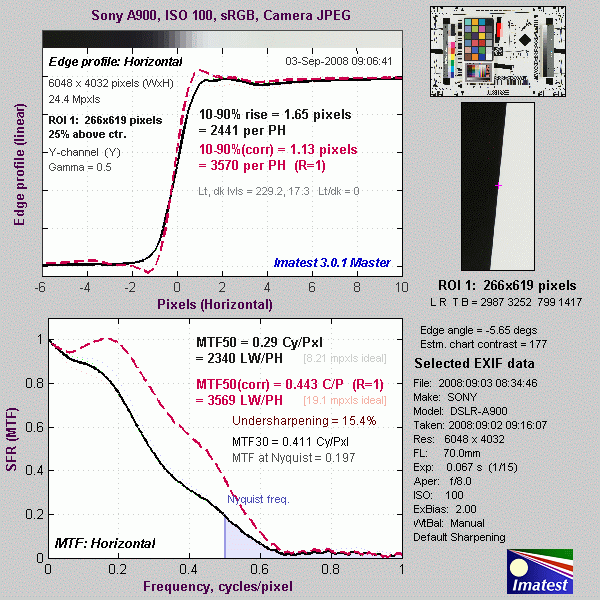

Shooting Modes
Sony A900 Modes and Menus
 Capture Mode: When powered on, the camera is automatically
placed into Record mode. The Exposure Mode dial on top of the camera sets the
main shooting mode, with the following options:
 Manual: Provides complete user control over the exposure,
including both aperture and shutter speed settings. A Bulb shutter setting
also becomes available in this mode, allowing variable length exposures for
as long as you hold down the shutter button.
 Shutter Priority: Allows the user to set the shutter speed,
from 1/8,000 to 30 seconds, while the camera selects the most appropriate
aperture setting.
 Aperture Priority: The opposite of Shutter Priority, this
mode puts the user in control of the aperture setting while the camera selects
the best shutter speed. (The aperture range varies with the lens in use.)
 Program AE (with Shift): This mode places the camera in
control over both aperture and shutter speed, while the user has access to
all other menu functions. Turning either of the control dials cycles through
a range of equivalent exposure settings, enabling the Program Shift mode.
 Full Auto: This mode places the camera entirely in control
of the exposure, though the user can adjust the exposure compensation and
determine the flash mode.
 Custom Modes 1-3: The A900 allows you to register three
custom exposure modes, through the Memory option of the Record menu, so that
you can quickly access your reserved settings by turning the Mode dial to
one of the three numbered positions.
 Playback Mode: The Playback button on the rear panel accesses
Playback mode, where you can review captured images. The left and right arrow
keys, as well as the up and down keys, scroll through the images on the card.
You can enlarge captured images or display them in an index format for quick
viewing.
Sony A900 Menus
Pressing the Menu button provides access to the camera's full menu system. The following options are available in most camera modes as menu tabs at the top of the display:
Sony A900 Record Menu:

Sony A900 full Record menu layout
(note, large download for dialup users)
| Record Menu 1 Options | ||
|
Top-Level
Selection |
Second-Level
|
Notes
|
|
Image Size
|
3:2 aspect mode:
- L:24M 16:9 aspect mode: - L:21M APS-C size Capt. On: |
Sets the pixel dimensions of
captured still images.
L=(6,048 x 4,032) L=(6,048 x 3,408) L=(3,984 x 2,656) |
|
Aspect Ratio
|
- 3:2
- 16:9 |
Select normal or HDTV wide screen
aspect ratios for images.
|
|
Quality
|
- RAW
- cRAW - RAW & JPEG - cRAW & JPEG - Extra Fine - Fine - Standard |
Specifies the compression level and file type of images. cRAW is compressed RAW. JPEG is Fine when saved with RAW or cRAW.
|
|
D-Range Optimizer
|
- Off
- Standard - Advanced Auto - Advanced with 5-step level adjustment |
Dynamic Range Optimization settings.
|
|
Custom Button
|
- AF lock
- AF/MF control - Optical preview - Intelligent preview - ISO - White balance - Exposure comp. - Flash compens. - Drive mode - AF area - Image size - Quality - Creative Style - D-Range Optimizer - Flash mode - Memory |
Defines the function of the Custom button.
|
|
Creative Style
|
- Standard
- Vivid - Neutral - Clear - Deep - Light - Portrait - Landscape - Sunset - Night View - Autumn Leaves - B/W - Sepia |
Customizable styles start with a preset
style, but allow contrast, saturation, sharpness, brightness and zone
adjustments (B/W and Sepia styles exclude saturation adjustment).
|
|
Color Space
|
- sRGB
- Adobe RGB |
Changes the color space setting.
|

Sony A900 full Record menu layout
(note, large download for dialup users)
| Record Menu 2 Options | ||
|
Top-Level
Selection |
Second-Level
|
Notes
|
|
Flash Mode
|
- Autoflash
- Fill-flash - Rear sync. - Wireless |
Wireless flash shooting requires
HVL-F56AM or HVL-F36AM external flash.
|
|
Flash Control
|
- ADI Flash
- Pre-flash TTL |
Selects the flash metering method.
ADI uses pre-flash, but includes distance info provided by lens. Pre-flash
TTL uses exposure calculated with pre-flash only.
|
|
Flash Compensation
|
- -3 to +3
|
Sets the flash exposure compensation
level in EV.
|
|
Exposure Step
|
- 0.5 EV
- 0.3 EV |
Exposure compensation increment.
|
|
ISO Auto Range
|
- 400-1,600
- 400-800 - 200-1,600 - 200-800 - 200-400 |
Controls the minimum and maximum ISO values
allowed in Auto mode.
|

Sony A900 full Record menu layout
(note, large download for dialup users)
| Record Menu 3 Options | ||
|
Top-Level
Selection |
Second-Level
|
Notes
|
|
AF-A Setup
|
- AF-A
- DMF |
Automatic AF or Direct Manual
Focus which allows fine manual adjustment after AF.
|
|
AF Area
|
- Wide
- Spot - Local |
Wide option lets the camera choose
AF area, Spot uses center focus area, Local allows user to choose which
of the 9 AF sensors to use.
|
|
Priority Setup
|
- AF
- Release |
The AF option will not release
the shutter unless focus is set, while the Release setting trips the shutter
even if AF is not established.
|
|
AF Illuminator
|
- Auto
- Off |
Enables the LED AF illuminator, for use in very
dark shooting conditions.
|
|
AF w/Shutter
|
- On
- Off |
Enables AF when shutter button is half-depressed.
When Off, autofocus by pressing center of multiselector, or a programmed
button.
|
|
Long exp. NR
|
- On
- Off |
Enables dark frame subtraction noise reduction
for exposures longer than one second.
|
|
High ISO NR
|
- High
- Normal - Low - Off |
Noise reduction levels at high ISOs (ISO 1,600 or higher).
|

Sony A900 full Record menu layout
(note, large download for dialup users)
| Record Menu 4 Options | ||
|
Top-Level
Selection |
Second-Level
|
Notes
|
|
Memory
|
Select settings for register:
- 1 - 2 - 3 |
Allows three sets of shooting
modes and parameters to be saved for quick recall on the Mode dial.
|
|
Rec mode reset
|
- OK
- Cancel |
Resets record mode settings to factory
defaults.
|
Sony A900 Custom Menu:

Sony A900 full Custom menu layout
(note, large download for dialup users)
| Custom Menu 1 Options | ||
| Top-Level Selection |
Second-Level | Notes |
|
AF/MF Button
|
- AF/MF control
- AF lock |
Use AF/MF for AF lock instead
of switching between auto focus and manual focus.
|
|
AF/MF Control
|
- Hold
- Toggle |
Hold requires button to be held down to switch,
while toggle switches modes every time it's pressed.
|
|
AF Drive Speed
|
- Fast
- Slow |
Speed of AF. Slow is useful for macro work.
|
|
AF Area Display
|
- 0.6 sec
- 0.3 sec - Off |
Duration of AF area illumination in viewfinder.
|
|
Focus Hold Button
|
- Focus hold
- Optical Preview - Intelligent Preview |
For lenses with a Focus Hold button, you
can change it to enable optical or intelligent preview modes.
|
|
Auto Review
|
- 10 sec.
- 5 sec. - 2 sec. - Off |
Sets the display time for an image immediately
post-capture, or turns review off.
|
|
Preview Function
|
- Intelligent
- Optical |
Sets the mode for the Preview button on the
front of the camera. Optical shows depth of field, and Intelligent shows
effects of exposure compensation, white balance, etc.
|

Sony A900 full Custom menu layout
(note, large download for dialup users)
| Custom Menu 2 Options | ||
|
Top-Level
Selection |
Second-Level
|
Notes
|
|
AEL Button
|
- AEL hold
- AEL toggle - Spot AE, AEL hold - Spot AE, AEL toggle |
Changes the behavior of the
AE Lock button. Spot AE can be performed before AEL hold or toggle, regardless
of metering mode.
|
|
Ctrl Dial Setup
|
- Front shutter speed / back aperture
- Front aperture / back shutter speed |
Adjust the shutter speed with the front dial
and aperture with the rear, or vice vera.
|
|
Dial Exp. Comp.
|
- Off
- Front dial - Rear dial |
Selects which dial adjusts exposure
compensation. Has no effect in Manual exposure mode.
|
|
Ctrl Dial Lock
|
- On
- Off |
On only allows dials to function while shutter
speed and aperture are displayed. Off allows changes even when not displayed.
|
|
Button Ops.
|
- Exclusive disp
- Quick Navi |
Display exclusive screen, or Quick Navi screen
when pressing ISO, WB, Drive, EV comp or C (custom) button.
|
|
Release w/o Card
|
- Enable
- Disable |
Allows shutter release without card installed.
|
|
Rec. Info. Disp.
|
- Auto Rotate
- Horizontal |
Auto Rotate automatically rotates the information
display when the camera's orientation changes.
|

Sony A900 full Custom menu layout
(note, large download for dialup users)
| Custom Menu 3 Options | ||
|
Top-Level
Selection |
Second-Level
|
Notes
|
|
Exp. Comp. Set
|
- Ambient&flash
- Ambient only |
Sets whether Exposure Compensation
adjusts the ambient exposure only, or the ambient exposure and the flash
(if flash is in use).
|
|
Bracket Order
|
- 0 to - to +
- - to 0 to + |
Sets the order in bracket sequence. Does
not apply to DRO advanced bracket.
|
|
Custom Reset
|
- OK
- Cancel |
Resets all Custom menu options to their
default settings.
|
Sony A900 Playback Menu:

Sony A900 full Playback menu layout
(note, large download for dialup users)
| Playback Menu 1 Options | ||
|
Top-Level
Selection |
Second-Level
|
Notes
|
|
Delete
|
- Marked images
- All images |
Lets
you delete all photos on the card, or only marked photos.
|
|
Format
|
- OK
- Cancel |
Formats the selected memory card,
erasing all files (even protected ones).
|
|
Protect
|
- Marked images
- All images - Cancel all |
Write protects images, or removes
protection.
|
|
DPOF Setup
|
- Marked images
- All images - Cancel all |
Sets up photos for DPOF (Digital Print Order
Format) printing on a compatible standalone printer.
|
|
Date Imprint
|
- On
- Off |
Chooses whether or not to print the date
on all photos in your DPOF order.
|
|
Index Print
|
- Create index
- Delete index |
Chooses whether to create or delete an index
print of all photos in your DPOF order.
|
|
Playback Display
|
- Auto rotate
- Manual rotate |
Sets whether the camera automatically rotates
vertically-shot images in Playback mode.
|

Sony A900 full Playback menu layout
(note, large download for dialup users)
| Playback Menu 2 Options | ||
|
Top-Level
Selection |
Second-Level
|
Notes
|
|
Slideshow
|
Press center of multi-selector to start/stop slide show.
|
Display slide show of captured images.
|
|
Interval
|
- 30 sec
- 10 sec - 5 sec - 3 sec - 1 sec |
Sets the slide show interval.
|
Sony A900 Setup Menu:
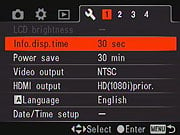
Sony A900 full Setup menu layout
(note, large download for dialup users)
| Setup Menu 1 Options | ||
|
Top-Level
Selection |
Second-Level
|
Notes
|
|
LCD Brightness
|
Select level (-5 to +5)
|
Adjust LCD brightness.
|
|
Info. Disp.Time
|
- 1 min
- 30 sec - 10 sec - 5 sec |
Length of time record information
is displayed on LCD in record mode.
|
|
Power Save
|
- 30 min
- 10 min - 5 min - 3 min - 1 min |
Determines the amount of inactivity time that
will cause camera to enter a low power mode. Pressing shutter button half-way
exits power save mode.
|
|
Video Output
|
- NTSC
- PAL |
Selects composite video out standard.
|
|
HDMI Output
|
- HD(1080i)prior.
- HD(720p)prior. - SD priority |
Selects type of signal over HDMI interface
(normally automatic).
|
|
Language
|
- English
- French - Spanish - Italian - Japanese - Chinese |
Menu language setup.
|
|
Date/Time Setup
|
Fields for: - Date - Time - Date format |
Set the cameras internal clock and calendar.
|

Sony A900 full Setup menu layout
(note, large download for dialup users)
| Setup Menu 2 Options | ||
|
Top-Level
Selection |
Second-Level
|
Notes
|
|
Memory Card
|
- Memory Stick
- CompactFlash |
Select type of memory card.
|
|
File Number
|
- Series
- Reset |
Set whether filename continues
to increment from last image, regardless of whether folder or card has
changed, or the card has been formatted.
|
|
Folder Name
|
- Standard form
- Date form |
Select standard folder names (i.e.,
100MSDCF), or include the date in the folder name (i.e.., 10170101).
|
|
Select Folder
|
Select from a list of folders.
|
Selects current folder.
|
|
New Folder
|
- OK
|
Create a new folder with a number incremented
from the largest previous number.
|
|
USB Connection
|
- Mass Storage
- PTP - Remote PC |
Sets USB mode.
|
|
MassStrg.Card
|
- Both cards
- Selected card |
Display both the Memory Stick Duo and CF cards,
(requires Windows 2000 SP3 or higher) or just the selected card when connected
to a computer.
|

Sony A900 full Setup menu layout
(note, large download for dialup users)
| Setup Menu 3 Options | ||
|
Top-Level
Selection |
Second-Level
|
Notes
|
|
Menu Start
|
- Top
- Previous |
Display the first or previous menu when
menu button is pressed.
|
|
Delete Confirm
|
- "Delete" first
- "Cancel" first |
Selects default action for Delete. |
|
Audio Signals
|
- On
- Off |
Enables sound during self-timer
countdown, etc.
|
|
Cleaning Mode
|
After cleaning, turn camera off. Continue?
- OK - Cancel |
Enables sensor cleaning mode, which vibrates
the sensor, then flips the mirror up and opens the shutter for access with
a blower or swab. Can be performed only when battery is at least 3/4 charged.
|
|
AF Micro Adj.
|
- On
- Off - Clear |
If on, registers the adjustment value of the
attached lens or focuses on a subject using the registered value, set between
-20 and +20. Clear removes the preset values.
|
|
Amount
|
Set the desired adjustment values for the AF Micro Adj. setting.
|
Sets the adjustment values for fine AF adjustment.
|
|
Focusing Screen
|
- Type G
- Type M - Type L |
Sets the focusing screen. G is default,
Type M makes it easier to check peak focus and sharpness (suitable for brighter
lenses f/1.4 to 2.8), and L is equipped with a grid.
|

Sony A900 full Setup menu layout
(note, large download for dialup users)
| Setup Menu 4 Options | ||
|
Top-Level
Selection |
Second-Level
|
Notes
|
|
APS-C Size Capt.
|
- On
- Off |
Captures an image in the area
equivalent to the APS-C size.
|
|
Reset Default
|
- OK
- Cancel |
Restore factory defaults for all menu settings.
|
Nr
Sony A900 Noise Reduction
One very encouraging sign in the Sony A900 is the extent to which Sony's engineers have listened to reviewers in their implementation of noise reduction (NR). The Sony A700 was an excellent DSLR, but many (ourselves foremost among them) felt that its Achilles' heel was that its high-ISO noise reduction couldn't be disabled, even in its RAW files.
In our view, a RAW file should be just that: An exact copy of whatever raw data came from the sensor array. Think of it as a "digital negative," which you can then choose to "develop" however you want. In rendering their RAW files, different users may prefer different tone curves, sharpening or noise reduction algorithms, color mapping schemes, etc. The important thing is that these choices be left up to the user.
The problem with the A700 was that its RAW files weren't really RAW: Even if you set the high-ISO noise reduction to "Off," there was always some amount of inter-pixel NR applied before the data was recorded in the RAW file. This meant that, no matter how good the NR algorithms in your post-processing software were, or how much you might want to choose to leave some noise in the image in order to preserve fine subject detail, you had to accept the particular tradeoffs chosen by the Sony engineers in their pre-RAW image processing. Ultimately, the A700's files came to be called "cooked RAW" on many internet forums.
Imaging Resource took the lead in calling attention to this issue in our early analysis of high-ISO images from the A700, so you can imagine how elated we were to hear that, in the Sony A900, when you turn NR Off, it actually does turn off, at least the inter-pixel processing in the RAW files!
Astute readers will note, though, that Sony's marketing materials for the A900 still make prominent mention of NR that's performed before data is saved in the RAW file. Also, in our discussions with Sony product managers and planners, they did say that there is still some NR that's done, even with the NR option set to Off. The good news is that this is "good NR," not the "bad NR" that caused so much foment in the case of the A700.
Wait a minute though: "Good NR"? "Bad NR"? What's that mean? This is an area that could cause a lot of confusion, and hence argument, so we'll take a moment here to explain it.
There are two fundamentally different approaches to reducing noise from an image sensor. On the one hand, you can deterministically measure the contribution certain noise sources are making to a pixel's output and subtract that contribution back out of the final image data. Alternatively, you can reduce the perceptual impact of the noise, through various clever image-processing techniques that act over areas of the image involving multiple pixels.
By definition, deterministic noise reduction techniques are removing only noise from the imager chip's signal, leaving the original image data untouched. This is a good thing, and is why we refer to deterministic NR as "good" NR.
On the other hand, perceptually-based noise reduction relies on characteristics of human vision and tries to remove both noise and subject detail in such a way that we aren't aware of how much subject detail is being lost, or of how much noise is still present. Perceptual NR basically tries to determine how much subject detail is present in a given area of the image, and ratchets the noise reduction up or down accordingly: In areas where there's a lot of local contrast (strong, fine-grained patterns, textures, or edges), the NR algorithm leaves the image more or less alone. There'll be more noise there, but the subject detail will tend to mask it, so it won't bother viewers as much. Alternately, in large areas with very little subject detail present (sky areas, for instance), any noise present will be very visible, so the NR algorithm flattens-out local brightness or color variations.
The problem, of course, is that a perceptual NR algorithm can only guess at what's subject detail and what's noise, so it's inevitably going to lose some of the former in its attempts to eliminate the latter. As the overall noise level increases (at higher ISOs or with smaller pixels), the local contrast from the noise will overwhelm that from fine subject detail to a greater and greater extent. At the same time though, there's a greater need for noise reduction, so the tendency will be to set the threshold for stomping on (flattening out) local contrast lower and lower. The result is the "watercolor" look we've all seen whenever we push the ISO level higher than our camera's sensor is really capable of delivering. Because they unavoidably throw away subject detail with the noise, we call perceptually-based NR systems "bad" NR.
So, back to the Sony A900 and how it differs from previous Sony DSLRs, notably the A700. One of the strengths of CMOS sensors (as used in both cameras) is that the technology allows per-pixel (good) noise reduction. The sensor in the Sony A900 takes advantage of this in all its shots, regardless of the setting of the Noise Reduction setting in its menu system. This is as it should be: Since per-pixel NR loses no subject detail, there's no reason to ever disable it. Per-pixel NR won't get you all the way to where you want to go, though, particularly at high ISOs. The A900 thus applies varying amounts of perceptual-based NR to its images. Unlike most digital SLRs, it applies this to both its RAW and JPEG files. BUT, unlike the A700, when you ask the Sony A900 to turn off its high-ISO NR, it does in fact refrain from applying perceptual NR to its RAW files.
Big kudos to Sony for listening to its customers (and reviewers) in this critical area!
Comparison
Sony A900 compared to other "compact" full-frame DSLRs
The chart below compares the Sony Alpha A900 with the Canon 5D Mark II and Nikon D700. What we've done below is presented something of a hybrid comparison between these three models. A red cell means that a given camera performs below the other two, a green cell means that it performs better than the other two, and a yellow cell means it falls between the other two. In cases where two cameras share a superior capability, both cells will be colored green.
| Sony A900 vs other "compact" Full Frame DSLRs | ||||
|
Manufacturer
|
Canon
|
Nikon
|
Sony | |
|
Model
|
EOS 5D Mark II
|
D700
|
DSLR-A900 | |
|
Imaging
System |
Sensor Manufacturer
|
Canon
|
Sony
|
Sony
|
|
Sensor Type
|
CMOS
|
CMOS
|
CMOS
|
|
|
Color Filter Array
|
RGB
|
RGB
|
RGB
|
|
|
Total Megapixels
|
22.0
|
12.87
|
25.7
|
|
|
Effective Megapixels
|
21.1
|
12.1
|
24.6
|
|
|
Effective Sensor Size (mm)
|
36.0 x 24.0
|
36.0 x 23.9
|
35.9 x 24.0
|
|
|
Pixel Pitch (µm)
|
6.4
|
8.5
|
5.9
|
|
|
Focal Length Multiplier (approx.)
|
1.0x
|
1.0x
|
1.0x
|
|
|
Image Processor
|
DIGIC IV
|
EXPEED
|
Dual BOINZ
|
|
|
Viewfinder
|
Type
|
Eye-level pentaprism
|
Eye-level pentaprism
|
Eye-level pentaprism
|
|
Coverage
|
98%
|
95%
|
100%
|
|
|
Magnification (-1 diopter with 50mm lens at infinity)
|
0.71x
|
0.72x
|
0.74x
|
|
|
Eyepoint (mm)
|
21
|
18
|
20
|
|
|
Dioptric Adjustment Range (diopters)
|
-3.0 to +1.0
|
-3.0 to +1.0
|
-3.0 to +1.0
|
|
|
Focusing Screen
|
Interchangeable,
Eg-A standard focusing screen provided, Eg-D: Grid lines, Eg-S (point of Focus) available |
Fixed
Type B BriteView Clear Matte VI, with on-demand grid lines |
Interchangeable,
Spherical Acute Matte focusing screen (type G) provided, Type L (grid) and Type M (super-spherical acute matte) available |
|
|
Built-in Eyepiece Shutter
|
No | Yes | Yes | |
|
Viewfinder
Info Display |
AF (AF points, focus confirmation light), Exposure (shutter speed, aperture, ISO speed, AE lock, exposure level, spot metering circle), Flash information (flash ready, flash exposure compensation, High-speed sync, FE lock), Image information (Highlight tone priority, monochrome shooting, maximum burst, white balance correction, CF card information), battery information
|
AF (AF points, focus confirmation, focus range-finder), on-demand framing grid, Exposure (exposure mode, shutter speed, shutter speed lock, aperture, aperture lock, aperture stop, ISO speed, Auto ISO, AE lock, exposure level, center-weighted metering circle, metering mode), Flash information (flash ready, flash exposure compensation, flash sync, FV lock), Image information (maximum burst, space on card, white balance recording), battery status, tilt indicator
|
AF (AF points, focus confirmation, manual focus), 16:9 area, APS-C crop area, Exposure (shutter speed, aperture, aperture, EV scale, AE lock, exposure level, spot metering circle), Flash information (flash ready, flash exposure compensation, wireless flash, high-speed sync), Image information (maximum burst, shake warning, SteadyShot level, aspect ratio
|
|
|
Depth of Field Preview
|
Enabled with depth-of-field preview button
|
Enabled with depth-of-field preview button
|
Enabled with depth-of-field preview button
|
|
|
Recording
System |
Recording Media / Slot Type
|
CF Card Type I and II, UDMA-compliant CF cards supported; (USB v.2.0 hard drive, via optional Wireless File Transmitter WFT-E4A)
|
Type I CF card
UDMA-compliant supported Wireless Transmitter WT-4A supported |
Dual CF Card (Type I and II, UDMA-compliant CF cards supported )
Memory Stick Duo slots |
|
Compatible File System
|
FAT 16 / FAT 32
|
FAT 16 / FAT 32
|
FAT 16 / FAT 32
|
|
|
Recording Formats
|
RAW, sRAW1, sRAW2 (CR2), JPEG, MOV
|
RAW 12-bit or 14-bit (uncompressed, lossless compressed or compressed NEF), TIFF (32-bit), JPEG
|
RAW, cRAW (ARW), JPEG
|
|
|
A/D conversion
|
14-bit
|
14-bit
|
12-bit
|
|
|
Dynamic Range Optimization Modes
|
Yes
(Highlight Tone Priority, on/off) |
Yes
(Advanced D-Lighting, 4 settings plus off) |
Yes
(D-Range Optimization, 7 settings plus off) |
|
|
Maximum Resolution
|
5,616 x 3,744
|
FX format (36 x 24): DX format (24 x 16): |
6,048 x 4,032
|
|
|
Reduced Resolutions (JPEG only)
|
4,080 x 2,720
2,784 x 1,856 |
FX format (36 x 24): DX format (24 x 16): |
4,400 x 2,936
3,024 x 2,016 16:9: APS-C: |
|
|
RAW + JPEG Recording
|
Yes, selectable JPEG resolution / compression
|
Yes, selectable JPEG resolution / compression
|
Yes, selectable JPEG resolution / compression
|
|
|
Processing Parameters,
Color Space & White Balance |
User-Selectable Color Space
|
Yes
sRGB + Adobe RGB |
Yes
sRGB + Adobe RGB |
Yes
sRGB + Adobe RGB |
|
WB settings
|
Auto, Daylight, Shade, Cloudy, Tungsten Light, White Fluorescent Light, Flash, Custom, Color Temperature setting
|
Auto, Direct Sunlight, Cloudy, Shade, Fluorescent, Incandescent, Flash, Custom, Color Temperature setting
|
Auto, Daylight, Shade, Cloudy, Tungsten, Fluorescent, Flash, 3 Custom, Color Temperature setting
|
|
|
Manual Color Temperature Setting Range
|
2,500 ~ 10,000K
|
2,500 ~ 10,000K
|
2,500 ~ 9,900K
|
|
|
WB Adjustment Range
|
Blue/Amber and/or Magenta/Green bias
±9 steps |
Blue/Amber and/or Magenta/Green bias
±6 steps 5 mireds per step |
Blue/Amber and/or Magenta/Green bias
±9 steps |
|
|
Vignette Correction
|
Yes
|
Yes
|
No | |
|
Adjustable High ISO NR (levels)
|
Yes
(3, plus off) |
Yes
(4, plus off) |
Yes (4, plus off) |
|
|
Phase
Detection Autofocus System |
Type
|
TTL-CT-SIR AF-dedicated CMOS sensor
|
TTL phase detection by Nikon Multi-CAM3500FX autofocus module
|
TTL phase detection by CCD line sensors
|
|
# of Focusing Points (Focusing Point Type)
|
9-point (1 center high-precision cross-type, 8 line-type, plus 6 line-type assist AF points), light source detection
|
51-point (15 cross-type, 36 line-type)
|
9-point (1 center dual cross-type, 8 line-type, plus 10 line-type assist AF points)
|
|
|
Superimposed Focus Point Display
|
Yes
|
Yes
|
Yes
|
|
|
AF Working Range
|
EV -0.5 ~ 18
|
EV -1 ~ 19
|
EV 0 ~ 18
|
|
|
AF-assist Beam
|
None. Emitted by EX-series Speedlite or optional ST-E2 Speedlite Transmitter
|
Yes
Bright incandescent lamp |
Yes
Bright LED |
|
|
AF Servo Modes
|
Auto, One-Shot AF, Predictive AI Servo AF, AI Focus AF, Manual Focus (MF)
|
Single (S), Continuous (C), Manual Focus (M)
|
Single (AF-S), Auto (AF-A), Continuous (AF-C), Direct Manual Focus (DMF), Manual Focus (MF)
|
|
|
AF Area Modes
|
Single point, Auto area
|
Single point, Auto area, Dynamic area (9-points, 21-points, 51-points, or 51-points with 3D-tracking)
|
Wide, Spot, Local (9 local focus areas selectable)
|
|
|
Focus Tracking
|
Focus tracking automatically activated by subject status in AI Focus or AI Servo mode
|
Focus tracking automatically activated by subject status
|
Focus tracking automatically activated by subject status
|
|
|
Exposure
Control |
Shooting Modes
|
Auto, Creative Auto, Program AE (shiftable), Shutter-priority AE, Aperture-priority AE, Manual, Bulb, 3 Custom settings
|
Program AE (shiftable), Shutter-priority AE, Aperture-priority AE, Manual mode
|
Auto, Program AE (shiftable), Shutter-priority AE, Aperture-priority AE, Manual mode, 3 Custom settings
|
|
Metering Zones
|
35
|
1,005
|
40
|
|
|
Metering Modes
|
Evaluative metering (linked to all AF points), Partial metering (approx. 8%; center), Spot metering (approx. 3.5%; center), Center-weighted average
|
3D Color Matrix Metering II, Center-weighted: Weight of 75% given to 8, 12, 15, or 20mm dia. circle in center of frame, Spot: Meters 3mm dia. circle (about 1.5% of frame) centered on active focus area
|
Multi-segment, Center-weighted average, Spot
|
|
|
Metering System Working Range (with 50mm f/1.4 lens, ISO 100)
|
EV 1 ~ 20
|
EV 0 ~ 20
EV 2 ~ 20 (Spot metering) |
EV 0 ~ 20
EV 2 ~ 20 (Spot metering) |
|
|
ISO Range / Extended
|
100 ~ 6400 / 50, 25600
|
200 ~ 6400 / 100, 25600
|
200 ~ 3200 / 100, 6400
|
|
|
Exposure Compensation
|
+/-2 EV in 1/2 or 1/3 EV increments
|
+/- 5EV in 1/2 or 1/3 EV increments
|
+/-3 EV in 1/2 or 1/3 EV increments
|
|
|
Automatic Exposure Bracketing
|
3 exposures, +/-2 EV in 1/2 or 1/3 EV steps
|
2 to 9 exposures, +/- 5 EV in increments of 1/3, 1/2, 2/3 or 1 EV
|
3 or 5 exposures, +/- 3 EV in increments of 1/3, 1/2, 2/3, 1 or 2 EV
|
|
|
Shutter
Speeds,
Frame Rate, Shutter Lag |
Shutter Type
|
Electronically-controlled focal-plane shutter; rated for 150K actuations
|
Electronically-controlled focal-plane shutter; rated for 150K actuations
|
Electronically-controlled focal-plane shutter; rated for 150K actuations
|
|
Shutter Speed Range
|
1/8000 ~ 30 sec. (1/2 or 1/3EV increments) and bulb
|
1/8000 ~ 30 sec. (1/2 or 1/3EV increments) and bulb
|
1/8000 ~ 30 sec. (1/2 or 1/3EV increments)
and bulb
|
|
|
Maximum Frames Per Second / Buffer depth
|
3.9 fps / 78 large/fine JPEG or 13 RAW frames
(manufacturer's spec) |
5 fps / 100 JPEG or 23 12-bit RAW or 20 14-bit RAW frames
up to 8 fps with optional MB-D10 battery pack (manufacturer's spec) |
5 fps / 105 large/fine JPEG or 12 RAW frames
(manufacturer's spec) |
|
|
Shutter lag, full AF (sec.)
|
TBD
|
0.197
|
0.183
|
|
|
Shutter lag, prefocus (sec.)
|
TBD
|
0.045
|
0.072
|
|
|
Flash
|
Built-in Flash / Guide Number at ISO 100.
|
No
|
Yes, (GN 12)
can act as Wireless Commander |
No
|
|
Max flash x-sync speed. (sec.)
|
1/200
|
1/250
|
1/250
(1/200 with SteadyShot active) |
|
|
PC Sync Terminal
|
Yes
|
Yes
|
Yes
|
|
|
Playback
System |
LCD Size / Pixel Count
|
3.0 in. LCD /
921,600 pixels |
3.0 in. LCD /
921,600 pixels |
3.0 in. LCD /
921,600 pixels |
|
Enlarged Playback / Scroll
|
Up to TBDx / Yes
|
Up to 27x / Yes
|
Up to 19x / Yes
|
|
|
LCD Monitor Brightness Adjustment Range
|
7 steps
|
7 steps
|
7 steps
|
|
|
Automatic Rotation for Vertical Shots
|
Yes
|
Yes
|
Yes
|
|
|
Extensive In-camera Image Editing
|
No
|
Yes,
D-Lighting, Red-eye Correction,Trim, Monochrome, Filter Effects, Color Balance, Image Overaly |
No
|
|
|
Other
Features
|
Live View mode
|
Yes
Phase- and Contrast-detect modes, Face detection, Exposure simulation |
Yes
Phase- and Contrast-detect modes |
No
(but has "Intelligent Preview") |
|
Computer Connection
|
USB 2.0 High-Speed, PTP-compliant
|
USB 2.0 High-Speed, PTP-compliant
|
USB 2.0 High-Speed, PTP-compliant
|
|
|
Direct Printing (PictBridge compliant printers)
|
Yes
|
Yes
|
Yes
|
|
|
Menu Languages (US model)
|
25 (English, German, French, Dutch, Danish, Portuguese, Finnish, Italian, Norwegian, Swedish, Spanish, Greek, Russian, Polish, Czech, Hungarian, Romanian, Ukraine, Turkish, Arabic, Thai, Simplified/Traditional Chinese, Korean, Japanese)
|
15 (Chinese [Simplified and Traditional], Dutch, English, Finnish, French, German, Italian, Japanese, Korean, Polish, Portuguese, Russian, Spanish, Swedish)
|
6 (English, French, Spanish, Italian, Japanese, Chinese)
|
|
|
Camera Default Reset
|
Yes
|
Yes
|
Yes
|
|
|
Custom Functions (Quantity)
|
Yes (25)
|
Yes (50)
|
Yes (16)
|
|
|
Remote Control
|
Yes, wired and wireless
|
Yes, 10-pin terminal
|
Yes, wired and wireless
|
|
|
Info LCD Panel / Illumination
|
Yes / Yes (dedicated button)
|
Yes / Yes (power switch)
|
Yes / Yes (dedicated button)
|
|
|
Ultrasonic sensor dust-removal function
|
Yes
|
Yes
|
Yes
|
|
|
Eye-start AF
|
No
|
No
|
No
|
|
|
Anti-Shake
(Sensor shift) |
No
|
No
|
Yes
|
|
|
Movie Mode?
|
Yes,
HD (1920 x 1080 pixels, 30fps) or SD (640 x 480 pixels, 30fps), up to 4GB per clip |
No
|
No
|
|
|
HDMI output
|
Yes
|
Yes
|
Yes
|
|
|
AF micro- adjustment
|
Yes,
20 lenses, body |
Yes,
12 lenses |
Yes,
30 lenses |
|
| Virtual Horizon |
No | Yes | No | |
| C.A. Reduction |
No | Yes | No | |
|
Body
|
Construction
|
Magnesium Alloy
|
Magnesium Alloy
|
Magnesium Alloy
|
|
Dust and weather resistant
|
Yes
|
Yes
|
Yes
|
|
|
Power
System
|
Battery Compatibility
|
LP-E6,
optional battery grip |
EN-EL3e,
optional battery grip |
NP-FM500H,
optional battery grip |
|
CIPA Rated Shooting Capacity at 23°C/73°F
|
850
(no flash) |
1000
(50% flash) |
880
(no flash) |
|
|
Dimensions
& Weight
|
Dimensions (WxHxD, mm)
|
152 x 114 x 75
|
147 x 123 x 77
|
156 x 117 x 82
|
|
Weight (body only)
|
810g / 28.6 oz.
|
995g / 35.1 oz.
|
850g / 30 oz.
|
|
|
Operational
Environment |
Operating Temperature Range
|
0 ~ 40C / 32 ~ 104F
|
0 ~ 40°C / 32 ~ 104°F
|
0 ~ 40C / 32 ~ 104F
|
|
Operating Humidity Range
|
< 85%
|
< 85%
|
< 85%
|
|
|
Lens Compatibility
|
Lens Mount / Compatibility
|
Canon EF, TS-E, and MP-E lenses (EF-S lenses not supported)
|
Nikon F-Mount
(FX, DX, AF, AF-S, AI lenses supported) |
Sony Alpha / Konica Minolta Maxxum AF
|
| APS-C Crop Mode? |
No, APS-Clenses not supported |
Yes | Yes, (metering may not be accurate) |
|
|
M.S.R.P.
|
Body only
|
US$2,700
|
US$3,000
|
US$3,000
|
Press Release
SONY UNVEILS FIRST FULL-FRAME ALPHA DSLR MODEL
SAN DIEGO, Sept. 9, 2008 — Sony is introducing its full-frame α (alpha) DSLR-A900 camera, aimed at serious photo enthusiasts looking for traditional SLR performance with the added benefits of digital photography.
It is designed to deliver ultra-fine picture quality with the world’s highest resolution, 24.6-megapixel, 35 mm full-frame CMOS sensor and fast image processing with a new dual BIONZ® processing engines. The camera is also the first to have a body-integrated image stabilization system for a full-frame sensor with Sony’s SteadyShot® Inside anti-shake system.
One look at the camera’s distinctive pentaprism and nostalgic body design will evoke its full-frame optical performance. It features a bright, clear optical viewfinder with 100% field of view coverage that would impress even film photography loyalists.
“The α (alpha) DSLR-A900 introduction solidifies Sony’s position as a leading camera manufacturer that can meet the demands of serious enthusiasts,” said Phil Lubell, director of digital camera marketing at Sony Electronics. “It represents the best in sensor and image processing technologies and offers enhanced functions, performance and reliability so photographers can push their creativity to the limit.”
Ultra-Fine Images As The Human Eye Perceives Them
The camera’s Exmor™ CMOS sensor delivers the photographic expressive power of wide angles and perspective that only a 35 mm full-frame sensor can offer, and is designed to take advantage of the resolving power of high-precision α (alpha) lenses. Its high pixel count and large size provide enhanced image detail and a wider dynamic range for natural color reproduction and subtle tonal gradations.
The sensor is produced using proprietary Sony planarization technologies to ensure an ultra-flat surface across the entire imaging area. Instead of a single analog/digital convertor, the sensor uses over 6,000 on-chip, column-parallel A/D converters to convert analog signals to noise-resistant digital signals at the earliest possible stage. The result is reduced noise and high-speed transfer of data.
Image processing gets a boost in speed and power from the application of two BIONZ image processing engines. Large amounts of data captured by the 24.6-megapixel sensor can be quickly processed to achieve a fast shooting response. Additionally, this dual BIONZ processing system applies advanced noise reduction algorithms producing images of exceptional quality and detail, especially at high ISO sensitivities.
World’s First Anti-Shake System for a Full-Frame Sensor
The camera’s newly-developed, body-integrated SteadyShot Inside unit achieves an anti-shake effect equivalent to shutter speeds faster by 2.5 to 4 stops. This new unit provides stabilization for Sony, Minolta and Konica-Minolta wide angle, large-aperture lenses, which is difficult for lens-integrated systems.
State-of-the Art Optical Performance and Responsiveness
The ultra-bright viewfinder with 100% field of view coverage and 0.74x magnification enables accurate framing and preview. It features a high-power condenser lens, an eyepiece with high reflective-index glass, and a multi-layer, anti-reflective coating on every optical surface to deliver its extraordinarily bright and accurate view.
Additionally, the focusing screen is user-replaceable, with additional L-type (grid pattern) and M-type (super spherical acute matte) screens sold separately.
The camera’s newly-developed autofocus system consists of nine wide-area sensors with 10 assist points for improved tracking of moving subjects. A center dual cross sensor comprised of two horizontal and two vertical line sensors as well as a dedicated f/2.8 sensor are included to achieve greater precision, especially when using fast-aperture lenses.
It also offers high-speed continuous shooting of 24.6 megapixel images at five frames per second. A newly-designed mirror box features a unique parallel-link mirror mechanism that moves on two horizontal axes to accommodate both 100% viewfinder coverage and the body-integrated image stabilization system without increasing the camera’s size. The mirror box also has a new moving magnet actuator, a high-powered coreless motor for a faster shutter charge, and a magnet catcher to minimize mirror bounce and light refraction within the box.
Versatility to Unleash Creative Possibilities
The model’s innovative intelligent preview function takes the guesswork out of setting up a shot and the hassle of taking multiple shots to achieve a desired effect.
After pressing the depth of field preview button, the camera “grabs” a RAW preview image which is processed and displayed on the LCD screen. You can then fine tune white balance, determine the best level and effect of dynamic range optimization, adjust exposure compensation and check histogram data, all before you actually take the picture. Preview images are not recorded on the camera’s memory card, thus saving capacity.
Other key features aimed to expand creative options include the Dynamic Range Optimizer (DRO) with five levels of user-selectable correction as well as DRO bracketing for enhanced scene analysis and graduation optimization. EV bracketing with ±2EV range makes it easy to create high dynamic range composite images.
Thirteen creative styles can be selected to enhance images and then fine-tuned by customizing contrast, sharpness, zone matching and other parameters, while 3 user-programmable memories provide instant access to as many as 26 different mode settings.
Powerful RAW file processing control is put in the photographer’s hands with the included Image Data Converter SR3 software that delivers faster file processing speeds, easy adjustment of image parameters, Dynamic Range Optimization and a new Peripheral Illumination function that compensates for corner light fall off.
With the camera’s HDMI output and Photo TV HD mode, your creative output can be enjoyed on a compatible HD television. This mode brings the look of actual printed photography to the television, by fine-tuning such image parameters as sharpness, gradation and color.
Comfort in Your Hands
Its construction features rugged, lightweight magnesium alloy with moisture-resistant, rubber seals for buttons and dials, an anti-static coating to prevent dust adherence to the imager, and a high-endurance shutter rated for more than 100,000 release cycles.
It has a 3-inch, Xtra Fine LCD screen (921K) makes it possible to check focus and image quality with accuracy. It incorporates an easy-to-see display with a quick navigation menu to easily access common functions without interrupting your creative flow. A backlit LCD panel sits on top of the camera and displays key settings.
System Expansion with New Accessories
The A900 camera will be accompanied with an array of accessories like the recently-announced Sony HVL-F58AM flash unit with its innovative Quick Shift Bounce system, powerful performance with a guide number of 58, and wireless auto flash ratio control.
The Sony® VG-C90AM vertical grip offers the same ease of operation when shooting vertically as horizontally, with its button layout and low-position shutter-release button. It also houses two InfoLITHIUM® batteries (sold separately) for longer shooting and playback.
The DSLR-A900 body will be available in November for about $3,000 along with related accessories. All will be available at authorized dealers, at military base exchanges, Sony Style retail stores (www.sonystyle.com/retail) and at sonystyle.com. Online pre-orders begin online on Sept. 10.
# # #
Editor’s Notes: Camera performance is measured using Camera Imaging Product Association (CIPA) standards. The viewable area of LCD displays is measured diagonally. The camera requires a Sony HD component cable or Sony HD Cyber-shot® cradle for viewing on an HDTV set (both sold separately). Available storage capacity of Memory Stick Duo™ and CompactFlash™ media may vary. A portion of the memory is used for data management functions. For additional information about Sony products, your readers can call toll-free (888) 222-SONY or visit Sony's web site at: www.sonystyle.com. Press releases and digital images are available for the news media at Sony Electronics’ news and information web site at: www.sony.com/news.