


Overview
Olympus E-P1 Overview
Reviewed by Shawn Barnett, Zig Weidelich, and Dave Etchells
Hands-on Preview: 06/16/09
Initial Test: 07/08/09
Full Review: 09/25/09
Olympus announces a return to an old form factor, and the beginning of a new era of small, interchangeable-lens digital cameras. Panasonic shipped the first Micro Four Thirds cameras, but the Olympus E-P1 wins the prize for the smallest of the new breed of digital camera. The company is aligning the Olympus E-P1 with the old PEN system of film cameras, dating back to 1959, and the camera's style reflects that heritage.
The Olympus E-P1 has a 12.3-megapixel sensor that is capable of both still and HD video capture. Many of the features in the E-P1 can also be found in Olympus's digital SLRs, including face detection, Art Filters, the SuperSonic Wave Filter for dust reduction, sensor-shift image stabilization, multiple exposures, and magnified focus assist. But the Olympus E-P1 introduces a lot of features new to the company as well, including HD video, digital leveling, 324-area matrix metering, onboard music, and in-camera music/still/video integration.
Two new lenses are available in separate kits with the Olympus E-P1: the 14-42mm f/3.5-5.6, and the 17mm f/2.8, as well as a small optical viewfinder matched to the 17mm lens. A small flash is also available for the Olympus E-P1.
Partially wrapped in a stainless steel skin, the Olympus E-P1 is available in either silver and black or white and tan.
Shipping as of July 2009, the Olympus E-P1 is available in three configurations. Body-only, the Olympus E-P1 sells for $750. With the ED 14-42mm f/3.5-5.6 zoom lens, the price will be US$800; and with the 17mm f/2.8 and the Olympus optical viewfinder, the price will be US$900.
Olympus E-P1 User Report
by Shawn BarnettI fell in love. After a few months spent together, I can more firmly say that I'm in love with the Olympus E-P1, not just the idea of the E-P1. There were a few bumps, and a couple of reality checks that woke me from my blissful state, but in the end I'm still quite pleased with this little camera. The Olympus E-P1 still brings back feelings I haven't had for 30 years. There is a flaw that I had to decide whether I could live with; in the end, for me, the answer was yes. But you'll have to ask the question for yourself, "Is it a small thing, like squeezing the tube of toothpaste in the middle? Or more like running up too much debt on the credit card?"
She sits on my desk and stares at me, her 17mm lens glistening in the light of the desk lamp. What is it about form that pulls at us? When is the last time I saw a form like this? It would have to be my first dance with the OM-1 as a teen back in the 1970s. I'm too young and too American to have experienced the Pen F, the half-frame film camera whose size and lines the E-P1 are modeled after. Not many Olympus PEN cameras made it stateside because Kodak refused to support the half-frame SLR; but they were big in Europe and Asia thanks to support from Agfa and Japanese film makers.
 But there's a little of the OM-1 in that top deck. Even the 14-42mm kit lens has the silver ring around its base like so many OM Zuiko lenses from the past. I flash back to the days of the wired rotary dial phone; when the microwave, if you had one, was called a radar range; and back to a time when my Dad activated the television remote control by saying, "Shawn, get up and change the channel."
Seeing a camera like this on my desk reminds me of freer days, when I was a whim away from dropping my OM-1 into a bag with a change of clothes, and jumping into a friend's VW Bus bound for a weekend in Joshua Tree National Monument.
Here at Imaging Resource, though, we don't care as much about how a camera looks as we do about its image quality, but Olympus must have done something right to stir such emotions in this jaded tech journalist. Producing a camera that makes me want to get out and take pictures with only a glance at its physique is noteworthy indeed.


Family members: Compared to my old OM-1 film SLR in the top image, the Olympus E-P1 borrows several design accents, including the silver ring around the 14-42mm's lens base. Compared to the Pen F, the bi-level deck and general small size are the main similarities (note that this second shot is in black and white, modified from an image provided by Olympus).
Back in the PEN F days, Olympus's famous and successful designer Yoshihisa Maitani (one of the few rock stars of camera design) chose the rather unconventional porroprism to eliminate the bump on the top of so many SLRs; something Olympus tried again in this century when they built the EVOLT E-300. Though the Pen F was around the same size as the current E-P1 -- a little wider, actually -- the E-300 was still quite chunky and wide, and had too much of the weight away from the grip thanks to that very porroprism. It was a good idea, but was not executed as well as the PEN F.


Smaller than small. The Olympus E-420 was indeed a small SLR, but eliminate the mirror box and pentaprism and make the lens contract, and you get the Olympus E-P1.
Obvious yet elusive. Olympus finally came close with the E-420, a small digital SLR whose form factor I like a lot, but now it's clear that they hadn't fully realized the goal of Four Thirds that today seems so obvious. I still argue in favor of the optical viewfinder in the SLR as the fastest method to compose images, because you're getting the image at the speed of light; but when a smaller form is the design goal, why bother with all those mirrors, focusing screens, and lenses necessary to support this faster method? We now have sensors to gather the light, convert it to electrons, and send an image to an LCD. Though there's a little lag when you do all that, you're getting an even truer through-the-lens image than you can through most SLR viewfinders. Indeed, it's not just coming through the lens, but through the sensor and processor that will ultimately form the final image and save it to a card. It's hard to get truer than that with a digital camera, because the sensor and processor can give you a better indication of how the exposure will turn out, something film cameras and optical viewfinders could never achieve.
But only now, nine years into the Twenty-First Century, someone creates a digital camera that has a good sized sensor, a big LCD, no viewfinder, and interchangeable lenses. What took so long?
I'm not sure, I'm just glad someone finally made it happen. The Olympus E-P1 beats my Rebel and 50 f/1.8 in sheer portability. I could take the lens off the Rebel and the body would still be thicker front-to-back than the Olympus E-P1 with the 17mm lens. And as for weight, the Rebel combo weighs 24.4 ounces (1.5 pounds, 693g) while the Olympus combo, even with its partly stainless-steel clad body, weighs only 16.01 ounces, just a hair over one pound (454g), with battery, card, and 17mm lens. Half a pound is a big difference.

Smaller than average. My usual small kit is a Rebel with a prime, or as seen here, the standard lightweight zoom. The Olympus E-P1 could well replace that kit.
Sizes. Why would I want a camera like an Olympus E-P1? I don't want to carry an SLR everywhere. Most of us who own them would like to, but we gravitate instead to pocket digital cameras or mid-size digital cameras with a moderate zoom range for everywhere use. When I'm carrying a backpack or computer bag I have a small SLR with me for anytime photography -- which requires me to carry a larger bag. Otherwise I carry a pocket digicam for stills and video. Many of us have sprung for cameras like the Panasonic LX2 and LX3 -- those who struck before they became scarce and overpriced in stores and websites -- or the Canon G7, G9, and G10, and of course the Ricoh GR and GRII, among few others. Those more serious about the larger sensor's role in better quality low-light images have opted for the Sigma DP1 and DP2.
A close friend in the business calls me every once in a while looking for news of any camera that will meet his need for high image quality in a pocketable form factor. I've offered the cameras I just mentioned, but none has fit his list quite as well as the Olympus E-P1 will.
It's still not perfect, but the Olympus E-P1 is the closest we've seen to the high-quality take-anywhere digital camera that John and so many others like him keep waiting for. It has a larger sensor, the Micro Four Thirds sensor (which is actually the same size as the original Four Thirds sensor), and the option of choosing the lens type and quality you want. Note that as of this writing Panasonic has also announced the Lumix GF1, which runs about the same size as the E-P1.
Choices in Micro Four Thirds now include five zooms and three primes from Panasonic and Olympus. With adapters, you can mount Four Thirds lenses and old OM lenses with the optional OM adapter, and two additional Panasonic adapters allow you to mount Leica M- and R-mount lenses. More on those options below.
Pocketable? Calling the Olympus E-P1 pocketable is pushing it, especially with the 14-42mm lens attached, compressed though it is. Though they've employed a special twist in this lens to compress the overall size, you'll be more comfortable with this zoom combo over your shoulder or around your neck than in a pocket.
What's interesting is how much thought this well-designed little camera has inspired around here. When it first arrived four of us stood around the table talking about the Olympus E-P1, its functions, and the potential implications, both for us and for the market. That's seldom happened. Just as there are different sizes and types of automobile for different people and purposes -- often more than one for each person -- it's clear that there's a place in quite a few lives for this type of small, interchangeable-lens digital camera.

Look and feel. In person, the look of the Olympus E-P1 is more retro than it seems here. Silver and black on the version we received, white and tan with chrome accents on the white version. From the front, the Olympus E-P1 is simple: a lens lock release on the body, a soft, leather-texture grip, a lamp for the self-timer, and stereo speaker holes left and right of the Olympus logo. From this angle shot, you can see just how close the sensor is to the lens mount; this makes for easier cleaning, but also underscores the extra care you'll need to use when changing lenses.

Most of the remaining controls can be seen from this angle, starting from the left. The mode dial peeks out from its port-hole on the top deck, and is set via the knurl on the back. The focal plane indicator is stamped between that and the flash hot shoe, which has its plastic cover in place. Note that there is no built-in flash on the Olympus E-P1. Getting back to the top deck, the Super Sonic Wave Filter lamp is next, followed by the power switch, whose outer ring glows green when the power is on. The shutter release button is ringed by a smooth bit of metal, and is a pleasure to press. The EV adjustment button is last.
On the small shelf behind the Olympus E-P1's top deck, Olympus has engraved the words, "OLYMPUS PEN Since 1959 E-P1." It's a shame that they didn't just revive the name PEN and call it the PEN F1 or something, because E-P1 is hardly catchy, and also a pain to type.
The 3-inch LCD is unfortunately limited to 230,000 pixels, though it is large, vibrant, and good outdoors thanks to its HyperCrystal technology. The lower resolution makes Manual focus a little more difficult than it was on the just-reviewed Panasonic GH1, even with the 7x or 10x zoom option.
On the back you can see the speaker and the unique horizontal scroll wheel, used for zooming and changing menu items. Four buttons run down the right side of the LCD, and a Function and Info button flank the navigation disk/wheel. The disk and wheel combination is small, but works surprisingly well. The wheel works better than most manufacturers' designs, a pleasant surprise. I'm not crazy about the layout of the rest of the buttons, though. It might be that the Olympus E-P1 is so short that the controls are just harder to reach than I'm used to. In the lower right corner you can see the card write lamp.
Note also the camera strap loops, which unfortunately require the annoying D-rings to work with most strap systems. These have become more of a burden thanks to the Olympus E-P1's movie mode, as every motion of the D-rings is recorded as the sound travels dutifully down the camera's lovely metal skin, quickly arriving at the microphone openings. Perhaps you can sense my irritation with this unnecessary metal-to-metal connection when cloth-to-metal is mostly standard on modern digital cameras and even camcorders. Since I don't like camera straps, I'll likely keep the camera strapless and ringless, and perhaps add a digicam wrist strap with a toggle lock for security.

LCD. As I mentioned, the 3-inch LCD is big, but low-resolution, and its viewing angle is 176 degrees. It's the only way to frame images on the Olympus E-P1, unless you opt for the camera kit with the 17mm lens, which includes the $99 optical viewfinder that slips into the hot shoe.
The Olympus E-P1 has many display screens, which you select by pressing the Info button, but I'm afraid none of them meets my needs all on one screen. Though I like the leveling feature, that screen doesn't tell you what aperture or shutter speed you have set, which is pretty important on a camera like the Olympus E-P1. If you want the histogram or exposure info, you have to lose the leveling feature. I found myself hitting the Info button way too often when using the Olympus E-P1.
And if you shoot in the Art Filters mode and have the center-AF point screen up, you can't zoom in to focus, because the Set button both zooms and changes the Art Filter; guess which wins?


Function. The Olympus E-P1 includes a new Function menu that works a lot like Canon's Function menu, only the E-P1 has two unique dials at its disposal for easy navigation.
Press the OK button in the center, and it brings up a menu matrix that's identical to the translucent screens seen on recent Olympus digital SLRs. It's a good system either way, but I prefer the new system shown above, because it shows more of the available options in each category without having to go to a different screen.
 Optical viewfinder. The VF-1 optical viewfinder, available for $99, also comes with the 17mm f/2.8 kit lens when you buy the E-P1 17mm kit. Separate, the lens and viewfinder total $400. The one I have has a nice dotted-line display inside, but neither this line nor the viewfinder itself represents the actual image captured by the 17mm lens, which was noticeably wider; and naturally there's also some significant parallax error between this viewfinder lens and the capture lens (see the Viewfinder page for just how much parallax in the Viewfinder Test Results).
For some reason I accidentally touch the front or rear optic too often, and I lament that the back of the viewfinder has no rubber guard to protect my glasses. Of course, with this big, square, nostalgic novelty mounted, we begin to approach the size and shape limitations found in the smaller SLRs, and the one place to mount a flash is occupied. The advantage, though, is that you get a third point of contact with your body (your face), offering inherently greater stability than you get while holding the Olympus E-P1 out in front of you to see the LCD. Note the white-bodied Olympus E-P1 at right.
Lenses. The primary kit lens designed for the Olympus E-P1 is the 14-42mm f/3.5-5.6. It's a shortened version of the standard kit lens shipped with so many digital cameras, equivalent to a 28-84mm zoom in this case. I'm reminded of an old Pirelli tire ad for some reason when I see this lens. It does a neat trick, though, when you twist it from its resting position: it pops out to its full operating length.
There's an unlock switch on the left of the barrel, but this actually unlocks the mechanism that keeps the lens from retracting back to its stowed position, so opening the lens is just a simple twist to the right. See the video at left for a visual demonstration.
Though I appreciated the effort Olympus made to keep this lens from being a gigantic nuisance, making this small camera a lot larger, it took me some time to like this lens; and in the end, I don't like it at all. Our sample was unbearably slow to focus, and still a little too big for me even when tucked away. According to our tests, the 14-42mm took 1.23 seconds to focus and fire at wide angle, and 1.07 seconds at telephoto. That's very slow, and version 1.1 firmware resulted in only a slight improvement (1.19 and 0.98 seconds respectively). Add the motion blur introduced at certain shutter speeds (see below), and the picture is complete.
My favorite of the two lenses is the 17mm f/2.8, the only other Olympus lens made specifically for Micro Four Thirds as of this writing. Its low barrel distortion made shooting with this pancake design a sincere pleasure, and its faster autofocus made me return to it again and again. Chromatic aberration is a little high, unfortunately, but that can be dealt with. While out shooting galleries with the Olympus E-P1, I had to remind myself a few times to get the 14-42mm lens mounted for a few shots; and after I got too frustrated with the autofocus from the prototype camera, I returned to the 17.
 Lenses and adapters. With only moments before they were due to ship back, we took the liberty of trying the Olympus E-P1 with the rather elite lenses that came with our Panasonic GH1, the second Micro Four Thirds digital camera. They both fit and worked well. Most impressive was Panasonic's 7-14mm on such a small body.
The Lumix Four Thirds lens adapter also allowed us to attach some of the more interesting Four Thirds lenses in house, including the 150mm f/2.0 monster lens (comparatively), pictured at right. Olympus's equivalent is the MMF-1, a silver Four Thirds adapter. Focusing is a lot slower with this adapter for most of the lenses we tried, so though it's possible, it's not entirely desirable to use Four Thirds lenses with the Olympus E-P1.
Sweetening the deal for OM-system lens owners like me is the MF-2 OM Adapter, which allows attachment of some really fine lenses. We tested my 50mm f/1.8 lens and posted the results on SLRgear.com. It's not good enough that I recommend everyone go out and snap up OM lenses to use with the E-P1, but it's still usable if you have the time to focus manually, and don't mind limiting yourself to f/4 or higher. Focusing is a little more difficult to do on the E-P1 than on the OM-1, because you have to press the Info button to navigate to the MF screen, then the OK button to zoom in on the scene, and if you're hand-holding the Olympus E-P1, the zoomed view can be shaky.

Tiny caps. The two kit lenses have very small caps, both of which seem about the same size. The problem is, they're not. The 17mm's cap measures 37mm, and the 14-42's measures 40.5mm. They're easy to lose, if inexpensive to replace, but serve their purpose just fine.
After spending a little more time with the Olympus E-P1 and both lenses, I was torn about which kit to recommend. My preference for primes is one of discipline, in addition to their reputation for greater image quality. I found long ago that a zoom made me lazy, and my pictures often suffered from a lack of creativity. Mounting a prime makes you work; and if you have to change a lens, you know exactly why, and will work equally hard with that lens to get the shot you've already framed with your mind.
However, as a casual shooter, as apt to take a picture of my kids as some interesting bit of architecture or unfolding human drama, having the 14-42mm (28-84mm equivalent) along is a good practical choice sometimes. With kids especially, the zoom is helpful to quickly cross a room for an impromptu portrait, or back off to get the whole room with all the kids active in some game. Also, the current lack of any other Micro Four Thirds prime lens to mount when needing telephoto makes the zoom more important. (You can, of course, use regular Four Thirds primes with the MMF-1 adapter, but the bulk of such combinations takes you away from the appealing compactness of the E-P1's design.) Finally, the 14-42mm lens is quite sharp, as our SLRgear.com test shows.
The wrench in the works is what I discovered after months of shooting with the 14-42mm lens: the lens elements get quite loose as you move to 35 and 42mm positions, and this can introduce motion blur into your images when you snap the shutter, so I strongly recommend against this lens. (Dave's feeling is that this doesn't bother him as much, because it occurs across a limited range of shutter speeds and focal lengths.) More on this later.
Meanwhile, the good news is that the Micro Four Thirds lens system is getting larger thanks to Panasonic's recent introduction of two prime lenses, the 20mm f/1.7 and the 45mm Macro f/2.8; and the available adapters also broaden the possibilities. Below are photos of the lenses, with links to their respective pages on SLRgear.com, where we have already reviewed many of these lenses.
| Micro Four Thirds lenses | |
 |
 |
| Panasonic 14-45mm f/3.5-5.6 | Olympus M.Zuiko 14-42mm f/3.5-5.6 |
 |
 |
| Panasonic 20mm f/1.7 | Olympus M. Zuiko 17mm f/2.8 |
 |
 |
| Panasonic 45-200mm f/4.0-5.6 | Panasonic 14-140mm f/4.0-5.8 |
 |
 |
| Panasonic 7-14mm f/4.0 | Panasonic 45mm f/2.8 Macro |
| Micro Four Thirds Adapters | |
| Panasonic Four Thirds DMW-MA1 | Panasonic M-Mount DMW-MA2M |
| Panasonic R-Mount DMW-MA3R | Olympus Four Thirds MMF-1 |
| Olympus OM Adapter MF-2 | |
With the 17mm f/2.8 attached, the Olympus E-P1 does indeed fit into the front pocket of my slacks, and with some effort I managed to get it into my back jeans pocket when I didn't want to leave it in the car on a hot day. It's an easy fit into a sportcoat pocket, if you can handle a pound of camera gently tugging at your shoulder. Olympus materials also show someone putting the E-P1 into a cargo pocket on some shorts. That actually works well if the pocket is mounted higher on the hip, but the lower pockets allow the camera to swing a little too much, causing bruising at best, camera damage at worst.
 Where's the Flash? The Olympus E-P1 is the first non-pro camera to ship without some kind of built-in flash. It's either a courageous or a crazy move, but given the poor performance of most built-in flashes on small cameras, I don't think an available-light photographer like me will miss it. Those who do can opt for the Olympus FL-14 flash, available for $199.99. The FL-14 lacks a bounce feature, though, and mounts quite low and close to the lens, so its usefulness is limited. FL-36R and FL-50R flashes are also compatible with the Olympus E-P1, but the flashes are not capable of remote controlling other strobes via the camera's TTL flash exposure system.
The Olympus FL-14 slips into a soft bag for storage and mounts in a snap. It's also pretty simple to use, defaulting to TTL-Auto mode, which allows the E-P1 to have full through-the-lens exposure control. It has a tendency to overexpose, though, and doesn't back off of exposures when specular highlights are detected, something I'm used to from other flash systems. Hence faces can be a little too bright and shiny in photos, and near objects are too often overexposed. I prefer using the Olympus E-P1 without flash. The Olympus E-P1 does quite well at high ISO, so the lack of a built-in flash is a message from Olympus that you won't need it.
Movie modes. HD movie modes are a new dimension to consider in a camera of this size, especially with the relatively compact lenses available for it. The Olympus E-P1 records AVI movies at 1280 x 720 and 640 x 480 both at 30 frames per second. Maximum file size is 2GB, and the maximum recording time is 7 minutes in HD mode, or 14 minutes in Standard Def (VGA). You can also use the ART filters to limited effect. Some of the filters slow the frame rate so much that I doubt most would want to use them. These include the Pinhole and Grainy Film modes. See our Video tab for more.
Audio technology. Olympus is also touting the audio technology they've built into the Olympus E-P1's Movie mode, which they say is as good as their best audio recorders. It's described as Wave Format Base Stereo PCM/ 16-bit at 44.1kHz. Unfortunately, that's only for movie recording or for attaching audio to a photograph; there is no audio-only recording mode, as we've seen on some other cameras. That's a shame, because I'd love to take advantage of that kind of high-end audio capability.
Music built in. Also built into the Olympus E-P1 are five ambient tunes to use with slideshows and videos, created by Daishi Dance, a famous Japanese musician.
 Leveling indicators. As I already mentioned, the Olympus E-P1 has leveling indicators that show whether you're tilting the camera left or right (roll), and they also help tilt the camera up or down to split the horizon evenly, helpful when the horizon is not visible (pitch). See Olympus's diagram at right.
Metering. Olympus's older ESP metering system has been updated with a new 18 x 18 matrix metering system, sampling 324 separate areas. You can also choose center-weighted and spot metering modes.
Many other features have become so common it's a little much to go on about. Face detection for example: The Olympus E-P1 can recognize up to 8 faces in a scene, even when people are moving; it then sets exposure to ensure sharp, well-exposed pictures. There's also sensor-shift image stabilization, a good feature for a camera without an onboard flash; and Olympus's SuperSonic Wave Filter for dust reduction.
Sensor and processor. Olympus didn't tell us much about the 12.3-megapixel LIVE-MOS sensor, except that it's similar to the ones in the E-30 and E-620. However, image samples that they showed us were significantly better than the latter two cameras, especially in noise processing at low light levels, so we assume that the new TruePic V image processor has something to do with it. According to the image samples you'll see below, the Olympus E-P1's output is significantly improved over the E-30 and E-620.
Multiple exposures. You can also overlay images right in the Olympus E-P1 with the Multiple Exposure tools, first seen on the Olympus E-30 digital SLR.
Aspect ratios. You can choose multiple aspect ratios to shoot with the E-P1, including the sensor's 4:3, but also 3:2 (more common among SLRs), 16:9 (better for HD television display), and 6:6.
Exposure modes. The Olympus E-P1 includes the four standard modes, Program, Aperture, Shutter, and Manual exposure modes, but also includes an Intelligent Auto mode that analyses the scene and chooses among Portrait, Landscape, Night Scene, Sport and Macro modes. Movie mode is of course for movies, and Scene mode avails you of 19 Scene modes, including Portrait, e-Portrait, Landscape, Landscape + Portrait, Sport, Night Scene, Night + Portrait, Children, High Key, Low Key, DIS Mode, Macro, Nature Macro, Candle, Sunset, Documents, Panorama, Fireworks, and Beach & Snow.

In-camera editing. Also new to the Olympus E-P1 is the ability to develop RAW images in-camera, including the ability to apply Art Filters to RAW images. JPEGs can have Red-eye fixes, trimming, shadow adjustment, resizing operations, and even sepia and saturation adjustments applied.
Storage and battery. Miraculously, the Olympus E-P1 uses SD cards exclusively for storage, with nary an xD-Picture Card in site. That really was important for this camera to gain widespread acceptance, so it was a good move. As with most digital cameras capable of recording in HD, the Olympus E-P1 requires a Class 6 or better SDHC card to capture 1280 x 720p video.
For a battery, Olympus chose the BLS-1 lithium-ion battery, also used in the Olympus E-620. It's rated at 300 shots per charge in the E-P1. That's not a lot for an SLR, and I was only able to shoot for about a day while on vacation at that rate, so consider a spare.
See the Design, Operation and Modes & Menus tabs for more details.
Shooting with the Olympus E-P1

Good detail.
Thanks to the light weight of the Olympus E-P1, I found myself shooting one-handed a lot more than I normally do. That's of course partly because I had no optical viewfinder to use while shooting, so I already had to hold the camera out in front of me to compose images. Since I shoot mostly vertical, it's more comfortable to shoot with one hand. I don't recommend it, but I do it.

Black and white goes well with the retro feel.
I also kept dropping into black and white mode just for the fun of it. It's a mode I've been locking my Rebel into by default, but shooting in live view lets you compose in black and white, which is something we haven't been able to do until recently. Even when I cranked up my ISO to 6,400, the image quality from the Olympus E-P1 was pretty good in black and white.
I tried the Grainy Film Art filter, too, but it slowed the Live View's refresh rate and produced more plugged shadows and more grain than even the ISO 6,400 setting. I'd rather get the benefit of the high ISO and good detail than play with that particular filter.
Olympus menus have a lot of depth, which can be a little crazy-making. I don't want to see all that when I'm trying to capture my world; I just want simplicity. You'll want to carry the manual around with you and study it to understand some of the menu items at the beginning. But sticking with the new Function menu makes using the Olympus E-P1 a little more straightforward. The new thumbwheel is also great to use, a novel, well-placed control.
In short, I had a hard time putting the Olympus E-P1 down. It was only other deadlines that kept me from using the camera more, and I could see myself spending a lot more of my free time taking pictures with the Olympus E-P1. You know, the kind of time you spend with a camera when all you do is explore its many features, re-read the manual, and try to get a different shot of some subject whose essence you've tried to capture for years.
Dave shot with a production camera at the launch up in New York, and captured these four video samples. Be aware that these files are large, and can take quite some time to download, depending on your connection speed. Also be sure to see our Gallery pictures by clicking here.
|
Olympus E-P1 Sample Videos
| |
 |
 |
 |
 |
|
HD (720p) Videos. 1280x720 at 30 frames per second. (Click to play / download ~50MB AVI files.)
|
SD (VGA) Videos. 640x480 at 30 frames per second. Note that the bottom video was shot indoors in low light. (Click to play / download ~30MB AVI files.)
|
Videos I shot with the Olympus E-P1 were pretty good, with a nice, wide view and good image quality. The E-P1 can be set to autofocus while shooting video, but both lenses tend to cycle through a broad range of possibilities with each focus check, and the resulting video is fraught with random blurry moments as the camera tries to follow subject movement. So it's better to shoot short snippets and stick to one focus setting, or else try to pull focus yourself. That's also more difficult with the fly-by-wire nature of manual focus with both Four Thirds and Micro Four Thirds lenses when compared to lenses with a physical focus coupling.
Audio quality with the videos is indeed good, as is video quality, so the Olympus E-P1's video mode fun to play with. I use it more as a still camera, though, so I don't have a lot more to say about it. For more on the video mode, check out our Video tab.


Image-doubling. This early shot from the New York trip illustrated the image-doubling IS problem, where the image stabilization system moved the sensor in response to the first shutter curtain. Clicking on either image will enlarge the main image (click on the interim image to see the full-res shot). Moving around the frame you'll find that every high-contrast element is doubled.
Anomalous image blurring. I shot with the Olympus E-P1 for a little over two months before sitting down to finalize this review. I used it as my daily shooter for quite a few events, including a small vacation with the family. I was very pleased with the camera, and pleased with most of the images, which exhibited good color and tonality, especially on cloudy days. There was a little softness here and there in more than a few images, but I just sharpened them, cropped them down to 1,024 pixels wide, and put them up on Facebook for friends and family to see, happy with the results for that size.
When I went through the images for inclusion in our image Gallery, though, I found precious few that were truly razor-sharp. In fact many suffered from motion blur, rather than just a general softness. I'll usually skip such images and post only the good ones, but because so many of my shots were taken between 1/80 and 1/160 second, and most of these were blurry enough that I would have to leave them out of the Gallery, I had to investigate further. (Images in the Gallery are intended to be demonstrations of the best the camera can do, and are expected to be carefully scanned by our more discriminating readers, so including images with obvious motion blur just seems like sloppiness on our part.) What got my attention was the blurring at shutter speeds where little should occur: 1/125 and 1/160 second. I'm generally a fairly steady shooter, so this was an unusual result, and one that left me with some doubts about the camera.
Rabbit hole. Getting to the bottom of this anomaly has taken more than a month of fairly serious investigation, requiring a lot of testing and re-testing with no less than three different cameras. Olympus has also looked at our results, but given us no official response, so we needed to test pretty extensively, in order to be sure of what we were seeing. This writeup is a summary of our findings, but for the whole of our results, please see the Blur Anomaly tab of this review.
We have concluded that:
- The Olympus E-P1's shutter produces a short-lived vibration during exposure, which can produce noticeable blur as the shutter speed gets shorter, moving toward 1/160 and 1/200 second, regardless of whether the image stabilization system is on or off.
- As you reach 1/160 second, the bottom one-third of the frame will be sharp, while the center and top of the frame will have more blur as you move up the frame (when the camera is held horizontally; the blur still occurs when the camera is held vertically, by the way, always offset toward the bottom of the camera).
- This vibration affects some lenses more than others (apparently depending on the internal construction of the lens, and how its elements respond to the vibration), but it is particularly noticeable with the 14-42mm kit lens zoomed to 35 or 42mm.
- Turning on IS sometimes makes the motion blur worse, sometimes better, depending on the camera and the level of vibration, as well as the firmware version installed. With version 1.0 firmware, the IS system fairly consistently overreacted to this vibration, often producing motion blur in the images. Version 1.1 firmware largely fixes this overreaction in the cameras we have tested.
- This vibration does not affect images if the camera is mounted on a heavy tripod, as we use in the lab, but it does affect handheld images. This explains why we did not find this issue until I looked closely at my handheld shots.
- Activating the camera's Anti-Shock shutter mode does nothing to reduce the amount of blur.
So there are two issues caused by the same vibration:
- First, the IS system can overreact to the vibration and cause the image-doubling seen below. Upgrading the firmware to 1.1 makes this error much less likely in our tests.
- Second, the 14-42mm lens, whose front elements are very loose, responds to this vibration, causing blur. Other than mounting the camera on a tripod, we have not found a way to dampen this vibration.
Applying Olympus's recent firmware patch, version 1.1, meant to improve continuous autofocus performance, also significantly improved the IS performance in both our second review unit and the third unit we purchased at retail to verify our results. The firmware patch, though, does not address the larger issue of shutter/lens vibration, so though the patch reduces the image stabilization's reaction to the vibration, it does not make the IS system able to counter the vibration, especially in the 14-42mm lens.
Mounting a different lens and turning IS off produces the sharpest images. I found no perceptible vibration when shooting with the 17mm with IS off, and only a hint of a smudge with IS on, something you'd never notice without straining to look for it, even in large prints. With IS off the 50mm f/2 Macro, a very sharp Four Thirds lens, also produced very sharp photos, as you'd expect. Turning IS1 on, however, did seem to show some minor blurring at 1/125 and 1/160 second, even with the 1.1 firmware loaded. But we don't think this would be noticeable in most situations. As in any macro situation, you'll do better mounting the Olympus E-P1 on a tripod with IS off.
|
Blur issue with image stabilization (IS1) on
|
||
 |
 |
 |
| 1/30, f/6.3, 42mm, ISO 100 | 1/125, f/7.0, 42mm, ISO 400 | 1/200, f/6.3, 42mm, ISO 400 |
|
Here's a good illustration of the image-doubling I found with the 14-42mm kit lens and firmware 1.0, with IS enabled. On average, five out of five shots at 1/30 second did not show the problem at all, and turned out about this sharp (a little soft, but not at all bad when handheld at this speed). Three out of five shots at 1/125 second showed the image-doubling issue, something that should not be happening at 1/125 second on an image-stabilized platform. The crop above is from the worst case we encountered in non-lab shooting. Take note of the "O" in On and "S" in Sunday, where the effect is most obvious. At 1/200 second five of five images were about this sharp, with no sign of image doubling.
|
||
The good news is that there is not an extreme problem with the image stabilization system, which was our first concern. The firmware patch seems to have addressed the issue well enough, even though that wasn't its officially-stated purpose.
The 14-42mm's looseness is the bad news, and we saw this problem to varying degrees in all three of our sample lenses, one of which was purchased at retail. Tests with another Micro Four Thirds camera, the Panasonic GF1 (which does not have IS built in), verify that the 14-42mm lens's looseness causes a good deal of blur on its own, regardless of the firmware loaded.
The cause of this problem may be an engineering one resulting from the aggressively compact design of the 14-42mm lens: In order to build a lens whose elements retract into a small body, they probably had to make the lens barrels taper ever so slightly to make sure that they don't bind when fully retracted. The problem is that because the lens barrels move so far out into their proper position, what would normally be considered a minor taper becomes a larger one, leaving the front elements quite loose when fully extended. We're just speculating on that point, but what's clear is that the act of extending the lens elements that far allows more shake than usual. When zoomed out to 35 and 42mm, the weight of the internal elements, now shifted further out, combine with the looseness to cause the shutter vibration to shake the lens elements during exposure. Pull them back to 14, 18, and 25mm positions, and the vibration is considerably reduced.
As convenient as we found the 14-42mm M.ZUIKO lens, and as well as it tested on SLRgear.com when mounted on a tripod, this tendency to introduce image blur when handheld is an unfortunate liability. It's unfortunate because the 14-42mm lens is otherwise surprisingly good for a kit lens, but we ultimately recommend against it, unless you only print at 8x10-inches or smaller, or can live with using the camera on a tripod in the shutter speed range of 1/80 to 1/200 second.
Our bottom line:
- Definitely update the Olympus E-P1's firmware to version 1.1, as the issue is more significant with the version 1.0 firmware.
- As with any camera, if you really want crisp images, put it on a tripod.
- Handheld shots can be blurred in the range of 1/100 to 1/200 second with the 14-42mm lens, especially at 35 and 42mm focal lengths.
- Other lenses didn't seem nearly as sensitive to the shutter vibration as did the 14-42mm, but we admittedly tested only a couple of other lenses.
For more on this issue, see our Blur Anomaly tab.

Large AF areas. With the focus point locked in the center, I focused on the bird and then recomposed. The autofocus system focused on the back window frame and not on the bird, twice.
Autofocus. Only one other problem came to light with the Olympus E-P1 in my shooting, and that was a tendency for the AF system to miss focusing on smaller foreground objects in favor of the background. This also happened in the lab, where the Olympus E-P1 chose to focus on the back wall of our Indoor shot (INB) rather than our one-inch by one-inch focusing target that is sufficient for almost all cameras we test, both digicam and digital SLR.
In the bird shot that appears at right, I'd have preferred the bird to be in focus, to showcase the insect clamped like a trophy in his beak, but the AF system chose the background instead, despite my best efforts to make the camera focus on the bird. It did this consistently in two shots, both of which I carefully focused using the center point, recomposing to make the shot, just like I do with an SLR.
Olympus E-P1 Image Quality
Olympus has come a long way in image quality. The Olympus E-P1's technology compares quite well to other similarly priced digital SLRs, and also to some that are more expensive and higher resolution. They seem to have done quite well with noise suppression, and their system also distinguishes between low-contrast and high-contrast areas well enough to know when to apply sharpening and when to keep the image soft. No camera handles all the image areas perfectly, and Olympus's method does create a slightly artificial look at times at full magnification. What's important, though, is how well the results look when printed. All the crops are shot at the camera's default noise reduction setting.
Olympus E-P1 versus E-30 at ISO 1,600
 |
 |
 |
 |
 |
 |
|
Olympus E-P1 at ISO 1,600 |
Olympus E-30 at ISO 1,600
|
|
This comparison represents the most dramatic difference I saw among SLRs we've tested. I was surprised to see the E-P1 so easily best the E-30. There's far more chroma noise in E-30's bottle shot at the top, as well has heavy luminance noise. The Mosaic shot from the E-P1 shows better detail than the E-30; and even the red leaf fabric pattern is better defined. Impressive. Both are 12.3-megapixel sensors. I would put up the latest Olympus SLR, the E-620, but it's essentially the same performance as the E-30.
|
|
Olympus E-P1 versus Panasonic GH1 at ISO 1,600
|
 |
|
 |
|
 |
|
Olympus E-P1 at ISO 1,600 |
Panasonic GH1 at ISO 1,600
|
|
Though I suspect that the Panasonic LiveMOS sensor is the same in both the E-P1 and the GH1, the two companies have taken a very different approach to image processing. Olympus's TruePic V may have a little special sauce after all. It's hard to compare these two images because of the size difference, meaning that they were both framed just a little differently. But you can get the general idea. The Olympus leaves a little more chroma noise in place and sharpens a little more in low-contrast areas. The GH1 captures the Mosaic image a little better. And the red leaf fabric has a little less detail, but more vibrant color. Both are 12.3-megapixel sensors. |
|
Olympus E-P1 versus Canon T1i at ISO 1,600
|
 |
|
 |
|
 |
|
Olympus E-P1 at ISO 1,600 |
Canon T1i at ISO 1,600
|
|
Canon, too, has come a long way with their noise suppression technology, and their 15.1-megapixel images are remarkably noise free at ISO 1,600. But remember this is a smaller Micro Four Thirds sensor at 12.3-megapixels going up against Canon's 15-megapixel APS-C sensor. Both sensors have smaller pixel sizes than normal, but the T1i theoretically has more resolving power. Yet the E-P1 looks quite good against Canon's latest. Panasonic's sensor design and Olympus's processing have come a long way indeed. |
|
Olympus E-P1 versus Nikon D5000 at ISO 1,600
|
 |
|
 |
|
 |
|
Olympus E-P1 at ISO 1,600 |
Nikon D5000 at ISO 1,600
|
|
Chroma noise of various sizes is visible in both images, but the Nikon D5000 handles the Mosaic image a little better, as well as the leaf crop. But the bottle image is harder to call. There's a mixture of luminance noise and chroma noise in the E-P1 image that doesn't look quite as smooth as the D5000 shot, but the E-P1 will likely look more film-like when it's printed large. The exception is the sharpening applied to the label, which is quite dramatic, making it pop from the background a little too much. Still, the point here is that the Olympus E-P1 virtually eliminates the advantage that APS-C has had over Four Thirds. I could go back and forth with quite a few more cameras, but these really are the best performers under $1,500. |
|
Detail: Olympus E-P1 vs E-30, Panasonic GH1, Canon T1i, and Nikon D5000
 |
 |
 |
 |
 |
 |
 |
 |
 |
 |
|
Olympus E-P1 |
Olympus E-30
ISO 100 ISO 3,200 |
GH1
ISO 100 ISO 3,200 |
Canon T1i
ISO 100 ISO 3,200 |
Nikon D5000
ISO 100 ISO 3,200 |
|
Detail comparison. An ISO 1,600 comparison is only so helpful. A camera's ISO 100 performance is also of value, so I've pitted the same set of cameras against each other in the high-contrast detail department. Both the 12.3-megapixel Olympus E-P1 and the 15.1-megapixel Canon T1i come out on top, with the slight edge overall to the Canon T1i. Both show evidence of edge enhancement around the letters, but both also have more detail to work with overall. I also give the slight edge to the T1i at ISO 3,200. Though the image is hazier, it retains more of the color of the letters, and more salvageable separation between the lines inside the letters, like inside the L in Lager. Bear in mind that the T1i also beat out the 12.1-megapixel full-frame Nikon D700, plus the APS-C Nikon D90, and Canon XSi at this test as well. Also consider that this test is not independent of lens quality, focus errors, and other variables, so again take this mostly as a comparison of what each camera was able to do with the best standardized optics we can muster. The Olympus E-P1 used the rather excellent Olympus Digital Zuiko 50mm f/2 Macro. The GH1 used its 14-140mm kit lens. The E-30 used the same 50mm f/2 Macro as the E-P1. The others used our laboratory-standard Sigma 70mm f/2.8 EX DG Macro lenses, which are very sharp. |
||||
Dynamic range. As I mentioned earlier, most of my shooting was done in cloudy weather, or indoors. So I didn't have occasion to notice the Olympus E-P1's reduced dynamic range, especially noticeable in JPEG images. It scores very low in Imatest, which you can see on our Imatest Results tab; below six stops at the highest quality level. We think this result is skewed a little due to the increased noise in the shadows; we're also happy to report that in addition to noise, you'll find detail in these shadows, which we think was the smart choice. What it means, unfortunately, is that you'll have slightly darker shadows, or more frequently blown sunlit skies than you'd get with other cameras when shooting JPEGs. You'll also only get the best dynamic range if you set the Olympus E-P1 to ISO 200 instead of 100, because we suspect that this is the sensor's true optimum ISO setting. The dynamic range numbers at 100 are a little lower.
The good news, though, is that you'll be able to resurrect quite a bit of detail from those shadows (not often from the skies, of course, as what's lost at the high end is usually lost). The better news is that if you shoot RAW, the Imatest dynamic range numbers improve significantly. Most of those who care about excellent image quality will have no problem shooting RAW with the Olympus E-P1.
Note that I also didn't have the trouble I did with the E-410's tone curve a few years ago. The Olympus E-P1 takes pleasing images that respond well to editing in Adobe Photoshop.
Analysis. I see a lot of cameras, and many of them are excellent and inspire my creativity. But the Olympus E-P1 captured my imagination even when it was first announced in wood-block form. Olympus has made a tradition of creating cameras that defy the trends, even with their E-series of modern digital SLRs, a camera system with a digital-specific lens design. But those cameras ended up looking the same as the cameras they intended to turn on their ear, with large lenses and bulky bodies.
What Olympus needed was to find a new niche. I think the Micro Four Thirds Olympus E-P1 has found that niche. First, the Olympus E-P1's image quality won't be held to the standard of bigger, heavier digital SLRs; even when it is compared people will make allowances for any shortcomings they see -- if they need to. Second, there are so many advantages to a camera of this size that Olympus can't help but attract new users on that fact alone. Finally, there is so much pent up demand for this form factor that Olympus's biggest problem will be meeting that demand, and introducing a sufficient number of new lenses to keep up with the inevitable demand for more optics to enhance this promising camera format.

OM mount. Here's the 50mm f/1.8 from my OM-1 mounted and ready to go out for test shots. See our SLRgear review of the 50mm f/1.8 for more on how this vintage lens performed on the Olympus E-P1.
It's clear from the image analysis of our test shots that the Olympus E-P1 has more to its appeal than good looks and a fine form. Indeed, it holds its own, and excels among its digital SLR peers. I'm disappointed that I can't use the otherwise excellent 14-42mm lens due to its loose front elements, but with the better-performing lens and its clearly excellent image quality, my level of enthusiasm for the Olympus E-P1 is still strong.
The gauntlet has been thrown: A new digital camera format as radical as the PENs that preceded it threatens to change the landscape, besting small sensor digicams, while capable of greater portability and familiar convenience over digital SLRs. How long before Nikon, Canon, Pentax, and Sony respond? Are any of them prepared to create a new lens mount to achieve the smaller lens sizes we see here? Will it be sufficient to build the body and mount their 35mm lenses to them? Sigma is well positioned to make the DP3 a Micro Four Thirds camera. Samsung's non-SLR system is also coming. Just when we thought it was all going to go SLR, Olympus makes an introduction that changes everything.
Exciting times in photography often begin with Olympus. The PEN, the M-1 (OM-1), the OM-10, OM-4, XA, Stylus, all shook the market with smaller sizes than anyone thought possible at the time, with innovative features and solid performance, and most of them sold extremely well. Even their micro-pulse flash system introduced focal plane flash sync to the world of photography, now allowing flash sync at shutter speeds of up to 1/8,000 second. Olympus has worked very hard on their current line of SLRs, with fine optics to match, and created competent cameras that are feature-rich and do impress; but against the might of Nikon and Canon's brand recognition alone, they remain a smaller player in the market. This latest flash of brilliance is a new opportunity I believe they can use to their advantage.
In the Box
The Olympus E-P1 ships with the following items in the box:
- E-P1 body
- 14-42mm or 17mm lens (if purchased as a kit)
- Body cap
- Lens caps
- Lithium-ion battery BLS-1
- Battery charger BCS-1
- Multi-cable
- Shoulder strap
- Olympus Master CD-ROM
- Instruction manual
- Warranty card
Olympus E-P1 Conclusion
| Pro: | Con: |
|---|---|
|
|
Not only did it introduce a new and much needed form factor to the digital camera market, the Olympus E-P1 is a great camera in its own right. (In fact, its detail rendering at moderate to high ISOs really marks a new level of performance for Four Thirds format cameras.) The small size and low weight mean you're more likely to have it along all the time, and its high image quality means you won't often regret leaving your digital SLR at home. As the Micro Four Thirds lens collection continues to grow, we'll be able to add small, lightweight lenses to our bags without exceeding the capacity of most briefcases and notebook bags. Small cameras like the Olympus E-P1 are also natural companions to netbooks, which, just like the E-P1, fit a lot of capability into a small space and usually have a built-in SD card slot.
As in any relationship, I ran into a snag or two in my romance with the Olympus E-P1. Despite the excellent image quality, fine form, and easy workflow, the Olympus E-P1's IS system and zoom lens tended to hiccup at inopportune moments, introducing blur into my images. But the version 1.1 firmware update from Olympus and a lesson to avoid the 14-42mm lens (at least within the focal length and shutter speed range where the vibration issue exists) has allowed our romance to continue with hope for a long future together.
Its good quality at high ISO makes the Olympus E-P1 a very good available-light camera, which includes liberal use indoors. Street photography is also a great way to use the Olympus E-P1, thanks to its 17mm f/2.8 lens and relatively unassuming presence, and it's also well suited for museum lovers, since there will be no flash automatically popping up just as the guard is watching.
A higher-resolution LCD should go on the checklist for the next PEN, as well as faster autofocus and an option for smaller, finer AF points to better simulate SLR focus systems. Better continuous autofocus during video recording would also be good, as well as longer battery life. Fresh from discovering the 14-42mm's vibration issue, I'm inclined to avoid it and stick with the 17mm. On the other hand, if I'm shooting snapshots that won't go larger than 8 x 10, the 14-42mm's images will do fine. Still, kit lenses usually have some compromise, including soft corners and audible noise, none of which appear in this lens, so some might just praise the 14-42mm's excellent image quality and be happy with 8x10-inch prints from hand-held shots. When it isn't affected by the vibration (at higher shutter speeds or mounted on a tripod), it is a very nice little lens, so you be the judge.
But the Olympus E-P1 with the 17mm lens hits the right spots for this photographer: great still image performance, very usable high ISO images, good optical quality, a prime lens with more to come, easy portability, and a certain charm that makes you want to take pictures. Hard to beat that. The Olympus E-P1 is a revolutionary design, and a Dave's Pick.

Design
Olympus E-P1 Design
Roll-over the various controls and features with your mouse for a brief description. Note: Rollovers are best viewed with the latest versions Firefox, Safari, or Opera browsers, or Internet Explorer 6 or earlier.

Front View. The Olympus E-P1 has a very clean, retro looking front, with minimal controls. The grip bevels down as it approaches the lens, and gives a little when you press on it. It's nice to use a metal camera again. Those dots left and right of the logo are holes for the stereo microphones.

Left View. No controls here. Note the D-ring, the only "retro" component on the Olympus E-P1 that we don't like much. Our key complaint is the noise the metal-to-metal interface can make while you're recording video.

Right View. The right side of the camera contains access to the USB/AV and HDMI ports. (Shown with M.Zuiko Digital Micro Four Thirds 14-42mm f/3.5-5.6 ED lens in retracted position.)

Top View. The top panel has a few controls including the Mode dial (activated from the rear), On/Off switch, Shutter button, and Exposure Compensation button. A hot shoe is provided for flash or the optional optical viewfinder (it's included with the 17mm kit).

Back View. The majority of controls are on the camera's rear panel, along with the 3.0-inch, 230K dot LCD. The Main dial is easy to use despite its small size, as are the buttons on the Arrow pad. The SubDial is also easy to use, and well placed despite its position atop the rear thumb-rest.

Bottom View. The camera's bottom panel is flat, with a the metal tripod mount off-center from the lens mount. The battery door conceals the SD and battery slots.
Operation
Olympus E-P1 Operation
The Olympus E-P1 packs a lot of features into a very compact body. This of course means that many features are accessed via menus shown on the LCD instead of dedicated buttons. Still, Olympus has crammed a lot of controls into what little space is available, and they've given a lot of flexibility on how many of them function, via an extensive set of Custom and Setup menu options. (See our Modes & Menus page for details.)
Most major functions are accessible via the ten buttons on the back and two on the top deck. A Function button activates an L-shaped menu that offers access to major functions, like White balance, Drive mode, Image stabilization, Aspect ratio, Compression, AF mode, Face detection, and AF point.
A Main and Sub dial navigate through menus, and are used to adjust shutter speed and aperture in Manual exposure modes.
Record Mode Displays
Full-time Live View The information display in record mode includes exposure mode, flash mode, ISO sensitivity setting, metering mode, AF mode, number of available images, resolution, aspect ratio, image stabilizer mode, drive mode, white balance, focus confirmation, battery status, etc. You can also enable a live histogram. A half-press of the Shutter button displays the shutter speed and aperture settings. Through the Custom menu, you can also enable one of three styles of grid displays. See the illustration below (courtesy of Olympus America) for information callouts in record mode.
As you change exposure settings, the display changes to reflect what the captured image will look like, also known as "exposure simulation."

|
1
|
Internal Temperature Warning
|
12
|
Aperture Value
|
|
Arrow Pad Function
|
13
|
Flash Status
|
|
|
2
|
My Mode
|
14
|
Battery Status
|
|
3
|
Shooting Mode
|
15
|
AF Confirmation
|
|
4
|
Flash Mode
|
16
|
Art Filter
|
|
5
|
ISO Sensitivity
|
Scene
|
|
|
6
|
Metering Mode
|
17
|
White Balance
|
|
7
|
AF Mode
|
18
|
Sequential Shooting
|
|
8
|
Face Detection
|
Self-Timer
|
|
|
5
|
ISO Sensitivity
|
19
|
Image Stabilizer Mode
|
|
9
|
Flash Intensity
|
20
|
Aspect Ratio
|
|
Super FP Flash Mode
|
21
|
Image Size & Quality
|
|
|
10
|
AE Lock
|
22
|
Number of storable still images
|
|
Auto Bracket
|
Available Recording Time
|
||
|
Multiple Exposure
|
23
|
Exposure Compensation Value
|
|
|
Home Position
|
24
|
Histogram
|
|
|
11
|
Shutter Speed
|
|
Level Gauge The Olympus E-P1 includes a nifty Level Gauge feature, which when enabled, displays the amount of roll (left/right) and pitch (forward/backward) as bars on the bottom and right hand-side of the screen respectively. This helps ensure that images are level with the horizon, or parallel with a subject for critical work such as architecture or macro. You can also calibrate, or "zero-out" the level gauge, in a Custom menu.
Super Control Panel In record mode, the LCD monitor displays the "Super Control Panel" when you press the Info button. You can navigate around in and make changes to a number of menu options (ISO, White Balance, etc.). See the illustration below (courtesy of Olympus America) for callouts of the various settings that are shown and adjustable from this screen.

|
1
|
Internal Temperature Warning
|
14
|
Picture Mode
|
|
Arrow Pad Function
|
15
|
Sharpness
|
|
|
2
|
Shooting Mode
|
Contrast
|
|
|
3
|
Function Name
|
Saturation
|
|
|
4
|
White Balance
|
Gradation
|
|
|
White Balance Compensation
|
B&W Filter
|
||
|
5
|
ISO Sensitivity
|
Picture Tone
|
|
|
6
|
Sequential Shooting
|
16
|
Color Space
|
|
Self-Timer
|
17
|
Face Detection
|
|
|
7
|
Flash Mode
|
18
|
Metering Mode
|
|
8
|
Flash Intensity
|
19
|
Number of storable still images
|
|
9
|
Image Stabilizer Mode
|
20
|
Exposure Compensation Value
|
|
10
|
AF Mode
|
Exposure Level
|
|
|
AF Target
|
21
|
Aspect Ratio
|
|
|
11
|
Image Size & Quality
|
22
|
Aperture Value
|
|
12
|
Flash Status
|
23
|
Shutter Speed
|
|
13
|
Battery Status
|
Live Control The Olympus EP-1 adds a new menu display type reminiscent of the Function menu found on Canon PowerShots, called Live Control. The menu is accessed by pressing the "OK" button, and overlays commonly used functions along the right hand side, and displays the options for the currently selected setting along the bottom. Menu options in this mode include Scene mode (when SCN exposure mode is selected), Art filter mode (when ART exposure mode is selected), Movie AE mode (in Movie mode), White Balance, Sequential shooting/self-timer, Image Stabilizer, Aspect Ratio, Record Mode (image size and quality), ISO sensitivity, Flash mode, Metering mode, AF mode, Face detection, AF target selection and Movie sound record (in Movie mode).
Playback Mode Displays
Information Screens In Playback mode, the default image display shows the most recently captured image. Pressing the Info button cycles through the main display (with no information), a simplified display with basic information overlay, a detailed thumbnail display with RGBY histogram, shooting info and highlight/shadow display, a luminance histogram overlay display, and a blinking highlight/shadow display (overexposed areas are shown in red, underexposed in blue). The last display type will be stored and shown the next time by default. Pressing the Right or Left arrow displays the next or previous frame, while pressing the Up or Down arrow jumps 10 frames forward or backward.
Index and Calendar Views Turning the Sub dial to the left cycles through a four, nine, 16, 25, 49, and 100-image index display, and finally a Calendar display. The arrow pad keys are used to select a particular frame in an index view. In Calendar view, you can display images arranged by date, and you can select a date by using the arrow keys, then pressing OK. If more that one shot was taken on a single date, the first shot on that date is displayed.
Magnified View Turning the Sub dial to the right enlarges the captured image as much as 14x. You use the four arrow keys to move around the zoomed image, and if Face Detect is enabled, a frame is displayed around a detected face. You can press OK to move the frame to another face. After pressing the Info button in magnified view, you can view other images at the same magnification by using the Left and Right arrows. When Face Detect is enabled, you can jump to the next or previous face by using the Up and Down arrows, useful for quickly checking for closed eyes or focus issues.
Optics
Olympus E-P1 Optics
Olympus M.Zuiko Lenses
 The Olympus E-P1 is compatible with any Micro Four Thirds lens, as well as standard Four Thirds lenses via an optional adapter. Olympus has dubbed their Micro Four Thirds lenses "M.Zuiko," and at the time of writing (June 2009), only two M.Zuiko lenses have been released. The Olympus 14-42mm f/3.5-5.6 ED M.Zuiko Digital zoom lens offers a fairly typical 3x zoom ratio, with a 35mm equivalent focal range of 28-82mm. When bundled with the E-P1 body, the kit lists for US$800. The test shots shown on this page were taken with that lens, unless otherwise noted. One interesting feature of this lens is it "collapses" for a smaller footprint when not in use. Shown unmounted to the right of the E-P1, it's in its collapsed position in this photograph.
Also offered is the Olympus 17mm f/2.8 M.Zuiko Digital, a sharp, fairly fast (f/2.8), and compact prime lens with an equivalent focal length of 34mm. The 17mm E-P1 bundle lists for US$900, and includes an optical viewfinder which mounts in the flash hot-shoe (see image above right). Because the E-P1 features in-body image stabilization, these lenses do not themselves incorporate optical image stabilization. (Note that Panasonic Micro Four Thirds lenses work with the Olympus E-P1, but you have to disable their built-in O.I.S. systems.)
Olympus E-P1 Autofocus

11-Area AF. Focus areas are bit large and their size is fixed, making it difficult to focus on small objects without resorting to manual focus.
You can register a "Home" position for the active AF by pressing the Function (Fn) and EV Compensation buttons simultaneously. This is useful for quickly retrieving your favorite AF area position, simply by pressing the Fn button. There is no option to change the size of the active area, a feature we think would be a useful enhancement, as we had difficulties focusing on the small AF target in our Indoor Portrait series.
Of course, the Olympus E-P1 also offers a manual focus mode. In MF mode, an option called MF assist causes the camera to optionally magnify the preview image by 7x or 10x whenever the focus ring is adjusted, to help determine critical focus. The focus area can also be freely moved around the entire screen, to a total of 225 positions once in magnified view mode, and we found that this could be done in autofocus mode as well, a nice feature that seems to be undocumented. For use with old manual-focus lenses (which lack the communication that would tell the body when the focus ring was being adjusted), or perhaps to simply check the focus that the AF system has achieved, you can also enable the 7x/10x magnification manually by using the Info button to select the screen with the green AF square in the middle; then just press the OK button to activate the zoomed view. Use the vertical control wheel to switch between 7x and 10x.
As we note elsewhere, the LCD on the E-P1 isn't one of the newer-generation high-resolution designs, as it has only 230K dots. For precise manual focusing, we'd really have preferred to have a higher-resolution LCD, even with the 10x magnification mode. That said, we found that we could still produce sharp images when focusing manually, at least under ideal conditions. Ideal conditions mean the camera mounted on a solid tripod, and a subject with strongly contrasting fine detail to examine while focusing. Under such conditions, we could consistently produce results as sharp as those delivered by the AF system, but we always felt like we were guessing somewhat as to where optimum focus really was. The results showed we perhaps should have had more confidence in our ability to focus the E-P1 manually, but we really would have been happier if the E-P1's LCD screen had more resolution.
Autofocus servo modes consist of S-AF (single shot autofocus), C-AF (continuous autofocus), MF (manual focus), and S-AF+MF (single shot autofocus with manual focus tweaking). In S-AF or S-AF+MF mode, focus is locked when the shutter button is half-pressed. In C-AF mode, the camera continuously cycles its AF system, which helps it track moving objects, keeping the current lens focal distance setting closer to the current subject distance than it might otherwise be. This can reduce AF "hunting" when it comes time to snap the actual shot.
Because contrast-detect AF systems have to perturb the focus in order to tell whether the image is actually in focus or not, the E-P1's Continuous-AF mode disturbs the viewfinder display on the LCD while it's operating. That is, the viewfinder image continuously shifts in and out of focus when C-AF is active, as the camera constantly re-checks its focus setting. This is a necessity for any contrast-detect AF system, but the amount of defocusing required by the E-P1 to check focus is greater than we've seen in some other systems.
While the recent G-series Micro Four Thirds cameras from Panasonic feature surprisingly fast contrast-detect autofocus, we found the AF performance on the Olympus E-P1 more in line with that of the contrast-detect systems in Live View-capable SLRs, its shutter lag with the 14-42mm kit lens ranging from 1.2 to 1.3 seconds.
AF in Movie mode
In Movie mode, you have the same focusing options available as when shooting stills, but the C-AF option operates a bit differently, and you may want to choose either S-AF, S-AF+MF or MF modes to minimize the impact of the focus motor noises on your audio track. With the 14-42mm kit lens attached, we found the focus motor noise to be very prominent in the audio track, especially during quiet passages. Even with a sound level corresponding to normal conversation, the focus motor noise was clearly audible in the sound track. With C-AF mode selected, the lens would cycle fairly rapidly whenever it made a change, creating more focus motor noise. If we carefully "pulled focus" manually, moving the focus ring slowly to track a moving subject, the focus motor noise was greatly reduced, but still audible unless the ambient sound level was fairly high. Also, we're not sure just what triggered AF cycles in C-AF mode while recording video. As best we could tell, the camera kept track of the overall scene brightness each time it cycled the AF, and then refocused whenever the brightness changed by more than some predetermined amount. The AF cycles thus tended to be somewhat unpredictable, and they didn't always correspond to there having been changes in the subject distance. (It seemed that the subject could move closer or further away without necessarily causing the camera to refocus, but nothing more than a relatively abrupt change in light level could trigger it at other times. Even under best-case conditions, the C-AF option didn't appear to be very useful for tracking moving subjects when recording videos.
Olympus E-P1 Sensor Cleaning
The Olympus E-P1 features an ultrasonic dust-reduction system, especially important since the E-P1's shutter is normally open for full-time Live View. The system automatically runs at power-up, and unfortunately, there is no option to disable it or run it manually, as it does contribute to startup time. The SSWF ("Super Sonic Wave Filter") LED on the top of the camera blinks when self-cleaning is performed.
Olympus E-P1 Kit Lens Test Results
Although we ended up preferring the 17mm f/2.8 lens, we did the majority of our optical performance testing with the 14-42mm f/3.5-5.6.
Kit Lens Test Results
Zoom
Excellent performance with the 14-42mm kit lens.


The Olympus E-P1 is available bundled with a Olympus14-42mm f/3.5-5.6 ED M.Zuiko Digital Micro Four Thirds lens, the first Olympus M.Zuiko zoom. The kit lens possesses a very typical optical zoom range of 3x, and the 35mm equivalent focal range is about 28-82mm, because of the E-P1's 2x "crop factor." Results were quite good at 14mm, with only slightly soft corners and strong detail throughout the frame. Coma distortion in the trees was low; however, chromatic aberration in the corners was moderate. Results were excellent at the 42mm setting, with sharp corners and just a a hint of chromatic aberration. Overall, an excellent result for a kit lens. The Olympus E-P1 does not offer a digital zoom mode.
Macro
A smaller than average area (for an SLD* kit lens), with excellent detail.

As with zoom performance, the Olympus E-P1's macro performance will depend entirely on the lens in use. However, with the 14-42mm kit lens set to 42mm, the Olympus E-P1 captured an smaller than average minimum area measuring 1.96 x 1.47 inches (50 x 37 millimeters). Resolution and detail were excellent, with very little if any softening in the corners. (Most lenses have some softening in the corners at macro distances, the Olympus E-P1's kit lens has much less than most.) Excellent performance for a kit lens here as well.
*SLD = Single Lens Direct-view
Geometric Distortion
Low geometric distortion with the 14-42mm kit lens in JPEGs, higher than average distortion in uncorrected RAW files.
| In-Camera JPEG: Barrel distortion at 14mm is 0.6 percent |
 |
| In-Camera JPEG: Pincushion distortion at 42mm is practically nonexistent |
 |
| Uncorrected RAW: Barrel distortion at 14mm is 1.6 percent |
 |
| Uncorrected RAW: Pincushion distortion at 42mm is 0.8 percent |
 |
When shooting JPEGs, the Olympus E-P1's 14-42mm kit lens produced about 0.6 percent barrel distortion at wide-angle, somewhat less than that produced by most cameras we've tested, and hardly noticeable in most of its images. At the telephoto end, there's almost no distortion, practically imperceptible. This is the tendency for the lens to bend straight lines outward (like a barrel -- usually at wide-angle) or inward (like a pincushion -- usually at telephoto).
We suspected the camera was correcting distortion in JPEGs (similar to the Panasonic G1/GH1), so we converted RAW files from the above shots with dcraw, which does not correct for distortion. As you can see, at wide angle, the barrel distortion is high at 1.6 percent, and pincushion distortion at telephoto is also fairly high at 0.8%. We've started to expect this for smaller interchangeable lenses though, so it's nothing to be concerned about unless you are using a RAW converter which does not understand the embedded "opcodes" to perform distortion corrections automatically. Most RAW converters these days are capable of applying distortion correction automatically, as specified by the manufacturer. (There's going to be some loss of resolution as a result of such correction, because pixels in the corners of the frame are being "stretched" to correct for the distortion. Obviously, a lens that doesn't require such correction, and is also sharp in the corners to begin with would be preferable, but relaxing constraints on barrel and pincushion distortion could bring other benefits in the lens design.)
Chromatic Aberration
Moderate at wide angle with the 14-42mm kit lens, low at telephoto.
|
In-Camera JPEGs
|
|
 |
 |
| Wide: Moderate, top left |
Wide: Moderate, top right |
 |
 |
| Tele: Low, top left |
Tele: Low, top right |
When shooting JPEGs, chromatic aberration in the corners with the Olympus E-P1's 14-42mm kit lens is moderate at the 14mm setting, with 4-5 pixels of fairly bright fringing. At 42mm telephoto, this distortion is much lower and hardly noticeable. (This distortion is visible as a slight colored fringe around the objects at the edges of the field of view on the resolution target.) Unlike some other manufacturers (notably Panasonic and Nikon, on their pro SLRs), the Olympus E-P1 does not appear to correct for lateral chromatic aberration in its JPEGs, as uncorrected RAW files do not show any significant increase in chromatic aberration.
Corner Sharpness
Slight blurring in the corners of the frame at wide angle, very little softening at telephoto with the 14-42mm kit lens. Some slight shading (vignetting) in the corners at maximum aperture.
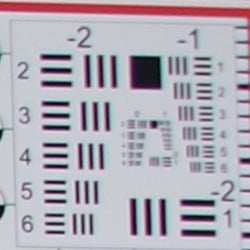
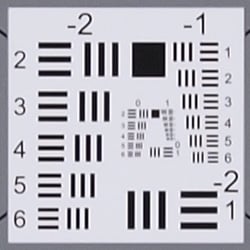


At wide angle with the 14-42mm kit lens, the extreme corners of our test targets were a little soft compared to the center. At telephoto, corners showed hardly any softening, There was also some minor shading (vignetting) at both wide angle and telephoto, as you can see in the two pairs of crops: Note how it's darker in the corner than in the center. Despite the slightly soft corners at wide angle, this is well above average performance for a kit lens, especially considering these shots were taken with the lens wide open. (Corner sharpness and vignetting typically improve when stopping down to a smaller aperture.) Again, an excellent performance.
The images above were taken from our standardized test shots. For a collection of more pictorial photos, see our Olympus PEN E-P1 Photo Gallery .
Exposure
Olympus E-P1 Exposure
Metering
Five metering systems are available on the Olympus E-P1: Digital ESP, Center-weighted, Spot, Spot HI (highlights), and Spot SH (shadows). All are accessed through the various menu systems on the camera's LCD monitor. Under the default Digital ESP setting, the camera takes an exposure reading from 324 segments of the image (this is up from 49 segments on Olympus SLRs), and chooses the best exposure based on brightness and contrast across the entire scene.  Center-weighted metering reads from the center of the frame, but from a fairly large area. Spot metering simply reads the exposure from the very center of the image, so you can pinpoint the specific area of the photograph you want properly exposed. (Spot metering is very handy when you have a subject that's backlit, or that has a very different brightness, either lighter or darker, than the background.) The two additional Spot options provide highlight and shadow control, whenever shooting in very bright or very dark conditions. Exposure (and autofocus) is optimized for faces when Face Detect is enabled. Metering range is from 0 to 20 EV, at room temperature with a 50mm f/2 lens at ISO 100. The Olympus E-P1 also gives you the ability to tweak the exposure of each metering mode as well, via a new Custom Menu called Exposure Shift. It allows you to assign an offset in 1/6 EV intervals between -1 and +1 EV for Digital ESP, Center-weighted, and Spot metering modes.
An AE/AF Lock button locks the current exposure settings whenever pressed, so you can independently lock exposure and focus. (AE Lock is useful when you want to base your exposure on an off-center subject. Point the camera at the subject, lock the exposure, then recompose your shot however you like. Your subject will be correctly exposed, regardless of what might be in the center of the frame when you finally snap the shutter.) Through a Custom menu, you can designate the function of the AE/AF lock button, and how it works in conjunction with the Shutter button. You can also specify which metering mode is used when this button is pressed. Available options are Auto, Center-Weighted, Spot, Spot HI, and Spot SH.
 In situations where exposure compensation is necessary, simply press the Exposure Compensation button and turn either dial (in all exposure modes except Manual and Bulb) and the EV value will display on the LCD. You can increase or decrease the exposure in either 0.3, 0.5, or 1.0 EV increments (selected via a menu option), up to a maximum of +/- 3 EV. Or, you can use the Auto Exposure Bracketing (AEB) function to automatically bracket three frames at 0.3, 0.7, or 1.0 EV steps each. The auto bracketing will center its efforts around whatever exposure you've chosen as the starting point, including any exposure compensation adjustments you've made. AEB is handy for those times when you want to make sure you get just the right exposure for a critical subject.
White Balance White balance options include Auto, Sunny, Shadow, Cloudy, Tungsten, Fluorescent 1, Fluorescent 2, Fluorescent 3, Flash, One-Touch, and Custom, to accommodate a variety of lighting situations. Pressing the White Balance button and turning either Control dial adjusts the setting, and the Kelvin temperature is displayed in the LCD monitor. The Olympus E-P1 offers a Custom setting, which lets you choose from a range of Kelvin temperature settings, from 2,000K to 14,000K. The One-Touch option is useful for basing the white balance on a white card. You can also adjust the white balance, controlling the amount of amber-blue and green-magenta bias in the color balance, in any of the selected modes, in +/- 7 steps. This ability to "tweak" the white balance, called White Balance Compensation, is very helpful when dealing with difficult light sources. The E-P1 also features a white balance bracketing. If activated, the camera will take three successive images, either biasing between amber and blue or green and magenta. You can set the images to vary by two, four, or six arbitrary adjustment steps.
ISO Sensitivity The Olympus E-P1 lets you adjust its light sensitivity, in either 1 or 1/3 EV steps, with options of 100 to 6,400 ISO equivalents, or to an Auto mode in which the camera selects an ISO appropriate to the subject's brightness. You can set a maximum ISO point for the Auto mode which won't risk noise in bright situations, from 200 to 6,400, as well as the default (minimum) ISO, also from 200 to 6,400. The higher ISO settings are helpful when you want faster shutter speeds under normal lighting, to help freeze fast action. There is also a unique ISO bracketing feature, where the camera takes three images, varying the ISO but keeping the shutter speed and aperture fixed. Of course, as with all digicams, the higher ISO settings produce photos with more image noise, in much the same way that higher-ISO films show more film grain. To combat this problem, the E-P1 offers a Noise Reduction option through the Record menu, which reduces the amount of image noise from long exposures, particularly at the higher ISO settings, as well as variable high ISO noise reduction Olympus calls Noise Filter. Noise Filter options consist of Off, Low, Standard, and High.
Picture Modes There are also options on the Record menu to set the color mode, which offers Vivid, Natural, Muted, Portrait, and Monotone, as well as custom options. Contrast, Sharpness, and Saturation levels may be adjusted in five steps for Vivid, Natural, Muted, and Portrait; while Contrast and Sharpness levels can be adjusted in five steps for Monotone. Yellow, Orange, Red, or Green filter effects are available for Monotone, as well as Sepia, Blue, Purple, or Green picture tones. In addition, the Olympus E-P1 has a Gradation setting to control the brightness of the entire image. You can choose between the Auto, Normal, Low, and High Key settings. A color space option under the Record menu lets you choose between sRGB (for Windows machines) and Adobe RGB (for Adobe Photoshop) color options.
Multiple Exposures The Olympus E-P1 supports multiple exposures of two frames overlaid as one image. You can overlay images while they are being taken, or overlay up to four RAW frames in playback mode. You can have the camera automatically adjust the gain (brightness) of each image by 1/2, by enabling the Auto Gain feature.
Drive Mode and Self-Timer
The Drive setting accesses Single-shot and Continuous modes, as well as Self-timer modes. Single-shot shoots one frame per shutter press, while Continuous mode shoots bursts at about 3 frames-per-second. As is usually the case, the number of frames you can capture continuously is limited by the camera's buffer memory capacity, the speed of your memory card, and the image file size and quality. 
The Olympus E-P1 also offers two Self-Timer modes for self-portraits or those occasions when you don't want to risk camera shake on a long exposure by pressing the Shutter button to trip the shutter. You can choose between a 2 or 12 second countdown. The 2 second countdown is useful for times when you're taking a long exposure with the camera on a tripod. Surprisingly for a camera without a mirror, there is also an Anti-Shock option, which allows a programmable delay from 1/8s to 30s between the shutter button being pressed and the actual exposure taken.
When the optional RM-UC1 Remote Cable is attached via the USB-AV/OUT port, remote operation is available. No wireless remote is available for the E-P1.
Shading Compensation The E-P1 is the third Olympus (after the E-30 and E-620)to implement what the company calls Shading Compensation, which is another term for lens vignetting or corner shading correction. Canon and Nikon offer a similar feature on some of their recent models, and it's nice to see the Olympus E-P1 does too. It's not clear whether the camera applies fixed compensation based on lens type, or by analyzing the actual light fall-off in the corners of captured images.
Art Filters Like the E-30 and E-620 SLRs, the Olympus E-P1 offers what the company calls Art Filters effects. There are six to choose from: Pop Art, Soft Focus, Pale & Light Color, Light Tone, Grainy Film, and Pin Hole. What's unique about these is that the camera performs these filters as it captures the image, taking exposure into account. As one might expect, Art Filters are not applied to RAW files. If RAW mode is chosen, the camera will automatically enable LN+RAW mode, and save the modified image as a large/normal JPEG.
The images above were taken from our standardized test shots. For a collection of more pictorial photos, see our Olympus PEN E-P1 Photo Gallery .
Not sure which camera to buy? Let your eyes be the ultimate judge! Visit our Comparometer(tm) to compare images from the Olympus PEN E-P1 with those from other cameras you may be considering. The proof is in the pictures, so let your own eyes decide which you like best!
Performance
Olympus E-P1 Performance
Timing and Performance
The Olympus E-P1 is somewhat slower than average compared to consumer SLRs and many point & shoot cameras.
| Startup/Shutdown |
||
| Power on |
2.5 seconds
|
Time it takes to turn on and capture a shot. |
| Shutdown |
0.8 second
|
How long it takes camera to turn off before you can remove the memory card. |
|
Buffer clearing time
|
8 seconds after 13 large/superfine JPEGs*
|
Worst case buffer clearing time. -- This is the delay after a set of shots before you can remove the card.
|
|
10 seconds after 11 RAW files*
|
||
|
22 seconds after 9 RAW+ LSF JPEG files*
|
||
|
*Note: Buffer clearing times measured with a SanDisk Extreme III 30MB/sec 8GB SDHC card. Slower cards will produce correspondingly slower clearing times. Slow cards may also limit length of bursts in continuous mode. ISO sensitivity and noise reduction settings can also affect cycle times and burst mode performance.
|
||
Startup and shut-down times are slower than those for most SLRs. The long startup time is likely due to the SSWF cleaning that takes place on power-up. Unfortunately, there is no way to shut that off with the current firmware (V1.1).
| Mode Switching | ||
|---|---|---|
| Play to Record, |
1.5 seconds
|
Time until first shot is captured. |
| Record to play |
2.2 seconds
|
Time to display a large/superfine JPEG file immediately after capture. |
| Display |
0.2 second
|
Time to display a large/superfine JPEG file already on the memory card. |
Mode switching is also slow. Displaying recorded JPEGs is pretty fast though.
| Shutter Response (Lag Time) | ||
|---|---|---|
|
Full Autofocus,
Single-area AF mode, Wide Angle |
1.187 seconds
|
Time from fully pressing shutter button to image capture, with the lens already at the proper focal distance setting. (Timed with Olympus 14-42mm kit lens. This measurement done at 14mm.)
|
|
Full Autofocus,
Single-area AF mode, Telephoto |
0.983 second
|
Time from fully pressing shutter button to image capture, with the lens already at the proper focal distance setting. (Timed with Olympus 14-42mm kit lens. This measurement done at 42mm.) |
|
Full Autofocus,
Multi-area AF mode, Telephoto |
1.190 seconds
|
Time from fully pressing shutter button to image capture, with the lens already at the proper focal distance setting. (This measurement done at 42mm.)
|
|
Full Autofocus,
Single-area AF mode, Prime lens |
1.038 seconds
|
Time from fully pressing shutter button to image capture, with the lens already at the proper focal distance setting. (Measured with Olympus 17mm f/2.8 lens.)
|
| Prefocused |
0.072 second
|
Time to capture, after half-pressing and holding shutter button. There was about 8% variation between iterations on this particular measurement. |
|
Continuous AF |
1.121 seconds
|
This mode usually shows no speed increase with our static subject; we have no way to measure performance with moving subjects. |
|
Manual Focus |
0.274 second
|
For most cameras, shutter lag is less in manual focus than autofocus, but usually not as fast as when the camera is "prefocused". There was about 12% variation between iterations on this measurement. |
The Olympus E-P1 showed full-autofocus shutter lag (with the subject at a fixed distance) that ranged from 0.983 seconds at full telephoto to 1.187 seconds at wide angle when using the 14-42mm kit lens, which is slower than almost every current digital camera we've tested (with the possible exception of Sigma's DP series). The lag was about the same in continuous mode AF, at about 1.121 seconds. The Panasonic GH1 was about 3-4 times faster at full autofocus. (The lens likely has a lot to do with that. Unlike the phase-detect AF systems used in SLRs, contrast-detect AF systems require refocusing the lens to determine optimal focus, so the focusing speed of the lens becomes a much larger factor in our measurements. We've heard that the E-P1 does much better when paired with the fast-focusing Panasonic 14-140mm HD lens, but unfortunately didn't have one available to test the E-P1 with.) With the 17mm f/2.8 prime, full AFlag was 1.038s, but that's still quite slow. When manually focused, the E-P1's lag time drops to 0.274 second, still on the slow side, but fast enough that it won't likely cause you to miss any shots. Manual focus lag also varied a lot more that autofocus lag (12% versus 3%). The E-P1's prefocused lag time of 0.072s is quite fast though, besting some SLRs in its general price range. That's partially because there is no mirror to move out of the way first. (The lag with the 17mm prime was with Version 1.0 firmware, other lag figures were with version 1.1. The kit lens tested at 1.07-1.23s with Version 1.0 firmware.)
Overall, AF shutter lag is clearly one of the weakest points of the Olympus E-P1 value proposition, at least with currently available Olympus Micro Four Thirds lenses. The version 1.1 firmware upgrade to improve continuous AF performance had a slight effect on shutter lag overall, but not enough to change the basic feel of the camera. That said, if you can prefocus by half-pressing and holding down the shutter button prior to the shot itself, you'll have no problem capturing critical moments. That's not possible with every subject, but for those that it does work with, the E-P1 will respond quickly enough.
| Cycle Time (shot to shot) | ||
|---|---|---|
| Single Shot mode |
1.93 seconds
|
Time per shot, averaged over 20 shots, 3 seconds to clear*. |
|
Single Shot mode |
1.93 seconds
|
Time per shot, averaged over 20 shots, 3 seconds to clear*. |
|
Single Shot mode
RAW + LSF JPEG |
2.12 seconds
|
Time per shot, averaged over 19 shots, 22 seconds to clear*. |
| Early shutter |
No
|
Some cameras don't snap another shot if you release and press the shutter too quickly in Single Shot mode, making "No" the preferred answer. |
|
Continuous Mode |
0.32 second (3.13 frames per second);
13 frames total; 8 seconds to clear* |
Time per shot, averaged over 13 shots, then slows to an average of about 0.53s or 1.89 fps. |
| Continuous Mode |
0.32 second (3.13 frames per second);
11 frames total; 10 seconds to clear* |
Time per shot, averaged over buffer length of 11 frames, then slows to an average of about 0.89s or 1.13 fps. |
|
Continuous Mode |
0.32 second (3.16 frames per second);
9 frames total; 22 seconds to clear* |
Time per shot, averaged over buffer length of 9 frames, then slows to 2.27s or 0.44 fps. |
| Flash Recycling |
n/a
|
Flash at maximum output. |
|
*Note: Buffer clearing times measured with a SanDisk Extreme III 30 MB/sec 8GB SDHC card. Slower cards will produce correspondingly slower clearing times. Slow cards may also limit length of bursts in continuous mode. ISO sensitivity and noise reduction settings can also affect cycle times and burst mode performance.
|
||
Single-shot cycle times are rather slow, at 1.93 seconds for large/superfine JPEGs or RAW files, 2.12 seconds for RAW + LSF JPEGs. Continuous mode, however, was faster and quite consistent. The camera managed about 3.1 frames per second no matter what image size or quality before the buffer filled. Buffer depth was also quite good, at 13 frames for large/superfine JPEGs, 11 for RAW and 9 for RAW + large/superfine JPEG. Note that our test target for this was designed to be difficult to compress, so JPEG burst lengths may be longer with simpler subjects. (Particularly in the case of buffer depths, we're careful to test under worst-case conditions.)
| Download Speed | ||
|---|---|---|
| Windows Computer, USB 2.0 |
7,273 KBytes/sec
|
Typical Values: |
Download speeds were fast, quick enough that you probably won't feel the need for a separate card reader, even with large memory cards. (Note that this test was performed with a SanDisk Extreme III 30 MB/sec SD card: Slower cards would likely show slower transfer times.)
Bottom line, the Olympus E-P1 is a bit of a mixed bag when it comes to performance. Startup time and full autofocus lag is quite slow, though prefocused shutter lag is very good. Burst speed is about average, and buffer size is pretty good. If you prefocus, you can capture some action shots, but the E-P1 is best suited for relatively static subjects.
Battery and Storage Capacity
Battery
Below average battery life, but not atypical of SLR-style cameras operating in Live View mode.
| Operating Mode | Number of Shots |
|---|---|
|
Still Capture,
(CIPA standard) |
300
|
The Olympus E-P1 uses a custom rechargeable lithium-ion battery pack for power, and comes with both a single battery and charger. The rated 300 shots per charge is below the capacity of most SLRs and Point & Shoots, especially considering the E-P1 has no built-in flash. - But this relatively short battery life isn't atypical of SLR-style cameras being used in Live View mode: Live View operation burns a fair bit of power. (The CIPA standard normally tests battery life with 50% of the shots taken with flash, so this isn't strictly a CIPA number, given that there's no internal flash to fire.) We do recommend getting a second battery for your E-P1 if you plan any extended outings.
The table above shows the number of shots the camera is capable of (on a fully-charged rechargeable battery), based on CIPA battery-life and/or manufacturer standard test conditions.
(Interested readers can find an English translation of the CIPA DC-002 standards document here. (180K PDF document))
Storage
The Olympus E-P1 accepts SD/SDHC memory cards, and does not ship with a card.
| Image Capacity with 1GB Memory Card |
SuperFine | Fine | Normal | Basic | RAW | RAW + LSF JPG |
|
|---|---|---|---|---|---|---|---|
|
4,032 x 3,024 |
Images (Avg Size) |
109
9.4 MB |
157
6.5 MB |
337
3.0 MB |
502
2.0 MB |
58
17.7 MB |
35
29.3 MB |
|
Approx.
Comp. |
4:1
|
6:1
|
12:1
|
18:1
|
1:1
|
-
|
|
|
3,200 x 2,400 |
Images (Avg Size) |
168
6.1 MB |
269
3.8 MB |
531 1.9 MB |
787 1.3 MB |
-
|
-
|
|
Approx.
Comp. |
4:1
|
6:1
|
12:1
|
18:1
|
-
|
-
|
|
|
2,560 x 1,920 |
Images (Avg Size) |
283
3.6 MB |
419
2.4 MB |
828 1.2 MB |
1,226 835 KB |
-
|
-
|
|
Approx.
Comp. |
4:1
|
6:1
|
12:1
|
18:1
|
-
|
-
|
|
|
1,600 x 1,200 |
Images (Avg Size) |
716
1.4 MB |
1,045
980 KB |
1,992 514 KB |
2,898 353 KB |
-
|
-
|
|
Approx.
Comp. |
4:1
|
6:1
|
11:1
|
16:1
|
-
|
-
|
|
|
1,280 x 960 |
Images (Avg Size) |
1,099
932 KB |
1,594
642 KB |
3,036
377 KB |
4,250
241 KB |
-
|
-
|
|
Approx.
Comp. |
4:1
|
6:1
|
11:1
|
15:1
|
-
|
-
|
|
|
1,024 x 768 |
Images (Avg Size) |
1,677
611 KB |
2,452
418 KB |
4,554
225 KB |
6,376
161 KB |
-
|
-
|
|
Approx.
Comp. |
4:1
|
6:1
|
11:1
|
15:1
|
-
|
-
|
|
|
640 x 480 |
Images (Avg Size) |
3,985
257 KB |
5,313
193 KB |
9,108
112 KB |
12,154
84 KB |
-
|
-
|
|
Approx.
Comp. |
4:1
|
5:1
|
8:1
|
11:1
|
-
|
-
|
|
We strongly recommend buying a large capacity SD/SDHC memory card at least a 2GB card, preferably a 4 or 8GB one, to give yourself extra space for extended outings, or when shooting RAW or video files. -- If you're going to shoot much video, you'll definitely want a large, fast card; look for a card with "class 6" speed or better. (Check the shopping link above, memory cards are really cheap these days, so no reason to skimp.)
Imaging
Olympus E-P1 Image Quality
Color
Saturation & Hue Accuracy
Good color and hue accuracy overall, with minor oversaturation of strong reds and blues.
 |
| In the diagram above, the squares show the original color, and the circles show the color that the camera captured. More saturated colors are located toward the periphery of the graph. Hue changes as you travel around the center. Thus, hue-accurate, highly saturated colors appear as lines radiating from the center. Click for a larger image. |
Saturation. The Olympus E-P1 pushes reds, purple and blues a bit, and dark greens very slightly, while undersaturating some cyans and yellows. With a default saturation of 105.6% (5.6% oversaturated), the E-P1 doesn't oversaturate as much as most consumer cameras. Most consumer digital cameras produce color that's more highly saturated (more intense) than found in the original subjects. This is simply because most people like their color a bit brighter than life.
Skin tones. Here, the Olympus E-P1 also did well, producing natural-looking skin tones, just slightly on the pinkish side. Where oversaturation is most problematic is on Caucasian skin tones, as it's very easy for these "memory colors" to be seen as too bright, too pink, too yellow, etc.
Hue. The Olympus E-P1 did push cyan toward blue and red toward orange, but shifts were relatively minor to moderate. Overall accuracy was still very good. (The cyan to blue shift is very common among the digital cameras we test; we think it's a deliberate choice by camera engineers to produce better-looking sky colors, though the sky in our far-field shots was still rendered with quite a bit of cyan.) Hue is "what color" the color is.
Saturation Adjustment
The Olympus E-P1 lets you adjust the image saturation, contrast, and sharpness in five steps each. As can be seen below, the saturation adjustment was quite effective, covers a photographically useful range, and does a good job of not impacting contrast.
| Saturation Adjustment Examples | ||
 |
 |
 |
| -2 | 0 | +2 |
The table above shows results with the default as well as the two extreme saturation settings. Click on any thumbnail above, then click again to see the full-sized image.


Sensor
Exposure and White Balance
Indoors, incandescent lighting
Very warm cast with Auto, but good color with the Incandescent and Manual settings. Average positive exposure compensation required.


Indoors, under normal incandescent lighting, color balance was very warm with the Auto white balance setting. Results with the Incandescent setting were quite good, very similar to the Manual setting, which was the most accurate. The 2,600 Kelvin setting was quite cool with a blue-green tint. The Olympus E-P1 required an average amount of positive exposure compensation here, at +0.3 EV. Overall color looks good, though the blue flowers look slightly purplish, probably due to the E-P1's tendency to punch up reds a little. ((Many digital cameras reproduce the blue flowers here with more of a purplish tint, so the Olympus E-P1 actually performs a bit better than average here.) Our test lighting for this shot is a mixture of 60 and 100 watt household incandescent bulbs, a pretty yellow light source, but a very common one in typical home settings here in the U.S.)
Outdoors, daylight
Bright colors overall, though a tendency toward high contrast under harsh lighting. About average exposure accuracy.
Outdoors, the Olympus E-P1 performed pretty well, with good color but slight overexposure in the outdoor far-field house shot. The Olympus E-P1 required an average amount of positive exposure compensation (+0.7 EV) to keep facial tones bright on the "sunlit" portrait test. That left the model's face a little dark, but there were still a lot of blown highlights in her shirt. Default contrast is on the high side, but fortunately, there's a contrast adjustment to help compensate. Overall, good results here, especially when the contrast setting is turned down (see Extremes section below).
See full set of test images with explanations
See thumbnails of all test and gallery images
Resolution
Very high resolution, 1,700 ~ 1,800 lines of strong detail.

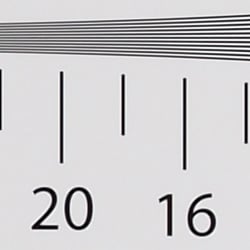


In camera JPEGs our laboratory resolution chart revealed sharp, distinct line patterns down to about 1,800 lines per picture height horizontally, and about 1,700 lines in the vertical direction. Extinction didn't occur until about 2,600 to 2,700 lines horizontally and vertically. We weren't able to extract much more resolution by processing the E-P1's ORF files using dcraw, and Adobe Camera Raw does not support the E-P1 at the time of writing (late June 2009). Use these numbers to compare with other cameras of similar resolution, or use them to see just what higher resolution can mean in terms of potential detail.
See full set of test images with explanations
See thumbnails of all test and gallery images
Sharpness & Detail
Good sharpness overall, though edge-enhancement artifacts on high-contrast subjects are visible. Moderate noise suppression visible in the shadows.


Sharpness. The Olympus E-P1 captures fairly sharp images overall, though quite a few edge enhancement artifacts are visible on high-contrast subjects such as the branches, roof and trim in the crop above left. (Most noticeable on edges of white trim against the brick; note light halo there.) Edge enhancement creates the illusion of sharpness by enhancing colors and tones right at the edge of a rapid transition in color or tone.
Detail. The crop above right shows some moderate noise suppression artifacts in the darkest areas of the model's hair, smudging individual strands together, though quite a few strands are visible. Overall detail is better than average for a Four-Thirds sensor, and better than quite a few APS-C sensors as well. Noise-suppression systems in digital cameras tend to flatten-out detail in areas of subtle contrast. The effects can often be seen in shots of human hair, where the individual strands are lost and an almost "watercolor" look appears.
RAW vs In-Camera JPEGs
As noted above, the Olympus E-P1 produces fairly sharp in-camera JPEGs. As is almost always the case, though, quite a bit more detail can be obtained from carefully processing RAW files than can be seen in the in-camera JPEGs. The Olympus E-P1's JPEGs are good straight from the camera, but it's surprising how much more detail is visible after processing in a good RAW converter. Take a look below, to see what we mean:
 |
||
In the table above, mousing over a link at the bottom will load the corresponding crop in the area above, and clicking on the link will load the full resolution image.
It's often the case that manufacturer's RAW conversion software doesn't manage the level of detail rendition that third-party programs do, but we felt that Olympus Master 2 really stayed too close to the camera's processing to be of much use. The dcraw conversion however contains a lot more fine detail than the camera JPEG, while at the same time showing fewer sharpening artifacts: The Olympus E-P1 rewards RAW shooters with really excellent detail.
ISO & Noise Performance
Low noise up to ISO 400, moderate to high at higher ISOs, but an improvement over previous generation Four-Thirds sensors at high ISOs.
|
Default High ISO Noise Reduction
|
 |
 |
 |
| ISO 100 | ISO 200 | ISO 400 |
 |
 |
 |
| ISO 800 | ISO 1,600 | ISO 3,200 |
 |
||
| ISO 6,400 | ||
The Olympus E-P1's images are quite clean at ISO 100, and ISO 200 is almost as good. We start to see some bright as well as dark noise pixels at ISO 400, but detail is still very good, with just a hint of chroma noise creeping into the shadows. ISO 800 is quite a bit softer due to more aggressive noise reduction, but detail is not too bad. At ISO 1,600, we see additional detail loss, as well as more obvious purple and yellow blotches in shadow areas. At ISO 3,200, noise grain is coarser and blurring stronger still, as you'd expect. ISO 6,400 is very noisy, having very little fine detail and also a strong purplish color cast, especially in darker areas. All things considered, the Olympus E-P1's high-ISO images are noticeably improved over those of the earlier Olympus Four-Thirds sensor cameras. As always, see the Print Quality section below for maximum recommended print sizes at each ISO.
Extremes: Sunlit and low light tests
High resolution with good overall detail, but somewhat high default contrast and limited dynamic range. Good low-light performance, but metering struggled quite a bit at lower light levels.


Sunlight. The Olympus E-P1 struggled a bit with the deliberately harsh lighting of this test, as its contrast was a little high at its default setting, and the dynamic range was somewhat limited. Shadow detail is pretty good though, albeit a bit noisy. (Compared some other cameras, including earlier Olympus models, we prefer seeing a bit of noise in the shadows to the alternative of lots of detail lost due to noise suppression.) Although we liked the detail in the shirt better at +0.3 EV with the default contrast, we preferred the +0.7 EV exposure overall, because the exposure of the skin tone in the face was better, without blowing out as many highlights as with +1.0 EV. Depending on the photographer, you could lean one way or the other. Pros and advanced users will want to shoot darker, to hold highlight detail. For those E-P1 owners that are going to want to just print an image, the +0.7 image would probably produce the best-looking print with little or no tweaking. The bottom line though, is that the E-P1 had difficulty with the wide dynamic range of this shot, at least with its default settings.
Because digital cameras are more like slide film than negative film (in that they tend to have a more limited tonal range), we test them in the harshest situations to see how they handle scenes with bright highlights and dark shadows, as well as what kind of sensitivity they have in low light. The shot above is designed to mimic the very harsh, contrasty effect of direct noonday sunlight, a very tough challenge for most digital cameras. (You can read details of this test here.)
Contrast Adjustment
As mentioned previously, the camera's contrast adjustment was at least some help in handling the harsh lighting.
|
Minimum Contrast
|
|
 |
 |
| Contrast set to lowest, +0.7 EV |
Contrast set to lowest, Auto Exposure |
At its lowest contrast setting, the Olympus E-P1 did a better job of preserving highlight detail, maintaining fairly natural-looking skin tones, and holding more in the shadows, but the limited dynamic range makes it perform a bit below average in this regard.
| Contrast Adjustment Examples | ||
|
 |
 |
| -2 | 0 | +2 |
The shots above show the results of the minimum, default and maximum contrast settings. While you can see the extremes, it's pretty hard to evaluate small differences in contrast on small thumbnails like these, click on any thumbnail to go to the full-size image. The Olympus E-P1's contrast adjustment helps a little with the strong highlights here, but we'd really like to see slightly greater range, at the low end. Even with the lowest contrast setting, the dynamic range isn't terribly impressive: While dropping the exposure slightly helps the highlights, and the contrast adjustment opened up the shadows somewhat, the camera still struggles with the deliberately harsh lighting of this test. (Which means it will also have issues with strong, direct sunlight.)
| Dynamic Range vs ISO Sensitivity | ||
|
 |
|
| ISO 100, f/8, 1/100s | ISO 200, f/8, 1/250s | |
It's important to note that for maximum dynamic range, you should really select ISO 200 when shooting with the Olympus E-P1. Although Olympus doesn't say, we think this is the E-P1's native ISO and why Auto ISOstarts at ISO200. While there is a bit more noise at ISO 200 versus 100, dynamic range is slightly better, as can be seen in the highlights and shadows of Far Field shots above. We used Aperture Priority for the above images, and the camera selected faster than double the shutter speed at ISO200 (1/250s) versus ISO100 (1/100s). This helped preserve more highlights compared to ISO 100 than if it used 1/200s, but overall dynamic range is still a bit better at ISO 200. The E-P1 also offers four Gradation options (Normal, Auto, High and Low Key). The above shots were taken with Gradation set to Normal.
| Face Detection | ||
 |
 |
|
| Off at 0 EV | On at 0 EV | |
Face Detection
Like most Point & Shoot cameras these days (and some DSLRs in Live View mode), the Olympus E-P1 has the ability to detect faces, and adjust exposure and focus accordingly. The E-P1 does it automatically in iAuto mode, when a Portrait scene mode is selected, or when Face Detection AF mode is selected. As you can see from the examples above, it really works, as the image with face detection enabled is much better exposed for the face, an excellent performance under very difficult lighting such as this.
| 1 fc 11 lux |
1/2 fc 5.5 lux |
1/4 fc 2.7 lux |
1/8 fc 1.3 lux |
1/16 fc 0.67 lux |
1/16fc No NR |
|
|---|---|---|---|---|---|---|
| ISO 100 |
 1.3 sec f2.8 |
 2 sec f2.8 |
 3.2 sec f2.8 |
 4 sec f2.8 |
 5 sec f2.8 |
 5 sec f2.8 |
| ISO 200 |
 0.6 sec f2.8 |
 1 sec f2.8 |
 1.6 sec f2.8 |
 2.5 sec f2.8 |
 4 sec f2.8 |
 3.2 sec f2.8 |
| ISO 400 |
 0.3 sec f2.8 |
 0.5 sec f2.8 |
 0.8 sec f2.8 |
 1.3 sec f2.8 |
 2 sec f2.8 |
 2 sec f2.8 |
| ISO 800 |
 1/6 sec f2.8 |
 1/4 sec f2.8 |
 0.4 sec f2.8 |
 0.6 sec f2.8 |
 1 sec f2.8 |
 1 sec f2.8 |
| ISO 1600 |
 1/13 sec f2.8 |
 1/8 sec f2.8 |
 1/5 sec f2.8 |
 0.3 sec f2.8 |
 0.4 sec f2.8 |
 0.5 sec f2.8 |
| ISO 3200 |
 1/25 sec f2.8 |
 1/15 sec f2.8 |
 1/10 sec f2.8 |
 1/6 sec f2.8 |
 1/4 sec f2.8 |
 1/4 sec f2.8 |
| ISO 6400 |
 1/50 sec f2.8 |
 1/30 sec f2.8 |
 1/20 sec f2.8 |
 1/13 sec f2.8 |
 1/8 sec f2.8 |
 1/8 sec f2.8 |
Low light. The Olympus E-P1 struggled a bit in our low light test, capturing acceptably bright images only down to about one foot-candle at any ISO in our test. We believe this is a bug or limitation of the autoexposure (AE) metering system. In this case Aperture-priority AE was used, with a reasonably fast (bright) f/2.8 lens. The camera is capable of much longer exposures (up to 60 seconds when using AE), and the E-P1's metering system is rated from 0 to 20 EV, so we're not sure why it produced such dim exposures at 1/2 foot-candle and below as it could have selected slower shutter speeds. We are however sure that bright images can be captured beyond the lowest light levels we test at, if manual exposure mode is used. Noise is low up to ISO 400, though there are a few hot pixels visible at lower light levels. White balance is quite neutral, and there doesn't appear to be any sign of banding at any ISO, an increasingly common issue lately.
The camera's autofocus system was able to focus on the subject down to almost the 1/8 foot-candle light level unassisted with the 14-42mm kit lens, which isn't as good as most DSLRs, but very good for a camera using contrast-detect autofocus. With the faster (brighter) 17mm f/2.8 lens, the E-P1 was able to focus down to just under 1/16 foot-candle. That's a good thing, because the E-P1 does not have a built-in focus assist lamp.
How bright is this? The one foot-candle light level that this test begins at roughly corresponds to the brightness of typical city street-lighting at night. Cameras performing well at that level should be able to snap good-looking photos of street-lit scenes.
NOTE: This low light test is conducted with a stationary subject, and the camera mounted on a sturdy tripod. Most digital cameras will fail miserably when faced with a moving subject in dim lighting. (For example, a child's ballet recital or a holiday pageant in a gymnasium.) Thanks to their phase-detect AF systems, digital SLRs tend to do much better than point & shoots, but you still shouldn't expect a quick autofocus lock with moving subjects. The E-P1 uses contrast-detect autofocus, as is found in most point & shoot cameras, so its low-light focusing ability is less than that of most SLRs with phase-detect systems. That said, though, the larger, more sensitive pixels of the E-P1's sensor do better under dim lighting than do the tiny pixels of most point & shoots, (A useful trick is to just prop the camera on a convenient surface, and use its self-timer to release the shutter. This avoids any jiggling from your finger pressing the shutter button, and can work quite well when you don't have a tripod handy.)
Output Quality
Print Quality
Great print quality, good color, good-looking 16x20 inch prints from camera JPEGs, usable 20x30 inch prints from RAW files.
 The Olympus E-P1's printed output looked quite good, but as always, to get the best results, you really need to work from its ORF RAW files. In-camera JPEGs don't look at all bad, but there's a slight heaviness to the finest detail, due to the camera's sharpening algorithm, and noise reduction also blurs subtle details, even at low ISOs. (Mitigated by the option to disable noise reduction, if you so desire.)
As of this writing (in late June/early July 2009), Adobe Camera Raw couldn't handle the E-P1's ORF files yet, but we used the free dcraw conversion software to process the ORF RAW files to low-compression JPEGs, and then applied strong/tight sharpening in Photoshop. The results did show significantly more fine detail, albeit at the cost of considerably worse color rendering. (Most third-party RAW converters will require that a custom ICC profile be applied, either during or after conversion, to achieve good color rendering.) Olympus' own Olympus Master 2 RAW conversion software (version 2.20) produced images very similar to those from the camera itself: We were a little frustrated by it, in that is sharpening control was only a single slider, so there was no way to tighten the radius of the sharpening operator. (Likewise, we found it had little or no ability to recover even slightly blown highlights.) It's often the case that manufacturer's RAW conversion software doesn't manage the level of detail rendition that third-party programs do, but we felt that Olympus Master 2 really stayed too close to the camera's processing to be of much use.
At the lowest ISO settings, we felt that the E-P1's in-camera JPEGs were good for prints up to about 16x20 inches, while images processed from its RAW files made 20x30 inch prints that were acceptably sharp for viewing on a wall. (The 20x30 prints would look a little soft if you really got up on them and squinted, but for any sort of normal viewing distance, they'd be just fine.)
As we increased ISO, there seemed to be something of a transition, going from ISO 800 to 1,600. Shots captured at ISO 800 made very good-looking 13x19 inch prints; just slightly soft and with small amounts of chroma noise visible when using the standard noise reduction setting, but quite acceptable. As we stepped up to ISO 1,600, though, the noise seemed to take an noticeable jump, to the extent that we felt 11x14 inches was really a little marginal for shots at that ISO setting, 8x10 inches being more acceptable. Above that point, shots at ISO 3,200 looked pretty decent as 5x7 inch prints, and shots at 6,400 were a little marginal at that size, better at 4x6 inches.
Two things we liked about the E-P1's noise character were (a) that it was pretty fine-grained, and so pretty well dropped out at reasonable print sizes, and (b) that Olympus evidently opted to leave a bit more noise in the image at a given ISO level, in the process also improving the preservation of subtle detail. As a result, the E-P1's high-ISO images may look rougher than others when pixel-peeped at 100% on-screen, but they print nicely, showing good detail and only modest amounts of noise up to ISO 1,600. (And as noted, shots at ISO 3,200 made pretty good-looking 5x7s.)
When it came to color, we found the Olympus E-P1's pretty appealing. Its hues were generally pretty accurate, and we appreciated that its default color saturation wasn't as overblown as that of many consumer cameras. (If you want it brighter by default, the color saturation adjustment mentioned earlier works well: We suspect that the +1 saturation setting would satisfy most saturation-hungry consumers.)
All in all, very impressive print quality from a nicely compact camera; As we've noted with other recent Micro Four Thirds cameras, you no longer need to carry a full-sized SLR to get great-looking prints.
Testing hundreds of digital cameras, we've found that you can only tell just so much about a camera's image quality by viewing its images on-screen. Ultimately, there's no substitute for printing a lot of images and examining them closely. For this reason, we now routinely print sample images from the cameras we test on our Canon Pro9000 Mark II studio printer, and on the (older) Canon iP5200 here in the office. (See the Canon Pixma Pro9000 Mark II review for details on that model.)
Viewfinder
Olympus E-P1 Viewfinder
See the Operation page for a discussion of the E-P1's full-time Live View using the LCD monitor as a viewfinder. Olympus also offers a the VF-1 optical viewfinder for the E-P1, available for $99. This hot-shoe mount optical viewfinder also comes with the 17mm f/2.8 kit lens when you buy the E-P1 17mm kit.
Viewfinder Test Results
Accuracy
Excellent accuracy from the LCD monitor. Optical viewfinder is tight.


The Olympus E-P1's LCD proved very accurate, showing about 101% coverage with our 50mm f/2.8 low distortion prime. The optical viewfinder specially designed for the 17mm f/2.8 M.Zuiko lens was a little tight, showing only about 90% of the final frame area. As expected, there's also quite a bit of parallax error for close-in subjects when using the optical viewfinder with the 17mm lens.
Video
Check out the links below for more sample images, videos and image quality analysis:
- Olympus PEN E-P1 Optics page (Crops from images shot with the camera's kit lens, if sold as a kit)
- Olympus PEN E-P1 Sample Images page (Index to all standard test shots, with explanations)
- Olympus PEN E-P1 Thumbnails page (Thumbnails of all shots, including RAWs, with EXIF data)
- Olympus PEN E-P1 Gallery page (Regular photos taken with the Olympus PEN E-P1)
Olympus E-P1 Video Recording
by Dave Etchells
Video recording in SLRs and other removable-lens digital cameras is an increasingly common and important feature, a trend the Olympus E-P1 supports. In common with its competitors, it offers the ability to use a variety of lenses for video recording, and offers greater control over depth of field than do typical camcorders or digicams. The E-P1 also brings video capability in a smaller package than any other interchangeable-lens camera, particularly when fitted with the new Micro Four Thirds 17mm f/2.8 lens Olympus announced along with the E-P1. We found the Olympus E-P1 to be a competent video platform compared to competing cameras, falling about in the middle of the range in terms of capability and features. Let's take a quick look at its overall specs, and then dive a little deeper into its features and options:
Olympus E-P1 Basic Video Specs
- 720p, 30 fps HD recording
- 480p, 30 fps SD recording
- Motion JPEG encoding, AVI file format
- Autofocus possible during recording, but we don't recommend it (highly visible/audible)
- Programmed and Aperture-Priority exposure modes available (no shutter-speed control)
- EV adjustment available prior to recording, not during
- No explicit ISO adjustment for videos
- "Art Filters" can be applied to video
- Stereo audio recording via built-in microphones, no external input
- Still + Video mode snaps still image at the end of video recording
Olympus E-P1 Video Resolutions & Recording Formats
The Olympus E-P1 records either 720p High-Definition or 640p Standard-Definition video in motion-JPEG files, using the AVI file format. Frame rate is always 30 fps, but bit rates may vary somewhat, depending on the resolution being recorded and complexity of the subject. Stereo audio is recorded as 44.1 KHz PCM data, embedded in the AVI files. Here's a run-down of the Olympus E-P1's video specs:
|
Olympus E-P1 Video Options
|
|||
|---|---|---|---|
|
Motion JPEG Format (.AVI files)
|
|||
|
Menu Designation
|
Resolution
|
Frame Rate
|
Card Capacity
(Approximate) |
|
HD |
720p |
30p recording* |
~240 MB/minute
(8.3 minutes on 2GB card**) |
|
SD |
640p |
30p recording* |
~120 MB/minute
(16-17 minutes on 2GB card**) |
|
* Some Art Filters (Pinhole, Grainy Film) reduce frame rate to as little as 2 fps, reduce bit rates accordingly. |
|||
The Olympus E-P1 offers just two video settings, either HD (high definition), recording at a resolution of 1,280 x 720 pixels and 30 frames/second, or SD (standard definition), recording 640x480 pixels, also at 30 frames/second. Its HD mode conforms to the "720p" spec, but doesn't offer the higher-resolution "1080i" mode HD option. This may not be much of a sacrifice, as 1080i recording in digicams and SLRs often brings with it either unacceptable levels of compression artifacts when faced with even modest amounts of movement in the video frame, reduced frame rates, or both. Likewise, the E-P1's 30 fps frame rate is better than some cameras that are limited to the 24 frames/second "cinema" standard, but it doesn't reach the level of smoothness and motion-capture ability offered by models sporting 60 frames/second recording. In both frame rate and resolution, it ranks roughly in the middle of the pack of current interchangeable-lens video-capable cameras.
The Olympus E-P1 records using Motion JPEG compression, saving its files in the AVI format. This is a somewhat more computer- and edit-friendly compression technology than MPEG4 or AVCHD, but at the expense of noticeably larger files: Expect to burn about 240 megabytes of card space for each minute of HD recording, and about 120 megabytes for each minute of standard-definition video. Interestingly, while the Olympus E-P1 uses Motion JPEG compression, it does vary the compression level used, depending on the complexity of the subject or amount of motion in the frame, to result in relatively fixed bit rates. That is, the megabytes/minute of video don't vary much, regardless of whether you're filming a blank white wall or highly detailed scene with lots of change from frame to frame. On higher-capacity cards, individual files are limited to 2 gigabytes in size, corresponding to a bit over 8 minutes of HD video, or 16-17 minutes of SD.
Here are a few examples of video from the Olympus E-P1, showing typical results under daylight conditions (with one example under rather dim lighting - we hope to add more such later):
| Olympus E-P1 Video Samples | |
|---|---|
|
|
 |
|
1,280 x 720, 30fps
(43.2 MB) Bright Sunlight: Good detail, only moderate compression artifacts. Motion blur, despite bright sunlight, though. |
640 x 480, 30fps
(25 MB) Same color settings (Auto white balance) as shot at left, but sun is behind a cloud, hence the more pronounced blue cast. |
 |
 |
| 1,280 x 720, 30fps (42 MB) Motion blur here again, but the subject goes by so fast, you frankly don't notice the blur very much. |
1,280 x 720, 30fps (35.7 MB) The E-P1's stereo audio does give you a sense of space on this one, but the direction is confused by my rapid panning of the camera. I think stereo is worth having, but in cases like this, the camera movement somewhat confounds it. |
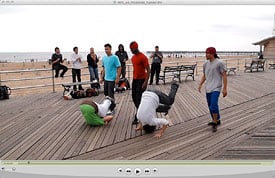 |
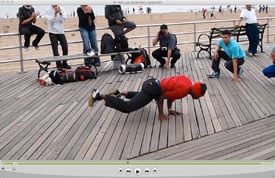 |
| 1,280 x 720, 30fps (63.7 MB) This crew's boom box wasn't working, hence the clapping for the audio track. |
1,280 x 720, 30fps (57.9 MB) More interesting moves in this one, I think: Pretty amazing muscle tone, to support himself horizontally like that... |
 |
 |
|
1,280 x 720, 30fps
(48.1 MB) This was shot from a moving boat and, while I tried to hold the camera steady, there was quite a bit of camera movement. The IS did an excellent job of holding the image steady, far better than I'd have expected. I was also surprised by how little change there is in focus as I zoom in and out again. Most modern "zoom" lenses actually change their focus considerably with zoom. At least at video resolution, the 14-42mm kit lens on the E-P1 does not. |
640 x 480, 30fps
(36.8 MB) This was a pretty dim interior: Shooting still images here, I was at ~1/40 second and f/5 at ISO 2500. An amazingly good video, given how little light the camera had to work with. |
 |
 |
|
640 x 480, 30fps
(15.6 MB) The Pin Hole Art Filter slowed apparent frame rate pretty noticeably in this clip, even though the file still shows 30fps. In HD mode, the file frame rate drops to only 2fps for this effect. |
640 x 480, 30fps
(25 MB) This is the Pop Art filter. No effect on frame rate that I could tell. This would probably be better applied to a subject with more graphical content, rather than people and dogs. It could be that I just don't "get" the Art Filters, though... |

Olympus E-P1 Video-Mode Focusing
The bugaboo of video with interchangeable-lens still cameras has been (and in most cases continues to be) focusing; specifically, the lack of autofocus capability during movie recording. In this area, the Olympus E-P1 once again places about midway in the range of current models. It does permit autofocus cycles during video recording, but the AF operation will be quite evident, both visibly and audibly in your recordings. - At least with the Micro Four Thirds format lenses that Olympus currently offers: We've heard that using the "video rated" 14-140mm zoom lens that Panasonic ships with their DMC-GH1 camera greatly improves the AF behavior of the Olympus E-P1 during recording, but haven't had the opportunity to test the GH1's lens on the E-P1 ourselves.
In its Movie mode, the Olympus E-P1 by default performs an autofocus cycle if you half-press the shutter button before recording a video. Once the recording has begun, half-pressing the shutter button has no effect; fully pressing it stops the recording. The AEL/AFL button on the camera's back panel will trigger an AF cycle any time, even while a recording is in process, though, and there's also a continuous AF mode that will update the focus setting whenever the camera detects a change in the image.
With either of the Micro Four Thirds lenses Olympus offers with the E-P1, the autofocus cycle is a pretty obvious affair: The image very visibly changes size as the camera adjusts the focus back and forth, and the sound of the focus activation is quite audible on the audio track in all but the loudest surroundings. As a result, we generally tried to avoid focusing during recording.
The Olympus E-P1's focus adjustment is of the "fly by wire" type, meaning that the focus ring on the lens isn't directly coupled to the lens elements, but instead simply commands the camera to move the lens elements. What this means in practice is that you can't avoid AF noise in your soundtrack by using manual focus and making only slow adjustments: The camera moves the lens in small, discrete steps, so slow adjustment of the focus ring in MF mode only means that the steps occur less frequently, not that they're any smaller or quieter. Rather than a continuous rattle, you'll hear individual ticking noises when the focus ring is adjusted slowly. One solution to this would be to simply mount an old mechanically-coupled manual-focus lens on the E-P1 via an adapter, but for most people, the solution will be to simply avoid adjusting focus while recording.
If you're not recording audio through the camera, you might find the bobble in image size acceptable, and so it might be useful to have the camera autofocus during recording. There is a continuous-AF option available in video mode that provides for exactly this. As noted, it isn't terribly quick (at least with the kit lens), but it will for the most part keep the camera focused as the framing changes. In single-AF mode, you have the option of choosing either a single AF area, or a multi-area mode, in which the camera focuses on the closest high-contrast object in the scene. In continuous-AF mode, only the single center AF area is active.
In continuous-AF mode, the camera does a pretty good (if not infallible) job of figuring out when the scene has changed. It wasn't clear to us whether it was choosing when to run a new AF cycle based on a change in brightness, color, or (most likely) simply change in the contrast-detect focus signal itself. Some subtle changes seemed to lull it into complacency, so it sometimes let changes in subject distance get a bit ahead of it. Fairly significant changes produced an immediate and generally accurate response, but we also encountered some situations (most often under indoor lighting) where the lens could "hunt" over a fairly wide range. Overall, our strong preference was to use the single-AF mode, and just let the camera focus before the recording of each clip began.
One piece of good news relative to focusing, though: If you shoot in aperture-priority mode with the lens stopped down, depth of field when recording videos can be pretty deep indeed. If you have a lot of light to work with (eg, outdoors in bright daylight), you can stop down to f/16 or even f/22 and the lens will effectively be hyperfocal from a few feet to infinity. The lower resolution of video recording helps a lot here too: With only a third to a quarter of the linear resolution of the camera's still images, the image can be quite a bit more out of focus on the sensor than would be tolerable for still images before you'll be able to discern the softness in the resulting videos. (The lens is quite soft at f/22 for still image shooting, due to diffraction limiting, but the lower resolution of video mode again renders this somewhat moot: Videos at HD resolution will be somewhat less crisp at f/22 than at the lens' sweet spot (around f/4 at wide angle, f/8 at tele), but we'd put the results well within the "acceptable" range.)
Olympus E-P1 Video Exposure Control
Some video-capable cameras offer only fully automatic exposure in movie mode, but the Olympus E-P1 gives you a choice of either Programmed or Aperture-Priority exposure metering. You can't choose the ISO the camera uses, though, nor can you set the effective shutter speed in movie mode.
In Programmed Auto mode, the camera reports the aperture it's selected, and very much tends toward larger apertures: It'll stop down some in full sunlight, but for any lighting that's much less intense than that, it tends to shoot wide open. We personally didn't mind this at all, as for most subjects we like the shallower depth of field that comes from shooting wide open. (Although the lower resolution of video vs still images means that DOF will be a good bit deeper at any given aperture than you might expect.) Still, the lack of "live" autofocus mentioned just above meant that we did find ourselves using Aperture Priority metering sometimes when the subject distance was likely to change a fair bit during the recording of a clip.
Like most video-capable SLRs, the Olympus E-P1 lets you choose from the camera's full range of White Balance settings, including manual white balance and a "Custom" (Kelvin temperature) mode that spans an unusually wide range from 2,000 - 14,000K.
The Olympic E-P1 also offers what we think may be the first implementation of a self-timer in video mode that we've seen to date. (There may well be others, this is just the first time that we've noticed one.) The self-timer feature seems less useful for video recording than it is for still images, since you'll presumably still need to trim the end of the clip, to cut out the part where you walk back to the camera stop the recording. Still, it at will at least save you from editing the beginning of the clip, so does offer some utility.
It's not strictly an exposure control feature, but this seems as good a place as any to mention the Olympus E-P1's Movie + Still recording mode. Selected via the second Record Menu screen, this option snaps a still image at the end of each movie clip: When you press the shutter button the second time, to stop movie recording, the shutter actuates, and the camera captures a full-resolution still frame. We suppose this is could be useful at times, but in our own movies, the action is usually over by the time we're ending a clip, so that's perhaps not the ideal place to capture a still frame. Still, there are times when we'd like to have a high-resolution still image of a video subject available, and this option is much quicker than having to switch back out of Movie mode to capture one.
Olympus E-P1 Image Stabilization During Video Recording
The Olympus E-P1 incorporates Olympus' body-based image stabilization, so any lens attached to it effectively becomes an image-stabilized model. (Note, though, that when using a lens that has its own image stabilization, you have to choose either the camera's IS or that in the lens; they won't work together.) All three IS modes the E-P1 offers are also available while recording movies. The four modes are IS 1 (stabilizer on), IS 2 (horizontal panning), and IS 3 (vertical panning). As in still-capture mode, you can also set the focal length of the lens explicitly, from 8-1,000mm, for use with non-Micro Four Thirds/Four Thirds system lenses, that don't communicate their focal length to the camera.
We somewhat expected to be able to hear the operation of the IS system during video recording, but instead found it to be completely silent. (At least, we weren't able to hear any trace of it in the audio track, even in very quiet surroundings.) It worked quite well, lending a good bit of added stability to our hand-held movie recordings, particularly when the kit lens was set toward the telephoto end of its zoom range.
We did notice that the IS system produced significantly more motion artifacts when it was active than when it was not. With its 30 fps frame rate, the Olympus E-P1's "rolling shutter" artifacts (see below) generally aren't quite as noticeable as those from some cameras with slower frame rates. When the IS system is active, though, the image jiggling effect we commonly associate with the rolling shutter image capture approach becomes much more prominent with the IS system in IS 1 mode. Switching to either IS 2 or IS 3 (horizontal or vertical panning mode) seemed to help this considerably, even for camera motion in the stabilized direction.
Digital and Body-Based Stabilization: Slightly longer effective focal lengths with video IS
Perhaps explaining both its silence and its impact on rolling shutter artifacts, we also noted that video-mode IS on the E-P1 appears to involve at least some amount of digital IS, of the type that stabilizes the video image by changing how the image data is clocked from the array. The key here is that the E-P1's sensor has a lot more pixels than required to generate even its 1,280 x 720 high-definition video, let alone its 640 x 480 standard definition output. In the HD case, there are 3.15x more sensor pixels than video pixels horizontally and 4.2x more vertically. This means you can compensate for camera shake pretty precisely, simply by changing which rows or column of pixels you're reading from to construct a given video frame: If camera movement shifted the image up by (for instance) an amount corresponding to a quarter of a video pixel, just shift your data readout up one row of sensor pixels to compensate.
|
Olympus E-P1 Video Image Stabilization: Increased Crop Factor
|
|
|---|---|
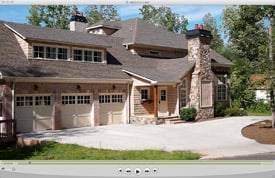 |
 |
|
Here's a screen grab of a video scene, shot with IS turned off.
|
Here's the same scene, shot from the same spot and with the same focal length just a few seconds later, but with IS turned on. Note the tighter crop and lost area in the foreground and sides of the image. The net difference is about a 30% increase in effective focal length.
|
To get a useful amount of image stabilization with this approach, you need to leave a band of "spare" pixels around the periphery of the sensor, so you can follow the image across the sensor array without running out of pixels at one edge. This in fact is exactly what the Olympus E-P1 does when you enable image stabilization in its movie mode: It crops the image slightly, then compensates for camera shake by changing the portion of the sensor it uses for the video frame. The net result is roughly a 30% increase in effective focal length: Maximum wide angle in video mode with IS active is roughly a 36mm equivalent (18mm on the lens barrel) vs the 28mm equivalent (14mm actual focal length) in still-capture mode.
Olympus E-P1 Audio Capabilities
Audio recording in movies is optional with the Olympus E-P: Audio can be turned on or off via the Live Menu, accessible by pressing the OK button on the camera's rear panel. Audio is recorded as 16-bit, 44.1 KHz stereo PCM, which Olympus advertises as being equal to the best quality provided by any of their popular handheld audio recorders. Stereo recording is done via two microphones on the camera's front face, appearing as small black dots on either side of the Olympus logo above the lens.
The internal mics did a pretty decent job of providing a stereo effect, although the localization of sound sources wasn't as good as with a high-quality external stereo microphone. (No surprise, really, given that good stereo microphones start at around $200 for just the microphone by itself.) Per their advertising, sound fidelity was indeed quite good; voices sounded natural, and sound outdoors was recorded clearly and in considerable detail.
Our one criticism of the E-P1's sound was that there seemed to be a bit more background noise in its audio tracks than we've noticed on some other cameras we've tested. There's no manual volume or input level control, so audio levels are set entirely automatically by the camera. (This is quite typical of video-capable SLRs that also record audio.) The combination of the auto-gain circuitry and the camera's somewhat "bright" sound quality tended to emphasize background noise, though, particularly in the upper midrange of the frequency spectrum. The result was a tendency toward noticeable hiss in the background of the E-P1's audio tracks. Also, the sensitivity to nearby background noises tended to limit the amount of gain increase when responding to reduced subject volume, so distant subjects were generally more difficult to hear clearly than closer ones. (This obviously will always be the case, what we're trying to say here is that the audibility of subjects fell off more rapidly with distance than we sometimes expected.) Ultimately the camera recorded any audio we were interested in hearing, but the hiss was more prominent than we'd have liked, and it would be nice if the mics' response pattern better suppressed sounds from behind and around the camera, favoring sound from in front of the camera more strongly.
In common with most other built-in mics on SLR-style cameras, the Olympus E-P1's internal mics were also very sensitive to hand movements on the body and operating noise from the camera itself. We mentioned the noise associated with focusing of the kit lens above, and found that adjustments of the zoom setting could also be heard in the audio track in quiet surroundings. A less-obvious source of noise were the little D-rings (which are actually triangular) that attach the neckstrap to the body. We noticed odd clicking noises in the E-P1's sound track, which we eventually traced to the D-rings clicking against the body as the strap flapped about while we were recording. We're not big fans of D-ring strap connections anyway; this gives us a new reason to dislike them. (We much prefer the rectangular body-mounted lugs used by some manufactures, that the strap passes through directly.)
Olympus E-P1 Movie Recording User Interface
The Olympus E-P1's movie mode is accessed via a separate position on the camera's mode dial, rather than being initiated from within one of the still-picture Live View modes. (The E-P1 is, of course, always in Live View mode, as there's no built-in optical viewfinder with Micro Four Thirds cameras.) There's no separate control button to start/stop movie recording: Pressing the shutter button begins recording, pressing it again stops it. Half-pressing the shutter button triggers an AF cycle without recording anything, just as in still-picture mode.
While some may find it more convenient to have a dedicated button to start/stop movie recording, we find the E-P1's use of the shutter button more intuitive. It might be nice to be able to initiate movie recording from any still-capture mode, but the flip side of that convenience would be a more cluttered on-screen information display when shooting still images (to accommodate information appropriate to only video recording), and a more complex Live Menu structure (already quite crowded in still-image mode). At least within the context of the Olympus E-P1's other controls, we prefer having movie mode as a separate mode dial option.
Setting adjustments in movie mode are made via a Live Menu, which appears down the right side of the LCD when you press the OK button on the camera's back. Options on the Live Menu for video recording are:
| Video Live Menu Options: | ||
|
Top-Level
Selection |
Second-Level
|
Notes
|
|
Exposure Mode
|
- Program Auto
- Aperture Priority - Pop Art - Soft Focus - Pale & Light Color - Light Tone - Grainy Film - Pin Hole |
Pop Art through Pin Hole are the six Art Filter modes. Some affect frame rate, see discussion under "In-Camera Image Adjustment" further down in the text.
|
|
White Balance
|
- Auto
- Sunny - Shadow - Incandescent - Fluorescent (3 settings) - Flash - Custom (Kelvin 2,000 - 14,000) |
Obviously, there's no flash in video mode, but Flash white balance may give you a slightly different "look" than Sunny.
|
|
Self-Timer
|
- Off
- 12 second - 2 second |
Unusual to find a self-timer in a movie mode. Starts recording after the delay, but you have to press the shutter button yourself to stop recording when done.
|
|
IS Mode
|
- Off
- IS1 (Normal IS) - IS2 (Horizontal panning) - IS3 (Vertical Panning) - (Select focal length) |
Focal length setting option is for use with non-system lenses.
|
|
Focus
|
- Single
- Continuous - Manual - Single plus manual focus |
Single+manual lets you adjust focus manually after camera has run its AF cycle
|
|
Recording Quality
|
- HD (1,280x720)
- SD (640x480) |
|
|
AF Area
|
- Multiple
- Single |
|
|
Audio
|
- Off
- On |
|
Olympus E-P1 Video Quality and Artifacts
The Olympus E-P1's video is of decent quality, although we felt that it clipped highlights more than some cameras we've evaluated. Thanks to its combination of 720p / 30 frame/second recording rate (and hence more modest data-rate requirements than some cameras offering 1080i HD modes) and its use of Motion JPEG for its file compression, it managed to hold good detail, even in the face of relatively rapid camera panning and/or high levels of subject detail. That said, though, there was also more motion blur present under bright daylight than we might have expected: While the frame rate is 30fps, some cameras can use a higher "shutter speed" for each frame, meaning the individual frames will be sharper when there's more light available. Here are some crops from one of our standard Charlotte/Frisbee clips:
|
Olympus E-P1 Video Quality, 720p HD Mode
|
|
|---|---|
 |
 |
|
Here's a 1:1 crop from the start of the video before there's been any camera or subject movement to speak of. Detail is pretty good, given how much detail there is in the image to begin with. (Challenging for any video compression scheme aiming for a reasonable bit-rate.)
|
This shows about the worst motion-related blur, the moment in the video when I was panning most rapidly to follow Charlotte. As compared to AVCHD-encoded motion artifacts, though, most of what we're seeing here is blur caused by a slower shutter speed, rather than that resulting from keyframe-based video compression. We do wish that the E-P1 could use faster shutter speeds in bright light like this, but shutter speed always seems to be rather slow. (Tied to the 30 fps frame rate?)
|
 |
 |
|
Here, I've almost stopped panning, as Charlotte got to the end of her run. No motion blur, but this shot shows the E-P1's tendency to clip highlights.
|
I really expected to see blurring here, because I was panning pretty quickly, with Charlotte passing right in front of me. Thanks to the Motion JPEG compression, no major loss of detail, though. This shot also somewhat illustrates the fact that the lack of focus adjustment during movie recording is often less of an issue than one might think: The subject in this frame is quite a bit closer than in the one to the left, but detail is still pretty good. (Or at least isn't too much worse than at the actual focal distance the lens was set to.)
|
As noted, the crops above show that the Olympus E-P1's motion JPEG image compression doesn't suffer too much from motion-induced artifacts. Rapid panning or subject movement will still lead to significant blurring, though, due to the slow shutter speed used to expose each frame. While we didn't attempt to measure it directly, it seems that the exposure time for each frame is tied to the E-P1's 30fps frame rate. As the crops above show, motion blur can be significant, even when shooting in bright sunlight. (That said, this is also a pretty severe test, with a fast-moving subject relatively close to the camera, and much more rapid panning than you'd ever use with most subjects.)
Rolling Shutter Artifacts
Essentially every video capable DSLR exhibits motion-related distortions called rolling shutter artifacts. These are caused because the image data is captured and then read off the chip sequentially by rows, rather being captured all at once. In the case of the Olympus E-P1, with its 30fps frame rate, this means that image data for the last row of a given frame was captured and read out about 1/30 second after the data for the top row was captured. The effect on moving objects is similar to that of a focal plane shutter in an SLR, but more pronounced, because the video frame is read out much more slowly than the slit of a focal plane shutter moves across the sensor.
For a camera that scans video frames vertically (as all do that we're aware of), rolling shutter artifacts will be most noticeable for subjects that are moving rapidly side to side, or when the camera itself is being panned horizontally. Verticals in the scene will appear tilted to the right or left, depending on the direction of camera motion. As an example, consider the case of a camera being panned from left to right, with a flagpole or other vertical object in the middle of the scene when recording for a particular frame begins: If the top of the object was centered horizontally when the first line of the video frame is acquired, by the time the last line of the frame has been captured, the bottom of the object will have shifted to somewhere left of center: As a result, the vertical object would appear to be leaning to the right.
The shots below show some screen grabs from our evaluation of the Olympus E-P1's rolling shutter behavior.
|
Olympus E-P1 Video - Rolling Shutter Artifact
|
|
|---|---|
|
|
 |
|
Reference: Static shot
This first shot shows what the subject looks like with the camera held steady. (Anything that's off vertical here is the result of faulty camera-holding technique. :-) |
Rolling Shutter, IS On
This shows the rolling shutter artifact (note the slanted verticals) about as bad as we could make it, without using absurd amounts of camera jiggling. Note that this shot was captured with the E-P1's image stabilization enabled, in its IS1 mode. |
 |
 |
|
Rolling Shutter, IS Off (a)
This was about as bad as we could find, with similar camera motion as above right, but with the IS turned off. The amount of slant here actually isn't much less than that show in the crop above right, but its duration in the video seemed to be much shorter, so more frames showed correct verticals. |
Rolling Shutter, IS Off (a)
The image at left shows pretty much the worst case we saw with IS disabled; the thumbnail above shows a more typical frame. The overall impact was much less with IS off than with it on. |
With its image stabilization system left off, the Olympus E-P1's rolling shutter artifacts seemed fairly modest relative to those of other cameras we've tested. Its 30fps frame rate is higher than the 24fps or 20fps of some competing models when shooting at HD resolutions, so its corresponding motion artifacts aren't as bad, either. As we mentioned in the section on image stabilization above, though, turning on IS made the rolling shutter artifacts much more obtrusive. The thumbnails above show examples with IS off and in IS1 mode; we found the artifacts in IS2 or IS3 modes noticeably reduced below the levels we saw with IS1, but still elevated above what we saw with IS off entirely.
The impact on rolling shutter artifacts does represent a limitation for the E-P1's IS system, but we don't want to give the impression that we don't feel that the IS system is a net negative for video. Quite the contrary: In those situations where you're trying to hold the camera steady, the Olympus E-P1's image stabilization system is very effective, to the point that we'd probably leave it enabled for most of our video shooting.
Olympus E-P1 In-Camera Image Adjustment for Movies
Olympus has for some time now made a big deal of their Art Filters in marketing their DSLRs. We know people that like these effects a lot, but confess that we've personally never found them very compelling. With the E-P1, Olympus has carried the full set of Art Filters over into Movie Mode, so those users who are into such things can take advantage of the same effects in their videos.
As usual, though, there's no free lunch, and the processing required for some of the Art Filter effects can significantly slow the frame rates. Here's a summary of what we found when shooting video using the various Art Filter effects:
|
Frame Rate Limits with Art Filters Applied
|
||
|---|---|---|
|
Art Filter
|
HD Frame Rate
|
SD Frame Rate
|
|
None
|
30
|
30
|
|
Pop Art
|
30
|
30 fps
|
|
Soft Focus
|
30 fps in file,
Seems much slower |
30 fps in file,
Seems slower |
|
Pale & Light Color
|
30
|
30 fps
|
|
Light Tone
|
30
|
30 fps
|
|
Grainy Film
|
30 fps in file,
Seems slower |
30 fps in file,
Seems slower |
|
Pin Hole
|
2 fps
|
30 fps in file,
Seems slower |
|
* Some Art Filters (Pinhole, Grainy Film) reduce frame rate to 15 fps, reduce bit rates accordingly.
** On cards larger than 2 GB, individual files are limited to 2 GB each. |
||
As the above table shows, the only time that the actual frame rate changed in the movie file itself was with the Pin Hole filter in HD mode. For the Soft Focus and Grainy Film modes, the frame rate in the AVI file remained at 30 frames/second, but the apparent frame rate (based on the visual jerkiness of motion in the scene) dropped noticeably. In the case of Soft Focus, the drop in apparent frame rate was pretty significant. The three other filters (Pop Art, Pale & Light Color, and Light Tone), had no apparent impact on frame rate.
Computer Requirements for Viewing HD Video
A typical computer these days has little trouble dealing with still images, but high-definition video can be another matter. Depending on the file format involved, it can take a pretty beefy computer to handle HD-resolution video playback without stuttering or dropping frames. The Motion JPEG image compression used by the Olympus E-P1 is one of the less compute-intensive formats, though, and its 1,280 x 720 resolution means there's a good bit less data in each frame to deal with than in videos with 1,920 x 1,080 resolution. The net result is that you should have no problem playing video files from the E-P1 on your computer, as long as it's a relatively recent and reasonably powerful model. We don't have a specific benchmark for this, but if your computer is less than 3 years or so old, it should have no problem with the E-P1's video streams. (By contrast, to play AVCHD or other keyframe-encoded video formats at full 1,920 x 1,080 resolution can demand a very powerful CPU and video card, to keep up.)
Olympus E-P1 Video Mode: The Bottom Line
Overall, the Olympus E-P1's video mode worked pretty well: It wasn't the most capable that we've tested to date, but neither was it the least. It should be reasonably competent at handling the bulk of the movie recording most consumers will care about, further enhancing the E-P1's appeal as a compact SLR-grade camera for travel and day to day portability: For the vast majority of consumers, it will eliminate the need to lug along a digicam, just for the sake of capturing video snapshots.
Flash
Olympus E-P1 Flash
To the disappointment of some, the Olympus E-P1 does not have a built-in flash. It does, however, have a dedicated hot shoe for mounting external flash units, like Olympus's new compact FL-14 flash. Other Olympus flash units such as the FL-50R, FL-36R and FL-20 also work, and non-dedicated units can also be used provided they have a compatible trigger voltage and polarity. (Olympus does not seem to mention the trigger voltage or polarity in the E-P1's user manual, though.)
The advantages of a good external flash are many: more power for increased range, faster recycle times, longer battery life, reduced red-eye, auto zoom to match coverage to the current focal length, and the ability to adjust the tilt and swivel of the head to allow light from the flash to be bounced off nearby surfaces such as a ceiling, for a diffuse effect. (The FL-14 does not, however, tilt for bounce-flash operation.) Many external flash units have a powerful AF assist illuminator, and other useful features such as modeling flash and high-speed focal plane (FP) sync mode are common on higher end models.

When using a dedicated external flash with the Olympus E-P1, seven flash modes are available: Auto, Red-eye Reduction, Forced On (Fill flash), Forced Off, Red-eye Reduction + Slow Sync, Slow Sync, and Slow Sync 2nd Curtain. X-Sync speed (the maximum shutter speed with the flash enabled) is 1/180 second, about average these days, though the high-speed FP mode offered on some external flash units is also supported, which should permit flash usage up to the 1/4,000 second maximum shutter speed the E-P1 is capable of.
The Olympus E-P1 allows you to adjust flash and ambient exposure independently of each other, by providing flash exposure compensation between -3 and +3 EV in one-third EV increments. An option in the Custom menu also allows for flash exposure compensation to be independent or additive to ambient exposure compensation. Flash exposure bracketing is also supported, where three shots can be taken at one-third, two-thirds or one EV increments of flash exposure compensation. Of course, if the external flash supports it, manual output power control is also available.
High ISO Noise Reduction
Olympus E-P1 Noise Reduction
The Olympus E-P1 offers 4 levels of noise-reduction settings giving you some flexibility in choosing how you want to make the trade-off between subject detail and noise levels. The E-P1 applies NR to its JPEGs at all ISOs, so we've included crops for all ISOs in the tables below. The combination of shooting with NR turned down to the lowest setting and using a good noise-filtering program after the fact can produce very clean images with lots of fine detail in them.
See for yourself how the noise reduction works under daylight-balanced lighting. Click on any of the crops below to see the corresponding full-sized image.
| Noise Reduction Comparison Daylight-balanced illumination |
||||
|
NR = Off
|
NR = Low
|
NR = Normal
|
NR = High
|
|
| I S O 1 0 0 |
 |
 |
 |
 |
 |
 |
 |
 |
|
 |
 |
 |
 |
|
|
NR = Off
|
NR = Low
|
NR = Normal
|
NR = High
|
|
| I S O 2 0 0 |
 |
 |
 |
 |
 |
 |
 |
 |
|
 |
 |
 |
 |
|
|
NR = Off
|
NR = Low
|
NR = Normal
|
NR = High
|
|
| I S O 4 0 0 |
 |
 |
 |
 |
 |
 |
 |
 |
|
 |
 |
 |
 |
|
|
NR = Off
|
NR = Low
|
NR = Normal
|
NR = High
|
|
| I S O 8 0 0 |
 |
 |
 |
 |
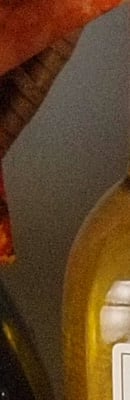 |
 |
 |
 |
|
 |
 |
 |
 |
|
|
NR = Off
|
NR = Low
|
NR = Normal
|
NR = High
|
|
| I S O 1 6 0 0 |
 |
 |
 |
 |
 |
 |
 |
 |
|
 |
 |
 |
 |
|
|
NR = Off
|
NR = Low
|
NR = Normal
|
NR = High
|
|
| I S O 3 2 0 0 |
 |
 |
 |
 |
 |
 |
 |
 |
|
 |
 |
 |
 |
|
|
NR = Off
|
NR = Low
|
NR = Normal
|
NR = High
|
|
| I S O 6 4 0 0 |
 |
 |
 |
 |
 |
 |
 |
 |
|
 |
 |
 |
 |
|
The above crops show the effects of the Olympus E-P1's four levels of noise reduction available, under the studio HMI lighting we use to simulate daylight. To our eyes, the default level of noise reduction strikes a good balance between noise and subtle subject detail, although the red fabric swatch presents a real challenge, as it does for virtually all cameras we test. Cranking the noise reduction setting up to High produces very smooth-looking images, while still maintaining good detail in areas of high local contrast (as seen in the circular scale), but a lot of detail is lost in areas of subtle contrast (the red fabric swatch is a particularly challenging subject, and the detail loss there is worse than you'd find in most real-world examples). At the other end of the scale, the Off noise reduction setting leaves a lot of noise in the image, but also leaves the subject detail largely undisturbed: Use this setting if you have good third-party noise reduction software; with appropriate processing, the result could be quite good. You should be able to do even better working from the RAW files.
But how does the Olympus E-P1 compare to other fairly compact models capable of shooting movies? See the following table which compares at the default Noise Reduction setting.
| High ISO Comparison with CanonT1i, NikonD500 and Panasonic GH1 (All default NR) Daylight-balanced illumination |
||||
|
Olympus E-P1
|
Canon T1i
|
Nikon D5000
|
Panasonic GH1
|
|
| I S O 8 0 0 |
|
 |
 |
 |
|
 |
 |
 |
|
|
 |
 |
 |
|
|
Olympus E-P1
|
Canon T1i
|
Nikon D5000
|
Panasonic GH1
|
|
| I S O 1 6 0 0 |
|
 |
 |
 |
|
 |
 |
 |
|
|
 |
 |
 |
|
|
Olympus E-P1
|
Canon T1i
|
Nikon D5000
|
Panasonic GH1
|
|
| I S O 3 2 0 0 |
|
 |
 |
 |
|
 |
 |
 |
|
|
 |
 |
 |
|
|
Olympus E-P1
|
Canon T1i
|
Nikon D5000
|
Panasonic GH1
|
|
| I S O 6 4 0 0 |
|
 |
 |
N/A
ISO 6400 not supported |
|
 |
 |
N/A
ISO 6400 not supported |
|
|
 |
 |
N/A
ISO 6400 not supported |
|
To our eyes, the Nikon D5000 has the best high ISO image quality of the group, however it's surprising just how good the Olympus E-P1, especially considering its compact size and smaller Four Thirds-format sensor. The Panasonic GH1 was a major step forward for Four Thirds-format high-ISO performance when it came out, and the E-P1 for the most part keeps up with it very well.
Detail in the red fabric swatch is lower for the E-P1 at ISO 800, but looking at the full images, the E-P1 does very well. Each camera obviously makes somewhat different trade-offs between noise and image detail, compounded by the number of different NR settings each offers. In our view, though, the Olympus E-P1 generally did better than the GH1 at high ISOs, although the two cameras were close competitors, and points could be argued either way in various situations.
Imatest Results
Olympus E-P1 Imatest Results
We routinely use Norman Koren's excellent "Imatest" analysis program for quantitative, thoroughly objective analysis of digicam test images. I highly recommend it to our technically-oriented readers, as it's far and away the best, most comprehensive analysis program I've found to date.
My comments below are just brief observations of what we see in the Imatest results. A full discussion of all the data Imatest produces is really beyond the scope of this review: Visit the Imatest web site for a full discussion of what the program measures, how it performs its computations, and how to interpret its output.
Here's some of the results produced by Imatest for the Olympus E-P1:
| sRGB Accuracy Comparison |
|||
The Olympus E-P1 showed good color accuracy, with only minor oversaturation of bright reds, deep blues and some purples, dark greens and browns. The E-P1 actually undersaturates some yellows and cyans. Hue accuracy was also generally good, with the typical cyan to blue shift we see in most cameras we test. Average saturation was 105.6% (oversaturated by 5.6%). Average "delta-C" color error was 4.85 after correction for saturation, which is very good, close to the best cameras we've tested. (Delta-C is the same as the more commonly referred to delta-E, but delta-C takes into account only color differences, ignoring luminance variation.) All in all, a very good color response for this class of camera. Mouse over the links below the illustration above to compare results with other recent Four Thirds sensor cameras.
Adobe RGB Accuracy Comparison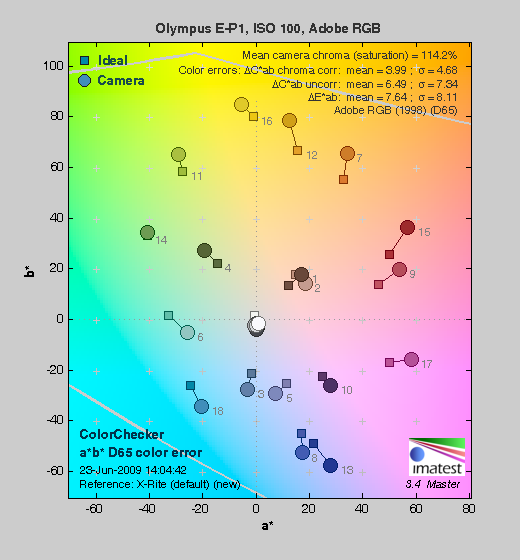 |
|||
As is true of most SLRs, when using the Adobe RGB color space (which provides a much wider gamut, or range of colors that can be expressed), the Olympus E-P1 delivers more highly saturated color, though the increase compared to sRGB is not as stark as with most SLRs we test (although it's the highest of the group compared above). Average saturation was 114.2%, and average saturation-corrected hue error was 3.99 "delta-C" units, actually slightly more accurate than the sRGB result. Again, mouse over the links below the illustration above to compare results with recent entry-level SLRs. (Sorry, we didn't take an Adobe RGB shot at ISO 200, the E-P1's native ISO.)
Olympus E-P1 Color Analysis

This image shows how the Olympus E-P1 actually rendered the colors of the MacBeth chart, compared to a numerically ideal treatment. In each color swatch, the outer perimeter shows the color as actually captured by the camera, the inner square shows the numerically correct color after correcting for the luminance of the photographed chart (as determined by a second-order curve fit to the values of the gray swatches), and the small rectangle inside the inner square shows the numerically correct color, without the luminance correction. This image shows the very good hue and saturation accuracy.
Olympus E-P1 Noise Analysis
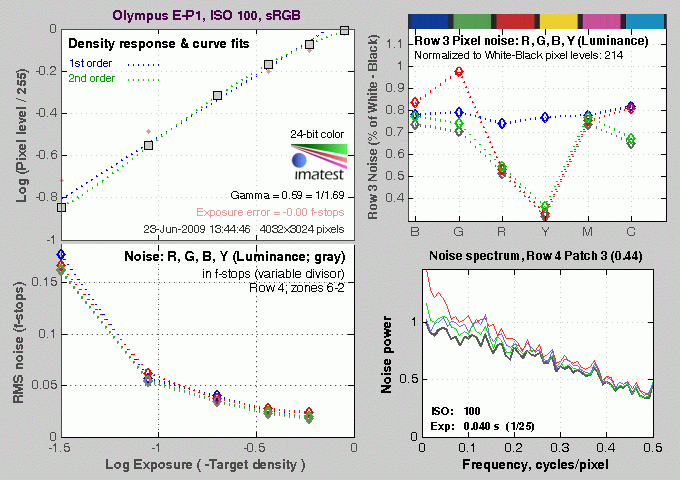
There's a lot in this particular graph, a lot more than we really have room to go into here. (This set of plots has also changed a few revisions back in Imatest. Some of the plots that were once shown here are now shown in other Imatest output. Since we largely focus on the Noise Spectrum plot, we only show the graphic above, which includes that plot.)
In comparing these graphs with those from competing cameras, we've found that the Noise Spectrum graph at lower right is the most important. Cameras that manage to shift their noise spectrum to higher frequencies have much finer-grained noise structures, making their noise less visually objectionable. In the graph above, this would show up as a noise spectrum curve that remained higher on the right side, representing higher noise frequencies.
The Olympus E-P1 does a pretty good job of keeping a lot of the luminance noise energy (indicated by the black line) up at high frequencies. What little low-ISO luminance image noise that's there is fairly fine-grained as a result. Chroma noise at low spatial frequencies is slightly higher, especially in the red channel, but this is not unusual, and the amount of chroma noise in the E-P1's low-ISO images is on par with other cameras in its price class.
Looking at the lower-left plot in the illustration above, the E-P1's overall noise levels are on generally on par with the Panasonic G1 and GH1 in the deepest shadows: Slightly higher than those of the G1 in the deepest shadows, but with considerably less chroma component. On par with the G1 and better than the GH1 in lighter shadows (log density = -1), and better than both in the midtones and highlights. Overall, a very good performance.
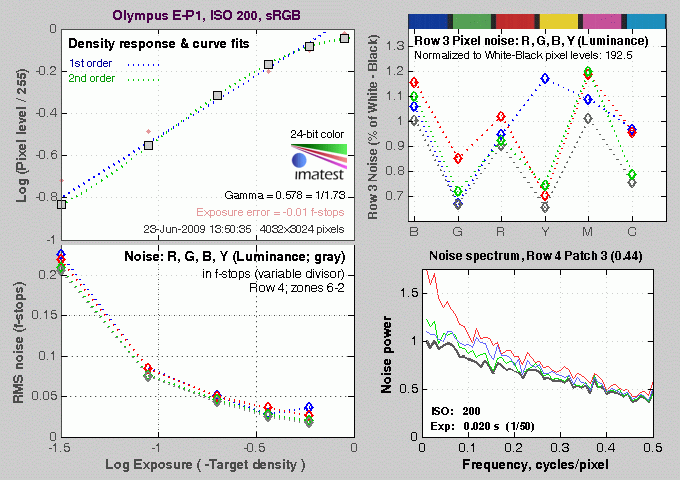
Above is the same set of noise data at ISO 200, the Olympus E-P1's native or "base" ISO. As you can see from the graphs, noise is a bit higher than at ISO 100, especially red channel noise at lower frequencies, but still pretty low overall.
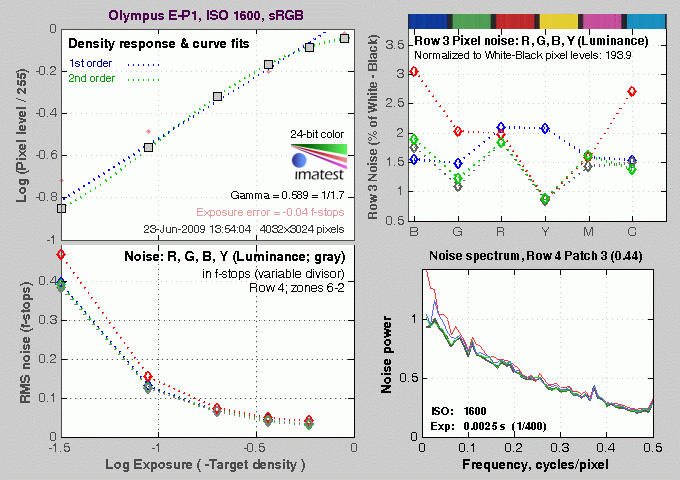
Above is the same set of noise data at ISO 1,600. Here, the Noise Spectrum graph is shifted quite a bit toward the left-hand, lower-frequency side than it was at ISO 100, coarsening the "grain" of the image noise patterns quite a bit. The red and blue channels still exhibit a bit more noise at the low end of the frequency spectrum, but track luminance noise very closely at all but the lowest frequencies. Looking at the lower left graph again, noise is higher than both the G1 and GH1 in the deepest shadows, better than the G1 and on par with the GH1 at all higher brightnesses.

Here's the same set of noise data at ISO 3,200. Here again, the Noise Spectrum graph is shifted even more toward the left-hand side, coarsening the "grain" of the image noise patterns further. The tracking of overall noise levels relative to the G1 and GH1 is very similar to what it was at ISO 1,600.

Here's the same set of noise data at ISO 6,400. The Noise Spectrum graph is similar, but notice the noise levels are much higher. (Particularly evident in the pixel noise plot in the upper right corner of the illustration.)

This chart compares the Olympus E-P1's noise performance over a range of ISOs against that of other recent Four-Thirds sensor models. While we continue to show noise plots of this sort because readers ask for them, we each time point out that the noise magnitude is only a small part of the story, the grain pattern being much more important. Here, we can see that the Olympus E-P1's luminance noise magnitude starts out a little higher than average relative to its "competition", and stays higher than the rest up to ISO 800, where it's about equal. At ISOs 1,600 and 3,200, luminance noise levels are lower than its competition, an indication more aggressive noise reduction is at work. The E-P1 is the only camera in this group to offer ISO 6,400, and although it doesn't look too noisy from this graph, the amount of detail left after noise reduction is performed is quite poor, though. Still, really excellent performance overall, when you consider the size of the E-P1. Do keep in mind these measurements are taken with each camera set at default settings, so the shape or position of the curve could be influenced by the settings you choose to use. The Olympus E-P1 offers four levels of noise reduction, with the above data collected using the default, "Standard" setting.
Olympus E-P1 Dynamic Range Analysis
A key parameter in a digital camera is its Dynamic Range, the range of brightness that can be faithfully recorded. At the upper end of the tonal scale, dynamic range is dictated by the point at which the RGB data "saturates" at values of 255, 255, 255. At the lower end of the tonal scale, dynamic range is determined by the point at which there ceases to be any useful difference between adjacent tonal steps. Note the use of the qualifier "useful" in there: While it's tempting to evaluate dynamic range as the maximum number of tonal steps that can be discerned at all, that measure of dynamic range has very little relevance to real-world photography. What we care about as photographers is how much detail we can pull out of the shadows before image noise becomes too objectionable. This, of course, is a very subjective matter, and will vary with the application and even the subject matter in question. (Noise will be much more visible in subjects with large areas of flat tints and subtle shading than it would in subjects with strong, highly contrasting surface texture.)
What makes most sense then, is to specify useful dynamic range in terms of the point at which image noise reaches some agreed-upon threshold. To this end, Imatest computes a number of different dynamic range measurements, based on a variety of image noise thresholds. The noise thresholds are specified in terms of f-stops of equivalent luminance variation in the final image file, and dynamic range is computed for noise thresholds of 1.0 (low image quality), 0.5 (medium image quality), 0.25 (medium-high image quality) and 0.1 (high image quality). For most photographers and most applications, the noise thresholds of 0.5 and 0.25 f-stops are probably the most relevant to the production of acceptable-quality finished images, but many noise-sensitive shooters will insist on the 0.1 f-stop limit for their most critical work.
The image below shows the test results from Imatest for an in-camera JPEG file from the Olympus E-P1 with a nominally-exposed density step target (Stouffer 4110), and the E-P1's settings such as Contrast (0) and Gradation (Normal) at their default positions. The E-P1's native ISO sensitivity of 200 was used, yielding the best dynamic range numbers.

Here, we can see that he tone curve shows pretty good gradation in highlights but shadows trail off much more abruptly. Total dynamic range is good (at 9.78 f-stops), however the score (5.47) at the highest level is poor, likely due to noise in darker tones. Indeed, when deep shadows are closely observed in E-P1 images, a moderate amount of noise is visible, though there is still a lot of subject detail present. We find this far preferable to low noise with detail obliterated by over-aggressive noise reduction, and applaud Olympus on the excellent job they've done, in intelligently managing noise and subject detail.

The illustration above shows the results from Adobe Camera Raw 5.5, with Auto settings (slightly better results are likely possible with manually tweaking, but we weren't able to do better, due to what appeared to be some truncation of the individual color channel tone curves at the highlight end of the tonal range). As can be seen, the score at the highest quality level is much better than the camera JPEG at 8.04 vs 5.47 f-stops, and total dynamic range increased from 9.78 f-stops to 12 f-stops. It bears noting though, that extreme manipulation of RAW files to extend dynamic range can introduce severe color shifts in the resulting files: This dramatically increased dynamic range may only be really usable when converting the images to black and white. (As is the case with most cameras.) With the E-P1, the results from Adobe Camera Raw clipped the green channel slightly in the brightest wedges of the step chart. Also worth noting is that ACR's default noise reduction settings reduced the pixel noise (see the plot in the lower left-hand corner) quite a bit relative to the levels in the in-camera JPEG, which tends to shift scores towards the high quality category.
Dynamic Range, the bottom line:
The net result was that the Olympus E-P1's JPEGs scored rather poorly in Imatest's dynamic range analysis when compared against other current Four-Thirds models, and of course also lags behind most DSLRs with APS-C size sensors. Dynamic range scores from ACR converted RAW files however did quite well, beating some APS-C cameras, but only after extreme manipulation which resulted in false colors at the highlight end of our step target.
To get some perspective, here's a summary of the Olympus E-P1's dynamic range performance, and how it compares to other digital SLRs that we also have Imatest dynamic range data for. (Results are arranged in order of decreasing dynamic range at the "High" quality level.):
| Dynamic Range (in f-stops) vs Image Quality (At camera's base ISO) (Blue = RAW via ACR, Yellow=Camera JPEG, Green=Current Camera) |
||||
| Model | 1.0 (Low) |
0.5 (Medium) |
0.25 (Med-High) |
0.1 (High) |
| Nikon D3X (Adobe Camera Raw 5.3b) |
-- | -- | 11.1 | 9.64 |
| Nikon D700 (Adobe Camera Raw 4.5) |
12.1 | 11.6 | 10.6 | 9.51 |
| Nikon D5000 (Adobe Camera Raw 5.4b) |
-- | 11.6 | 10.8 | 9.50 |
| Sony A900 (Adobe Camera Raw 4.6b) |
-- | 12.1 | 10.7 | 9.36 |
| Nikon D90 (Adobe Camera Raw 4.6b) |
12.1 | 11.8 | 10.7 | 9.27 |
| Fujifilm S3 Pro (Adobe Camera Raw 2) |
12.1 | 11.7 | 10.7 | 9.00 |
| Nikon D40x (Adobe Camera Raw 4.1) |
12.0 | 10.9 | 10.3 | 8.90 |
| Canon 5D Mark II (Adobe Camera Raw 5.2) |
-- | 10.8 | 10.0 | 8.89 |
| Canon EOS-1Ds Mark III (Adobe Camera Raw 4.5) |
11.5 | 10.7 | 9.96 | 8.84 |
| Nikon D3 (Adobe Camera Raw 4.5) |
11.7 | 11.0 | 10.0 | 8.75 |
| Canon EOS-1D Mark III (Adobe Camera Raw 4.5) |
11.7 | 10.7 | 9.99 | 8.73 |
| Pentax K20D (Adobe Camera Raw 4.5) |
11.4 | 10.6 | 9.82 | 8.56 |
| 8.5 Stops | ||||
| Nikon D300 (Adobe Camera Raw 4.3.1) |
11.4 | 10.9 | 9.87 | 8.45 |
| Sony A200 (Adobe Camera Raw 4.3.1) |
11.6 | 10.4 | 9.82 | 8.43 |
| Nikon D60 (Adobe Camera Raw 4.4.1) |
11.6 | 10.5 | 9.74 | 8.31 |
| Nikon D40 (Adobe Camera Raw 4.1) |
11.9 | 10.9 | 9.89 | 8.30 |
| Canon EOS-1Ds Mark III (Camera JPEG) |
10.9 | 10.2 | 9.71 | 8.23 |
| Pentax K100D (Adobe Camera Raw 3.6) |
11.3 | 10.3 | 9.51 | 8.23 |
| Pentax K200D (Adobe Camera Raw 4.4.1) |
-- | 10.5 | 9.54 | 8.19 |
| Pentax K10D (Adobe Camera Raw 3.7) |
10.6 | 10.0 | 9.29 | 8.19 |
| Sony A100 (Adobe Camera Raw 3.4) |
11.3 | 10.5 | 9.69 | 8.16 |
| Canon EOS-1Ds Mark II (Adobe Camera Raw 3) |
11.2 | 10.3 | 9.40 | 8.14 |
| Canon EOS 50D (Adobe Camera Raw 4.6) |
11.2 | 10.5 | 9.49 | 8.06 |
| Nikon D40x (Camera JPEG) |
10.8 | 10.0 | 9.42 | 8.04 |
| Olympus E-P1 (ISO 200, Adobe Camera Raw 5.5) |
11.5 | 10.4 | 9.26 | 8.04 |
| Canon Rebel XSi (Camera JPEG) (ALO on by default) |
11.3 | 10.1 | 9.34 | 8.01 |
| 8.0 Stops | ||||
| Fujifilm S3 Pro (Camera JPEG) |
-- | 9.90 | 9.40 | 7.94 |
| Nikon D3X (Camera JPEG) Advanced D-Lighting=Low) |
-- | -- | -- | 7.91 |
| Sony A350 (Adobe Camera Raw 4.4) |
11.6 | 10.5 | 9.61 | 7.89 |
| Canon EOS-1D Mark III (Camera JPEG) |
-- | 10.2 | 9.70 | 7.88 |
| Canon Rebel XS (Adobe Camera Raw 4.5) |
-- | 10.3 | 9.27 | 7.88 |
| Nikon D3 (Camera JPEG) |
-- | -- | -- | 7.87 |
| Canon Digital Rebel XTi (Adobe Camera Raw 3.6) |
10.8 | 9.88 | 9.18 | 7.84 |
| Canon EOS 5D (Adobe Camera Raw 3) |
11.0 | 10.4 | 9.21 | 7.83 |
| Canon EOS 50D (Camera JPEG) (ALO Off ) |
-- | 9.64 | 9.17 | 7.83 |
| Nikon D90 (Camera JPEG) |
-- | -- | -- | 7.77 |
| Panasonic DMC-GH1 (Adobe Camera Raw 5.4b) |
9.88 | -- | 9.30 | 7.76 |
| Panasonic DMC-GH1 (Camera JPEG iExposure=Standard) |
8.76 | -- | -- | 7.76 |
| Nikon D5000 (Camera JPEG), (Advanced D-Lighting=Low ) |
-- | -- | 9.28 | 7.75 |
| Canon EOS 40D (Adobe Camera Raw 4.2) |
11.2 | 10.1 | 9.26 | 7.72 |
| Canon Rebel XSi (Adobe Camera Raw 4.4.1) |
10.6 | 9.95 | 9.10 | 7.68 |
| Canon EOS 50D (Camera JPEG) (ALO STD by default) |
-- | -- | 8.90 | 7.68 |
| Nikon D700 (Camera JPEG) |
-- | -- | 9.05 | 7.67 |
| Canon 5D Mark II (Camera JPEG) (ALO STD) |
10.6 | 9.68 | 8.98 | 7.66 |
| Nikon D5000 (Camera JPEG), (Advanced D-Lighting=Off) |
-- | -- | 8.96 | 7.65 |
| Canon EOS-5D (Camera JPEG) |
10.2 | 9.68 | 8.82 | 7.65 |
| Olympus E-3 (Adobe Camera Raw 4.3) |
10.3 | 10.1 | 9.29 | 7.64 |
| Canon 5D Mark II (Camera JPEG) (ALO Off) |
-- | 9.67 | 8.96 | 7.62 |
| Nikon D60 (Camera JPEG) |
10.5 | 9.62 | 8.89 | 7.62 |
| Nikon D200 (Adobe Camera Raw 3) |
10.6 | 9.65 | 8.96 | 7.61 |
| Nikon D80 (Adobe Camera Raw 3.6) |
11.1 | 10.4 | 9.42 | 7.51 |
| 7.5 Stops | ||||
| Olympus E-500 (Adobe Camera Raw 3) |
10.7 | 9.97 | 8.90 | 7.46 |
| Olympus E-510 (Adobe Camera Raw 4.1) |
10.0 | 9.43 | 8.64 | 7.46 |
| Pentax K10D (Camera JPEG) |
-- | 9.49 | 8.88 | 7.44 |
| Nikon D300 (Camera JPEG) |
-- | -- | 8.70 | 7.44 |
| Olympus E-420 (Adobe Camera Raw 4.1.1) |
10.0 | 9.61 | 8.65 | 7.44 |
| Canon Rebel T1i (Camera JPEG) (ALO=STD by default) |
11.3 | 10.1 | 9.34 | 7.43 |
| Nikon D2Xs (Adobe Camera Raw 3.6) |
10.6 | 9.90 | 8.93 | 7.42 |
| Canon EOS 40D (Camera JPEG) |
10.6 | 9.52 | 8.78 | 7.42 |
| Nikon D3X (Camera JPEG) (Advanced D-Lighting=Off) |
-- | -- | -- | 7.37 |
| Nikon D50 (Camera JPEG) |
10.7 | 9.93 | 8.70 | 7.36 |
| Panasonic DMC-G1 (Adobe Camera Raw 5.2) |
10.7 | 9.78 | 8.70 | 7.32 |
| Sony A900 (Camera JPEG) (DRO off by default ) |
10.2 | 9.75 | 8.49 | 7.31 |
| Sony A200 (Camera JPEG) (DRO on by default) |
10.4 | 9.43 | 8.91 | 7.29 |
| Canon EOS 20D (Camera JPEG) |
10.3 | 9.66 | 8.85 | 7.29 |
| Canon EOS 30D (Camera JPEG) |
10.3 | 9.50 | 8.57 | 7.29 |
| Nikon D40 (Camera JPEG) |
10.4 | 9.80 | 8.89 | 7.28 |
| Sony A900 (Camera JPEG) (DRO on) |
10.1 | 9.76 | 8.47 | 7.26 |
| Canon Rebel XS (Camera JPEG) |
10.3 | 9.4 | 8.61 | 7.22 |
| Olympus E-520 (Adobe Camera Raw 4.5) |
11.0 | 9.46 | 8.70 | 7.20 |
| Sony A350 (Camera JPEG) (DRO on by default) |
10.3 | 9.55 | 8.85 | 7.19 |
| Nikon D80 (Camera JPEG) |
10.1 | 9.43 | 8.48 | 7.12 |
| Canon Digital Rebel XT (Camera JPEG) |
10.3 | 9.51 | 8.61 | 7.11 |
| Nikon D200 (Camera JPEG) |
-- | 9.07 | 8.36 | 7.11 |
| Panasonic DMC-G1 (Camera JPEG, iExposure = Low) |
-- | 9.29 | 8.50 | 7.09 |
| Panasonic DMC-G1 (Camera JPEG, iExposure = Standard) |
-- | 9.30 | 8.54 | 7.07 |
| Olympus E-300 (Camera JPEG) |
10.8 | 9.26 | 8.48 | 7.07 |
| Olympus E-410 (Adobe Camera Raw 4.1) |
10.2 | 9.40 | 8.24 | 7.05 |
| Olympus E-500 (Camera JPEG) |
10.0 | 9.14 | 8.16 | 7.05 |
| Canon Digital Rebel XTi (Camera JPEG) |
9.83 | 9.10 | 8.27 | 7.04 |
| Canon EOS-1Ds Mark II (Camera JPEG) |
10.3 | 9.38 | 8.60 | 7.04 |
| Panasonic DMC-G1 (Camera JPEG, iExposure = High) |
10.3 | 9.23 | 8.54 | 7.04 |
| Panasonic DMC-G1 (Camera JPEG, iExposure = Off) |
-- | 9.33 | 8.52 | 7.03 |
| Pentax K200D (Camera JPEG) |
-- | 9.50 | 8.30 | 7.01 |
| 7.0 Stops | ||||
| Canon Digital Rebel (Camera JPEG) |
10.1 | 9.11 | 8.47 | 6.97 |
| Nikon D2Xs (Camera JPEG) |
9.82 | 8.98 | 8.23 | 6.97 |
| Panasonic DMC-L10 (Adobe Camera Raw 4.2) |
10.4 | 9.34 | 8.48 | 6.91 |
| Sigma DP1 (Camera JPEG) |
-- | 8.95 | 8.13 | 6.91 |
| Pentax *istDs (Camera JPEG) |
10.2 | 10.0 | 8.87 | 6.90 |
| Sony A100 (Camera JPEG) |
10.2 | 9.24 | 8.39 | 6.89 |
| Pentax K100D (Camera JPEG) |
10.3 | 9.30 | 8.39 | 6.73 |
| Pentax K20D (Camera JPEG) |
10.2 | 9.21 | 8.09 | 6.66 |
| 6.5 Stops | ||||
| Nikon D2x (Camera JPEG) |
-- | 8.93 | 7.75 | 6.43 |
| Olympus E-3 (Camera JPEG) |
9.32 | 9.06 | 8.50 | 6.42 |
| Panasonic DMC-L10 (Camera JPEG) |
-- | 8.94 | 8.00 | 6.38 |
| Olympus E-420 (Camera JPEG) |
9.18 | 8.82 | 7.93 | 6.37 |
| 6.0 Stops | ||||
| Olympus E-410 (Camera JPEG) |
-- | -- | 7.60 | 5.99 |
| Nikon D70s (Camera JPEG) |
9.84 | 8.69 | 7.46 | 5.85 |
| Nikon D70 (Camera JPEG) |
9.81 | 8.76 | 7.58 | 5.84 |
| Olympus E-520 (Camera JPEG) |
9.32 | 8.68 | 7.74 | 5.74 |
| Olympus E-P1 (Camera JPEG, ISO 200, Gradation = Normal) |
-- | 8.85 | 7.74 | 5.47 |
| < 5.0 Stops | ||||
| Olympus E-510 (Camera JPEG) |
7.70 | 7.16 | 5.87 | 3.55 |
The results shown in the table are interesting. One of the first things that struck me when I (Dave) initially looked at test data for a wide range of DSLRs, was that here again, purely analytical measurements don't necessarily correlate all that well with actual photographic experience. There's no question that the Fuji S3 Pro deserved its place atop the list, as its unique "SR" technology did indeed deliver a very obvious improvement in tonal range in the highlight portion of the tonal scale relative to competing models of its day. (Amazing that it's now surpassed by even consumer-level models using today's technology.) I was also surprised to see the analytical results place the original Olympus E-300 as highly as they did, given that our sense of that camera's images was that they were in fact noisier than those of many other DSLRs that we looked at. In the other direction, I was quite surprised to see the Nikon D2x place as low on the listings as it did, given that we found that camera's shadow detail to be little short of amazing.
One thing that's going on here though, is that we tested each camera at its base ISO setting, which should produce best-case noise levels. This is in fact what many photographers will be most interested in, but it does perhaps place some of the Nikons (like the D40) at a disadvantage, as their lowest ISO setting is 200, as compared to the ISO 100 settings available on most other models.
When it comes to the Olympus E-P1, as noted above, its low scores for camera JPEGs reflect Olympus' decision to leave more image noise in its files, so as to not have to trade away as much subject detail. We're finding that we prefer this approach to cameras that smudge away subtle subject detail just to achieve lower noise levels in areas of flat tint, so encourage readers to look at our actual test images (particularly the OUTB shots, which really challenge a camera's dynamic range), rather than making their decision solely on the basis of the numbers in the chart above.
Olympus E-P1 Resolution Chart Test Results

The chart above shows consolidated results from spatial frequency response measurements in both the horizontal and vertical axes. The "MTF 50" numbers tend to correlate best with visual perceptions of sharpness, so those are what we focus on here. The uncorrected resolution figures are 2,602 line widths per picture height in the horizontal direction (corresponding to the vertically-oriented edge), and 2,541 lines along the vertical axis (corresponding to the horizontally-oriented edge), for a combined average of 2,571 LW/PH. Correcting to a "standardized" sharpening with a one-pixel radius reduced the resolution score by quite a bit, resulting in a lower average of 1,999 LW/PH, indicating that the Olympus E-P1 oversharpens a lot at its default settings. The corrected numbers put the E-P1 pretty much on par with its competitors.
To see what's going on, refer to the plots below, which show the actual edge profiles for both horizontal and vertical edges, in both their original and corrected forms. Here, you can see that a high amount of in-camera sharpening is applied in the horizontal direction (oversharpened by 13.3 %), as well as in the vertical direction (12.6 % oversharpened), explaining why standardized sharpening reduced the MTF 50 numbers so much. You should thus turn the camera's sharpening down for optimal results when sharpening in-camera JPEGs post-exposure in Adobe Photoshop or other image editing software. (And, as always, careful processing of RAW files in a good third-party RAW conversion program will likely yield a good bit more fine detail than can be seen in the in-camera JPEGs, regardless of in-camera sharpening settings.)


RAW Files
Olympus E-P1 High ISO RAW Image Quality
We've recently started looking at RAW files converted with dcraw, an excellent freeware raw converter. dcraw usually offers timely support for the latest cameras, but more importantly, it does not apply any noise-reduction, sharpening or other corrections such as geometric distortion correction to the output files. (We found that Adobe Camera Raw still applies some limited noise-reduction when its NR settings are set to zero, and it also applies other corrections depending on the make and model of the camera). There will always be differences between RAW converters, in terms of the sort of demosaicing algorithms they use (the processes by which they convert the separate Red, Green, and Blue data sets to an array of full-color RGB pixels), but dcraw seems to use a fairly generic algorithm that delivers good sharpness with relatively few artifacts, and can be counted on to not apply any noise reduction if you don't want it to.
Below are crops from Olympus E-P1 high ISO RAW files compared to RAW files from the Canon T1i, Nikon D5000 and Panasonic GH1, converted with dcraw. We chose these models to compare, as they are the most compact models each respective company offers with movie capability.
| High ISO Image Quality Olympus E-P1 vs Canon T1i, Nikon D5000 and Panasonic GH1 RAW Comparison RAW files converted with dcraw, no NR, no sharpening Simulated Daylight |
||||
|
|
Olympus E-P1
|
Canon T1i
|
Nikon D5000
|
Panasonic GH1
|
I
S O 8 0 0 |
 |
 |
 |
 |
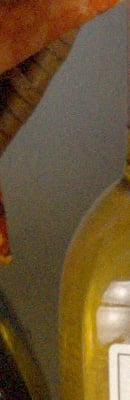 |
 |
 |
 |
|
 |
 |
 |
 |
|
|
|
Olympus E-P1
|
Canon T1i
|
Nikon D5000
|
Panasonic GH1
|
|
I
S 0 1 6 0 0 |
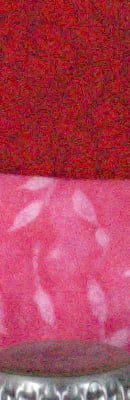 |
 |
 |
 |
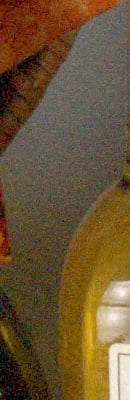 |
 |
 |
 |
|
 |
 |
 |
 |
|
|
|
Olympus E-P1
|
Canon T1i
|
Nikon D5000
|
Panasonic GH1
|
I
S O 3 2 0 0 |
 |
 |
 |
 |
 |
 |
 |
 |
|
 |
 |
 |
 |
|
|
|
Olympus E-P1
|
Canon T1i
|
Nikon D5000
|
Panasonic GH1
|
|
I
S 0 6 4 0 0 |
 |
 |
 |
N/A
ISO 6400 not supported |
 |
 |
 |
N/A
ISO 6400 not supported |
|
 |
 |
 |
N/A
ISO 6400 not supported |
|
|
|
Olympus E-P1
|
Canon T1i
|
Nikon D5000
|
Panasonic GH1
|
|
I
S 0 1 2 8 0 0 |
N/A
ISO 12800 not supported |
 |
N/A
ISO 12800 not supported |
N/A
ISO 12800 not supported |
|
N/A
ISO 12800 not supported |
 |
N/A
ISO 12800 not supported |
N/A
ISO 12800 not supported |
|
|
N/A
ISO 12800 not supported |
 |
N/A
ISO 12800 not supported |
N/A
ISO 12800 not supported |
|
As you can, the Four Thirds sensors of the Olympus E-P1 lag behind the APS-C sized sensors of the Nikon D5000 and Canon T1i in terms of noise at all ISOs above about 800, but not as much as we would have expected to see a year ago. Particularly at the higher ISOs, the Olympus E-P1 seems to do noticeably better in its RAW files than the Panasonic GH1 at high ISOs, the only other Four-Thirds model in the group. The E-P1 still lags behind the Canon T1i and D5000 (the latter of which has the cleanest files of any in this grouping), but not by as much as was the case for Four Thirds sensors only a short while ago.
Shooting Modes
Olympus E-P1 Modes and Menus
Olympus E-P1 Capture Mode
 When powered on, the camera is automatically placed into Record mode. The Exposure Mode dial on top of the camera sets the main shooting mode, with the following options:
 Program AE (Program Shift): This mode places the camera in control over both aperture and shutter speed, while the user has access to all other menu functions. Turning either dial cycles through a range of equivalent exposure settings, enabling the Program Shift mode.
- Aperture Priority: The opposite of Shutter Priority, this
mode puts the user in control of the aperture setting while the camera selects
the best shutter speed. (The aperture range varies with the lens in use.)
- Shutter Priority: Allows the user to set the shutter speed,
from 1/4,000 to 60 seconds, while the camera selects the most appropriate
aperture setting.
- Manual: Provides complete user control over the exposure,
including both aperture and shutter speed settings. A Bulb shutter setting
also becomes available in this mode, allowing variable length exposures for
as long as you hold down the shutter button.
 Movie Mode: Used for shooting HD (1280x720) or SD (640x480) movies at 30 frames per second with stereo sound. A menu allows Program or Aperture Priority modes to be used, as well as the one of the six available Art Filters.

 Scene Mode: This mode provides access to the 19 preset shooting modes via a scene menu. Scene modes available are: Portrait, e-Portrait, Landscape, Landscape + Portrait, Sport, Night Scene, Night + Portrait, Children, High Key, Low Key, DIS Mode, Macro, Nature Macro, Candle, Sunset, Documents, Panorama, Fireworks, and Beach & Snow.
- Art Filters: This mode accesses the six available Art Filter modes: Pop Art, Soft Focus, Pale & Light Color, Light Tone, Grainy Film, and Pin Hole. As mentioned above, Art Filters can be used while recording movies, but frame rate can be impacted.
 Intelligent Auto: This mode gives the camera complete control of the exposure: The E-P1 analyses the scene and automatically selects from Portrait, Landscape, Night Scene, Sport, and Macro exposure modes.
 Program AE (Program Shift): This mode places the camera in control over both aperture and shutter speed, while the user has access to all other menu functions. Turning either dial cycles through a range of equivalent exposure settings, enabling the Program Shift mode.
 Aperture Priority: The opposite of Shutter Priority, this
mode puts the user in control of the aperture setting while the camera selects
the best shutter speed. (The aperture range varies with the lens in use.)
 Shutter Priority: Allows the user to set the shutter speed,
from 1/4,000 to 60 seconds, while the camera selects the most appropriate
aperture setting.
 Manual: Provides complete user control over the exposure,
including both aperture and shutter speed settings. A Bulb shutter setting
also becomes available in this mode, allowing variable length exposures for
as long as you hold down the shutter button.
 Movie Mode: Used for shooting HD (1280x720) or SD (640x480) movies at 30 frames per second with stereo sound. A menu allows Program or Aperture Priority modes to be used, as well as the one of the six available Art Filters.

 Scene Mode: This mode provides access to the 19 preset shooting modes via a scene menu. Scene modes available are: Portrait, e-Portrait, Landscape, Landscape + Portrait, Sport, Night Scene, Night + Portrait, Children, High Key, Low Key, DIS Mode, Macro, Nature Macro, Candle, Sunset, Documents, Panorama, Fireworks, and Beach & Snow.
 Art Filters: This mode accesses the six available Art Filter modes: Pop Art, Soft Focus, Pale & Light Color, Light Tone, Grainy Film, and Pin Hole. As mentioned above, Art Filters can be used while recording movies, but frame rate can be impacted.
 Intelligent Auto: This mode gives the camera complete control of the exposure: The E-P1 analyses the scene and automatically selects from Portrait, Landscape, Night Scene, Sport, and Macro exposure modes.
 Playback Mode: The Playback button on the rear panel accesses Playback mode, where you can review captured images. The left and right arrow keys scroll forward and backward one image at a time, while the up and down keys scroll ten images at a time. You can enlarge captured images or display them in an index format for quick viewing.
Olympus E-P1 Menus
Pressing the Menu button provides access to the camera's full menu system. The following options are available in most camera modes as menu tabs at the left of the display:
Record Menu 1:
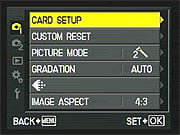
| Record Menu 1 Options: | |||
|
Top-Level
Selection |
Second-Level
|
Third-Level
|
Notes
|
|
Card Setup
|
- All Erase
- Format |
|
Erases images from the memory card or formats the card.
|
|
Custom Reset
|
- Reset
- Reset 1 - Reset 2 |
|
You can register two sets of custom settings, or reset to factory defaults (Reset option).
|
|
Picture Mode
|
- Vivid
- Natural - Muted - Portrait - Monotone - Custom |
- Contrast (Lo to Hi)
- Sharpness (Lo to Hi) - Saturation (Lo to Hi) - BW Filter: Neutral, Yellow, Orange, Red, or Green -Pict. Tone: Neutral, Sepia, Blue, Purple or Green |
Select a preset for specific situations, or manually adjust each preset.
|
|
Gradation
|
- Auto
- Normal - High Key - Low Key |
|
Adjusts overall brightness for higher or lower contrast.
|
|
Quality
|
- Still Picture
|
- RAW
- LF JPEG - LN JPEG - MN JPEG - SN JPEG - LF JPEG + RAW - LN JPEG+ RAW - MN JPEG + RAW - SN JPEG + RAW |
Select the image size and quality, and the movie mode.
|
|
- Movie
|
- HD
- SD |
HD: 1280x720 at 30fps,
SD: 640x80 at 30fps |
|
|
Image Aspect
|
- 4:3
- 16:9 - 3:2 - 6:6 |
|
Sets the still image aspect ratio. Shows the sizes of RAW, Large, Middle, and Small JPEGs.
|
Record Menu 2:

| Record Menu 2 Options: | |||
|
Top-Level
Selection |
Second-Level
|
Third-Level
|
Notes
|
|
Movie AE Mode
|
- P
- A - ART 1 - ART 2 - ART 3 - ART 4 - ART 5 - ART 6 |
|
Sets the exposure mode in movie mode. Programmed, Aperture Priority, or one of the six Art Filters can be used.
|
|
Movie + Still
|
- Off
- On |
|
Automatically takes a full-resolution still when movie recording is stopped.
|
|
Drive Mode
|
- Single
- Continuous - 12s Self-timer - 2s Self-timer |
|
|
|
Image Stabilizer
|
- Off
- I.S. 1 - I.S. 2 - I.S. 3 - Focal Length |
|
I.S. 1 stabilizes in both directions. I.S. 2 stabilizes in vertical plane, I.S. 3 stabilizes in the horizontal plane.
|
|
Multiple Exposure
|
Frame
|
- Off
- 2?Frames |
Capture multiple exposures, or overlay existing RAW shot.
|
|
Auto Gain
|
- Off
- On |
||
|
Overlay
|
- Off
- On |
||
Playback Menu:

| Playback Menu Options: | |||
|
Top-Level
Selection |
Second-Level
|
Third-Level
|
Notes
|
|
Slideshow
|
- Start
|
|
Slideshows of stills (and movies) with optional background music.
|
|
- BGM
|
- Melancholy
- Nostalgic - Love - Joy - Cool - Off |
||
|
- Slide
|
- All
- Still Picture - Movie |
||
|
Rotate
|
- Off
- On |
|
Rotates images automatically.
|
|
Edit
|
- Sel Image
|
RAW Data Edit:
- On - Off |
Edit still images. You cannot edit movies. Selecting a RAW image creates a JPEG?with the currently selected settings.
|
|
JPEG:
- Shadow Adjustment - Redeye Fix - Crop - Aspect - Black & White - Sepia - Saturation - Resize - e-Portrait |
|||
|
Audio Record:
- No - Start/Yes |
|||
|
- Image Overlay
|
- 2 Images Merge
- 3 Images Merge |
||
|
Print
|
- Single Image
- All |
|
Marks single or all frames for printing.
|
|
Reset Protect
|
- Yes
- No |
|
Cancels all write protection marks.
|
Custom Menu:

| Custom Menu Options, Tab A: AF/MF | |||
|
Top-Level
Selection |
Second-Level
|
Third-Level
|
Notes
|
|
AF Mode
|
- Still Picture
|
- S-AF
- C-AF - MF - S-AF+MF |
Sets the autofocus mode in both still capture and Movie mode. Modes are Single, Continuous, Manual, and Single AF with Manual adjust.
|
|
- Movie
|
- S-AF
- C-AF - MF - S-AF+MF |
||
|
AF Area
|
- All Target
- Single Target |
|
All automatically selects one of the AF areas.
|
|
AF Select Wrap
|
- Off
- Loop - Spiral |
|
Determines how next AF point is selected when at the edge of the array.
|
|
Reset Lens
|
- Off
- On |
|
Resets focus to infinity when camera turns off.
|
|
Bulb Focusing
|
- Off
- On |
|
Enables focusing during Bulb exposures.
|
|
Focus Ring
|
- Counter-clockwise
- Clockwise |
|
Controls the direction of focus ring.
|
|
MF Assist
|
- Off
- On |
|
Enables automatic magnification during manual focus.
|

| Custom Menu Options, Tab B: Button/Dial | |||
|
Top-Level
Selection |
Second-Level
|
Third-Level
|
Notes
|
|
Dial Function
|
- P
|
- Program shift
- Flash Exp. Comp. - Exp. Comp. |
Controls the function of the dials. Any option can be applied to Main and Sub dial.
|
|
- A
|
- Aperture
- Flash Exp. Comp. - Exp. Comp. |
||
|
- S
|
- Shutter speed
- Flash Exp. Comp. - Exp. Comp. |
||
|
- M
|
- Aperture
- Shutter speed |
||
|
- Menu
|
|
Swap behavior of dials while navigating menus.
|
|
|
Dial Direction
|
- Dial 1
- Dial 2 |
|
Directs the type of dial control depending on the direction of turning:
- Dial 1 setting enables slower shutter speed, open aperture for clockwise and the opposite for counter-clockwise - Dial 2 is opposite. |
|
AEL/AFL
|
- S-AF
|
- Mode 1
- Mode 2 - Mode 3 |
Controls the function of the Shutter and AEL/AFL buttons in each AF mode.
|
| - C-AF | - Mode 1 - Mode 2 - Mode 3 - Mode 4 |
||
| - MF | - Mode 1 - Mode 2 - Mode 3 |
||
|
AEL/AFL Memo
|
- Off
- On |
|
Off setting locks exposure only while button is held down.
|
|
Function Button
|
- Face Detect
- One-Touch WB - AF Home - Manual Focus - RAW - Test Picture - My Mode - Backlit LCD - Off |
|
Assigns a function to the Fn button.
|
|
Left Arrow Function
|
- AF Mode
- Metering - Flash Mode - Backlit LCD - Image Stabilizer |
|
You can change the function of the left arrow button in Record mode.
|
|
My Mode Setup
|
- My Mode 1
- My Mode 2 |
|
Lets you register settings for My Mode.
|
|
Button Timer
|
- Off
- 3 Sec. - 5 Sec. - 8 Sec. - Hold |
|
Sets how long a button's function displays after a quick press.
|
|
AEL/Fn Button swap
|
- Off
- On |
|
You can swap the functions of the AE L and Fn buttons.
|
|
4-Way Function
|
- On
- AF Area - Off |
|
Disables the 4-way controller to prevent unintended operation or lets it select AF point.
|
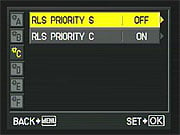
| Custom Menu Options, Tab C: Release/Drive | |||
|
Top-Level
Selection |
Second-Level
|
Third-Level
|
Notes
|
|
RLS Priority S
|
- Off
- On |
|
If enabled, the camera will
release the shutter before AF function is complete.
|
|
RLS Priority C
|
- Off
- On |
|
If enabled, the camera will release the
shutter before AF function is complete.
|

| Custom Menu Options, Tab D: Disp/Sound/PC | |||
|
Top-Level
Selection |
Second-Level
|
Third-Level
|
Notes
|
|
HDMI
|
- 1080i
- 720p - 480p/576p |
|
HDTV output mode.
|
|
Video Out
|
- NTSC
- PAL |
|
|
|
Sound
|
- Off
- On |
|
Turns the camera's beep sounds on or off.
|
|
Sleep
|
- Off
- 1 minute - 3 minutes - 5 minutes - 10 minutes |
|
Sets the camera to go to sleep after a period of inactivity.
|
|
USB Mode
|
- Auto
- Storage - MTP |
|
|
|
Live View Boost
|
- Off
- On |
|
If on, boosts the LCD brightness.
|
|
Face Detect
|
- Off
- On |
|
If on, detects faces in the frame and sets focus for those faces.
|
|
Info Setting
|
- Play Info
|
- Image Overlay
- Overall - Histogram - Highlight & Shadow |
Information displayed with the INFO?button is pressed.
|
|
- Live View Info
|
- Histogram
- Zoom - Multi View - Image Only - Grid (3 types) |
||
|
Volume
|
- 5 levels, or off
|
|
Speaker volume.
|
|
Slideshow Setup
|
- Slide Interval
|
- 2 to 10s
|
|
| - Movie Interval | - Full - Short |
Play entire move or just a short segment. | |
|
Level Gauge
|
- Off
- On |
|
Display camera roll and pitch.
|
|
Movie Audio
|
- Off
- On |
|
Set to On to record audio with movies.
|

| Custom Menu Options, Tab E: EXP/Point/ISO | |||
|
Top-Level
Selection |
Second-Level
|
Third-Level
|
Notes
|
|
EV Step
|
- 1/3 EV
- 1/2 EV - 1 EV |
|
Sets the exposure compensation increment.
|
|
Metering
|
- ESP
- Center-weighted - Spot - Spot Highlights - Spot Shadows |
|
Sets the exposure metering mode.
|
|
AEL Metering
|
- Auto
- Center-weighted - Spot - Spot Highlights - Spot Shadows |
|
Controls the type of metering performed via the AEL/AFL button.
|
|
ISO
|
- Auto
- 100 - 200 - 400 - 800 - 1,600 - 3,200 - 6,400 |
|
Sets the current ISO sensitivity. (Intermediate values appear if ISO Step is set to 1/3 EV.)
|
|
ISO Step
|
- 1/3 EV
- 1 EV |
|
Sets the ISO EV step size.
|
|
ISO-Auto Set
|
- High Limit
|
- 200
- 400 - 800 - 1,600 - 3,200 - 6,400 |
Sets the upper limit and default of the Auto ISO setting.
|
|
- Default
|
- 200
- 400 - 800 - 1,600 - 3,200 - 6,400 |
||
|
ISO-Auto
|
- P / A / S
- All |
|
Sets a shooting mode that automatically enables Auto ISO.
|
|
Bulb Timer
|
- 30 minutes
- 25 minutes - 20 minutes - 15 minutes - 8 minutes - 4 minutes - 3 minutes - 1 minute |
|
Sets the maximum time for the Bulb exposure.
|
|
Anti-Shock
|
- Off
- 1/8s to 30s |
|
Select the interval between pressing the shutter button and releasing the shutter.
|
|
Bracketing
|
- AE BKT
|
- Off
- 3F 0.3EV - 3F 0.7EV - 3F 1.0EV |
Exposure bracketing.
|
|
- WB BKT
|
- Off
- 3F 2STEP - 3F 4STEP - 3F 6STEP |
White Balance bracketing. Selectable for both Amber-Blue and Green-Magenta directions.
|
|
|
- FL BKT
|
- Off
- 3F 0.3EV - 3F 0.7EV - 3F 1.0EV |
Flash exposure bracketing.
|
|
|
- ISO BKT
|
- Off
- 3F 0.3EV - 3F 0.7EV - 3F 1.0EV |
ISO sensitivity bracketing.
|
|

| Custom Menu Options, Tab F: Flash Custom | |||
|
Top-Level
Selection |
Second-Level
|
Third-Level
|
Notes
|
|
Flash Mode
|
- Auto
- Red-eye Reduction - Forced On (Fill flash) - Forced Off - Red-eye Reduction + Slow Sync - Slow Sync - Slow Sync 2nd curtain |
|
External flash mode.
|
|
Flash Exposure Compensation
|
- -3 to +3 in 1/3 EVsteps
|
|
External flash exposure compensation.
|
|
Flash X-Sync
|
- 1/60 to 1/180
|
|
Sets shutter sync speed for external flash firing.
|
|
Flash Slow Limit
|
- 1/30 to 1/180 (1/60 is default)
|
|
Sets the lower shutter limit for the Slow Sync flash modes.
|
|
Flash EV Comp. + EV Comp.
|
- Off
- On |
|
If on, flash EV comp. will be added to overall EV comp. and flash intensity control.
|

| Custom Menu Options, Tab G: Quality/Color/WB | |||
|
Top-Level
Selection |
Second-Level
|
Third-Level
|
Notes
|
|
Noise Reduction
|
- Off
- On - Auto |
|
Long exposure noise reduction (dark frame subtraction).
|
|
Noise Filter
|
- Off
- Low - Standard - High |
|
Noise reduction processing setting. Higher values recommended for high ISO.
|
|
White Balance
|
- Auto
- 5300 K (Daylight) - 7500 K (Shade) - 6000 K (Cloudy) - 3000 K (Tungsten) - 4000 K (Fluorescent 1) - 4500 K (Fluorescent 2) - 6600 K (Fluorescent 3) - 5500 K (Flash) - Custom - Kelvin (2000 - 14000 K) |
- Fine tune Amber / Green (15 steps) for all except Custom and Kelvin
|
|
|
All (WB +/-)
|
- All Set
|
- Amber -7 to +7
- Green -7 to +7 |
In All Set, you can apply the same WB compensation values to all WB modes at once.
|
|
- All Reset
|
- Yes
- No |
||
|
Color Space
|
- sRGB
- Adobe RGB |
|
|
|
Shading Compensation
|
- Off
- On |
|
Enables a shading compensation that attempts to eliminate vignetting with certain lenses
|
|
Quality Set
|
- 1
- 2 - 3 - 4 |
- L/M/S
- SF/F/N/B |
You can combine three image sizes and four compression ratios and register those settings.
|
|
Pixel Count
|
- Middle
- Small |
Middle:
- 3,200 x 2,400 - 2,560 x 1,920 - 1,600 x 1,200 Small: - 1,280 x 960 - 1,024 x 768 - 640 x 480 |
Set the pixel size for the Middle and Small options.
|

| Custom Menu Options, Tab H: Record/Erase | |||
|
Top-Level
Selection |
Second-Level
|
Third-Level
|
Notes
|
|
Quick Erase
|
- Off
- On |
|
If on, allows you to immediately erase an image during post-capture display.
|
|
RAW + JPEG Erase
|
- JPEG
- RAW - RAW + JPEG |
|
Designates how JPEG+RAW files are erased.
|
|
File Name
|
- Auto
- Reset |
|
Auto continues file numbering to new cards while Reset starts from 0.
|
|
Edit File Name
|
- Adobe RGB
- sRGB |
- Off
- A-Z - 0-8 |
You can change the 2-digit file name prefix.
|
|
Priority Set
|
- No
- Yes |
|
Sets the priority of cursor display for Erase screen to No or Yes.
|
|
dpi Setting
|
- Auto
- Custom |
|
Lets you set the resolution for printing images.
|

| Custom Menu Options, Tab I: Utility | |||
|
Top-Level
Selection |
Second-Level
|
Third-Level
|
Notes
|
|
Pixel Mapping
|
- Start
|
|
Enables a self-check of the sensor, and remaps bad pixels.
|
|
Exposure Shift
|
- ESP
|
- 1 to +1 EV
|
Each metering mode can be "fine-tuned" between -1 and +1 EV in 1/6 EV steps.
|
|
- Center-weighted
|
- 1 to +1 EV
|
||
|
- Spot
|
- 1 to +1 EV
|
||
|
Warning Level
|
- -2 to +2
|
|
Battery warning level can be tweaked from the default, in arbitrary units.
|
|
Level Adjust
|
- Reset
|
|
You can calibrate the level gauge ("zero" it out).
|
Setup Menu:
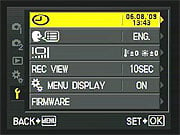
| Setup Menu Options: | |||
|
Top-Level
Selection |
Second-Level
|
Third-Level
|
Notes
|
|
Date and Time
|
- Date
- Time - Format |
|
Sets the camera's clock and
calendar.
|
|
Language
|
English (default)
|
Sets the menu language. Options available varies with region. You can download additional options with the included software.
|
|
|
LCD Color & Brightness
|
- Brightness
|
-7 to +7
|
Adjusts LCD brightness and color response.
|
|
- Color A-B
|
-7 to +7
|
||
|
- Color G-M
|
-7 to +7
|
||
|
Rec. View
|
- 1 to 20s
- Off - Auto Playback |
|
Controls a post-capture display and the display
time.
Auto setting displays image then switches to Playback mode for quick deletion. |
|
Custom Menu Display
|
- Off
- On |
|
Enables display of the Custom Menu.
|
|
Firmware
|
|
|
Displays the current firmware version.
|
Blur
Olympus E-P1 Blur issue
by Shawn Barnett and Dave Etchells
 Because the full story of our testing of the Olympus E-P1's blur anomaly takes so many words to describe, we didn't want to burden our overview/shooter's report with all the details behind it. We also had (and continue to have) some concern that reams of detail on this one issue might overshadow the E-P1's good points, of which there are many. This is particularly important, given that the 1.1 firmware update appears to have made a change that largely eliminates the IS-related part of the problem.
At the same time, we can't just ignore the issue of anomalous blur with the E-P1. We also believe that it's always important for a test organization to share full details of their testing, so readers can trust and properly evaluate the results. Hence this separate page in our review of the E-P1, for those who are interested in all the details.
The E-P1's anomalous blur occurs under two circumstances, both arising from the same underlying cause.
- With the 14-42mm M.ZUIKO lens mounted, the shutter's vibration can produce sufficient vibration in the lens elements, especially at 35 and 42mm, to cause noticeable blurring from about 1/100 to 1/200 second.
- With firmware version 1.0, and far less so with 1.1, turning on image stabilization (IS1) will result in increased blurring in about the same shutter speed range.
We think Olympus has addressed the image stabilization issue well in the version 1.1 firmware, even though Olympus has made no formal acknowledgement of the issue, and there's no mention of the 1.1 firmware doing anything other than improving continuous-AF performance in both the camera and the two kit lenses. The only solution we can come up with for the 14-42mm M.ZUIKO lens vibration is either to not use it, to use it on a tripod when shooting in the critical speed range of 1/100 - 1/200 second, or else limit your print sizes. The lens vibration affects image quality whether image stabilization is on or off, and you're likely to see evidence of it somewhere in the image at all shutter speeds between roughly 1/100 and 1/200 second; at 1/250 and above, the second shutter curtain covers the sensor before the vibration can affect the image. Below 1/100 (assuming you can even hand-hold the camera steady enough to be able to tell), the vibration dies out quickly enough that you won't notice.

Micro Four Thirds shutter: Unlike most interchangeable-lens cameras, the Micro Four Thirds shutter is open by default to enable full-time live view, so the first curtain must first close before opening to make the exposure. This video is shot at 420 frames per second to capture the shutter and illustrate what 1/160 second looks like. Don't look for the moment of blur in this video, though, because you won't see it. (It's only a few pixels' worth of motion, so you'd never be able to see it at this scale.) Click to play/download 610KB .mp4 file.
As an aside, we were a little surprised not only to see no mention of this problem on any other review site, but when we looked for evidence of blur in the images of other writers, we found very few shots taken at 1/160 second, with most writers omitting that shutter speed altogether. This is not to say that anyone was trying to hide those images, just that they didn't choose them, possibly because they were slightly blurry. Had we not noticed the issue, we'd have also just left out blurry images that we perceived to be caused by errors on our part, so we wouldn't have had any hand-held images at 1/160 either.
But Shawn in particular shot with the Olympus E-P1 for about two months before sitting down to really take a close look at both the image quality and the shutter speeds at which they were captured. This anomaly showed up in a large percentage of his images, most often taking the form of image-doubling at shutter speeds where it should not occur: 1/80 to 1/160 second with image stabilization enabled (IS1 setting).
To reduce the likelihood that this anomaly was only present in the earlier camera bodies we received directly from Olympus, with serial numbers 00126 (Camera 1) and 02460 (Camera 2), we purchased a third body at retail, which had serial number 05532 (Camera 3). This body still showed both problems, but somewhat less so than the others, which is encouraging.
What we saw
Blur resulting from this issue had two characteristics that let us distinguish it from ordinary motion blur:
- Because it results from a momentary vertical movement of the camera body and lens, anomalous blur is always in a vertical or nearly-vertical orientation. Ordinary motion blur may be in other directions (although it isn't always), and focus blur doesn't have a directional component to it.
- Because it is caused by the first shutter curtain reaching the bottom of its travel, the bottom of the sensor will see more of the effects of this vibration than will the top of the sensor, which is covered by the second curtain of the shutter relatively soon after the vibration begins (at least within the critical shutter speed range we're talking about). Because the image is inverted on the sensor plane, this means that the top of the image will show the most blur. Accordingly, if we saw equal blur at the top and bottom of the image within the critical shutter speed range, that meant we could safely discount it as user-caused blur, rather than anomalous blur caused by the shutter mechanism.
Indeed, if the shake is induced by the impact from the first shutter curtain, there would have to be a shutter speed where part of the sensor is covered by the second shutter curtain, and therefore protected from the influence of any sensor or lens motion. In the crops below, taken from an image captured at 1/160 second, you can see that the top and center of this particular image are affected by the anomalous motion blur, but the bottom is not.
|
Olympus E-P1 @ 1/160 second, IS1 ON Firmware v.1.0 Camera 2
14-42mm lens at 42mm |
||
|---|---|---|
 |
 |
 |
|
Top of image (bottom of sensor) shows significant image-doubling
|
Center of image also shows doubling (note that this center USAF target is larger than the top and bottom ones)
|
Bottom of image (top of sensor) shows no doubling at all |
At 1/160 second only the upper 2/3 of the image is soft while the lower 1/3 of the image is sharp. According to our analysis, this is because the second shutter curtain has already begun to close before the vibration of the camera or sensor begins. (The shutter closes in a downward motion relative to the camera body, but remember that the lens projects the image upside down and backwards onto the sensor, so it's the top of the sensor that captures a sharp image before the vibration can cause doubling.) The Olympus E-P1's X-sync is actually adjustable from 1/60 to 1/180 second, but we found no difference in behavior with the X-sync set to 1/60: It's possible that this setting only affects shutter operation when the flash is enabled, which is obviously not a condition we're testing under here.
As we said, the motion in the image above is quite vertical. This is characteristic of IS-induced blur, while with the IS off, as seen below, the blur offset suggests motion downward and slightly left. Both were quite consistent over hundreds of images.
|
Olympus E-P1 @ 1/160 second, IS1 OFF v.1.0 Camera 2
14-42mm lens at 42mm |
||
|---|---|---|
 |
 |
 |
|
Top of image shows motion blur down to the right
|
Center of image also shows motion blur down to the right
|
Bottom of image shows no blur |
Controlled testing before and after update
Once we saw the phenomenon in all three cameras, we decided to eliminate the first unit, Camera 1, because it was early production.
We had already updated Camera 2 with the autofocus update and saw a reduction in the overall number of significantly blurry images, but there was still a difference between the images with IS on and IS off. So we assigned values to the amount of blur per image, then shot six sets of 30 images at 1/160 second, taking the average of each to determine the amount of blur both with and without IS. Two of the sets were from Camera 2 and only include firmware 1.1. The last four sets were from Camera 3, shot first with firmware 1.0, then with firmware 1.1.
|
How we scored the images (shown at 100% magnification)
|
||
|---|---|---|
 |
 |
 |
|
IS On Score: 1
|
2
|
3
|
 |
 |
 |
|
IS Off Score: 1
|
2
|
3
|
The images above are cropped from the middle of the test target, and show the amount of blurring that we assigned the various scores to. Note that few of the images at 1/160 second were really tack sharp, but also note that we're really pixel-peeping here. If you look at the top of the number two, you can see the clearest sign of motion blur. With IS on, the motion is more vertical, while with IS off, the motion is vertical and slightly left.
Tally all the results and here are the scores:
|
Results
|
v.1.0
|
v.1.1
|
|
Camera 2 IS Off
|
N/A
|
2.50
|
|
Camera 2 IS On
|
N/A
|
2.03
|
|
Camera 3 IS Off
|
1.20
|
1.20
|
|
Camera 3 IS On
|
2.17
|
1.47
|
It's interesting that while Camera 2's images got noticeably better with IS on, Camera 3's images start out less blurry with IS off, but actually got very slightly more blurry with IS on, both before and after the firmware update. The good news is that the firmware update improved both cameras, but it did not entirely eliminate the problem, and thus leaves a risk of image doubling at random. The amount of blur in Camera 3's images, the one we purchased at retail, is far less noticeable, and though image stabilization does add a little bit of blur, it's not significant. (Note that Camera 2's firmware was updated before we began this particular test.)
Why the blur occurs at the shutter speeds it does
It seemed pretty unusual for a faster shutter speed to be blurred by such noticeable and repeatable motion blur. As we mentioned, we believe the same vibration is occurring with images shot at slower shutter speeds, it just doesn't make up as large a percentage of the exposure, and so isn't nearly as visible. But as the duration of the exposure gets shorter, the moment of vibration makes up a larger percentage of the exposure time. The graph below illustrates this point.

Note that this is not an actual plot of the vibration in question,
just an illustration of the concept.
In the illustration above, the hypothetical vibration is shaking the camera/lens for a majority of the exposure time at 1/160 second, so the resulting image shows the resulting blur pretty clearly. At 1/30 second, though, the vibration dies away quickly enough that the image is stationary on the surface of the sensor for most of the exposure time. The "fringe" around objects in the image resulting from the vibration will thus be all but invisible.
IS vs Lens
It's important to reiterate that the above images were made with the 14-42mm lens mounted and set to 42mm, the focal length that also produces the greatest IS-off blur. The amount of blur varies as you change the focal length, and it also varies from lens to lens. We took a 10-shot series at each focal length, taking care to keep the target the same size in the image frame, and scored them as above. The numbers below show our results (higher numbers indicate more anomalous motion blur).
|
Results
|
14mm
|
18mm
|
25mm
|
35mm
|
42mm
|
|
Lens 1
|
1.05
|
1.05
|
1.15
|
1.70
|
1.90
|
|
Lens 2
|
1.06
|
1.05
|
1.06
|
1.50
|
2.40
|
Though at 42mm Lens 2 has higher levels of anomalous blur, moving to 25mm seemed to really tighten up the mechanism, resulting in fewer soft exposures. Looking at the incidence of blurred shots, though, there were three slightly soft shots at 25mm, and only one each at 18mm. Lens 1 also had only one blurred shot at 14mm, while Lens 2 had three (slightly) blurred ones. It may be that as the front lens barrels come back out at 14mm, the likelihood of vibration increases somewhat.
Just to finish out the analysis, at 35mm each lens had six out of ten shots with anomalous blur, and at 42mm Lens 1 had nine out of ten with noticeable anomalous blur, and Lens 2 had ten out of ten with noticeable anomalous blur.
How much will this affect my prints?
It's important to note, of course, that we're pixel-peeping here. This is a 12-megapixel camera, so the blur is much more apparent above than it would be in all but the largest print sizes. When we printed out the images shown here, "level 3" blur was quite evident in 13 x 19-inch prints, but much less so at 8 x 10. With the right subject, discriminating users would be able to see Level 3 blur at 8 x 10 inches, but we believe the majority of users with the majority of subjects would not. "Level 2 blur was visible in 13 x 19 inch prints, but didn't leap out at us: The average user might not be aware of it, and certainly not at 8 x 10 inches.
Using the printed results as a guideline, and keeping in mind that the numbers in the table above are averages, we believe discriminating users printing at sizes equivalent to 13 x 19 inches full frame (in other words, printing at that size, or cropping into a portion of the frame and enlarging to that level) would find some of their shots taken with version 1.0 firmware, the IS enabled, the kit lens within the focal length range, and the shutter speed within the critical range to be unacceptably blurred. With firmware version 1.1, we believe that such users would find a few of their images unacceptably blurred, under those same circumstances. At sizes of 8 x 10 and below, even fairly critical users wouldn't notice the issue with version 1.1 firmware. Consumer-level users might not notice the blurring with version 1.1 firmware, even at 13 x 19 inches.
Bottom line, with the version 1.1 firmware loaded, we don't see this as a crippling deficiency for the E-P1. But we definitely advise updating your camera to version 1.1, if you haven't already done so.
Why Bother?
Some may question the amount of effort we put into testing the E-P1, particularly for what may seem to them like a minor issue in the final analysis. When we first encountered the issue, though, it was something we hadn't seen before. Until we could fully characterize just when and how it happened, no one could know whether it was minor or not. We don't want to slam a camera based on partial information, and just as importantly, we don't want to simply sweep a potential problem under the figurative rug. Likewise, different people may have different interpretations of what constitutes "minor:" We might call something minor that some readers would consider critical. On the other side, others will look at something like this and say "so what?" (As noted in the review, there's some difference of opinion even between IR's editors as to how we each feel about the issue.) That's why the approach at IR is to characterize exactly what's going on, when & how it happens, and show what the results look like -- Then our readers can make up their own minds whether it's important to them. We think any E-P1 owner should apply the version 1.1 firmware, as there's no downside, and blur is noticeably reduced in the critical shutter speed range with IS enabled. Beyond that, it will be a matter of the type of shooting you do and how large you print. For readers routinely printing 11 x 14 inches and larger and also shooting a lot of hand-held material in the range of 1/80 - 1/200 second, it might still be a problem. More casual snap-shooters printing at 8 x 10 and below, or enthusiasts shooting from a tripod should have no concern. The key is that we've rooted out all the details so you can make up your own mind about it. It's a huge amount of work fully characterizing something like this, but this is the kind of truly in-depth reporting our readers have come to expect from us, and that's available nowhere else.
Summary
We really didn't want to have to go into such detail on this, but as we kept working to well and truly nail down the problem, it proved elusive and more complex than we could cover with just a quick note. When purchasing a third unit showed that the problem existed in later units, we knew we had to more thoroughly characterize and document it. We could go into even more detail here (this investigation consumed many dozens of hours), but we're happier to move on and say that half of the problem has been addressed with Olympus's firmware update, and the other half is better solved by either avoiding the 14-42mm M.ZUIKO lens, or by just using a tripod for critical shots within the affected shutter speed range. You could also just decide to accept a little motion blur in your handheld shots at 35 and 42mm, and confine your prints to 8 x 10, where it'll have relatively little impact.
See the Overview page for our full conclusion, but it bears repeating that the Olympus E-P1 is an excellent little camera when we eliminate this issue by shooting with the 17mm f/2.8 lens and turn off image stabilization. It's easy enough to turn on image stabilization when we know our shutter speeds will be slow, as it does seem to help more than hurt when shooting below 1/80 second. The trick is remembering to turn it back off when shooting at intermediate shutter speeds. Thankfully, Olympus's firmware update gets pretty close to eliminating that worry.
We went through a period of disappointment with the Olympus E-P1 when we first discovered this issue, but we're glad we took the time to pinpoint why and when the blur occurs. We can now resume liking and using the E-P1 as much as before.
Press Release
OLYMPUS UNVEILS A NEW ERA WITH THE E-P1:
NOT A POINT & SHOOT. NOT AN SLR. IT’S A PEN.
WHAT WILL YOU CREATE?
Experience Incredible Multimedia Creative Freedom Blended with Digital SLR
Image Quality, HD Video and Stereo Audio in a Compact Camera Body
CENTER VALLEY, Pa., June 16, 2009 – A new era of digital imaging begins today with the launch of the Olympus E-P1. The world’s smallest 12.3-megapixel interchangeable lens system camera blends the high-quality still images of a digital single lens reflex (DSLR) with High Definition (HD) video, stereo Linear PCM audio recording and In-Camera Creativity within an ultra-portable body. The easy-to-use E-P1 expands your creative horizons and its diverse multimedia features offer something for everyone. Built for today’s visual generation who lead active lives online and offline, the E-P1 will make you rethink what you can do with a camera.
Capture More of the Life You Live
Shooting spontaneous images of your daily life usually means snapping small, grainy images with your cell phone or using a point-and-shoot if it’s handy. A DSLR delivers incredible image quality, but most aren’t compact enough to roam with you. Now, the E-P1 changes the game with a compact body that delivers the professional quality images of a DSLR without the bulk. Moreover, its sharp HD video capture and stereo audio helps you live a better-documented life because you’re carrying one portable camera rather than a DSLR, an HD camcorder and a high-end audio device.
You can share more of your life with the world when the E-P1 travels with you. Make your Facebook, MySpace, Flickr, YouTube, Twitter and personal blog postings unique by capturing and sharing more videos and photos. You can chronicle more of the life you actually lead, rather than just special occasions you prepare for, like weddings, holidays and birthday parties. Since it’s the only camera to offer in-camera art filters for both still photography and videos with high-end audio, even your everyday activities will look and sound amazing!
“The E-P1 is designed for the mobile, visual generation that lives active lives online and off, and its portability ensures that it will go with you wherever life takes you,” said John Knaur, senior marketing manager, Digital SLR, Olympus Imaging America Inc. “As someone who has shot with an SLR most of my life, I’m excited that SLR-quality images can be captured with a camera this compact and portable. The E-P1 truly allows you to capture it all with the highest still photo image quality blended with HD video, high-end audio, multiple exposure and creative art filters in one small, stylish camera.”
Innovation since 1959: The Olympus PEN
They say that the pen is mightier than the sword, and now the E-P1 takes self-expression to a whole new, powerful level. Olympus has a long history of miniaturizing camera technology. The first-generation Olympus PEN appeared in 1959 and led the way to high-quality images in a small package, matching SLR cameras’ performance of the era.
Today, Olympus utilized its miniaturizing and engineering expertise to create a slimmer body, removing the optical viewfinder and mirror box found inside a traditional DSLR, to create a small but high-quality interchangeable lens camera. By reducing its lens mount diameter, Olympus also enabled the production of smaller and lighter lenses to match the E-P1’s body size.
Beautifully Designed Stainless-Steel Body
The new camera’s high-end, stainless-steel body is easy to handle and carry, and has the styling and refinement of a precision watch. Its retro-chic look turns heads, from tech aficionados and camera buffs to the fashion-conscious and everyday point-and-shooter. Built to be solid, it fits comfortably in a jacket pocket or a handbag for a night on the town, or to take on any spontaneous adventure. The E-P1 lets you do more and go more places while capturing your life, thanks to its compact size – 4.75"(W) x 2.75" (H) x 1.43" (D) – and light 11.8-ounce body. Attention to detail is visible in every aspect of the camera’s retro-style metal body design, available in either silver or white with accompanying new small and lightweight Olympus M. ZUIKO Micro Four Thirds lenses: 14-42mm f3.5-5.6 (28-84mm equivalent) and 17mm f2.8 (34mm equivalent).
The new E-P1 offers many great features derived from the E-System, as well as many breakthrough innovations, including:
- Superior DSLR Image Quality
- In-body Image Stabilization
- Amazing 3-inch LCD
- Proven Dust Reduction System
- 12 megapixels with next-generation TruePic™ V
- HD video with high-quality stereo audio
- In-camera creative features (for still images and video)
- Multiple exposures
- Multi-aspect shooting
- Multimedia slideshows
- Digital leveler
- Magnified focus assist
- 18x18 metering modes
- Small accessories for small camera
Ultra-Compact Body Delivers Superior DSLR Image Quality
The E-P1 erases all doubts about whether a compact camera can take images that are equal to those taken by a DSLR, because it has everything you need to produce vibrant DSLR-quality images: a large 12.3-megapixel imager, In-body Image Stabilization, fast Imager Autofocus, the proven Olympus Dust Reduction System and the new TruePic™ V Image Processor.
As the first Micro Four Thirds camera from Olympus, the E-P1 provides the same image quality as current Four Thirds format E-System cameras because it has the same image sensor size as the E-30 and E-620 DSLR models, but in a much smaller body. This high-performance 12.3-megapixel Live MOS image sensor delivers excellent dynamic range, accurate color fidelity, and a state-of-the-art amplifier circuit to reduce noise and capture fine image details in both highlight and shadow areas.
Be a Mover, Not a Shaker
Any lens attached to the E-P1 will deliver blur-free images thanks to three modes of In-body Image Stabilization that compensate for up to four steps EV (exposure value). Mechanical Image Stabilization works to automatically compensate for camera shake in low light or when using a telephoto lens. And because the E-P1 is the world’s smallest interchangeable lens camera with built-in Image Stabilization, you’ll feel comfortable taking it on the road with you to capture the action.
Small Real Estate with an Amazing 3-Inch LCD View
What you see on the new camera’s 100 percent accurate, 3-inch full color HyperCrystal LCD is what you get. Consumers accustomed to composing and focusing using a point-and-shoot camera’s LCD will appreciate that the E-P1 offers the same easy, seamless experience when shooting still images or videos. With the new Live Control function, icons appear on the LCD, making it easy to compose, edit and shoot pictures or videos without stopping to access various menus. The E-P1’s fast Imager Autofocus in Live View also enables you to compose, focus and capture the shot quickly and easily without ever taking your eyes off the large LCD.
The LCD displays 230,000 pixels in vivid color and includes HyperCrystal technology, which offers many times the contrast of conventional LCD monitors for easier viewing in both preview and playback. It also provides a wide viewing angle of 176 degrees, which ensures that images can be composed from even the most obscure angles.
This Camera Leaves Others in the Dust
You don’t have to waste precious time worrying about dust ruining the perfect image; instead, spend more of that time shooting with the E-P1. The proven Olympus Dust Reduction System produces spot-free photos with the exclusive Supersonic Wave Filter™, a patented ultrasonic technology that vibrates to remove dust and other particles from the front of the image sensor, capturing it on a special adhesive membrane every time the camera is turned on.
Unleash 12 Million Pixels on Your Canvas
The E-P1’s Live MOS image sensor is complemented by Olympus’ next-generation TruePic™ V Image Processor, which produces clear and colorful photos using all the pixel information for each image to provide the best digital images possible. The new image processor is noted for accurate natural color, true-to-life flesh tones, brilliant blue skies and precise tonal expression; it also lowers image noise in photos shot at higher ISO settings (ISO 100 to an incredible ISO 6400), enabling great results in low-light situations.
What Will You Create with In-Camera Creativity in HD?
Olympus pioneered easy-to-use Art Filters for still images captured inside its E-System DSLRs, and now those same In-Camera Creative Features are built into the E-P1 with a fresh twist – they can also be applied to High Definition video recordings to take your videos to a new level of creative expression and put you in the director’s chair.
Your movies and YouTube videos will have the incredible clarity of HD whether Art Filters are applied or not. Just imagine how dramatic and unique your videos will appear with any one of the six in-camera Art Filters applied as effects: Pop Art, Soft Focus, Pale & Light Color, Light Tone, Grainy Film or Pin Hole. Whether you’re a videographer, documentarian or established director – or just want to shoot like one – Art Filters set your images and videos apart from the pack. Since they’re built into the camera, you can achieve dramatic results on the go without needing a computer or editing software.
Because the E-P1 is an interchangable lens system camera you have more creative options in composition for video capture, to add to your visual palette. You can attach any one of the new super-compact Micro Four Thirds lenses or, because the camera can accept many of the other Four Thirds Format lenses with an available MMF-1 Four Thirds System Lens Adapter, you can add anything from an extreme wide-angle fisheye lens to a super telephoto lens for a wide range of expressive options. All the while you will have more DSLR-like control over depth of field, focus, white balance and ISO.
What You See Is What You Get
When viewing the LCD in Live View, Art Filter effects and settings like white balance and exposure are viewable right on the LCD, and their impact is seen instantly on the display. This real-time monitoring offers amazing versatility and creative control, and users who apply a setting have instant gratification because what they see on the camera’s LCD is what they’ve captured. For musicians used to applying audio effects like reverb to their instruments before recording them, the concept of setting the E-P1 to capture precisely the kind of image they want before they press the shutter makes perfect sense. For imaging purists who want to shoot without filters, and apply them to unfiltered images inside the camera later, or just edit images back at their computers, the E-P1 provides these options and opens more in-the-field creative possibilities.
Mix It Up with Multiple Exposures
With the E-P1’s Multiple Exposure function available for still image capture you are free to tell a visual story your way, whether in a portrait, a landscape or a combination of both. The image capture options allow you to shoot one shot, then another and combine them in real time, or capture both shots separately and combine them in the camera later. Overlay your face on top of your pet’s face. Create an “identical twin” of yourself. Put the moon in the sky at noon. Your ability to manipulate space and time makes this new creative multimedia device a veritable time machine.
Frame Your Works of Art Inside the E-P1
You can often achieve greater photographic expression by framing a scene in a unique way. The E-P1 provides four aspect ratios that serve as masks to frame your image to the desired proportions, including: the standard 4:3 aspect ratio that is perfectly suited to an 8 x 10-inch enlargement; the 16:9 aspect ratio that will display your images beautifully on a widescreen television; and other popular aspect ratios such as 3:2 and 6:6. The Multi-Aspect Shooting further expresses your creative vision when combined with Art Filters and multiple exposures.
Stereo Audio Sounds As Good As the E-P1 Images Look
Like the innovative Olympus LS-10 portable audio recording device that puts the power of a recording studio in your pocket, the E-P1 features uncompressed 24 bit/96kHz Linear PCM recording capability to capture the rich sound quality of your scene. When you shoot with the E-P1, it’s like having a sound technician built into your camera to capture the nuances of the audio happening all around you. It has the versatility to record and play back in the WAV format and can record with its built-in stereo microphone. Whether recording audio while shooting a video or adding audio by recording a narration to your still images, the E-P1’s audio sounds as great as its images look.
Create Your Own Multimedia Slideshows with Stills, Video and Audio Inside E-P1
Content is king, and with the E-P1 you have your own portable kingdom of still images, HD video, and audio to remix at your command. In playback mode you can seamlessly mix stills and movies inside the camera to create a multimedia slideshow and dub in one of five built-in dramatic background music options to provide a soundtrack for your cinematic creation. Plug the E-P1 into any HD television with an HDMI cable and show off your masterpieces to your audience before the DVD arrives in stores.
As Easy to Use As a Point-and-Shoot with SLR-Quality Technologies
The E-P1 is equipped with 19 automatic scene modes for effortless picture taking. Standard scene modes like Night-Scene, Portrait and Landscape are easy-to-use solutions for everyday shooting. Capturing beautiful portraits is easy with the new ePortrait Mode. It enables you to smooth your subject’s face – all in the camera and before capture! Additionally, edits can be made post-capture using the ePortrait Fix mode.
Shooting scenes with both highlights and shadows can often be dicey because of the extreme contrast between dark and bright areas. The E-P1 addresses this challenge with Shadow Adjustment Technology that adjusts for extreme light variations and maintains visible detail in both the shadow and highlight areas of the scene. Now users can see and preview the gradation on the Live View LCD and capture images showing the shadow detail they saw. This feature is also accessible in the Edit menu after the shot has been taken.
The E-P1’s Face Detection reduces the chance of blurred subjects in images by recognizing up to eight people’s faces and the background, tracking the faces within the image area, even if people are moving, and automatically focusing and optimizing exposure for sharp, brilliant portrait pictures (ideal for large family or party group photos).
If you don’t want to change camera settings every time you’re shooting something different, then the E-P1’s Intelligent Auto Mode is for you. It automatically identifies what you are shooting (Portrait, Landscape, Night + Portrait, Macro, Sports) and adjusts settings to capture the best result depending on the situation. First-time users will enjoy this quick and hassle-free feature, which does the thinking for them and produces incredible images like a pro.
The New Super Control Panel with Live Control technology, along with the camera’s intuitive button layout, enables you to see both the image and the controls on the 3-inch HyperCrystal LCD, making the camera simple to use. The E-P1 records to SDHC media cards to accommodate large files including videos with In-Camera Creative Features and uncompressed audio.
Digital Leveler
The E-P1 is equipped with an internal Digital Level Sensor that detects the camera’s pitch and roll and indicates it on the control panel. This Digital Leveler is a tremendous benefit when capturing landscapes. Level the perfect coastline shot on your next tropical vacation without being tethered to a computer and editing software.
Magnified Focus Assist
To enable accurate manual focusing the E-P1 provides MF Assist Function and Magnification Display. In S-AF + MF or MF, the MF assist enables you to zoom up the central part of the image by up to 5 times by turning the focus ring. The Magnification Display lets you magnify the image on the LCD by up to 7X at the touch of a button. Additionally, if you use the dial, you can boost magnification all the way up to 10X for more precise manual focusing.
18x18 Metering Modes
This mode divides the image area into an 18 x 18 grid, metering each of the 324 separate cells to obtain optimum exposure. In addition to 324-division ESP metering, center-weighted metering and spot metering modes are also available.
Smaller Accessories for Small Camera
In addition to the new Micro Four Thirds lenses, Olympus also offers an optional Clip-on Optical Viewfinder for use with the Micro Four Thirds 17mm f2.8 (34mm equivalent) lens. The MMF-1 Four Thirds System Lens Adapter enables all Olympus ZUIKO Digital lenses as well as Four Thirds System lenses from Sigma, Panasonic and Leica lenses to attach to the E-P1. If you have Olympus OM lenses and want to attach them to the E-P1, that is possible with the MF-2 OM Lens Adapter. Additionally, an optional FL-14 flash unit, suitably small for the camera, adds more lighting versatility to your shots.
OLYMPUS Master 2 Software
Use the included OLYMPUS Master 2 software (Mac and PC) to easily download images from the camera or other external device, such as a USB drive, and automatically organize them into albums and groups and by date. Develop high-quality RAW images, apply Art Filter effects, edit and print images. Update camera and lens firmware through the software and download additional menu languages. A direct link makes uploading your images and videos to YouTube™ easier than ever.
OLYMPUS Studio 2 (Trial Edition Included)
Extend the capability of OLYMPUS Master 2 with OLYMPUS Studio 2. In addition to the functions of OLYMPUS Master 2, this software includes a lightbox mode and selection marks for comparing and sorting multiple images. RAW processing is enhanced with additional controls for finer adjustments. The trial edition can be used for 30 days after installation. After the trial period has expired, a license key is required for further use.
Availability
The Olympus E-P1 will be available in July 2009. It includes E-P1 Body, USB Cable, Video Cable, Li-Ion Battery Pack (BLS-1), Li-Ion Battery Charger (BCS-1), Shoulder Strap, OLYMPUS Master 2 Software CD-ROM, Manuals and Registration card.
U.S. Pricing / Product Configurations
E-P1 Body Estimated Street Price: $749.99
E-P1 Body with ED 14-42mm f3.5/5.6 Zuiko Digital Zoom Lens Estimated Street Price: $799.99
E-P1 Body with ED 17mm f2.8 with optical viewfinder Estimated Street Price: $899.99