Ricoh GR II Field Test
Big sensor, little camera: Ricoh's enthusiast compact is more connected than ever
By Mike Tomkins | Posted: 02/29/2016

In mid-2013, I was fortunate to be able to review the original Ricoh GR alongside its main rival, the Nikon Coolpix A. A couple of years down the road, the GR's successor is here in the form of the Ricoh GR II, and while this time there's no direct rival from Nikon -- the Coolpix A having been discontinued a year or so back -- I was nevertheless thrilled to get my hands on the new camera, and see how it compared to its predecessor.
Evolutionary rather than revolutionary
The Ricoh GR II is clearly very closely-related to its predecessor. In fact, the imaging pipeline is nearly untouched, with the same image sensor and processor used to shoot photos in the GR II as in the original GR.
It's so close that I'm only going to touch on handling, build and image quality very briefly in this field test, except as it pertains to the new features. You can read my Ricoh GR review for more detailed image quality analysis.
Fair ergonomics for such a relatively compact APS-C camera
In a nutshell, though, the Ricoh GR II's body is crafted from magnesium alloy, but in hand feels rather more like plastic with only a very slight amount of panel flex / creak noticeable. It's fairly light and comfortable in-hand, but lacks a true twin-dial design and has a rather cramped layout. The exposure compensation rocker control is also rather easy to bump, making accidentally-changed exposures a little too frequent.
 |
|
There's no lens ring, so manual focus adjustment can be a bit tedious unless you can first use autofocus to get you in the ballpark. And the menu system could use larger fonts and fewer items per page, as it can be a bit tricky to read under harsh sunlight. Although with that said, if you forgo the default settings, the LCD monitor is pretty bright -- more so than was that in the Nikon Coolpix A -- making it better visible than some under these conditions.
And on the plus side, the Ricoh GR II is a very customizable camera indeed, and performance is for the most part fairly good for this class. It also has good image quality, especially if you can stay below ISO 3200-equivalent. The GR II's lens is really good, with with great sharpness and detail-gathering, good contrast, and minimal aberrations or distortion. There's some vignetting, but I didn't find this too obtrusive in real-world shooting, and it's easily corrected in post-processing. With no optical low-pass filter, it's occasionally prone to moiré and false color artifacts, but that's true of most cameras at this sensor size nowadays.

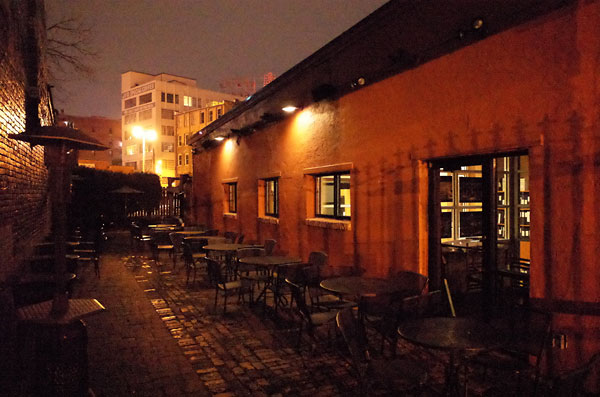
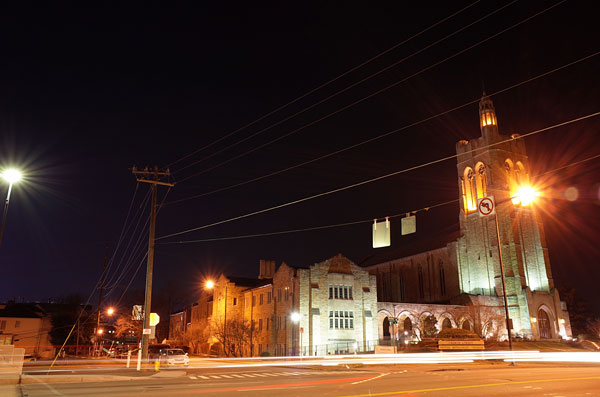
Of course, with a fixed prime lens, the Ricoh GR II does take some getting used to if you have a background shooting with zooms. You'll either need to zoom with your feet, or learn to look for photographic opportunities that are better-suited to a relatively wide 28mm focal length. But in a way, I've kind of come to see that as a positive thing: If the lens trains you to think more carefully about how to shoot your subjects, you start seeing framing possibilities you'd never have even given a second thought with a zoom lens.
A noticeably better raw-shooting experience
The only real change in imaging as compared to the earlier Ricoh GR is an improvement in the GR II's raw burst depth, something we've confirmed both in the lab and in the real world. The earlier camera was limited to just four raw frames, while the GR II can now manage around ten. That's a pretty significant difference, and should be more than ample in a camera that's unlikely to be used for sports shooting.
Of course, this change is only relevant if you are predominantly a raw shooter, as both cameras were capable of shooting unlimited bursts in JPEG mode. And there are a couple of other changes which will also affect only raw shooters.
Firstly, image quality on-screen when reviewing raw images is said to be better. As I said, I didn't have the original GR in-hand for a side-by-side comparison, but looking at raw images in comparison to JPEGs on the GR II's display, I was hard put to notice any difference in detail, sharpness and clarity. You should now be able to rely on the LCD to determine if your raw images are sharply-focused, and that's good news.
 |
|
A more film-like digital look for raw shooters
There's also a somewhat-new raw file-related option which bears a little explanation. Rather vaguely named "ambient brightness" and providing options of "normal" or "original", this is said by Ricoh to render images "with the ambient light quantities comparable to those of the GR film cameras". That's a direct quote from the user manual, incidentally, and left me none the wiser.
Before our GR II review sample arrived, I speculated that this was perhaps a vignetting control, and that's indeed what it seems to be. After shooting a few side-by-side comparisons, the only difference I really noticed was that images with the "Original" setting showed a little bit of vignetting that wasn't noticeable in otherwise-identical images shot with the "Normal" setting. Presumably, the intent here is to provide an image without the auto-correction wizardry typical of modern digital cameras -- and thereby satisfy those who miss the uncorrected feel of their GR film camera shots.
 |
|
Frankly, I didn't really feel the slight vignetting added much to the image, but which option you choose pre-capture really doesn't matter terribly much anyway, as you can opt to process raw images in-camera using either "Original" or "Normal" settings, regardless of which was selected prior to shooting the image.
Oh, and why did I refer to this feature as "somewhat new"? Well, because it's already available to Ricoh GR owners too, courtesy of the version 3.00 firmware update which landed in January 2014.
In-camera Wi-Fi that's much more open than most
Without a doubt, the biggest change in the Ricoh GR II is its support of in-camera Wi-Fi. The manner in which this achieved is totally different to most Wi-Fi-capable cameras on the market though. That has its strengths and weaknesses.
Most Wi-Fi-equipped cameras rely on the user also owning a smart device on one of the two dominant mobile operating systems -- Google's Android, and Apple's iOS. That's all fine and dandy if you happen to own one of those devices, as many of us do these days, but what if you are on Windows Phone, Symbian, Blackberry, or something else entirely? Or what if you'd like to work with your camera remotely from a desktop or notebook computer? Well, with most cameras you're simply out of luck in this case.
Not so the Ricoh GR II! The Wi-Fi connectivity of this camera is as close to brand-agnostic as its possible to be. The camera really doesn't care much which device type and operating system you're using, so long as it offers up a reasonably fully-featured web browser.
Easy NFC pairing for Android; Not quite as seamless with Apple
Thanks to an NFC antenna in the handgrip of the camera, the Ricoh GR II can direct Android smartphones and tablets to the Google Play store to download Ricoh's Image Sync app with a simple bump of the two devices against each other, orienting their NFC antennas to come in close proximity. If the app is already installed, it will instead be opened automatically after an NFC bump.
 |
|
If the app is already running, a bump of the two devices will cause the connection to be established, although I did need to first manually enable Wi-Fi on the camera. (The other functions work without intervention on the camera -- in fact, the battery doesn't even need to be installed for the passive antenna to work.)
We'll come back to the app itself in a moment, but first let's look at the situation on Apple devices. Users of iOS will also find a version of the same app in the iTunes store, should they want to use it, but they won't be able to take advantage of the NFC pairing. That's not Ricoh's fault, though: Apple has thus-far refused to open up the NFC radio in its latest devices for third-party use.
 |
|
With that said, it's still pretty easy to pair with devices that lack NFC. Just press-and-hold the Effect button on the left side of the camera body, which doubles as a Wi-Fi button if long-pressed. A Wi-Fi hotspot will be created by the camera, and you simply connect to this from your iPhone, iPad, computer or other device. You'll need a password to complete the connection, but this can be found in the Wi-Fi Information page of the Setup menu.
Image Sync is clumsy, and not well-suited to this camera
Once paired, the Ricoh Image Sync app allows you to transfer images to your phone with a minimum of fuss. The app has a three-tab design, with the first tab showing images already on your smart device, the second showing those on the camera, and the third providing access to remote control functionality -- at least, in theory. (We'll return to that in a moment.)
The interface -- on Android, at least; I don't own an iOS device -- isn't really optimized for tablets, though. It's locked in portrait orientation, and shows three columns of tiny thumbnails presented in a narrow strip down the center of the screen, with loads of unused space on either side. Open an image, and unless it is also in portrait orientation, most of your screen space is again wasted, with the image shown in landscape-orientation in the middle of the display.
It's also a bit on the laggy side, taking a half-second or so to respond to a pinch-zoom gesture. And the interface for transferring images is rather bewildering. There's a button used to select or deselect images, and once you tap this, you can click on grey tick-marks that appear on each image, turning them blue to indicate that the image will be transferred. Nowhere, though, is there a button to start the transfer.
Two buttons which at first glance might appear to be intended to start the transfer will actually take you to the app's Wi-Fi connection dialog (even though you're already connected), or will take you out of image selection mode (and in the process, lose your selections). Instead of these buttons, what you're supposed to do -- with no guidance whatsoever -- is to long-press on a thumbnail after making your selections.
 |
|
At this point, a circular array of eight buttons will appear, sometimes right under your finger, and other times in the middle of the screen. One of these buttons will delete images; another will transfer them. A third will set them up for transfer to Facebook immediately that they've been downloaded. The remainder of the buttons, in my setup at least, are completely blank. If you have certain social networking apps installed, these buttons will instead enable transfer to those networks -- but there's again nothing to tell you as much.
Perhaps the weakest point of the Image Sync experience with this particular camera, though, is the remote control tab. Switch to this, and you're simply shown a message stating that "This function is not supported". No explanation, no assistance of any kind -- and if you've bought the camera without cracking open the manual or reading a review, you might well now believe you've hit the end of the GR II's Wi-Fi features, when in actual fact you're not even close to seeing what's possible.
Image Sync is, frankly, a very obtuse and frustrating app to use, and I recommend skipping it entirely.
You'll want to skip NFC and apps; connecting can be a little complex but the result is going to be much more useful to you
Instead, what you want to do -- even though it may seem rather counterintuitive -- is to ignore the NFC antenna and Ricoh's provided app completely. There's a whole lot more that the Ricoh GR II can manage via Wi-Fi, but the app isn't going to get you any closer to it.
Instead, what you need to do is pair manually, just as I described above for Apple devices. Once paired, you'll want to switch to your web browser, from where you'll be controlling the camera.
 |
|
But there's another small catch, I'm afraid. Before you can control the camera remotely, you'll have to prepare your web browser -- at least, unless your smart device is capable of connecting to a Wi-Fi network and continuing to use its mobile data connection for internet access, that is. You'll need to visit a URL which is a bit of a mouthful -- http://www.ricoh-imaging.co.jp/english/products/gr_remote/app/latest-appcache/index.html -- and allow it to cache itself on your smart device. Then you'll want to bookmark this page, so you don't have to type its address in manually next time around.
(My devices don't support simultaneous connection to Wi-Fi and mobile data, so I can't test this myself, but I believe that with these devices you can simply visit the GR Remote page on Ricoh's site after pairing, and then click on the link labeled "GR Remote Initial start-up button", which will download the remote control page without needing to disconnect your Wi-Fi first.)
 |
|
Very comprehensive remote control, even from your laptop
The process of getting everything prepared and connected is perhaps a little unintuitive, but once you've achieved it all, the Ricoh GR II can do something few others can: Provide a remote live view, wirelessly, not just on your smart device but also on regular laptop or desktop computer. And not just to let you trip the shutter, either.
In fact, it's surprising just how many features of the camera you can control remotely. Alongside a live view that's a duplicate of what is shown on the camera's own screen -- including all of the overlays -- the Ricoh GR II will allow your remote device to control most any feature from a distance. You can even enter the menu system remotely and change settings to your heart's content.
A huge live view, but a very complex, busy interface
And on a laptop screen, the remote live view can be absolutely huge. On the 16:9-aspect, HP ZBook 15 DreamColor, the live view is shown at around 11 inches across by 8.5 inches vertically. In fact, it's roomy enough that the entire live view won't fit on screen at once, with around 1-1.5 inches altogether cut off at the top and/or bottom.
This can be resolved by adjusting the browser's zoom control, making the right-column controls larger and thus forcing the live view window to shrink. The downside is that you end up with huge buttons for the controls, and have to scroll up and down a little to fit these in. That's just the price you pay for working in a browser, where a responsive design is a bit more challenging than in an app, though.
For some reason, as well as the whopping 35 buttons shown at the right of the screen by default, a further 12 controls are hidden beneath the "Settings" button -- and they're not necessarily things you'd consider to be settings. For example, ISO sensitivity, flash and metering controls can all be found here. And when this submenu is opened, the live view is pushed a couple of inches off the left side of the screen, so you can't really leave it open at all times.
 |
|
The many, many controls on the right of the screen are, to say the least, a little disorganized. That makes them a little intimidating initially, especially because some have icons or names that don't exactly match those on-camera. Personally, I think it'd have been better to try and arrange these in the same basic arrangement that they share on the camera body, but with that said, you do get used to them reasonably quickly.
Wi-Fi range is fair, but not spectacular
And as I said, you've got a level of remote control far beyond what's possible with most cameras. Sadly, range was only around 40 feet or so with perhaps one wall in between camera and laptop, but third-party accessories should be able to increase this significantly. The remote live view feed has fair quality and is both fast and responsive when camera and laptop or smart device are near each other. (You do notice some compression artifacts, though, especially when using things like the menu system.)
 |
|
As you near the limits of the camera's Wi-Fi range, the feed does become choppy, but it remains fairly usable right up to within a few feet of the feed stopping altogether. Once the feed stopped, I did have to reload the page in the browser to get it back running, though.
On-camera controls almost all keep working under remote control
Clicking or tapping on the live view feed sets focus, and this was the only feature I noticed where the on-camera control didn't keep working too. (That is to say that you can't tap on the camera's LCD to set focus when remote live view is active.) Other controls, though, all remain active on the camera body, letting you choose whether to control from the camera or the remote device.
This can occasionally cause a little confusion, for example in that the Mode dial may not reflect what is shown on the live view feed if you change the mode remotely. If you spin the Mode dial after this, though, the physical dial takes over from the remotely-set value just fine.
Transferring images to your computer or phone is quick and easy
Once you're done shooting, getting your images onto the remote device is quick and easy. You can either hit the Quickview button to see the last shot (or optionally, the last nine shots) as small thumbnails, and clicking on these shows a mid-sized preview. Another click, and the image will transfer to your computer, even if it's a raw file or movie.
Alternatively, though, you can hit the menu icon at top left of the screen and switch to Viewer mode to review all content on the camera. These can be grouped by date, and transferred en masse if you want. The same menu also gives you access to options like syncing the camera's clock to the computer, checking on battery level, firmware version, storage status and more. You can even use tools like interval shooting, interval composite and slideshows from this menu, and put the camera to sleep, power it down or reboot it, all remotely.
The Ricoh GR II's Wi-Fi feature-set is impressive for its possibilities, if not its implementation
I find myself a little conflicted by the Ricoh GR II's Wi-Fi capabilities, if I'm honest. The interface and connection process is clumsy and feels rather rough around the edges, but once you get used to it, it does work. And I'm seriously impressed by the scope for remote control. It's near-unprecedented, especially in a camera this compact and affordable.
 |
|
On balance, I think despite those rough edges, it's a pretty darned good system for what it allows you to do, and for the fact that it doesn't leave everyone except Android and iOS users out in the cold. I'd really like to see Ricoh put some thought into cleaning up the interface, though, and making it a bit easier to access -- if only by providing an app for the dominant mobile operating systems that will set everything up, cache the browser page and provide a home screen shortcut to the right web page automatically.
Wireless off-camera flash lets you control the light
In my review of the original Ricoh GR, I noted that the company had adopted some Pentax conventions in its new camera. (If you're not familiar with the companies' history, Pentax was acquired by Ricoh in late 2011, some 18 months or so before the original GR was announced.)
For an example of the link between Ricoh and Pentax, note that the GR and GR II both use Pentax parlance for the main shooting modes -- that is to say, P, Av, Tv, and M, instead of the more common P, A, S, and M. They also include Pentax's TAv mode, which allows you to dial in both shutter speed and aperture, then let the camera attain the metered exposure by adjusting the ISO sensitivity.
Now, the integration between the two brands has gone another step further with the introduction of support for Pentax's wireless remote flash system in the GR II. Of course, there was already a hot shoe for external strobes, but this change takes things a step further. Now you can position the flash right where you want it, and the system works just as it would on your Pentax SLR.
At least, it works almost identically; there is one slight difference. The Ricoh GR II doesn't let you choose whether or not the onboard flash should take part in the exposure. In a Pentax DSLR, you'd be able to select either to have the onboard flash used only for remote flash control, or to have it both control the remote strobe(s) and also take part in the exposure itself.
 |
 |
|
Color Temperature Enhancement is also a Pentax-derived feature
Another feature derived from Pentax is the Ricoh GR II's latest white balance mode. Dubbed "Color Temperature Enhancement", this debuted in early 2009 with the Pentax K-7 DSLR. In a nutshell, what this does is to intensify the dominant color in the scene, rather than neutralizing it. It's the exact opposite of what white balance is typically used for, and can make your sunsets richer or your blue-hour shots cooler, and so on.
 |
 |
|
Even more effect options than ever
The original Ricoh GR offered quite a range of different image effects such as black and white, cross process, bleach bypass, and more. It started off with nine such effects, and was gifted two more -- slight and shift crop -- in firmware updates.
The GR II inherits all of these, along with six brand-new options: HDR Tone, Clarity, Brilliance, Vibrant, Bright and Portrait. They won't be for everybody's tastes, by any means, but they do increase the possibilities for artistic treatments you can apply to your images without the need for a computer. You can see examples of these below.
 |
|
Adjust focus and exposure during movie capture
A couple more tweaks to the Ricoh GR II can be found in its movie capture capabilities. On paper at least, the most important of these is probably autofocus during movie capture.
|
Where its predecessor, the GR, allowed autofocus only before capture started, the Ricoh GR II will allow either continuous autofocus or single autofocus operations during movie capture. I found the latter more useful, personally, as the continuous autofocus system was sometimes slow to react to significant changes in focus distance, occasionally taking as long as two or three seconds before it even began to rack to the new focus position. It also had a tendency to suddenly lose focus when panning.
|
The press of a thumbtip on the AE-L/AF-L/C-AF button was enough to prompt an immediate focus change when I specifically wanted it, though, and while the change in focus is very noticeable in the resulting video, it's still likely better than having to focus manually for consumer use.
|
Also new is the ability to adjust exposure compensation during movie capture, and this I found to be much more useful. The change in exposure happens gradually enough that it's not disconcerting, and the exposure compensation controls are perfectly positioned to make exposure changes without jostling the camera too much.
|
Battery life has been improved, too
The last change of note in the Ricoh GR II is its improved battery life. According to Ricoh, you'll now get around 10% more frames on a charge than in the original GR. Unfortunately, as I've already said, I didn't have both cameras in-hand at once to make a precise comparison.
However, I'd say that the manufacturer-rated figure of 320 shots with 50% flash usage seems reasonable to me. The Ricoh GR II was able to get me through an afternoon's shooting most of the time, but I did run out the battery once or twice in a single afternoon's shooting, particularly when using Wi-Fi remote control extensively. That's pretty typical for cameras in this class, though, and if anything the GR II does a little better than most.
Grab an extra battery pack or two and you'll be just fine, although you will probably want to buy a standalone charger at the same time, since the GR II charges batteries in-camera by default.
 |
|
 Fujifilm GFX 50S Review
 Fujifilm X-T3 Review
 Olympus E-M5 III Review

Follow Imaging Resource