
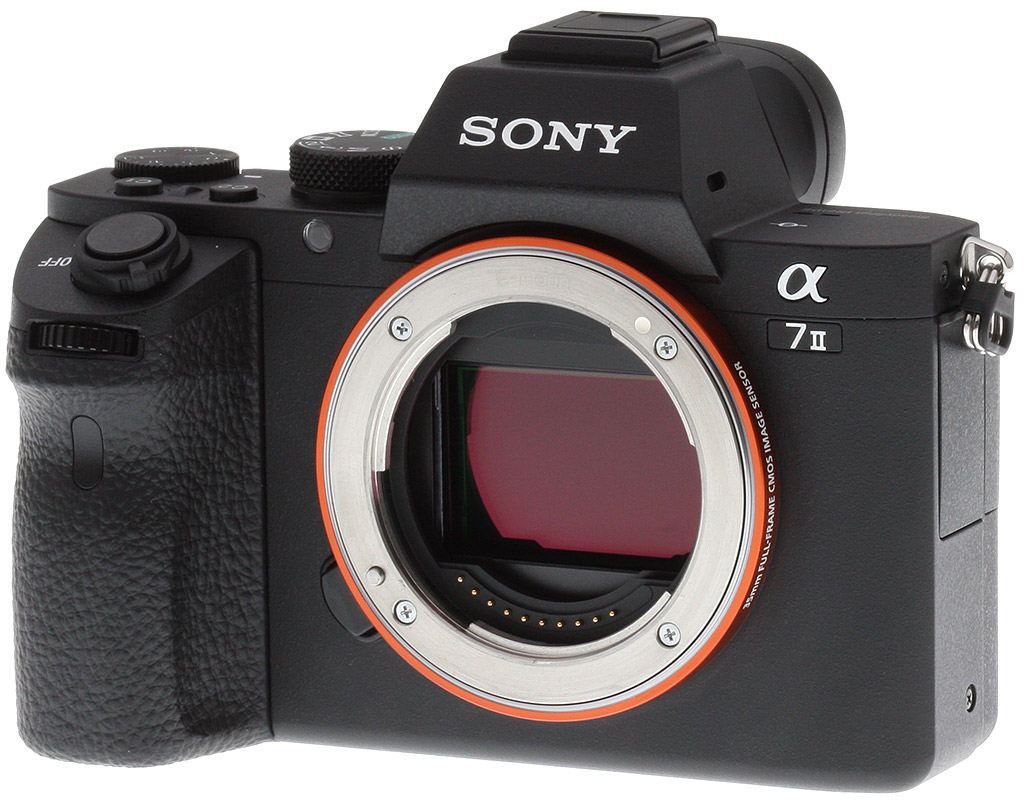


Overview
Forbidden
You don't have permission to access /_fragment on this server.
Optics
The Sony A7 II ships body-only or bundled with the FE 28-70mm f/3.5-5.6 OSS lens. Since we've already posted test results with this lens in our Sony A7 review's Optics page we won't repeat them here. However, we do have viewfinder coverage results...
Viewfinder Test Results
Coverage
Excellent accuracy from the EVF and LCD monitor.


The Sony A7 II's OLED electronic viewfinder and LCD monitor both show 100% coverage with our FE 55mm f/1.8 prime lens. Excellent performance.
The images above were taken from our standardized test shots. For a collection of more pictorial photos, see our Sony Alpha ILCE-A7 II Photo Gallery .
Exposure
Color
Saturation & Hue Accuracy
Typical saturation levels and hue accuracy.
 |
||||
|
ISO Sensitivity
|
||||
| In the diagram above, the squares show the original color, and the circles show the color that the camera captured. More saturated colors are located toward the periphery of the graph. Hue changes as you travel around the center. Thus, hue-accurate, highly saturated colors appear as lines radiating from the center. Mouse over the links to compare ISOs and click on a link for a larger version. | ||||
Saturation. The Sony A7 II's mean default color saturation is 111.2% at base ISO or in other words, oversaturated by 11.2%. That's about average these days. Mean saturation remains fairly stable across the ISO range, dropping gradually as sensitivity rises to a minimum of 107.6% at maximum ISO. Reds, dark blues and dark green are boosted the most, but not as much as we often see. Most other colors are pushed just a bit, though yellow, light green and aqua are slightly undersaturated which is quite common. Overall, saturation levels are quite pleasing to our eyes, and you can of course tweak saturation to your liking. Most consumer digital cameras produce color that's more highly saturated (more intense) than found in the original subjects. This is simply because most people like their color a bit brighter than life.
Skin tones. The Sony A7 II does fairly well with Caucasian skin tones when white balance is adjusted to match the lighting. Brighter flesh tones have a healthy-looking pinkish tint, though darker areas are nudged slightly toward orange. Still, pretty realistic results here. Where oversaturation is most problematic is on Caucasian skin tones, as it's very easy for these "memory colors" to be seen as too bright, too pink, too yellow, etc.
Hue. Like many cameras, the Sony A7 II shifts cyan toward blue, red toward orange, orange toward yellow and yellow toward green, but shifts are relatively minor. (The cyan to blue shift is actually fairly minor and very common among the digital cameras we test; we think it's a deliberate choice by camera engineers to produce better-looking sky colors.) With an average "delta-C" color error of 5.45 after correction for saturation at base ISO, overall hue accuracy is about average, with accuracy only moderately lower at higher ISOs. Hue is "what color" the color is.


Sensor
Exposure and White Balance
Indoors, incandescent lighting
Warm cast with Auto white balance; Incandescent is pretty good, and Manual is very good. Average exposure compensation required.


Indoors, under normal incandescent lighting, color balance is too warm and orange with the Auto white balance setting, though results here are slightly better than average. Results with the Incandescent setting are quite good and only slightly warm. Results with the Manual setting are the most accurate, though just slightly cool. The Sony A7 II required +0.3 EV positive exposure compensation here, which is about average for this shot. (Our test lighting for this shot is a mixture of 60 and 100 watt household incandescent bulbs, a pretty yellow light source, but a very common one in typical home settings here in the U.S.)
Outdoors, daylight
Excellent results under harsh lighting, with very good handling of contrast, color, and exposure.
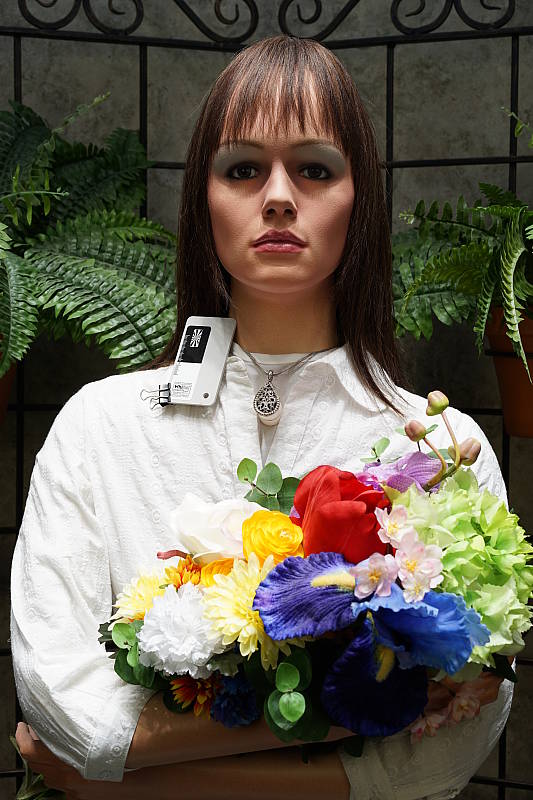
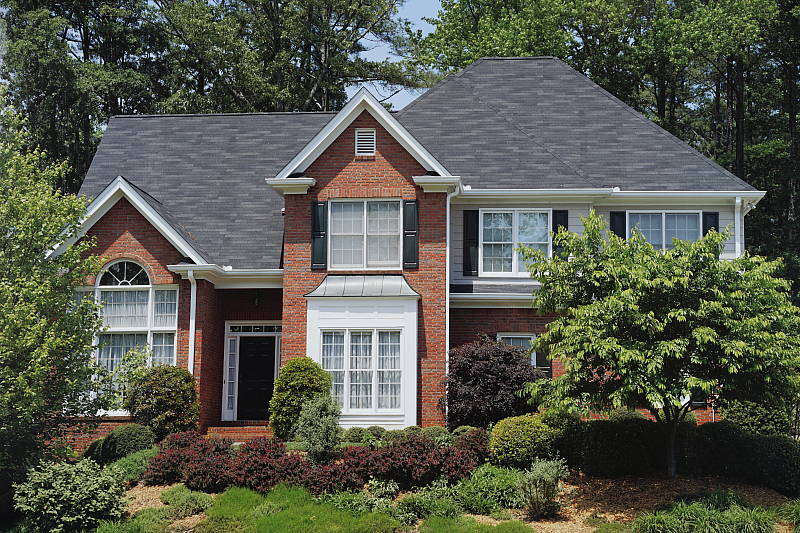
Outdoors, the Sony A7 II performed very well. +0.7 EV exposure compensation was required to keep the mannequin's face bright in our "Sunlit" Portrait shot, which is average among the cameras we've tested. Contrast is a little high as you might expect under such harsh lighting, but despite the bright appearance, the camera does a great job of holding onto detail in both the shadows and bright highlights, even without the help of DRO. We preferred Manual color balance for our "Portrait" shot, though Auto white balance produced very similar results. Default exposure is just slightly underexposed in our Far-field shot, but with very few highlights blown or shadows lost, again with DRO disabled. Shadows were remarkably clean, though some very deep ones had a blue tint to them. The Far-field shot with Auto white balance has very good color, just a touch cool. Overall, great performance in harsh lighting, especially considering DRO was off for these shots.
See full set of test images with explanations
See thumbnails of all test and gallery images
Resolution
Very high resolution, ~2,850 to ~2,900 lines of strong detail from JPEGs, about the same from RAW files.

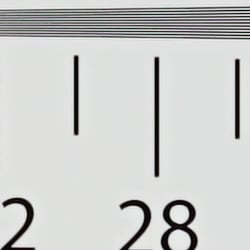


In-camera JPEGs of our laboratory resolution chart reveal sharp, distinct line patterns down to about 2,900 lines per picture height in the horizontal direction and to about 2,850 lines per picture height in the vertical direction. Complete extinction of the pattern didn't occur until about 3,600 lines in both directions. Adobe Camera Raw wasn't really able to extract more resolution here from matching RAW files, but it produced a lot more color moiré and false colors as it often does at and above the limits of resolution. Use these numbers to compare with other cameras of similar resolution, or use them to see just what higher resolution can mean in terms of potential detail.


The Sony A7 II's in-camera JPEG showed much lower levels of color moiré than its predecessor's JPEG, though some odd horizontal artifacts can be seen in areas with vertical detail, which may be the result of color moiré suppression possibly interacting with phase-detect AF pixels (hints of similar artifacts can be seen from the A7 but not from the A7R). We doubt these artifacts will be an issue in the vast majority of real-world images, though. See the Aliasing Artifacts section below for more.
See full set of test images with explanations
See thumbnails of all test and gallery images
Sharpness & Detail
Excellent detail and sharpness, with very few sharpening artifacts (at low ISOs). Mild noise suppression visible in the shadows and areas of low contrast.


Sharpness. The Sony A7 II captures very sharp, crisp and detailed images overall, and it doesn't leave behind heavy sharpening halos around edges with high contrast that we often see around the lines and letters of our bottle label crop (above left). The A7 II's RAW images don't need a lot of sharpening because of the weak optical low pass filter, but Sony really has done an excellent job with the A7 II's low-ISO JPEG processing. Edge enhancement creates the illusion of sharpness by enhancing colors and tones right at the edge of a rapid transition in color or tone.
Detail. The crop above right shows fairly mild noise suppression in the darker areas of the model's hair. A number of low-contrast strands are smudged together, though higher contrast strands are distinct, though as you can see some suffer from the "jaggies" (see below). Still, excellent results here considering the resolution. Noise-suppression systems in digital cameras tend to flatten-out detail in areas of subtle contrast. The effects can often be seen in shots of human hair, where the individual strands are lost and an almost "watercolor" look appears.


Aliasing Artifacts. As mentioned previously the Sony A7 II captures sharp, detailed images thanks to its high resolution and weak optical low pass filter, but that means it's also susceptible to moiré and other aliasing artifacts when used with a sharp lens.
As you can see in our Still Life shots, luminance moiré patterns can for instance be seen in the red-leaf fabric. Compared to another 24-megapixel full-frame camera with a stronger anti-alias filter (the Sony A99 in the table above for example, though its transmissive mirror may also be contributing a slight low-pass filter effect), you'll immediately notice the A7 II's crop contains aliasing artifacts in the form of a wavy moiré pattern that the A99's crop does not contain (both images are at ISO 100 taken with our very sharp Sigma 70mm f/2.8 Macro lenses at f/8).
With the increasing trend of using either a very weak or no optical low pass filter, quite a few cameras produce similar artifacts these days, and the A7 II's JPEG processing engine actually does a good job at suppressing aliasing-related false colors in our Resolution target. But it's not fool proof as we've shown, and luminance moiré is much more difficult to deal with. That's something to be aware of especially if you shoot a lot of man-made subjects with repeating patterns, such as buildings, fabrics, etc. Techniques than can be used to reduce aliasing include shooting at a smaller aperture so that lens diffraction acts as an anti-alias filter, defocusing slightly, shooting at higher ISOs, and post-processing particularly with RAW files.
RAW vs In-Camera JPEGs
As noted above, the Sony A7 II produces in-camera JPEGs with lots of crisp detail. Additional detail can often be obtained from carefully processing RAW files with a good converter, so let's have a look at base ISO:
| Base ISO (100) | |
 |
 |
 |
 |
 |
 |
|
Camera JPEG, defaults
|
RAW via Adobe Camera Raw
|
In the table above, we compare an in-camera JPEG taken at base ISO using default noise reduction and sharpening (on the left) to the matching RAW file converted with Adobe Camera Raw 8.7 using default noise reduction with some moderate but tight unsharp masking applied in Photoshop (200%, radius of 0.3 pixels, and a threshold of 0).
As you can see, the Adobe Camera Raw conversion contains more fine detail, even revealing some of the threads in our challenging red-leaf fabric, but it also reveals a bit more luminance noise in flat areas. You can always turn up the luminance noise reduction (default of zero was used here), though noise levels are already quite low. Also note the moiré pattern in the red-leaf pattern in both images.
Bottom line: Although Adobe Camera Raw is able to extract more fine detail, the Sony A7 II's JPEG engine does a very good job at low ISOs, with a great balance of fine, crisp detail, low noise, and low sharpening artifacts straight out of the camera.
ISO & Noise Performance
Improved noise reduction, but still over-processed at high ISOs.
|
Default High ISO Noise Reduction
|
 |
 |
 |
| ISO 50 | ISO 100 | ISO 200 |  |
 |
 |
| ISO 400 | ISO 800 | ISO 1600 |
 |
 |
 |
| ISO 3200 | ISO 6400 | ISO 12,800 |
 |
||
| ISO 25,600 | ||
The Sony A7 II's JPEG images are quite clean and extremely detailed at ISOs 50 though 400, with almost no image degradation as ISO rises within this range. ISO 800 is slightly softer though fine detail is still excellent. ISO 1600 is the first sensitivity step that shows any significant blurring of fine detail, but detail retention is still very good. ISO 3200 is softer as you'd expect, however fine detail is still quite good, however images start to take on a more processed look, though the A7 II's noise reduction processing appears to be a little more refined compared to its predecessor. At ISO 6400 fine detail takes a bigger hit though there's still some left, and chroma noise artifacts starts to appear in the form of yellow and purple blotches in the shadows. ISO 12,800 is significantly noisier and sharpening combined with strong noise reduction give the image a somewhat hammered look in darker areas and shadows, though hard edges aren't as rough and haloed as we saw with the A7. Almost all fine detail in the hair is lost at ISO 25,600 and the image looks almost like a painting with a stippled effect and strong chroma blotching.
It appears as though default noise reduction processing has improved slightly over the A7, though images still look over-processed at high ISOs when viewed on screen at 100%. Overall, the A7 II offers very good high ISO performance, though some full-frame DSLRs do significantly better. As always, see the Print Quality section below for maximum recommended print sizes at each ISO.
A note about focus for this shot: We shoot this image at f/4 since the scene isn't brightly lit as it's in typical indoor lighting. To insure that the hair detail we use for making critical judgements about camera noise processing and detail rendering is in sharp focus at the relatively wide aperture we're shooting at, the focus target at the center of the scene is on a movable stand. This lets us compensate for front- or back-focus by different camera bodies, even those that lack micro-focus adjustments. This does mean, though, that the focus target itself may appear soft or slightly out of focus for bodies that front- or back-focused with the reference lens. We know this; if you click to view the full-size image for one of these shots and notice that the focus target is fuzzy, you don't need to email and tell us. :-) The focus target position will have been adjusted to insure that the crop area of the scene is focused properly.
Extremes: Sunlit, dynamic range and low light tests
Very high resolution with excellent highlight and shadow detail. Very good low-light performance, capable of capturing bright images in near darkness.


Sunlight. The Sony A7 II handled the deliberately harsh lighting in the test above brilliantly. We preferred the +0.7 EV exposure here, as the +0.3 EV exposure is a touch dim in the face while the +1.0 EV exposure is a bit too bright. Contrast is a little high, but shadow and highlight detail are both very good. Despite the bright appearance, few highlights are blown in the model's shirt and face at +0.7 EV, though the red channel is clipped in some of the flowers as is often the case, and in specular highlights where you'd expect clipping. There are some dark shadows however they're quite clean, though very deep shadows are posterized as expected. Overall, excellent performance here.
For best results, be sure to use fill flash in situations like the one shown above; it's better to shoot in the shade when possible. See below for results with Dynamic Range Optimization and High Dynamic Range features enabled.
Because digital cameras are more like slide film than negative film (in that they tend to have a more limited tonal range), we test them in the harshest situations to see how they handle scenes with bright highlights and dark shadows, as well as what kind of sensitivity they have in low light. The shot above is designed to mimic the very harsh, contrasty effect of direct noonday sunlight, a very tough challenge for most digital cameras. (You can read details of this test here. In actual shooting conditions, be sure to use fill flash in situations like the one shown here; it's better to shoot in open shade whenever possible.)
| Face Detection | ||
 |
 |
 |
| Aperture Priority, 0 EV Face Detection Off |
Aperture Priority, 0 EV Face Detection On |
Auto Mode, 0 EV |
Face Detection. Like most cameras these days, the Sony A7 II has the ability to detect faces (up to 8 in a scene), and adjust exposure and focus accordingly. As you can see from the examples above, face detection worked as expected in Aperture Priority at f/8, producing a brighter image than without it by reducing the shutter speed from 1/40 to 1/25s (that's a bit slow for handheld and the type of subject, but it had little other choice since the aperture and ISO was manually selected). Full Auto mode is a bit better than Aperture Priority without face detection, however it is still a bit dim. It selected a larger aperture of f/5 while maintaining a relatively fast shutter speed of 1/100s, and automatically applied DRO (see below) to reduce overall contrast.


Dynamic Range Optimization is Sony's name for their dynamic range enhancement technology. DRO divides the image into small areas, analyzes the range of brightness of each area, and adjusts the camera's image processing parameters accordingly to make the best use of the available dynamic range. Auto DRO is enabled by default on the Sony A7 II. You can also set the level manually, from 1 ("weak") to 5 ("strong"), or turn it off. As one would expect, DRO is only available for JPEG files.
The above thumbnails and histograms show the effects of the various levels of DRO on our "Sunlit" Portrait shot with no exposure compensation. Mouse over the links on the right to load the associated thumbnail and histogram, and click on the link to visit the full resolution image. As you can see from the thumbnails and associated histograms, increasing DRO progressively boosts shadows and midtones while leaving highlights essentially intact, though boosting shadows does make noise slightly more visible. The Auto setting did a pretty good job overall, and the five manual levels give quite a bit of control over the effect.

Above, you can see the effect of DRO settings on our Far-field shot. The default Auto setting produced a nicely balanced exposure, despite the harsh lighting. A useful feature.


High Dynamic Range. The Sony A7 II's HDR mode takes three images in rapid succession, one nominally exposed , one underexposed, and one overexposed, then combines them into one high dynamic range JPEG automatically. Lighter areas from the underexposed image are combined in-camera with darker areas from the overexposed image to produce an image with compressed tonal range. The camera then saves a single composite image, as well as the nominally exposed image. The overlaid images are micro-aligned by the camera, but it can only correct for so much movement. If it can't micro-align successfully, an icon indicating HDR capture failed will appear. For best results, the subject should not move or even blink, so it's not really intended for portraits. There is also a manual mode where you can select 1 EV ("weak") to 6 EV ("strong") difference in exposures.
Mouse over the links to load the associated thumbnail and histogram, and click on the link to visit the full resolution image. As you can see, the Auto setting did a decent job, similar to the 3 EV manual setting. The higher the manual setting, the more highlights were toned-down and shadows opened up, but as you can see higher settings can produce flat and unnatural results with this subject.
Above, you can see the effect of HDR settings on our Far-field shot. Watch out for ghost images from subject movement during the capture sequence, though, as can be seen in some of the shots above.
(Note: The Far-field DRO and HDR shots were mistakenly taken at f/18 and ISO 6400; we'll retake these once the weather cooperates.)
Dynamic Range Analysis (RAW mode). While we once performed our own dynamic range measurements based on in-camera JPEGs as well as converted RAW images (when the camera was supported by Adobe Camera Raw), we've switched to using DxO Labs' results from their DxOMark website. As technology advanced, the dynamic range of modern high-end cameras in some cases exceeded the range of the Stouffer T4110 density scale that we used for our own measurements. DxO's approach based on RAW data before demosaicing is also more revealing, because it measures the fundamental dynamic range of the sensor, irrespective of whatever processing is applied to JPEGs, or to RAW data by off-the-shelf conversion software.
In the following, we use DxO's "Print" dynamic range results, which are scaled based on camera resolution. As the name suggests, this scaling corresponds to the situation in which you print at a given size, regardless of how many megapixels the camera might have. (In other words, if you've decided to make a 13x19 inch print, that's the size you're printing, whether the camera's resolution is 16 or 300 megapixels.) For the technically-minded, you can find a discussion of the reasoning behind this here on the DxOMark website. Also note that DxO Labs uses a signal-to-noise (SNR) threshold of 1 when defining the lower boundary of acceptable luminance noise in their dynamic range measurements, which corresponds to the "Low Quality" threshold of the Imatest software we used to use for this measurement.

The Sony A7 Mark II's dynamic range performance is very similar to its predecessor, the A7, so here we compare the Sony A7 II to the Nikon D750 and Canon 5D Mark III full-frame DSLRs.
As you can see from the above graph (click for a larger image), the A7 II's dynamic range isn't quite as high as the D750's at most ISOs, with the D750 producing about 14.5 EV at base ISO versus the A7 II's 13.6 EV, which is almost a full EV advantage for the Nikon. The Sony does however catch up at ISOs 400 through 1600, but then the D750 retakes a slight lead up until ISO 25,600 where they are both essentially the same.
The Sony A7 II's dynamic range is however dramatically better than the Canon 5D Mark III's at lower ISOs with an almost 2 EV advantage at base ISO (13.6 vs 11.7 EV), though at ISO 1600 and above, the two cameras perform roughly equivalently, with the Canon even pulling ahead slightly at ISOs 6400 and 12,800.
Click here to visit the DxOMark page for the Sony A7 II for more of their test results and additional comparisons.
| 1 fc 11 lux |
1/16 fc 0.67 lux |
1/16fc No NR |
|
|---|---|---|---|
| ISO 100 |
 2s, f2.8 |
 30s, f2.8 |
 30s, f2.8 |
| ISO 3200 |
 1/15s, f2.8 |
 1s, f2.8 |
 1s, f2.8 |
| ISO 25600 |
 1/125s, f2.8 |
 1/8s, f2.8 |
 1/8s, f2.8 |
Low Light. The Sony A7 II performed well in our low light tests, producing usable exposures with very low noise down to the lowest light level we test at (1/16 fc) at base ISO of 100. Noise is well-controlled at ISO 3200, though as expected, at the highest ISO of 25,600 luminance noise is high and blotchy chroma noise can be seen in darker areas. With noise reduction minimized (right-most column), noise "grain" is quite fine and tight and not too objectionable except at the highest ISOs.
We found a few hot pixels, particularly when long exposure noise reduction is turned off (where you'd expect to find them), but nothing significant. We didn't detect any significant issues with banding (pattern noise), however some minor heat blooming can be seen emanating from the bottom of the frame in longer exposures at the highest ISOs. That's not unusual, though.
Auto white balance did a very good job here, producing a fairly neutral, just slightly cool color balance.
The Sony A7 II's autofocus system was able to focus on our target down to the 1/8 foot-candle light level unassisted with an f/2.8 lens. That's fair for a mirrorless, but not as good as most DSLRs. However with the AF illuminator enabled, the camera was able to focus in complete darkness. This of course will vary with subject type and distance.
How bright is this? The one foot-candle light level that this test begins at roughly corresponds to the brightness of typical city street-lighting at night. Cameras performing well at that level should be able to snap good-looking photos of street-lit scenes. (A useful trick is to just prop the camera on a convenient surface, and use its self-timer to release the shutter. This avoids any jiggling from your finger pressing the shutter button, and can work quite well when you don't have a tripod handy.)
NOTE: This low light test is conducted with a stationary subject, and the camera mounted on a sturdy tripod. Most digital cameras will fail miserably when faced with a moving subject in dim lighting. (For example, a child's ballet recital or a holiday pageant in a gymnasium.) Thanks to its larger sensor and Hybrid AF, compact system cameras like the Sony A7 II tend to do better than point & shoots, but you still shouldn't expect a quick autofocus lock with moving subjects.
Output Quality
Print Quality
Excellent 30 x 40-inch prints or larger at ISO 50/100; ISO 3200 images look good at 13 x 19; ISO 12,800 images make a good 5 x 7.
 ISO 50 and 100 images look excellent at 30 x 40 inches or larger until you run out of resolution, with super-sharp detail and rich color across the board, even at handheld distances. Wall-display prints look great even up to 40 x 60 inches.
ISO 200 and 400 prints also look superb at 30 x 40 inches. There's excellent detail, nice color, and no trace of noise or noise suppression artifacts.
ISO 800 images look quite good at 24 x 36 inches, with only the slightest hint of noise in flatter areas and mild softening in reds. 20 x 30-inch prints are fantastic, and eliminate virtually all of these minor concerns.
ISO 1600 shots show a slight pattern of luminance and chrominance noise in the shadows, but you have to look closely to make it out -- even at 20 x 30 inches, which is a nice size for this ISO. Detail is still quite sharp except in our tricky red swatch, which most cameras typically have trouble with. 16 x 20-inch prints tighten up a lot more and are superb.
ISO 3200 prints at 13 x 19 inches start to show a light grain pattern in the shadows, with reds becoming a bit softer. We can still give this size our "good" rating, but for ultra-critical prints at this sensitivity you'd be better to remain at 11 x 14 inches.
ISO 6400 images almost make the grade at 11 x 14, but there is just a bit too much noise in flatter areas with default noise reduction to call them "good". Certainly OK for less critical applications, but we can call 8 x 10s good, and that's still a nicely-sized print for this sensitivity.
ISO 12,800 prints will work for less critical applications at 8 x 10 inches and almost warrant our "good" seal, which is really amazing. 5 x 7's are quite good for most-any application, and colors still look nice, retaining good overall saturation for this sensitivity.
ISO 25,600 prints are a bit on the soft side in general, but will work for a decent 4 x 6, which is not bad!
With the same 24.3MP full-frame sensor and BIONZ X image processor as the original A7, it's no surprise that print quality results are the same. The A7 II delivers excellent results in the print quality department, as expected. At base sensitivity and up to ISO 400, 30 x 40-inch prints look outstanding indeed (with larger prints certainly capable until you run out of resolution). And while not of the super-crisp caliber of the 36MP big brother A7R, they're still world class and among the best for the 24-megapixel resolution. There is a noticeable downturn in quality and a rise in noise beginning at ISO 3200, but it's nice to know that even at ISO 6400 you can still achieve a good quality 8 x 10 inch print. And well done again Sony for producing a decent print even at the highest-rated sensitivity!
The images above were taken from our standardized test shots. For a collection of more pictorial photos, see our Sony Alpha ILCE-A7 II Photo Gallery .
Not sure which camera to buy? Let your eyes be the ultimate judge! Visit our Comparometer(tm) to compare images from the Sony Alpha ILCE-A7 II with those from other cameras you may be considering. The proof is in the pictures, so let your own eyes decide which you like best!
Performance
Timing and Performance
Generally good performance, but startup and buffer clearing are still slow.
| Startup/Play to Record | ||
|---|---|---|
| Power on |
~1.7 seconds
|
Time it takes to turn on and capture a shot. |
|
Play to Record, |
~1.0 second
|
Time until first shot is captured. |
Powerup to first shot was still somewhat sluggish, but improved over the 2.1 seconds we measured for the A7. Switching from Play to Record mode and taking a shot was however a bit slower than the A7, at about one second versus about 0.7 second.
| Shutter Response (Lag Time) | ||
|---|---|---|
|
Full Autofocus, |
0.221 second
|
Time from fully pressing shutter button to image capture, with the lens already at the proper focal distance setting. (AF timing performed with the Sony FE 35mm f/2.8 lens.) |
| Manual Focus |
0.151 second
|
For most cameras, shutter lag is less in manual focus than autofocus, but usually not as fast as when the camera is "prefocused". |
|
Prefocused |
0.053 second
|
Time to capture, after half-pressing and holding shutter button. |
Looking at the Sony A7 II's ability to determine that it's properly focused when shooting the same, static target multiple times without defocusing between shots (our standard test), its autofocus speeds were good for a CSC, and about average compared to most consumer DSLRs. The Sony A7 II's full-autofocus shutter lag (with the subject at a fixed distance) was 0.221 second in Single-area (center) AF mode. This is very similar to the 0.227 second result we got for the A7. With electronic first curtain disabled (enabled is the default), full AF shutter lag increased to 0.359 second.
When manually focused, the Sony A7 II's lag time dropped to 0.151 second, which is good, but a bit slower than the 0.132 second we got for the A7. The Sony A7 II's prefocused shutter lag was 0.053 second which is also good, but oddly once again slower than the A7's 0.023 second.
To minimize the effect of different lens' focusing speed, we test AF-active shutter lag with the lens already set to the correct focal distance.
| Cycle Time (shot to shot) | ||
|---|---|---|
|
Single Shot mode |
0.74 second
|
Time per shot, averaged over a few frames (we no longer test for buffer depths in single-shot mode). |
|
Single Shot mode |
0.79 second
|
Time per shot, averaged over a few frames (we no longer test for buffer depths in single-shot mode). |
|
Early shutter |
No
|
Some cameras refuse to snap another shot if you release and press the shutter too quickly in Single Shot mode, making "No" the preferred answer. |
|
Continuous Hi mode |
0.20 second (5.00 frames per second);
52 frames total; 36 seconds to clear* |
Time per shot, averaged over buffer length of 52 frames, then slows to an average of 0.88s or 1.14fps when buffer is full. |
|
Continuous Hi mode |
0.20 second (5.00 frames per second);
28 frames total; 15 seconds to clear* |
Time per shot, averaged over buffer length of 28 frames, then slows to an average of 0.69s or 1.44fps when buffer is full. |
|
Continuous Hi mode |
0.20 second (5.01 frames per second);
24 frames total; 21 seconds to clear* |
Time per shot, averaged over buffer length of 24 frames, then slows to an average of 1.02s or 0.98fps when buffer is full. |
|
*Note: Buffer clearing times measured with a SanDisk Extreme Pro 95MB/sec UHS-I SDHC card. Slower cards will produce correspondingly slower clearing times. Slow cards may also limit length of bursts in continuous mode. ISO sensitivity and noise reduction settings can also affect cycle times and burst mode performance.
|
||
Single-shot cycle time was about 0.7 second when shooting Large/Extra Fine JPEGs. This increased slightly to 0.8 second when shooting RAW+ Large/Fine JPEG files. This is a little sluggish compared to most DSLRs, but pretty good for a CSC and very similar to the A7.
The Sony A7 II's Continuous Hi burst mode is rated at 5 fps, and our lab results agree. Note that continuous AF is supported in burst mode, and Sony no longer calls it Speed Priority Continuous mode so there shouldn't be any aperture limitations. While not quite as fast as most full-frame DSLRs this isn't bad considering the resolution and price point. There's also a Continuous Lo mode rated at 2.5 fps, but we didn't test that mode.
Buffer depths were very good at 52 frames for Large/Extra Fine JPEGs, 28 for RAW and 24 for RAW+Large/Fine JPEGs (like many Sonys, the A7 Mark II does not support RAW + Extra Fine JPEGs). In Continuous Lo mode, buffer depths are likely even better. Note that our target for this test was designed to be difficult to compress, so maximum JPEG burst lengths should be even longer with typical subjects.
Buffer clearing times were slow even with our fast UHS-I card, but perhaps not unreasonable given the deep buffers and file sizes, ranging from 15 seconds after 28 RAW files to 36 seconds after 52 Large/Extra Fine JPEGs.
Bottom line, the Sony A7 II's overall performance is generally good for its class, however while Startup time was a bit better than its predecessor it's still slow, as is buffer clearing. We were not able to validate Sony's ~30% faster autofocus claim, however we do not defocus between trials in our AF lag tests.
Battery Life
Fair battery life for a Compact System Camera.
| Operating Mode | Battery Life |
|---|---|
|
Still Capture,
(CIPA standard, EVF) |
270 shots
|
|
Still Capture,
(CIPA standard, LCD Monitor) |
340 shots
|
The Sony A7 II uses a custom NP-FW50 rechargeable lithium-ion battery pack for power, and comes with both a single battery and AC adapter for in-camera charging via USB. The battery is rated for 270 shots when using the electronic viewfinder and 340 shots per charge when using the LCD monitor, when tested according to the CIPA standard. Battery life is fair compared to typical CSCs though pretty good considering its size and sensor, but poor compared to most DSLRs. We definitely recommend getting a second battery for your A7 II if you plan any extended outings or shoot a lot of video. An optional VG-C1EM vertical grip is available which doubles battery life with two batteries.
The table above shows the number of shots the camera is capable of (on a fully-charged rechargeable battery), based on CIPA battery-life and/or manufacturer standard test conditions.
(Interested readers can find an English translation of the CIPA DC-002 standards document here. (180K PDF document))
Image Quality
Below are crops comparing the Sony A7 II with the Sony A7, Canon 6D, Fujifilm X-T1, Nikon D610 and Samsung NX1. All of these models sit at relatively similar price points and/or categories in their respective product lineups as advanced enthusiast or professional-level cameras.
NOTE: These images are best quality JPEGs straight out of the camera, at default settings including noise reduction and using the camera's actual base ISO (not extended ISO settings). All cameras in this comparison were shot with our very sharp reference lenses. Clicking any crop will take you to a carrier page where you can click once again to access the full resolution image as delivered straight from the camera. For those interested in working with the RAW files involved, click these links to visit each camera's respective sample image thumbnail page: Sony A7 II, Sony A7, Canon 6D, Fujifilm X-T1, Nikon D610 and Samsung NX1 -- links to the RAW files appear beneath those for the JPEG images, wherever we have them. And remember, you can always go to our world-renowned Comparometer to compare the Sony A7 II to any camera we've ever tested.
Sony A7 II vs Sony A7 at Base ISO
 |  |
 |  |
 |  |
Sony A7 II at ISO 100 | Sony A7 at ISO 100 |
No surprises here that the image quality is practically identical between the original A7 and the A7 II. With both cameras sharing the same 24.3MP full-frame sensor and BIONZ X image processor, the base ISO images are crisp, vibrant and full of fine detail. | |
Sony A7 II vs Canon 6D at Base ISO
|  |
|  |
|  |
Sony A7 II at ISO 100 | Canon 6D at ISO 100 |
This is an interesting comparison with both cameras producing lots of fine detail, but the Sony does noticeably better with the mosaic, while the Canon does a bit better with the tone-on-tone detail in the red fabric. Despite having a low-pass filter, we can see some moiré pattern interference in the red fabric in the A7 image. The Sony, however, does do considerably better with detail in the pink fabric. | |
Sony A7 II vs Fujifilm X-T1 at Base ISO
|  |
|  |
|  |
Sony A7 II at ISO 100 | Fujifilm X-T1 at ISO 200 |
Pitting a 24.3 full-frame camera against a 16.3 APS-C camera is a little unfair, but the two cameras have similar form-factors, and the X-T1's unique X-Trans sensor is known to produce fantastic images, so we thought this could be an interesting comparison. In all three comparisons, both cameras produce lots of sharp, fine detail, but the Fuji struggles in the pink fabric and just doesn't have the "pop" of the sharpness from the Sony (which could be in part due to differences in their in-camera sharpening). | |
Sony A7 II vs Nikon D610 at Base ISO
|  |
|  |
|  |
Sony A7 II at ISO 100 | Nikon D610 at ISO 100 |
Similar to what we saw with the A7R vs D800E, it appears that the Sony is applying a bit more in-camera sharpening versus the Nikon. Both cameras produce a lot of fine detail, and both do great with the red fabric. The Sony wins with the pink fabric in this comparison. Sony has made huge strides in their JPEG processing, and particularly with how they can create dramatically sharp images without creating halos or outlines around objects. | |
Sony A7 II vs Samsung NX1 at Base ISO
|  |
|  |
|  |
Sony A7 II at ISO 100 | Samsung NX1 at ISO 100 |
Despite having a smaller sensor, the 28MP NX1 is able to produce very high-res images and give the full-frame A7 II a run for its money here at base ISO. Fine detail on the bottle and mosaic crops from both cameras are very impressive and rater evenly matched. The fabric swatches however show the biggest difference. Pink fabric detail is excellent from both cameras, but while the A7 II shows some moiré interference, the NX1 is cleaner but displays slightly less fine detail. | |
Most digital SLRs and CSCs will produce an excellent ISO 100 shot, so we like to push them and see what they can do compared to other cameras at ISO 1600, 3200, and 6400. Recent advances in sensor technology have made ISO 1600 look a lot more like ISO 100, but there are still cameras whose quality starts to fall apart at this setting. We also choose 1600 because we like to be able to shoot at least at this level when indoors and at night.
Sony A7 II vs Sony A7 at ISO 1600
 |  |
 |  |
 |  |
Sony A7 II at ISO 1600 | Sony A7 at ISO 1600 |
Again, both cameras here at ISO 1600 display very clean, highly detail images, with very little, if any, difference between the two. | |
Sony A7 II vs Canon 6D at ISO 1600
|  |
|  |
|  |
Sony A7 II at ISO 1600 | Canon 6D at ISO 1600 |
The default noise reduction from the Canon in the first crop seems to be just a hair cleaner and smoother than the Sony, but it's quite minor. Both cameras retain lots of fine detail in the mosaic, with the Sony in the lead thanks to its excellent sharpening, and both do almost equally well with the red fabric (though the edge goes to Canon with a better leaf pattern). | |
Sony A7 II vs Fujifilm X-T1 at ISO 1600
|  |
|  |
|  |
Sony A7 II at ISO 1600 | Fujifilm X-T1 at ISO 1600 |
The smaller sensor of the Fuji holds up surprisingly well here at ISO 1600. There's more grain in the bottle crop from the Fuji (but not an extreme amount), and the Sony produces crisper detail in the mosaic. However, the Fuji is able to produce a much more distinct red leaf pattern. The overall win goes to the Sony, but it's frankly surprising how well the X-T1's smaller sensor does here. | |
Sony A7 II vs Nikon D610 at ISO 1600
|  |
|  |
|  |
Sony A7 II at ISO 1600 | Nikon D610 at ISO 1600 |
This is a bit of a mixed comparison, with no clear winner. The Sony does better at cleaning up high ISO noise with their default level of noise reduction in the bottle crop, and also produces crisper detail in the mosaic. However, Nikon does markedly better with the red fabric, while the Sony handles the pink fabric much better. Apart from its handling of the red fabric, we'd give the nod to the Sony A7 II here. | |
Sony A7 II vs Samsung NX1 at ISO 1600
|  |
|  |
|  |
Sony A7 II at ISO 1600 | Samsung NX1 at ISO 1600 |
The NX1's default noise reduction processing is taking an aggressive stance toward noise at this ISO, and the artifacts from this processing are quite visible in the bottle crop and really reduces fine detail rendering in the fabric swatches. All told, the A7 II takes the crown in this comparison set, though that's no surprise given the NX1's smaller sensor. | |
Today's ISO 3200 is yesterday's ISO 1600, so below are the same crops at ISO 3200.
Sony A7 II vs Sony A7 at ISO 3200
 |  |
 |  |
 |  |
Sony A7 II at ISO 3200 | Sony A7 at ISO 3200 |
Looking very closely, you can see slight differences in the A7 II's NR processing compared to its predecessor. However, by and large, again, the images at ISO 3200 are strikingly similar. There's still a great amount of fine detail and low noise at this higher ISO level. | |
Sony A7 II vs Canon 6D at ISO 3200
|  |
|  |
|  |
Sony A7 II at ISO 3200 | Canon 6D at ISO 3200 |
The Sony does a bit better with the mosaic crop in terms of fine detail, but the Canon looks slightly cleaner with noise in the bottle crop and does slightly better with the red fabric. A toss-up, really, depending on what you're looking for. We'd personally probably go with the A7 II, but others might as easily pick the 6D. | |
Sony A7 II vs Fujifilm X-T1 at ISO 3200
|  |
|  |
|  |
Sony A7 II at ISO 3200 | Fujifilm X-T1 at ISO 3200 |
Both bottle crops here looking very similar with both cameras doing equally well at controlling high ISO noise. The Sony does better with fine detail in the mosaic crop, while they both struggle with the red fabric pattern. Again, advantage Sony, but we're surprised by how well the X-T1 does, given the difference in sensor sizes. | |
Sony A7 II vs Nikon D610 at ISO 3200
|  |
|  |
|  |
Sony A7 II at ISO 3200 | Nikon D610 at ISO 3200 |
Interestingly, the high ISO noise starts to hurt the image quality from the Nikon, which you can see in both the bottle and mosaic crops. The Sony shows less noise and is able to produce a lot of fine detail in the mosaic. As before, the Nikon does better with the red fabric, while the Sony handles the pink fabric better. | |
Sony A7 II vs Samsung NX1 at ISO 3200
|  |
|  |
|  |
Sony A7 II at ISO 3200 | Samsung NX1 at ISO 3200 |
The strong NR processing is really the NX1's big downfall here in this comparison. The A7 II still displays great control of noise, while displaying a lot of fine detail, despite having NR processing enabled by default. The NX1 however has a lot of fine detail smoothed away by noise reduction processing here, but again, keep in mind the NX1's much smaller photosites. | |
Sony A7 II vs. Sony A7, Canon 6D, Fujifilm X-T1, Nikon D610, Samsung NX1
 |  |  |  |  |  |
 |  |  |  |  |  |
 |  |  |  |  |  |
| Sony A7 II ISO 100 ISO 3200 ISO 6400 | Sony A7 ISO 100 ISO 3200 ISO 6400 | Canon 6D ISO 100 ISO 3200 ISO 6400 | Fujifilm X-T1 ISO 200 ISO 3200 ISO 6400 | Nikon D610 ISO 100 ISO 3200 ISO 6400 | Samsung NX1 ISO 100 ISO 3200 ISO 6400 |
| Detail comparison. High-contrast detail is also important, pushing the camera in different ways, so we like to look at it too. Both the Sony A7 II and A7 show a fantastic amount of high-contrast detail all the way from ISO 100 to ISO 6400. There is also a difference in the default level of contrast applied to in-camera JPEG across these different models and brands. While all cameras here do well in the ISO 100 comparison, both of the Sonys really pull out ahead with much-improved sharpness. It's even more noticeable as the ISO rises, with ISO noise taking its toll on fine detail and contrast. The Canon 6D does quite well at the higher ISO levels as does the Samsung NX1, but the Sony A7 II really maintains a high level of fine detail, contrast and low noise at the higher ISO sensitivities. | |||||
Excellent 30 x 40-inch prints or larger at ISO 50/100; ISO 3200 images look good at 13 x 19; ISO 12,800 images make a good 5 x 7.
ISO 50 and 100 images look excellent at 30 x 40 inches or larger until you run out of resolution, with super-sharp detail and rich color across the board, even at handheld distances. Wall-display prints look great even up to 40 x 60 inches.
ISO 200 and 400 prints also look superb at 30 x 40 inches. There's excellent detail, nice color, and no trace of noise or noise suppression artifacts.
ISO 800 images look quite good at 24 x 36 inches, with only the slightest hint of noise in flatter areas and mild softening in reds. 20 x 30-inch prints are fantastic, and eliminate virtually all of these minor concerns.
ISO 1600 shots show a slight pattern of luminance and chrominance noise in the shadows, but you have to look closely to make it out -- even at 20 x 30 inches, which is a nice size for this ISO. Detail is still quite sharp except for our tricky red swatch, which most cameras typically have trouble with. 16 x 20-inch prints tighten up a lot more and are superb.
ISO 3200 prints at 13 x 19 inches start to show a light grain pattern in the shadows, with reds becoming a bit softer. We can still give this size our "good" rating, but for ultra-critical prints at this sensitivity you'd be better to remain at 11 x 14 inches.
ISO 6400 images almost make the grade at 11 x 14, but there is just a bit too much noise in flatter areas with default noise reduction to call them "good". Certainly OK for less critical applications, but we can call 8 x 10s good, and that's still a nicely-sized print for this sensitivity.
ISO 12,800 prints will work for less critical applications at 8 x 10 inches and almost warrant our "good" seal, which is really amazing. 5 x 7's are quite good for most-any application, and colors still look nice, retaining good overall saturation for this sensitivity.
ISO 25,600 prints are a bit on the soft side in general, but will work for a decent 4 x 6, which is not bad!
With the same 24.3MP full-frame sensor and BIONZ X image processor as the original A7, it's no surprise that print quality results are the same. The A7 II delivers excellent results in the print quality department, as expected. At base sensitivity and up to ISO 400, 30 x 40-inch prints look outstanding indeed (with larger prints certainly capable until you run out of resolution). And while not of the super-crisp caliber of the 36MP big brother A7R, they're still world class and among the best for the 24-megapixel resolution. There is a noticeable downturn in quality and a rise in noise beginning at ISO 3200, but it's nice to know that even at ISO 6400 you can still achieve a good quality 8 x 10 inch print. And well done again Sony for producing a decent print even at the highest-rated sensitivity!
Field Test
---
Apologies for any inconvenience, but we're running an experiment, and have moved our Sony A7 II Field Test back to the camera's home page. Click here to go directly to it.
---
High ISO Noise Reduction
Sony A7 II High ISO Noise Reduction
The Sony A7 II offers only three High ISO Noise Reduction settings: "Off", "Low" and "Normal" (default). The user manual doesn't say at what sensitivity High ISO Noise Reduction begins to be applied, so we've included crops from ISO 50 on up to find out.
See for yourself how the the default and lowest noise reduction settings compare to RAW files with no noise reduction or sharpening applied. Click on any of the crops below to see the corresponding full-sized image.
| High ISO Noise Reduction Comparison In-Camera JPEGs vs RAW Simulated Daylight |
|||
|
Normal
|
Off
|
RAW (No NR)
|
|
| I S O 5 0 |
 |
 |
 |
 |
 |
 |
|
 |
 |
 |
|
|
Normal
|
Off
|
RAW (No NR)
|
|
| I S O 1 0 0 |
 |
 |
 |
 |
 |
 |
|
 |
 |
 |
|
|
Normal
|
Off
|
RAW (No NR)
|
|
| I S O 2 0 0 |
 |
 |
 |
 |
 |
 |
|
 |
 |
 |
|
|
Normal
|
Off
|
RAW (No NR)
|
|
| I S O 4 0 0 |
 |
 |
 |
 |
 |
 |
|
 |
 |
 |
|
|
Normal
|
Off
|
RAW (No NR)
|
|
| I S O 8 0 0 |
 |
 |
 |
 |
 |
 |
|
 |
 |
 |
|
|
Normal
|
Off
|
RAW (No NR)
|
|
| I S O 1 6 0 0 |
 |
 |
 |
 |
 |
 |
|
 |
 |
 |
|
|
Normal
|
Off
|
RAW (No NR)
|
|
| I S O 3 2 0 0 |
 |
 |
 |
 |
 |
 |
|
 |
 |
 |
|
|
Normal
|
Off
|
RAW (No NR)
|
|
| I S O 6 4 0 0 |
 |
 |
 |
 |
 |
 |
|
 |
 |
 |
|
|
Normal
|
Off
|
RAW (No NR)
|
|
| I S O 1 2 8 0 0 |
 |
 |
 |
 |
 |
 |
|
 |
 |
 |
|
|
Normal
|
Off
|
RAW (No NR)
|
|
| I S O 2 5 6 0 0 |
 |
 |
 |
 |
 |
 |
|
 |
 |
 |
|
As you can see, the Sony A7 II's High ISO Noise Reduction already has a noticeable effect at sensitivities as low as ISO 50, and the "Off" setting really isn't off (which is usually the case for all cameras).
With default noise reduction, you can see signs of the A7 IIs area-specific algorithm as it leaves high-frequency detail (and noise) around edges which can give them a somewhat rough, haloed look at higher ISOs, but the effect isn't quite as noticeable as its predecessor. Sony has also fixed the bug where the "Off" setting blurred our red-leaf swatch more than the default setting at ISO 800 through 6400, and the rendering of the that swatch is improved over the A7 at moderate to high ISOs with reduced smudging.
As we saw with the A7, moiré patterns in the red-leaf swatch are quite visible, indicating the A7 II is equipped with a weak optical low-pass filter.
Overall, there appears to be very slightly improved high ISO performance in raw data over the A7, and the A7 II's noise reduction has also improved but it's still overly aggressive at high ISOs.
Conclusion
| Pro: | Cons: |
|---|---|
|
|
Overall, the Sony A7 II shares many similarities to the original A7 with regards to our lab performance and testing. See more Pros & Cons in our Sony A7 Review Conclusion. |
|
Sony is going all out with their full-frame mirrorless camera series; first with a high-res base model and an even higher-res model, and then with an ultra-low-light, 4K-capable model. Now, they've circled back around a year later to update the original, base-model A7. With the new A7 Mark II, Sony has kept the same imaging pipeline with a very good, high resolution 24.3-megapixel sensor and BIONZ X image processor, so basic image quality performance remains practically identical to its predecessor, which is to say, very good.
The big change, however, is that Sony took this large full-frame sensor and added sensor-shift image stabilization. The A7 II is the world's first 5-axis image stabilization system in a full-frame mirrorless camera. Sony claims the IS system will provide up to 4.5 stops of correction, and the system is also designed to work in concert with Sony's optically-stabilized glass when such lenses are used. We found the A7 II's "SteadyShot INSIDE," as Sony calls it, works very well, for both stills and stationary, handheld video. For run-and-gun video, or other video with lots of camera movement, however, the IS system did not show significant improvement over non-stabilized footage. But, for stills, especially low-light and macro photography, or video shooting without a tripod, the 5-axis IS system was very impressive.
The new Sony A7 II also underwent a much-welcomed cosmetic upgrade, with improved ergonomics and control layout. The addition of the sensor-shift IS system increases the bulk of the A7 II ever-so-slightly compared to the original A7, but Sony deepened the handgrip for a more comfortable and secure hold. Most notably, though, is the rearrangement of the shutter release button and front control dial to more natural, more comfortable locations. The new button placement also left space for Sony to add an additional customizable button -- win-win! The A7 II also borrows the beefier, all-metal lens mount and flange from the A7S for added durability and stability, which is especially important when using longer, heavier lenses.
Performance remains largely unchanged on the Mark II, though some aspects have improved. Start-up time which was quite sluggish -- even frustrating at times -- on the original A7 is noticeably better, though it's still not what we'd call fast. And while we weren't able to corroborate Sony's claims of 30% faster AF and 1.5x improved tracking performance in the lab, in real-world shooting, the A7 II's AF performance nevertheless felt quick and speedy -- even when shooting difficult, fast-paced subjects like indoor basketball in continuous AF mode. As with many mirrorless cameras -- even those with hybrid AF systems like the A7 II -- autofocus can however struggle or slow down with low-contrast and dimly-lit subjects.
Video specs also get a nice boost, borrowing the higher bitrate XAVC S format option from the A7S -- though, like the A7S, you require a SDXC card in order to enable XAVC S mode. You also gain S-Log2 gamma for maximum dynamic range, time code and clean HDMI output up to 1080/60p with simultaneous internal recording and uncompressed 4:2:2 8-bit output. However, unlike the A7S, there's no 4K recording or 4K output via HDMI on the A7 II.
Overall, Sony has yet another winner on their hands with the A7 II. By addressing some of the design quirks of the original model, as well as providing a notable technological achievement with their 5-axis image stabilization -- and some subtle, yet worthwhile, performance enhancements -- the Sony A7 II is a more matured, more well-rounded camera and an easy choice as a Dave's Pick.
Follow Imaging-Resource.com on Twitter!