Have more time for photography by automating your Lightroom processing
posted Monday, December 14, 2015 at 11:56 AM EDT
If you've ever been processing and editing images in Lightroom and thought, "Wow, this is taking forever…," then photographer Viktor Elizarov has just the guide for you.
Elizarov starts out by describing that feeling of helplessness that many of us have experienced when faced with a massive backlog of images that need to be sorted and processed. After experiencing this with over 5,000 images from a trip to Hawaii, California, and the Southwest, Viktor started to analyze his editing habits in Lightroom. What he realized was that for all of his images, about 80% of the edits he does are identical.
By taking this 80% and automating it, he was able to dramatically reduce the amount of time he spent in front of his computer. Less time on the computer means more time for taking actual photos, something every photographer yearns for. Lightroom Presets out of the box are not quite what he was looking for, however, so he adopted a two-level editing approach. Level one involves using a style-based preset such as cool or warm, cross processed or natural, contrasted or soft, that defines the overall look of an image. The second level is adjustment presets that fine-tune an image without changing the style defined in the first level.
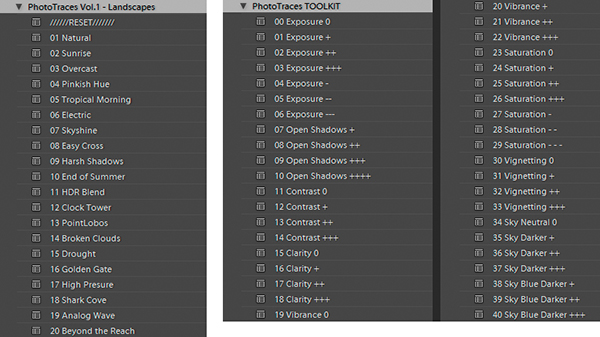
After selecting his style, he has a collection of 40 presets to choose from that affect specific parameters of an image. These presets are stackable so he can apply multiple presets without overwriting any of his previous selections. When he's done with this process, he saves the entire process as a snapshot in Lightroom and is free to try out alternative presets on the same image. By streamlining his editing process, he has more time to explore alternative ways to process images or capture new images.
All of Viktor's Lightroom presets are available for free download here. For a guide on how to use these free Lightroom presets, see here.
I downloaded and tried out the presets for myself. Viktor has an installation guide that made the process very simple. After getting them installed, I decided to try them out on an image I took earlier this fall. I never quite decided on how to process the image earlier, so it seemed like a good candidate for trying out these presets.
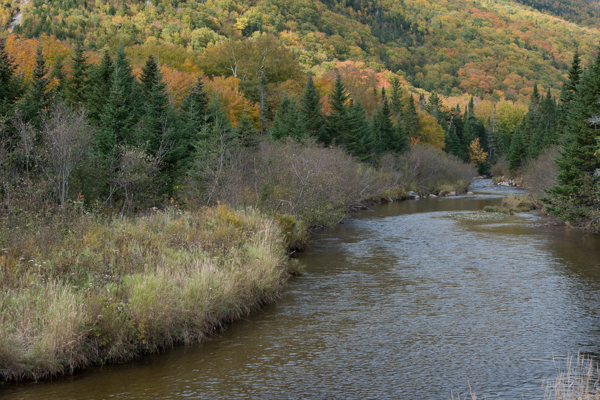
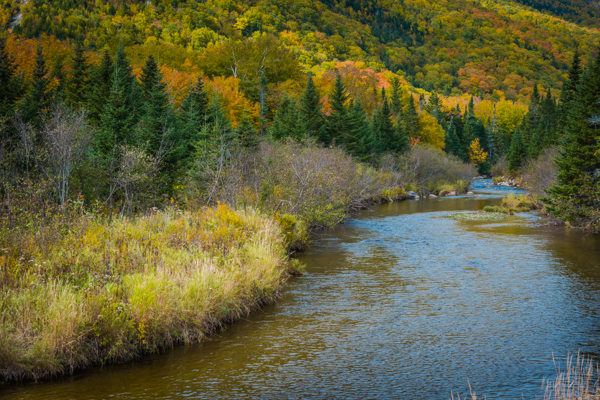
The entire edit took me less than half a minute by applying the 'Natural' style and then adding Exposure++, Clarity+, Vibrance++, Sky Blue Darker++ (to make the background trees darker), and Contrast+.
Be sure to visit Viktor Elizarov's site for more tutorials and to see his work.
(Seen via Digital Photography School)