=================================================================
To subscribe, unsubscribe or change your email address, visit:
http://www.imaging-resource.com/IRNEWS/index-subs.html
Support the Newsletter!
- Find the best price for anything at http://ir.pricegrabber.com
- Shop Amazon, Adorama at http://www.imaging-resource.com/buynow.htm
=====================================================
THE IMAGING RESOURCE DIGITAL PHOTOGRAPHY NEWSLETTER
=====================================================
Volume 16, Number 7 - 4 April 2014
----------------------------------------------------------------------
Copyright 2014, The Imaging Resource. All rights reserved.
----------------------------------------------------------------------
Welcome to the 384rd edition of The Imaging Resource Newsletter!
Welcome to your regularly scheduled Imaging Resource Newsletter for April 4th! In this edition, we start things off with two hot shooter's reports. First, Mike Tomkin's writes up experiences with the Fujifilm X-T1 in Hong Kong! Then, William Brawley takes us through shooting sports, wildlife and long exposures with the Olympus E-M10 in the second installment of his shooter's report.
On the feature side, we've got a double header in this issue. The first is a big interview (so big, it's only Part I, in fact) from Dave Etchells' trek over to Japan for CP+. He sat down with Sigma CEO Kazuto Yamaki to discuss all things Sigma, including Global Vision lenses and their new dp2 Quattro camera. We also have the follow-up and conclusion to photographer Josh Cogan's trek through Bhutan and his experience with mobile charging solutions.
In the Quick Hits section, you'll find a pair of new first shots -- the hot new Sony A6000 and Canon's large-sensor compact, the G1 X Mark II. We also have a review of the new Sony FE 24-70mm f/4 Zeiss lens.
Finally, we share some of the most popular news stories from this past week, including a look at all the Canon gear that goes into filming VICE Media's HBO documentary series, some stunning aerial photos taken the "hard way" and a brief roundup of some of the biggest camera-related April Fools shenanigans.
Happy reading!
TOPICS
----------
- Get Social with IR
- Sponsors
- Reviews:
- Fujifilm X-T1 Shooter's Report Part I
- Olympus E-M10 Shooter's Report Part II
- Feature:
- Sigma Q&A from CP+, excerpt
- The Journey to Bhutan, Part II by Joshua Cogan
- Quick Hits:
- First Shots: Sony A6000; Canon G1 X Mark II
- Lens Review: Sony FE 24-70mm f/4 Zeiss
- Popular News
- Next Issue
- Signoff
GET SOCIAL WITH IR
---------------------------
If you want to stay up-to-date with the latest camera and photography news, get notified when IR posts its latest camera or lens review, and much more, get social with us on your favorite networking sites by:
By doing so, you'll also be supporting our efforts to deliver the best camera and photography content on the planet. (Google in particular appears to pay lots of attention to Google+ in deciding site/page relevance for its search results, so "circling" us there and +1-ing our site and pages would be an especially big help.) Thanks! We appreciate it!
SPONSORS
--------------
This issue is sponsored in part by the following companies. Please show your appreciation by visiting the links below. (Visiting our sponsor's links really helps support this newsletter, thank you for your attention!) And now a word from our sponsors:
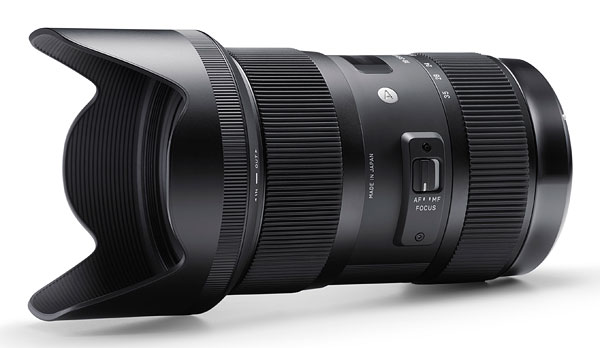
* Sigma *
------
Sigma's approach to photographic equipment is based on quality, craftsmanship, value, customization and
responsibility to photographers and the environment. All encompassed in our breakthrough, award winning
Global Vision lenses:
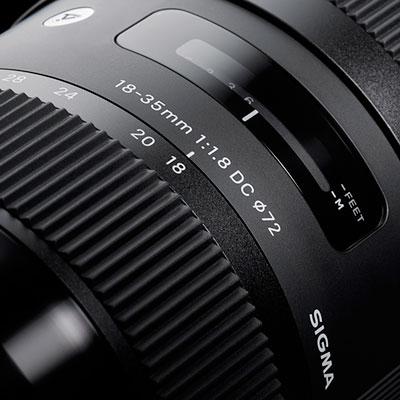
18-35mm F1.8 DC HSM
35mm F1.4 DG HSM
17-70mm F2.8-4 DC Macro OS HSM
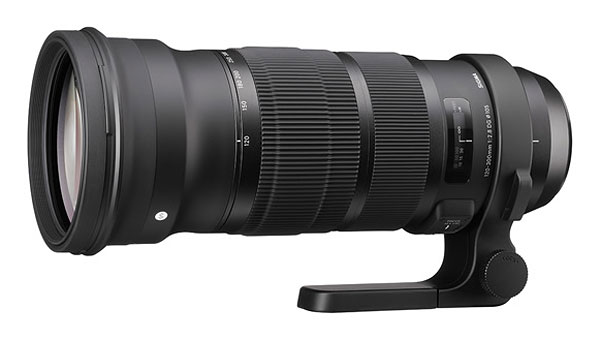
120-300mm F2.8 DG OS HSM
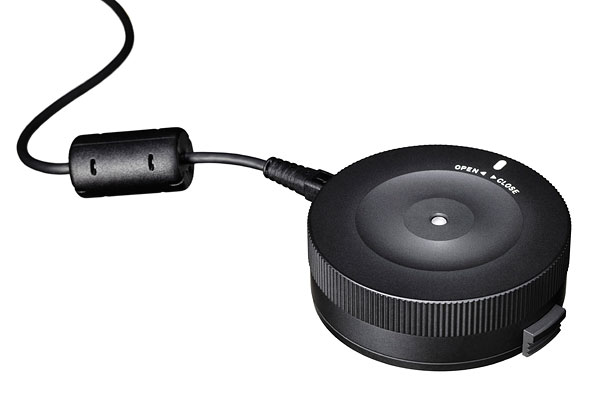
USB Dock
All designed to deliver the highest optical quality and performance.
-----------------------------------------------------------------------------------------------------
Are you in the digital photo business? This newsletter is read by more than 47,000 direct subscribers (plus additional pass-along readers), all with a passion for digital photography. For information on how you can reach them, contact us at editor@imaging-resource.com.
-----------------------------------------------------------------------------------------------------
Camera Review: Fujifilm X-T1 Shooter's Report, Part I
by Mike Tomkins
Part I -- Bright lights, big city
|
When it was time�for an overseas trip, the Fuji X-T1's trim body seemed like the ideal companion. |
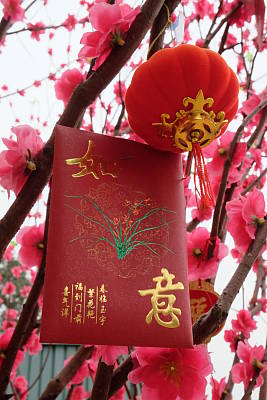
As a fan of retro ergonomics, I've been interested in the Fuji X-T1 ever since it was announced at the start of the year. It wasn't until a two-week vacation in my one-time home of Hong Kong came near, though, that I had the perfect excuse to get my hands on what's proven to be a pretty popular camera ever since it arrived at Imaging Resource headquarters. When the trip loomed large and I inquired as to which cameras might be available to take with me, the X-T1 seemed to be the obvious choice. Not only was it a nice match for my shooting style, but it was also pretty compact, and for this trip I would be packing light.
To accompany the X-T1 body, I selected three lenses: the Fujinon XF18-55mmF2.8-4 R LM OIS and Fujinon XF55-200mmF3.5-4.8 R LM OIS zooms, as well as the Fujinon XF35mmF1.4 R prime. The two zooms touched the bases for a broad coverage from wide-angle to telephoto, while the prime seemed ideal as a walkaround, street shooter lens. (Truth be told, I wasn't expecting to need the longer focal lengths of the 55-200mm lens too much. Hong Kong being a densely-populated city, getting far enough from your subject is usually harder than framing up close. Still, it seemed worth taking nonetheless, if only for shooting around the harbor.) I also brought the VG-XT1 vertical battery grip with a spare battery, which never left the camera, as well as the tiny, bundled EF-X8 flash strobe which it turned out I never needed to use.
The savings in weight over a similarly-specified enthusiast DSLR kit -- a Pentax K-3, battery grip, and similar lenses -- is actually only very slight. The Fujifilm gear comes to about 3.9 pounds all-in, where the equivalent Pentax kit would be just a touch under 4.1 pounds. However, Fuji's lenses are all somewhat brighter than their nearest Pentax equivalents, despite a very noticeable savings in size. And honestly, it's size more than weight that matters when I'm packing for overseas travel. I'm not letting my camera gear be put in the hold -- my family worked in the airline industry, and I know what happens to checked bags (!!) -- but space is at a premium in a carry-on bag. Especially one that can fit in the little regional jets that frequent my local airport.
|
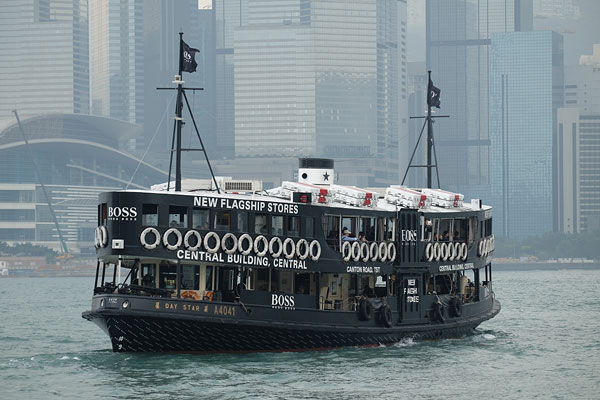
With Hong Kong�being densely packed and somewhat hazy at this time of year, I expected to get more use out of my 18-55 zoom and 35mm prime than out of the 55-200mm zoom -- and I was right. Still, I got some very nice shots out of the latter, such as this Hugo Boss-wrapped Star Ferry. |
I had a few days to familiarize myself with the X-T1 before leaving for Hong Kong, but it wasn't until I arrived that I had time to really shoot in earnest. Thankfully, I found the little Fuji to be very approachable and quick to come to terms with. Having all those clearly-marked external controls makes for an intuitive experience. And since each control also has an Auto position, there's no need for a Mode dial. The result is much more coherent than another retro shooter I'd recently taken for a spin, the Nikon Df. (And despite being a much smaller camera, the X-T1 somehow feels less cramped than the Df did, as well.) It took me a little while to remember that, with no Mode dial, features like panorama shooting and multiple exposure belonged on the Drive mode dial, but once I got used to that I really fell in love with the X-T1's layout.
|
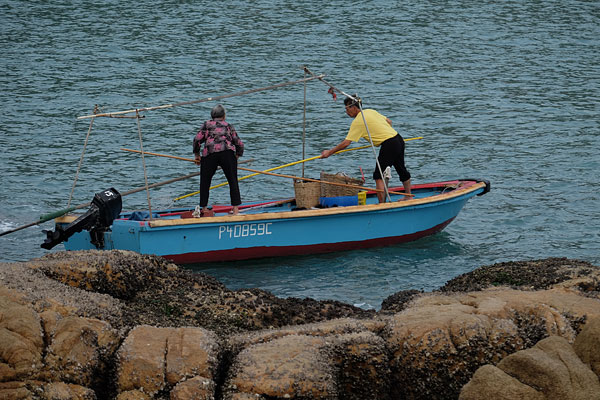
The 55-200mm lens�also did a nice job with these sea urchin fishermen. You can easily make out the individual, razor-sharp spines of their freshly-gathered catch, emptied from traps just moments before. |
There is a slight dichotomy in the lenses, though. The two zooms have fly-by-wire aperture rings and a separate auto / manual aperture switch, where the 35mm prime has a proper, manual aperture ring complete with an "A" position for automatic aperture control. I much prefer the manual ring, which gels better with the overall experience of the X-T1, but honestly I could live with either approach by itself. I find it a bit confusing switching back and forth between the two depending on which lens is in use, however. Were I to buy the X-T1, I'd probably factor the aperture control method into my decision when choosing which lenses to buy, for a more cohesive experience.
|
By default,�the Fuji X-T1's colors are quite realistic, but a bit muted. This temple roof in the fishing town of Sai Kung is a bit richer in real life. Adding about +10 vibrance and +10 saturation in Photoshop yields a result closer to my memory. |
Despite a shallower grip than I typically prefer, I find the Fuji X-T1 very comfortable in-hand, and nicely balanced as well. Especially so with the portrait grip attached -- I left this on all the time, and not just for its extra battery, but also for its duplicate portrait-orientation controls. It took quite a while before I could remember to use them, though. Perhaps because the combination of body and grip is still so (relatively) compact, I kept forgetting there was another shutter button, and reaching across the top of the camera to the main button even for portraits. And even now I've gotten used to it, I still sometimes stick to the main shutter button simply because I find its locking switch to be a little bit fiddly.
There's also a slight quirk with the grip's operation with respect to the second battery. The camera will power-cycle itself after you first switch it on if the battery in the grip is flat, and continues to randomly do so every now and then before or after a shot, if you leave the drained cell in the grip. I did, just one time, miss a shot due to this quirk, but it's easy enough to remove the drained battery and slip it in a pocket. I'm hopeful this is something that can be addressed with a firmware update, too.
I also found occasional issues with the camera not waking back up after it had gone to sleep, even if I fully depressed the shutter button. I've yet to figure out a pattern to this -- perhaps there's a certain time duration that has to elapse to trigger the problem -- but power-cycling the camera always brought it straight back to life. And battery life seems reasonable. Only twice during my fortnight in Hong Kong did I shoot enough to drain the entire battery in a single day, and I never came close to draining both batteries in a day's shooting. (But then, I did religiously charge both cells each night.)
Although I've yet to shoot any particularly active subjects, autofocus performance so far seems pretty good, with one exception. Beyond about 135mm, the 55-200mm is a bit on the slow side, autofocus-wise. Even when presented with a high-contrast subject that's already in focus, it will rack all the way from the nearest focus distance to the actual focus distance, taking as much as a second to do so. (Other lenses, and the 55-200mm at nearer focal lengths, show the same focus-racking behavior, but they arrive at the point of focus quickly enough that it doesn't feel like an issue.) I was initially frustrated by the need to dive into the menu to change between multi-point and single-point AF modes, but as soon as I found that I could assign this to the front function button, I was happy once more.
|
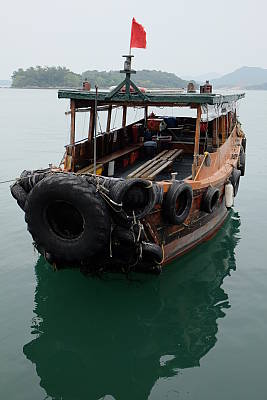
Plenty of detail�in this old sampan, shot with DR400 (400% Dynamic Range) to open up the shadows without blowing the bright but slightly hazy, overcast sky. The default exposure would've been perfect, but unfortunately the exposure compensation dial got bumped, leaving me with a choice of slightly underexposed or overexposed shots from my +/-2/3EV bracketed triplet. |
There are a couple of controls on the X-T1's body that I'm not entirely happy with. The rear four-way controller's buttons are very small and don't have a great button-feel when pressed, so they're not the best to operate solely by touch. And after spending a little while shooting with exposure compensation dialed in by accident, I realized that you really have to pay attention to this control. It's simply too easily turned, and needs either a locking button or a stronger click detent. After that first problem, I checked almost every time I went to take a shot, and noticed just in time that the dial had changed on several other occasions. (Typically, when the camera had been in a bag, but I also noticed it changing a couple of times after I'd been wearing it around my neck on bumpy minibus rides.)
I'm a big fan of optical viewfinders, and have yet to find an electronic viewfinder that has persuaded me to convert. The Fuji X-T1's viewfinder is the closest yet, though. There are a couple of things I very much like about it. For one thing, it's very roomy. I'm also starting to realize that one of my key complaints with electronic viewfinders is the lag between the real world, and what my eye sees. It might be barely perceptible on most cameras, but it's still a disconnect from my subject. The X-T1's viewfinder is much faster than most -- and for that reason it feels more natural to me.
It could stand to be a bit brighter, but I only really had difficulty with it under harsh sunlight, and even then mostly because of its viewfinder eyepiece, which has a very shallow cup. Shielding the top or side of the camera with my free hand does the trick, but if I were to buy this camera, I'd probably take a trip to my local camera store to see if I could find a more generous viewfinder eyecup that fit. (Fuji doesn't make one, and although I tried eyecups from Canon, Pentax and Sony, none of them fit either.) I also noticed its eye sensor has a range of several inches, which is enough that when holding the camera in my right hand with a heavier lens attached and using my left hand to fiddle around in menus, causes the screen to randomly turn off and on. The solution's pretty simple -- don't use my left hand to reach across the camera.
The menu system is pretty straightforward, if a bit plain. (But then I must admit I tend to prefer plain over showy when it comes to menus.) There are a few places it could use better organization -- I'm not entirely sure why there are two separate sections on far-distant tabs of the menu related to Wi-Fi connectivity, for example -- but it's probably as good as (or better than) most in this respect.
|
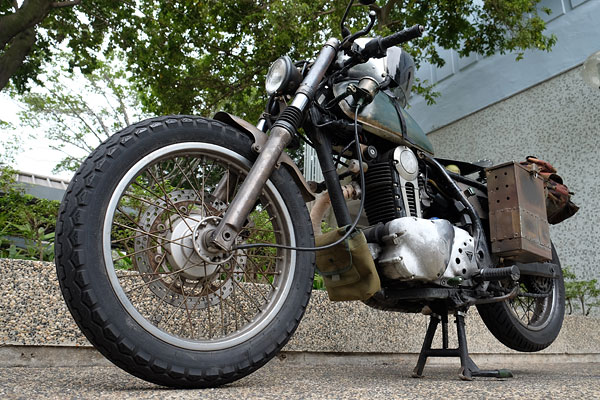
The only way to isolate�this old Triumph motorcycle from a rather distracting background was to shoot from ankle-height. The Fuji X-T1's handy, tilting LCD monitor helped me get really, really low. |
Speaking of Wi-Fi, I found myself using this a lot more than I do with most cameras. That's perhaps in part because I was on a trip home, and many of my Facebook friends wanted to see the pictures too. Still, it's also because once set up, it's a pretty painless process: just press the top-deck Wi-Fi button, open the Photo Receiver app on my phone, and wait ten or fifteen seconds before choosing a few photos to transfer. The only real annoyance is that I tend to leave Wi-Fi disabled on my phone to save on battery life, but Fuji's app (for Android, at least) leaves the Wi-Fi connection active when it's finished with it, rather than returning it to its original state. That caused a flat phone battery once, when I wasn't aware of the behavior -- but I quickly learned to disable Wi-Fi manually whenever I was done. I've not used the more complex Camera Remote app (which allows remote control and geotagging) very much yet, so expect more on that in a later Shooter's Report.
|
The Fuji X-T1 occasionally�struggled with the complex mixture of light sources on offer in Hong Kong. It's easily fixed, though -- Photoshop's Auto Color tool corrects the excessive warmth nicely. Add a touch of saturation/vibrance, and this shot in Choi Hung's wet market matches my memory nicely. |
While I was in Hong Kong, I didn't have much opportunity to assess image quality, as my laptop screen -- while bright -- is not the best in terms of color rendition. Now that I'm back in the office, I've taken a look on my calibrated Dell UltraSharp U2410 monitor, though, and I like what I see from out-of-camera JPEGs. (I've not yet had a chance to try fiddling with raw files from the X-T1.) Colors are accurate and very much as I remember them, if perhaps just a little muted. White balance can tend to struggle a bit with Hong Kong's wildly-varying light sources, though, occasionally rendering night scenes either warm, or with a somewhat sickly green cast. Exposures were likewise pretty accurate. Sharpness seems fairly good as well, considering that the sensor resolution does lag what's available from APS-C rivals these days.
|
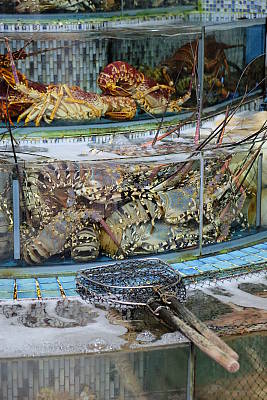
Now, this shot�the X-T1 really nailed. The colors and detail in these colossal lobsters in a Sai Kung fish market are exactly as I remember them. |
Another feature of the X-T1 that I found myself playing with quite a bit is it's panorama feature, Hong Kong being a place which lends itself to a good pano. It's pretty straightforward to use, and interesting in that it provides a choice not just of how wide the pano should be, but also of which direction it should run in. It doesn't handle moving subjects very gracefully, though, and when presented with Hong Kong's twinkling lights at night, had a tendency to produce some fairly heavy banding in the sky as lights pulsed on and off between frames. Still, presented with a more static subject it yielded some pretty nice results, and after a dozen or so tries, I got one handheld panorama of the Hong Kong harbor at dusk that I'll likely put on my wall, after a little tweaking.
One last feature that's an absolute delight is the Fuji X-T1's playback mode, which allows you to review images while they're still being written to the Secure Digital card. Initially, we'd understood that feature to be reliant on using the swifter UHS-II Secure Digital cards, which feature a second row of contacts for increased bandwidth. Although I've not done a lot of burst-shooting yet, I've tried a few lengthy bursts of images both on UHS-II and UHS-I cards, and the speed with which you can start reviewing images on either is seriously impressive. After a burst of a couple of dozen images in raw+JPEG format, there's a delay of just a few seconds until you can start reviewing those images, unlike most cameras which make you wait until the entire burst has finished writing to storage. That one change makes the camera feel much more responsive -- and you don't even have to shell out for a UHS-II card to get it! Very cool indeed.
For my next Shooter's Report, I'm planning on taking a look at the camera's performance with some more active subjects, as well as getting to the bottom of its more fully-featured Wi-Fi app on the Android platform, and trying my hands at some raw processing. If you have any requests for Shooter's Report two, be sure to leave them in the comments at the end of this review!
|
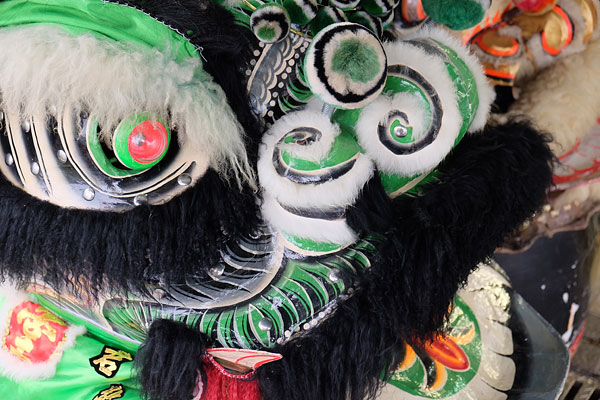
This lion dancer's mask, believe it or not, is even richer and more colorful in person. A little boost in saturation from the default easily fixes that, though, and the default colors do seem quite accurate. |
-----------------------------------------------------------------------------------------------------
Camera Review: Olympus E-M10 Shooter's Report, Part II
by William Brawley
Part II -- Sports, Wildlife and Long Exposures
Fear not OM-D fans, the next installment of my Olympus E-M10 shooter's report is here. I was fortunate to have all the stars fall into alignment and was able to test the E-M10 on a variety of subjects that happen to be some of my favorites -- sports, wildlife and long exposures.
 |
The Olympus 12mm F2 lens gave me a fairly generous depth of field making precise focusing less critical. Also the tilting screen of the E-M10 let me easily get the shot from a cool, ground-level angle. (M.Zuiko 12mm F2: f/2, 1/1250s, ISO 1600) |
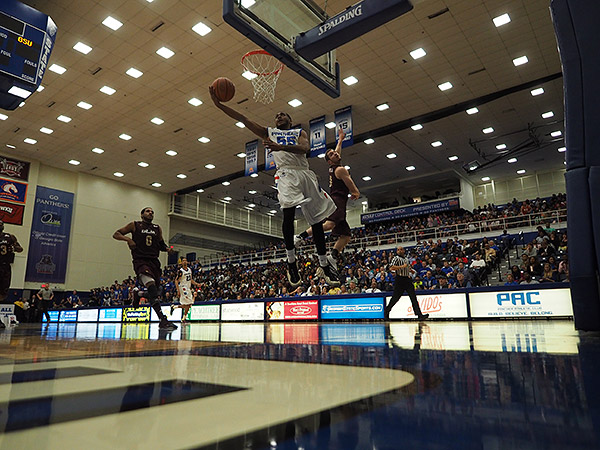
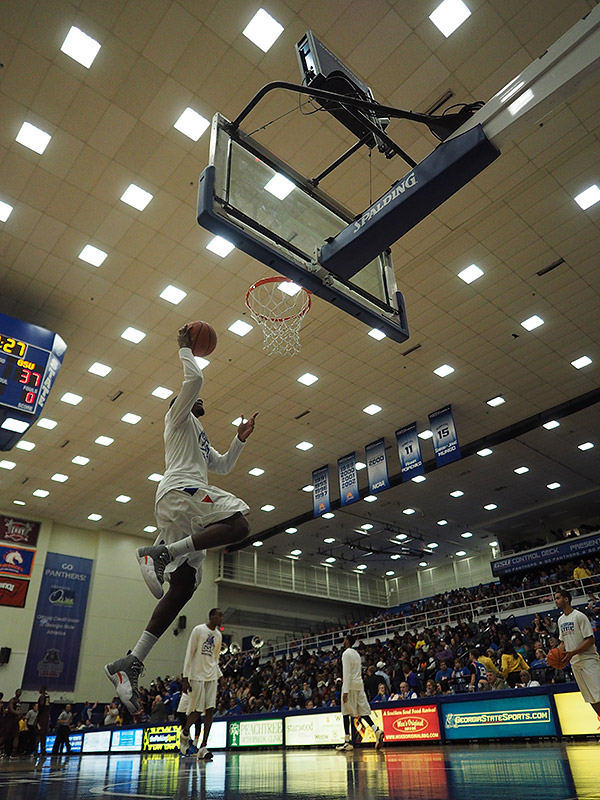
Let the games begin.�I had the fantastic opportunity to photograph a local college basketball game and thought it would be the perfect chance to see how a camera like the OM-D E-M10 would handle high-speed sports photography. Traditionally, sports photography is all about the DSLR -- fast phase-detect AF, rapid-fire FPS and bright wide-aperture lenses.�With the ever-improving performance of contrast-detect AF systems, plus the E-M10's 8fps burst speed and a decidedly more compact setup, I was curious to see how the new Olympus E-M10 would handle a serious sporting event.
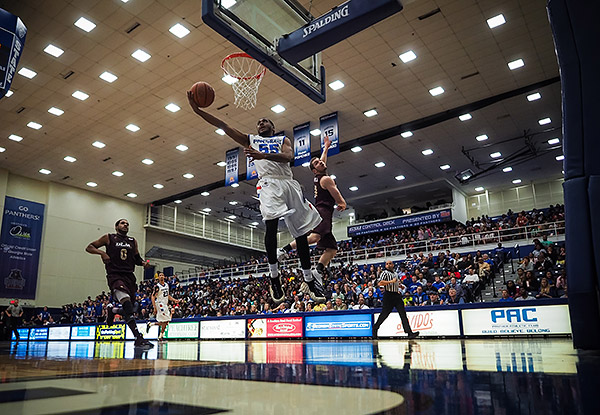 |
The previous JPEG edited in Adobe Lightroom 5 for a slight exposure boost, white balance correction, cropping and noise reduction. |
Well, as they say,�all that glitters is not gold, and with the E-M10, that's surely the case. There are good things and bad things about using the E-M10 to shoot sports, or many other fast action subjects for that matter. First, the size is great. The small E-M10 and compact Micro Four Thirds lenses are much more portable, as you already know. If you're shooting for hours on end, like at a basketball game, a smaller camera like the E-M10 is much more comfortable than a large, gripped DSLR and an f/2.8 telephoto zoom. I shot the basketball game with the E-M10 plus three Olympus fast prime lenses, and all I needed to carry was a small waist pack. No heavy, back-breaking backpack for me!
|
Fast FPS.�The E-M10's 8fps burst mode does a nice job of capturing a sequence of action. Head over to the� gallery page�to view the full-res images (YP2200508.JPG - YP2200514.JPG). |
Secondly, I found the 8fps Continuous High Speed burst mode plenty fast to catch an excellent frame or two, or even an entire sequence of a player going up for a shot. Of course top of the line DSLRs like the Canon 1D X and Nikon D4S can shoot at a massive 12 and 11fps, respectively, but as someone who has used a Canon 7D for sports with its 8fps continuous burst rate, the E-M10 felt plenty speedy.�
However, here's where we get to the first caveat. The Olympus E-M10 can shoot at 8fps, but�only�without continuous AF. So, if your subject moves closer or farther away and therefore out of the plane of focus, chances are you're going to end up with a not-so-great shot (or one in-focus shot followed by a bunch of out of focus ones). If you want AF working between each shot during continuous shooting, you're left with a mere 3.5fps, which is certainly not fast enough to capture a full sequence of a basketball player rushing past.
However, a caveat to a caveat: I found the buffer to clear at a more steady pace in the 3.5fps low-speed continuous mode, and I could therefore keep on shooting more or less at a constant pace if needed. The 8fps mode shot a fast burst of 11 frames, and then continued on with a much slower frames-per-second rate as the camera tried to clear through the buffer. (I was shooting RAW+Large SuperFine JPEGs at ISOs�1600 to 2500 with a Sony 94MB/s 32GB SDHC card. Your mileage may vary.)
 |
(M.Zuiko 12mm F2: f/2, 1/1000s, ISO 2500) |
However I was a little confused at first between "Sequential High Speed" and�"Sequential Low Speed" modes and how they related to Continuous AF. Going into this, I assumed that the 8fps and 3.5fps were simply high- and low-speed burst modes -- similar to what you get on, say, a Nikon D7100. I assumed that by simply having Continuous AF (C-AF) enabled, the camera would automatically slow the burst rate if it had to when the camera attempted to refocus between frames.
So, when I selected "Sequential High Speed" mode and C-AF, I was surprised to find the 8fp speed working like a charm. I then thought perhaps it was the dedicated "AF Tracking" focus mode that slowed the burst rate -- nope. Still 8fps. I later found out that it's not the focus mode that determines the burst speed, but the burst speed mode itself that determines if the camera focuses between each frame. In "Sequential High Speed" mode, focus�is locked at the first frame (even if C-AF is selected), while in "Sequential Low Speed" mode, the camera attempts to focus between frames if C-AF is selected. Chalk this whole thing up to user error, but I can see it being a little confusing to others unfamiliar with Olympus cameras as well.
 |
(M.Zuiko 12mm F2: f/2, 1/1250s, ISO 1600) |
I also noticed a strange behavior with Continuous AF mode, not only when shooting sports, but also with birds and other wildlife. When shooting moving subjects or other objects that were small in the frame, such as birds, I could really see the inherent "wobble" of the E-M10's contrast-detect AF system as it continuously tried to keep the subject in focus. It was a little disconcerting at times, since I had a hard time telling if my subject was, in fact, in focus when I pressed the shutter button.
Of course, the E-M10 gives you the option of having Release Priority (RP) or Focus Priority (FP). With RP enabled, the camera will still take a shot when you press the shutter button even if the subject is not in focus, while FP mode does the opposite -- it delays taking the shot until the subject is in focus. As you might expect, with fast sports or quick-moving animals, the delay in FP mode would not be ideal and could lead to missing a shot at that perfect moment. Thankfully, the E-M10's AF speed is, in general, quick enough for most subjects I encountered, especially higher contrast subjects.
Just how fast is the Olympus E-M10? Find out by clicking here to see our full battery
of rigorous, objective speed and operation tests conducted in the IR Lab.
 |
The E-M10 paired with a long 75-300mm lens was very comfortable to use thanks to the built-in EVF. The f/6.7 aperture of the lens, however, forced me to use a high ISO in this shot, which took a toll on fine detail. (M.Zuiko 75-300mm F4.8-6.7 II: 300mm, f/6.7, 1/320s, ISO 2500) |
Compact wildlife camera?�If you've read my other reviews, you'll know that I like to shoot wildlife, and particularly in my recent�Panasonic GM1 review, I attempted to use long telephoto lenses with that small camera. The experience in that case was far from ideal. The lack of an EVF was troublesome as it forces you to hold the camera out in front of you rather than up against your eye, which enhances stability and comfortable, especially with these larger, heavier lenses.
Thankfully, the Olympus E-M10 has a nice built-in EVF in a traditional DSLR-like, on-axis design. Using a long telephoto zoom lens such as the�Olympus M.Zuiko 75-300mm f/4.8-6.7 II�was easy and comfortable, and gave me the very familiar, DSLR-like shooting experience that I enjoy. Plus, the addition of in-body image stabilization was extremely helpful, if only to steady the shot when framing at the full 600mm-equivalent focal length. I found the body-based IS works quite well, making it much easier to get shots on small subjects like perched songbirds or other scenes off in the distance where framing with long telephoto lenses can get tricky -- minute movements of the camera can equal large changes in composition.
Despite a long 600mm-equivalent zoom lens, subjects like birds are oftentimes still quite small in the frame. As such, I found the AF system, especially when using C-AF, to be a little disconcerting, as the camera had trouble focusing on small subjects. Like I mentioned earlier in the sports section, especially when using Continuous AF, I really noticed the hunting or wobbling effect of the contrast-detect AF system as it tried to achieve and maintain focus on the subject. I found it difficult at times to tell if the subject was in crisp focus when I snapped the shot.
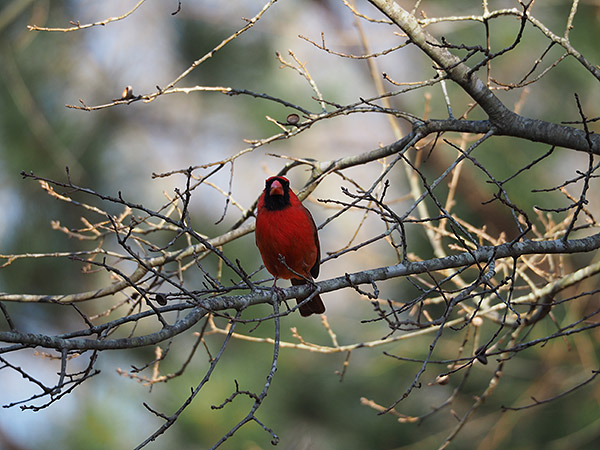 |
Despite being a bright color, the E-M10 had trouble focusing on this Cardinal. It took a few tries before I was able to get a photo with the bird in focus. (M.Zuiko 75-300mm F4.8-6.7 II: 300mm, f/6.7, 1/250s, ISO 320) |
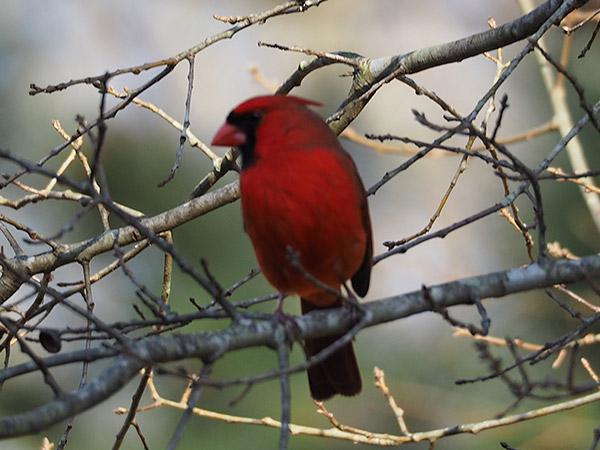 |
In a crop of a shot taken just prior to the one above, you can see that despite a similar composition with the AF target over the bird, the E-M10 had issues achieving correct focus. |
This is perhaps, not an issue with the E-M10 itself, but rather an inherent limitation of contrast-detect autofocus systems. The autofocus "points" of the E-M10 are not really points at all, but rather focus target areas, and you simply don't get the fine-grained focus point with CDAF systems that you do on straight phase-detect AF systems like in DSLRs. As such, photographing subjects like birds and other small objects can be tricky for CDAF cameras.
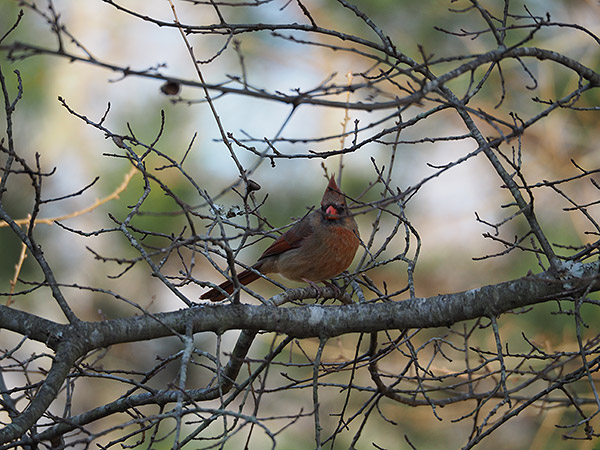 |
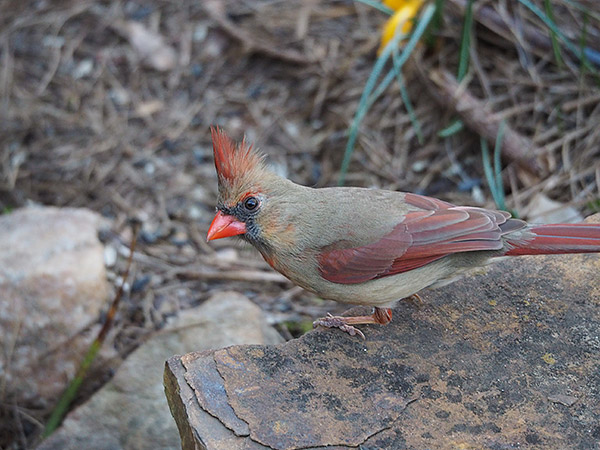
Worst-case scenario?�Not only was this female Cardinal pretty small in the frame, the small twigs and low-contrast coloring made it even more difficult for the contrast-detect AF system to get a crisp shot of the bird itself, yet the E-M10 still managed to focus correctly this time. (M.Zuiko 75-300mm F4.8-6.7 II: 300mm, f/6.7, 1/320s, ISO 400) |
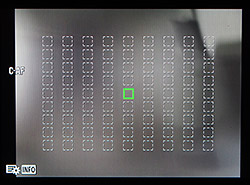
As I mentioned up in�Part I, the E-M10 does bring the more precise grid of 81 AF areas from the E-M1, which is a solid upgrade over the E-M5. These smaller AF areas allow you to more precisely place an AF "point" over your subject.
The E-M10 takes it a step further by bringing over the "Small Target AF" option from the E-M1 (shown on the right). With this mode, the comparatively coarse 81 AF area grid is shrunken down to a much finer-grained grid, which are more akin to typical DSLR AF points. This mode makes is easier to autofocus on smaller subjects, such as birds perched in a tree, although you can still see the distinct "wobble" when using Continuous AF.
You can also magnify the display by up to 14x for an even smaller AF area, and of course there's always manual focus which supports magnification and focus peaking.
 |
The Olympus E-M10 is also much quieter than competing DSLRs, which means you are less likely to disturb skittish animals. (M.Zuiko 75-300mm F4.8-6.7 II: 300mm, f/6.7, 1/250s, ISO 2000) |
I'm seeing stars!�I've realized I like shooting extremes -- fast-moving, hard-to-capture subjects, such as sports, as well as very slow-motion subjects with a more involved setup, such as long exposure shots. The Olympus E-M10 did reasonably well at capturing the fast stuff, but it makes easy work of the slow stuff, which in this case are long-exposure multi-shot star trail composite photos.
Typically, with star trail photos, you need lots of time, an intervalometer to make the camera continuously take photos periodically for a long span of time, and then lots of post-processing time stacking and combining hundreds of photos -- not to mention additional time if you want to mask in a foreground shot, perhaps done with some light-painting, for a really interesting nightscape.
I've always wanted to try my hand at creating star trail photos, and the Olympus E-M10 makes it a much simpler endeavor -- all you need is time and a tripod. And clear skies, of course. Introduced as a new feature on the E-M10, the Live Composite mode lets you build multi-shot long exposure photographs right in the camera! And you see it all happening live on-screen in real time!
|
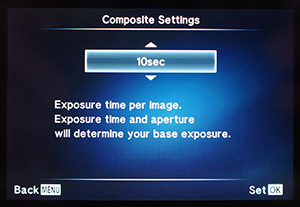
The E-M10 lets you adjust the exposure time for Live Composite shots from 1/2s to 60s. |
Accessed in manual exposure mode by scrolling down past Bulb Mode, Live Composite Mode takes an initial shot of the scene for noise reduction, and then a second press of the shutter button begins the live sequence of continuous shooting. Prior to shooting, you adjust the exposure time per shot, from a half-second to a long 60s shutter speed. After capturing the scene for your desired length of time, simply press the shutter button again and have the E-M10 combine all the shots into one final image. The cherry on top? It can also produce a composited RAW image, allowing for all the increased flexibility with post-processing that RAW images give you.
While I never had a great star trail scene to experiment with, I was able to test this cool new feature, and I have to say, I am impressed. It worked exactly as described. I set the camera up on a sturdy tripod, adjusted the timing, and let it capture away. Sure enough, periodically checking back on the camera, I could see star trails slowly building up on the screen. If you don't know how or don't want to spend lots of time Photoshopping hundreds, possibly thousands of individual images together, the E-M10 makes it super simple to get great star trails or other long exposure shots (fireworks photos also come to mind as a possible use for this mode).
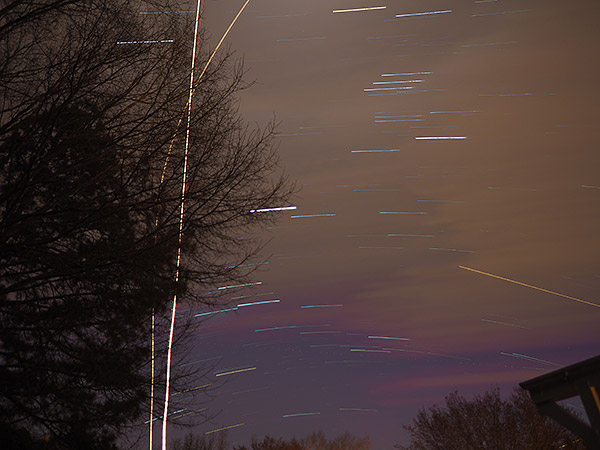 |
With the E-M10's new Live Composite mode, you can see star trails build up on screen in real time. I used a 10s exposure time and kept the camera running for about 30 minutes. As you can see, be aware of objects like aircraft that enter the frame. (M.Zuiko 12mm F2: f/2, 10s, ISO 200) |
There are a few issues or notes worth pointing out, however. You can use Live Composite mode with either the EVF or rear LCD screen; however, one of the screens will remain powered (even if it's mostly black -- no battery-friendly OLED rear screen here like in the E-M5). So be sure to charge those batteries before setting off to shoot for very long periods of time. (There's still no word on an AC Adapter for the E-M10 like we saw with the E-M5 to let you keep the camera up and running via mains power.) Also, shooting is limited to a maximum of three hours (or however long your battery lasts), so no super-long all-night photos with the E-M10.
Also, as with other long exposure shots, be aware of vibrations and other camera shakes. It's recommended to use a remote shutter release to avoid bumping the camera. Thankfully, the built-in Wi-Fi on the E-M10 works for Live Composite mode, and I was able to use my smartphone to start and trigger the shutter. Also, be aware that if you're shooting into the open sky, you might have an unwelcome visitor or two appear in your final photo. In this case, airplanes. Clouds are another possibility.
Overall, the Olympus E-M10 did well in these little experiments, and while it won't replace a DSLR for me when shooting sports or wildlife, it's generally very speedy with excellent burst performance if you don't need continuous AF. The contrast-detect AF is excellent on all but very small and low-contrast subjects, as well. The built-in EVF is large and easy to view and makes it comfortable to use larger, longer and heavier telephoto lenses even though the E-M10 itself is quite small. Lastly, the Live Composite mode works exactly as described, giving photographers an easy way to explore the world of astrophotography and other long exposure, multi-shot compositions.
-----------------------------------------------------------------------------------------------------
FEATURE: Sigma Q&A Part I: CEO Kazuto Yamaki explains why so few Pentax-mount lenses, and much more (EXCERPT)
by Dave Etchells
|
Kazuto Yamaki
Chief Executive Officer,
Sigma Corp. |
Imaging Resource publisher and editor-in-chief Dave Etchells recently interviewed a number of industry leaders at the annual CP+ tradeshow, held last February in Yokohama, Japan. Here's a transcript of his interview with Kazuto Yamaki, CEO of Sigma Corporation. Among other things, we learn why third-party lenses for the Pentax mount are so scarce and why the newly-announced�Sigma dp1 Quattro camera -- as well as its siblings the�dp2 Quattro�and�dp3 Quattro -- have such an unusual shape.
Dave Etchells/Imaging Resource: The camera market is becoming increasingly fragmented. In the past, Canon and Nikon have dominated everything, but that seems to be changing: We have Olympus and Panasonic with Micro Four Thirds; we have Sony with E-mount, FE lenses, and A-mount; Fuji has the X-mount. They're all stealing market share, so there are many more mounts to deal with. What's your strategy for dealing with such an increasingly fragmented market?
Kazuto Yamaki/Sigma:�We believe it's our mission to support as many systems as possible, as a lens manufacturer. Especially if they are photo enthusiasts; our main customers are photo enthusiasts, so we try to support as many systems as possible. There are limitations, of course -- especially the engineering resources are limited -- �so we have to carefully choose which system to support. Basically, we'd like to support as many as we can.
DE: With many mirrorless cameras having very short flange distances, can you use a similar design for multiple platforms? Basically, design for the largest flange distance, and then just extend the barrel for shorter ones?
KY:�The same optics?
DE: Yeah, the same optics.
KY:�Yes, we can do that. If we use the same optics, then we can apply to other mounts�
DE: To a different mount, and reprogram the microprocessor.
KY:�Yes, yes.
DE: That makes sense. We've heard a lot of favorable comments from readers about your program of offering to change lens mounts. People are really liking that a lot.
KY:�Thank you.
DE: It's a big deal for them. You have your DN series of lenses for compact system cameras, one of my editors was asking, are there any plans to make EOS M lenses in the DN line?
KY:�We have not decided yet.
DE: Haven't decided yet? Yeah. My sense is that the EOS M line is still fairly low volume.
KY:�Yes, low volume so far.
DE: I think you told me once that the costs actually kind of went in the other direction, but the price for your incredible 18-35mm F1.8 DC HSM | Art lens is really extraordinary, because people were expecting it to cost much more. Has your manufacturing process that integrates lens adjustment and calibration reduced manufacturing costs, or perhaps are your overall operations just that much more efficient than some other camera manufacturers?
KY:�Actually, the manufacturing cost for that lens is quite high, because the performance is really high -- so we have to use very expensive materials. Although the quality is so high, we felt that the price could not be super-high. The price is a little bit strategic, because this lens will be used for APS-C size cameras, and those cameras' prices are getting lower and lower. So, if we price a lens too high, it wouldn't be so attractive to that customer.
DE: Ah, so a price really reflective of the quality and performance wouldn't match the cost of the body, so you've priced it to make it more accessible.
I think that your lens engineer may have answered this when I was at your headquarters earlier this week, but what specifically led to the decision to produce the 18-35mm? What was the impetus or the strategy or�
KY:�Actually, this project was initiated by my father, when he was still running the company.
DE: Really? So this has been going on for years now.
KY:�Yes. He wanted to make the world's first f/1.8 zoom lens -- that was the beginning. At the time, I was the manager of the optical design division, and I said to the engineers, "I've got this project from my father. Let's study how we can do it." Then we came to the conclusion that it was possible, and we started the project. We arrived at that spec because the APS-C sized sensor has a bit deeper depth of field; so a f/1.8 zoom lens would be a good solution for those users.
DE: That's interesting. So that was in development three years, four years you think?
KY:�From the beginning? No, actually -- maybe two years.
DE: Two years? Ah.
KY: Two years or more.
DE: I remember your lens designer Mr. Koyama, whom I met on Monday, said that the intent was to make a lens that would make people say, "Wow!" And I told him they certainly did.
KY:�Yes!
DE: Currently, you're re-releasing some of your old designs as Global Vision lenses. Are those actually redesigns, or is it just that they have improved coatings, and are compatible with the USB dock?�[Ed. Note: Sigma's USB dock lets you reprogram the CPU in their Global Vision lenses, micro-adjusting focus accuracy, and reprogramming things like autofocus speed, image stabilization behavior, and other lens parameters.]
KY:�Basically, most of the lenses are totally new lenses, completely re-designed. The only exception is the 120-300mm F2.8 DG OS HSM | Sports, where the optics are the same, but we changed some mechanical parts, and also the firmware. But the other lenses we developed from scratch.
DE: Ah, wow. That's a lot of design work.
KY:�Basically, the Global Vision lenses have a different product concept, so we have to start from scratch.� But just for our 120-300mm f/2.8, we felt that its optical design exactly matched our Global Vision concept, so we decided to use the same optics, then change the mechanical parts and firmware to match the concept.
DE: I remember from the�factory tour, you were saying that part of what you're doing now is a bit of a change in direction from when your father ran the company; you've built in more adjustability in the lenses, so you can fine-tune them as they come off the production line. Is that partly how the 120-300mm was in alignment with Global Vision? Does it have that adjustment, or is it more just the optical design.
KY:�Yeah, we introduced that fine adjustment, yes.
DE: One of our editors commented that he's very excited about the Global Vision series, but we haven't seen follow-on lenses in the DN series. Is it the sort of situation where there are only so many resources to go around, and further down the road, there'll be more DN Global Vision lenses?
KY:�It's just a matter of priority. We'd like to release more DN lenses, but we have more demand from conventional DSLRs. The conventional DSLRs -- especially like the Nikon D800 -- have more pixels, they're much sharper, higher resolution. Those cameras require better optics, so we have to consider them.
DE: Plus, I guess there are so many more SLRs out there, there's a much larger body of people buying them.
This is also kind of a strategy question, I guess. Samsung claims to be a major player in the mirrorless market already. I don't recall the exact figures, but I think Samsung said they were in the top three manufacturers of interchangeable lens cameras, and their goal is to be number one by next year. I don't know if they'll make that, but I think that over the holidays, they were actually number two in the U.S.
KY:�Really?
DE: Yes, in mirrorless cameras, at least. Mirrorless is still small compared to SLRs, but it really seems to be gaining a lot of traction. Do you have plans to support Samsung's NX lens mount? You said you want to support everything, but�
KY:�We don't have that planned yet.
DE: Not planned yet -- OK. One of my editors asked about Sony FE-compatible lenses, but I think the answer there is pretty clearly "no." That's still a very, very small market.
KY:�But we are getting many demands for that FE mount.
DE: For FE-mount, really? Interesting! I guess the users there are really very quality-conscious, so it makes sense that they would like high quality lenses like your Global Vision products.
Have you announced -- or do you have -- any approximate pricing and availability for the 50mm F1.4 DG HSM | Art and the 18-200mm F3.5-6.3 DC Macro OS HSM | Contemporary yet?
KY:�I'm still studying it.
DE: Ah, okay. Are there any plans to update your full frame 28-300mm lens to a Global Vision version? That's a much older lens, I think -- full frame.
KY:�Tamron has just announced the same spec lens. Yeah, if there's a demand.
DE: Again, if there's a demand -- although, as you said, the full frame people are very high quality-oriented. It may be tough to hit that quality mark with such a long-ratio zoom.
KY:�There is no magic in optical design, so if we have to design a 10x zoom, we have to compromise in the quality compared to a prime lens. Our priority is to release more high quality lenses than hyper-zooms.
DE: I'm not sure if this is something you can answer, or would want to go on record with. We found some compatibility issues with some Nikon models -- the D5300 and Df in particular -- and with our own... We use Sigma 70mm F2.8 EX DG Macro lenses for our lab testing, because they're so sharp, and we've seen exposure issues on various Nikon bodies with that lens.
KY:�Is that so? I've never heard of it.
DE: We've occasionally seen compatibility issues between third-party lenses and camera bodies, particularly Nikon bodies. Do you think that some camera manufacturers purposely make it difficult for third-party lenses to be compatible?
KY:�I actually have no idea.
DE: It's difficult, but you don't know if they're trying to make it harder?
KY:�I know the engineers over there, or at least some of the engineers over there, and I know their perspective. I don't believe their engineers -- given the nature of engineers -- are trying to make things difficult. They just focus on their own product improvement.
DE: So solving the problem, making it better.
KY:�Yes, they don't make it more difficult on purpose by themselves; I don't believe so.
DE: That's interesting, your comment about the engineers. It makes sense: Engineers just want to optimize their own designs, not consciously make things more difficult for third parties.
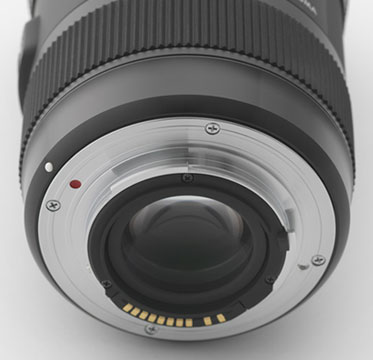
One of our readers asked why you offer so few of your lenses with the Pentax mount, and he also asked about longer telephotos, in particular. If the mounts are fairly simple -- if it's really just a matter of changing out the mount, shouldn't it be possible to make more Pentax lenses? Or is it still just a cost issue, even for a relatively small investment?
KY:�Pentax still uses mechanical parts to control the aperture.
DE: Ohhh.
KY:�So, mechanically, it's totally different, even though it uses the same optics. Making a Pentax mount is much more involved -- we have to use special parts just for Pentax mounts.
DE: It's a whole different aperture mechanism that you have to use. Ah, that's very interesting.
KY:�Yes. So, we'd like to make as many lenses for Pentax as possible, but with very small demand we cannot make them frequently. For such a lens, the long back-order times are a big problem for us. So we cannot make too wide a product line for Pentax. For example, a 300mm f/2.8 -- maybe we can produce this for Pentax once every few months; but some people may need a 300mm f/2.8 now. We cannot make it so often.
DE: Ah -- you can't afford to carry a large inventory given the small sales volume, but you also have a minimum production run that's economically viable. So you end up having long lead times, sometimes. I see, that makes sense, very interesting.
Head on over to Imaging Resource to read the rest of the interview, as it's quite long and detailed and packed full of more interesting insights and discussions! http://www.imaging-resource.com/news/2014/04/02/sigma-qa-part-i-ceo-kazuto-yamaki-explains-why-so-few-pentax-mount-lenses
-----------------------------------------------------------------------------------------------------
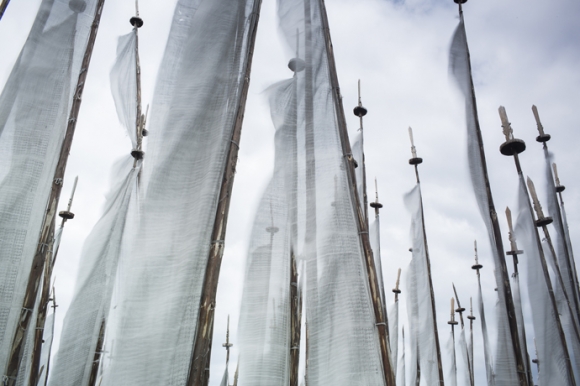
FEATURE: A trek through Bhutan part II: lessons learned and experiences shared (with VIDEO)
by Josh Cogan
[If you've yet to read�part I�in this series from Josh Cogan, check out that piece first!]
Our journey begins
The trail for the first few days was relatively easy, and I say�relatively�because as a flatlander who had done little to get in shape before the trip, even a modest pitch felt like�something�at 10,000 feet with 35 hours of jet-lag and a 12-hour time difference.
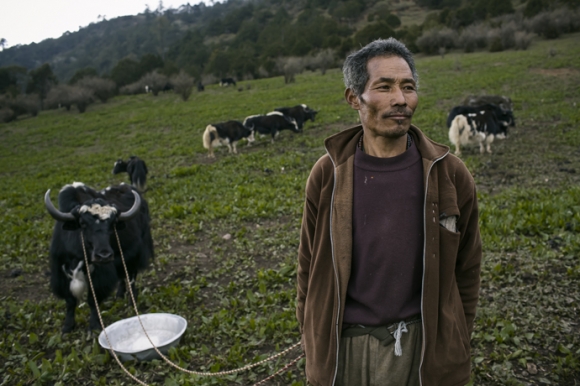 |
Mountain yaks.
5D Mark III, 35mm f/1.4 L, f/5.0, 1/250s, ISO 320 |
At the lower altitudes the trails were covered with wild strawberries and evergreens. Herds of mountain yaks strolled lazily through the open woodlands. Above us we could see the rising peaks we would soon cross.
Even though I knew more majestic scenery was yet to come, I started shooting heavily early on. This landscape was different than much of what I normally get to see, and I wanted to capture the beginning of what was shaping up to be a memorable journey. I found it nearly impossible to restrain my finger from pressing the shutter button with abandon. It was okay though: I had planned for this... or so I thought.
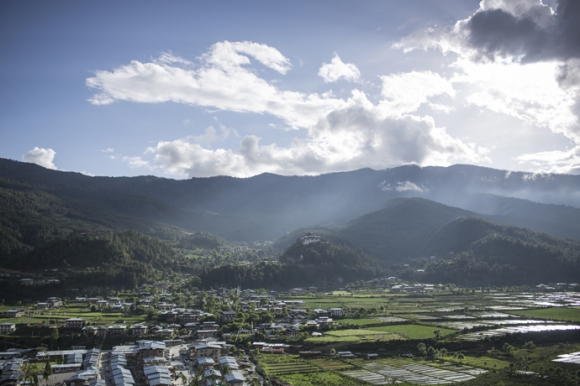 |
Scenery like this tempted me to shoot with abandon.
5D Mark III, 35mm f/1.4 L, f/2.5, 1/2000s, ISO 100 |
By the end of the second full day of hiking, my assistant and I had burned through 3 of the 5 batteries we brought. �It started to enter my mind at this point that it would be better to stay out in front of the charging rather than wait until we drained all our batteries.
That night we charged from the Vagabond Mini and the Nomad, both of which I had pre-charged before coming out. That's one of the great features of the Goal Zero system, compared to other solar options: if you happen to find a traditional power source, it can also be used as a portable power pack.
Click on over to the article at Imaging Resource or over to our YouTube channel to watch Josh's before and after videos!
By the morning, we had charged two of the dead batteries using the Nomad, and charged the 3rd dead battery and my assistant's MacBook Pro on the Vagabond Mini. While charging the two Canon batteries completely drained the Goal Zero, the Vagabond Mini was left with half its power.
Given we had 5 days left, I realized that perhaps these units wouldn't give us exactly the freedom I was hoping for. I would need to do my best to stretch out and repower as I went.
Extreme environments demand clever improvisation
���
There was a challenge though. It was pouring. Constantly.�How does one charge a solar pack when you are walking in a cloud all day? The answer of course is� slowly.
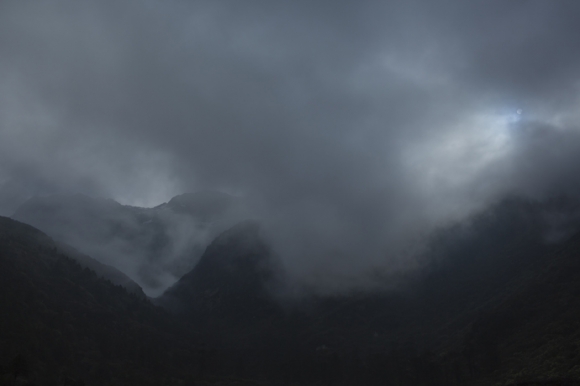 |
Rains and clouds were a constant.
5D Mark III, 35mm f/1.4 L, f/5.6, 1/2500s, ISO 100 |
To add to the drama, it was nearly impossible to keep the gear accessible for quick shooting and still to keep it dry.�I settled on strapping the camera to a carabiner on my shoulder strap, under a poncho.
To keep the Goal Zero charging we had to get a bit more creative. As we were hiking all day, it was tough to keep the solar panel facing towards the sky. Most days we wouldn't get to camp until a few hours before sunset, and with the combination of cloudy days and short hours, something needed to be improvised. �
After consulting with Sonam, our horse master, we strapped the solar panel to the top of the donkey, covered the inverter in a Ziploc and placed it in one of the mule baskets. While less than ideal, especially given the densely-forested passes the pack animals would take to beat us to the campsites, our mule-borne solar station at least kept the Goal Zero charging constantly.
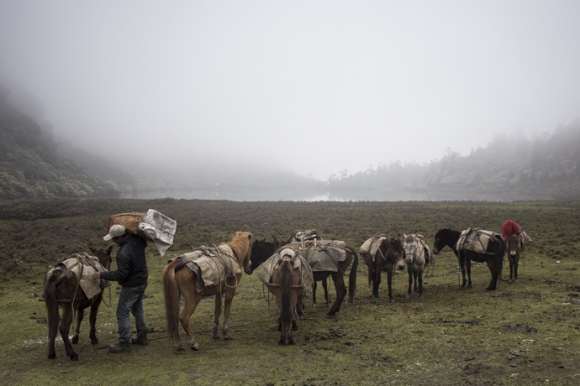 |
Our mobile solar station was a Goal Zero panel atop a mule.
5D Mark III, 35mm f/1.4 L, f/5.6, 1/250s, ISO 640 |
There seemed to be a strong correlation between the mystery of the landscapes and the ethereal, ever-present rain and clouds that shrouded them. I'd had used almost all my batteries and the Goal Zero was charging between 40 and 60 percent during the very cloudy days. Fortunately, the panel was fully waterproof and didn't seem offended by the long rainy days on the mule's back. By this point I had completely drained the Vagabond Mini, achieving about 3 full battery charges and 1 full MacBook Pro charge, so I was entirely dependent on the solar system if I was to make it through. �
Generally, the mule-powered solar station would generate enough power in a day to fully charge one battery. This was a fine pace for my own shooting, but wasn't quite enough to keep up with both cameras, as each consumed about one full charge a day with heavy shooting.
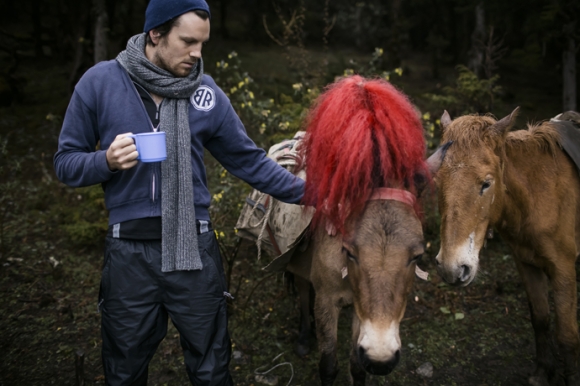 |
This trusty steed helped keep us powered up through the constant rain.
5D Mark III, 35mm f/1.4 L, f/2.0, 1/1000s, ISO 640 |
Saved by a turn of good weather
We were about to seriously ration our shooting when we finally had some luck with the weather. On the morning of our 5th day the weather finally cleared. Not only could we top up our batteries, but we were able to dry out our sopping wet socks!
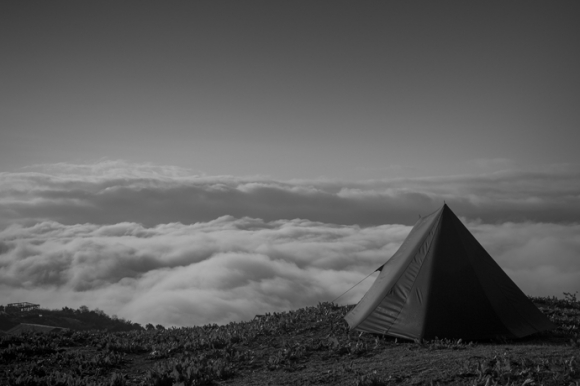 |
Above the clouds.
5D Mark III, 35mm f/1.4 L, f/8.0, 1/1250s, ISO 160 |
The socks were the least of our worries, though. Moisture had invaded every crevice and cranny, finding its way between every filter and lens element, nearly rendering shooting impossible. The sunny weather couldn't have been better timed. After sticking a few pieces of gear in the Bhutanese rice bags our guides brought along, we were back in business.
With good sun at altitude, charging became a pretty easy affair. We could get the Goal Zero inverter battery fully charged in somewhere around 4-6 hours, and that was more than enough to power our shooting for the final two days of the trek.
 |
Glorious sun.
5D Mark III, 35mm f/1.4 L, f/22, 1/15s, ISO 100 |
Head on over to Imaging Resource to read the rest of the article and Josh's final takeaway on what he experienced with these two recharging and power systems, as it's quite long and detailed -- plus there's a lot more photos and a final video! http://www.imaging-resource.com/news/2014/03/25/a-trek-through-bhutan-lessons-learned-and-experiences-shared-part-ii
-----------------------------------------------------------------------------------------------------
QUICK HITS
-------------------
First Shots: Sony A6000, Canon G1 X Mark II
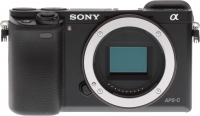
Sony A6000 First Shots posted! See how the NEX-6 successor stacks up against the rest of the pack
Sony's doing a lot of talking these days, and you camera fans out there are listening. Take a quick glance at the "Most Popular Digital Cameras" section of our homepage and you'll see the Sony Alpha 6000�sitting securely in the pole position. With a body-only pre-order price of just US$648�and a storied pedigree, this is not surprising.
The latest top-shelf model in the Sony Alpha APS-C world (formerly known as NEX) and logical successor to the�NEX-6�from 2012, the Sony A6000 sports a 24.3 megapixel sensor giving it resolution similar to the flagship�Sony NEX-7. It also sports the same Bionz X processor found in the�award-winning Sony A7/A7R�full frame mirrorless models from 2013.
And this is where the real fun begins, as Sony is calling the A6000 the "Fastest Focusing Camera in the World." Indeed, the�Fujifilm X-T1�(also hugely popular) held that distinguished honor for but a nanosecond it seemed, until the A6000 stole the proverbial thunder. But remember that these are marketing figures and neither camera has yet to complete the rigorous trek through our test lab nor had the data scrutinized by our senior technical editor, Zig Weidelich, who leaves no stone nor sensor unturned.
While you're waiting for the lab test results and our shooting experiences, we present to you our test lab�First Shots, a standard series of Still Life shots that allow you to compare the image quality of the Sony A6000 to any camera we've ever tested in our�Comparometer.
To whet your appetite, below is quick comparison with the NEX-7 at ISO 1600.
[To perform your own comparisons against the rest of the field, just�click here!]
---
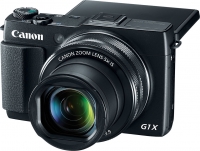
Canon G1X Mark II First Shots Posted! The highly anticipated G1X follow-up lands in our test lab
Canon's only large sensor, fixed lens compact camera, the�G1Xfrom 2012, recently received a long-awaited makeover in the form of the�G1X Mark II�which has just completed the first leg in our lab test series. Our�First Shots�allow you to take a close-up look at our Still Life target images across the ISO range at default JPEG settings, and to also compare the G1X Mark II to its predecessor, or to any other camera we've ever tested, using our world-renowned�Comparometer.
As a special note to readers who've yet to read our�G1X Mark II preview, below is an in-depth description of why we chose to shoot these test shots in a 4:3 aspect ratio, as opposed to the default setting of 3:2, written by our publisher Dave Etchells:
"Here at IR, we normally shoot cameras in whatever their default modes are, figuring that most users will do the same. In the case of the Canon G1X Mark II, though, we opted to shoot our laboratory test images at the 4:3 aspect ratio, vs the 3:2 that's the default. We did so for two reasons. For one, it's the highest-resolution mode, by a whisker (12.98 megapixels vs 12.63), but more importantly, so that readers could better compare images from it and the original G1X in the�Comparometer�and in our comparison crops that will be added to the review itself.
The G1X II takes an unusual approach in how it generates 4:3 and 3:2 aspect ratios, one that makes a lot of sense, and that we've seen before in some older Panasonic models, but not for a little while now.
 |
| The Canon G1X Mark II changes both vertical and horizontal pixel counts when moving from 4:3 to 3:2 aspect ratios, so both modes can avoid the extreme edge of the lens's image circle. The original G1X simply crops the 4:3 sensor output vertically to create its 3:2 images. |
The illustration above shows the relative pixel dimensions of the 4:3 and 3:2 aspect ratios of the two cameras. The original G1X had a 4:3 aspect ratio sensor, and created its 3:2 ratio images simply by lopping off the top and bottom of the frame. One consequence of this is that the corners of the 4:3 ratio images extended further out from the center, so were more prone to optical shortcomings as they approached the limits of the lens's image circle.
By contrast, in switching from 4:3 to 3:2 mode, the G1X Mark II shortens the vertical dimension somewhat, but at the same time, increases the width. This approach means that the corners of both the 4:3 and 3:2 images use the same amount of the lens's image circle. Optical performance in the corners of images with both aspect ratios will be about the same.
In the original G1X, the higher-resolution 4:3 aspect ratio was its default, while in the G1X Mark II, 3:2 is the default. (Perhaps to mimic the ratio most DSLR shooters are familiar with.)
Following the industry convention for comparing resolution between cameras having different aspect ratios, our test shots are set up so the subject fills the same percentage of the frame vertically. Particularly in the case of our Still Life subject, which is only a little wider than it is tall, this makes sense, since that will best fill the frame with the subject. Wider aspect-ratio cameras simply show more blank space on the left and right.
Given this framing, shooting the G1X Mark II in its default 3:2 mode would have resulted in less resolution (fewer pixels on the subject) than at 4:3. Comparing the G1X Mark II at 3:2 with the original model at 4:3 would have further increased the apparent difference, when the actual difference in vertical resolution between the two cameras (the value that's most relevant to the Still Life target) is actually fairly modest, at 3,120 vs 3,264 pixels, a difference of less than 5%, vs the more than 12% difference, had we shot at 3:2.
All this is perhaps more explanation than is called for, but we wanted readers to understand why we didn't use the G1X Mark II's default aspect ratio for our shots. (And it also highlights and explains Canon's clever avoiding of the most extreme edges of the G1X Mark II lens's image circle.)"
So, now that you're aspect ratio savvy, go�take a look at the images for yourself!
---
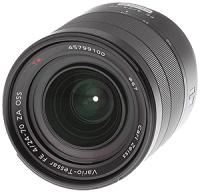
Sony FE 24-70mm Zeiss lens review: A stumble in Sony�s thus far excellent FE lens lineup?
by William Brawley
We've just published our review for the�Sony FE 24-70mm f/4 ZA OSS Carl Zeiss Vario-Tessar T*, the compact, Zeiss-branded zoom lens that was announced alongside the hot�Sony A7R�andA7�full-frame E-mount mirrorless cameras. Unfortunately, it doesn't seem to be quite up to the same standards as the FE primes we tested earlier, at least in RAW files captured with it.
This Carl Zeiss-branded lens features a very versatile 24-70mm focal length range making it suitable for landscapes, portraits and pretty much everything in between. The lens includes a variety of high-end features like Sony's Optical SteadyShot image stabilization technology, Carl Zeiss' T* coatings for reduced flare and boosted contrast, and a rugged build quality that's resistant to dust and moisture.
Like the other Sony FE lenses released so far, the Sony FE 24-70mm Zeiss has excellent build quality. The all-metal construction is dust and moisture ("spray") resistant and has a solid feel and slight heft, while still being compact, lightweight and relatively well-balanced on the A7/R cameras (there's a bit of front-heaviness to it, but it's not awkward to use by any means). The zoom and focus rings rotate very smoothly with just the right about of dampening -- not too stiff but not loose either to cause concern for lens creep.
As noted above, though, we felt the image quality of this particular lens somewhat missed the mark, especially when it comes to corner sharpness (even at 70mm). Other optical factors like vignetting and distortion didn't receive high marks either. As noted in the review, though, it's possible that some of these issues could be significantly improved by in-camera processing of the JPEG files.
Jump on over to SLRgear to read our full�Sony FE 24-70mm f/4 ZA OSS Carl Zeiss Vario-Tessar T* lens review�to see our test results and read our current verdict, based on RAW file output. We'll hopefully have an update within a week or so, looking at how much the in-camera processing helps JPEG images.
This compact full-frame zoom lens ships with a bayonet-style lens hood, front and rear caps and a soft pouch. The Sony FE 24-70mm �/4 ZA OSS Carl Zeiss Vario-Tessar T* is currently available for purchase for a retail price around $1,198 - (Adorama,�Amazon,�B&H). By purchasing this lens, or any other product, by clicking on one of our trusted affiliates, you help keep these reviews coming!
In the meantime, check out some sample photos shot by our senior lens technician Rob Murray. You can view more sample photos, plus download the full-resolution files, over at our�Flickr page.
 |
| Sony A7R: 70mm, f/4, 1/2500s, ISO 100 |
 |
| Sony A7R: 70mm, f/4, 1/1600s, ISO 100 |
 |
| Sony A7R: 70mm, f/4, 1/1250s, ISO 100 |
-----------------------------------------------------------------------------------------------------
POPULAR ON THE SITE
---------------------------------
At http://www.imaging-resource.com/news you can keep track of the photo news on our main site. Among the most popular stories over the last couple of weeks:
- What�s it take to film in a warzone? VICE photojournalists give a rundown of their Canon gear (http://www.imaging-resource.com/news/2014/04/03/whats-it-take-to-film-in-a-warzone-vice-photojournalist-canon-gear)
- New York Times editor offers tips to aspiring photojournalists (http://www.imaging-resource.com/news/2014/04/03/new-york-times-editor-offers-tips-to-aspiring-photojournalists)
- Stunning aerial photos shot the hard way -- leaning out of an airplane (http://www.imaging-resource.com/news/2014/04/03/stunning-aerial-photos-shot-the-hard-wayleaning-out-of-an-airplane)
- Secret life of coral: See the jaw-dropping time-lapse for which a Canon 7D and laptop gave their lives (http://www.imaging-resource.com//news/2014/03/28/secret-life-coral-jaw-dropping-time-lapse-for-which-canon-7d-gave-its-life)
- Photographer captures the adventures of his Star Wars action figurines (http://www.imaging-resource.com/news/2014/04/03/photographer-captures-the-adventures-of-his-star-wars-action-figurines)
- Mirrorless camera sales rising despite continually shrinking global camera market (http://www.imaging-resource.com/news/2014/04/02/mirrorless-camera-sales-rising-despite-continually-shrinking-global-camera)
- Latest Nikon Hacker firmware patch brings 64 Mbps Full-HD video to Nikon DSLRs http://www.imaging-resource.com//news/2014/03/31/latest-nikon-hacker-firmware-patch-brings-64-mbps-full-hd-video-to-nikon-ds)
- Camera fans fooled yet again by April Fools� Day pranks (http://www.imaging-resource.com//news/2014/04/01/camera-fans-fooled-yet-again-by-april-fools-day-pranks)
----------------------------------------------------------------------------------------------------
NEXT ISSUE
---------------
We'll see you next on April 18, with a regularly scheduled edition (and lots more news and analysis to share)!
SIGNOFF
-----------
That's it for now, but between issues visit our site for the latest news, reviews, or to have your questions answered in our free discussion forum. Here are the links to our most popular pages:
Newsletter Archive: http://www.imaging-resource.com/cgi-bin/dada-nltr/mail.cgi/archive/irnews
Daily News: http://www.imaging-resource.com/news
SLR Gear: http://www.slrgear.com
New on Site: http://www.imaging-resource.com/new-on-ir
Review Index: http://www.imaging-resource.com/camera-reviews
IR Photo Contest: http://www.dailydigitalphoto.com
Google + http://plus.google.com/+imagingresource
Facebook: http://www.facebook.com/imagingresource
Twitter: http://www.twitter.com/IR_Lab
Happy snapping!
Dave Etchells & the IR Editorial Team
editor@imaging-resource.com
|