Fujifilm FinePix S6000fd Design
With its traditional 35mm styling, the Fujifilm FinePix S6000fd would be called compact if it were an SLR, but it's quite large for a digicam. It's actually a little wider than a Canon Digital Rebel XTi, but it manages quite a bit more zoom than that compact SLR, with a 10.7x optical zoom lens. Its black plastic body is relatively light and well-balanced at 21 ounces (601 grams) without batteries or memory card, and the camera fits the hand well, measuring 5.2 x 3.8 x 5.0 inches (132 x 97 x 127 millimeters). The grip may actually be a bit big for those with smaller hands; but it's certainly comfortable for medium to large hands. The large lens features a manual zoom ring, and comes with a lens hood, and a plastic cap that tethers to the camera body. A neck/shoulder strap is also included, and highly recommended when strolling about.
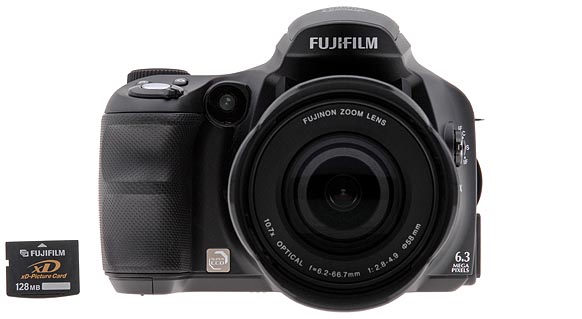
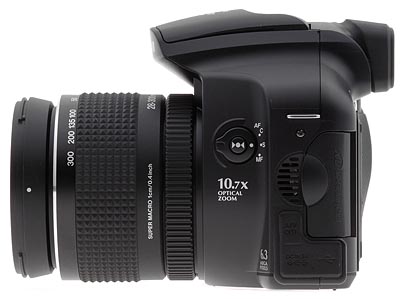
The Fujifilm FinePix S6000fd has a nice handgrip, complete with two small wells for fingers to settle into, and a rubbery texture that extends all the way to the back. The 10.7x, 28-300mm equivalent zoom lens juts out from beneath the flash above, looking for all the world like a removeable lens. It has both manual focus and zoom rings for quick adjustment. The focus ring turns freely, because it's a fly-by-wire focus system, but the zoom is a real, manual zoom, great for framing your shot just right. A very bright lamp tucked between the handgrip and lens shines to assist the autofocus system in dark conditions, and also serves as a blinking self-timer indicator. Barely noticeable above the lens and underneath the flash compartment are three tiny holes for the camera's microphone.
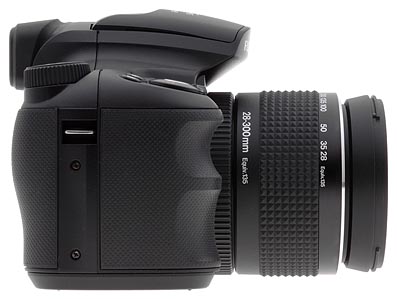
The right side of the camera (as viewed from the rear) features only one of the neck strap eyelets.
On the left side of the camera body are the Focus Switch and One Touch AF button, as well as the camera's speaker and the memory card and connector compartments. A plastic, hinged door covers the memory card compartment, which opens toward the rear of the camera. Inside is the xD-Picture Card slot, and you press the card in to eject it. Covered by a flexible, rubbery flap just below the card door are the AV Out, DC In, and USB connector terminals. At the top of this panel is the second neck strap eyelet.
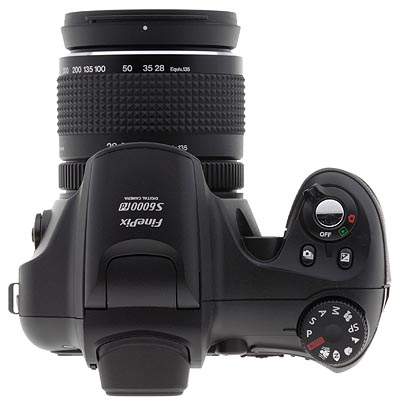
The camera's top panel includes the Shutter button and Power/Mode dial combination at the very front of the handgrip, as well as the Continuous Shooting and Exposure Compensation buttons. The Exposure Mode dial is perched perfectly on the back edge, making for quick mode changes with the flick of your thumb. Also on the top panel is the camera's pop-up flash compartment.
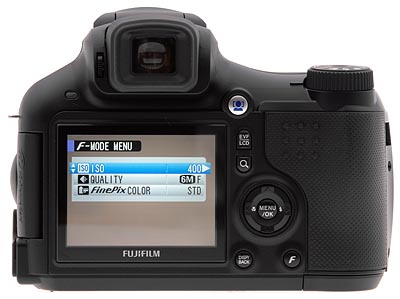
The few remaining camera controls are on the S6000fd's rear panel, along with the 2.5-inch color LCD monitor and electronic optical viewfinder eyepiece. A rubbery eyecup surrounds the eyepiece and a small dioptric adjustment dial on its left adjusts the view for eyeglass wearers. This electronic viewfinder has a higher eyepoint than most SLRs, making it very easy to use without smushing your glasses against the rubber eyecup. At the top right corner of the LCD monitor is the Intelligent Face Detection button, with the EVF/LCD and Digital Zoom buttons just below it. A Four-Way Rocker button right of the LCD monitor controls a variety of camera settings and functions, and features a Menu/OK button at its center. Directly below are the Display/Back and Photo Mode buttons.
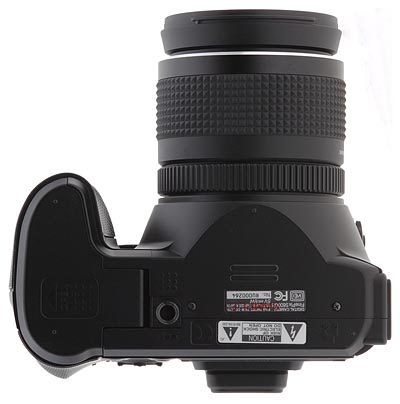
Finally, the Fujifilm FinePix S6000fd's flat bottom holds the threaded plastic tripod screw mount and the battery compartment directly adjacent (making quick battery changes while mounted to a tripod impossible). The plastic battery compartment door slides sideways before opening, and releases all four batteries immediately. (Thus, you should hold the camera on its side to avoid dumping spent batteries on the floor.)
Fujifilm FinePix S6000fd External Controls

Shutter Button: Placed at a slight angle on top of the handgrip, this
button sets focus and exposure when halfway pressed, and fires the shutter when
fully pressed.
Power/Mode Dial (see image above): Surrounding the Shutter button on the top panel, this
dial controls the camera's power, and also accesses Record and Playback modes.
![]()
Drive Mode Button: Behind the Shutter button and Power/Mode dial, this button cycles through the camera's available drive modes when held down while pressing the up and down arrow keys. Choices are Single (Off), Top 3, Auto Bracketing, Final 3, and Long Period.
![]()
Exposure Compensation Button: Right of the Continuous Shooting button on the top panel, this button lets you adjust the exposure compensation when held down while pressing the left and right arrow keys. A small histogram appears while making the adjustment, so you can somewhat guage any potential over- or underexposure. In Manual mode, holding this button down and pressing the up and down arrow keys adjusts the aperture setting.
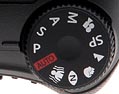
Mode Dial: Perched high on the right side of the camera's top panel,
this ribbed dial sets the camera's operating mode, offering Auto, Program, Shutter
Priority, Aperture Priority, Manual, Movie, Scene Program, Landscape, Portrait,
Night, and Picture Stabilization modes. (See menus and descriptions below.)

Intelligent Face Detection Button: Adjacent to the top right corner
of the LCD monitor, this button activates Intelligent Face Detection mode, which
automatically finds the faces in the subject frame and sets the optimum focus
and brightness. (For multiple faces, the camera highlights the center face in
green and uses it for the main focus and optimizes focus for all faces detected.)
![]()
EVF/LCD Button: Directly below the Intelligent Face Detection button,
this button switches the viewfinder display between the EVF and LCD monitors.
![]()
Digital Zoom Button: Just below the EVF/LCD button, this button enables
the camera's 2x digital zoom, which is adjusted with the optical zoom ring around
the lens.

Four-Way Rocker Button: The largest control feature on the camera's rear panel, this rocker button features an arrow in four directions (up, down, left, and right). In any settings menu, the arrow keys serve as navigational tools. Outside of the menu, in Record mode, the left button accesses Macro mode, and the right arrow accesses the camera's flash modes. The arrow keys also serve as adjustment tools, when pressed in combination with some of the control buttons (such as the Exposure Compensation button). In Aperture and Shutter Priority exposure modes, the up and down arrows adjust the available exposure variable. In Manual mode, the up and down arrows adjust shutter speed. To adjust aperture, you hold down the Exposure Compensation button and then use the up and down arrow keys.
In Playback mode, the right and left arrows cycle through recorded images. When an image has been enlarged using the up arrow, you press the left or right arrow to begin panning mode. To return to zoom in or out again, you press the Back button.
Menu/OK Button (see image above): Set in the center of the Four-Way Rocker button, this
button accesses the camera's menu system or dismisses the menu. Within the settings
menus, it also acts as the OK to confirm setting changes.
![]()
Display/Back Button: Below left of the Four-Way Rocker button, this
button cycles through the available LCD display modes. When making a settings
change, this button backs out of the change.
![]()
Photo Mode Button: To the right of the Display/Back button, this button
pulls up the Photo Mode menu in any Record mode. The following options are available:
 ISO: Sets the camera's sensitivity to Auto, or to 100,
200, 400, 800, 1,600, or 3,200 equivalents.
ISO: Sets the camera's sensitivity to Auto, or to 100,
200, 400, 800, 1,600, or 3,200 equivalents.- Quality: Controls the image resolution and quality settings, offering 6 megapixel Fine (2,848 x 2,136 pixels), 6 megapixel Normal, 3:2 (3,024 x 2,016 pixels), 3 megapixel (2,048 x 1,536 pixels), 2 megapixel (1,600 x 1,200 pixels), or 0.3 megapixel (640 x 480 pixels). Movie options are 640 x 480 or 320 x 240 pixels.
- FinePix Color: Offers Standard, Chrome, or Black & White color options.
In Playback mode, this button pulls up the following menu items:
- Playback Mode: Sets the automatic playback style of the captured images. Choices are Normal Face Detection, Normal, Fade-in Face Detection, Fade-in, Multiple, and Clock. The Face Detection modes allow you to zoom into the portion of the image with the detected face by pressing the Face Detection button. Multiple displays a mosaic of smaller images, showing only part of the frame, in quarters or halves of the screen (a strange mode), and the Clock setting displays a graphic "clock" in the upper right corner of the image with a series of boxes animating in the left corner as images crossfade in and out.
- Print Order: Lets you decide to print the date with images, or reset all print settings for DPOF compatible devices.

Focus Mode Dial: Located on the camera's left panel, just behind the
lens barrel, this switch selects the main AF mode. Choices are C-AF (Continuous),
S-AF (Single), and MF (Manual).
One-touch AF Button (see image above): Surrounded by the Focus Mode dial, this button sets the autofocus when shooting in Manual focus mode. Thus, you can quickly set the AF, then manually tweak the focus with the focus ring.
![]()
Focus Ring: Encircling the camera lens and close to the camera
body, this ridged ring controls the camera's focus in Manual focus mode.

Zoom Ring: The larger ring encircling the lens, this ring
controls the optical zoom, from 28-300mm 35mm equivalents. If enabled, this
ring also adjusts the digital zoom.
 Fujifilm GFX 50S Review
 Fujifilm X-T3 Review
 Olympus E-M5 III Review

Follow Imaging Resource