


Overview

Panasonic continues to rethink and retool their camera lineup, revamping controls and cosmetics while maintaining the resolution and capabilities of their mainstream Lumix G-series camera. The Panasonic G5's most noticeable improvement is their switch back to a larger grip, both front and back. Sensor resolution remains essentially the same, at 16.05 megapixels, but Panasonic says both the sensor and Venus Engine are improved for better performance. After using the G5, it's clear the autofocus speed is improved, now actually beating Olympus' extremely fast autofocus. Panasonic calls the new system Lightspeed AF. It alone could be worth an upgrade for Panasonic fans.
Kitted with the standard 14-42mm G Vario lens, the Panasonic G5 weighs 20.3 ounces (1.27 pounds; 575g), including lens, hood, battery, and card. Dimensions are 4.72 x 3.28 x 2.79 inches (119.9 x 83.2 x 70.8mm) for the body alone, just a little wider and deeper than the G3.

The change in the grip is probably a good one to help the Panasonic G5 compete with SLRs on the market. It's nice that they added a divot for the middle finger more easily find its position, but the divot should run more front-to-back instead of outward from the center of the camera. This, and the long curve back to flat give my fingers less purchase rather than more. I tend to get used to most grips, though, adjusting my hand to compensate, so it's hard to tell how big an issue this is. I think it looks great, and comfortable in the hand, but my grip on it feels just a little less secure than I like. Other than that, the G5 is pretty similar to the G3. The AF assist/self-timer lamp and G-series logo have swapped positions too.

The Panasonic G5's strap lugs jut out a bit more than the G3's did, but thank goodness they're modern cloth-to-metal lugs rather than D-ring based. Stereo microphones top the EVF housing as they did on the G3. The key differences are available because of the larger grip area. The Shutter release button is now out on the grip like most competing designs, and the Movie Record button returns to the top deck, where most Panasonic cameras now feature them. The new shutter button position falls right under your index finger, making for a much more natural, comfortable shooting experience, and the top-mounted Movie Record button is likewise much more convenient to use. A new toggle control appears between the two buttons, serving dual functions. By default, if a Power Zoom lens is attached, it controls the lens zoom setting. Alternatively, if shooting with a manual zoom lens or if you configure it so in the Custom menu, you can use it to set Exposure compensation in Program, Shutter, and Aperture priority modes, and adjust aperture in Manual mode. It's a good, quieter substitute for the second dial on most SLRs, and much more convenient than relying on the lens-barrel zoom toggle on the Power Zoom lenses themselves.

Continuing the shift toward a more ergonomic look and feel, the Panasonic G5's thumbgrip is more comfortable than the G3's. The rear dial is now set off further to the right of the thumbgrip and seems a bit larger. I'm not sure if I like it as well, as you have to bend your thumb a little more to reach it, and of course you lose your thumb hold while you're making adjustments. Use two hands when making adjustments when possible.
An AF/AE lock button is well-placed, as is the Q.Menu button, so kudos there. Also note the proximity sensor beneath the electronic viewfinder, which automatically switches to the EVF when you hold the camera to your eye.
The 1,440,000-dot equivalent EVF (which Panasonic calls the LVF for Live View Finder) uses the same time-multiplexed display technology as did the G3, which delivers a smooth image, completely devoid of the grid effect so common with LCDs.

The LCD monitor is also 920,000 dots making it impressively sharp. Mounted in an articulated housing, the display can be swung out to serve as a touch focus control while you use the electronic viewfinder to frame your images. It's almost like a mouse for your AF point.
Overall, the Panasonic Lumix G5 looks like a good quality bundle of features we've seen in other Lumix cameras, bringing the main consumer G series up to date with recent advances.
Panasonic G5 Field Test
by David Schloss
As one of the pioneering developers behind the Micro Four Thirds standard, it's no surprise that Panasonic has continually released a stream of cameras that take the fullest advantage of the format's size and performance strengths. However, as with many cameras in the new compact interchangeable lens space, compromises are necessary to squeeze a DSLR-worth of features into a body about the size of a paperback novel.
As many customers in this category are likely moving up from compact digital point-and-shoots, the interface of the Panasonic G5 is that of an overgrown compact digital, rather than a scaled-down DSLR. Its price -- around $800 with kit lens -- puts it above a pure entry-level DSLR, though, so it needs to compete on functionality. As you'll see below, it does this rather handily. By comparison, a camera like the Nikon D5200 is a full-fledged DSLR (albeit with an APS-C based sensor) in a package that sells for about $100 more, but is fully 42% larger.
Much of the usefulness of a compact interchangeable camera comes down to ergonomics, control and performance, all of which are generally excellent in the Lumix G5. However, there are some design choices that won't work well for some photographers.

Legacy. The Panasonic Lumix G5 is an only slightly modified version of the Lumix G3, a camera that earned the Dave's Pick rating on this site, and for good reason. The G3 and the G5 by extension fit comfortably in the hand, provide precise and fast autofocus and render excellent quality images and video.
The main changes to the G5 come in the redesign of the front handgrip, which is now extended forward in a more traditional DSLR style. This provides a much better holding surface than that of the G3, and I found myself using the G5 without a strap for much of the time. (Conversely, the G3, with a more subtle front profile was hard to hold for many photographers.) As I have average sized hands, I found the G5 fit perfectly in my grip, though users I showed the G5 to that have larger paws felt their fingers cramped between the lens and the grip and weren't able to get as much purchase on the grip as I was.
One vexing change was the relocation of the rear control dial (the thumb-actuated dial) outbound of the grip -- it's now almost touching the camera's strap mount. As a result, it's necessary to almost completely release the hand grip in order to turn the dial. That's a big issue as it means destabilizing your grip on the camera to change something like aperture or shutter speed. As a left-eye-dominant shooter I find this particularly annoying as it means that my thumb bangs back against my face every time I release the rear dial and put my hand back to its normal position.

Control deck. As with many compact digital cameras, the rear interface on the G5 is a bit crowded. Often during shooting, I found myself accidentally activating one of the four-way switches and suddenly dialing in a new white balance or ISO instead of capturing a photo. I've personally always wanted a lockout switch for compact digital cameras that would deactivate the rear rocker dial unless the switch was pressed, at which point the rocker dial would become active for a few seconds.
Aside from the close positioning of the buttons (something that's just endemic for all of these diminutive bodies), the ergonomics of the G5 are very good. It doesn't feel so much like an overgrown compact digital but instead a smallish DSLR.
A good view. The Panasonic G5 retains the same high-resolution electronic viewfinder as on the G3. Relatively few compact digitals have provided an EVF of high enough quality to rival an optical viewfinder, but the display inside the G5 is excellent.
With the equivalent of nearly one-and-a-half million dots (800 x 600 pixels), the EVF on the G5 is spectacularly useful. No matter how good the quality of a an optical viewfinder there are things that it cannot do. It can't display the shooting values over the screen, nor can it superimpose a horizontal level, rule of thirds grid or histogram. For video shooters, an EVF is even more helpful as it allows for composition and capture of video while the camera is pressed against the face and in a more stable position.

Take your pick. The G5 allows the user a variety of different ways to select and altering the user settings. Pressing the up arrow shows this display.
The rear LCD screen is equally as stunning (with double the pixels of the earlier G3) and provides a clean, clear image even under bright daylight. The touch-screen capabilities of the G5's LCD screen make it very useful in real world situations. Usually I only make use of an articulated display when shooting macros or overhead shots, but the G5's LCD screen is a great tool for setting selection and composition. Being able to adjust settings, set focal points and capture images all by tapping iPhone-style on the display is great.
In a few cases the user interface doesn't exactly work in harmony with the display, though -- for example, a few of the sliding menus are hidden right at the edge of the screen and you have to tap in a specific place to activate them. The least sensitive spot on the LCD screen happens to be the area where the glass meets up with the frame, yet that's where a lot of the sliding menus can be found.
Still, turning the LCD screen into an interface device is an excellent choice, and even better is the fact that the settings on the LCD screen can all be performed with the physical buttons if preferred. That's good because some cameras with touch-screen interfaces use them instead of buttons, which forces the shooter into a less-than-ideal interface system. With the G5, the shooter can take their pick of control systems.
Autofocus. In all of our tests, the G5 performed flawlessly in autofocusing, even in poor light situations. Panasonic's Micro Four Thirds cameras have always been quite fast at focusing, and the G5 is especially peppy. In testing I was able to quickly face-detect focus on a trio of kids running through a forest. The camera was able to instantly detect the people (as opposed to the foliage) and lock on.
Having the ability to prioritize focus based on facial recognition (as opposed to mere face detection) is excellent as well, though in some cases it can lead to having to fight with the camera. While my son and my wife are registered faces in the camera, they're not always the subject in a shot. Except, when they're in the frame and face recognition is on, they are whether I want them to be or not. As a general rule, I used the G5 without registering faces but leaving face detection on.
The focus tracking modes worked very well for everything from running toddlers to speeding cars and were much faster than most DSLRs in the same price category.


Image is everything. Image quality on the G5 was generally excellent, though the quality of any camera's images depends of course on several factors, most prominently the sensor and the lens. In my user-testing I only used the G X Vario PZ 14-42mm f/3.5-5.6 zoom lens that arrived with the G5, which means that I couldn't shoot anything above f/3.5. I'm not particularly fond of zoom lenses with small maximum apertures, especially those not offering a constant aperture while zooming, as I like to shoot wide open to control the depth of field. (Note that images in this review were taken with v0.2 firmware, as Panasonic assured us that image quality was production-quality.)


Understandably at this price point the G5 isn't going to ship with an f/2.0 lens, but high end users will have to understand that they might want to immediately invest in a better lens for more professional-looking images. That, of course, is one of the advantages of working with a standard like Micro Four Thirds (MFT), as there are lots of lenses available.
On the flip side, as one of the HD series lenses from Panasonic, the "Power Zoom" kit lens performed well in video, and the silent internal motor reduces noise picked up by the microphone making it an excellent choice for video work. The side-mounted zoom switch is much nicer than a body-only zoom solution or a manual zoom ring as it's able to be racked during video recording without jumping or stuttering.
Image quality with the kit lens is decent, though not as good (obviously) as the high-end MFT lenses. Like with all small sensors the G5 has a good amount of noise in low-light and high ISO shots, but that's unavoidable. (See the crops from our test images below for comparisons of high ISO shots taken with sharp prime lenses.)


Speed of shutdown. The G5 boots up instantly, going from sleep to shooting in the blink of an eye. Particularly when shooting with slow SD cards, though, the camera didn't shut-down nearly as quickly. With several (RAW+JPEG) images in the buffer it could take up to thirty seconds for the buffer to clear and the camera to shut down.
The downside to this is that the camera doesn't retract the Power Zoom lens into the barrel until the camera has emptied the buffer. I'm not sure why this is the case -- it seems that the lens could easily retract while the buffer was still being written out to the card -- but it meant that in a few cases I had to wait to put the camera into its case or into my jacket pocket. That shouldn't be an issue with the standard kit lens.
Movie maker. With Full HD support up to 60p, the Panasonic G5 is a great camera for video capture. It's perhaps one of the most powerful video capture devices you can stick in a pocket. (Well, a coat pocket, at least.)
Strangely the G5 has no audio-in jack, one area where Panasonic didn't improve over the G3. My theory on this is that they didn't want to change the layout of the controller board, but this does reduce the usability of the camera for video capture.
Yes, the G5 has a built-in stereo microphone, but that's not acceptable for high quality video work. It can be argued that no motion picture will be made on a small sensor camera like the G5, and that video editors can easily combine the footage from the G5 and audio from an outboard audio recorder, but it seems that a stereo mic input would have been a great addition to make the G5 more flexible for amateurs who want to experiment with off-camera mics.
Also strange is there's no support for manual or priority exposure modes for video recording, which was true of the G3 as well. You'll want to step-up to a GH-series model for that.
See our G5 Video page for more details and sample videos.
Panasonic G5 Technical Info
by Mike Tomkins

At the Panasonic G5's heart is a newly-developed 16.05 megapixel, 4:3 aspect ratio Live MOS image sensor in the standard Four Thirds format. The design includes per-pixel analog to digital conversion, allowing for the fast readout required for 60p video, high speed autofocus, etc.
Output from the G5's sensor is handled by an updated Venus Engine image processor, said to offer more advanced signal processing than its predecessor. A "3D" NR function varies noise reduction levels depending on scene detail, while Multi-process NR determines noise reduction levels based on subject brightness.
ISO sensitivity in the Panasonic G5 varies from 160 to 12,800 equivalents. There's also an Auto ISO mode, and an Intelligent ISO function. The latter detects subject movement, and boosts ISO as needed to freeze the action.

The new Venus Engine processor allows full-res burst shooting at six frames per second, for nine raw or unlimited JPEG frames. If tracking autofocus is enabled after the first frame, this falls to 3.7 frames per second.
Like the majority of mirrorless cameras, the Panasonic G5 relies on contrast detection autofocus. As in other recent G-series models, this is branded "Light Speed AF", and is said to couple high precision with high speed focus lock. (Our tests certainly seemed to bear this out.) The system operates with 23 preset areas or in a single-area mode. It's also possible to touch the camera's LCD to set focus anywhere within the image frame. Face detection and tracking functions are included, and there's an AF assist lamp to help out in low light.
As you'd expect, there's a standard Micro Four Thirds lens mount, compatible with lenses from Panasonic, Olympus, and their Micro Four Thirds partners. Including optics from companies such as Sigma, Kenko Tokina and Cosina Voigtländer, the Micro Four Thirds mount selection is expected to pass 40 lens models this year. These include a generous selection of both primes and zooms, plus Panasonic's unique 3D lens. The Panasonic Lumix DMC-G5's lens mount ring is crafted from metal.

One of the defining features of the Panasonic G5 is its electronic viewfinder, which is similar in specification to that of the G3. Resolution is unchanged at 800 x 600 pixels, and it's still a time-multiplexed design with high refresh rate to minimize color breakup issues. (Panasonic touts this as 1.44 million "dots equivalent," for more accurate comparison with displays having separate RGB pixels.) Also retained are the 100% coverage, 0.7x magnification, 17.5mm eyepoint, and very generous +/-4.0 diopter correction. So what's new? The eye proximity sensor of the G2 returns, allowing automatic switching of viewfinder and LCD, as well as eye-start autofocus.
The G5's LCD monitor, meanwhile, is a new design since the G3. Resolution increases significantly from 460k to 920k dots, with the same three-inch diagonal. The panel has a 3:2 aspect ratio, approximately 100% coverage, and a wide viewing angle (although Panasonic doesn't specify the actual horizontal / vertical viewing range). Interestingly, the company says display lag has been reduced by 18% since the LUMIX G3, for easier framing of fast-moving subjects. Contrast, saturation, and brightness can all be adjusted.

The LCD panel is still articulated, like that of the Panasonic G3, with a side-mounted tilt / swivel mechanism. It can swivel 180 degrees outwards from the camera's back surface, and rotate 270 degrees for viewing from most angles, including in front of the camera.
The design retains the touch panel overlay of the G3, as well. One important change: the Lumix G5 now allows touch autofocus on the swiveled-out LCD display while framing your subject through the electronic viewfinder. (!) It's more intuitive than it sounds, and works very well.

On the top deck of the G5 is what Panasonic refers to as the Function lever: basically, a rocker-switch that controls the zoom on Power Zoom lenses for single-handed operation. It can also be assigned to Manual-mode aperture, or exposure compensation control in other exposure modes. In playback mode, it controls image zoom, while in menus it's used for page selection.
Also on the top deck are both a built-in popup flash, and a flash hot shoe for external strobes. The built-in flash has a guide number of 10.5 meters at ISO 160 equivalent. Flash x-sync is at 1/160 second or less.
The Lumix G5's exposure modes include Program, Aperture-priority, Shutter-priority, and Manual, plus two Custom modes. There's also a Scene position, and a Creative Control mode that tweaks the look of images by automatically adjusting variables such as color, saturation, contrast, brightness, and tone curve.

The G5's images are metered using the main image sensor, and the metering system considers the image frame as 144 separate zones. As well as the standard Intelligent Multiple metering, you can also opt for Center-weighted or Spot modes. The metering system has a working range of EV 0 to 18 at ISO 100 with an f/2.0 aperture, and +/-5.0EV of exposure compensation is offered in 1/3 EV steps. There's also a bracketing function, providing for three, five, or seven frames with a step size of 1/3, 2/3, or 1 EV.
In front of the Panasonic G5's image sensor is a focal plane shutter, and the camera also now has an electronic shutter mode for completely silent operation. Shutter speeds range from 1/4,000 to 60 seconds, plus a bulb mode that's limited to a maximum of 120 seconds.
There are nine white balance modes on offer in the Panasonic G5: Auto, Daylight, Cloudy, Shade, Incandescent, Flash, two Manual modes, and a direct color temperature setting (2,500 to 10,000 kelvin in 100K steps). The G5 also offers a three-shot white balance bracketing function on either blue/amber or magenta/green axes.
Compared to its predecessor, the G5 offers expanded creative options. Key among these is a new HDR function that composites several sequential exposures into a single image with increased dynamic range. There are also more than twice as many filter effect functions. New filter effects include Soft Focus, Dynamic Monochrome, Impressive Art, One Point Color, Cross Process, Low Key, Toy Effect and Star Filter. Filter effects can be previewed before capture, and in Intelligent Auto modes, the camera can actually recommend filters it feels are appropriate.
Another new user interface option is the Lumix G5's Scene Guide. This provides 23 professional sample photos, and lets the user select the one closest to the photo they'd like to take, then configures the camera appropriately. The camera can also provide shooting advice and suggest suitable lenses for the scene type selected.

Also new is the Panasonic Lumix G5's level gauge, based around input from a three-axis accelerometer sensor. This provides a dual-axis (side-to-side roll and front-to-back pitch) level display, helping you get level horizons and prevent converging verticals.
As you'd expect, the Panasonic G5 retains its predecessors' Supersonic Wave Filter function, which is used to shake free dust from the low-pass filter over the image sensor, reducing the impact of dust that enters the camera body between lens changes.
Although the resolutions and file formats are unchanged, the G5's video capabilities have had a significant refresh since the G3. Most significantly, it's now possible to record at up to 60p / 60i frame rates at Full HD (1,920 x 1,080) resolution, and that's using 60 frames per second sensor data. You can also opt for 60p or 30p at 720p (1,280 x 720) resolution, or 30p at VGA (640 x 480) resolution. (PAL cameras replace 60p/i with 50p/i, and 30p with 25p.)

60i, 60p, 50i, and 50p video are recorded only with AVCHD compression, while MPEG-4 compression only offers 30p or 25p video. Interestingly, the Full HD 60p / 50p mode can be recorded at a bit rate of 28 Mbps, which Panasonic says is the same as offered in the highest-end consumer camcorders.
The G5 has a dedicated video record button, allowing capture of spontaneous clips in the midst of still image shooting. It's also possible to take photos during video capture by pressing the still image shutter button. Movies have shutter speeds from 1/16,000 to the frame rate of the video itself.
Focus tracking is available for video shooting, as is touch autofocus, making it easy to achieve focus effects or switch subjects during capture. There's also a digital crop function that increases effective focal lengths without extra interpolation by simply cropping the sensor data. Magnification ratios available are 2.4x for Full HD, 3.6x for HD, and 4.8x for VGA resolution.

You can also use Creative Control effects for movies, but note that the Miniature Effect filter causes movies to be recorded without sound, and to play back at 10x real time speed.
For movies other than with the Miniature Effect, audio is recorded with a stereo microphone located in front of the hot shoe. AVCHD movies have Dolby Digital audio, and MPEG-4 movies have AAC audio. The microphone level is adjustable in four steps, and there's a wind cut function. As mentioned, there is no external microphone jack, though.
Connectivity options include USB 2.0 High Speed for data, and both standard / high definition video outputs. The composite standard-def output is NTSC-only for the North American market, and includes monaural audio. The Type-C Mini HDMI output includes stereo audio. There's also a wired remote jack, for use with the optional DMW-RSL1 remote shutter release.

Images and movies are stored on Secure Digital cards, including both the higher-capacity SDHC and SDXC types, and the higher-speed UHS-I types. Images are stored in JPEG or 12-bit raw file formats, or Multi Picture Object files when shooting with the unusual 3D lens.
Power comes from a 7.2 volt, 1,200 mAh DMW-BLC12 lithium ion battery pack, the same as used previously in the Lumix GH2. With the H-FS014042 lens, battery life is rated as 310 shots to CIPA standards, about 20 frames less than the GH2 managed with the same battery and lens. While there's no DC input jack, there is a cable channel to the battery compartment that allows the use of an optional DC coupler (DMW-DCC8) connected to an AC adapter (DMW-AC8).
Panasonic G5 Image Quality Comparisons
Most CSCs and SLRs will produce very good base ISO shots, so we like to push them and see what they can do at ISO 1,600. Recent advances in sensor technology have made ISO 1,600 look a lot more like ISO 100, but there are still cameras whose quality starts to fall apart at this setting. We also choose 1,600 because we like to be able to shoot at least at this level when indoors and at night.
NOTE: These images are best quality JPEGs straight out of the camera, at default settings including noise reduction. All cameras in this comparison were shot with our very sharp reference lenses.
Panasonic G5 versus Panasonic G3 at ISO 1,600
 |
 |
 |
 |
 |
 |
|
Panasonic G5 at ISO 1,600
|
Panasonic G3 at ISO 1,600
|
|
Color comes out looking a little better on the Panasonic G5, which is a good move in the right direction. Detail looks a little softer, though, with less detail in the mosaic image and no hint of threads in the pink swatch, something the G3 does at least hint at. Both cameras show some blotchiness in the shadows, rather than a smooth gradient.
|
|
Panasonic G5 versus Canon T3i at ISO 1,600
|
 |
|
 |
|
 |
|
Panasonic G5 at ISO 1,600
|
Canon T3i at ISO 1,600
|
|
The Canon T3i manages a bit more sharpness and detail from the mosaic image, although some of that may be down to its heavier-handed sharpening. The T3i's shadow behind the bottle is smoother, but its treatment of the red leaf swatch is up for debate, looking quite artificial.
|
|
Panasonic G5 versus Olympus E-M5 at ISO 1,600
|
 |
|
 |
|
 |
|
Panasonic G5 at ISO 1,600
|
Olympus E-M5 at ISO 1,600
|
|
Though it leaves more stippled chroma noise in the shadows and around the bottle, overall we like the Olympus E-M5's treatment of fine detail a bit better, although again, a lot of the look could simply be the heavier sharpening it applies. The two cameras are very close, though, and only the Olympus' crisper rendering of the mosaic bottle label pushes it over the top.
|
|
Panasonic G5 versus Pentax K-01 at ISO 1,600
|
 |
|
 |
|
 |
|
Panasonic G5 at ISO 1,600
|
Pentax K-01 at ISO 1,600
|
|
The Pentax K-01 adds an artificial pointillist interpretation to the background shadow, producing a smooth gradient, but a rather strange appearance. Its rendering of the mosaic bottle has the appearance of more detail, but the G5's approach may be the better one. Notice how the K-01's sharpening artificially brightens the intersections of the grout lines in the mosaic. In real life, the grout color is quite uniform, as shown in the G5's image. The G5 certainly handles the red leaf swatch better than the K-01.
|
|
Panasonic G5 versus Sony NEX-5N at ISO 1,600
|
 |
|
 |
|
 |
|
Panasonic G5 at ISO 1,600
|
Sony NEX-5N at ISO 1,600
|
|
While some of the difference is again the result of more image sharpening in the competitor's default settings, the Sony NEX-5N's sensor clearly does better with detail overall, finding thread patterns in the pink swatch and really nailing the detail in the mosaic label. The red leaf swatch is soft, but shows much more detail than the G5.
|
|
Today's ISO 3,200 is yesterday's ISO 1,600 (well, almost), so below are the same crops at ISO 3,200.
Panasonic G5 versus Panasonic G3 at ISO 3,200
 |
 |
 |
 |
 |
 |
|
Panasonic G5 at ISO 3,200
|
Panasonic G3 at ISO 3,200
|
|
The G5 does better than the G3, if only just. We prefer the color and detail in the G5.
|
|
Panasonic G5 versus Canon T3i at ISO 3,200
|
 |
|
 |
|
 |
|
Panasonic G5 at ISO 3,200
|
Canon T3i at ISO 3,200
|
|
The Panasonic G5 manages to surpass the Canon T3i at ISO 3,200, with more apparent detail in the mosaic, and a crisper image where the contrast is high. However, the T3i handles the background and bottle edge a little more faithfully (albeit with higher noise levels), rather than blurring them together, whereas the G5's rendering blurs some of the yellow into the background. The same "bleeding" happens in the red swatch, bleeding into the pink (now dark magenta). So a mixed bag here.
|
|
Panasonic G5 versus Olympus E-M5 at ISO 3,200
|
 |
|
 |
|
 |
|
Panasonic G5 at ISO 3,200
|
Olympus E-M5 at ISO 3,200
|
|
The Olympus E-M5 does better overall here, choosing to allow a bit more chroma noise as the cost of a much better rendering of the bottle shoulder, and more detail in the mosaic. As always, such choices are a matter of personal preference, but we'll tolerate the amount of chroma noise the E-M5 leaves in, because the shoulder of the bottle in particular is so much better defined and natural-looking.
|
|
Panasonic G5 versus Pentax K-01 at ISO 3,200
|
 |
|
 |
|
 |
|
Panasonic G5 at ISO 3,200
|
Pentax K-01 at ISO 3,200
|
|
The K-01 image is both softer and has less detail than the Panasonic G5.
|
|
Panasonic G5 versus Sony NEX-5N at ISO 3,200
|
 |
|
 |
|
 |
|
Panasonic G5 at ISO 3,200
|
Sony NEX-5N at ISO 3,200
|
|
The Sony NEX-5N really pulls ahead here, perhaps in part due to its slightly larger APS-C size sensor.
|
|
Detail: Panasonic G5 vs. G3, Canon T3i, Olympus E-M5, Pentax K-01, and Sony NEX-5N
 |
 |
 |
 |
 |
 |
 |
 |
 |
 |
 |
 |
 |
 |
 |
 |
 |
 |
| Panasonic G5 ISO 160 ISO 3,200 ISO 6,400 |
Panasonic G3 ISO 160 ISO 3,200 ISO 6,400 |
Canon T3i ISO 100 ISO 3,200 ISO 6,400 |
Olympus E-M5 ISO 200 ISO 3,200 ISO 6,400 |
Pentax K-01 ISO 100 ISO 3,200 ISO 6,400 |
Sony NEX-5N ISO 100 ISO 3,200 ISO 6,400 |
| Detail comparison. High-contrast details often stay sharper as ISO rises, so they're worth a look as well. The Panasonic G5 does surprisingly well maintaining high-contrast detail here; it's almost the same as the G3, handily beating the T3i as ISO rises, and is bested only by the Olympus E-M5. (Although again, the sharpness of the E-M5's images are more perceived than real, the result of much stronger sharpening than seen with the G5. Judicious use of Photoshop's unsharp masking filter could easily achieve the same result or better.) Even the NEX-5N's rendering of the lines in the Pure Brewed letters isn't quite as good as that of the G5. | |||||
Panasonic G5 Print Quality
Good, sharp 20 x 30 inch prints at ISO 160 and 200; ISO 1,600 shots look better at 8 x 10; ISO 12,800 shots make a decent 4 x 6-inch print.
 ISO 160 shots look great at 20 x 30 inches.
ISO 200 shots also look very good at 20 x 30 inches.
ISO 400 shots are softer, but still look good at 20 x 30 inches, and really excellent at 16 x 20.
ISO 800 shots lose more detail in the red leaf swatch and shadows, but fine detail is strong enough for a usable 20 x 30 inch print and a great 16 x 20.
ISO 1,600 shots are usable at 16 x 20, with a bit more detail loss in the red swatch and more noise in the shadows. Prints at 13 x 19 look great.
ISO 3,200 shots show almost no detail in the red swatch and noise in the shadows increases noticably, but they'll look good on a wall at 13 x 19 and fine for close viewing at 11 x 14.
ISO 6,400 images are usable at 8 x 10, and look very good at 5 x 7 inches.
ISO 12,800 images are slightly oversaturated, and make noisy but usable 4 x 6 inch prints.
Overall, the Panasonic G5 does very well, producing good 20 x 30 inch prints from 160 to 400, and even its highest ISO makes a usable 4 x 6-inch print.
In the Box
- Panasonic Lumix G5 digital camera
- Lumix G Vario 14-42mm f/3.5-5.6 lens (if bought as a kit)
- Lithium-ion battery pack
- Battery charger
- Body cap
- USB connection cable
- Shoulder strap
- CD-ROM
- One-year limited warranty
Recommended Accessories
- Protective case
- Extra battery pack for extended outings
- Large capacity, high-speed SDHC/SDXC memory card. 8-16GB or larger makes sense if you plan on shooting lots of HD video. Look for a speed grade of at least Class 4 for video capture.
- Additional lenses
- External flash
- LCD monitor protector
Panasonic G5 Conclusion
| Pro: | Con: |
|---|---|
|
|
The Panasonic Lumix G3 was a very good camera, the updated G5 is a great one. Its excellent image quality and blazing-fast autofocus make it one of the best Micro Four Thirds cameras on the market. By upping HD video support (with a variety of frame rates), the G5 becomes suitable not just for the advanced photographer but also the advanced videographer.
The super EVF and touchscreen LCD make the Panasonic G5 more capable than cameras with only an LCD screen and more comfortable to use for traditional DSLR photographers. Ergonomics are generally much improved over the G3, though a few quirks still get in the way.
The Lumix G5 feels better thought out than many competing DSLRs, with more features and more capabilities at about the same price. Photographers choosing between the G5 and an APS-C sized DSLR camera will have to weigh the advantages of the low weight, fast performance and compact size of the G5 over the slightly better high-ISO image quality from some APS-C sized competitors. Given the Panasonic G5's sterling qualities, we think it's a choice most people will make in its favor.
At the end of the day, Panasonic has taken all the greatest features of the previous G-series Lumix cameras and stepped them up a notch for the G5. It's a great camera, and a clear Dave's Pick.
Optics
The Panasonic G5 is available body-only, bundled with the older Lumix G VARIO 14-42mm f/3.5-5.6 ASPH MEGA O.I.S. (H-FS014042 ) lens, and in some regions, bundled with the collapsible Lumix G X VARIO PZ 14-42mm f/3.5-5.6 ASPH. POWER O.I.S. (H-PS14042) lens. The test results on this page are with the newer 14-42mm X lens. See the Panasonic G3 Optics page for optical performance of the older, more common 14-42mm lens.
14-42mm X Lens Test Results
Zoom Lens
A typical zoom ratio for a kit lens, with fair performance.


The above shots were taken with the Lumix G X VARIO PZ 14-42mm f/3.5-5.6 Power O.I.S. zoom kit lens. The 35mm equivalent focal length is about 28-82mm which is typical for a kit lens. Results at full wide angle (18mm) are good at f/8, but detail is a touch soft across most of the frame, with hints of flare around bright objects. Extreme corners exhibit mild to moderate blurring and minor coma distortion. Chromatic aberration is well controlled at all focal lengths (the G5 suppresses C.A.). Performance at medium focal length (26mm) is fair, again with a hint of softness and flare, while corners are blurred. At full telephoto (42mm), the lens is softer across the frame, corners are softer still, and there is some noticeable vignetting (shading) in the corners as well. The Panasonic G5's digital zoom mode shows a typical loss of fine detail for such a high magnification, as well as more obvious chroma noise in the shadows.
Macro
A larger than average minimum area, with somewhat soft detail and strong corner shading. Flash throttled down well, though.


The Panasonic Lumix DMC-G5's macro performance will depend entirely on the lens in use. However, with the 14-42mm X kit lens, the Panasonic G5 captures a much larger than average minimum area measuring 3.77 x 2.83 inches (96 x 72 millimeters). Detail is a little soft across the frame at f/8, with additional softening in the corners. (Most lenses have some additional softening in the corners at macro distances.) There's also some fairly strong vignetting or corner shading in the extreme corners, much more than we're used to seeing especially stopped-down to f/8. The popup flash had no trouble throttling down at this distance, resulting in a pretty good exposure, though corner shading is still visible as expected (caused by the lens).
Geometric Distortion
Low geometric distortion with the 14-42mm X kit lens in JPEGs, though strong distortion in uncorrected raw files.
| In-Camera JPEG: Barrel distortion at 14mm is 0.4 percent |
 |
| In-Camera JPEG: Pincushion distortion at 42mm is less than 0.1 percent |
 |
When shooting JPEGs, the Panasonic G5's 14-42mm kit lens produces about 0.4 percent barrel distortion at wide angle, which is much less than average and just slightly noticeable in its images. Pincushion distortion at full telephoto is less than 0.1 percent, also much lower-than-average and hardly noticeable. This is the tendency for the lens to bend straight lines outward (like a barrel -- usually at wide-angle).
| Uncorrected RAW: Barrel distortion at 14mm is 2.1% |
 |
| Uncorrected RAW: Pincushion distortion at 42mm is 0.7% |
 |
To see how much correction is taking place in the camera, we converted raw files from the above shots with DxO Optics Pro with corrections disabled. As can be seen above, actual barrel distortion at wide angle is very high at about 2.1%, while pincushion at telephoto is fairly high, at about 0.7%. We expect this for smaller interchangeable lenses though, so it's nothing to be concerned about unless you are using a raw converter which does not understand the embedded "opcodes" to perform distortion corrections automatically. Most raw converters these days (including Adobe Camera Raw and SilkyPix) are capable of applying distortion correction automatically, as specified by the manufacturer. There is however going to be some loss of resolution in the corners as a result of such correction, because pixels in the corners of the frame are being "stretched" to correct for the distortion. Obviously, a lens that doesn't require such correction, and is also sharp in the corners to begin with would be preferable, but relaxing constraints on distortion brings other benefits in the lens design, such as a very compact design.
Chromatic Aberration and Corner Sharpness
Low to moderate levels of chromatic aberration from the kit lens in JPEGs. Uncorrected raw files show higher amounts. Corners are somewhat soft wide open, but improve when the lens is stopped down.
| Maximum Aperture | |
 |
 |
| 14mm @ f/3.5: Upper right C.A.: Moderate Softness: Moderately soft |
14mm @ f/3.5: Center C.A.: Very low Softness: Sharp |
 |
 |
| 42mm @ f/5.6: Upper right C.A.: Low Softness: Moderately high blurring |
42mm @ f/5.6: Center C.A.: Very low Softness: Slightly soft |
Chromatic Aberration. Chromatic aberration in the corners of JPEGs taken with the Panasonic G5's 14-42mm X kit lens is moderate at wide angle, but coloration is fairly dull and bluish. At full telephoto, C.A. is quite low in the corners. As usual, color fringing gradually reduces in brightness and width as it approaches the center of the image, where it's almost non-existent at both ends of the zoom range. Thus, the camera's processor does a pretty good job of reducing lateral C.A. in JPEGs (see below for uncorrected raw).
Corner Softness. The Panasonic G5's 14-42mm X kit lens produces minor to moderate blurring in all four corners at wide angle when wide open at f/3.5, while the center is fairly sharp. Corners have stronger blurring at full telephoto with the top corners a bit softer than the bottom, and the center is a bit soft as well.
Vignetting. Moderate corner shading ("vignetting") is noticeable at both wide angle and telephoto, as can be seen from the difference in brightness of the center versus corner crops above. The G5 does offer shading compensation, though. See below.
| f/8 Aperture | |
 |
 |
| 14mm @ f/8: Upper right C.A.: Moderate Softness: Slightly soft |
14mm @ f/8: Center C.A.: Very low Softness: Sharp |
 |
 |
| 42mm @ f/8: Upper right C.A.: Low Softness: Slightly soft |
42mm @ f/8: Center C.A.: Very low Softness: Slightly soft |
Stopped down to f/8, corner sharpness improves, but they're still a touch soft. Center sharpness also improves slightly. Vignetting (corner shading) improves quite a bit to the point of being almost negligible.


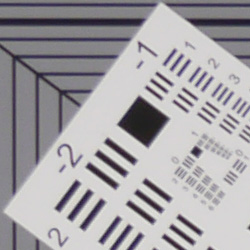

Chromatic Aberration Suppression. As mentioned above, the Panasonic G5 suppresses chromatic aberration in its JPEGs, with uncorrected raw files showing more distinct magenta and green coloration along high-contrast edges. Raw files converted with the bundled SilkyPix software or Adobe Camera Raw are automatically corrected for C.A. and geometric distortion, so we used DxO Optics Pro with corrections disabled for the uncorrected conversions above right.
Overall, a fair performance for a kit lens. Performance isn't bad on lower-resolution bodies, but the 16-megapixel G5 is slightly more demanding of lenses, making this kit lens's optical flaws more noticeable.
Shading Compensation
The Panasonic G5 features optional Shading Compensation to reduce vignetting in JPEG images.
 |
||
| Shading Compensation: (14mm @ f/3.5) |
Off (default) | On |
Mouse over the links above to compare thumbnails, and click on the links to load the full resolution images.
As you can see, the Panasonic G5's Shading Compensation reduces corner shading with the 14-42mm X kit lens, so it's a useful feature. Shading Compensation is off by default, not available when shooting video or when burst rate is set to SH, and is not available with all lenses. It may also produce more visible noise in the periphery, particularly at higher ISOs.
Panasonic G5 Viewfinder
Viewfinder Test Results
Accuracy
Very good coverage accuracy from the electronic viewfinder and LCD monitor.


The Panasonic G5's electronic viewfinder and LCD monitor both proved quite accurate in record mode, showing just over 100% coverage with our low-distortion Olympus 50mm f/2 reference lens. Very good results here.
The images above were taken from our standardized test shots. For a collection of more pictorial photos, see our Panasonic Lumix DMC-G5 Photo Gallery .
Exposure
Color
Saturation & Hue Accuracy
Lower-than-average saturation levels. Some issues with hue accuracy, primarily in orange through yellows.
 |
|||
|
ISO Sensitivity
|
|||
| In the diagram above, the squares show the original color, and the circles show the color that the camera captured. More saturated colors are located toward the periphery of the graph. Hue changes as you travel around the center. Thus, hue-accurate, highly saturated colors appear as lines radiating from the center. Mouse over the links to compare ISOs and click for larger versions. | |||
Saturation. The Panasonic G5 produces slightly lower average saturation levels than most cameras at default settings. The Lumix G5 pushes dark red and dark green slightly, and darker blues a fair bit, but undersaturates yellow, aqua and cyan. Average saturation is 105.9% (only 5.9% oversaturated) at base ISO, which remains fairly consistent across the ISO range except at the highest ISO where it drops off a bit. Most consumer digital cameras produce color that's more highly saturated (more intense) than found in the original subjects. This is simply because most people like their color a bit brighter than life.
Skin tones. Here, the Panasonic G5 does fairly well, producing natural-looking Caucasian skin tones with a push towards pink when Auto white balance is used, giving a healthy appearance. Darker skin tones have a small nudge toward orange and red, but overall results are pretty good here. Where oversaturation is most problematic is on Caucasian skin tones, as it's very easy for these "memory colors" to be seen as too bright, too pink, too yellow, etc.
Hue. The Panasonic G5 struggles a bit with hue accuracy, pushing red toward orange, orange toward yellow and yellow toward green. The cyan toward blue shift, which we think is done to improve sky color, isn't as strong as we normally see, though. As is often the case with Panasonic models, the yellow through orange shifts and reduced saturation of yellows are especially apparent in the yarn of our Still Life test image. As we've seen with other Panasonic models, the orange-yellow shifts are significantly mitigated by shooting in raw format and using a good-quality raw converter. The bundled SilkyPix software as well as Adobe Camera Raw do much better with hue accuracy than JPEGs produced in-camera. Click here to see a Adobe Camera Raw conversion of the same Still Life shot. The camera's average "delta-C" color error after correction for saturation is 5.9 for JPEGs at base ISO, which is a bit below average these days. Hue is "what color" the color is.
Saturation Adjustment
The Panasonic G5 lets you adjust image saturation, contrast, and sharpness in five steps each. As can be seen below, the saturation adjustment is quite subtle, and works mainly on reds, as we've seen with prior models. At least contrast isn't affected much.
| Saturation Adjustment Examples | ||
 |
 |
 |
| -2 | 0 | +2 |
The table above shows results with the default as well as the two "extreme" saturation settings. Click on any thumbnail above, then click again to see the full-sized image.


Sensor
Exposure and White Balance
Indoors, incandescent lighting
Better than average color with Auto white balance, but very warm with the Incandescent setting. Best color balance with the Manual setting, a little too cool with 2,600 Kelvin. Average positive exposure compensation required.


Indoors, under normal incandescent lighting, color balance is just slightly warm with the Auto white balance setting, though the Panasonic G5 does much better than most cameras in this regard. Results with the Incandescent setting are much too warm for our tastes, with a strong orange-yellow cast. The Manual setting produced the most accurate results, just a touch cool, while the 2,600 Kelvin setting which should match the color temperature of our lights is a bit too cool with a bluish cast. The Panasonic G5 required +0.3 EV exposure compensation here, about average for this shot. (Our test lighting for this shot is a mixture of 60 and 100 watt household incandescent bulbs, a pretty yellow light source, but a very common one in typical home settings here in the U.S.)
Outdoors, daylight
Slightly cool, muted colors overall, with a tendency toward high contrast under harsh lighting. About average exposure accuracy.
Outdoors, the Panasonic G5 performed pretty well, with good though slightly cool, muted color in the Far-field shot. Skintones are reasonably realistic in our "Sunlit" Portrait shot, with a healthy-looking push of pinks and reds which is preferable to too flat or yellow. Exposure accuracy is about average, as the camera required +0.7 EV compensation for our "Sunlit" Portrait shot to keep facial tones reasonably bright. That's average for this shot, but it led to some blown highlights while leaving some dark shadows. The default exposure is a little dim for the Far-field shot, but there are very few blown highlights, though some shadows are very dark. Default contrast is on the high side, but that's how most consumers prefer their photos.
See full set of test images with explanations
See thumbnails of all test and gallery images
Resolution
Very high resolution, 2,200 ~ 2,300 lines of strong detail.
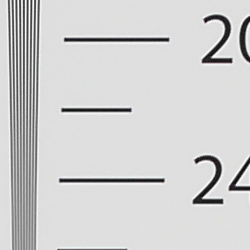
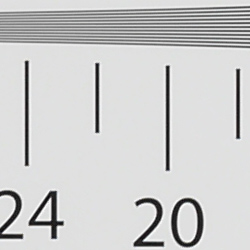


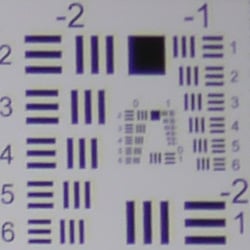
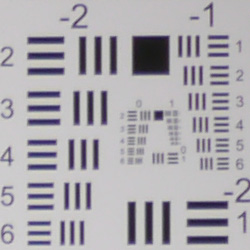
In camera JPEGs, our laboratory resolution chart reveal sharp, distinct line patterns to about 2,300 lines per picture height horizontally, and about 2,200 lines in the vertical direction. (Some might argue for higher, but aliasing artifacts begin to appear before that.) Complete extinction of the pattern didn't occur until about 3,100 lines horizontally and to 3,100 lines vertically. We weren't able to extract significantly more high-contrast resolution by processing the Panasonic G5's RW2 file using Adobe Camera Raw, and the ACR conversion also shows significantly more color moiré than the camera JPEG.
Use these numbers to compare with other cameras of similar resolution, or use them to see just what higher resolution can mean in terms of potential detail.
See full set of test images with explanations
See thumbnails of all test and gallery images
Sharpness & Detail
Very good sharpness overall, though with visible edge-enhancement artifacts on high-contrast subjects. Moderate noise suppression visible in the shadows even at base ISO.


Sharpness. The Panasonic G5 captures sharp, detailed images overall, though edge enhancement artifacts are quite visible on high-contrast subjects such as the "halos" along the thicker branches and pine cones in the crop above left. The sharpening isn't nearly as evident on lower-contrast elements, such as the pine needles and smaller branches. Given its target market, the default sharpening applied is probably appropriate, as we think most users printing camera JPEGs would be pleased with the results. And of course, you can always tweak the sharpness setting to your liking, or shoot raw and sharpen for yourself. Edge enhancement creates the illusion of sharpness by enhancing colors and tones right at the edge of a rapid transition in color or tone.
 |
|
Detail. The crop above right shows the effect of noise suppression in the form of smudging of individual strands together in the darker areas of the model's hair, as well as in areas with low local contrast. Processing raw files with a good raw converter can produce much improved detail and can also reduce noise reduction and demosaicing artifacts, as can be seen in the ACR converted raw crop at right. (Mouse over the links to compare.) Noise-suppression systems in digital cameras tend to flatten-out detail in areas of subtle contrast. The effects can often be seen in shots of human hair, where the individual strands are lost and an almost "watercolor" look appears.
Intelligent Resolution
The Panasonic G5 offers four levels of "Intelligent Resolution," which essentially sharpens fine detail and outlines, while reducing noise in areas with little or no detail (such as a cloudless sky). To see how well it works, compare the crops below at each setting.



In the table above, mousing over a link at the bottom will load the corresponding crop in the area above, and clicking on the link will load the full resolution image.
As you can see, fine detail contained in and around the lettering on the bottle has progressively stronger local sharpening applied as the setting is increased, while noise in flatter areas that would normally be emphasized with standard, global sharpening is actually reduced. Sharpening halos are however more visible at higher settings. According to Panasonic, the Extended setting is designed to produce more natural results when making large prints.
Raw vs In-Camera JPEGs
As noted above, the Panasonic G5 produces sharp in-camera JPEGs with good detail, though default noise reduction is a bit high at base ISO. As is almost always the case, quite a bit more detail can be obtained from carefully processing raw files than can be seen in the in-camera JPEGs, with fewer sharpening artifacts to boot. Take a look below, to see what we mean:
 |
|||
In the table above, mousing over a link at the bottom will load the corresponding crop in the area above, and clicking on the link will load the full resolution image.
The first crop from the left is from an in-camera Fine JPEG at default settings. The second is a raw file converted with SilkyPix 3.1 SE (the raw converter Panasonic bundles with their raw-capable cameras), using default settings. The third crop is also a raw conversion done with SilkyPix but with noise reduction and sharpening set as low as they go within the editor, and then sharpened using SilkyPix's output unsharp masking feature set to 250%, a radius of 0.3 pixels, and a threshold of 0. Adobe Camera Raw 7.2 was used for the ACR conversion at right. Default settings were used for conversion, though no sharpening was applied in ACR. The image was then sharpened in Photoshop using the same sharpening settings as we used with SilkyPix.
As you can see, the in-camera JPEG contains pretty good fine detail. SilkyPix however had trouble with the pine needles, flattening them out and making them look reminiscent of a watercolor painting. It's likely doing some fairly heavy-handed noise reduction under the hood which can't be disabled. The results we got using SilkyPix are a bit disappointing, but we must confess we didn't experiment with different settings for very long, so you may be able to do better. The ACR conversion extracted the most detail, but also shows more noise, especially in areas with little detail such as the sky. You can always turn up the luminance noise reduction (default of zero was used here), or process the files in your favorite noise reduction program or plugin if you find the noise objectionable. Bottom line, though, as is usually the case shooting in raw mode provides better detail, color, and control than in-camera JPEGs when using a good raw converter.
ISO & Noise Performance
Good noise performance to moderate ISOs, but image quality drops off quickly after ISO 1,600.
|
Default Noise Reduction
|
||
 |
 |
 |
| ISO 160 | ISO 200 | ISO 400 |
 |
 |
 |
| ISO 800 | ISO 1,600 | ISO 3,200 |
 |
 |
|
| ISO 6,400 | ISO 12,800 | |
The Panasonic Lumix DMC-G5's images are pretty clean at ISOs 160 and 200, with only minor luminance and chrominance noise visible in the shadows, but as mentioned previously there's already some smudging visible from noise reduction efforts. Stronger chrominance noise reduction kicks in a ISO 400, removing much of the color noise in the hair. Luminance noise reduction is also stronger, with more smudging, but fine detail is still pretty good. ISO 800 and 1,600 continue this gradual deterioration, with increased smudging and reduced detail. A sudden increase in sharpening makes luminance noise much more obvious with a peppering effect at ISO 3,200. ISO 6,400 is worse as you'd expect, with more noticeable noise pixels and sharpening artifacts that give the image an almost crystalline appearance. These artifacts are very noticeable and distracting at ISO 12,800, along with much stronger chroma noise in the form of purple and yellow blotches. Color balance also shifts toward green at the highest ISOs.
Overall, high ISO performance hasn't improved significantly over the G3, and isn't as good as most recent 16-megapixel competitors from Olympus or Sony. We're of course pixel-peeping to an extraordinary extent here, since 1:1 images on an LCD screen have little to do with how those same images will appear when printed. See the Print Quality section below for our evaluation of maximum print sizes at each ISO setting.
A note about focus for this shot: We shoot this image at f/4, usually using one of three very sharp reference lenses (70mm Sigma f/2.8 macro for most cameras, 60mm f/2.8 Nikkor macro for Nikon bodies without a drive motor, and Olympus Zuiko 50mm f/2.0 for Four Thirds and Micro Four Thirds bodies). To insure that the hair detail we use for making critical judgements about camera noise processing and detail rendering is in sharp focus at the relatively wide aperture we're shooting at, the focus target at the center of the scene is on a movable stand. This lets us compensate for front- or back-focus by different camera bodies, even those that lack micro-focus adjustments. This does mean, though, that the focus target itself may appear soft or slightly out of focus for bodies that front- or back-focused with the reference lens. We know this; if you click to view the full-size image for one of these shots and notice that the focus target is fuzzy, you don't need to email and tell us. :-) The focus target position will have been adjusted to insure that the rest of the scene is focused properly.
Extremes: Sunlit, dynamic range and low light tests
Somewhat high default contrast and limited dynamic range. Good low-light performance.


Sunlight. The Panasonic Lumix DMC-G5 struggled a bit with the deliberately harsh lighting of this test. Contrast is a little high at its default setting, and dynamic range limited. This led to quite a few blown-out highlights in the mannequin's shirt and flowers, and deep, somewhat mushy shadows (the G5 appears to apply stronger noise reduction in the shadows) that also show some posterization at darker levels. Although skin tones around the eyes are a bit dark at +0.7 EV exposure, we prefer it to the +1.0 EV exposure overall, because there are fewer clipped highlights. It's really the photographer's choice here as to which direction to go in. For those Panasonic G5 owners that are going to want to just print an image with little or no tweaking, the +1.0 image would probably produce a better-looking face uncorrected. The bottom line though, is that the Panasonic G5 had difficulty with the wide dynamic range of this shot, at least in JPEGs with its default settings.
Because digital cameras are more like slide film than negative film (in that they tend to have a more limited tonal range), we test them in the harshest situations to see how they handle scenes with bright highlights and dark shadows, as well as what kind of sensitivity they have in low light. The shot above is designed to mimic the very harsh, contrasty effect of direct noonday sunlight, a very tough challenge for most digital cameras. (You can read details of this test here.)
Dynamic Range Analysis
A key parameter in a digital camera is its Dynamic Range, the range of brightness that can be faithfully recorded. At the upper end of the tonal scale, dynamic range is dictated by the point at which the RGB data "saturates" at values of 255, 255, 255. At the lower end of the tonal scale, dynamic range is determined by the point at which there ceases to be any useful difference between adjacent tonal steps. Note the use of the qualifier "useful" in there: While it's tempting to evaluate dynamic range as the maximum number of tonal steps that can be discerned at all, that measure of dynamic range has very little relevance to real-world photography. What we care about as photographers is how much detail we can pull out of the shadows before image noise becomes too objectionable. This, of course, is a very subjective matter, and will vary with the application and even the subject matter in question. (Noise will be much more visible in subjects with large areas of flat tints and subtle shading than it would in subjects with strong, highly contrasting surface texture.)
What makes most sense then, is to specify useful dynamic range in terms of the point at which image noise reaches some agreed-upon threshold. To this end, Imatest computes a number of different dynamic range measurements, based on a variety of image noise thresholds. The noise thresholds are specified in terms of f-stops of equivalent luminance variation in the final image file, and dynamic range is computed for noise thresholds of 1.0 (low image quality), 0.5 (medium image quality), 0.25 (medium-high image quality) and 0.1 (high image quality). For most photographers and most applications, the noise thresholds of 0.5 and 0.25 f-stops are probably the most relevant to the production of acceptable-quality finished images, but many noise-sensitive shooters will insist on the 0.1 f-stop limit for their most critical work. A full discussion of all the data Imatest produces is really beyond the scope of this review: Visit the Imatest website for details of what the program measures, how it performs its computations, and how to interpret its output.
 JPEG. The graph at right (click for a larger version) was generated using Imatest's dynamic range analysis for an in-camera Panasonic G5 JPEG file with a nominally-exposed density step target (Stouffer 4110). At default settings and base ISO of 160, the results shows only 9.63 f-stops of total dynamic range, but with 8.6 f-stops at the "High" quality level. From the chart in the top left, we can see gradation tapers-off fairly smoothly at the highlight end, but steps at the shadow end are spread apart, indicative of a tendency of the deepest shadows to break up into discrete levels (posterization) if you try to brighten them too much. Although total dynamic range is quite poor because of the steep drop-off on the shadow end, the score at the highest quality level is actually pretty good for a Micro Four Thirds model, likely the result of fairly strong noise reduction in darker areas. Note, that this measurement has a margin of error of about 1/3 f-stop, so differences of less than 0.33 can be ignored when comparing results to other models.
 Raw. The graph at right is from the same Stouffer 4110 stepchart image captured as a raw (.RW2) file, processed with Adobe Camera Raw using the Auto setting, then tweaked from there for best results. As can be seen, the score at the highest quality level actually went down compared to the in-camera JPEG, to 7.87 from 8.6 f-stops, while total dynamic range increased dramatically to 11.9 f-stops with a much better behaved tonal curve at the shadow end. The results at the highest quality level are still fairly good for Micro Four Thirds, but not quite as good as the Olympus E-M5, and lower than most APS-C sensors. It's worth noting here is that ACR's default noise reduction settings normally reduce overall noise somewhat (see the plot in the lower left-hand corner) relative to the levels in the in-camera JPEG, which would tend to boost the dynamic range numbers for the higher quality thresholds, however ACR did not reduce RMS noise lower than the matching JPEG in shadow areas.
Contrast Adjustment
The camera's contrast adjustment was at least some help in handling the harsh lighting.
|
Minimum Contrast
|
|
 |
 |
| Contrast set to lowest, +0.7 EV |
Contrast set to lowest, Auto Exposure |
The Panasonic Lumix DMC-G5's lowest contrast setting does a good job bringing out detail in the shadows and darker midtones, but it does little did little to preserve clipped highlight detail in the Sunlit Portrait shot. (The default Far-field shot had few highlights clipped to begin with.) Overall, the camera's limited dynamic range in JPEGs makes it perform below average in this situation.
| Contrast Adjustment Examples | ||
|
 |
 |
| -2 | 0 | +2 |
The table above shows results with the default as well as the two "extreme" contrast settings. Click on any thumbnail above, then click again to see the full-sized image. The control for contrast was not quite as subtle as saturation was in its effect, though it appears to leave the strongest highlights at about the same values, then applies a proportional boost to tones as it moved down the tone curve. To make the most of it in a shot like this, you'll want to expose for the highlights and apply a good amount of contrast reduction.
|
Outdoor Portrait Intelligent Dynamic Range
|
|
 |
iD-Range Setting: Off (Default) Low Standard High |
 |
|
Panasonic's Intelligent Dynamic Range
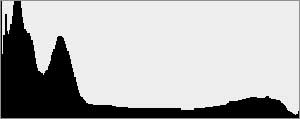
The above shots are examples of Panasonic's Intelligent Dynamic Range Control (or iD-Range) at work, with no exposure compensation. Note that the camera does not take multiple shots and merge them as HDR mode does (see below). It's a system that adjusts local contrast and exposure more akin to Nikon's Active D-lighting, Canon's Automatic Lighting Optimization or Sony's Dynamic Range Optimization.
There are three levels of iD-Range available on the Panasonic G5: Low, Standard and High, plus Off. It's automatically invoked in iAuto and some scene modes and manually selectable in PASM modes. For our Sunlit Portrait shot, the Low and Standard settings are an improvement over the Off setting, lightening shadows and delivering a better exposure overall, while doing a good job at holding on to highlight detail. (The histograms show how shadows were boosted while highlights were kept roughly the same.) The High setting however seemed to give up on protecting highlight, clipping a lot of them by halving the shutter speed (from 1/60 to 1/30s).
Because multiple images are not combined in this mode, actual dynamic range doesn't change, however iD-Range can provide a useful extension to the practical dynamic range of the Panasonic G5.
|
Far-field HDR Example
|
||
|
|
||
| HDR: | ||
New HDR mode
Here, you can see the Panasonic G5's new High Dynamic Range mode at work with our Far-field shot. HDR mode takes three images at different exposures and combines them to increase dynamic range. Mouse over the links, and click on them the view the full resolution files. Notice the double images and ghosting of objects or people moving between frames. Also notice the angle of view is narrower in the HDR image, likely because the image has been cropped and upsized during the alignment process.
| Face Detection | ||
 |
 |
 |
| Aperture Priority, 0 EV, f/8 Face Detection Off |
Aperture Priority, 0 EV, f/8 Face Detection On |
iAuto, 0 EV, f/2.5 |
Face Detection
Like most cameras these days, the Panasonic Lumix DMC-G5 has the ability to detect faces (up to 15 in a scene), and adjust exposure and focus accordingly. The G5 does so automatically in Intelligent Auto (iAuto) and iAuto Plus modes, when Portrait scene mode is selected, or when Face Detection AF mode is enabled. As you can see from the examples above, face detection made a slight difference in Aperture Priority at f/8, but iAuto mode really performed well where the camera had control over aperture, and automatically applied Intelligent D-Range.
| 1 fc 11 lux |
1/2 fc 5.5 lux |
1/4 fc 2.7 lux |
1/8 fc 1.3 lux |
1/16 fc 0.67 lux |
1/16fc No NR |
|
|---|---|---|---|---|---|---|
| ISO 160 |
 1.3 s f2.8 |
 2.5 s f2.8 |
 5 s f2.8 |
 10 s f2.8 |
 20 s f2.8 |
 20 s f2.8 |
| ISO 200 |
 1 s f2.8 |
 2 s f2.8 |
 4 s f2.8 |
 8 s f2.8 |
 15 s f2.8 |
 15 s f2.8 |
| ISO 400 |
 0.5 s f2.8 |
 1 s f2.8 |
 2 s f2.8 |
 4 s f2.8 |
 8 s f2.8 |
 8 s f2.8 |
| ISO 800 |
 1/4 s f2.8 |
 0.5 s f2.8 |
 1 s f2.8 |
 2 s f2.8 |
 4 s f2.8 |
 4 s f2.8 |
| ISO 1600 |
 1/8 s f2.8 |
 1/4 s f2.8 |
 0.5 s f2.8 |
 1 s f2.8 |
 2 s f2.8 |
 2 s f2.8 |
| ISO 3200 |
 1/15 s f2.8 |
 1/8 s f2.8 |
 1/4 s f2.8 |
 0.5 s f2.8 |
 1 s f2.8 |
 1 s f2.8 |
| ISO 6400 |
 1/30 s f2.8 |
 1/15 s f2.8 |
 1/8 s f2.8 |
 1/4 s f2.8 |
 0.5 s f2.8 |
 0.5 s f2.8 |
| ISO 12800 |
 1/60 s f2.8 |
 1/30 s f2.8 |
 1/15 s f2.8 |
 1/8 s f2.8 |
 1/4 s f2.8 |
 1/4 s f2.8 |
Low Light. The Panasonic Lumix DMC-G5 performed fairly well in our low light test, able to capture bright images down to the lowest light level we test at, at all ISO settings, though exposure varied a bit. The darkest level equates to about 1/16 the brightness of average city street lighting at night, so the Panasonic G5 should be able to take well-exposed photos in almost any environment in which you can see well enough to walk around in.
Using default noise reduction setting, noise is low fairly up to ISO 1,600. At ISOs 3,200 and above, noise is a little higher at lower light levels compared to most recent cameras with APS-C sensors, but not bad for a MFT model. Some minor horizontal banding is visible in the shadows at higher ISOs and lower light levels, but nothing unusual. We didn't notice any issues with hot or stuck pixels. There is a hint of some very minor heat blooming along the bottom of images at very high ISOs, but again, that's not unusual. Automatic color balance was pretty good (just slightly cool), something that's not a given at such low light levels.
The camera's autofocus system was able to focus on our subject down to below the 1/16 foot-candle light level unassisted with an f/2.8 lens which is excellent, especially for a camera with contrast-detect autofocus. The Panasonic Lumix DMC-G5 does have a focus-assist light option which allows it to autofocus in total darkness, as long as the subject is within range and has sufficient contrast.
How bright is this? The one foot-candle light level that this test begins at roughly corresponds to the brightness of typical city street-lighting at night. Cameras performing well at that level should be able to snap good-looking photos of street-lit scenes.
NOTE: This low light test is conducted with a stationary subject, and the camera mounted on a sturdy tripod. Most digital cameras will fail miserably when faced with a moving subject in dim lighting. (For example, a child's ballet recital or a holiday pageant in a gymnasium.) Thanks to their phase-detect AF systems, digital SLRs tend to do much better than point & shoots, but you still shouldn't expect a quick autofocus lock with moving subjects. The G5 uses contrast-detect autofocus, as is found in most point & shoot cameras, so its low-light focusing ability is less than that of some SLRs with phase-detect systems. That said, though, the larger, more sensitive pixels of the G5's sensor do better under dim lighting than do the tiny pixels of most point & shoots, (A useful trick is to just prop the camera on a convenient surface, and use its self-timer to release the shutter. This avoids any jiggling from your finger pressing the shutter button, and can work quite well when you don't have a tripod handy.)
Output Quality
Print Quality
Good, sharp 20 x 30 inch prints at ISO 160 and 200; ISO 1,600 shots look better at 8 x 10; ISO 12,800 shots make a decent 4 x 6-inch print.
 ISO 160 shots look great at 20 x 30 inches.
ISO 200 shots also look very good at 20 x 30 inches.
ISO 400 shots are softer, but still look good at 20 x 30 inches, and really excellent at 16 x 20.
ISO 800 shots lose more detail in the red leaf swatch and shadows, but fine detail is strong enough for a usable 20 x 30 inch print and a great 16 x 20.
ISO 1,600 shots are usable at 16 x 20, with a bit more detail loss in the red swatch and more noise in the shadows. Prints at 13 x 19 look great.
ISO 3,200 shots show almost no detail in the red swatch and noise in the shadows increases noticably, but they'll look good on a wall at 13 x 19 and fine for close viewing at 11 x 14.
ISO 6,400 images are usable at 8 x 10, and look very good at 5 x 7 inches.
ISO 12,800 images are slightly oversaturated, and make noisy but usable 4 x 6 inch prints.
Overall, the Panasonic G5 does very well, producing good 20 x 30 inch prints from 160 to 400, and even its highest ISO makes a usable 4 x 6-inch print.
Testing hundreds of digital cameras, we've found that you can only tell just so much about a camera's image quality by viewing its images on-screen. Ultimately, there's no substitute for printing a lot of images and examining them closely. For this reason, we now routinely print sample images from the cameras we test on our Canon Pro9000 Mark II studio printer, and on the Canon Pixma MP610 here in the office. (See the Canon Pixma Pro9000 Mark II review for details on that model.)
The images above were taken from our standardized test shots. For a collection of more pictorial photos, see our Panasonic Lumix DMC-G5 Photo Gallery .
Not sure which camera to buy? Let your eyes be the ultimate judge! Visit our Comparometer(tm) to compare images from the Panasonic Lumix DMC-G5 with those from other cameras you may be considering. The proof is in the pictures, so let your own eyes decide which you like best!
Performance
Timing and Performance
Generally good performance for a Compact System Camera.
|
Startup/Shutdown
|
||
|
Power on |
~1.3 seconds
|
Time it takes to turn on and capture a shot. |
|
Shutdown |
~2.5 seconds
|
How long it takes camera to turn off before you can remove the memory card. |
|
Buffer clearing time
|
12 seconds after
18 Large/Fine JPEGs* |
Worst case buffer clearing time. -- This is the delay after a set of shots before you can remove the card.
|
|
12 seconds after
9 RAW files* |
||
|
14 seconds after
9 RAW+ L/F JPEG files* |
||
|
*Note: Buffer clearing times measured with a SanDisk Extreme Pro 95MB/sec UHS-1 SDHC card. Slower cards will produce correspondingly slower clearing times. Slow cards may also limit length of bursts in continuous mode. ISO sensitivity and noise reduction settings can also affect cycle times and burst mode performance.
|
||
Startup time is a little faster than average for a Compact System Camera, but shutdown is a bit sluggish. Buffer clearing times aren't exactly fast, but are reasonable. (Panasonic says the G5 is UHS-I compliant.)
| Mode Switching | ||
|---|---|---|
|
Play to Record, |
~0.6 second
|
Time until first shot is captured. |
|
Record to Play |
~1.3 seconds
|
Time to display a large/fine file immediately after capture. |
|
Display |
~0.3 second
|
Time to display a large/fine file already on the memory card. |
Mode switching is quite fast except for Record to Play.
| Shutter Response (Lag Time) | ||
|---|---|---|
|
Full Autofocus,
Single-area AF mode |
0.194 second
|
Time from fully pressing shutter button to image capture, with the lens already at the proper focal distance setting. (All AF timing done with the Panasonic 14-42mm X PZ kit lens at approximately 25mm.)
|
|
Full Autofocus,
Multi-area AF mode |
0.191 second
|
Time from fully pressing shutter button to image capture, with the lens already at the proper focal distance setting.
|
|
Full Autofocus,
Single-area AF mode, Flash enabled |
0.471 second
|
Time from fully pressing shutter button to image capture, with the lens already at the proper focal distance setting, auto flash enabled.
|
|
Continuous AF
|
0.188 second
|
This mode usually shows no speed increase with our static subject; we have no way to measure performance with moving subjects.
|
|
Manual Focus
|
0.079 second
|
For most cameras, shutter lag is less in manual focus than autofocus, but usually not as fast as when the camera is "prefocused".
|
|
Prefocused |
0.063 second
|
Time to capture, after half-pressing and holding shutter button. |
The Panasonic G5's contrast-detect autofocus is quick, faster than most consumer SLRs. The G5's full-autofocus shutter lag (with the subject at a fixed distance) is only 0.194 second using single-area (center) AF with the 14-42mm X PZ kit lens in our test. 23-area AF is slightly faster at 0.191 second. Enabling the flash increases lag quite a bit to 0.471 second, but that's still pretty good. When manually focused, the G5's lag time drops to 0.079 second, which is also quite fast. The G5's prefocused shutter lag time of 0.063 second is also pretty quick.
To minimize the effect of different lens' focusing speed, we test AF-active shutter lag with the lens already set to the correct focal distance.
| Cycle Time (shot to shot) | ||
|---|---|---|
|
Single Shot mode |
0.45 second
|
Time per shot, averaged over 20 shots with no signs of slowing, 3 seconds to clear*. |
|
Single Shot mode |
0.44 second
|
Time per shot, averaged over 8 shots, 12 seconds to clear*. |
|
Single Shot mode
RAW + L/F JPEG |
0.54 second
|
Time per shot, averaged over 6 shots, 12 seconds to clear*. |
|
Early shutter |
No
|
Some cameras don't snap another shot if you release and press the shutter too quickly in Single Shot mode, making "No" the preferred answer. |
|
Continuous H |
0.16 second (6.25 frames per second);
18 frames total; 12 seconds to clear* |
Time per shot, averaged over buffer length of 18 frames, then slows to an average of 0.23s or 4.27 fps. |
|
Continuous H |
0.18 second (5.56 frames per second);
9 frames total; 12 seconds to clear* |
Time per shot, averaged over buffer length of 9 frames, then slows to an average of 1.33s or 0.75 fps. |
|
Continuous H |
0.18 second (5.56 frames per second);
9 frames total; 14 seconds to clear* |
Time per shot, averaged over buffer length of 9 frames, then slows to an average of about 1.61s or 0.62 fps. |
|
Continuous Super H |
0.05 second (20.0 frames per second);
40 frames total; 12 seconds to clear* |
Time per shot, averaged over buffer length of 40 frames. |
|
Flash Recycling |
3.8 seconds
|
Flash at maximum output. |
|
*Note: Buffer clearing times measured with a SanDisk Extreme Pro 95 MB/sec UHS-1 SDHC card. Slower cards will produce correspondingly slower clearing times. Slow cards may also limit length of bursts in continuous mode. ISO sensitivity and noise reduction settings can also affect cycle times and burst mode performance.
|
||
Single-shot cycle times are quite fast. We measured 0.45 second for Large/Fine JPEGs, 0.44 second for RAW and 0.54 second for RAW+L/F JPEGs.
Continuous H (High Speed) mode is pretty fast at 6.25 frames per second when shooting full-resolution JPEGs. This drops to about 5.6 frames per second with RAW files, though. Note that Live View is not available during bursts in Continuous H mode. Continuous Medium and Low speed modes offer 3.7 and 2 frames per second respectively, while supporting Live View.
Full resolution buffer depth is pretty good for Large/Fine JPEGs, at 18 frames (we suspect there is no limit with typical scenes and a fast card -- our test scene is designed to be difficult to compress). When shooting RAW or RAW+JPEG files, though, buffer depth drops to 9 frames. Buffer clearing times aren't exactly quick for a model that supports UHS-I cards, but not too bad.
The flash recycled after a full discharge in an average of 3.8 seconds, but there was a lot of variation ranging from 1.7s to 4.9s during our testing.
| Download Speed | ||
|---|---|---|
|
Windows Computer, USB 2.0 |
9,390 KBytes/sec
|
Typical Values: |
Download speeds are fast, quick enough that you probably won't feel the need for a separate card reader, even with large memory cards. (Note that this test was performed with a SanDisk Extreme Pro 95MB/sec UHS-1 SD card: Slower cards would likely show slower transfer times.)
Bottom line, the Panasonic G5's performance is generally good. Autofocus is very fast, cycle times and burst speeds are good, but buffer clearing wasn't impressive even with a fast 95MB/s UHS card.
Battery Life
Slightly below average battery life for a Compact System Camera.
| Operating Mode | Battery Life |
|---|---|
|
Still Capture, CIPA standard
(H-PS14042 X PZ or H-FS45150 lens) |
320 shots
|
|
Still Capture, CIPA standard
(H-FS014042 lens) |
310 shots
|
The Panasonic G5 uses a custom rechargeable lithium-ion battery pack for power, and comes with both a single battery and charger. The CIPA rated 310-320 shots per charge depending on the lens is a little below average for a Compact System Camera, and much lower than a typical digital SLR when using the SLR's optical viewfinder. We strongly recommend getting a second battery for your G5 if you plan any extended outings.
The table above shows the number of shots the camera is capable of (on a fully-charged rechargeable battery), based on CIPA battery-life and/or manufacturer standard test conditions.
(Interested readers can find an English translation of the CIPA DC-002 standards document here. (180K PDF document))
Video
Check out the links below for more sample images, videos and image quality analysis:
- Panasonic Lumix DMC-G5 Optics page (Crops from images shot with the camera's kit lens, if sold as a kit)
- Panasonic Lumix DMC-G5 Sample Images page (Index to all standard test shots, with explanations)
- Panasonic Lumix DMC-G5 Thumbnails page (Thumbnails of all shots, including RAWs, with EXIF data)
- Panasonic Lumix DMC-G5 Gallery page (Regular photos taken with the Panasonic Lumix DMC-G5)
Panasonic has been one of the leaders in video from interchangeable-lens still cameras from the beginning of their Micro Four Thirds product line. And at the high end, their DMC-GH2 (and now the newly-released DMC-GH3) was a real breakthrough product for super-compact, high-quality HD video recording.
The Panasonic G5 doesn't aspire to those heights, but does provide good, basic video recording capability for the average consumer, with much better than average focus tracking, stereo sound recording, and a nice set of creative modes to boot. Add one of Panasonic's PowerZoom lenses for silky-smooth (and silent) zooming, and you'll have a very nice little video-recording package. Even with the non-PowerZoom kit lens, though, the Panasonic G5 is a great consumer-level video solution.
Panasonic G5 Basic Video Specs
- 1080p (1,920 x 1,080) Full HD recording at 60p and 30p; 1080i at 60i
- 720p (1,280 x 720) HD recording at 30p
- AVCHD or MP4 file formats, with Dolby Digital 2ch audio (AVCHD) or AAC (MP4)
- VGA (640 x 480), 30 fps, 4Mbps standard-definition recording (4:3 ratio MP4)
- Program AE-only exposure for video recording
- Very broad range of exposure styles and creative effects available in video mode
- Built in stereo microphone
- Still images can be captured while recording video, temporarily muting the audio
- Can be set to "motion picture priority" or "still pictures priority", governing whether stills shot during video recording are 2 megapixels, with only a brief gap in the audio, or full-resolution, with a brief screen blackout
- Video AF modes include single AF, continuous AF, and subject tracking AF (AFF)
- Autofocus can be triggered during movie recording by half-pressing the shutter button,in single-AF mode
- Manual focus also available in movie mode, although no focus-assist available during movie recording itself
- "Touch-focus" feature is great for shifting focus during movie recording, works very well
- Lossless digital zoom in video mode, up to 3.6x for HD resolutions, 4.8x for VGA
- 2x/4x digital zoom also available in any video recording mode
- Wind noise can be minimized with a wind-cut setting, although audio may be slightly altered
- Microphone input sensitivity can be adjusted to 4 different levels, and there is an option for displaying the level onscreen if desired
- Flicker reduction settings of: [1/50], [1/60], [1/100], [1/120] and [Off] to minimize flicker under fluorescent or LED lights
- Can divide short film clips in-camera into 2 separate clips
- Class 4 or higher cards recommended for video
Panasonic G5 Video Speeds & Feeds: Image size, frame rate, and file format
The Panasonic G5 offers three video resolutions, three frame rates and two format settings in the following combinations:
|
Panasonic G5 Video Options
|
|||
|---|---|---|---|
|
AVCHD Format (.MTS files)
|
|||
|
Menu Designation
|
Resolution
|
Frame Rate
|
Approx. Bitrate
|
|
(PSH) |
1,920 x 1,080 |
60 (progressive)
|
28 Mbps
|
|
(FSH) |
60 (interlaced)
|
17 Mbps
|
|
|
(FPH) |
30 (progressive)
|
17 Mbps
|
|
|
(SH) |
1,280 x 720
(16:9 aspect ratio) |
60 (progressive)
|
17 Mbps
|
|
MPEG-4 Format (.MP4 files)
|
|||
|
Menu Designation
|
Resolution
|
Frame Rate
|
Approx. Bitrate
|
|
(FHD) |
1,920 x 1,080 |
30 (progressive)
|
20 Mbps
|
|
(HD) |
1,280 x 720 |
10 Mbps
|
|
|
(VGA)
|
640 x 480
(4:3 aspect ratio) |
4 Mbps
|
|
All but one of the Panasonic G5's video modes are progressive scan, meaning that every video line is scanned, one after the other, for every frame. The FSH mode uses an interlaced scan, in which every other line is displayed in one scan, then the alternate lines are displayed in the next. Interlaced scanning reduces the data rate that needs to be recorded, and plays pretty well on HDTVs, but many viewer programs on computers will show severe "tearing" artifacts if your subject moves in between scans.
The Panasonic G5 also offers both AVCHD and MPEG-4 recording formats. AVCHD compresses the video imagery better, producing higher-quality imagery with smaller file sizes, but is much harder to edit than MPEG-4. This is changing somewhat now, with more software available that can effectively edit AVCHD, but if you want to edit your video clips, check to see what your editing software supports before deciding on a format.
The G5 sample we tested was intended for sale in the US, so its video timing supported the NTSC spec. Units sold in PAL countries have frame rates of 50 and 25 fps vs the 60/30 fps shown in the table above.
Panasonic G5 video quality
The Panasonic G5 produced very good-quality video, with very good detail at the highest bitrate (and the good side of average at lower bitrates), practically no motion artifacts, and good-looking color. It did best in daylight, a well-lit interior or shortly after dusk. It rendered our standard night scene a little darker than we'd prefer, but you could still make out some detail in the shadows, and areas like the "INC" sign with its light shining on it and the store interior were quite good. Much to its credit, there was very little video noise in the night shots, and we saw no sign of moiré or aliasing anywhere in the image. (The corrugated roof under the INC sign often shows moiré patterns, even with higher-end cameras.) We also saw no signs of moiré in the big grass fronts in our daylight tests with Charlotte the Wonder Dog.

Unlike some cameras like the GF5 which read the sensor at only 30p and repeat frames to achieve 60p, or extract two fields from one frame for 60i, the G5's sensor output is 60p in all AVCHD modes.
While AVCHD may be a little harder to edit, the image quality in the Panasonic G5's "PSH" mode (AVCHD, 60 progressive frames/second, 28 megabit bitrate) is a good argument for its use. The full 60p meant very smooth motion with no artifacts, and the detail the G5 delivered in this mode was very impressive. Particularly noteworthy was how well the camera held onto fine detail even during fairly rapid panning. Situations like that, with large changes from frame to frame, are very tough on AVCHD encoders, but the G5 did very well with it.
Rolling shutter artifacts (aka the "Jello effect") are a fact of life in video from digital still cameras, but the Panasonic G5 again did very well in this area, likely due to its fast sensor readout. Rolling shutter is very minimal; you're unlikely to notice any sign of it, at any normal panning speed.
Overall, we were very impressed with the image quality of the Panasonic G5's videos: It outperforms many cameras selling at considerably higher prices.
Panasonic G5 video focusing
- Multiple focus modes:
- Single AF
- Continuous AF
- AFF - subject tracking
- Manual focus
- Multiple AF options:
- Face Detection
- Object tracking
- 23-area
- 1-area
- Pinpoint
- Touch focus works beautifully for videos
- Focus motor operation with PowerZoom lens is silent, can't speak for normal kit lens
- i.Resolution mode for enhanced sharpness (not really focus, but seemed to fit here)
Video autofocus operation with the G5 is very smooth, and generally quite accurate. It was confused a couple of times by Charlotte the Wonder Dog's mottled coat and fast action, but it recovered pretty rapidly each time, and with all other subjects its autofocus was very sure-footed. We were also very pleased with the way the G5 handled large, abrupt changes in subject distance, too: Many contrast-detect systems have real trouble when faced with an abrupt change in subject distance, but the G5 just smoothly moved from the old to the new focus positions, with no sign of hunting or confusion.
Our favorite feature: We love Panasonic's touch-focus feature for video recording! It makes it easy to smoothly shift focus from foreground to background or between subjects, with the slow, steady focus shift giving a very professional look to your movies.
Panasonic G5 video exposure
- Video exposure is always fully automatic, but you can adjust exposure compensation before recording begins
- Multi-zone, center-weighted, and spot metering available
- i.Dynamic mode adjusts exposure and contrast to maximize dynamic range
- Auto Exposure lock doesn't work in video mode
- Multiple exposure styles available:
- Standard
- Vivid
- Natural
- Monochrome
- Scenery
- Portrait
- Custom
- Contrast, Sharpness, Saturation and Noise Reduction settings can be adjusted in any exposure style
- Very wide range of creative options available in video mode:
- Clear Portrait
- SilkySkin
- Backlit Softness
- Clear in Backlight
- Relaxing Tone
- Sweet Child's Face
- Distinct Scenery
- Bright Blue Sky
- Romantic Sunset Glow
- Vivid Sunset Glow
- Clear Nightscape
- Cool Night Sky
- Warm Glowing Nightscape
- Artistic Nightscape
- Clear Night Portrait
- Appetizing Food
- Cute Dessert
- Freeze Animal Motion
- Clear Sports Shot
- Monochrome
Video exposure with the Panasonic G5 is always fully automatic, although you can adjust exposure compensation over a very wide range, before recording begins. We found the G5's video exposure system to be quite accurate most of the time, though as mentioned previously, it rendered our standard night scene a little darker than ideal.
Panasonic G5 audio recording
- Built-in stereo mics
- No external audio input
- Recording level manually adjustable in 4 steps
- Optional audio-level display on-screen during recording
- Wind noise can be minimized with a wind-cut setting (Auto, Off)
Panasonic G5 video samples
Here are some examples of video shot with the Panasonic G5:
|
Panasonic G5: Video Samples
|
|---|
| 1,920 x 1,080 AVCHD, (FPH) mode, 30p, MTS format Download Original |
| 1,920 x 1,080 AVCHD, (FSH) mode, 60i, MTS format Download Original |
| 1,920 x 1,080 AVCHD, (PSH) mode, 60p, MTS format Download Original |
| 1,280 x 720 AVCHD, (SH) mode, 60p, MTS format Download Original |
| 1,920 x 1,080 MP4, Progressive, 30p, (FHD) mode Download Original |
| 1,280 x 720 MP4, Progressive, 30p, (HD) mode Download Original |
Panasonic G5 focus speed test
|
Panasonic G5: Focus Speed
|
|---|
|
|
Panasonic G5 depth of field test
|
Panasonic G5: Depth Of Field (No Aperture Control)
|
|---|
|
|
| 1,920 x 1,080 MP4, Progressive, 30p, f/22 Download Original |
Panasonic G5 Rolling Shutter Artifacts ("Jello Effect")
|
Panasonic G5: Rolling Shutter Artifacts
|
|---|
|
|
|
|
Flash
Panasonic G5 Flash
Flash Test Results
Coverage and Range
Decent flash power, with uneven coverage at wide angle. Above average positive exposure compensation required.


Coverage. Flash coverage is rather uneven at wide angle, leaving the corners of our flash target image darker at 14mm, thought that's not unusual. Some of the corner shading can also attributable to the lens itself. Coverage is more uniform at full telephoto (42mm).
Exposure. Indoors under incandescent background lighting, the Panasonic G5's flash produced a fairly bright exposure of our indoor portrait scene at ISO 200, when +1.0 EV flash exposure compensation was used. (An average of +0.7 EV is normally needed for this shot.) The camera's slow-sync flash mode required no compensation, though the longer shutter time resulted in a much warmer cast from the ambient background lighting.
| Flash Range: Wide Angle | |||||
|---|---|---|---|---|---|
| 6 ft | 7 ft | 8 ft | 9 ft | 10 ft | 11 ft |
 1/60 sec f3.5 ISO 200 |
 1/60 sec f3.5 ISO 200 |
 1/60 sec f3.5 ISO 200 |
 1/60 sec f3.5 ISO 200 |
 1/60 sec f3.5 ISO 200 |
 1/60 sec f3.5 ISO 200 |
| 12 ft | 13 ft | 14 ft | 15 ft | 16 ft | |
 1/60 sec f3.5 ISO 200 |
 1/60 sec f3.5 ISO 200 |
 1/60 sec f3.5 ISO 200 |
 1/60 sec f3.5 ISO 200 |
 1/60 sec f3.5 ISO 200 |
|
| Flash Range: Telephoto | |||||
|---|---|---|---|---|---|
| 6 ft | 7 ft | 8 ft | 9 ft | 10 ft | 11 ft |
 1/60 sec f5.6 ISO 200 |
 1/60 sec f5.6 ISO 200 |
 1/60 sec f5.6 ISO 200 |
 1/60 sec f5.6 ISO 200 |
 1/60 sec f5.6 ISO 200 |
 1/60 sec f5.6 ISO 200 |
| 12 ft | 13 ft | 14 ft | 15 ft | 16 ft | |
 1/60 sec f5.6 ISO 200 |
 1/60 sec f5.6 ISO 200 |
 1/60 sec f5.6 ISO 200 |
 1/60 sec f5.6 ISO 200 |
 1/60 sec f5.6 ISO 200 |
|
ISO 200 Range. At 14mm wide angle, flash exposures start out dim at 6 feet but brighten considerably at 7 feet, decreasing gradually with distance from there. Usable range is about 14 feet, which is pretty good. At full telephoto, flash exposures start out bright at 6 feet, with brightness falling from there. We'd say range at telephoto is about 8 feet. In both cases, the range exceeds Panasonic's Guide Number rating when len aperture is taken into account.
| Manufacturer-Specified Flash Range | |
|---|---|
| Wide Angle | Telephoto |
 30.8 feet Auto ISO 1000 |
 19.4 feet Auto ISO 1000 |
Manufacturer-Specified Flash Range Test. Panasonic rates the G5's flash range with the kit lens as 30.8 feet at wide-angle, and 19.4 feet at telephoto, when using Auto ISO. In the shots above, the Panasonic G5 produced well exposed targets at both wide-angle and telephoto. (We used spot metering at wide-angle so that the camera would ignore the bright surroundings.) Good results here. Our standard test method for flash range uses either a fixed setting of ISO 200, to provide a fair basis of comparison between cameras. We've now also begun shooting two shots using the manufacturer-specified camera settings, at the range the company claims for the camera (at Auto ISO if so specified), to assess the validity of the specific claims.
High ISO Noise Reduction
Panasonic G5 Noise Reduction
The Panasonic G5's 5 noise-reduction settings provide quite a bit of flexibility in choosing how you want to make the trade-off between subject detail and noise levels in JPEGs. The Panasonic G5 applies NR to its JPEGs at all ISOs, so we've included crops from the base ISO on up in the tables below.
The crops below show the effects of three (-2, 0 and +2) of the Panasonic G5's five levels of noise reduction available, under the studio HMI lighting we use to simulate daylight. We've also included RAW crops converted using Adobe Camera Raw with noise reduction and sharpening turned off, to show what the sensor output is like. See for yourself how the noise reduction works under daylight-balanced lighting. Click on any of the crops below to see the corresponding full-sized image.
| Noise Reduction Comparison Daylight-balanced illumination |
||||
|
|
NR = -2
|
NR = 0
|
NR = +2
|
RAW (No NR)
|
|
I
S O 1 6 0 |
 |
 |
 |
 |
 |
 |
 |
 |
|
 |
 |
 |
 |
|
|
|
NR = -2
|
NR = 0
|
NR = +2
|
RAW (No NR)
|
|
I
S O 2 0 0 |
 |
 |
 |
 |
 |
 |
 |
 |
|
 |
 |
 |
 |
|
|
|
NR = -2
|
NR = 0
|
NR = +2
|
RAW (No NR)
|
|
I
S O 4 0 0 |
 |
 |
 |
 |
 |
 |
 |
 |
|
 |
 |
 |
 |
|
|
|
NR = -2
|
NR = 0
|
NR = +2
|
RAW (No NR)
|
|
I
S O 8 0 0 |
 |
 |
 |
 |
 |
 |
 |
 |
|
 |
 |
 |
 |
|
|
|
NR = -2
|
NR = 0
|
NR = +2
|
RAW (No NR)
|
|
I
S O 1 6 0 0 |
 |
 |
 |
 |
 |
 |
 |
 |
|
 |
 |
 |
 |
|
|
|
NR = -2
|
NR = 0
|
NR = +2
|
RAW (No NR)
|
|
I
S O 3 2 0 0 |
 |
 |
 |
 |
 |
 |
 |
 |
|
 |
 |
 |
 |
|
|
|
NR = -2
|
NR = 0
|
NR = +2
|
RAW (No NR)
|
|
I
S O 6 4 0 0 |
 |
 |
 |
 |
 |
 |
 |
 |
|
 |
 |
 |
 |
|
|
I
S O 1 2 8 0 0 |
 |
 |
 |
 |
 |
 |
 |
 |
|
 |
 |
 |
 |
|
To our eyes, the default (0) level of noise reduction strikes a good balance between noise and subtle subject detail, although the red fabric swatch presents a real challenge, as it does for virtually all cameras we test. Cranking the noise reduction setting up to +2 produces very smooth-looking images, while still maintaining good detail in areas of high local contrast (as seen in the circular scale), but a lot of detail is lost in areas of subtle contrast (the red fabric swatch is a particularly challenging subject, and the detail loss there is worse than you'd find in most real-world examples). Color bleeding is also an issue at higher ISOs with all three NR levels, particularly evident in the smeared shoulder of the bottle. As you'd expect, the -2 noise reduction setting leaves the most noise in JPEG images, but also leaves more subject detail, though you can easily see by comparing to the RAW crops that the lowest NR setting still applies aggressive noise suppression at moderate to high ISOs.
Pricing and availability
The Panasonic G5 began shipping in the U.S. from October, 2012. Body-only suggested list price is US$699.99, and a kit bundled with the G Vario 14-42mm f/3.5-5.6 MEGA O.I.S. lens is priced at US$799.99, though street price can be significantly lower.