Create natural-looking composite images using this light wrapping technique
posted Thursday, February 11, 2016 at 2:19 PM EDT
Light wraps, or light spills as they're sometimes known, are useful for helping create more natural transitions in composite images. By using a light wrap to create simulated ambient light, you can make a subject that was added to an image appear more natural. Photoshop Training Channel has created a tutorial for how to create a light wrap in Photoshop. You can view more information on the tutorial video seen below by visiting here.
This technique is often used by video editors in an application such as After Effects, but the same effect can be applied to a still photograph in Photoshop. The key to mastering this technique is subtlety. Ideally, the viewer won't realize they're viewing a composite image.
The first thing that you'll do is create a selection of your subject. After you have made your selection, you will want to view only your background layer, although you should still see the "marching ants" of your selection on the background. Next you will expand your selection by only a few pixels and then duplicate the layer. Making another selection on the duplicate layer and this time contracting your selection, you should now have three layers: the background, a layer with your subject's outline filled with the background contents, and the selected subject itself.
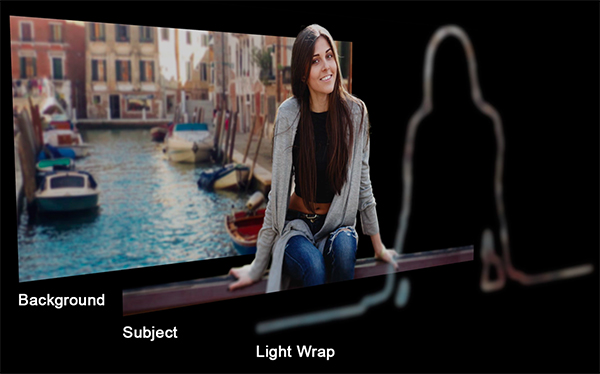
By now deleting the selection you've made on the outline layer, you should have just an outline of your subject that is made from the background and is only a few pixels wide. Now deselect, move your outline layer above your subject layer, and rename this layer "light wrap." Finally, enable your subject layer and set the blend mode to "screen" or "linear dodge," selecting the one that looks better.
To fine-tune your light wrap, you may need to create a clipping mask, add some selective blur, and utilize additional techniques to make a more natural blend. Watch the video above to see the entire process.
Photoshop Training Channel works on another image example with a darker background, which requires a slightly different technique. You can also learn how to use color adjustments to make a more natural-looking composite.
For more tutorial videos, head on over to the Photoshop Training Channel's YouTube channel and visit their website.
(Seen via ISO 1200)