Video: How to achieve the perfect exposure in your landscape photos
posted Wednesday, March 2, 2022 at 1:00 PM EDT
Landscape and nature photographer Mads Peter Iversen is back with another video aimed at helping budding landscape photographers improve their photography skills and capture better images. The topic this time is exposure. If you're a regular viewer of Iversen's YouTube channel, you may recall this video from last year about achieving the perfect exposure. Iversen realized that he didn't include everything he wanted to in that video, so he has released a follow-up.
The first video focused on using the histogram, exposing to the right, understanding different camera settings, using bracketing and more. The new video discusses some of these same topics in greater detail while also covering middle gray, zebra stripes, auto exposure bracketing, underexposure and more.
What is middle gray? In last year's video, Iversen mentioned that a camera's metering system tries to expose for 50 percent gray. However, he misspoke. Without exposure compensation, a camera tries to meter for 18 percent gray. Why is this 'middle' gray? Our visual perception of brightness isn't linear, so a geometric mean is required rather than an arithmetic mean. At the midpoint between pure white and black, that shade of gray reflects 18 percent of light. Reflective metering is the method of metering used by your camera. This measures the amount of light that bounces off a subject, and your camera tries to meter for 18 percent reflection at default settings. You can learn more about incident versus reflective metering and when an external light meter can be useful by reading this article.
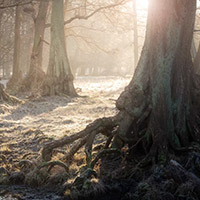
Getting back to it, at default settings, anything that appears white in your scene, such as snow, will be gray at default settings, and you'll need to increase your exposure compensation. Meanwhile, if you're using matrix metering and a large portion of the image area is taken up by backlit subjects, the camera tries to make the relatively dark area brighter, and you may instead need to reduce exposure compensation. It can quickly become complicated to achieve the right exposure. So, what do you do?
Many cameras include great built-in tools to help you understand what your camera sees. You can have zebra stripes or 'blinkies,' as I've heard some photographers call them. It's a type of warning system that displays the overexposed areas on your captured image or live view display. However, it's important to understand that this warning refers to a JPEG image. Even if you're only shooting RAW, your camera still displays a JPEG image rather than a processed, demosaiced RAW image. A JPEG image has less exposure latitude than a processed RAW file, so a 'blown out' JPEG image doesn't mean that your RAW image will be blown out beyond repair. Unfortunately, it requires experience and practice to precisely how much wiggle room your camera affords you with its RAW files.
If you are photographing a very challenging scene with a lot of dynamic range, you can use your camera's automatic exposure bracketing feature. Iversen tries to optimize his settings for a single image. However, bracketing is always an option if you don't want to risk losing important shadow or highlight data.
Once you get a good grasp of your camera's capabilities and how it meters different scenes, you can benefit from using a technique called 'exposing to the right.' You sometimes see it referred to as 'ETTR' online. This technique requires a strong understanding of exposure fundamentals, but it can also allow you to produce images with superior quality when done correctly. Iversen discusses it some in the video above, but if you want to learn even more, check out the fantastic guide at Photography Life by Spencer Cox, 'Exposing to the Right Explained.'
To learn more about different exposure settings and how you can use your camera's built-in features and settings to achieve the perfect exposure, be sure to watch Iversen's full video above. To see more from Mads Peter Iversen, subscribe to his YouTube channel, visit his website, and follow him on Instagram.
(Via Mads Peter Iversen)