Sony A200 Design
The A200's all-black, compact body measures 5.2 x 4.0 x 2.9 inches (131 x 99 x 71 millimeters) without the 18-70mm lens attached; and weighs 22 ounces (625 grams) with the lens, battery, and memory card. While the A200 isn't small enough to fit into a pocket or purse, it is light enough to carry on vacation thanks to the plastic body panels. You'll want a camera bag for better protection and portability, but the positions of the eyelets for the included neck strap at least let the camera hang level with the standard lens.
Roll-over the various controls and features with your mouse for a brief description.
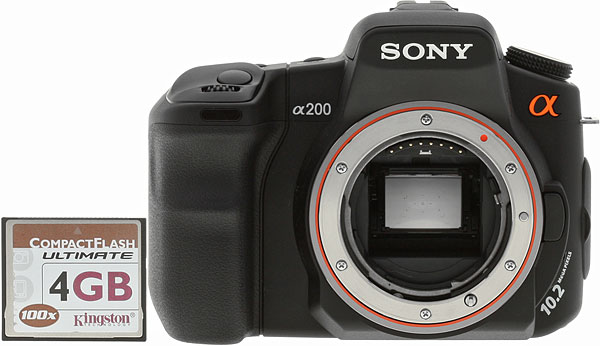
Sony A200 Front View
The camera's front panel has the bayonet lens mount, lens release button, Self-Timer lamp, and the front of the pop-up flash compartment. Gone is the Depth of Field Preview button the A100 has. Also visible from the front of the camera are the Shutter button and Front Control dial, located at the top of the hand grip. An indentation near the top of the hand grip comfortably cradles your middle finger as it curls around the grip.
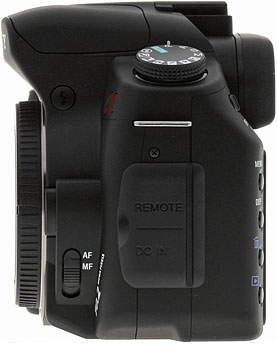
Sony A200 Left Side
The left side of the camera has a connector compartment covered by a rubbery flap. Inside the compartment are the wired Remote and DC-IN jacks. The Auto / Manual focus switch is also visible just below the lens release button housing. At the top is the other neck strap attachment eyelet. Also from this view, the pop-up flash button is visible on the side of the pop-up flash unit.
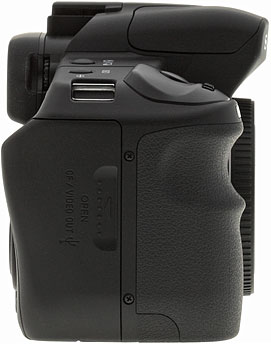
Sony A200 Right Side
The right side of the camera has the CompactFlash memory card slot, covered by a hinged plastic door. The Sony A200 accommodates Type I or II CF memory cards, including Microdrives. Nestled inside the compartment door is the shared-use A/V Out / USB 2.0 jack for direct connection to a computer or television set. At the very top of the right panel is one of the two neck strap attachment eyelets.
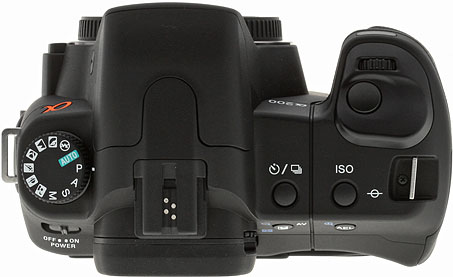
Sony A200 Top View
The top panel accommodates the pop-up flash compartment and external flash hot shoe, the latter protected by a sliding, removable plastic cover. The hot shoe employs a proprietary electrode setup and mounting bracket for Konica Minolta and Sony accessory flash units, which isn't compatible with generic hot-shoe flashes, nor with Sony's older hot shoe flash units for the F828 and R1, like the HVL-F32X. In addition, there are a number of controls that access various camera functions, including the Exposure Mode Dial, Drive Mode button, ISO button, front Control dial, and Shutter Release button.
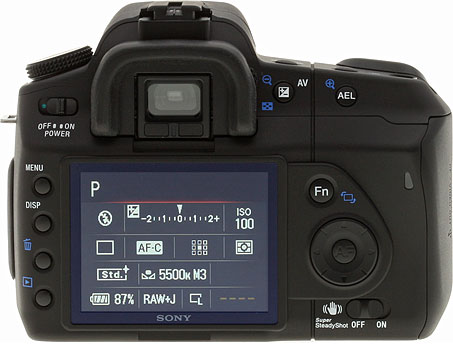
Sony A200 Back View
The remaining controls are on the camera's rear panel, along with the optical viewfinder and 2.7-inch LCD monitor. The A200's optical viewfinder is surrounded by a flexible, removable arch, and features two sensors below it that detect when your eye is brought up to the viewfinder. (You can enable these sensors through the Custom menu to automatically detect your eye in front of the viewfinder and disable the information display on the LCD monitor, cutting out any distracting glare; it also begins the autofocus process before you press the shutter halfway.) A diopter adjustment dial on the right side of the eyepiece adjusts the view for eyeglass wearers. Controls on the left side of the rear panel include the Power switch, and the Menu, Display, Delete, and Playback buttons. On the other side of the LCD monitor are the eight-way Controller with an AF button / OK button at its center, with the Function button just above it and the Anti-Shake switch just below. Toward the top of the rear panel and to the right of the optical viewfinder are the Exposure Compensation button (Zoom Out) and the AE Lock button (Zoom In).
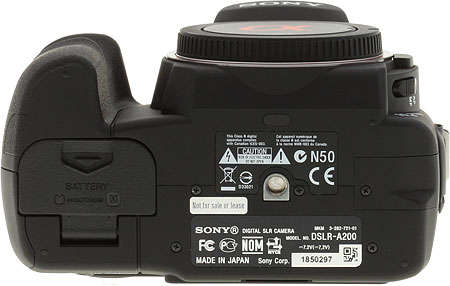
Sony A200 Bottom View
The camera's bottom panel is fairly flat, with a the metal tripod mount centered beneath the lens. Also on the bottom panel is the camera's battery compartment, which features a locking, hinged door.
 Fujifilm GFX 50S Review
 Fujifilm X-T3 Review
 Olympus E-M5 III Review

Follow Imaging Resource