


Overview
Nikon D80
Nikon D80 User Report
by Shawn Barnett
The new Nikon D80's combination of high-end features and its 18-135mm DX kit lens make a killer photographic tool for the amateur and intermediate photographer who can't afford or justify the extra cost of the Nikon D200.
While it is very similar to its predecessor, the Nikon D70s, and sports the higher 10.2 megapixel resolution of the D200, the Nikon D80 is replete with new features and advances in overall quality that make it a great upgrade for D50 and D70 owners, plus a compelling "other choice" for those who've been looking at (or waiting for) a Nikon D200. Finally, because its controls are so similar to the D2X and D200, pro photographers may want to pick up a D80 as a second or third body to take along instead of their heavier pro cameras.

Just right. While the lens that comes with the D80 is a little longer than the D70's, the overall package has trimmed down well, fitting a lot of camera into a small package.
Though it's changed somewhat, the grip of the D80 is enough like the D70 that I still like it. The change in weight distribution as well as the mild trimming of the bulk matches the grip change; it's more subtle than the change made by Canon as they went from the Digital Rebel to the Digital Rebel XT, which left the otherwise excellent XT with an anemic grip.

Diopter dial. Now in a far better location for easy adjustment.
Speaking of grips, consumers will be able to purchase a Nikon-branded battery grip for the D80, which was unavailable for the D70. The MD-80 vertical grip/battery pack will be compatible with two EN EL-3e batteries (no EN EL-3), or six AA batteries. Price for the MD-80 is expected to be around $166.
Silhouette. When I first saw Nikon's teaser ads for the D80, which went up 20 days before the announcement date, I thought the silhouette looked a lot like a close competitor: the Canon 30D. From the fall of the shoulders to the height of the pentaprism mound, they're remarkably similar. After looking at the two cameras side-by-side from the back, the location of the diopter adjustment wheel helps complete the impression. It's a far better location for the diopter adjustment, by the way, appearing here on every mid-range Canon digital SLR since the original D30, as well as the Digital Rebels. On the D100 and D70 models, the diopter control was a vertical slider nestled behind the viewfinder's rubber eyepiece, requiring removal of the eyepiece to adjust the slider. Whether this is imitation of a good design or just the most natural place for diopter control, Nikon D200 owners will feel right at home. I think it's safe to say that the silhouette similarity is just a coincidence, however noticeable to my eye (after all, saying one SLR looks like another is like complaining that all sedans look alike).


Just a trim: Side-by-side the differences seem dramatic, but the D70 was big by today's standards. The D80, on the left, trims the body down while maintaining a healthy heft.
Where the D70 bulged out in the back, left, and front, the D80 has been tapered and flattened. The D80 is shorter left to right, contributing to the balance equation. While the D70 was excellent in its day, it now seems bulky compared to more recent competitors that are smaller and yet higher resolution. The D80 brings Nikon's mid-range digital SLR into compliance with the industry trend toward smaller bodies with bigger LCDs. The overall impression is one of greater quality than the Nikon D70. It feels more solid, and still big in terms of features and capability, yet it takes up less space and is easier to bring along.
Views and Displays. The 2.5 inch display from the Nikon D200 comes to the D80, but perhaps the best news is that the D200's bigger optical viewfinder has also been brought along, with a 0.94x magnification, a welcome relief to the eyes. As a result, you'll squint less when composing images and adjusting menu settings, and be able to show off your pictures more dramatically than before. The greater magnification to the optical viewfinder really does make a big difference, and the large LCD is beautiful.
One complaint I've had about other Nikons that I must repeat, however, is about the large "screen protector" that comes standard with all Nikon digital SLRs. I shot with it in place, since I think most users will; but I found that the extra glare introduced from the two additional optical surfaces made me misjudge the resulting images, and I was inclined to make adjustments that I didn't need. I've never scratched an LCD display on an SLR, so I will always remove these covers. But those who wear their SLRs around their necks should leave the screen cover in place to avoid scratching the LCD surface with their shirt buttons. The good news is that screen covers are optional on Nikon digital SLRs, but there's no place to mount them on the competition.
The Nikon D80's Status LCD display on the top deck is largely the same, not as big as the monstrous display on the D200, but it's a little wider left to right and a little narrower top to bottom. The illumination button for the Status LCD has been moved from just right of the LCD to the power switch surrounding the shutter button.
Speaking of buttons. Controls on the Nikon D80 will be familiar to most Nikon users, but some functions have been moved around. The White Balance and ISO buttons on the left side of the camera's back have been swapped, for example. The delete button (a trash can icon) has been moved from the lower left corner of the LCD display to the upper left where the Bracket and Drive Mode buttons were on the D70. The Bracket button (BKT) has been moved to the left of the lens on the front of the camera, just under the Flash button, oddly. And button position on the top deck has been refined, for the better, I think. In place of the Status LCD illumination button are the Drive mode and AF mode buttons. Pressing either button cycles through the available modes, changing the icons and words on the Status LCD.
One of the few contributions from the Nikon D50 to the D80 is the AF-A mode, which automatically switches from AF-S (single autofocus) to AF-C (continuous autofocus) if subject movement is detected. This feature has been on Canon digital SLRs for some time, and is welcome on the D80.
Finally, a Function button has been added to the D80, which appears between the grip and lens. This arrangement will cause a little confusion for D200 users, because this is where the DOF button resides on the D200, with the Function button beneath it; but D80-only users will be happy to have such easy access to this reprogrammable button, which can be used to for a number of different functions, like quickly turning on the framing grid, or switching temporarily to spot metering mode.

SD, SDHC support. The Nikon D80 is one of the first electronic devices to support the new SDHC standard, which will handle up to 32GB.
Memory shift. Looks like the days of CompactFlash are numbered, at least in consumer cameras. The D80 uses both SD and the new SDHC (High Capacity) cards. The SD standard only allowed up to 2GB capacity, but the new SDHC standard will allow up to 32GB. (That should be plenty for the next year or so--maybe.) That makes the D80 a great upgrade for D50 owners, which also uses SD, but not so great for D70 and D200 owners who want a second camera and want to use their existing cards. More peripherals are compatible with SD these days, though, so I suppose the move was inevitable. Perhaps the best news about SD is that it uses only 10 contacts, which are less prone to damage than the CompactFlash's array of 50 straight pins, which can bend in certain circumstances. Unlike other Nikon memory door arrangements, the D80 is no-nonsense: just slide the door toward the back and it swings open toward the front. Press down on the card and it pops up for easier removal.
Sensor. Not only did the camera get smaller while the LCD and viewfinder got bigger, the pixel count went from 6.1 megapixels on the D70s to 10.2 megapixels on the D80. This is the same basic number of pixels as are in the D200, but the sensor isn't identical. They're both CCD, but the difference, as far as we know at this date, has mostly to do with readout speed. The D200 has a four-channel data readout, while the Nikon D80 has only a two-channel readout. This means data can't be read off the sensor as quickly, hence the difference in maximum frame rate: the D80 is limited to three frames per second and the D200 can capture up to five. Put another way, the D80 sensor's speed is matched to the shutter's ability, and delivers more pixels at a lower price than its bigger brethren, the D200 and D2X.


Turn it up: Just a quarter turn takes you from very wide to a very tight 7x magnification. This combination of lens and camera really does turn up the heat on the competition.
Kit lens. The D70's 18-70mm kit lens was unusually excellent for a kit lens when it debuted. But the D80's kit lens adds unprecedented versatility to the excellence equation, with a focal length of 18-135mm, equivalent to a 27-202.5mm lens on a 35mm camera. It used to take two lenses to cover this range, but now a single, relatively small lens covers the entire range of 7.5x. I think 10x gives most users just what they want in terms of capturing all that their mind's eye can conceive without a lens, but 7.5x is pretty close. Sure, it would be better optically to have the excellent 18-200mm VR lens, but that weighs more and costs several hundred dollars more than this new kit lens. Build quality of the 18-135 is very tight, and it's only a little longer than the 18-70mm.

Far reaching. The D80's kit lens completes a compelling package that is currently unrivaled at this price point.
This non-cheap kit lens has a long list of fine features, including ED glass, a silent wave motor (SWM), digital-specific design (DX), a rounded seven-blade diaphragm for smoother bokeh, manual adjustment after AF in AF-S mode, and it focuses as close as 17.7 inches (45cm) regardless of zoom position. Add a non-rotating front element and an included lens hood, and you have quite a lot for the effective $300 price when purchased with the camera.
 Flash. X-sync speed has been reduced from 1/500 on the D70 to 1/200 second on the Nikon D80. However, the D80's master flash control capabilities have been markedly improved, with an expanded Commander mode. Whereas the D70 could only control one group of remote or slave flashes using its built-in strobe, and couldn't add its own flash to the exposure, the Nikon D80 can control up to two groups of SB-800 and SB-600 flashes in addition to contributing to the scene. With the addition of an SB-800 flash, the D80's capabilities increase to controlling up to three groups of flashes independently, and also allows fill flash sync at up to 1/8000 second.

Slight reshuffle. Swapping the White balance and ISO buttons allowed the zoom out button to maintain its ability to zoom out to a thumbnail view, while joining the Zoom in button in a more logical position.
In short, the D80 has more complete access to Nikon's Creative Lighting system than any of Nikon's consumer-level cameras to date. See the Flash section under the Exposure tab for more on the improved flash capabilities in the D80.
Shooting. Our experience with the D80 prototype model left us quite impressed, and additional time with a production sample did nothing to change our minds. The camera was nimble. Controls were well placed and familiar, and the menu usually presented what I needed on the first screen. The camera's trimmer figure made it easier in the hand than the bulkier D70, and its soft shutter sound drew less attention, so I felt a little more stealthy than I do with some digital SLRs. The 18-135mm zoom is relatively short when retracted, but zooms to its full 135mm with just a quarter turn, offering excellent speed for candid photography.Candids become even more fun when you have confidence that your camera is getting what you want, and the large LCD helps build that confidence (though more so without the screen cover in place). Zooming in on captured images is now as easy as pressing the big QUAL/Zoom button on the lower left of the screen repeatedly. You're able to check focus in seconds, then zoom back out with the button above it (ISO/Zoom out) and check the next shot.
I really like that Nikon moved the AF and Capture mode buttons to the top deck just right of the LCD. Continuous mode used to be on the back beneath the mode dial, but this positioning makes a lot more sense, because I can be looking at the Status LCD as I watch the setting change. AF mode used to be limited to a menu item where you could switch between AF-Single and AF-Continuous, but it's such a common item it really should be adjustable via a button within sight of the Status LCD, and now on the D80 it is. Pressing the button cycles through three options instead of two, including AF-A, which detects subject motion and changes from AF-Single to AF-Continuous when something starts moving. I found that particularly beneficial in an amusement park, where there's an assortment of subjects that change from static to dynamic at random. For shots where I figured the camera would guess wrong, I switched it back to Single or Continuous with a few presses of the AF button.

Top deck. Simple button additions and relocations make on-the-fly adjustments much easier. Particularly welcome is the AF mode button.
The large viewfinder and 11-point AF system made composing images easier, and it seems Nikon has made the LCD/LED arrangement a little brighter; at least I didn't run into the normal trouble I have in half-light detecting the selected AF point. The Nikon D80 made all the necessary AF decisions very quickly, which allowed me the versatility to take the shot or else release and half-press the shutter again for another pass. The D80 would always choose the center point on that second pass, which I could use if I wasn't happy with its first AF point selection. The Nikon representative told me that was a feature designed into the D80. I'm curious to see whether it will make it into the production unit, because it seems like a good idea.
The production sample we ultimately received didn't seem to offer this return-to-center behavior, or the subjects we were pointing the camera at had more dominant/obvious areas of interest close to the center of the frame. When faced with subject elements all at close to the same focal distance though, it would frequently choose slightly different sets of AF points on successive actuations. We also found that we could get the camera to focus on a subject closer to the camera that was more on the edge of the frame just by slightly moving the frame towards that subject a little. This was sometimes handy for getting the camera to select an off-center subject for its AF, but I personally prefer to manually select AF points in such situations.
On that bright, HOT, summer day, I found I needed to use fill flash a lot, and the onboard flash was happy to oblige. I just pressed the flash button on the left side of the lens housing and turned the front mode dial. Here's where the screen protector induced more adjustments than were necessary, which I didn't find out until I got back to the computer.
 I also liked the Nikon D80's Auto ISO mode, which is available in most modes, not just Full Auto. Not only is that unusual for an SLR at this level, you can set a threshold shutter speed for it to activate, and also limit how high it will automatically adjust the camera if the required shutter speed goes below, say, 1/40 second. That's smart use of digital technology.
Modes. The Nikon D80 has the usual complement of scene modes, called Vari-program settings, but I seldom use them on any camera, save for night modes. You can also bias the color settings in a number of ways, and even take multiple exposures; but the best addition to the D80 is its more comprehensive Black & White modes. Like other leading SLRs, the Nikon D80 can simulate a number of common filters that are traditionally used with black and white film. While reviewing these modes, it would have been nicer if the settings weren't buried so deeply in the menu, but once you know what effect you're looking for, you won't mind so much. Like other offerings from Canon and Olympus, you can also tint the images you capture.
Taking it further. But unlike the Canon and Olympus digital SLRs, you can do more than just tint the images or apply a filter before you capture. You can tint them post-capture, and do a whole lot more.
 Post-capture image editing, available via the new Retouch Menu, is limited to one adjustment per type of adjustment, but can include a combination of tinting and cropping, for example. Other options include several Coolpix favorites, like D-lighting, to improve shadow and highlight detail, and heretofore-unaddressed essentials like Red-eye correction are now possible in the camera. Changes are not applied to the original image, so you can make several versions with different changes to see what you like, and still have the original to edit later on the computer. You can also combine two images with Image overlay, a feature that first appeared on the D2X.
 Color balance is among the more interesting filters (skipping right past Skylight and Warm filter). While Nikon didn't put this tool to use like Canon does to set and bracket white balance, they did put it here where you can fix images post-capture using the two-axis color chart. Regrettably, you can't use the resulting settings to set a white balance once you've achieved it. Could be patents, perhaps, but the Color balance filter is quite useful to fix a worthy shot if you forgot to set the proper white balance; then you can go back and use the conventional tools to white balance the shot properly.
 Slideshows. Another Coolpix feature to make the jump to the Nikon D80 is the more elaborate Pictmotion Slideshow, which can include music in the mix. The music selection is limited to a handful of well-known songs. It's good they're well known, too, because you can't actually hear the music you've chosen from the D80 as the camera has no built-in speaker; but hook it up to a TV via the included AV cable, and you'll have nice musical accompaniment to your effects-driven slideshow. While this functionality falls under the "nice but non-essential" category, it begs the question why more cool features that have grown up in the digital all-in-one camera aren't included on today's crop of digital SLRs. Nikon has thrown down, so we'll see if the other majors will have time to react to this consumer-friendly move for the upcoming holiday season. Even if the consumer never uses any of it, it'll wow them at the sales counter for sure. Maybe the next version will include that speaker they're missing to complete the package.
More time. Shooting with the Nikon D80 was a blast. I didn't want to put it down, but time constraints limited my experience with the prototype. Now that I've had more time with a production sample of the D80, I'm even more impressed.
My first impression was that I was pleasantly surprised by the Nikon D80's easy nature. "Easy" doesn't really do justice considering the depths you can explore with the D80 if you want to, but I'm referring more to its ability to reach out and get the picture you want in the way that you want it. Even after just a few minutes, I quickly felt comfortable and could concentrate on composition while exploring the special features, with none of the awkwardness that usually accompanies complicated new SLRs. (This is particularly impressive, given that I've historically been a Canon shooter, so am much more familiar with Canon controls and operating details than those of Nikon cameras.)
Nikon has hit on the right combination of camera capabilities and zoom range, to the extent that I'd call the Nikon D80 a near-ideal camera. I'm not sure the competition could have seen this one coming, especially the ground-breaking inclusion of a very good quality 7.5x zoom. Add a bigger viewfinder, more integrated access to the Nikon Creative Lighting System, a 10.2 megapixel sensor, excellent image quality, very fast performance, and some of the best enhancements from the Coolpix line, and Nikon has another potential runaway best seller on its hands.
Nikon D80 High Points
- 10.2-megapixel CCD delivering a maximum image resolution of 3,872 x 2,592 pixels.
- SLR design with true, TTL optical viewfinder.
- Large, bright viewfinder, thanks to pentaprism design and 0.94x magnification factor
- 2.5-inch TFT color LCD monitor.
- Interchangeable lens design, accommodates a wide range of "F" mount Nikkor lenses.
- Manual and automatic focus modes, with adjustable 11-point AF area selection.
- Program, Flexible Program, Shutter Priority, Aperture Priority, and Manual exposure modes.
- Shutter speeds from 1/4,000 to 30 seconds, with a Bulb setting for longer exposures.
- X-Sync speed of 1/200 second
- Depth of Field Preview mode.
- TTL exposure metering with three modes.
- Adjustable sensitivity from 100 to 1,600 ISO equivalents, plus three boost settings to a maximum of 3200.
- User-selectable white balance with nine modes and manual fine-tuning.
- Three Color modes (actually, two in sRGB, three in Adobe RGB color space).
- Hue, Contrast, and Sharpness adjustments.
- Built-in, pop-up flash with five sync modes and exposure compensation adjustment.
- External flash hot shoe.
- Onboard flash works as a Commander, to control itself and up to two groups of remote slaves, using the Nikon Creative Lighting System.
- Continuous Shooting, Auto Exposure Bracketing, and Self-Timer modes.
- JPEG and RAW (NEF) file formats, as well as NEF+JPEG options.
- Image storage on SD and SDHC memory cards.
- USB cable for connection to a computer or PictBridge-compatible printer.
- Included CD-ROM loaded with Nikon Picture Project software and 30-day trial of Capture NX.
- NTSC video cable for playback on a television set (PAL for European models).
- Power from lithium-ion battery pack, optional AC adapter, or optional Nikon Multi-Function battery pack/vertical grip.
- Optional remote control accessory.
Nikon D80 Included Software
The D80 ships with the Nikon Picture Project software, which provides basic manipulation and cataloging capabilities for images captured by the camera, and which can interpret the raw CCD format "NEF" files. More advanced packages called Nikon Capture and Nikon Capture NX are available separately. A thirty-day trial version of Capture NX is included in the box. (Read our review of Nikon Capture NX for more details on an excellent image-editing application.) Users will also want to check out the third-party applications Bibble and Qimage Pro, both of which offer enhanced interpolation of NEF files, for even higher image resolution. Bibble also offers very sophisticated noise-reduction processing and highlight recovery algorithms, making it a particularly capable RAW-file processor.
Nikon D80 Components: In the Box
Included in the box with the D80 are the following items:
- Nikon D80 body with body cap, eyepiece cap, eyecup, and LCD monitor cover.
- AF-S DX Zoom-Nikkor 18-135mm f/3.5-5.6 IF ED lens (in "kit" versions)
- Neck strap.
- USB cable.
- Video cable.
- Battery and quick charger.
- Nikon Picture Project CD-ROM.
- User guide.
- Registration kit.
Recommended Accessories
- Large capacity SD memory card. These days, a 1GB or 2GB card is inexpensive enough.
- Camera case for protection
- Accessory lenses
- Accessory flash: SB-600, SB-800
Nikon D80: Conclusion
| Pro: | Con: |
|---|---|
|
|
Having now thoroughly tested a production sample of the Nikon D80, all our initial impressions have been confirmed, and we can give it our wholehearted endorsement. By any measure, the Nikon D80 is a superb photographic tool, offering value well beyond its relatively modest price point. It delivers a huge step up in virtually every parameter relative to the earlier D70/D70S, and even the D100 owner on a budget may want to consider it over the the higher-priced D200. It's solidly built, well-balanced in the hand, highly responsive, and delivers excellent image quality. It's not a cheap camera, selling in "kit" form for a good $200 or so above its nearest rival, the Canon Digital Rebel XTi. Even taking the $200 differential into account though, the Nikon D80's combination of build quality, image quality, extensive configurability, rich post-capture processing features, and excellent kit lens make it a genuine bargain. This is a camera that's quite approachable for complete novices, thanks to a very capable fully automated "Green" zone and handful of Scene modes, yet offers the serious amateur a range of creative control and sophisticated operating features unparalleled in its price class. Very highly recommended, and a slam-dunk for a Dave's Pick nod as one of the better cameras on the market.
Design
Design
The Nikon D80 is an interesting hybrid of the original D70 and the recent D200, but is smaller than both, measuring 5.2 x 4.1 x 3.0 inches (132 x 103 x 77mm), or about the same size as the D50, which measures 5.2 x 4.0 x 3.0 inches (133 x 102 x 76mm). It weighs in at 21 ounces (585 grams) without battery, memory card, body cap or monitor cover. The photos below compare the size of the Nikon D80 with the original D70.

In the hand, the Nikon D80 conveys an excellent sense of ruggedness and bulk without seeming the least bit heavy. It feels a bit more solid than the original D70 did, but less so than the ultra-rugged D200. Interestingly though, while it feels more solid than the D70, it's actually a few grams lighter: The solid feeling perhaps comes from its somewhat more compact form.


The D70's grip has been our benchmark of fit and comfort for some time now, so we were surprised to find ourselves immediately liking the fit of the Nikon D80's grip better. While it's somewhat smaller, the depth and the shape of the D80's grip is such that our fingers didn't feel at all cramped, and our grip on the camera was noticeably more secure. Very well done, Nikon's design team must have spent hours tweaking the design to achieve such a perfect fit, and to have it work as well as it does for such a range of hand sizes
With the basics out of the way, let's take a walk around the camera. Former D70 users will find a lot that's familiar, but there are a lot of elements picked up from the D200 that make the D80 a much more capable and better-shooting camera.

Nikon's standard F-style lens mount, dominates the D80's front panel, accommodating a broad range of Nikkor lenses, although it lacks the D200's excellent ability to meter with non-CPU and older "AI" style lenses (the instruction manual has a complete list of compatible lens types). A small black button on the left side of the lens (as viewed from the rear) unlocks the lens, letting you twist it out of the mount. Just below this button is the Focus Mode control, which selects between Auto or Manual focus. On the opposite side of the lens, the Depth of Field Preview button rests just below the AF assist lamp. The programmable Function button is positioned on the grip side, closer to the lens. Also visible from the front is the Sub-Command dial at the top of the hand grip. The programmable function button is a nice touch, carried over from the D200 (but positioned slightly differently): It's an easy reach for your fingers as you grip the camera, and can be configured for any of the following functions: ISO display, Framing Grid on, AF-area mode, Center AF area narrow/wide, Flash exposure lock, Flash off (temporarily), and switch temporarily to Matrix, Center-Weighted, or Spot metering. We liked the D200's programmable function button a lot, and are pleased to see it repeated (albeit with a somewhat different list of options) on the D80.

The right side of the camera (as viewed from the rear) features an eyelet for attaching the neck strap, as well as the memory card compartment. The memory compartment door is much smaller than on other previous Nikon dSLRs, thanks to the change to SD cards first seen in the D50 and carried forward to the D80.

The left side of the D80 (again, as viewed from the rear) features another neck strap eyelet, as well as two connector compartments. Flexible, rubbery flaps protect both compartments, and remain attached to the camera when opened. Inside the top compartment are the Video Out, DC In, and USB connector jacks, with a jack for an optional remote control in the lower compartment.
Also visible from this side are the Flash Release/Flash Exposure button, just below the the pentaprism housing, as well as the BKT (Bracketing) and Focus mode controls. The BKT button was located on the rear panel of the D70, putting it here makes it easier to access, without fear of hitting an adjacent button by mistake.

The pop-up flash compartment and external flash hot shoe are centrally located on the D80's top panel. To the right of the flash unit, a small status display panel shows basic exposure information, as well as a few main camera settings. This panel lets you change a variety of camera settings without entering the LCD menu system, a feature we always appreciate. Remaining camera controls include the Shutter button, Power dial, Metering Mode and Exposure Compensation buttons. Drive mode (single/continuous/self timer/remote) and AF mode buttons are also found on the right side. By moving the backlight control for the D70's data LCD onto the power switch, the designers opened space for the extra button on the left side, and brought two more functions onto the top panel. Overall, a much better use of space, and having the extra control on the top panel will make for faster, easier shooting.
The left side of the top panel holds only the main Mode dial, a control brought over unchanged from the D70.

The Nikon D80's rear panel holds the majority of the camera's controls, as well as the LCD monitor and viewfinder eyepiece. The optical viewfinder has a moderately high eyepoint (19.5mm), so the full display remains visible at least a short distance from the camera. This is a decided plus for eyeglass wearers, although Dave does report having to press his eyeglasses up against the viewfinder bezel in order to see the entire screen. As further accommodation to those of us with suboptimal eyesight, a rotating diopter adjustment (-2.0 to +1.0) on the right side of the eyepiece changes the focus of the viewfinder optics. Positioned just left of center, the 2.5-inch LCD monitor comes with a protective plastic cover that keeps the monitor safe from accidental scratches and smudges. Several camera controls flank the LCD monitor on each side, including a Four-Way Arrow pad for navigating the LCD menu system. A slide switch locks the arrow pad to prevent inadvertent changes of AF area. A small LED lamp just below and to the right of the arrow pad lights whenever the camera accesses the memory card (indicating that you shouldn't open the compartment door or remove the card). In the very top right corner is the Main Command Dial, which navigates menus and changes camera settings.
Here again, we see a few differences relative to the D70: The Trash button has been moved from lower right to the upper left, an OK button taking its place. The OK button performs the same function as the Enter button on the D70, letting that control now serve just for setting Quality in record mode and Zoom in playback mode. The net result is that you can now navigate the D80's menu system using only your right thumb, but we personally found the two-handed approach required by the D70 to be faster.

The camera's bottom panel has slightly raised rubber ribs crossing it, to provide better traction when mounted on a tripod head. Apart from these though, it's quite flat overall. A threaded metal tripod mount sits near the center of the body, aligned with the optical center of the lens, and very close to the center of mass of the camera.

The battery compartment is on the right side of the body (when viewed from the back). A lock button in the battery compartment door prevents it from opening accidentally, and the pressure of the door holds the battery in place. The battery is a slightly firm fit in the compartment, so it doesn't immediately eject when the door is opened, but we still prefer having a battery compartment with both a stronger spring and a latch to hold the battery in place.
Operation
Nikon D80 Operation
If the Nikon D80 is going to be your first digital SLR, the assortment of buttons and dials might be a little intimidating at first look. After only a short time working with it though, the control layout becomes quite intuitive and very fast to navigate. As we made note of in the Design section of this review, a number of controls have moved around on the body relative to their positions on the D70. Almost all of these changes constitute improvements in the camera's ergonomics, at worst, the changes are relatively neutral. The D80 retains the same mode dial as was found on the D70, so we found ourselves missing the arrangement of buttons and mode dial employed on the D200. We have to admit though, that the easy access to the handful of scene modes provided by the D80's dial is perhaps more appropriate to the amateur market the D80 is designed for.
Overall, the control layout places the main shooting controls on top of the camera and the rest on the back panel, for ease of use. Changing shutter speed, aperture, metering mode, etc. is quick and simple, with changes shown on the small black & white data readout on the top panel of the camera, and some of them in the viewfinder readout display as well.
 The LCD menu system itself is well-organized and simple to navigate, with five main menu pages. The Custom Settings menu is just a single scrolling list of entries (as in the D50 and D70), rather than the banks of settings seen in the D200. This is perhaps easier for novice users, and arguably a bit faster for shorter lists of options, but the bank system used in the D200 made for a cleaner layout, and made the various functions a bit easier to find.
Top Panel Status LCD


As with most Nikon DSLRs, the top-panel data readout communicates a lot of information about current camera settings, and provides an interface for setting many camera functions, when used in conjunction with the various buttons and Command Dials. The illustrations above show the meaning of the various icons and readouts in this display.
We really like top-panel data readouts of this sort, and hope that Nikon continues to include them on their cameras. Canon removed the top-panel readout on their competing Rebel XTi model and, while the rear-panel displays are gorgeous and readable, we're always conscious that we're using battery power whenever we access them. (We're also more inclined to want to look down on the top of the camera while making adjustments, but that may just be force of habit from our film days.)
The big news with the D80's menu system is that there's now a fifth "Retouch" menu at the bottom of the list, offering a much greater range of in-camera image-manipulation possibilities than we've seen previously on a dSLR. (Or on just about any digital camera, for that matter.) We look at some of the functions available there in more depth on the Operation/Image Retouching subtab of this review.
As always on Nikon dSLRs, the viewfinder display does a good job of keeping you informed of what's going on with the camera, without having to take your eye away from the viewfinder to find out. Those times that you do, the combination of external controls and the monochrome data display can handle most common camera settings without forcing you into the LCD menu system. All in all, a very well laid-out, efficient user interface.
Click on the other sub-tabs above to read about the Nikon D80's Viewfinder, Controls, and Menu system.
Nikon D80 Main LCD
 Like those on essentially all digital SLRs at the time of writing, the LCD panel on the D80 isn't usable as a viewfinder. It does, however, provide a great deal of information about your pictures after you've shot them. A variety of playback options are offered, including image-only, six flavors of overlaid information, a 4- or 9-image thumbnail display, and a zoomed playback mode with variable information. The screenshot at right shows several of the information displays that are available.
Its playback screens were one of the things we liked most on the D200, so we were very happy to see a lot of that functionality carried over to the D80 as well.
Of the various screens, one of the more interesting options on the Nikon D80 is the histogram screen. Histogram displays are common on professional digital cameras (and many amateur models now as well), regarded as almost mandatory by many pros for evaluating exposure levels. A histogram is simply a graph of how many pixels there are in the image at each brightness level. The brightness is the horizontal axis, running from black at the left to white at the right. The height of the graph shows the relative number of pixels having each brightness level. This sort of display is very handy for determining under- or overexposure. Ideally, the histogram would stretch across the entire width of the display, using the full range of brightness values available. An underexposed image will have a histogram with all the data lumped on the left-hand side, with nothing reaching all the way to the right. Likewise, an overexposed image will have all the data lumped on the right hand side.
 On the D80, Nikon appears to have dispensed with the luminance-only option for the histogram display, opting instead to make the RGB+L histogram display the default. As seen at right, this display graphs the overall brightness (the white graph) as well as brightness values in the Red, Green, and Blue channels separately. Having the three colored histogram graphs available makes it much easier to tell when you're in danger of saturating highlights with strongly colored objects, and also gives good guidance as to whether you've achieved a neutral white balance or not.
 A histogram display is very helpful in telling whether you've got the exposure right, but to my mind isn't adequate by itself. With digital cameras, it's very important not to blow-out the highlights in a picture (they're similar to color positive film in that respect), since once you hit the maximum brightness, the image just saturates, and any highlight detail will be lost. A histogram display does a pretty good job of telling you how the image as a whole is doing, but what if there are just a few critical areas that you're worried about for the highlights? If only a small percentage of the total frame is involved, it won't account for many pixels. That means any peak at the "white" end of the histogram graph would be pretty small, and easy to miss (or just plain invisible). What to do? The folks at Nikon recognized this problem some time ago, and so have provided another special display mode on the D80 (as on most of their dSLRs) that they simply call "highlights," accessible via the Playback settings menu, under "Display Mode." This mode blinks any highlights that are saturated in any of the color channels. It does this by taking the nearly-white areas on the LCD and toggling them between white and black. (This screen shot is actually borrowed from our D200 review, the function works identically on the two cameras.)
One option sadly not copied from the D200 though, is the ability to do a highlight blink based on the individual color channels: On the D80, the highlight blink only shows you areas where the overall luminance is approaching saturation.
 The D80 also offers the D200's greatly excellent options for display magnification, but does so via a somewhat simpler interface. You have the normal thumbnail or normal-sized displays available, but can also enlarge the display up to 25x to examine critical focus and framing. Pressing the Magnify button enables zoomed playback, and each subsequent press of it zooms in a step closer. Pressing the "unmagnify"/Thumbnail button zooms you out. Any time you're zoomed in, you can scroll around the magnified image by using the Multi-controller. This interface is potentially slightly slower than that of the D200, but much simpler, not requiring the simultaneous manipulation of the zoom buttons and Main Control Dial.
Optics
Nikon D80 Optics
Lenses
Like other Nikon SLRs, the D80 accommodates a wide range of Nikkor lenses, via the standard Nikon "F" lens mount. With very few exceptions, you can use the D80 with any F Mount Nikkor lens ever made, but older non-CPU lenses will significantly limit your exposure options. (Lacking from the D80 is the "Non-CPU Lens Data" menu item found in the D200 and D2Xs, for entering information about non-CPU lenses, as well as the aperture-indexing finger that the D200 has for wide-open metering with older "AI" lenses. If you have any AI lenses you want to be able to use the camera's metering system with, you should go with the D200.)

New Kit Lens
One notable upgrade from the D70 to the D80 is that the kit lens bundled with the D80 has a significantly longer zoom range, extending from 18-135mm. The official designation of this new lens is an alphabet soup of specifiers: AF-S DX Zoom-Nikkor 18-135mm f/3.5-5.6 G IF-ED. (Whew) That long list of jargon translates into some pretty promising specs. Here's a breakdown:
- AF-S - "Silent Wave" motor for fast, quiet focusing. This design also lets you adjust focus manually after the autofocus system has achieved focus, handy for manually tweaking focus to your liking in tricky situations.
- DX - designed to mate with Nikon's DSLRs, smaller and lighter because its image circle doesn't have to cover the full 35mmm film plane.
- 18-135mm - A pretty wide zoom range, 7.5x from wide to tele, equivalent to a 27-202mm lens on a 35mm camera.
- f/3.5-5.6 - Well, this is the one parameter that's not terribly impressive, this is a fairly typical aperture range for consumer zoom lenses.
- G - It has a CPU so it will work with Nikon's 3D Color Matrix Metering II system. The G also means no aperture ring, you set the aperture only through the camera's controls. Speaking of aperture, the diaphragm in this lens is a 7-blade rounded-opening design, for more appealing bokeh. (A more natural blur for out-of-focus objects.)
- IF - Internal focusing, for a more compact design. IF also means that the front element doesn't rotate when focusing, so you can use it with circular polarizing filters, and the focusing won't mess up your polarizer setting.
- ED - Uses Extraordinary Dispersion glass for better control of distortion, astigmatism, and chromatic aberration. This lens also uses 7 aspheric surfaces to improve optical performance.
Other features include the ability to focus to 17.7 in (45 cm) from the subject across its full focal length range. It's 2.9 inches in diameter by 3.4 inches long (86.5 x 73.5mm), and weighs in at 13.6 ounces (386 g). It accepts 67mm screw-in filters, and ships with lens pouch, front and back caps, and a bayonet hood to block stray light.
We've now received a production sample of this lens, and have run it through the full range of tests over on our sister site SLRgear.com. Our test results there show that the Nikkor 18-135mm delivers excellent sharpness for a modestly-priced long-ratio zoom, but at the cost of a fair bit of chromatic aberration and significant shading ("vignetting") in the corners at wide angle. Geometric distortion is also on the high side. Despite this, it's still a significant step up from the inexpensive "kit" lenses that are generally bundled with SLRs. (Higher distortion, vignetting, and chromatic aberration are unfortunately common characteristics of long-ratio zooms.)
Lens Compatibility
As noted above, functions and exposure modes available with a given lens will vary greatly with the lens type. More recent Nikkors (the G- or D-type models) include a microchip (CPU) that communicates focal-distance information to the camera. Lenses without the microchip won't support the 3D Matrix metering mode, and in fact all metering is disabled on the D80 when using a non-CPU lens.
We'll have full lens-compatibility information once the final specs are published in the D80's manual. The basics though are that all G- and D-type AF Nikkor lenses should work without restriction, with the sole exception of the PC-Micro Nikkor 85mm f/1.8D perspective-correction lens, for which the camera may not be able to meter properly if the lens is tilted or shifted, or if its aperture is stopped down. Most non-CPU lenses can be attached to the camera, but the shutter release will be disabled unless the camera is in Manual exposure mode, and AF, metering, electronic analog exposure display and TTL flash control can't be used. There is however a list of non-CPU lenses and accessories that can't be used at all, and these are listed below.
Incompatible Optics
- TC-16A AF Teleconverter
- Non-AI lenses
- Lenses that require the AU- 1 focusing unit (400 mm f/4 5, 600 mm f/5.6, 800 mm f/8, 1200 mm f/l1)
- Fisheye (6 mm f/5,6, 8 mm f/8, OP 10 mm f/5 ~6)
- Old-model 21 mm f/4
- K2 rings
- ED 180-600mm f/8 (serial numbers 174041-174180)
- ED 360-1200 mm f/I I (serial numbers 174031-174127)
- 200-600 mm f/9.5 (serial numbers 280001 300490)
- Lenses for the F3AF (80 mm f/2-8, 200 mm f/3.5, TC- 16 Teleconverter)
- PC 28mm f/4 (serial number 180900 or earlier)
- PC 35mm f/2.8 (serial numbers 851001906200)
- Old-model PC 35 mm f/3.5
- Old-model 1000 mm f/6.3 Reflex
- 1000mm f/11 Reflex (serial numbers 142361-143000)
- 2000mm f/11 Reflex (serial numbers 200111-200310)
Focusing Options
Given that the optical characteristics will depend entirely on the lens attached, we'll concentrate here on the focusing options and modes rather than lens characteristics. There's a lot to talk about, given the exceptional flexibility afforded by the D80's autofocus system, which incorporates many of the features and capabilities of the system in the D200. As we noted in the review section covering the viewfinder, the D200 has a total of 11 autofocus regions, arranged with 9 in an almost square matrix in the central area of the frame, with two additional ones positioned to the right and left of the central array. The D80 uses Nikon's Multi-CAM 1000 AF Sensor Module, which provides the same 11-sensor pattern as the D200's AF system, but with slightly lesser performance and only a single selectable normal/wide AF area in the center. Each of the 11 focus areas can be used individually, the center sensor can be switched to wide-frame operation for broader coverage, and a new Auto-area AF mode measures all 11 focus areas, automatically determines which of them are on the primary subject and activates only those areas. As with the D200, only the center sensor is cross-type, able to respond to subject detail oriented either horizontally or vertically.
The D80 lets you take advantage of auto or manual focus via a small dial on the front of the camera, next to the lens. Setting the switch to "M" puts the camera into manual focus mode, "AF" places it in autofocus mode. Single AF (AF-S), Continuous AF (AF-C), and Auto-switching AF (AF-A) options can be selected by pressing the AF button on the right side of the camera's top panel repeatedly, to cycle through the choices. Single AF simply means that the camera sets focus only once, when the Shutter button is first pressed halfway, and is best for stationary objects. Continuous AF means that the camera continuously adjusts the focus, as long as the Shutter button is halfway pressed, and is best for moving objects. In AF Auto mode, the camera begins focus operations in single-focus mode, but switches to Continuous Dynamic AF if it detects motion within the active AF area.
There's an important difference between Single and Continuous Servo modes: In Single Servo mode, the shutter won't release unless the lens is focused, or the lens itself is set to manual focus. (Focus Priority) In Continuous Servo mode however, the camera will fire regardless of the state of focus. (Release Priority) If you want to be sure that the camera is focused when you snap the picture, use Single Servo mode. Use Continuous Servo for moving subjects, and/or times when the instant of shutter release is more important to you than sharp focus.
The AF Area Mode option (02) on the Custom Settings Menu lets you select between Single Area, Dynamic Area, and Auto AF modes. Single Area AF simply means that the camera judges focus based on one part of the subject, and the user can manually select the AF point by pressing the arrow keys. Dynamic Area AF employs all of the autofocus points, though you can still manually select the main point. When Dynamic Area focusing is enabled, the camera first focuses on the subject in the primary focus area. When the subject moves to a different AF area, the camera shifts the focus to "follow" the subject. This is great for irregularly moving subjects. (Sports and kids come to mind.) The Auto-area AF option means that the camera first focuses on the subject in whatever single AF area is selected, but will switch to Dynamic Area AF if it detects subject motion. In any of the modes, you can change the primary focus area by unlocking the focus area selector (the Four-Way Arrow pad on the back panel) and then shifting the focus area using the up, down, right, or left arrow directions on the control rocker. You can lock the focus area selection by turning the switch back to the lock position. By default, the D80 does not "wrap" the focus area selector as you scroll between focus areas. Through the Custom Settings menu though (option 20), you can opt for a "Wrap" function. What this means is that if you press the right arrow key again, after the right focus area is already selected, the selection will immediately jump to the left focus area. The same thing happens when moving the focus area selection vertically as well.
The center focus area of the D80 can be set to either a normal or wide zone, through Custom Settings Menu option 03. The wider zone could be better for initially acquiring a moving subject, particularly when combined with the Dynamic Focus option.
There are three methods by which you can lock focus on the D80. The first is to half-press the Shutter button to lock the focus, placing your subject in the selected focus area, halfway pressing the Shutter button, then realigning the composition and firing the shutter. (This is the default behavior of the Shutter button, but if the AE-L/AF-L button is set to AF Lock, it will override the shutter button as long as it's held down.) Alternatively, when using Single Servo AF, you can press the AF-L/AE-L button to lock focus (and exposure, unless that button is set for focus only in Custom Settings menu 18). Keeping this button pressed will lock focus and/or exposure, even if the Shutter button is released. This lets you recompose the photograph without keeping your finger on the Shutter button, but on the AE-L/AF-L button instead. (Reducing the chance that you'll accidentally trip the shutter when you don't intend to.) The front-panel FUNC button can also be set (via Custom Settings Menu option 16) to set focus temporarily.
There are several options available for the AE-L/AF-L button, which can be set via Custom Settings Menu 18. You can program it to lock either focus or exposure separately, or both together (the default). You can also change its operation so a single press locks and holds the exposure setting. (No need to keep the button pressed down.) Finally, you can set the AE/AF lock button so it alone controls the autofocus system, meaning the autofocus won't actuate when the shutter button is half-pressed, only when the AE/AF lock button is pressed instead.
AF Performance
We don't have any way to measure autofocus performance directly, but on a subjective level, the AF system in the Nikon D80 did seem to be very fast and responsive. We particularly liked the Dynamic AF option, but could see where the Group Dynamic AF option of the D200 would be nice to have in some situations. (Group Dynamic AF handles the common situation where it's difficult to place a single AF point on a very active subject at the start of focus tracking. By having a larger area in which to position the subject, it becomes much easier to initially acquire focus.)
AF Assist
Like past Nikon DSLRs with built-in flashes, the D80's AF-assist light is a bright incandescent bulb that emits from the body near the handgrip. We thought to call particular attention to it, because some competing cameras (notably the Canon Digital Rebel series) use the flash as an AF-assist light. This would be fine, but they also require that the flash be used in the exposure, so there's no way to have AF assist for available-light shots. The D80 doesn't have this limitation.
Nikon D80: 18-135mm Kit Lens Optical Tests
Zoom
The Nikon D80's 18-135mm kit lens performs well.


The Nikon D80 digital SLR accommodates a wide range of Nikkor lenses. Here, we tested the performance of the 18-135mm kit lens, but zoom performance will of course vary with the lens in use. Results are very good at wide angle, with clear details throughout the frame. Some coma distortion is visible in the tree limbs at 18mm, as is some slight corner softness. At 135mm, details are very crisp, with little noticeable distortion. This lens is consistently very sharp across its focal length range, much more so than most long-ratio zoom lenses. The penalty paid is somewhat higher geometric distortion and vignetting, though. You can read our detailed test results for it here: SLRgear.com test of Nikon 18-135mm f/3.5-5.6G
Macro
An average size macro area with fuzzy details from the 18-135mm kit lens.
Flash performs well.


The 18-135mm kit lens bundled with the Nikon D80 captures an average size minimum area of 3.47 x 2.32 inches (88 x 59 millimeters) at the 135mm lens setting. Detail and resolution were both high, though details are a little soft overall, even at the center of the frame. (It's possible that we'd pushed the focal distance a little closer than the optimal minimum.) Performance will naturally be better with a true macro lens, but the kit lens does pretty well in the macro area. The camera's built-in flash also produced good results here, with only slight falloff in the corners of the frame. (Helped by the greater working distance that a 135mm macro focal length provides.)
Distortion
High barrel distortion, and slightly high pincushion distortion with
the kit lens.
This is the tendency for the lens to bend straight lines outward (like a barrel -- usually at wide angle) or inward (like a pincushion -- usually at telephoto). The Nikon D80's 18-135mm kit lens produced about 1.03% barrel distortion at the 18mm setting, which is high but not totally unexpected at the wide angle end of a long-ratio zoom lens. At the 135mm setting, pincushion distortion measures about 0.48%, which is also slightly high.
| Barrel distortion at 18mm is 1.03% |
 |
| Pincushion at 135mm is 0.48% |
 |
Chromatic aberration
High and bright at the extreme telephoto and wide angle settings, very
noticeable effect on images at edges, not uncommon among long zooms.


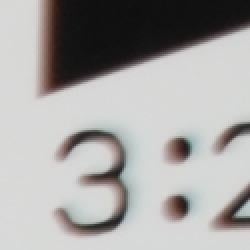


This is perhaps the most consistently noticeable flaw with the 18-135mm kit lens: Chromatic aberration is rather high at both 18mm and 135mm settings, showing 15+ pixels of very bright coloration on either side of the target lines. However, at 35mm, the distortion is lower, and pixels aren't nearly as bright. (This distortion is visible as a slight colored fringe around the objects at the edges of the field of view on the resolution target.)
Corner Sharpness
Slight to moderately high softening in the corners of the frame with
the kit lens.


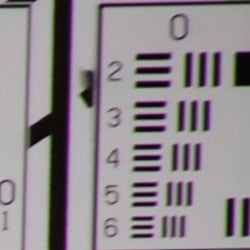

The 18-135mm kit lens that accompanies the Nikon D80 showed some blurring in the corners, though the most noticeable effect was at the 135mm position. The strongest instance occurred in the upper right corner, though the other three corners at full telephoto were also fairly soft. (Apologies for the rough crops above, our alignment resulted in the D80 cropping the 3:2 frame slightly.)
The images above were taken from our standardized test shots. For a collection of more pictorial photos, see our Nikon D80 Photo Gallery .
Exposure
Nikon D80 Exposure Options
The Nikon D80 gives you all the exposure options you'd expect in a high-end prosumer SLR, plus a few surprises. Available exposure modes include Program AE, Manual, Aperture Priority, and Shutter Priority modes with shutter speeds from 1/4,000 to 30 seconds available, as well as a Bulb setting for longer exposures. While an impressive range, the 1/4,000 top speed is a full stop down from that of the D70/D70S, a reduction in shutter speed that also shows up in the D80's lower 1/200 second x-sync speed, a significant drop from the 1/500 second x-sync of the D70/D70S. (See the discussion below about "Shutter Control vs CCD Gating" that explains the benefit of the D80's approach to exposure-time control.)
A very nice touch that's common to other Nikon DSLRs is that, while in Program AE mode, you can rotate the Main Command dial to select different combinations of aperture and shutter speed settings than those normally chosen by the autoexposure system. (That is, if the automatic program would have chosen 1/125 second and f/5.6, you could instead direct the camera to use 1/60 at f/8 or 1/30 at f/11, to get greater depth of field.) This is a very handy option for those times when you need some measure of increased control, but still want the camera to do most of the work for you. We personally use this capability more than Aperture- or Shutter-priority metering in our own shooting.
An interesting feature when using Manual exposure mode is the electronic analog exposure display visible in the optical viewfinder data readout. This shows the amount the camera thinks an image will be over- or underexposed, based on the settings you have selected, and helps you find the best exposure for the subject.
ISO Range
ISO sensitivity ranges from 100 to 1,600, adjustable by pressing the ISO button and turning the Main Command dial to change the setting. Scrolling past the 1,600 setting offers HI-0.3, HI-0.7, and HI-1 settings, which translate to High ISO +0.3, +0.7, and +1.0 EV settings above the 1600 mark. (The maximum ISO setting is thus 3200.) ISO values are adjustable in 1/3 EV increments across the full range, but there's no option for 1/2 EV adjustments as in the D200. (Not a significant loss of capability, in our opinion.) A High ISO Noise Reduction mode in the settings menu lets you increase or decrease the effect of noise reduction processing when shooting at the higher sensitivity settings (800 and above), in addition to the standard Noise Reduction option for longer exposures (which itself can be turned on or off as desired).
White Balance Options
White balance modes on the Nikon D80 include Auto (usable from 3,500K to 8,000K), Incandescent (set to about 3,000K), Fluorescent (4,200K), Direct Sunlight (5,200K), Flash (5,400K), Cloudy (6,000K), Shade (8,000K), Choose K Temp (adjustable from 2,500 to 10,000K), and Preset (which allows you to manually adjust the white value by using a white card or object as a reference point). All white balance settings are adjustable from -3 to +3 units on an arbitrary scale by turning the Sub-Command dial (on the front of the hand grip) while pressing the White Balance button (with the exception of the Preset option, which is not adjustable). While we called it arbitrary, in all but Fluorescent white balance mode, each step on the fine-tuning scale corresponds to 10 mired of color shift. The fluorescent setting provides a wider range of variation to accommodate the wide range of colors available in fluorescent lighting. You can also bracket white balance exposures (see the Autobracketing discussion below). Higher values correspond to a decrease in the camera's white point, in degrees Kelvin (meaning the images become "cooler" in appearance). This is a very nice feature, as we often wish we could use one of a camera's standard white-balance settings, but tweak it to be just a bit warmer or cooler than the default. To be sure, some experimentation would be required to familiarize yourself with the impact of these "tweaked" white balance settings, but having them available is a big plus. The table below shows approximate white point temperatures in degrees Kelvin for the various adjustments in each of the major white balance settings.
| Camera Display--> | -3 | -2 | -1 | 0 | 1 | 2 | 3 |
| Direct Sunlight | 5600 | 5400 | 5300 | 5200 | 5000 | 4900 | 4800 |
| Shade | 9200 | 8800 | 8400 | 8000 | 7500 | 7100 | 6700 |
| Overcast | 6600 | 6400 | 6200 | 6000 | 5800 | 5600 | 5400 |
| Incandescent | 3300 | 3200 | 3100 | 3000 | 2900 | 2800 | 2700 |
| Fluorescent | 7200 | 6500 | 5000 | 4200 | 3700 | 3000 | 2700 |
| Flash | 6000 | 5800 | 5600 | 5400 | 5200 | 5000 | 4800 |
Nikon D80 Exposure Timing: Shutter Control vs CCD Gating
We confess that we were surprised to see that Nikon had dropped the maximum x-sync shutter speed and maximum absolute shutter speed on the D80 relative to the capabilities of the earlier D70 and D70S. While the slower shutter speeds do limit the camera's capabilities somewhat (that 1/500 x-sync speed was great for taking "flash only" shots under bright lighting), it turns out that the change has brought about a very significant improvement in another area, namely exposure "blooming" on the CCD caused by strong light overloads. The shots below show the difference between the D70 and D80 in two identically-exposed images, with the sun intruding on the image area.
| D-80 vs D70 CCD Blooming (Click on any image to see full-size version) |
|
|---|---|
 |
 |
| Nikon D80 1/4,000 sec f/5.6 ISO 400 |
Nikon D70 1/4,000 sec f/5.6 ISO 400 |
Both shots above were captured with the same ISO, shutter speed and aperture settings, but the shot from the D70 shows horrible streaking around the overexposed sun. (This is generally a bad idea, by the way, direct images of the sun on your CCD can cause damage if you're not very careful. - So don't try this at home.)
What's going on with the D70's sensor here is called "blooming": Extreme overexposure can cause charge to bleed from photo-active areas into adjacent ones, or into shift register cells used to transfer the charge off the chip so it can be measured.
It turns out that the D70's shutter only governs relatively long exposures: Shorter exposures are controlled by "gating" the sensor chip, starting and stopping its light-gathering electronically. This lets you achieve very fast shutter speeds economically, but has the limitation that the sensor's surface is actually exposed to incoming light for a period of time much longer than the exposure itself. Normally, this causes no problems, but as we see above, massive light overloads can bleed charge into the CCD's transfer registers while the image data is being read out. The result is horrible streaking.
In the shots above, the sun itself was directly in the field of view, so it's very much a worst-case example. The same thing can happen with much smaller areas of strong highlight, as would be found with the sun glinting off chrome or some other reflective surface. Very annoying, to say the least.
So why doesn't the D80 show the same behavior? Because Nikon gave it a "real" shutter, capable of exposures down to 1/4,000 second on its own. Really high-speed shutters are more expensive to build than merely fast ones, so Nikon chose to give the D80 a fast focal-plane shutter, but drop its maximum shutter speed to 1/4,000 in the process. (This is another area where the D200 surpasses the D80; it has a shutter capable of delivering 1/8,000 second exposures directly.)
This strikes us as a pretty important feature of the D80, but to the best of our knowledge, it hasn't been reported on by any other review organizations.
Nikon D80 Metering Options
The D80 has three metering options: 3D Color Matrix II, Center-Weighted, and Spot. The 3D Color Matrix II setting integrates exposure information from a large number of areas across the frame (useful when brightly colored or very dark subjects occupy a significant portion of the frame) with distance information from the microchip in D- and G-series lenses. The result is much more accurate metering response than more conventional center-weighted metering would provide. The D80 uses a 420-segment RGB metering sensor for its 3D Color Matrix II metering, vs the 1,005-segment one in the D200 and D2Xs, but does still use the same 30,000-image database for judging exposure. Center-Weighted metering measures light from the entire frame but places the greatest emphasis on a circular area in the center, marked by the large circle in the viewfinder. (The size of the Center-weighted metering area can be changed via Custom Settings Menu option 12 to either 6 or 10mm from its default value of 8mm.) Spot metering takes a reading from a 3.5mm circle centered on the active focus area only, covering about 2.5% of the frame.
The D80's Exposure Compensation adjustment increases or reduces the overall exposure from -5 to +5 exposure equivalents (EV) in one-half or one-third step increments, in all exposure modes. An Auto Bracketing feature captures multiple shots with different exposure or white balance values determined by either the photographer in Manual mode or by the camera in all other modes. (See below for details.)
A new addition is the Exposure Delay mode, which delays the exposure for a few tenths of a second after the mirror raises, to let the the mirror shock subside (intended for times when the camera is on a tripod). This is intended to have the same effect as the Mirror Up shooting mode on other Nikon SLRs, but differs in that Mirror Up mode requires two actuations of the shutter button (or remote) to fire the shutter, whereas the Exposure Delay of the D80 handles the delayed shutter release automatically.
When reviewing images on the LCD monitor, you can call up a histogram and a highlight function to give you a complete readout on the exposure. This is a useful tool to examine your exposure in the camera instead of waiting to download images and then deciding to reshoot. One change from the D200 though is that the D80 can't blink highlights independently for the R, G, and B color channels, but rather bases its highlight blinking on the luminance value alone.
Nikon D80 Continuous Shooting Modes
The Nikon D80 offers a single continuous shooting mode, accessed via the Drive Mode button on top of the camera. Only a single drive mode is offered (vs the separate low and high-speed modes on the D200), with a frame rate of three frames/second. This matches the performance of the original D70/D70S, fairly impressive considering how much more image data the D80's processor has to contend with. The D80 also sports the obligatory self-timer mode, with delay options of 2, 5, 10, and 20 seconds.
Nikon D80 Exposure and White Balance Bracketing
Most digital cameras these days offer some sort of exposure bracketing, but the bracketing function on the Nikon D80 goes beyond simple exposure adjustment, to permit white balance bracketing as well. Bracketing settings are controlled via Custom Settings Menu option 13, where you can choose to bracket both normal exposure and flash, normal exposure only, flash only, or white balance.
Bracketing is controlled by holding down the BKT button and rotating the Command Dials. The Main Command dial selects either 3 or 5 frames per bracket, while the sub-command dial selects 0.3, 0.7, or 1.0 EV step sizes for exposure adjustment. Auto exposure bracketing can thus cover as wide a range as +/- 2.0 EV, in steps of 1 EV, or +/- 2/3 EV in steps of 1/3 EV.
White balance bracketing can occur in the same 3 or 5-shot brackets, with the step size between shots being either 1, 2, or 3 of the white balance "fine tuning" steps. (As noted above, each such step corresponds to 10 mireds of color-temperature adjustment except when in Fluorescent mode, which offers larger steps.) Normal white balance bracketing can thus cover a range from +/- 10 mireds (3 shots, 1 step each ) to +/- 60 mireds (5 shots, 3 steps of variation each).
Nikon D80 "Image Optimization" Options
The Nikon D80 also offers the by-now-familiar Optimize Image option, accessed through the Shooting menu, which lets you adjust sharpness, contrast, saturation, and hue. A Custom setting accepts downloaded tone curves created in Nikon's Capture application (version 4 or later) and then downloaded from a computer. (If no curve is downloaded, the Custom setting defaults to the Normal setting.)
You can also opt for a black-and-white shooting mode, which on the D80 offers a nice enhancement, in the form of "color filtration" mimicking the effect of color contrast filters when shooting with black-and-white film, to enhance clouds, etc. Color contrast filter options in the D80's black and white mode include yellow, orange, red, and green. You can also set the contrast and sharpening for black and white shooting entirely separately from the controls for full-color mode, so you could dial-in a special tone curve for your black and white photos without disturbing the camera's normal color characteristics. Overall, the D80's black and white mode goes far beyond what we're accustomed to seeing, and its color contrast filtration is the equivalent of carrying a bagful of color filters back in the film days. (No worries anymore about having the wrong size color filter for the lens you were shooting with!) It's also important to realize that if you shoot in NEF+JPEG mode, you can play to your heart's content with color contrast filtration, while still preserving the original (full-color) RAW-format NEF file on the memory card. This gives you great freedom to experiment in the field, knowing that all the original image data remains untouched in the NEF "negative." Pretty slick!
The images above were taken from our standardized test shots. For a collection of more pictorial photos, see our Nikon D80 Photo Gallery .
Not sure which camera to buy? Let your eyes be the ultimate judge! Visit our Comparometer(tm) to compare images from the Nikon D80 with those from other cameras you may be considering. The proof is in the pictures, so let your own eyes decide which you like best!
Performance
Nikon D80 Performance
Shooting with the Nikon D80, we found it to be a very responsive camera in all respects. Startup was quick enough that you're never likely to notice, shutter lag was low, and shot to shot cycle times in both single-shot and continuous mode were very good. It falls short of its big brother the D200 in several areas, but that's to be expected, given the substantial price difference between the two models. Read on below for all the details:
Timing and Performance
Excellent speed for a digital SLR.
|
Startup/Shutdown
|
||
|
Power on
to first shot |
~0.5 second
|
Almost immediate, difficult to measure accurately.
|
|
Shutdown
|
~0.1 second
|
Almost immediate, difficult to measure accurately.
|
|
Buffer clearing time
|
8 seconds
(2 seconds buffer clearing in LF JPEG*) |
Worst case buffer clearing time.* -- This is the delay after a set of shots before you can remove the card. (Worst case clearing for the D80 is after 5 RAW + Large/Fine JPEG frames.)
|
|
Mode switching
|
||
|
Play to Record,
first shot |
~0.4 second
|
Time until first shot is captured: Very fast, shooting priority essentially means camera is always ready to shoot.
|
|
Record to play
|
1.6 seconds
|
Time to display a large/fine file immediately after capture
|
|
Display
recorded image |
~0.4 second
|
Time to display a large/fine file already on the memory card.
|
|
Shutter response (Lag Time):
|
||
|
Full Autofocus
|
0.25 second
|
Time from fully pressing shutter button to image capture, zoom lens at wide angle position. Good speed, very comparable to D200.
|
|
Prefocused
|
0.083 second
|
Time to capture, after half-pressing and holding shutter button. Quite fast, but slower than the D200's 0.057 second.
|
|
Continuous AF
|
0.095 second
|
This mode usually shows no speed increase with our static subject; we have no way to measure performance with moving subjects. Continuous AF does help on the D80 though, but it doesn't get quite a quick as when you've prefocused in normal AF mode.
|
|
Manual focus
|
0.083 second
|
For most cameras, shutter lag is less in manual focus than autofocus, but usually not as fast as when the camera is "prefocused"
|
|
Cycle time (shot to shot)
|
||
|
Single Shot mode
Large Fine JPEG |
0.37 seconds
|
Time per shot, averaged over 6 shots. Good speed, but about 40% slower than the D200.
|
|
Single Shot mode
Small JPEG (1,936 x 1,296) |
0.37 seconds
|
Time per shot, averaged over 20 shots
|
|
Single Shot mode
RAW |
0.54 seconds for 6 shots, then slows to 1.06 seconds
|
Time per shot, averaged over buffer length or 20 shots, whichever came first
|
|
Single Shot mode
RAW+LF JPEG |
0.54 seconds for 5 shots, then slows to 1.73 seconds
|
Time per shot, averaged over buffer length or 20 shots, whichever came first
|
|
Early shutter
penalty? |
No
|
Some cameras refuse to snap another shot if you release and press the shutter too quickly in Single Shot mode, making "No" the preferred answer
|
|
Continuous mode
Large Fine JPEG |
0.33 second (3.0 frames per second)
1 second to clear |
Time per shot, averaged over 9 shots
|
|
Continuous mode
Small JPEG (1,936 x 1,296) |
0.33 second (3.0 frames per second)
1 second to clear |
Time per shot, averaged over 20 shots
|
|
Continuous mode
RAW |
0.33 second (3.0 frames per second) for 6 shots, then slows to 1.28 second per shot;
8.1 seconds to clear* |
Time per shot, averaged over buffer length of 6 shots.
|
|
Continuous mode
RAW+LF JPEG |
0.33 second (3.0 frames per second) for 5 shots, then slows to 2.07 second per shot;
13.8 seconds to clear* |
Time per shot, averaged over buffer length of 5 shots.
|
|
Flash recycling
|
1.2 seconds
|
Flash at maximum output
|
|
Download speed
|
||
|
Windows Computer, USB 2.0
|
2855 KBytes/sec
|
Typical Values:
Less than 600=USB 1.1; 600-770=USB 2.0 Low; 771-4000=USB 2.0 High |
|
*Note: Buffer clearing times measured with a SanDisk Extreme III SD memory card. Slower cards will produce correspondingly slower clearing times. Slow cards may also limit length of bursts in continuous mode.
|
||
Startup & Shutter Lag
The Nikon D80 is a very responsive camera, albeit not quite up to the level of performance of its big brother, the D200. It's full-autofocus shutter lag is actually just a hair faster than that of the D200, but its shot to shot cycle times are longer, and continuous-mode speed is lower, with much lower buffer capacities as well. Shutter response when prefocused is also slower though, the 83 msec response of the D80 being only average for a DSLR.
Continuous Mode Speed and Buffer Capacity
The Nikon D80 has only one continuous mode, vs the two modes of the D200. It normally shoots at 3 frames/second, but we found that this dropped to just under two frames/second (0.54 second between shots, or 1.86 frames/second, to be precise) when long-exposure noise reduction was enabled, even when using short shutter speeds. - For best performance then, it's important to turn off long-exposure NR unless you're actually shooting at very slow shutter speeds. (NOTE that Long Exposure NR is NOT reset by the reset-all button combination! - You'll want to make sure that this option is disabled if you need maximum shooting speed.)
The Nikon D80's buffer capacity can be highly variable, depending on the mode you're shooting in, and the subject content. This isn't unusual, as many cameras show different buffer depths for RAW vs JPEG shooting, and subjects with little detail compress much better than those with a lot of detail, so relatively plain images will translate into greater buffer capacity.
Shooting to RAW or RAW+JPEG formats, the D80 can capture 6 frames before having to slow down for the memory card, and scene content doesn't matter very much. (That is, you only get 6 frames, whether you're shooting a blank wall or a subject with loads of fine detail.) As just noted above, JPEG buffer depth will depend quite strongly on scene content and the amount of JPEG compression you've selected. Scenes with a great amount of fine detail captured at the highest JPEG quality will result in a 6-frame buffer depth, while scenes with less detail or captured at lower JPEG quality settings will result in buffer depths of 10, 20 or more frames.
Infinite buffer capacity?
Some reviewers have claimed that the D80 has "unlimited" buffer capacity with fast enough memory cards, but we found that to be true only if you're shooting subjects with less than average amounts of detail in them, and then really only at lower ISO settings. Subjects with a lot of fine detail and high ISO settings produce images that don't compress as well, and so fill up the buffer memory faster. "Average" subjects (if there is such a thing) will probably give you buffer lengths of 20 or more frames, certainly an impressive performance for a consumer DSLR.
The combination of shooting speed and buffer capacity is one of the key differentiators between the D80 and its big brother the D200: As we've just seen, the D80 nominally manages 6 frames at 3 frames/second, while the D200 can shoot a minimum of 21 RAW or 24 large/fine JPEGs at 5 frames/second. Photojournalists, fashion photographers, and sports shooters will likely gravitate to the D200 for this reason, but most amateurs are likely to find the D80's speed more than adequate for their purposes.
Download Speed
The D80 is also quite fast when it comes to offloading images onto a computer. We clocked our test unit at 2,855 KBytes/second when downloading a collection of JPEG images to our Sony VAIO desktop computer. (A 2.4 GHz Pentium IV with a high-speed USB 2.0 port.) You'll likely get even slightly faster transfer rates with RAW images, as Windows is quicker when handling fewer, larger files than it is with more, smaller ones. Here again, the D200 is a good bit faster (4,386 KB/sec), but the D80 is fast enough that most users will feel no need for a separate card reader.
Battery and Storage Capacity
Battery
Very good battery life
Like the D200, the D80 uses Nikon's new EN-EL3e lithium-ion battery pack or an optional AC adapter for power. The EN-EL3e is backward-compatible with the EL3a version, in that it can be used to power older cameras like the D70, but the older EN-EL3a battery can't be used to power the D80. (A pain for all those who have spare batteries from their D70 or D100 that they will no longer be able to use on the new body.) An indicator on the status display panel lets you know approximately how much battery power is left. The D80/EN-EL3e combination seems to offer really exceptional battery life, as we could shoot literally hundreds of photos without draining the battery. While it's hard to compare apples to apples based on Nikon's numbers, the D80 does appear to have better battery life than the D200. (Although the tests for the D200 equivalent to those listed below were conducted with different lenses that possibly drew more power for their focus motors, and the parameters for the second test were different in several areas.)
In the manual, Nikon themselves offer the following characterizations of the D80's battery life:
Example 1
Zoom Nikkor AF-S DX IF ED 18-135mm f/2.8-5.6G lens; continuous shooting mode; continuous-servo autofocus; image quality set to JPEG Basic; image size set to M; shutter speed 1/250s; shutter-release pressed half way for three seconds and focus cycled from infinity to minimum range three times with each shot; after six shots, monitor turned on for five seconds and then turned off; cycle repeated once exposure meters have turned off.
Number of shots (EN-EL3e): 2,700Example 2
Zoom Nikkor AF-S DX IF ED 18-135mm f/2.8-5.6G lens; single-frame shooting mode; single-servo autofocus; image quality set to JPEG Normal; image size set to L; shutter speed 1/250s; shutter-release pressed half way for five seconds and focus cycled from infinity to minimum range once with each shot; monitor turned on for four seconds after each shot; built-in Speedlight fired at full power with every other shot; cycle repeated once exposure meters have turned off;
Number of shots (EN-EL3e): 600
Storage
The Nikon D80 uses Secure Digital (SD/MMC) memory cards, but no card is supplied.
The D80 uses SD/MMC memory cards for image storage. Like virtually all digital SLRs, the D80 does not come with a memory card, so you'll need to purchase one separately. The D80 utilizes a folder arrangement that lets you organize images in the camera and a sequential frame counter option to avoid problems with overwriting files when copying them to the computer.
Captured images can be individually write-protected via the Protect button on the back panel. Write-protected files are only immune to accidental deletion, not card reformatting. Three image sizes are available: Large (3,872 x 2,592 pixels), Medium (2,896 x 1,944 pixels), and Small (1,936 x 1,296 pixels). File formats include three levels of compressed JPEG files as well as RAW (NEF file format) data modes. The "raw" file format stores the data exactly as it comes from the CCD array, losslessly compressed. (The D80 only stores RAW files in compressed form, lacking the uncompressed option of the D200.) Since the "raw" format is proprietary though, it's intended to only be processed by Nikon's "Nikon Capture" software, although a number of third-party RAW file converters do support it as well, and in some cases offer expanded capabilities relative to the Nikon software package. (See Bibble, from Bibble Labs, for instance.) The compressed RAW format is a "lossless" compression, making it difficult to determine the actual amount of compression being used. Nikon estimates that compression is 50 or 60 percent over an uncompressed RAW format, depending on the subject data.
Below are the approximate number of images and their compression ratios for a 1GB SD card, probably about the minimum realistic size for a camera with the resolution, RAW-mode and continuous shooting capabilities of the D80.
|
Image Capacity vs Resolution/Quality 1 GB Memory Card |
Fine | Normal | Basic | RAW | RAW+JPG | |
| 3872 x 2592 | Images (Avg size) |
129 7.8 MB |
251 4.0 MB |
487 2.1 MB |
79 12.7 MB |
53 18.9 MB |
| Approx. Compression |
4:1 | 8:1 | 15:1 | 1.2:1 | - | |
| 2896 x 1944 | Images (Avg size) |
225 4.4 MB |
431 2.3 MB |
839 1.2 MB |
- | 61 16.4 MB |
| Approx. Compression |
4:1 | 7:1 | 14:1 | - | - | |
| 1936 x 1296 | Images (Avg size) |
487 2.1 MB |
888 1.1 MB |
1,536 651 KB |
- | 70 14.3 MB |
| Approx. Compression |
4:1 | 7:1 | 12:1 | - | - | |
Imaging
Nikon D80 Imaging Characteristics
Imaging and file quality are where the rubber meets the road for digital cameras. Fortunately for Nikon, this is an area that the D80 does very well in. Evaluating the D80 in this regard is also a bit more straightforward than was the case with the D200. With the D200, Nikon took an extremely conservative approach to both anti-aliasing and in-camera sharpening, with the result that JPEG images straight from that camera are quite soft-looking. This let the D200's images accept post-processing unusually well, but the downside was that the D200's images really needed at least some post-processing to look their best. With the D80, Nikon sems to have tweaked the in-camera sharpening a little, to make its images a little more crisp straight from the camera. (While at the same time managing to hold sharpening artifacts to a very low level.) As a result, the D80's JPEG files look quite nice when printed without any added manual processing, a nice feature for a camera that's aimed primarily at high-end consumers and serious amateurs.
Nikon also seems to have fine-tuned their noise suppression processing in the D80 as well, as it turned in a very impressive performance at ISO 1600, and its ISO 3200 images were surprisingly usable. Read on for all the details!
Resolution & Detail
Resolution
Very high resolution, 1,600-1,700 lines of strong detail.
Our laboratory resolution chart revealed sharp, distinct line patterns down to about 1,700 lines per picture height horizontally, and 1,600 lines per picture height vertically, with extinction not occurring until well past 2,000. Use these numbers to compare with other cameras of similar resolution, or use them to see just what higher resolution can mean in terms of potential detail. Beware that while you might be able to make out what looks like distinct lines at numbers higher than those we've mentioned here, the camera is just doing its best to continue interpreting the lines. If you zoom in and follow them from the wider portions, you'll see the lines converge and reappear several times, so the lines you see at 1,900 and higher are really only artifacts generated by the camera's imaging system.


See full set of test images with explanations
See thumbnails of all test and gallery images
Sharpness & Detail
Sharp images, though very slight edge enhancement. Minimal noise suppression visible in the shadows.

The Nikon D80 produced sharp images with very good detail definition. A very small amount of edge enhancement is visible in the crop above left, and the images straight from the camera are slightly soft in their finest details, but the overall detail handling is very good, and the D80's images take post-capture sharpening very well: To see the detail really pop, try applying 150% of unsharp masking in Photoshop, with an 0.3 pixel radius. (Edge enhancement creates the illusion of sharpness by enhancing colors and tones right at the edge of a rapid transition in color or tone.)
Noise-suppression systems in digital cameras tend to flatten-out detail in areas of subtle contrast. The effects can often be seen in shots of human hair, where the individual strands are lost and an almost "watercolor" look appears. The crop of hair above right shows some noise suppression-caused flattening in the darkest areas, but individual strands of hair are still discernible even in the darkest areas. The D80 overall seems to manage a very good trade-off between detail and noise suppression.
Color
Saturation & Hue Accuracy
Excellent color, with pleasing accuracy and saturation. Some oversaturation in strong reds and blues, but still good results overall.
 |
| In the diagram above, the squares show the original color, and the circles show the color that the camera captured. More saturated colors are located towards the periphery of the graph. Hue changes as you travel around the center. Thus, hue-accurate, highly saturated colors appear as lines radiating from the center. |
Most consumer digital cameras produce color that's more highly saturated (more intense) than found in the original subjects. This is simply because most people like their color a bit brighter than life. The Nikon D80 pushes strong red and blue tones a little, and to some extent, strong yellow tones. However, results are still quite pleasing overall. Where oversaturation is most problematic is on Caucasian skin tones, as it's very easy for these "memory colors" to be seen as too bright, too pink, too yellow, etc. The D80 produced good, natural skin tones in most cases, though with a hint of a warm tint. Most consumers would rather a digital camera err on the side of added warmth rather than coolness, so the D80 performs well here.
Hue accuracy is the other important part of color rendition, and the Nikon D80 turned in excellent results here as well. Hue is "what color" the color is. Like many digital cameras, the D80 pushes cyan toward blue, and it also pushes red toward orange slightly, but the saturation-corrected average delta-E color error was only 5.6, placing it in the first rank of cameras we've tested.


Sensor
Exposure and White Balance
Indoors, incandescent lighting
Good color with the Manual white balance setting, and less than average positive exposure compensation required.


The Nikon D80's Auto white balance setting produced very warm color in response to the household incandescent lighting of this test, and the Incandescent setting also produced images that were a bit on the warm side (though not nearly as strong). Both the 2,800 Kelvin and Manual white balance options resulted in more accurate color, and which you'd choose will be up to your personal preferences. I (Dave) happen to like more neutral color treatments, so personally prefer the results from the manual white balance setting, but other people might like the 2800K result better, as it preserves more of the warmth of the original illumination.
The camera required only a +0.7 EV exposure boost here, which is less than average. Even at that level, the overall image is just slightly bright, but I felt that the +0.3 EV results were too dark. Color looks pretty good throughout the frame with the Manual white balance, though the blue flowers in the bouquet are much darker and more purplish than in reality. (A common occurrence among digital cameras under this lighting.) Our test lighting for this shot is a mixture of 60 and 100 watt household incandescent bulbs, a pretty yellow light source, but a very common one in typical home settings here in the U.S.
Outdoors, daylight
Accurate color outdoors, and pretty accurate exposure as well. Slightly high contrast, but the optional low-contrast setting does an excellent job of preserving highlight detail. The D80 requires less positive exposure compensation here than average.


The Nikon D80 performed well outdoors under harsh lighting, though its default contrast is a little high. Even with the high contrast, shadow detail is quite good, with low image noise to interfere with definition. Highlights are a bit bright, but still within reason, and with a good level of detail. In the "Sunlit" Portrait above, the D80's lower contrast setting (accessed via the Custom option of the Optimize Image submenu) did a good job of taming the highlights and shadows, preserving more detail in both, and leading the D80 to a better performance with this very difficult subject than most cameras manage. Overall color outdoors was excellent, and very natural looking. The outdoor house shot looks pretty good colorwise, if just a tiny bit cool. Overall, the D80 handled these lighting challenges very well.
See full set of test images with explanations
See thumbnails of all test and gallery images
ISO & Noise Performance
Surprisingly low noise, even at higher sensitivities. A jump in noise level at the very highest settings, but excellent results overall.



Noise levels are quite low at the Nikon D80's lower ISO settings, and really quite reasonable even at the 400 and 800 ISOs. At ISOs 1,600 and 3,200, noise levels increase with more blurring in the fine details, but results are still better than what you might expect at such high settings, and compete very well with the performance of dSLRs in its price range from other manufacturers at these ISO levels.
ISO 1600 Comparison
A very strong performance against its principle competitor, the Canon Digital Rebel XTi.
While it sells at a lower price, with a lesser lens, the obvious competition for the Nikon D80 is Canon's Digital Rebel XTi. In the past, Canon's noise-suppression technology has generally been superior to that of other manufacturers, but with the D80, Nikon seems to have pulled even. Given the rivalry between these two particular cameras, we'll look at two sets of crops from them both, at ISO 1600.
In the first set of crops, we'll look at swatches from the MacBeth ColorChecker target, as an example of how each performs in areas with flat tints. We'll show both the RGB image, and the individual red, green, and blue color channels, so you can see what's going on in the individual color channels.
| ISO 1600 Flat-Tint Noise Comparison | |
|---|---|
| Nikon D80 ("Normal" high-ISO NR) |
Canon Rebel XTi |
 |
 |
| (click for full D80 file) -- RGB -- (click for full XTi file) | |
 |
 |
| Red Channel | |
 |
 |
| Green Channel | |
 |
 |
| Blue Channel | |
The pixel-peeping crops above tend to favor the D80, both due to their enlargement, and because they're showing a relatively limited area. In the full images, the D80 shows some blotchiness when you look at larger areas (for instance, the dark border around the MacBeth chart) that isn't evident in the XTi's image. As noted in the Imatest Results section, this corresponds to a spike in the very lowest frequencies on the D80's noise spectrum, compared with a notch in the same area on the XTi's spectrum plot. (We speculate that this very low-frequency blotchiness is something that Canon's active-pixel CMOS technology is particularly good at dealing with.)
In the next set of crops, we'll look at some samples from our Still Life target, where the tone-on-tone coloring of the fabric swatches reveals much about the inner details of how cameras make the trade-off between subject detail and sensor noise.
| ISO 1600 Tone-on-Tone Noise/Detail Comparison | |
|---|---|
| Nikon D80 ("Normal" high-ISO NR) |
Canon Rebel XTi |
 |
 |
| (click for full D80 file) ---- (click for full XTi file) | |
 |
 |
 |
 |
 |
 |
 |
 |
 |
 |
 |
 |
 |
 |
In the first set of crops, we saw that the D80 won handily in terms of noise present in areas of flat tint. In the second set of crops though, we see the price that's paid to achieve that, namely that fine detail in areas of subtle contrast, and some overall sharpness are lost in the process. In the crops above, we consistently see more fine detail retained by the XTi, albeit at the cost of higher image noise, particularly chroma (color) noise. It's also interesting to note how the noise processing varies as a function of the part of the color spectrum you're looking at. This is particularly evident in the D80's images, which give up detail in reds and yellows far more quickly than in blues and purples.
As always, it's important to note that we're engaged in some pretty deep pixel-peeping here, given that we're looking at images from 10 megapixel cameras 1:1 on a computer screen. Given typical computer display resolutions of ~75 pixels/inch, this corresponds to peering at printed images roughly 52 x 35 inches(!) in size. Not to totally dismiss the differences noted above though, you can see detail differences in the red fabric swatches even in 8x10 inch prints -- But you have to squint and look pretty carefully to make them out.
The bottom line is that we have two slightly different approaches to noise suppression here, one slightly favoring smoothness in flat tints, the other slightly favoring subtle detail. How you feel about either will depend a lot on your personal preferences, both cameras deliver really excellent images at high ISO settings.
High-ISO Noise Reduction Control
Good options for user control of noise reduction.
A nice feature of the D80 is that it gives the user control over how much high-ISO noise reduction to apply. Accessible from the Shooting menu, options for High-ISO noise reduction are Off, Low, Normal, and High. As we'll see below, "off" doesn't actually disable all noise reduction, but it does reduce its impact on your images quite a bit. High-ISO noise reduction kicks in when the ISO is set to 800 or higher.
| ISO 1600 Noise Reduction Options Comparison: Subtle Detail |
|
|---|---|
| High-NR Setting | Results |
| High |  |
| Normal |  |
| Low |  |
| "Off" |  |
| Really off (Converted in Bibble, with zero noise reduction.) |
 |
| ISO 1600 Noise Reduction Options Comparison: Flat Tints in Shadows |
|
|---|---|
| High-NR Setting | Results |
| High |  |
| Normal |  |
| Low |  |
| "Off" |  |
| Really off (Converted in Bibble, with zero noise reduction.) |
 |
As we can see from the crops above (click on any image to see the full-size file), the Nikon D80 offers a nice range of adjustment for high-ISO noise reduction, letting you choose the tradeoff between noise and detail that's most appropriate for your subject or your intended usage for the images. As we can also see though, even the "off" setting doesn't completely disable noise reduction. (Presumably, this setting is just disabling the additional noise reduction that's applied at higher ISO settings, as you'd expect from its naming.)
Extremes: Sunlit and low light tests
Excellent resolution and detail, and good exposure (though slightly high contrast). Less positive exposure compensation required than average. Excellent low-light performance, capable of capturing bright images in near darkness.


Sunlight:
Because digital cameras are more like slide film than negative film (in that they tend to have a more limited tonal range), we test them in the harshest situations to see how they handle scenes with bright highlights and dark shadows, as well as what kind of sensitivity they have in low light. The shot above is designed to mimic the very harsh, contrasty effect of direct noonday sunlight, a very tough challenge for most digital cameras. (You can read details of this test here.)
The Nikon D80 performed well under the harsh lighting of the test above, though its default contrast setting was a little high. The shots above were taken with the contrast set one notch below neutral in the Optimize Image settings, which evened out the exposure considerably. Shadow areas some some noise suppression, but detail is still surprisingly good across the tonal range. Though some readers may prefer the slightly brighter exposure at +1.0 EV (which puts more of Marti's skin tones in the range that most consumers would consider about right), I personally found the +0.7 EV exposure more appealing, despite a few dark areas. (The highlights on the white shirt were a little too hot at the +1.0 EV setting. In "real life" though, be sure to use fill flash in situations like the one shown above; it's better to shoot in the shade when possible.)
| 1 fc 11 lux |
1/2 fc 5.5 lux |
1/4 fc 2.7 lux |
1/8 fc 1.3 lux |
1/16 fc 0.67 lux |
1/16fc No NR |
|
| ISO 100 |
 3 sec f3.5 |
 6 sec f3.5 |
 13 sec f3.5 |
 20 sec f3.5 |
 30 sec f3.5 |
 30 sec f3.5 |
| ISO 200 |
 1.6 sec f3.5 |
 3 sec f3.5 |
 6 sec f3.5 |
 10 sec f3.5 |
 15 sec f3.5 |
 15 sec f3.5 |
| ISO 400 |
 1/1 sec f3.5 |
 1.6 sec f3.5 |
 3 sec f3.5 |
 5 sec f3.5 |
 8 sec f3.5 |
 8 sec f3.5 |
| ISO 800 |
 1/2 sec f3.5 |
 1/1 sec f3.5 |
 1.6 sec f3.5 |
 2.5 sec f3.5 |
 4 sec f3.5 |
 4 sec f3.5 |
| ISO 1600 |
 1/5 sec f3.5 |
 1/2 sec f3.5 |
 1/1 sec f3.5 |
 1.3 sec f3.5 |
 2 sec f3.5 |
 2 sec f3.5 |
| ISO 3200 |
 1/10 sec f3.5 |
 1/5 sec f3.5 |
 1/2 sec f3.5 |
 1/1 sec f3.5 |
 1 sec f3.5 |
 1 sec f3.5 |
Low light:
The Nikon D80 handled low lighting very well. The camera captured bright images down to the darkest light level we test at, equivalent to about 1/16 of average city street lighting at night. Images were just a a little dim at this lowest light level (the camera seemed to underexpose slightly), though still usable, with a slight magenta cast from the Auto white balance. The camera's autofocus system was able to focus on the subject well below the 1/16 foot-candle light level unassisted, a very impressive feat. With its AF-assist light enabled, it can focus on nearby objects in total darkness. Do keep in mind though, that the very long shutter times required by such dim lighting absolutely demand the use of a tripod or other camera support to get sharp photos. - And this is about more than just motion blur during the exposure: Any movement while the camera is trying to autofocus can result in the camera not being able to focus at all. A useful trick is to just prop the camera on a convenient surface, and use its self-timer to release the shutter. This avoids any jiggling from your finger pressing the shutter button, and can work quite well when you don't have a tripod handy. This only helps with camera movement though, a moving subject can defeat a camera's AF system in dim lighting as well.
Output Quality
Print Quality
Excellent print quality, great color, excellent 13x19 inch prints. ISO 1600 images are only a little soft and surprisingly clean at 8x10 inches: Most users would probably find high-ISO shots acceptable even at 11x14.
Testing hundreds of digital cameras, we've found that you can only tell just so much about a camera's image quality by viewing its images on-screen. Ultimately, there's no substitute for printing a lot of images and examining them closely. For this reason, we now routinely print sample images from the cameras we test on our Canon i9900 studio printer, and on the Canon iP5200 here in the office. (See the Canon i9900 review for details on that model.)
We were very impressed when we printed out images from the Nikon D80: JPEGs straight from the camera made very crisp-looking 13x19 inch prints, and manual sharpening on the computer (particularly working from its RAW files) will let you produce great-looking prints a good bit larger than that. (As noted elsewhere, one change Nikon seems to have made in the D80 vs the D200 is to tweak its in-camera sharpening slightly: Images straight from the camera are a little more crisp, and so more suitable for printing without further manipulation. This is a good call for a camera aimed at a consumer and advanced-amateur audience, rather than the pros who will be the D200's biggest customers.)
Our biggest surprise with the D80 overall though, was its excellent high-ISO performance, as it clearly challenges Canon's competing models in that respect. Our initial positive reaction to seeing its files on-screen was more than supported by the prints we made later. Printing to an 8x10 inch output size, its ISO 1600 shots looked only a little soft, and what noise we could find was surprisingly unobtrusive. Both noise and softness increased markedly at ISO 3200, but even there, we suspect most consumers would be perfectly happy with 8x10 inch prints made from such images. ISO 1600 settings have been available on dSLRs for quite some time now, but we've always winced inwardly when we've been forced to use them, because we knew that noise would be a factor in the final prints. With the D80 though, we'd feel perfectly comfortable shooting routinely under available light at ISO 1600, the prints looked that good.
Of course, this is a very subjective issue, and how you feel about it will depend on your tolerance for image noise, the size you most commonly print at, and what the typical viewing distance will be for your prints. Personally, the largest we tend to go is 8x10 or 8.5x11 inches, framed and hung on a wall or set on a table. Given those parameters, we'd be comfortable shooting the D80 all day long at ISO 1600.
Color-wise, prints from the D80 looked very nice spooling out of the i9900. Colors were bright but believable (although strong reds and blues do tend to get a little hot), and skin tones were rendered very appealingly: A little more pink than real life, but well within the range that would constitute "a healthy glow," rather than appearing unnatural. Bottom line, the D80 delivered beautiful-quality prints.
Viewfinder
Nikon D80 Viewfinder
Like most dSLRs, the Nikon D80 uses an optical viewfinder that works through the lens. (The LCD monitor is for image playback and accessing the menu system only.) A diopter adjustment dial adjusts the focusing of the viewfinder optics to accommodate eyeglass wearers, and the viewfinder also has quite a high eyepoint (meaning you can see the full frame with your eye a good distance from the rear objective). The 19.5mm eyepoint is fairly good, but I personally (Dave speaking here) do still end up having to press my eyeglass lens against the rubber eyecup in order to see the full frame clearly. The -2.0 to +1.0 diopter adjustment range of the viewfinder optics isn't nearly enough to accommodate my own very nearsighted (20:180) vision, but is more than ample to handle my "computer glasses", which are set to provide good focus for my eyes at a distance of about 18-24 inches. (Frankly, people as nearsighted as me are unlikely to ever walk around without some degree of vision correction, so we think the dioptric adjustment range of the D80 should be more than sufficient for most users.)

One big plus about the D80's viewfinder is its size: It's basically the same viewfinder as used on the D200, and is very noticeably larger than the viewfinders on other Nikon consumer SLRs. (The D70/D70S and D50, for instance.) The illustration above, courtesy Nikon, compares the size of D80's viewfinder with those of the Canon Rebel XT and the Sony A100 (both of which are approximately the size of the D50/70 screens). While I dislike having to press my eyeglasses up against the eyecup, all of us at IR really like having a larger viewfinder image to look at.
Here's another, more subtle point about the Nikon D80's viewfinder: It uses a true pentaprism, rather than the pentamirror arrangement that's all but universal in consumer-level SLRs. The reason this is important is that pentaprisms are much brighter. This is because a convenient trick of optics makes prisms 100% internally reflective, so no light is lost as it bounces around inside and back out the eyepiece. Even the best mirrors typically pass only 96-98% of the light falling on them. In a pentamirror, with three reflections required to bounce the light into your eye, this means that anywhere from 6 to 12% of the light is lost, making for a noticeably darker viewfinder image.

An illuminated display inside the viewfinder provides detailed exposure and camera information, including black and white mode, battery low, and "no memory card" warnings, focus confirmation, flash and AE lock, Auto ISO, shutter speed, aperture, metering, battery status, exposure and flash compensation, white balance/exposure bracketing indicator, frame counter, flash ready light, and eleven sets of focus brackets. When activated, the view also includes an alignment grid, useful for lining up difficult shots. A large circular outline in the center of the view indicates the Center-Weighted metering area. The optional grid (enabled via a Custom Menu setting) and focus area indicators can be set to illuminate briefly when the shutter button is half-pressed, although the illumination isn't too bright, and is easily missed against a bright background. (Presumably though, if the background and subject are that bright, you'll be able to see the dark viewfinder markings easily enough without the illuminator.)
Viewfinder Accuracy Test
Coverage
Good accuracy with optical viewfinder.


The Nikon D80's through-the-lens optical viewfinder was pretty accurate, showing 95-98% frame accuracy, depending on the zoom setting. (The variation is likely the result of the barrel/pincushion distortion from the lens.) This agrees with Nikon's own specifications, but as always, we wonder why DSLR makers can't design 100% viewfinders as a matter of course.
Flash
Nikon D80 Flash
Flash photography has been a particular expertise of Nikon's for some time now, and is arguably one of the D80's strongest suits. The D70/D70S could interface with Nikon's excellent wireless Creative Lighting System, but could only control a single channel of remotes, and its built-in flash couldn't contribute to the exposure when running in Commander mode. We were thrilled to see that the D80 incorporates the full flash capability of the D200, and so is able to control two groups of remotes, as well as have its own flash contribute to the exposure. This is a huge capability upgrade, and is sure to sell loads of Nikon's excellent remote speedlights. (The non-commander SB-600 units are quite attractively priced.)
Like the D200's flash, the built-in strobe of the D80 operates in one of five main modes: Front-Curtain Sync, Red-Eye Reduction, Red-Eye Reduction with Slow Sync, Slow Sync, and Rear-Curtain Sync. Front-Curtain Sync fires the flash at the beginning of the exposure, with every shot. Red-Eye Reduction mode fires the (very bright) AF-assist light before the main flash exposure, to reduce the Red-Eye Effect in shots of people. Red-Eye Reduction with Slow Sync works in a similar fashion, but combines the flash with a slower shutter speed for night portraits. (This reduces the harsh effect of nighttime flash shots, allowing more of the ambient illumination into the picture.) Slow Sync mode works with shutter speeds as slow as 30 seconds to preserve color in night shots. Finally, Rear-Curtain Sync fires the flash at the end of the exposure, producing light trails that appear to follow (rather than precede) moving subjects. In all flash modes, the flash fires with every exposure. Closing the flash disables it completely. Holding down the Flash Mode button while turning the Sub-command dial adjusts the overall brightness of the flash from -3 to +1 EV in one-third-step increments.
One significant difference between the D80 and earlier D70/D70S that might seem like a step backward is its x-sync shutter speed. The D70/D70S apparently used electronic gating of the CCD chip to produce its higher shutter speeds. In that approach, the entire surface of the CCD sensor is exposed to incoming light for some relatively long period of time (we don't know just how long, but certainly longer than 1/100 of a second). Rather than being controlled by a shutter, the actual exposure time was determined by sending a signal to the CCD chip, telling it just when and for how long to collect light. This let Nikon create very high "shutter speeds" (short exposure times) quite inexpensively, and the x-sync speed (the maximum shutter speed at which the entire surface of the array is exposed to light from the flash) could be a very high 1/500 second. In the D80, exposure is determined solely by a conventional metal-curtain focal-plane shutter, so the top shutter speed is 1/4,000 vs 1/8,000, and the maximum x-sync speed has dropped to 1/200 second. This will come as a disappointment to some, as it reduces your ability to drop out ambient light in flash shots. While it does result in slower x-sync speed and a lower maximum shutter speed, having a true focal-plane shutter does avoid a really serious imaging problem when dealing with overly strong highlights. (See the discussion of shutter control vs CCD "gating" on the main exposure page of this review for more detail and examples of this.)
Another note relative to the x-sync speed on the D80: Its built-in flash is not FP-capable. Basically, this means that the on-board flash can't sync at shutter speeds greater than 1/200 second. If you need to do flash photography at higher shutter speeds, you'll need to purchase an SB-800 or SB-600 external strobe unit. These devices will be able to sync successfully all the way to the maximum shutter speed of 1/4,000 second. (If you do this, note that you'll want to set flash sync to front-curtain, and turn on Custom Settings Menu option 25, so the camera will automatically switch the external strobe to FP mode when necessary.)
Besides the main flash modes listed above, the D80's onboard speedlight can also be used in manual mode, as a repeating flash, or as a commander in Nikon's Creative Lighting System. (See below for more on that last item.) The D80's internal flash is fairly powerful, with a guide number of 12 meters or 39 feet at ISO 100 in auto mode, extending slightly to 13 meters (42 feet) in manual mode. (The greater range in manual mode is because it doesn't have to expend energy on the metering pre-flash.)

Repeating Flash Options
While we've never personally felt a need for a stroboscopic flash on a camera, we can imagine it being used for a variety of creative effects, as well as being highly useful for scientific applications. Once again mirroring that on the D200, the D80's onboard speedlight can be used as a stroboscope, using the Repeating Flash option on custom setting menu 22. Through this menu, you can set the power level from 1/128 to 1/4 power, the number of flashes from 2-35, and the frequency of flash pops from 1 to 50 Hz (1-50 pops/second). As you might expect, the number of times you can have the flash fire varies inversely with the power of each pop: At the maximum 1/4 power, you can only get two pops in rapid succession. The maximum of 35 pops in sequence is only possible at the 1/128 power setting, moving up to 1/64 power decreases the maximum number to 25, and so on. Also note that you'll of course have to have a long enough shutter time to accommodate your flash series, so you'll likely have to visit custom setting menu 24, to change the maximum shutter time permitted with the flash.
Also included on the D80 is an external flash hot shoe, just behind the pop-up flash compartment, but there's no separate PC-style sync terminal as found on the D200. The hot shoe accommodates Nikon accessory flash units, as well as a wide range of third party flashes. The full range of flash sync modes remains available for compatible flash units, but third-party models may not support all modes. Different Nikon speedlights offer different features when used on the D80 as well though. The table below (again by courtesy of Nikon) shows the features available when using current Nikon speedlights with the D80.

Compatibility notes:
- Functions as remote flash only.
- Can not be mounted on camera accessory shoe. Can be used as remote flash if camera is in commander mode or SB-800 Speedlight is mounted on camera and SB-R200 is controlled by optional SU-800 wireless Speedlight commander.
- Non-CPU lenses may not work properly with I-TTL Balanced Fill-Flash for Digital SLR.
- Standard i-TTL for Digital SLR is used with spot metering or when selected with Speedlight.
- Not available with non-CPU lenses.
- Use Speedlight controls to select flash mode.
- Available with non-CPU lenses, set lens aperture on lens aperture ring.
- Enable Auto FP via Custom Setting 25. Not available if built-in flash fires.
- Available only when SB-800 is used as master flash or optional SU-800 wireless Speedlight commander is used.
- Available with AF CPU lenses only.
That's it for current Nikon speedlights, but about older models? Most older Nikon speedlights can be used in non-TTL auto and manual exposure modes, but if they're set to TTL, the camera shutter-release button will lock and no photographs can be taken. They'll by and large work as expected in auto-aperture and manual modes though. Here's a list of older-model Speedlights and the flash modes they can be used with. (This table once again courtesy of Nikon):

- When an SB-27 is mounted on the D80, the flash mode is automatically set to TTL, and the shutter-release will be disabled. Set the SB-27 to A (non-TTL auto flash).
- Autofocus is only available with AF-Micro lenses (60 mm, 105 mm, or 200 mm).
As you can see, while many older Speedlights are usable with the D80, you'll really want to use more current models to take full advantage of its advanced flash capabilities.
3D Color Matrix II Flash Metering
The "3D" aspect of the Nikon metering system is that it uses subject distance information from the lens (only available with G or D-type lenses) to guide its exposure decisions. This is particularly key with flash exposures, because flash illumination falls off quite strongly as the subject gets further from the camera. The "Color Matrix" part of the name refers to the use of a 420-segment RGB sensor for exposure determination, which significantly improves the accuracy with which the camera can determine various scene types, for lookup in its 30,000-image exposure database. We at IR are huge fans of Nikon's flash technology, it's really a case of technology working perfectly in the service of creativity. The camera just quietly does its job, so you can focus on composition, color, interacting with your subjects, etc. It doesn't remove the creative decisions of how you want to light your subject, it simply removes the technical legerdemain from the equation. It won't by any means turn a duffer into a pro photographer, but it'll certainly take an average shooter a long ways in that direction.
The D80 with Nikon's Creative Lighting System
Nikon has long been a leader in flash technology, but in late 2003, they significantly upped the ante, by announcing their Creative Lighting System. This system of flashes and supporting camera bodies lets the photographer control up to three separate groups of remote flash units, with an essentially unlimited number of individual strobes in each group. The exposure and operating mode of each group of flashes can be controlled independently, and exposure is metered through the lens (TTL) for all units.
Previously, the only Nikon SLR bodies that could directly act as a controller for the Creative Lighting System were the D70 and D70S. Both those cameras were restricted to only controlling a single group of external strobes, could only talk to them via channel 3, and their own internal strobes could only act as the controller, not contribute themselves to the exposure. The more recently-announced D200 greatly expanded this capability though, and the full functionality of the D200's improved system has been brought over to the D80 as well.


Flash Commander Mode Options
On the D80, the internal strobe can both act as a controller and also contribute to the exposure, it can control two groups of remote strobes, and can use any of the four available channels to communicate on. The screenshots above give some idea of the options available. The built-in flash can operate in either TTL or Manual exposure mode. In TTL mode, you can vary its exposure over a range of -3 to +1 EV. In Manual mode, you can vary its power from full power (1/1) to 1/128 power. Each of the two groups of remote flash units can be operated in either TTL, AA (Auto Aperture), or Manual mode. Auto Aperture mode is the exposure mode that will be familiar to users of non-TTL metered autoexposure flash units, in which you set the camera at a given aperture setting, and then the flash measures the light reflecting back at it and adjusts its output to produce a given level of reflected light. The remote flash groups can be adjusted over the same +/- 3EV exposure level or 1/1 - 1/128 power levels as the built-in flash unit.
This degree of control directly from the camera is really remarkable, and can save you some serious money if you're planning on taking advantage of Nikon's Creative Lighting System. If you don't need to control more than two groups of external strobes, you won't need to buy an SB-800, saving you at least $300 at retail. If you're interested in macro flash photography, you also won't need the SU-800 controller that comes as part of Nikon's R1C1, going with the simpler R1 kit instead. - That'll save you a good $200-250 at retail. Likewise, compared to Canon's wireless flash system, there's no need for a separate controller with the D80, again saving you several hundred dollars.
A full treatment of this system is beyond the scope of this review of the D80, but we have a bit more detail on it posted as a separate article: See our Nikon Creative Lighting System review for more info.
Built-In Flash Test Results
Coverage and Range
Bright exposures even at the default exposure setting, with good color
in the Normal flash mode. Good range as well.


Flash coverage was slightly uneven at wide angle and telephoto, with some falloff at the edges and in the corners. Indoors, under incandescent background lighting, the Nikon D80's flash proved surprisingly bright at the default exposure setting, and some users may actually prefer a slight decrease in exposure (say, -0.3 EV). This exposure accuracy was as welcome as it is unusual: Cameras almost always underexpose this shot, usually by a full f-stop (EV) or so. Nikon has always been proud of their 3D Color Matrix flash metering, and its performance on this difficult shot amply justifies that pride. Overall color looks good, without any strong color casts. The camera's Night Portrait mode uses a slower shutter speed in combination with the flash, which results in a strong orange cast from the background incandescent lighting. However, the exposure is more even here, and results are again fairly bright at the default exposure. This is a good thing, as the Night Portrait mode disables your ability to adjust the flash exposure. (If you want to take control, it's easy enough to put the camera in Manual mode and fiddle to your heart's content. That said though, it'd still be handy if the camera let you adjust flash exposure in Night Portrait mode.)
| Flash Range: Wide Angle | |||||
|---|---|---|---|---|---|
| 6 ft | 7 ft | 8 ft | 9 ft | 10 ft | 11 ft |
 1/60 sec f3.5 ISO 100 |
 1/60 sec f3.5 ISO 100 |
 1/60 sec f3.5 ISO 100 |
 1/60 sec f3.5 ISO 100 |
 1/60 sec f3.5 ISO 100 |
 1/60 sec f3.5 ISO 100 |
| 12 ft | 13 ft | 14 ft | 15 ft | 16 ft | |
 1/60 sec f3.5 ISO 100 |
 1/60 sec f3.5 ISO 100 |
 1/60 sec f3.5 ISO 100 |
 1/60 sec f3.5 ISO 100 |
 1/60 sec f3.5 ISO 100 |
|
| Flash Range: Telephoto | |||||
|---|---|---|---|---|---|
| 6 ft | 7 ft | 8 ft | 9 ft | 10 ft | 11 ft |
 1/60 sec f5.6 ISO 100 |
 1/60 sec f5.6 ISO 100 |
 1/60 sec f5.6 ISO 100 |
 1/60 sec f5.6 ISO 100 |
 1/60 sec f5.6 ISO 100 |
 1/60 sec f5.6 ISO 100 |
| 12 ft | 13 ft | 14 ft | 15 ft | 16 ft | |
 1/60 sec f5.6 ISO 100 |
 1/60 sec f5.6 ISO 100 |
 1/60 sec f5.6 ISO 100 |
 1/60 sec f5.6 ISO 100 |
 1/60 sec f5.6 ISO 100 |
|
The Nikon D80's flash was powerful and bright. At wide angle, the flash maintained a constant exposure out to a distance of 12 feet, with slight decreases in exposure from that point onward. Its range at maximum telephoto is somewhat limited by the small f/5.6 maximum aperture of the kit lens at the 135mm focal length, and the exposure started falling off somewhere around 8 feet or so.
| Manufacturer-Specified Flash Range | |
|---|---|
| Wide Angle | Telephoto |
 12.0 feet ISO 100 |
 7.5 feet ISO 100 |
Our standard test method for flash range uses a fixed setting of ISO 100, to provide a fair basis of comparison between cameras. We've now also begun shooting two shots using the manufacturer-specified camera settings, at the range the company claims for the camera, to assess the validity of the specific claims. In the shots above, and based on our own standard tests, the Nikon D80 seems to perform exactly to its specifications, producing good exposures at the rated distances with its ISO set to 100. (Some cameras have their flash range specified with the ISO set to Auto, but as it happens, Nikon rates the D80's range the same way we do, based on a reference ISO of 100.)
Imatest Results
Nikon D80 Imatest Results
We routinely Norman Koren's excellent "Imatest" analysis program for quantitative, thoroughly objective analysis of digicam test images. I highly commend it to our technically-oriented readers, as it's far and away the best, most comprehensive analysis program I've found to date.
My comments below are just brief observations of what we see in the Imatest results. A full discussion of all the data Imatest produces is really beyond the scope of this review: Visit the Imatest web site for a full discussion of what the program measures, how it performs its computations, and how to interpret its output.
Here's some of the results produced by Imatest for the Nikon D80:
Color Accuracy

The Nikon D80 showed good color accuracy overall, but got a bit carried away with strong reds and blues. Both are fairly common response with this target (the MacBeth ColorChecker), and the D80's response is fairly typical for consumer DSLRs, more highly saturated than that of pro models. Hue accuracy is excellent, with minor shifts in a number of colors, rather than large shifts in any one area. The largest shift was in yellow-orange, which moved toward yellow a fair bit. Average saturation was 114.6% (oversaturated by 14.6%, largely in the reds, but somewhat in the blues as well), average "delta-E" color error was 5.6 after correction for saturation. All in all, an excellent, nicely-balanced color response for a consumer SLR, among the best we've seen. (Although the Canon Rebel XTi beats it slightly in hue accuracy, and is a bit less saturated with strong reds and blues.)
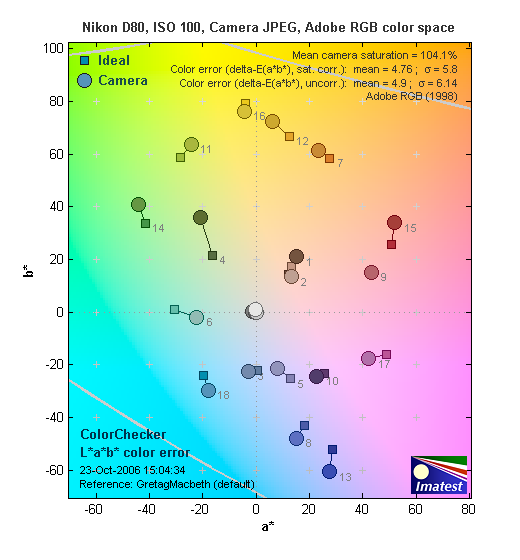
Using the Adobe RGB color space (which provides a much wider gamut, or range of colors that can be expressed), the Nikon D80 delivers extremely accurate color, with an average saturation-corrected hue error of only 4.76 delta-E units, one of the most accurate readings we've seen, and average saturation of 104.1%. As it turns out, the oversaturation was almost entirely limited to the forest-green color swatch of the MacBeth chart, with most colors being rendered very closely to their mathematically ideal values. Very impressive!
Color Analysis

This image shows how the Nikon D80 actually rendered the colors of the MacBeth chart, compared to a numerically ideal treatment. (Apologies for the tilt, the MacBeth chart on our Multi target had slipped slightly in these shots.) In each color swatch, the outer perimeter shows the color as actually captured by the camera, the inner square shows the color after correcting for the luminance of the photographed chart (as determined by a 2nd-order curve fit to the values of the gray swatches), and the small rectangle inside the inner square shows what the color should actually be, based on perfect rendering in the sRGB color space. This image shows the excellent hue accuracy, as well as a gamma curve that results in an overexposure of highly saturated swatches.
Gray Patch Tone and Noise Analysis

As always, there's a lot in this particular graph, a lot more than we have room to go into here. Bottom line, the Nikon D80's noise levels are low at low ISO, and the frequency spectrum favors higher frequencies a bit more than did that of the D200. In comparing these graphs with those from other competing cameras, I've found that the Noise Spectrum graph at lower right is the most important. Cameras that manage to shift their noise spectrum to higher frequencies have much finer-grained noise structures, making their noise less visually objectionable. In the graph above, this would show up as a noise spectrum curve that remained higher on the right side, representing higher noise frequencies. The champion at this was the Canon EOS-1Ds Mark II, which produced remarkably fine-grained image noise, even at very high ISOs. The D80's noise spectrum doesn't rise to that standard, but is pretty good for a consumer camera.

Here's the same set of noise data at ISO 1600. Here, the Noise Spectrum graph is shifted a bit more toward the left-hand, lower-frequency side than it was at ISO 100, coarsening the "grain" of the image noise patterns. Once again, not bad, and in this case, the D80 actually has a lot less of its noise energy in the range from 0 to 0.2 cycles/pixel than does the competing Canon XTi. This is visible in its images, where the D80's luminance noise is generally lower than that of the XTi. (There is very interesting and subtle difference in the noise spectra of the two cameras though: The D80's has a spike leading right up to zero frequency, whereas the XTi has a dip there. This shows up in high ISO shots as a slightly "splotchy" look to large, uniform dark areas in the D80's images that isn't shown by the XTi's. (You can see this in the black surround on the MacBeth chart in our Multi Target shots.)
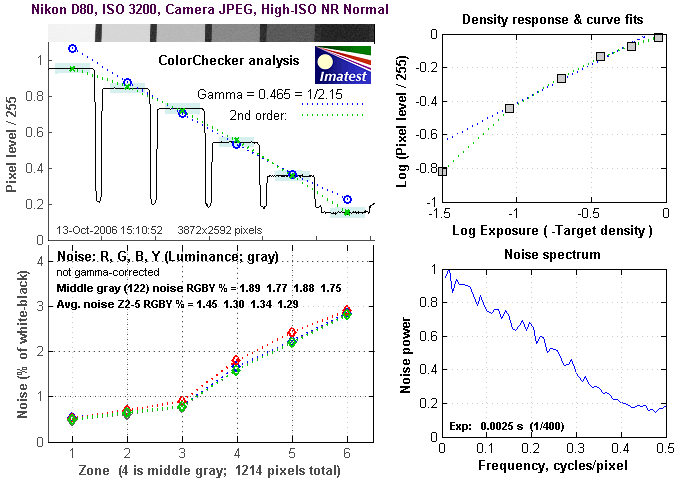
Here's the same set of noise data at ISO 3200. Here, the Noise Spectrum graph has a similar shape to the one for ISO 1600, but the overall magnitude of the noise nearly doubles. A pretty good performance, particularly considering that many consumer SLRs don't even offer an ISO setting of 3200. (The D80's luminance noise at ISO 3200 is close to that of the D70S at ISO 1600.)

This chart compares the Nikon D80's noise performance over a range of ISOs against that of other cameras. While I continue to show noise plots of this sort because readers ask for them, I each time point out that the noise magnitude is only a small part of the story, the grain pattern being much more important. There's also the matter of how much subtle subject detail is traded away in pursuit of low noise figures. In the case of the Nikon D80, while it actually does very well in terms of both noise level and noise grain size, it does trade away some subject detail to achieve those results. (See the discussion and examples on the Imaging page of this review.)
Dynamic Range Analysis
A key parameter in a digital camera is its Dynamic Range, the range of brightness that can be faithfully recorded. At the upper end of the tonal scale, dynamic range is dictated by the point at which the RGB data "saturates" at values of 255, 255, 255. At the lower end of the tonal scale, dynamic range is determined by the point at which there ceases to be any useful difference between adjacent tonal steps. Note the use of the qualifier "useful" in there: While it's tempting to evaluate dynamic range as the maximum number of tonal steps that can be discerned at all, that measure of dynamic range has very little relevance to real-world photography. What we care about as photographers is how much detail we can pull out of the shadows before image noise becomes too objectionable. This, of course, is a very subjective matter, and will vary with the application and even the subject matter in question. (Noise will be much more visible in subjects with large areas of flat tints and subtle shading than it would in subjects with strong, highly contrasting surface texture.)
What makes most sense then, is to specify useful dynamic range in terms of the point at which image noise reaches some agreed-upon threshold. To this end, Imatest computes a number of different dynamic range measurements, based on a variety of image noise thresholds. The noise thresholds are specified in terms of f-stops of equivalent luminance variation in the final image file, and dynamic range is computed for noise thresholds of 1.0 (low image quality), 0.5 (medium image quality), 0.25 (medium-high image quality) and 0.1 (high image quality). For most photographers and most applications, the noise thresholds of 0.5 and 0.25 f-stops are probably the most relevant to the production of acceptable-quality finished images, but many noise-sensitive shooters will insist on the 0.1 f-stop limit for their most critical work.
The image below shows the test results from Imatest for an in-camera JPEG file from the Nikon D80 with a nominally-exposed density step target (Stouffer 4110), with the D80's contrast setting at its default position.
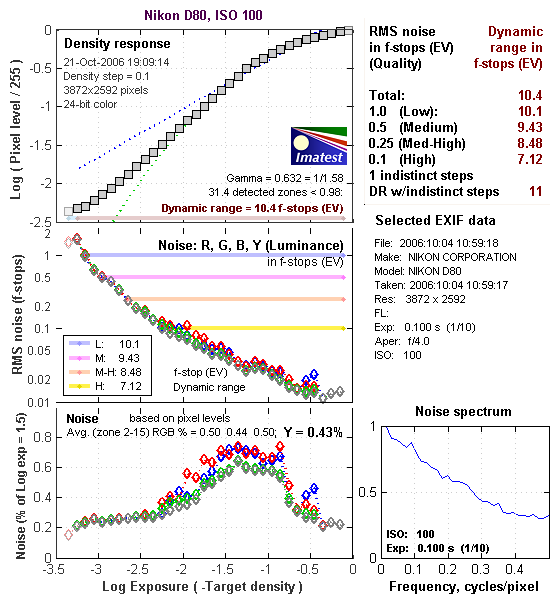
These are decent if not exceptional numbers for an in-camera JPEG, but the dynamic range number at "high" quality itself (7.12) isn't the most important thing to look at here. A dynamic range of 7.12 f-stops at high image quality is within a half a stop of most of the D80's competition, not enough difference to be a significant issue. (Yes, a half a stop more dynamic range would be nice, but that's not the main thing that affects what a photographer will perceive as the D80's dynamic range here.)
More significant than the absolute dynamic range is the shape of the density curve, and how smoothly it transitions from highlight to midtone to shadow. The D80 has a nice, smooth curve, approaching both ends of the range at a gradual slope. This contrasts with the rather abrupt shadow end of the D200's curve, which caused that camera to produce somewhat blocky, quantized shadow detail. The D80 does much better in this respect.
That's the story with JPEG files created in the camera, how about in an external RAW converter, such as Adobe Camera Raw (ACR)?

Using its automatic settings (which in my experience has generally worked best for dynamic range tests like this), ACR managed to extract about four tenths of a stop more dynamic range from the NEF file at the highest quality level, although the resulting tone curve doesn't have quite as nice a shape, with a bit of a bump in it, heading into the shadows.

While I've generally used ACR's auto settings in the past, I found with the D80 that manually setting exposure (-1.7 EV), brightness (87), and contrast (minus 35) ended up extracting an additional 0.21 EV of dynamic range. For the sake of consistency with past results though, I'll use the 7.51 EV dynamic range rating for the purposes of comparing to other cameras.
I normally always check the manufacturer's own RAW processing application, but for some reason, couldn't get the latest version (4.4.2) of Nikon's Capture to open the D80's NEF files, and didn't have time to devote to trying to debug the problem. Since we don't use the manufacturer's RAW converter results to make cross-camera comparisons, the behavior of Capture with the D80 was moot for this review.)
Dynamic Range, the bottom line:
So what can we conclude about the D80's dynamic range? I think two things: First, that the D80's internal JPEG output produces a nicely shaped tone curve, with good detail available at both ends of the curve. Second, the D80's NEF files do contain a modest amount of additional information that the right RAW converter can extract.
To get some perspective, here's a summary of the Nikon D80's dynamic range performance, and how it compares to other digital SLRs that we also have Imatest dynamic range data for. (Results are arranged in order of decreasing dynamic range at the "High" quality level.):
| Dynamic Range (in f-stops) vs Image Quality (At camera's minimum ISO) |
||||
| Model | 1.0 (Low) |
0.5 (Medium) |
0.25 (Med-High) |
0.1 (High) |
| Fujifilm S3 Pro (Adobe Camera Raw 2) |
12.1 | 11.7 | 10.7 | 9.0 |
| Canon EOS-1Ds Mark II (Adobe Camera Raw 3) |
11.2 | 10.3 | 9.4 | 8.14 |
| Fujifilm S3 Pro | -- | 9.9 | 9.4 | 7.94 |
| Canon EOS-5D (Adobe Camera Raw 3) |
11.0 | 10.4 | 9.21 | 7.83 |
| Canon EOS-5D (Camera JPEG) |
10.2 | 9.68 | 8.82 | 7.65 |
| Nikon D200 (Adobe Camera Raw 3) |
10.6 | 9.65 | 8.96 | 7.61 |
| Nikon D80 (Adobe Camera Raw 3.6) |
11.1 | 10.4 | 9.42 | 7.51 |
| Nikon D50 | 10.7 | 9.93 | 8.70 | 7.36 |
| Canon EOS 20D | 10.3 | 9.66 | 8.85 | 7.29 |
| Nikon D80 (Camera JPEG) |
10.1 | 9.43 | 8.48 | 7.12 |
| Canon Digital Rebel XT | 10.3 | 9.51 | 8.61 | 7.11 |
| Nikon D200 (Camera JPEG) |
-- | 9.07 | 8.36 | 7.11 |
| Olympus EVOLT | 10.8 | 9.26 | 8.48 | 7.07 |
| Canon EOS-1Ds Mark II (Camera JPEG) |
10.3 | 9.38 | 8.6 | 7.04 |
| Canon Digital Rebel | 10.1 | 9.11 | 8.47 | 6.97 |
| Pentax *istDs | 10.2 | 10 | 8.87 | 6.9 |
| Nikon D2x | -- | 8.93 | 7.75 | 6.43 |
| Nikon D70S | 9.84 | 8.69 | 7.46 | 5.85 |
| Nikon D70 | 9.81 | 8.76 | 7.58 | 5.84 |
Standard Observations:
The results shown in the table are interesting. One of the first things that struck me when I initially looked at test data for a wide range of d-SLRs, was that here again, purely analytical measurements don't necessarily correlate all that well with actual photographic experience. There's no question that the Fuji S3 Pro deserves its place atop the list, as its unique "SR" technology does indeed deliver a very obvious improvement in tonal range in the highlight portion of the tonal scale. I was surprised to see the analytical results place the Olympus EVOLT as highly as they did, given that our sense of that camera's images was that they were in fact noisier than those of many other d-SLRs that we looked at. In the other direction, I was quite surprised to see the Nikon D2x place as low on the listings as it did, given that we found that camera's shadow detail to be little short of amazing.
One thing that's going on here though, is that we tested each camera at its lowest ISO setting, which should produce best-case noise levels. This is in fact what many photographers will be most interested in, but it does perhaps place some of the Nikons at a disadvantage, as their lowest ISO setting is 200, as compared to the ISO 100 settings available on most other models.
D80 Specifics:
Regardless of the positions of the other cameras though, the Nikon D80 does appear to have a good dynamic range, coupled with a well-proportioned tone curve. It happily offers a better-looking tone curve in the shadows than the D200 does, making it easier for shooters of average ability to extract useful shadow detail.
As I always say though, at the end of the day, I think you have to take the figures here with a grain of salt, and look at actual images with your own eyes to see what you make of each camera's tonal range and noise levels. We'll continue performing these dynamic range tests on the digital SLRs that we review, but (just as with the laboratory resolution target results), we suggest that you not rely on them exclusively for making your purchase decisions.
Resolution Chart Test Results
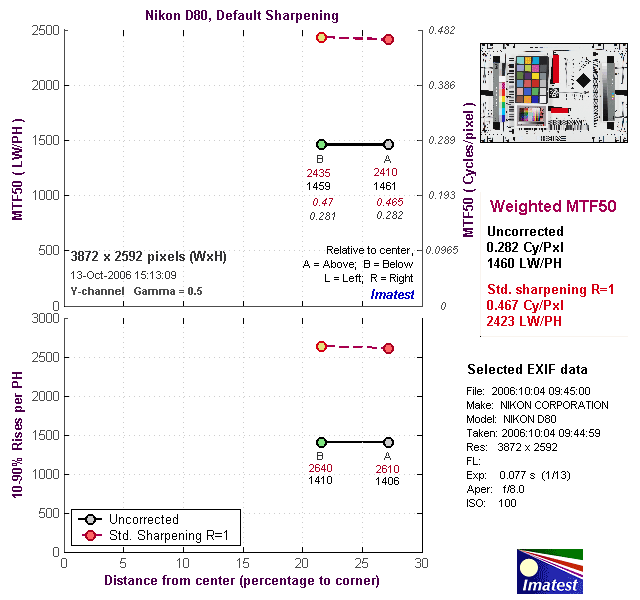
The chart above shows consolidated results from spatial frequency response measurements in both the horizontal and vertical axes. The "MTF 50" numbers tend to correlate best with visual perceptions of sharpness, so those are what I focus on here. The uncorrected resolution figures are 1406 line widths per picture height horizontally and 1410 lw/ph vertically. Correcting to a "standardized" sharpening with a one-pixel radius increases this number quite a bit, to an average of 2423 LW/PH. This characteristic is similar to what we saw with the Nikon D200, which showed very low uncorrected numbers and very high corrected ones. The D200 in particular uses very conservative in-camera processing at its default setting, producing very soft-looking edges but more importantly, ones with no overshoot or other sharpening artifacts. This means that images look very soft straight from the camera, but take subsequent sharpening very well. Aimed more at the consumer market, the D80 sharpens its images a good bit more in the camera, but (as we'll see below) still manages to avoid almost sharpening artifacts almost entirely. It appears that the "standard" 1-pixel radius sharpening that Imatest applies almost exactly compensates for the edge profile of the D80, with the result that the edges become very sharp indeed when it's applied.
To see what's going on, refer to the plots below, which show the actual edge profiles for both horizontal and vertical edges, in both their original and corrected forms. Bottom line, the D80 captures excellent detail, really making the most of its 10.2 megapixel sensor. You can't sharpen its camera-created JPEGs quite as much as those from the D200, but they're much crisper looking straight from the camera, as is appropriate for a DSLR aimed at the consumer market. That said, enthusiast shooters will be able to extract a lot of fine detail with a little playing around using Photoshop's unsharp masking operator or other image-sharpening application.
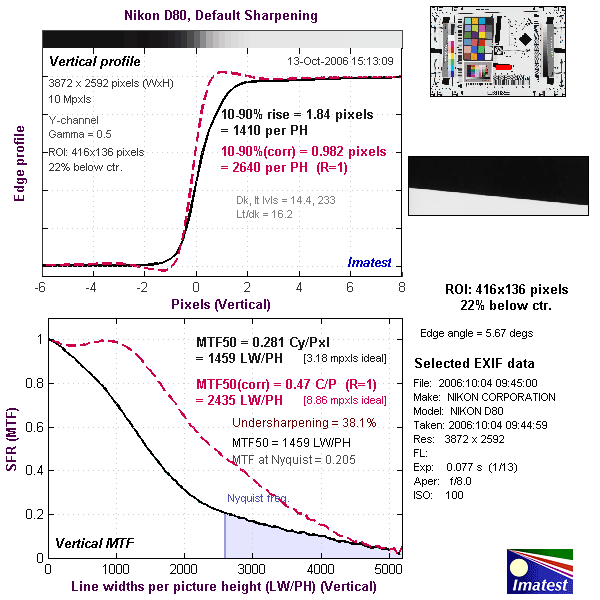

Menus
Camera Modes and Menus
The mode dial on the left side of the D80's top panel provides access to its various exposure modes, the same arrangement of Auto, three semi-auto, one Manual, and six scene modes as on the original D70/D70S. Here's a list of what's available:
 Program: Puts the camera in charge of aperture and shutter speed, though all remaining camera settings are available. (And you can vary the combination of aperture and shutter speed the camera has selected, by rotating the Main Command Dial.)
 Shutter Priority: The user controls shutter speed, from 1/4,000 to 30 seconds, while the camera sets the aperture value.
 Aperture Priority: The opposite of Shutter Priority mode, this mode lets the user control the aperture, while the camera sets the shutter speed.
 Manual: Gives the user complete control over the exposure (both shutter and aperture settings), and provides access to the camera's Bulb shutter setting for exposures longer than 30 seconds.
 Auto: The camera sets everything. Used for snapshots or users who just don't want to be bothered with the details of how the camera will do its work. Flash is set to front curtain sync.
 Portrait: Adjusts Aperture to soften background details to help the main subject stand out more clearly. Flash set to front curtain sync
 Landscape: Turns up color, saturation, contrast, and enhances outlines for city and forest landscape shots. Flash is turned off in this mode.
 Close up: Reds and greens are pumped up, camera sets center focus point, flash set to front curtain sync.
 Sports: Uses high shutter speed, camera switches to continuous focus, both flash and AF illuminator are turned off and will not fire.
 Night Landscape: Uses a slow shutter speed with no flash.
 Night Portrait: Uses slow shutter speed with flash, balancing the two so that night portraits look natural even with flash.
Nikon D80 Menus
The menu system on the Nikon D80 follows most closely that of its big brother, the D200, although the D80 sports a Retouch menu instead of the D200's Recent Settings menu, and its custom settings menu isn't divided into sub-pages the way the D200's is.
The D80's menu system makes good use of the large, high-resolution LCD screen, with fonts that are larger and smoother than those on the D70/D70S, and much-improved graphics. The net result is much better readability and a more sophisticated appearance. There are five main menus: Playback, Shooting, CSM (custom menus), Set Up, and Retouch. The Retouch menu is a new addition on the D80, and offers much more extensive options for in-camera image manipulation than we've previously seen. Navigation takes place via the Multi Selector pad, assisted at times by the Enter button. The menus themselves are chosen via a "tabbed" interface, with icons on the left of the screen corresponding to the five menus.
 The Nikon D80 carries forward the help system we first saw on the D2x, but has expanded it to cover essentially every menu item, as on the D200. Whenever a menu item is selected that has a help screen associated with it, a square icon with a question mark on it appears in the lower lefthand corner of the screen. When you press the Protect/Help button, the LCD screen will display help information for that current menu selection. Most help screens are just a single page, but a few extend onto multiple pages. The explanations are pretty informative (better than average, we'd say), but there is still room for improvement on a number of the more arcane/involved settings. (Memory is so cheap these days, we don't know why Nikon didn't go the extra mile with an already good idea, and include much more information on some of the help screens. Particularly on a camera aimed more at the mass market, the incremental effort and expense to offer more complete explanations of more infrequently-used camera functions seems small relative to the time it could save for D80 owners, helping avoid trips back to the manual to ferret out the information.)
In the section below, rather than reproduce every menu screen in the main text, we've shown screenshots for only the top level of each menu, and provided clickable links in the descriptive text leading to the various sub-screens.
Nikon D80 Playback Menu

| Nikon D80 Playback Menu Options | |||
|---|---|---|---|
| Top-Level Selection |
Second-Level | Third-Level | Notes |
| Delete | - Selected - All |
- Select image from thumbnail display | Select one or multiple images, then execute with "Enter" button. The Menu button exits without deleting any images.
Delete All doesn't affect images that have been "protected" via the WB/help/protect button |
| Playback Folder | - Current - All |
"All" will also display DCF-compliant image from other manufacturers that may be on the same card. | |
| Rotate Tall | - On - Off |
Images captured in "portrait" orientation are rotated onscreen to display in their original orientation. (The camera can even tell whether you had the grip side up or down. If it is moved to point vertically up or down after the shutter button has been half-pressed, it will remember the previous orientation and use that to tag the image.) | |
| Slide Show | - Start - Select pictures - Change settings |
- Select Pictures (All or select from thumbnails)
- Change settings: Style (Standard, Pictmotion) - Change Settings: Frame Interval (seconds) - Change Settings (background music) |
Enables an automated slide show of captured images on the memory card, with many options, including the ability to combine music with your images.
This function has a complex set of sub-menus, see Slide Show sub-menu screenshots for more details. |
| Hide Image | - Select/set
- Deselect all? |
- Select image from thumbnail display | Hiding an image also protects it from deletion with the "delete all" command. The menu button exits without hiding any images. |
| Print Set | - Select/set - Deselect all? |
- Select image from thumbnail display, if select/set is chosen | Sets up images for printing using the DPOF (Digital Print Order Format). |
Nikon D80 Shooting Menu:

| Nikon D80 Shooting Menu Options | |||
|---|---|---|---|
| Top-Level Selection | Second-Level | Third-Level | Notes |
| Optimize Image | - Normal - Softer - Vivid - More vivid - Portrait - Custom - Black-and-white |
(For Custom option only)
- Done (accept settings) - Image sharpening (Auto, -2 to +2, None) - Tone compensation (Auto, -2 to +2, Custom) - Color Mode (Ia(sRGB), II (Adobe RGB), IIIa (sRGB) - Saturation (Auto, -, 0, +) - Hue adjustment (-9 to +9 degrees) |
Softer reduces contrast and saturation
Vivid and More vivid increase saturation and contrast Portrait makes subtle, specific color and tonal-rendering adjustments. Custom tone compensation option enables curve loaded from computer Black-and-white now includes color filtration effects NOTE - you must select "Done" for custom settings to be registered. |
| Image Quality | - NEF (RAW) - JPEG Fine - JPEG Normal - JPEG Basic - NEF + JPEG Fine - NEF + JPEG Normal - NEF + JPEG Basic |
D80 now offers choice of any JPEG quality in NEF + JPEG modes | |
| Image Size | - Medium (2,896 x 1,944 pixels)/5.6M - Small (1,936 x 1,296 pixels)/2.5M |
||
| White balance | - Auto - Incandescent - Fluorescent - Dir. sunlight - Flash - Cloudy - Shade - K (choose color temp) - PRE WB Preset |
- Auto and all presets: fine tune +/- 3 units
- Choose color temp: (2,500 - 10,000K) - WB Preset: |
Auto and all presets let you fine-tune white balance +/- 3 units.
Manual option (PRE) is nice, in that it gives you the choice of setting directly or using a previously-shot photo on the card. |
| ISO Sensitivity | - (Auto) - 100 - 125 - 160 - 200 - 250 - 320 - 400 - 500 - 640 - 800 - 1000 - 1250 - 1600 - Hi 0.3 - Hi 0.7 - Hi 1 |
Auto is only available in auto or some scene modes
The "Hi" settings refer to the number of EV above 1600: Hi 1 is equivalent to ISO 3200 |
|
| Long exp. NR | - Off - On |
Only affects exposures longer than 1 second. | |
| High ISO NR | - Normal - Low - High - Off |
Adjusts strength of the camera's noise reduction processing at ISOs higher than 400. Off disables noise reduction unless sensitivity exceeds ISO 800. Minimal noise reduction is performed at sensitivities over IS0 800 when Off. | |
| Multiple Exposure | - Done - Number of shots - Auto gain |
- Select number of shots (2,3)
- Auto gain (on/off) |
Creates a single photograph by combining from two or three images. You can also enable the Auto Gain feature, to adjust the exposure on each individual shot so the final composite image is properly exposed. Unlike the Image Overlay function, Multiple Exposure builds the composite image on the fly (rather than working from previously captured images), and can be used when saving to either JPEG or NEF file formats. (screenshot) |
Nikon D80 Custom Settings Menu
The Nikon D80's custom settings menu has more options than on the D70/D70S, but fewer than the D200. It's organized as a single scrolling list as in the D70/D70S, rather than the bank-oriented layout of the D200.
| Nikon D80 Custom Settings Menu Options | |||
|---|---|---|---|
| Top-Level Selection |
Second-Level | Third-Level | Notes |
| R Reset | - No - Yes |
Resets the CSM options to their default values.
(NOTE that the reset that's accomplished by pressing and holding down BKT and meter-pattern buttons for 2 seconds does not reset the CSM settings.) |
|
| 01 Beep | - On - Off |
Beep sounds for focus confirmation, remote release, or self-timer countdown. | |
| 02 AF-area mode | - Single area - Dynamic area - Auto area AF |
Single and Dynamic area let you select the primary AF point. Auto area AF switches from Single to Dynamic if motion is detected.
Single is the default for P, S, A, M and Macro modes. |
|
| 03 Center AF area | - Normal zone - Wide zone |
Sets the center AF area to be either a normal-size area or an expanded, wider zone. | |
| 04 AF assist | - On - Off |
Enable or disable the AF-assist light. Light only comes on if it's needed.
If SB-800 or SB-600 is attached, camera will use the strobe's AF assist illuminator. |
|
| 05 No memory card? | - Release locked - Enable release |
Prevents (default) or permits shutter release if there's no SD card in the camera.
(Helps avoid shooting a pile of photos without "film" in the camera.) |
|
| 06 Image review | - On - Off |
Enables or disables the immediate review of an image on the LCD screen after each shot. | |
| 07 ISO Auto | - Off - On - Max Sensitivity - Min. shutter speed |
- Max Sensitivity (200, 400, 800, 1600)
- Min. shutter speed (1, 1/2, 14, 1/8, 1/15, 1/30, 1/40, 1/60, 1/80, 1/100, 1/125) |
Boosts ISO automatically if aperture and/or shutter speed selection wouldn't provide sufficient light for a good exposure.
This option expands on that of the D70/D70S, by letting you specify both a maximum sensitivity that auto ISO boosts will be limited to, as well as the minimum shutter speed at which the boost will begin. |
| 08 Grid display | - Off - On |
Enables or disables alignment grid in viewfinder. | |
| 09 Viewfinder warning | - On - Off |
Enables or disables warning icons in the viewfinder for black/white mode, low battery power, and no memory card. | |
| 10 EV step | - 1/3 step - 1/2 step |
Sets step size (in EV units) for aperture, shutter, and exposure compensation adjustment.
(NOTE, ISO steps are always 1/3 EV.) |
|
| 11 Exp comp. | - Off - On |
Determines whether +/- button is needed to adjust exposure compensation. When "on", you can adjust EV at any time with just the command dial. | |
| 12 Center-weighted | - 6 mm - 8 mm - 10 mm |
Selects the area in the center of the frame that's given the greatest weight in center-weighted metering mode. (Only the 8 mm area is indicated in the viewfinder, however). | |
| 13 Auto BKT | - AE & flash - AE only - Flash only - WB bracketing |
The D80's auto bracketing feature can control either normal (ambient) exposure, flash exposure, both, or white balance variation. | |
| 14 Auto BKT Order | - Default order (MTR>Under>Over) - Under>MTR>Over |
In auto bracketing mode, you can change the order in which the camera shoots the bracket. | |
| 15 Command dials | - Default - Reversed |
Reverses the roles of the Main and Sub Command dials in all control modes. | |
| 16 FUNC button | - ISO display - Framing grid - AF-area mode - Center AF area - FV lock - Flash off - Matrix metering - Center-weighted - Spot metering |
Select a function to be assigned to the FUNC button. Most of these let you use the FUNC button to temporarily override camera settings such as metering pattern, flash mode, etc. | |
| 17 Illumination | - On - Off |
When on, the backlights for the top panel data readout and main LCD (and on any attached SB-600/800 strobe units) remain lit for a longer time, after the metering-active timer expires. | |
| 18 AE-L/AF-L |
- AE/AF Lock - AE Lock only - AF Lock only - AE Lock hold - AF-ON - FV-Lock - Focus area selection - AE-L/AF-L/AF area - AE-L/AF area - AF-L/AF area - AF on/AF area |
Controls the function of the AE/AF lock button.
Most modes release the lock after the shutter is tripped, but "AE Lock hold" holds the AE setting until the button is pressed again. AF-ON causes the camera to autofocus when the AE/AF button is pressed. |
|
| 19 AE Lock | - Off - On |
Enables AE lock with half-pressed shutter button | |
| 20 Focus area | - No Wrap - Wrap |
When selecting AF points, commanding the selection to move past the edge of the frame causes it to "wrap" around to the other side. | |
| 21 AF area illumination | - Auto - Off - On |
Controls the (overly?) subtle backlighting of the active AF point when the AF system actuates. In Auto mode, the backlight doesn't activate when you're shooting a bright subject. | |
| 22 Built-in flash | - TTL - Manual - Repeating flash - Commander mode |
Manual - (choose from Full, 1/2, 1/4, 1/8, 1/16, 1/32, 1/64, 1/128 power) Repeating flash Commander mode: |
Sets the built-in flash to operate TTL (through the lens metering, the default), Manual, Repeating Flash, or Commander modes.
Under the Manual option, you can set the flash power from Full to 1/128 power. Repeating Flash mode lets you fire the flash repeatedly while the shutter is open, and you can set the variables for output, time, and interval. Commander mode sets the flash to work with up to two wireless slave units. (Very capable, matches D200) See the menu screenshots for full information. |
| 23 Flash Warning | - On - Off |
When enabled, a flash indicator (lightning bolt) will flash in the viewfinder when flash is recommended. | |
| 24 Flash shutter speed | - 1/60 sec - 1/30 sec - 1/15 sec - 1/8 sec - 1/4 sec - 1/2 sec - 1 sec - 2 sec - 4 sec - 8 sec - 15 sec - 30 sec |
Sets the slowest shutter speed that the camera will use in P and A exposure modes when the flash is enabled. | |
| 25 Auto FP | - Off - On |
When using a compatible, FP-capable external strobe (like the SB-600/800), camera will automatically command the flash to switch to FP mode if the shutter speed is set faster than 1/200 second with the flash enabled. (NOTE, internal flash is not FP-capable.) | |
| 26 Modeling flash | - Off - On |
If enabled (the default), the built-in flash will temporarily light as a modeling flash when the Depth of Field Preview button is pressed. In Commander mode, Speedlights that support the Nikon Creative Lighting System will also emit modeling flashes. | |
| 27 Monitor off | - 5 sec - 10 sec - 20 sec - 1 min - 5 min - 10 min |
Delay after which rear-panel LCD switches off if no activity. | |
| 28 Auto meter-off | - 4 sec - 6 sec - 8 sec - 16 sec - 30 sec - 30 min |
Length of time the meter displays the exposure setting after it's been activated. (By either a shutter half-press or a press of the AE-L/AF-L button.) Unless the AE-Lock hold option is selected, the meter will continuously update as the scene or camera settings change. | |
| 29 Self-timer | - 2 sec - 5 sec - 10 sec - 20 sec |
Duration of self-timer delay. | |
| 30 Remote on duration | - 1 min - 5 min - 10 min - 15 min |
Sets the length of time the camera will wait for a signal from the remote control before reverting to single-shot or continuous mode, whichever was last in effect. | |
| 31 Exp. delay mode | - Off - On |
If enabled, delays shutter release 0.4 second after mirror raises, to let vibrations die down when shooting on a tripod | |
| 32 MB-D80 batteries | - LR6 (AA alkaline) - HR6 AA Ni-MH) - FR6 (AA lithium) - ZR6 (AA Ni-Mn) |
Selects the type of batteries in use with the MB-D80 pack, to insure the correct minimum-voltage cutoff point. | |
Nikon D80 Setup Menu


| Nikon D80 Setup Menu Options | |||
|---|---|---|---|
| Top-Level Selection |
Second-Level | Third-Level | Notes |
| CSM/Setup menu | - Simple - Full - My menu |
Select simple or full menus, or customize as you'd like | |
| Format memory card | (Warning / confirmation screen) | Reformat SD card | |
| World time | - Time zone - Date - Date format - Daylight saving time |
- Set time zone from graphical display
- Set date and time - Date format (yy/mm/dd, mm/dd/yy, dd/mm/yy) - Daylight savings time (off, on) |
Self-explanatory. See subscreens for details. |
| LCD brightness | (set brightness, -2 to +2) |
The camera displays a gray scale on its LCD as an aid to setting the LCD brightness. | |
| Video Mode | - NTSC - PAL |
Changes video output signal timing | |
| Language | - German - English - Spanish - Suomi - French - Italian - Dutch - Polish - Portuguese - Russian - Swedish - Traditional Chinese - Simplified Chinese - Japanese - Korean |
No Esperanto?
;-) |
|
| USB | - Mass Storage - PTP |
Chooses protocol for USB port. Mass Storage tends to transfer faster, PTP links to automatic camera-download software on Mac OS 10 and Windows XP. | |
| Image comment | - Done - Input comment - Attach comment (view) |
(Input screen) | Embeds an alphanumeric character string in the EXIF header of captured images. An on-screen keyboard similar to that used for naming folders is shown, but in addition to upper case characters, numbers and the underscore symbol, also lets you select lower case characters and a good range of other punctuation symbols.
Comments are visible in Picture Project or Nikon Capture 4, versions 4.1 and later. |
| Folders | - Select folder - New - Rename - Delete |
- Select folder from list of folders
- Enter new folder name - Rename folder - Delete folder (No, Yes) |
Select which folder will be used for both image storage and playback. Folder names created in the camera allow upper case letters, numbers and the underscore symbol only, and are entered using an on-screen keyboard. The four-way controller is used to highlight a letter on the keyboard, the White Balance / Protect / Help Button is used to select it, the ISO / Thumbnail View Button and Main Command Dial can be used to move backwards or forwards through the folder name, and the Quality / Enter / Magnify Button accepts the name. |
| File No. Seq | - Off - On - Reset |
If on, camera will remember and continue file number sequence from one card to the next, and across erase/format operations. | |
| Mirror lock-up | - On - Off |
For sensor cleaning, locks mirror up and shutter open. Turn off camera to reset. AC adapter not required.
NOTE: Don't confuse this with a mirror lockup mode that locks the mirror pre-exposure, to minimize camera shake from mirror bounce. (The D80 doesn't have that feature, but does have Exposure Delay mode, see CSM 31.) |
|
| Dust off ref photo | - On - Off |
Capture a special "Dust Reference" image that can be used with Nikon Capture 4 to automatically touch-out the images of dust specks on the sensor. | |
| Battery Info | Bat meter (%)
Pic meter (#) Charge Life (0 to 4) |
Very complete battery status display, same as on D200 | |
| Firmware version | (info screen) | Displays current camera firmware version. | |
| Image rotation | - Automatic - Off |
The D70S has an orientation sensor that records the position of the camera in the file headers, allowing the images to display in their correct orientation on the camera's LCD or in Nikon's software. This option disables this, useful if you're going to be using in an orientation (straight up or straight down) that would result in incorrect orientation data being recorded. (The camera will otherwise simply tag images shot vertically up or down with the last position the camera was in before it was pointed up or down). | |


Nikon D80 "Retouch" Menu
Most digital cameras offer at least some degree of in-camera image modification, even if it's just resizing or cropping. The Nikon D80 goes way beyond that level of capability though, with an entire menu devoted to in-camera "retouching." Calling it retouching may be a bit of a stretch, as retouching has to us always implied direct human interaction with an image, as in cloning-out unwanted elements, locally altering the color or tone, etc. There's no question though, that the Retouch menu on the Nikon D80 goes far beyond anything that's been seen on a mainstream digital camera before.The various options on the Retouch menu are shown below, see the Operation>Viewfinder page of this review for a bit more detail:

| Nikon D80 Retouch Menu Options | |||
|---|---|---|---|
| Top-Level Selection |
Second-Level | Third-Level | Notes |
| D-lighting | Choose image from thumbnail display |
- Normal - Enhanced - Moderate |
Nikon's D-Lighting features boosts exposure in the shadows and adjusts the tone curve to give more even illumination with backlit or harshly-lit subjects. |
| Red-eye correction | Choose image from thumbnail display |
Nikon's automatic red-eye reduction algorithm is quite sophisticated, has been part of their consumer point & shoot models for some time | |
| Trim | Choose image from thumbnail display |
Choose size of trimmed image: - 2560x1920 - 1920x1440 - 1280x960 - 960x720 - 640x480 |
Cropped image displays on monitor,you can scroll with the Multi Selector pad to choose position within larger image |
| Monochrome | Choose image from thumbnail display |
- Black-and-white - Sepia - Cyanotype |
Fixed conversions, no color contrast filters available as in shooting mode |
| Filter Effects | - Sky light - Warm filter - Color balance |
Choose image from thumbnail display | Skylight is a slight warming, Warm filter is more so. Color balance gives you a wide range of color adjustment |
| Small Picture | - Select picture
- Choose size |
- Select image from thumbnail display
- 640x480 |
Handy for making small versions of images for email transmission |
| Image Overlay | - Choose Image 1 - Choose Image 2 - Overlay - Save |
(Select images from thumbnail display) | Perhaps of limited use (Photoshop or another image editor will give more control), but it can result in some neat effects. (Could be neat for party/event photography, combine images with pre-shot frames or other elements.) |
Controls
Controls
Control Enumeration, Command Dials
Here's our usual "walk around the camera," this time starting with the two Command Dials, the Main Command Dial and the Sub Command Dial, since they're so key to camera operation. Most camera settings are made by pressing and holding the appropriate button while rotating one or the other of these two controls. Functions controlled by these dials are as follows:

Main Command Dial: The Main Command Dial is located on the back of the camera, in the upper right hand corner, directly under your right thumb. Used in conjunction with other buttons, this dial controls ISO, White Balance, Quality, exposure mode, EV compensation, and Flash mode settings when turned while pressing any of those buttons. It also controls bracketing when used in conjunction with the BKT button. In Shutter Priority and Manual exposure modes, this dial sets the shutter speed, although it can be made to control the aperture instead, via a Custom Menu setting. In Program exposure mode, turning this dial shifts the program to favor higher or lower speeds/larger or smaller apertures.

Sub-Command Dial: The Sub Command Dial is located on the front of the handgrip, just under the Shutter button, conveniently placed for your index finger to grip. This dial fine-tunes the white balance across the -3 to +3 range (arbitrary units) when pressing the White Balance button. It sets the image resolution when the Quality button is pressed, and adjusts the Flash Compensation when used with the Flash Mode button. In Manual and Aperture Priority modes, it sets the aperture value, although it can be made to control shutter speed instead, via a Custom Menu setting.
As we've seen in other of their SLRs, Nikon's combination of Main and Sub-Command Dials makes for very fluid camera operation, as you can quickly adjust two related parameters, one with your thumb, the other with your index finger. Once you're familiar with the camera, the layout of other controls on the camera body and their separation from each other makes it relatively easy to reach and press them without looking. Taken together, the various buttons and the twin Command Dials let you control most important shooting parameters with a minimum of fuss and distraction; in many cases without so much as taking your eye away from the viewfinder.
Control Enumeration, Top Panel Controls, Right
The controls on the right side of the top panel are the primary shooting controls, generally dealing with immediate camera operations.
Power Dial: Surrounding the Shutter button on the top right of the camera, this dial turns the camera on and off. A third On position illuminates the small status display for easy viewing in dim lighting.
Shutter Button: In the center of the Power dial, on the top of the camera, this button sets focus (when in autofocus mode) when halfway pressed and fires the shutter when fully pressed. You can choose whether or not the Shutter button also locks exposure, via an option on the Custom Settings menu.
When an image is displayed on the LCD monitor, halfway pressing the Shutter button dismisses the display and immediately switches the camera to shooting mode. (A partial expression of Nikon's "shooting priority" philosophy.)

Exposure Compensation Button: Behind and to the right of the Shutter button on the top of the camera, pressing this button while turning the Main Command dial sets the Exposure Compensation from –5 to +5 exposure equivalents (EV) in one-third step increments. Pressing and holding down this button and the AE button simultaneously resets the camera to its default settings.
Metering Button: Directly beside the Exposure Compensation button, holding this button and rotating the Main Command Dial changes the metering mode. Choices include matrix, center-weighted, and spot. Pressing and holding this button together with the Delete button on the rear panel reformats the memory card. (You have to press and hold a few seconds, then press both together again to confirm that you really do want to reformat the card.)

Drive Mode Button: Located just to the right of the data readout LCD, the Drive Mode button lets you select between single shot, continuous shooting, self-timer and remote control options. Following the trend seen in some other controls on the D80, you cycle through the drive options by pressing this button multiple times, rather than by holding it down and using one of the Command Dials.

AF Button: In the lower right hand corner of the top panel, this button selects the D80's focus mode. As with the Drive button, you choose a focus mode by pressing the button repeatedly to cycle through the options, rather than holding it down while rotating a Command Dial as in other Nikon dSLRs. Options include Single AF, Continuous AF, and AF Auto. In AF Auto mode, the camera begins focus operations in single-focus mode, but switches to Continuous Dynamic AF if it detects motion within the active AF area.
Control Enumeration, Top Panel Controls, Left
 Mode Dial : The left side of the D80's top panel holds only the main Mode Dial. The Mode Dial exactly duplicates that on the D70 and D70S, offering a range of programmed and automatic exposure options, as well as a choice of 6 Scene modes. See the Modes & Menus subtab of this review for details on all the options.
Control Enumeration, Left Side Controls

The left side of the protrusion surrounding the lens mounting flange carries three controls, plus the lens-mount lock button.

BKT Button: This button controls exposure and white balance bracketing, when used in conjunction with the Main and Sub Control dials. For a full description of the options available, refer to the bottom of the Exposure>Control/Metering page of this review.

Flash Button: Pressed with the flash down, this button releases the flash head to pop up. Pressing and holding it while rotating the Main Command Dial changes the flash sync mode (Normal, Red-Eye Reduction, Slow Sync, Slow Sync with Red-Eye Reduction, and Rear Curtain sync); holding it down while rotating the Sub Command Dial varies flash exposure compensation.

Focus Selector: At the bottom of the lens flange is a small rotary switch, which selects between Autofocus (AF) and Manual (M) focusing options. Many Nikkor lenses also have a Manual/Auto focus switch on the side of the lens barrel, so note that if that's the case with a lens you're using, both switches must be in the Auto position for AF to function.
Control Enumeration, Rear Panel Controls
Most of the camera's remaining controls are found on the rear panel. As we noted earlier, some of them have moved around a bit relative to the arrangement of the D70/D70S. We think the changes amount to improvements in the user interface, but experienced D70/D70S owners may find themselves having to reacclimate a little to the changed layout. We'll start our tour at the top left.

Delete Button: In the upper left hand corner, underneath the mode dial, this button deletes individual images in playback mode, with a confirmation screen to give you the opportunity to change your mind. Pressing and holding this button together with the Metering Mode button formats the memory card. (For safety's sake, you have to press both a second time to confirm the format.)

Diopter Adjustment Dial: Adjacent to the top right side of the viewfinder eyepiece, this dial adjusts the optical viewfinder to accommodate eyeglass wearers. (Range is -2 to +1 diopters.)

AE/AF Lock Button: Located to the right of the viewfinder eyepiece, this button locks the exposure and/or focus when pressed. The settings remain locked as long as you hold the button down, regardless of any action of the Shutter button. Several options for this control can be set via the Custom Settings Menu. You can program it to lock either focus or exposure separately, or both together (the default). You can also change its operation so a single press locks and holds the exposure setting. (No need to keep the button pressed down.) It can also be used to temporarily turn the AF on, if the camera is set to manual focus mode. An FV lock option lets it lock the flash exposure value, and a final option lets it enable focus-area selection.

Multi Controller (Focus Area Selector and Lock / Four-Way Arrow Rocker Pad): Just off the top right corner of the LCD monitor on the back panel, this rocker button with its associated locking switch (directly below it) controls the autofocus area in Record mode. The switch beneath it unlocks the rocker control and pressing any side of the rocker moves the active AF selection in that direction. (by choosing one of the 11 brackets displayed in the viewfinder).
In Playback mode, the rocker pad's right and left arrows scroll through captured images while the up and down arrow directions cycle through various information displays for each image. When you zoom in on an image in playback mode, the rocker pad lets you scroll around the magnified image.
In any settings menu, the arrow directions on this control are used to navigate through the LCD menu system.

Playback Button: Just off the top left corner of the LCD monitor, this button displays the most recently captured image, putting the camera into Playback mode. Once an image is displayed, the arrow keys navigate through the other images saved on the memory card. This button also dismisses the image display. (The camera also drops out of playback mode immediately if you touch the shutter button.)

Menu Button: Below the Playback button, this button displays or dismisses the LCD menu system.

Protect / Help / White Balance Button: Just under the Menu button, this button write-protects individual images, protecting them from accidental deletion. (Note though, that even "protected" images will be lost when a card is reformatted.) If an image is already protected, pressing the Protect button removes protection.
In Record mode, pressing this button and rotating the Main Command Dial changes the White Balance setting.
In any settings menu, pressing the Protect/Help Button displays an explanation of the current menu selection.

Thumbnail View / Zoom Out / ISO Button: Just below the Protect/Help/WB button, this button either zooms out from a magnified view or shows either a four or nine-image index view of images in the current folder on the memory card. The chosen display mode remains selected indefinitely, even if the camera is turned off. To return to normal viewing, press the Thumbnail View button again, and rotate the Command Dial in the opposite direction. When a thumbnail view is activated, you can scroll a cursor through the thumbnail images very rapidly with the rocker pad. Pressing the Quality/Magnify button (see below) magnifies the image that's currently selected, increasing the magnification each time it's pressed, up to a limit of 25x for the highest-resolution images. See the previous Viewfinder section of this review for a more complete description of this function.
In Record mode, pressing this button and rotating the Main Command Dial changes the ISO setting.

Quality / Magnify Button: In the bottom left corner of the rear panel, this button zooms in on images displayed in playback mode. Pressing the button repeatedly increase the magnification level, up to a limit of 25x at the largest image size. (Zoom magnification is limited on smaller images, basically always taking you in to the same pixel scale on the LCD display.)
In Record mode, pressing this button while rotating the Main Command Dial selects image size, while rotating the Sub Command Dial selects JPEG quality.
Control Enumeration, Front Controls
There are just three controls on the front of the camera body. They are:

Function Button: On the right side of the body (as viewed from the back), just beneath the AF assist light, this button is programmable, and can control a range of functions. The Custom Settings menu lets you choose the function, from 9 available options. (ISO display, Framing Grid on, AF-area mode, Center AF area narrow/wide, Flash exposure lock, Flash off (temporarily), and switch temporarily to Matrix, Center-Weighted, or Spot metering)

Depth of Field Preview Button: Below the FUNC button, nestled close beneath the lens-mount flange, this button lets you check the depth of field with the current aperture setting. Pressing the button stops down the lens, so you can get an idea of the depth of field through the viewfinder.

Lens Release Button: Right next to the lens mount, at about the 3 o'clock position (viewed from the front), this button releases the lens from its mount when pressed, so you can rotate and remove it.
Retouch
Image Retouching?
Most digital cameras these days let you do at least some level of image manipulation in the camera, even if it's only to make small copies of images for emailing. With the D80 though, Nikon has gone a long step further, letting the user perform quite a few useful images modifications, without having to resort to the computer. We're not sure we'd call the end result "retouching" ourselves, but the net result does seem to be a significant uptick in capability relative to the D80's competition. For a complete list options, see the D80 "Retouch" Menu table elsewhere in this review. Here, we'll take a brief look at a couple of the more interesting/useful capabilities.
Before discussing the effects in more detail, it bears noting that all the examples below that all the "Retouch" options on the Nikon D80's menu are non-destructive, in that they always store their results in new image files on the D80's memory card, never overwriting the original images. The importance of not losing your original images is obvious, but a nice psychological effect is that it's very freeing, knowing that nothing you do will harm your original images. - So experiment away!
D-Lighting
Nikon's D-Lighting option has been around in their Coolpix line of cameras for quite some time now, but it's worth mentioning again, as it's one of the more photographically useful of the in-camera image-modification tricks we've seen. It selectively (and seemingly, quite intelligently) lightens dark areas of the subject. The effect is that of relatively gentle fill illumination, and the camera gives you three options for applying it, varying the strength of the effect.
| D-Lighting Examples (Click on any image to see full-size version) |
||
|---|---|---|
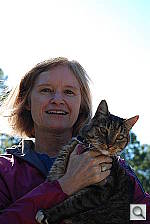 |
||
| D-Lighting Off (as-shot) | ||
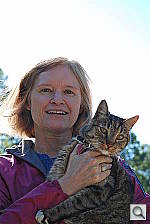 |
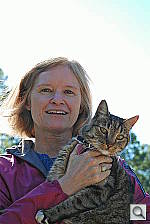 |
 |
| "Moderate" D-Lighting |
"Normal" D-Lighting |
"Enhanced" D-Lighting |
The shots above show a fairly representative backlighting situation, were the subject's back was to the sun, silhouetted against the sky. Which level of D-Lighting you like best will depend somewhat on personal preferences, but I like the "Normal" version the best myself. - The "Enhanced" setting looks slightly artificial to me, and Marti's skin tones are a little ruddy-looking. (D-Lighting tends to preserve color saturation, which can be quite high in shadowed areas of an image. When those areas are brightened up, they can sometimes seem a little overly-saturated.
As you can see, D-Lighting's effects are subtle, but it generally does a good job of doing just what you'd want. This backlit shot of Marti is a good example of a common shooting situation, where D-Lighting's effect can be the difference between a nice shot and one that pretty well misses the mark. Just as important as fixing exposure problems when needed is the principle of doing no harm when less of a fix is called for. In other shots I took, where less correction was called for, D-Lighting was quite restrained, making just the sort of subtle adjustment I would have if I'd been doing the work myself in Photoshop.
Of course, there's no free lunch, so a natural consequence of D-Lighting's boosting of shadow areas is that it will of necessity be boosting image noise along with the image detail you want it to brighten up. Looking at a number of shots with D-Lighting applied to them though, I have to say that this will be a moot point for the vast majority of users. Unless you're shooting at a very high ISO setting (which some users of course will be), the increased noise in the shadow areas is really negligible: You can see it if you zoom in pixel-for-pixel on a computer screen, but in any reasonable-sized print, it'll be essentially invisible.
Bottom line, D-Lighting isn't a panacea, but it can make a very worthwhile contribution to your photography, with a minimum of fuss or muss.
Image Overlay
We wouldn't see ourselves using this effect a whole lot (we'd be more inclined to go to Photoshop for this sort of thing), but the Nikon folks showed us some pretty cool photos created with it, so it's sure to appeal to a lot of creatively-minded but computer-challenged users out there. The concept is very simple: Just overlay two images and combine them into a single new one. Its very well executed though, with a dirt-simple interface and a nice blending of the two images when it's done. (You can adjust the relative strength of each image by using the Multi-Selector pad to change the "x" numbers beneath each image.) The screen shots below show an outline of the process.)
| Nikon D80 Image Overlay feature | |
|---|---|
 |
 |
 |
 |
 |
 |
Filter Effects
This is another (mostly) very subtle option, but the samples below will give you a good idea of what's possible. It's easily the most powerful in-camera image-editing function we've seen to date. Options are Skylight, Warming, and Custom.
Skylight
As with film, the Skylight filter applies a very subtle warming effect to the image, and removes a bit of "haze" from it in the process. The effect is pretty subtle, it might be more evident in an image with more visible haze in it than the example below. Still, this example gives you an idea of what the D80's Skylight filter looks like:
| D-80 Skylight Filter (Click on any image to see full-size version) |
|
|---|---|
 |
 |
| As-Shot | "Skylight" filter |
Warming
Warming produces a more pronounced (but still subtle) warming effect, ideal for restoring skin tones shot in the shade under clear blue skies, or for giving any scene a warmer, more inviting cast. In the example below, I deliberately left the D80's white balance set to "Daylight" for this shot taken in the shade, under a clear blue sky. The original has a pretty pronounced blue cast, the warmed version looks surprisingly close to correct.
| D-80 Warming Filter (Click on any image to see full-size version) |
|
|---|---|
 |
 |
| As-Shot | "Warming" filter |
Custom
The real fun comes with the Custom option though: You basically have the ability to shift the image color in any hue direction you want, with control over both direction and amount of shift, via a nifty 2-D control.
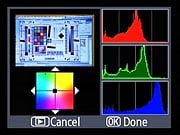 The screen shot at right shows you the main adjustment screen for the Custom filter option. You're shown a small thumbnail of the image being manipulated with the results of the current color filter applied to it, separate Red, Green, and Blue histograms, and the 2-D color control we just mentioned. Nikon's done something very clever here, in that they've provided a full 360-degree range of hue variation, rather than restricting the control to just offering differential adjustments of red and blue versus green, or of changes along yellow-blue and cyan-red axes. Here, all the hues are arranged radially, and the distance you move the cursor dot away from the center of the image, the more the hue will shift in the direction you've selected. In the shot at right, we've begun with a very strongly blue-tinted image (shot from a computer screen, it should really have had a different white balance to begin with). The RGB histograms very clearly show the heavy blue cast, with the green being a little high as well.
 In the shot at right, we've moved the color-control cursor to the far upper right-hand corner, basically asking for a maximum yellow shift. You can see that the thumbnail image is now much closer to being a neutral color, and the blue histogram has come down a lot, to be much more in line with the red and the green. There's obviously still a slightly cyan tint to the image as a whole, but it's much improved overall. This wasn't the best choice for an example of this function, as it's meant to to provide fine-grained control over more subtle color problems. It does give you a pretty good idea of what's possible though - The range of the Custom filter extends quite a bit beyond what's possible with the Skylight or Warming filters, not to mention that it can adjust the color in any direction, not just make it warmer.
Nikon told us that one important change in the D80 was that the color LCDs are all tested and calibrated at the factory, to give consistent color and tonal reproduction. Even with a well-controlled camera LCD, it's still a little dicey relying on what you see on the back of the camera to make critical color judgements (the background lighting could easily throw you off, if nothing else), but we don't think this is really meant to be the final word in color correction. If you really care about color, you'll do your work on a computer, with a color-managed monitor, in a carefully-lit environment. For quick changes, to warm up or cool down an image prior to outputting directly on a PictBridge-compatible printer though, this looks like just the ticket.
As you can see in the first screen shot above, other options on the Retouch menu include red-eye correction, trimming (cropping) images to smaller pixel dimensions, and making small images for use in emails.
There's a clear trend afoot to let users do more with their images directly on the camera, without computer intervention. We can't say how far this will ultimately go, but for the moment, Nikon has taken this further than just about anyone else, particularly in the SLR space.
Comparison
Nikon D80 Feature Comparison
The exceptionally rich feature set of the Nikon D80 begs comparison against many pro-level cameras. Given its price point though, we'll resist that temptation, and limit our comparison to current consumer and prosumer models from Nikon and Canon.
The chart below compares the D80 with other current Nikon cameras. Constructing this table was a little tough, because the most natural comparison is relative to the D70S, its immediate predecessor. That said though, many people will be trying to make up their minds between a D80 or a D200. What we've done below is to present something of a hybrid comparison between these three models. A red cell means that a given camera performs below the other two, a green cell means that it performs better than the other two, and a yellow cell means it falls between the other two. In cases where two cameras share a superior capability, both their cells will be colored green. Sharp-eyed readers may find some areas where we haven't chosen to highlight a particular difference (such as the D200's offering exposure compensation in 1 EV increments). Those cases are simply ones that we don't feel are significant in typical use of the camera. Also, in some cases we colored cells yellow where we noted a difference but weren't sure of which parameter really constituted a benefit. Finally, we've marked in dark grey cells for parameters that we haven't tested for ourselves as yet.
We also have a table comparing the Nikon D80 with competing models from other manufacturers. This table is a bit wider though, and breaks the page layout in some browsers, so we're simply providing a link to it here that will open in a separate browser window. See the Nikon D80 vs the Competition comparison table for more info.
| Nikon D80 vs other Nikon SLRs | |||||
Manufacturer |
Nikon |
Nikon |
Nikon |
Nikon |
|
Model |
D50 |
D70s |
D80 |
D200 |
|
| Imaging System |
Sensor
Manufacturer
|
Sony | Sony | Sony | Sony |
|
Sensor Type
|
CCD | CCD | CCD | CCD | |
|
Color Filter
Array
|
RGB | RGB | RGB | RGB | |
|
Total Megapixels
|
6.24 |
6.24 |
10.75 |
10.92 |
|
|
Effective
Megapixels
|
6.1 | 6.1 | 10.2 | 10.2 | |
|
Effective Sensor Size (mm)
|
23.7 x 15.6 |
23.7 x 15.6 |
23.6 x 15.8 |
23.6 x 15.8 |
|
|
Focal Length Multiplier (approx.)
|
1.5x |
1.5x |
1.5x |
1.5x |
|
|
Image Processor
|
Not stated |
Not stated |
Not stated |
Not stated |
|
| Viewfinder |
Type
|
Eye-level pentamirror |
Eye-level pentamirror |
Eye-level pentaprism |
Eye-level pentaprism |
|
Coverage
|
95% |
95% |
95% |
95% |
|
|
Magnification
(-1 diopter with 50mm lens at infinity) |
0.75x |
0.75x |
0.94x |
0.94x |
|
|
Eyepoint (mm)
|
18 |
18 |
19.5 |
19.5 |
|
|
Dioptric Adjustment Range (diopters)
|
-1.6 to +0.5 |
-1.6 to +0.5 |
-2.0 to +1.0 |
-2.0 to +1.0 |
|
|
Focusing Screen
|
Type-B BriteView clear matte screen Mark V |
Type-B BriteView clear matte screen Mark V,
with on-demand grid lines |
Type-B BriteView clear matte screen Mark II,
with on-demand grid lines |
Type-B BriteView clear matte screen Mark II,
with on-demand grid lines |
|
Viewfinder Info Display |
5 focus area brackets/spot metering areas, center-weighted metering area, no memory card warning indicator, battery status, focus confirmation, focus area/AF-area mode, AE lock indicator, FV lock indicator, shutter speed, aperture value, electronic analog exposure display, flash compensation indicator, exposure compensation indicator, Auto ISO indicator, number of exposures remaining/buffer space/preset WB recording indicator/exposure compensation value/flash compensation value/PC mode indicator, flash-ready indicator |
5 focus area brackets/spot metering areas, center-weighted metering area, on-demand framing grid, focus confirmation, focus area/AF-area mode, AE/FV lock indicator, battery status, shutter speed, aperture value, electronic analog exposure display, flash compensation indicator, exposure compensation indicator, Auto ISO indicator, number of exposures remaining/buffer space/preset WB recording indicator/exposure compensation value/flash compensation value/PC mode indicator, flash-ready indicator |
11 normal and 1 wide focus area brackets/spot metering areas, center-weighted metering area, on-demand framing grid, black and white mode warning, low battery warning, no memory card warning, focus confirmation, FV lock indicator, AE lock indicator, Auto ISO indicator, shutter speed, aperture value, electronic analog exposure display, battery status, flash compensation indicator, exposure compensation indicator, WB/exposure bracketing indicator, number of remaining exposures/buffer space/exposure compensation value/flash compensation value/PC mode indicator, flash-ready indicator |
11 normal and 7 wide focus area brackets/spot metering areas, center-weighted metering area, on-demand framing grid, black and white mode warning, battery status, no memory card warning, focus confirmation, metering mode, FV lock indicator, AE lock indicator, flash sync indicator, shutter speed, aperture stop indicator, aperture value, exposure mode, electronic analog exposure display, flash compensation indicator, exposure compensation indicator, Auto ISO indicator, ISO sensitivity value, number of exposures remaining/buffer space/preset WB recording indicator/exposure compensation value/flash compensation value/PC mode indicator, flash-ready indicator |
|
|
Depth of Field Preview
|
Not available |
Enabled with depth-of-field preview button |
Enabled with depth-of-field preview button |
Enabled with depth-of-field preview button |
|
|
Live Preview on LCD?
|
No |
No |
No |
No |
|
| Recording System |
Recording Media / Quantity / Slot Type
|
Secure Digital card |
Type I or II CF card / Microdrive |
Secure Digital card (SDHC compatible) |
Type I or II CF card / Microdrive |
|
Compatible File System
|
FAT 16 / FAT 32 |
FAT 16 / FAT 32 |
FAT 16 / FAT 32 |
FAT 16 / FAT 32 |
|
|
Recording Formats
|
RAW (NEF), JPEG |
RAW (NEF), JPEG |
RAW (NEF), JPEG |
RAW (NEF), JPEG |
|
|
Maximum Resolution
|
3008 x 2000 |
3008 x 2000 |
3872 x 2592 |
3872 x 2592 |
|
|
Reduced Resolutions (JPEG only)
|
2256 x 1496; 1504 x 1000 |
2240 x 1488; 1504 x 1000 |
2896 x 1944; 1936 x 1296 |
2896 x 1944; 1936 x 1296 |
|
|
RAW + JPEG Recording
|
Yes, basic JPEG only |
Yes, basic JPEG only |
Yes, selectable JPEG resolution / compression |
Yes, selectable JPEG resolution / compression |
|
| Color
Space & White Balance |
User-Selectable Color Space
|
Yes sRGB (two variants) + Adobe RGB |
Yes sRGB (two variants) + Adobe RGB |
Yes sRGB (two variants) + Adobe RGB |
Yes sRGB (two variants) + Adobe RGB |
|
Processing Parameters
(Contrast, Sharpness, Saturation, Color Tone) / # of Increments |
7 options each for sharpness and
contrast, 3
options for saturation. 7-step hue adjustment. Digital vari-programs
preset various processing parameters as well. Second sRGB color space
boosts saturation
somewhat. |
7 options each for sharpness and
contrast, 3
options for saturation. 7-step hue adjustment. Digital vari-programs
preset various processing parameters as well. Second sRGB color space
boosts saturation
somewhat. |
7 options each for sharpness and
contrast, 4
options for saturation. 7-step hue adjustment. Digital vari-programs
preset various processing parameters as well. Second sRGB color space
boosts saturation
somewhat. |
7 options for sharpening, 5 options for
contrast, 4 options for saturation, 7-step hue adjustment. Second sRGB
color space boosts saturation
somewhat. |
|
|
Preset WB settings
|
6 (Daylight, Cloudy, Shade, Incandescent,
Fluorescent, Flash) |
6 (Daylight, Cloudy, Shade, Incandescent,
Fluorescent, Flash) |
6 (Daylight, Cloudy, Shade, Incandescent,
Fluorescent, Flash) |
6 (Incandescent, Fluorescent, Direct
Sunlight, Flash, Cloudy, Shade) |
|
|
Manual Color Temperature Setting Range
|
(No Kelvin option, but very broad Preset WB
range) |
(No Kelvin option, but very broad Preset WB
range) |
2,500 ~ 10,000K in increments of roughly 10
mired |
2,500 ~ 10,000K in increments of roughly 10
mired |
|
|
WB Adjustment Range
|
Not available |
±3 steps in 1-step increments 10 mireds per step |
±3 steps in 1-step increments 10 mireds per step |
±3 steps in 1-step increments 10 mireds per step |
|
| AF System |
Type
|
TTL phase detection by Nikon Multi-CAM900
autofocus module |
TTL phase detection by Nikon Multi-CAM900
autofocus module |
TTL phase detection by Nikon Multi-CAM1000
autofocus module |
TTL phase detection by Nikon Multi-CAM1000 autofocus module |
|
# of Focusing Points (Focusing Point Type)
|
5 points (1 cross-type, 2 horizontal-type, 2 vertical-type) |
5 points (1 cross-type, 2 horizontal-type, 2 vertical-type) |
11 normal points or 1 wide point (1 cross-type, 2 horizontal-type, 8 vertical-type) |
11 normal points or 7 wide points (1 cross-type, 2 horizontal-type, 8 vertical-type) |
|
|
Superimposed
Focus Point Display
|
Yes | Yes | Yes | Yes | |
|
AF Working Range
|
EV -1 ~ 19 (ISO 100) |
EV -1 ~ 19 (ISO 100) |
EV -1 ~ 19 (ISO 100) |
EV -1 ~ 19 (ISO 100) |
|
|
AF-assist Beam
|
Bright incandescent lamp, (Range approx. 3.0
m, 9.8 ft, depending on lens.) Not dependent on flash setting. |
Bright incandescent lamp, (Range approx. 3.0
m, 9.8 ft, depending on lens.) Not dependent on flash setting. |
Bright incandescent lamp, (Range approx. 3.0
m, 9.8 ft, depending on lens.) Not dependent on flash setting. |
Bright incandescent lamp, (Range approx. 3.0
m / 9.8 ft, depending on lens.) Not dependent on flash setting. |
|
|
Eye-start Focusing
|
No |
No |
No |
No |
|
|
AF servo modes
|
AF-S (single one-shot), AF-C (continuous
tracking), AF-A (for auto selection of AF-S or AF-C modes). |
AF-S (single one-shot), AF-C (continuous
tracking). |
AF-S (single one-shot), AF-C (continuous
tracking), AF-A (for auto selection of AF-S or AF-C modes). |
AF-S (single one-shot), AF-C (continuous
tracking). |
|
|
AF area modes
|
Single area, Dynamic area, Dynamic area with
closest subject priority. |
Single area, Dynamic area, Dynamic area with
closest subject priority. |
Single area, Dynamic area, Auto area. |
Single area, Dynamic area, Group Dynamic
area, Dynamic area with closest subject priority. |
|
| Exposure Control |
Shooting Modes
|
11 - Program, shutter-priority AE,
aperture-priority AE, Manual, Auto, Portrait, Landcape, Close up,
Sports, Child, Night Portrait. |
11 - Program, shutter-priority AE,
aperture-priority AE, Manual, Auto, Portrait, Landcape, Close up,
Sports, Night Landscape, Night Portrait. |
11 - Program, shutter-priority AE,
aperture-priority AE, Manual, Auto, Portrait, Landcape, Close up,
Sports, Night Landscape, Night Portrait. |
4 - Program, shutter-priority AE,
aperture-priority AE, manual mode. |
|
Metering Zones
|
420 |
1,005 |
420 |
1,005 |
|
Metering Modes |
1) 3D Color Matrix Metering II (type G and D
lenses); Color Matrix Metering II (other CPU lenses); metering
performed by 420-segment RGB sensor. 2) Center-weighted: Weight of 75% given to 8mm dia. circle in center of frame. 3) Spot: Meters 3.5 mm dia. circle (about 2.5% of frame) centered on active focus area. |
1) 3D Color Matrix Metering (type G and D
lenses); Color Matrix Metering (other CPU lenses); metering performed
by 1,005-segment RGB sensor. 2) Center-weighted: Weight of 75% given to 6, 8, 10, or 12 mm dia. circle in center of frame. 3) Spot: Meters 2.3 mm dia. circle (about 1% of frame) centered on active focus area. |
1) 3D Color Matrix Metering II (type G
and D lenses); Color Matrix Metering II (other CPU lenses); metering
performed by 420-segment RGB sensor. 2) Center-weighted: Weight of 75% given to 6, 8, or 10 mm dia. circle in center of frame. 3) Spot: Meters 3.5 mm dia. circle (about 2.5% of frame) centered on active focus area. |
1) 3D Color Matrix Metering II (type G and D
lenses); Color Matrix Metering II (other CPU lenses); color matrix
metering available with non-CPU lenses if user provides lens data;
metering performed by 1,005-segment RGB sensor. 2) Center-weighted: Weight of 75% given to 6, 8, 10, or 13mm dia. circle in center of frame. 3) Spot: Meters 3mm dia. circle (about 2.0% of frame) centered on active focus area (on center focus area when non-CPU lens is used). |
|
Metering System Working Range |
1) EV 0 ~ 20 (Matrix or
center-weighted metering) 2) EV 2 ~ 20 (spot metering) (ISO 100 equivalent, f/1.4 lens, 20°C/68°F) |
1) EV 0 ~ 20 (Matrix or
center-weighted metering) 2) EV 2 ~ 20 (spot metering) (ISO 100 equivalent, f/1.4 lens, 20°C/68°F) |
1) EV 0 ~ 20 (Matrix or
center-weighted metering) 2) EV 2 ~ 20 (spot metering) (ISO 100 equivalent, f/1.4 lens, 20°C/68°F) |
1) EV 0 ~ 20 (Matrix or
center-weighted metering) 2) EV 2 ~ 20 (spot metering) (ISO 100 equivalent, f/1.4 lens, 20°C/68°F) |
|
ISO Range / Extended |
200 ~ 1600 / -- |
200 ~ 1600 / -- |
100 ~ 1600 / 3200 |
100 ~ 1600 / 3200 |
|
Exposure Compensation |
+/- 5EV in 1/2 or 1/3EV increments |
+/- 5EV in 1/2 or 1/3EV increments |
+/- 5EV in 1/2 or 1/3EV increments |
+/- 5EV in 1, 1/2 or 1/3EV increments |
|
Automatic Exposure Bracketing |
3 shots, 1/3, 1/2, 2/3 or 1 EV steps |
2 or 3 shots, 1/3, 1/2, 2/3 or 1 EV steps |
2 or 3 shots, 1/3, 1/2, 2/3, 1 or 2 EV steps |
2 to 9 exposures in increments of 1/3, 1/2,
2/3 or 1EV |
|
| Shutter
Speeds, Frame Rate, Shutter Lag |
Shutter Type |
Combined mechanical and CCD electronic
shutter |
Combined mechanical and CCD electronic
shutter |
Electronically controlled mechanical (We're frankly uncertain of what constitutes "better" in this case) |
Electronically controlled mechanical |
Shutter Speed Range |
1/4000 ~ 30 sec. in steps of 1/3 or 1/2 EV,
bulb |
1/8000 ~ 30 sec. in steps of 1/3 or 1/2 EV,
bulb |
1/4000 ~ 30 sec. in steps of 1/3 or 1/2 EV,
bulb |
1/8000 ~ 30 sec. in steps of 1/3 or 1/2 EV,
bulb |
|
Maximum Frames Per Second / Buffer depth |
2.47 fps / 16 frames (JPEG large/fine) |
3.05 fps / 15 frames (JPEG large/fine) |
3 fps / 9 frames (JPEG large/fine) |
5 fps / 31 JPEG large/fine or 21 RAW frames |
|
Shutter lag, full AF (sec.) |
0.27 |
0.29 - 0.32 |
0.25 |
0.27 |
|
Shutter lag, prefocus (sec.) |
0.114 |
0.106 |
0.083 | 0.057 |
|
Startup time (sec.) |
~0.25 |
~0.40 |
0.20 |
~0.20 |
|
| Flash | Built-in Flash / Guide Number at ISO 100. |
Yes (12 meters / 39 feet) |
Yes (12 meters / 39 feet) |
Yes (13 meters / 43 feet) |
Yes (13 meters / 43 feet) |
Max flash x-sync speed. (sec.) |
1/500 (!) |
1/500 (!) |
1/200 |
1/250 |
|
Flash Exposure Compensation |
-3 to +1 EV, 1/3 or 1/2 EV steps |
-3 to +1 EV, 1/3 or 1/2 EV steps |
-3 to +1 EV, 1/3 or 1/2 EV steps |
-3 to +1 EV, 1/3 or 1/2 EV steps |
|
Slow-sync flash |
1st or 2nd curtain |
1st or 2nd curtain |
1st or 2nd curtain |
1st or 2nd curtain |
|
PC Sync Terminal |
Hot shoe only |
Hot shoe only |
Hot shoe only |
Yes |
|
|
Nikon Advanced
Wireless Lighting support
|
Only with attached SB-800 flash or SU-800 wireless controller | Camera can act
as wireless controller, single group and channel |
Camera can
act as wireless controller with multiple groups, modes and channels |
Camera can act as wireless controller with multiple groups, modes and channels | |
| Playback System |
LCD Size / Pixel Count
|
2.0 in LCD / 130,000 pixels |
2.0 in LCD / 130,000 pixels |
2.5 in LCD / 230,000 pixels |
2.5 in LCD / 230,000 pixels |
|
Enlarged Playback / Scroll
|
1.1 - 4.7x in 10 steps / Yes |
1.1 - 4.7x in 10 steps / Yes |
1.1 - 25x for large images, 19x for medium
images, or 13x for small ones/ Yes
|
1.1 - 25x for large images, 19x for medium
images, or 13x for small ones/ Yes
|
|
|
LCD Monitor Brightness Adjustment Range
|
5 steps |
5 steps |
5 steps |
5 steps |
|
|
Automatic Rotation for Vertical Shots
|
Yes |
Yes |
Yes |
Yes |
|
| Other Features |
Computer Connection
|
Yes, PTP-compliant (v2.0 standard, v2.0
speed) |
Yes, PTP-compliant (v2.0 standard, v1.1
speed) |
Yes, USB 2.0, PTP-compliant (v2.0 standard,
v2.0 speed) |
Yes, USB 2.0, PTP-compliant (v2.0 standard,
v2.0 speed) |
|
Direct Printing (PictBridge-compliant printers)
|
Yes |
Yes |
Yes |
Yes |
|
|
Menu Languages
|
13 (Japanese, German, English, Spanish,
French, Portuguese, Russian, Korean, Italian, Traditional Chinese,
Simplified Chinese, Dutch, Swedish) |
10 (Japanese, German, English, Spanish,
French, Korean, Italian, Simplified Chinese, Dutch, Swedish) |
15 (Japanese, German, English, Spanish, Finnish,
French, Italian, Dutch, Polish, Portuguese, Russian, Swedish,
Traditional Chinese, Simplified Chinese, Korean)
|
13 (Japanese, German, English, Spanish,
French, Italian, Dutch, Portuguese, Russian, Swedish, Traditional
Chinese, Simplified Chinese, Korean)
|
|
|
Camera Default Reset
|
Yes |
Yes |
Yes |
Yes |
|
|
Custom Functions
(Quantity) |
Yes (20) |
Yes (25) |
Yes (32) |
Yes (45) |
|
|
Multiple exposures
|
No |
No |
Yes (2~3 shots) |
Yes (2~10 shots) |
|
|
In-camera image retouching
|
No |
No |
Yes, D-lighting, Red-eye correction, Trim,
Monochrome, Filter effects, Small Picture, Image overlay |
No |
|
|
Remote Control
|
Optional ML-L3 wireless remote |
Optional, compatible with MC-DC1 remote cord
or
ML-L3 wireless remote |
Optional, compatible with MC-DC1 remote cord
or
ML-L3 wireless remote |
Yes, 10-pin remote terminal for optional
MC-20/30/36 remote cords or WT-3 wireless remote |
|
|
Info LCD Panel / Illumination
|
Yes / No |
Yes / Yes (dedicated button) |
Yes / Yes (power switch) |
Yes / Yes (power switch) |
|
|
Number of Command Dials
|
1 |
2 |
2 |
2 |
|
|
Programmable function button
|
No |
No |
Yes |
Yes |
|
|
Ultrasonic CCD dust-removal function
|
No |
No |
No |
No |
|
| Body Structure |
Body Cover/Chassis
|
Largely Plastic |
Largely Plastic |
Unknown, feels more solid than D70 though |
Largely Magnesium Alloy, full environmental
seals |
| Power System |
Battery Compatibility
|
EN-EL3, EN-EL3a (Ships with EN-EL3, 1400 mAh vs 1500 mAh for EN-EL3a) CR2 pack is an added-cost accessory |
EN-EL3, EN-EL3a (Ships with EN-EL3a, 1500 mAh vs 1400 mAh for EN-EL3) CR2 pack is an added-cost accessory |
EN-EL3e, optional MB-D80 battery pack |
EN-EL3e, optional MB-D200 battery pack |
|
Rated Shooting Capacity at 20°C/68F
|
100% AE: 2000 50% Flash: 400 |
100% AE: 2500 50% Flash: 500 |
100% AE: 2700 50% Flash: 600 |
100% AE: 1800 50% Flash: 340 |
|
| Size & Weight |
Dimensions (WxHxD, mm)
|
133 x 102 x 76 |
140 x 111 x 78 |
132 x 103 x 77 |
147 x 113 x 74 |
Weight (body only) |
540 g |
600 g |
585 g |
830 g |
|
| Enviro. | Operating Temperature Range |
0 ~ 40°C |
0 ~ 40°C |
0 ~ 40°C |
0 ~ 40°C |
Operating Humidity Range |
< 85% |
< 85% |
< 85% |
< 85% |
|
| Kit Lens | Focal length / aperture |
18-55mm f/3.5-5.6G ED |
18-70mm f/3.5-4.5G ED |
18-135mm f/3.5-5.6G ED |
- |
| Lens Comp. | Lens Mount / Compatibility |
|
|
|
|