


Overview
Overview, Walkaround and Tech Info by Mike Tomkins and Dave Etchells
Posted: 09/10/2013
Field Test by David Schloss
Posted: 11/04/2013
Updates
09/16/2014: Added information on new silver body color.
12/05/2015: Firmware v4.0 + in-camera focus-stacking!
Last edited: 02/09/2017

---
UPDATE: 02/09/2017:
Want the absolute latest and greatest? If so, you'll want to check out the Olympus E-M1 II, a successor to this camera which brings with it a huge raft of improvements, as you'll find out in our Olympus E-M1 II preview! The E-M1 II is a heck of a camera, and proved that point recently when it scored our 2016 Camera of the Year award as Best Professional Mirrorless camera, but actually went on to take the prize for Best Overall Camera of the Year, too.
Of course, that's not surprising given its heritage. The original E-M1 might not be available direct from Olympus any more, but it's readily available elsewhere, giving you a chance to spend a little less to get the previous-generation model. And just like the E-M1 II, the original E-M1 placed well in our 2013 Camera of the Year awards, taking home both the Best Professional Camera award, and earning mention as a Camera of Distinction among the Best Cameras of the Year.
---
With the introduction of the Olympus E-M1, two birds have been killed with one stone. The E-M1 is both a new flagship for the OM-D series, and a replacement for the long-in-the-tooth Olympus E-5 digital SLR. In one smooth move, Olympus has given the OM-D series a new aspirational benchmark, and answered the concerns of photographers shooting with its Four Thirds-series SLRs, who've long wanted to know the future of their seemingly-dormant format. And it's answered in style, delivering a camera that combines the best of both the SLR and mirrorless worlds, and adds some significant, brand-new features, as well.
The 16-megapixel E-M1 is the first Olympus mirrorless camera with on-chip phase detection autofocus, resolving performance issues when shooting with Four Thirds lenses. It has a mighty-impressive electronic viewfinder which is, in essence, a refined version of the well-received VF-4 viewfinder accessory. It also boasts a higher-resolution tilting LCD monitor, and adds freezeproofing to its roster of element-friendly shooting features. And acknowledging that sharing is key, it sports in-camera Wi-Fi connectivity that's been further refined since we first saw it in the PEN E-P5 compact system camera. And there's so much more.
For Four Thirds shooters, there's no question which feature will be key: The greatly-improved support for their existing lenses, some of which were truly superb. From the start, earlier PEN and OM-D series models have been able to accept Four Thirds lenses via an adapter. The problem was that the shooting experience was degraded, compared to that you'd get when shooting with a true Four Thirds body. Autofocus was slower, and neither continuous AF nor tracking were possible when shooting with an adapter. For certain lenses, autofocus wasn't possible at all. The reason: Four Thirds lenses were designed for use with phase-detection autofocus, and Micro Four Thirds cameras used only contrast-detection.
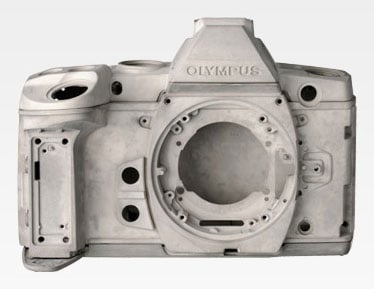
The Olympus E-M1 changes all that, pairing contrast-detect autofocus with on-chip phase-detect. In the process, it makes the jump to Micro Four Thirds a much more palatable proposition for photographers who want to keep shooting their Four Thirds lenses. (And if you've already accepted the compromise and made the jump, upgrading to the E-M1 will make shooting with your Four Thirds glass fun again.)
The Olympus E-M1 doesn't just appeal to Four Thirds shooters, though. As the new flagship and object of desire for Olympus' interchangeable-lens camera lineup, the E-M1 is packed with features that will appeal to enthusiasts and pros alike.
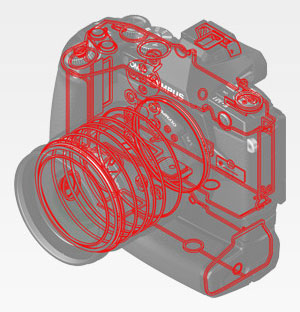
As you'd expect, the magnesium alloy body of the E-M1 is fully weather-sealed, but it's now freezeproof as well. It also includes the clever 2x2 Control Dial system introduced earlier this year with the PEN E-P5. And while it's a little larger than the E-M5 -- due in no small part to a much more prominent, SLR-like handgrip -- it's also a whole lot smaller than the E-5.
Inside, there's a generously specified electronic viewfinder that aims to make converts of optical viewfinder fans. Olympus has also included its five-axis, in-body image stabilization system, as well as a refinement of the Wi-Fi wireless networking feature-set -- including advanced remote control capability -- that was introduced in the E-P5 mirrorless. And there's plenty else besides in Olympus' most capable mirrorless camera to date, as you'll see in our walkthrough and shooter's report below.
Available since October 2013, the Olympus E-M1 initially shipped body-only, with pricing set at around US$1,400. [Click here for recently released firmware v4.0 results with focus stacking!]


Walkaround. The Olympus E-M1 shares a similarly retro styling aesthetic with the earlier E-M5, but from all angles looks much more feature-packed. A panoply of controls -- many of them programmable -- sprout from almost every surface. It's a very slight 0.1-0.2 inches (6-8mm) wider and taller than the E-M5, and 0.8 inches (20mm) deeper.
Loaded and ready to go, body weight is some 17.5 ounces / 497g, about 2.5 ounces (72g; 17%) heavier than the E-M5. Compared to the older E-5 (31.5 ounces / 892g), though, body-only weight is around 27% less, giving a pretty significant advantage in portability over the SLR model.

Seen from the front, the most striking change is the new handgrip. It gives the Olympus E-M1 much more SLR-like handling, and explains the increase in depth. We're big fans of this new grip, which makes it much more comfortable and secure in-hand.

Don't be mistaken in thinking it bulky, though: the SLR-like looks are somewhat deceiving. Even with the handgrip, it's still 0.2 inches (6mm) less thick than the smallest SLR on the market -- the Canon SL1 -- despite that camera's extremely shallow grip. The modest depth of the mirrorless body makes the E-M1's grip seem much deeper than it truly is.
Where the E-M5 had just one control -- the lens mount release button -- on its front surface, the E-M1 sports three. Directly across the lens mount from the release button are two new controls, nicely positioned for fingertip access. One is for depth-of-field preview, and the other for one-touch white balance. A dimple on one button helps to distinguish them by touch.
Another new arrival on the Olympus E-M1's front panel is a flash sync terminal, located at the top left corner (as seen from the camera's rear), right where the AF assist lamp was on the E-M5. That lamp has now jumped across the lens mount in the E-M1, and sits alongside the OM-D logo, snug against the top of the handgrip. The deep sculpting at the top of the grip ensures your fingers won't accidentally stray and cover the lamp.
Switching to the top deck, it's apparent that the Olympus E-M1's body hasn't grown much in thickness compared to that of the E-M5. The greater depth is accounted for simply by the new handgrip, and a slightly more generous eyecup for the electronic viewfinder.

As in its predecessor, there's no popup flash strobe. Instead, you're reliant on external strobes (the tiny FL-LM2 flash is included in the bundle) to throw more light on your subject, and as an alternative to the front panel's flash sync terminal, a hot shoe at top center caters to these.
To the left of the hot shoe are the Power switch, AF / Metering mode button, and Drive mode / Self-timer / HDR button. (Fans of HDR photography will doubtless appreciate not having to dig for this in the menu system.) The Power switch location is, admittedly, a bit unusual. It probably makes more sense than the location used in the E-3 and E-5 digital SLRs, and mirrored in the OM-D E-M5, though. All three cameras placed the switch at the bottom right corner of the rear panel. Sitting snug alongside the viewfinder hump as it does, the E-M1's Power switch should be less prone to accidental operation.
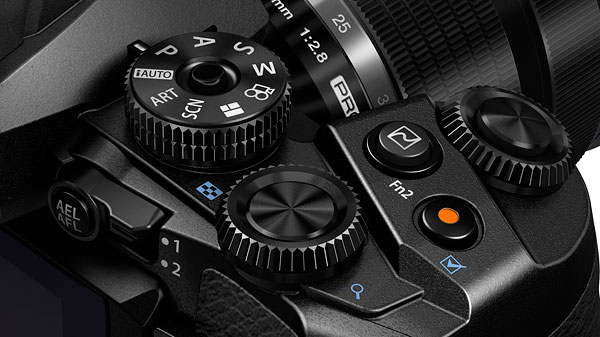
On the other side of the hot shoe, you'll find a cluster containing all of the controls from the E-M5's top deck. There's a locking Mode dial, twin dials with which to control exposure variables, plus the Curves and Movie buttons. Cleverly, the Mode dial locks with one press of the button, and unlocks with a second press, so you can leave the dial free to spin if you expect to be changing modes in a hurry. The Shutter button sits in the center of the front dial.
A nice touch is that the Olympus E-M1 adopts the 2x2 Dial Control system which debuted on the E-P5. This lets you adjust the function of the front and rear dials with a flick of a special lever encircling the Autoexposure Lock / Autofocus Lock button, which sits just to the right of the electronic viewfinder and directly behind the Mode dial. On the other side of the viewfinder is a Display button, used to manually toggle between the viewfinder and monitor being active. The E-M1 can also switch these automatically, courtesy of a proximity sensor which sits just right of the viewfinder window.

The electronic viewfinder itself, incidentally, is related to the VF-4 external viewfinder which debuted alongside the E-P5 compact system camera. That viewfinder was truly superb, pairing extremely high resolution with a very generous magnification. The built-in viewfinder on the E-M1 is even better, because it now adjusts the backlight level to account for scene brightness. Previously, the backlight illumination was constant, and the viewfinder's LCD panel was used for brightness control. The result is that the brightness no longer appears to ebb and brighten as it did with the VF-4.
The new viewfinder also has more dynamic range, and pretty minimal latency. Olympus is rightly proud of the optics used, which control chromatic aberration nicely, even in the corners. Of course, all of this has minimal effect on your final images, but it makes for a much more optical viewfinder-like experience -- important given that Olympus is courting converts from its long-dormant DSLR line.
Between the viewfinder and flash hot shoe is Olympus' proprietary Accessory Port 2, seen in several past OM-D and PEN-series cameras. This allows attachment of a range of accessories, all of which sit in the hot shoe above, and so preclude use of a flash strobe. These include several electronic viewfinders (the only reason you might want to use these would be for shooting at low angles, since they can be tilted), the SEMA-1 external microphone adapter, MAL-1 Macro Arm Light, and PP-1 PenPal Bluetooth adapter.
Beneath the viewfinder sits a 3-inch articulated Live View monitor, which like that in the E-M5 can be tilted upwards 80 degrees, or downwards 50 degrees. It's not the same OLED panel used in the M5, however. The E-M1's monitor is an LCD and has a higher resolution of 1037k dots. It includes a capacitive touch overlay, similar to those found in modern smartphones.
An array of controls line the right side of the LCD, but thanks to the relocated Power switch and the slightly wider body, they feel much less cramped. Buttons include Menu, Playback, Delete, and Info, as well as a four-way controller with central OK button. Beneath the button cluster, and just to the right of the Delete button, there's a small three-hole grille for the E-M1's speaker. There's also a Fn1 button at top right, sitting on a long and steeply-raked triangular bevel that also serves as a thumbgrip.

On the left side of the camera body, you'll find a strap lug, which unfortunately uses a metal-on-metal D-ring, a design we've oft commented on because it tends to make noise during video capture if there's a strap attached. Beneath sit two rubber compartment doors. The top covers a new external microphone jack. Beneath, the second door covers the combined USB and standard-def A/V port, and the high-definition HDMI video output. You can also see the left port for the built-in stereo microphone, located on the side of the viewfinder hump. Gone is the speaker grille from the E-M5, relocated to the rear panel.

And finally, the right side of the body -- shown here mounted on the optional portrait grip -- is largely featureless. There's a second neck-strap lug with D-ring, the second port for the stereo mic, and an access door for the Secure Digital card slot, which is compatible with UHS-I and SDHC / SDXC cards.
It's also worth noting that the portrait grip replicates the twin dials of the camera body, letting you continue to use the 2x2 Control Dial system regardless of orientation. It also has two Function buttons of its own, and a locking lever that ensures you won't accidentally bump its controls if you're shooting in landscape orientation.
Shooting with the Olympus E-M1
by David Schloss

The Olympus OM-D E-M1, the company's flagship Micro Four Thirds camera borrows heavily -- and successfully -- from the company's historical pedigree. Fans of the film-based OM-1 will clearly recognize the shape of this camera. From the stout pentaprism box (which now houses a stunning electronic viewfinder) to the mechanical dials, the OM-D E-M1 evokes the lineage of great Olympus cameras while moving that form factor into a new era. You better believe I was excited to review this mirrorless model that boasts pro-level capabilities.
Size vs. image quality. In fact, almost everything about the E-M1 screams professional, despite the fact that Micro Four Thirds models have often been questioned about their ability to deliver pro-level images with such a relatively small sensor. But on the other hand, most APS-C and full-frame DSLR cameras are larger and heavier, and most people end up leaving them home on a day-to-day basis, only bringing them out for special occasions. The result is that many important photos get taken with cellphones or with compacts -- both of which have vastly smaller sensors than do Micro Four Thirds cameras.

The MFT world then is about tradeoffs, balancing the power of a small camera system that can go anywhere against the image quality that's not quite what a bigger camera system could offer.
This same issue played out in the SLR and medium format markets a few years ago. When I started in photography, just about every commercial shooter had and used a medium format camera for important studio-quality shoots, but as DSLR quality improved, the idea of lugging around 5-plus pounds of camera didn't seem as important any more.
This history lesson is more important when you look at the form factor of the Olympus OM-D E-M1 because it's clearly designed to function like a professional rig and it comes with a professional price tag. At about $1,400, the OM-D E-M1 body is more expensive than prosumer DSLRs like the Nikon D7100 and Canon 70D, and just a little less expensive than the full-frame Nikon D600 and Canon 6D.
Who the E-M1 is for. That makes two likely users for the OM-D E-M1. The first is the professional shooter who's been wanting a smaller, lighter system that doesn't skimp on manual controls and offers the best image quality possible for its size. The other user is the Micro Four Thirds system owner who's looking to take his photography to the next level with more pro-type controls yet doesn't want to abandon his investment in lenses or gear.
In both cases the OM-D E-M1 is a great solution, although as with all compromises we'll see that there are other great solutions in the Micro Four Thirds line as well. This brings up an interesting point: The Olympus OM-D E-M1 (I'm going to just refer to it as E-M1 going forward) is an expensive, pro-level camera in a market filled with much less expensive, but still very high quality alternatives. While it's certainly better built and more fully featured than any Micro Four Thirds system we've evaluated to date, the end user will have to carefully consider whether or not these advantages are worth the hefty price tag.
A professional-grade camera? In DSLR systems there's quite a wide range of performance available between an amateur camera and a pro camera. Professional bodies tend to have more powerful autofocus systems and motors, more sophisticated metering and better image processing engines. However, in my opinion, Micro Four Thirds cameras have less variation from the lower-end to the higher end. Since the lenses were designed to work well in this digital era they focus quickly and accurately across the models with less difference in image quality and performance than I've seen with DSLRs. For example, I've also been testing the Panasonic G6 which costs half the price of the Olympus E-M1, but has very good image quality and performance for its price. It's definitely an amateur, or enthusiast consumer, camera, so what makes the E-M1 a truly pro model?
I've always been wary of the term professional being ascribed to a camera -- I know professionals that shoot with point-and-shoots and create stunning images, and enthusiasts that shoot with top-end DSLRs and create uninspired, poorly composed photos. But the industry has ascribed a certain number of features that we can agree belongs to a professional camera, namely: a durable and weatherproof design, tons of physical controls with direct access to key settings, good ergonomics, an excellent sensor-and-processor combination that autofocuses quickly and delivers sharp images; and the ability to expand the system with a wide range of accessories.

The OM-D E-M1 succeeds on all counts. With the OM-D E-M1 Olympus has delivered a truly professional level camera in the Micro Four Thirds arena, with perhaps the Panasonic GH3 (which is especially popular among pro videographers) as its top rival. The E-M1 is splashproof, freezeproof and dustproof, with a magnesium alloy chassis and watertight ports. The heft of this camera is impressive, without a lens it weighs more than a pound and is more than 5 inches wide. However, it's still vastly smaller than my Nikon D3s. Somehow the E-M1 feels like its both huge (for a MFT model) and diminutive (for a pro model) at the same time.

'Kit' lens. Concurrent with the launch of the E-M1, Olympus rolled out a beautiful new piece of glass, the M.Zuiko Pro 12-40mm f/2.8, which was our primary lens for testing (other than for lab shots we normally shoot with prime reference lenses). Regardless of what Micro Four Thirds camera you use, this lens is a stunner and it produced incredible images throughout our tests. Of course, it does so at an additional $1,000, meaning that the photographers ponying up for the E-M1 and the 12-40mm f/2.8 will likely part with more than $2,000 before they've left the starting gate. See our review of the Olympus 12-40mm f/2.8 lens on SLRgear.com.
Four Thirds compatibility and performance. Speaking of lenses, one of the biggest selling points about the Olympus E-M1 is its improved performance with Four Thirds lenses, thanks to the camera's on-chip phase detect autofocus. Previous Olympus models have long been compatible with Four Thirds lenses by using an adapter, but such pairings were notoriously sluggish and limited.
The IR Lab tested the E-M1's AF speed mounted with an Olympus 50mm f/2 Zuiko Four Thirds lens and adapter, and the report is truly good news for photographers who have made significant investments in Four Thirds systems. The E-M1 proved to be almost four times as fast as the E-M5, clocking an average AF speed of 0.528s compared to 1.983s with the Zuiko 50mm f/2 Four Thirds lens. And the E-M1 was no slouch when compared to the company's last Four Thirds camera, the Olympus E-5, which autofocused in an average of 0.435s using its phase-detect AF system (and a comparison worst 2.148s using its contrast-detect AF system). If you've been waiting for a new camera to take advantage of your Four Thirds lenses, the E-M1 definitely fits the bill.
LCD monitor. The rear of the E-M1 features a 3-inch, 1.04M-dot display that's bright and clear, but somehow feels small due to the thick black bezel that surrounds the display (likely to give support to the pivoting mechanism). The entire articulating panel measures 3.5 inches diagonally, so it feels like a lot of the display space is not being used as it could be.

The LCD screen has touch capabilities and uses capacitive technology (like an iPhone) rather than older-style pressure-based (resistive) touch control. The result is that it's possible to navigate the controls with some limited gestures. The screen is bright and clear enough to view in direct sunlight, although with some reflections from the polished glass covering. As mentioned the LCD screen on the E-M1 articulates so I'd often tilt the screen during image review for better visibility.
The articulation of the screen is good, though its movement is less than what some other cameras offer. The screen can pivot flat for a heads-down view during low level shooting and it can tilt about 45 degrees for overhead shots, but it's not possible to rotate the screen around for self-portraits or video preview work, nor is it possible to use the articulating display when shooting in portrait mode.
The E-M1 boasts touchscreen control for some features, including touch shutter. This allows the E-M1 to trigger the shutter simply by tapping on the LCD screen. This makes the E-M1 a terrific camera for the shy street photographer as it's possible to look down at the viewfinder as if reviewing photos and actually capture images. However, overall the touchscreen functionality of the camera is severely limited, especially when it comes to menu navigation. More on this later.
Electronic viewfinder. However, it's the camera's electronic viewfinder that's the star of the LCD show here with its 100% coverage, 1.48x magnification and 2.4M-dot resolution, a big upgrade over the E-M5's 1.15x, 1.4M-dot EVF. I've long said that the optical viewfinder's lifespan is only as long as it will take for EVF systems to become so good as to provide more benefits than glass.
With the E-M1 we are getting tantalizingly close. The display is incredibly crisp and accurate, vibrant and "realistic." And there are some benefits to having such a great EVF. First is real-world DOF preview. Unlike with an optical viewfinder in an SLR there's no decrease in brightness when previewing small aperture settings.
Another benefit is the ability to see overblown highlights directly thanks to a more accurate representation of what the sensor is going to capture. If I point the camera at a lamp in my bedroom with delicate vertical strips of bamboo running in front of rice paper, I can see if the light will be so overexposed as to wash out the bamboo strips. Likewise if I point the camera at a tree with the leaves against the sky, I can tell if the sky will wash out the detail. With an optical viewfinder I have to use my inherent understanding of the dynamic range of the camera to guess this.
Of course there is also the advantage of being able to overlay shooting data on top of the image HUD style, which makes it much easier to compose images while keeping an eye on settings. The EVF in the E-M1 is the best I've used and it shows how far this technology has come and how soon it will be until it is ubiquitous.

One odd note, the E-M1 has the clunkiest implementation of a level indicator I've seen on a mirrorless system that has this feature, but for a good reason. The E-M1 shows level not just horizontally ("roll") but also with regard to camera tilt ("pitch"). Most systems simply display a bar across the display and that bar turns green when level, but they ignore the tilt of the camera. This system indicates both axes, but it does so at the expense of a lot of screen real estate (it's much less intrusive to have a small line across the plane than a beveled display with a series of dots). I wish that Olympus would have used the common small thin line for horizontal level and another indicator for camera tilt, freeing up more of the screen.
A closer look at the physical controls. Arrayed across the E-M1 are numerous buttons, switches and dials. At first blush the control layout seems excessive and chaotic, but it actually all makes sense.
To the right of the display is a pretty standard array of buttons: Info, Menu, Play, Delete and a four-way arrow pad with central OK button. Moving up from those controls though the camera starts to get more unique. On the far right edge of the rear panel is a function button, to its left sits a unique "2x2 Dial Control" function lever that works in conjunction with the two top control dials (but also a few other controls; more on this in a bit) alongside a AE-L/AF-L button. On the other side of the finder is a control button for the camera's display. On the top deck the right side is tightly clustered with the shutter release and front control dial, a Fn2 button, a one-touch Movie record button, rear control dial, and locking Mode dial with full PASM control, among other goodies.
Locking Mode dial. Before I move on to the rest of the controls I want to take a moment to thank Olympus for their locking Mode dial. In many reviews I rail against the lack of locking mechanisms on these dials because they always seem to change position when a camera is removed from a camera bag, resulting in incorrectly exposed shots. I can't count the number of times I've found myself in manual exposure when I thought I was in aperture priority.
The Mode dial on the E-M1 locks in place when a center button is depressed. A satisfying click lets you know the dial is locked. Pressing this button again unlocks the dial, and while it's still possible for this to unlock in a camera bag, it's much less likely. Indeed, it's a smart solution to a common problem that some other manufacturers don't even address.
Drive/HDR and AF/metering buttons. To the left of the dedicated flash shoe (which has an accessory port beneath it) is an On/Off switch and a round raised selection of buttons that do split duty. One button is labeled with icons for frame rate control, self-timer and HDR, while the other button has icons for autofocus control and metering. Press the button that has an icon for drive mode and HDR, and the camera's front control dial switches between different HDR and bracket modes while the rear dial controls frame rate. Press instead the AF/metering button and the front dial controls the metering while the rear controls the AF.
This smart layout doubles the functionality of the control dials, and prevents the need for more dedicated buttons like the small buttons found on a high-end Canon. In practice, I found it a bit confusing during shooting: First I had to remember which of the two buttons controlled which one of the four functions I wanted, and then I had to remember which dial controlled which half of the equation. It might have been easier to simply place four buttons here, each one with a dedicated function, but I suppose over time a photographer will get used to it.
Power switch on left side? In one last note on the top left controls, the placement of the On/Off switch on the left side is an odd and -- I think -- incorrect choice. With the power switch on the right, which is conventional placement, it's possible to take a camera from a bag or from a position slung on a camera strap and to bring it up into shooting position while flicking on the power with one finger. This isn't possible with the E-M1, and either two hands -- or one hand and an awkward reach-around -- is required to switch the camera on. I can't stress enough how much I dislike having the power switch on the left side of the camera and I think many photographers will feel the same.
"2x2 Dial Control" function lever. This lever on the back panel drew immediate attention from me. What exactly does it do? I wondered. The answer is: "It depends." The basic idea is that the switch instantly changes the use of the two control dials (and a few different buttons) on the camera. Diving into the custom menus on the camera, there are five different modes for assigning custom functions to the lever and dials/button (as well as some unchangeable defaults, depending on the mode). For example, in the primary lever position (1), at default the front and rear dials are set based on the exposure mode -- for example, in aperture priority the rear dial controls f/stop and the front dial controls exposure compensation -- but flip the lever to the second position (2) and the dials control ISO and white balance. In another mode, the second lever position assigns the Fn2 button for setting ISO and the Movie record button setting white balance.
It's a bit confusing to use at first, but provides a great deal of quick-switch customizability for fast changing shooting situations once you master it. Again, with all of the E-M1's customization options, there's a rather steep learning curve -- but it's worth it. When you buy a camera of this caliber you have to expect it will take a few months at least to become familiar with all it can do.
Handgrip and grip-top control layout. The front of the camera features a beefy, solid and well-designed handgrip. The position places the shooting finger directly on the front control dial and the angle of the grip places the thumb across the rear control dial.
In fact it's while holding the camera that the rather unusual button layout comes together. The buttons between the control dials are on an angled strip of chassis that puts them above and in line with the shooting finger. The side Fn button can be accessed easily by the thumb, which is also positioned to change the Mode dial, flip the 2x2 function switch and also hit the AE-L/AF-L button. I'm thrilled that Olympus has designed the E-M1 with so many dedicated buttons to directly access camera settings, as well as the option to program most of them (and a couple Fn buttons, too) to your heart's content. This camera simply gives a serious photographer -- whether pro or enthusiast -- a ton of flexibility.
One feature that may seem lacking on the E-M1 is a custom setting mode (or two) right on the Mode dial. After all, it's great to be able to configure an array of settings and assign them to a custom mode that can be activated with a turn of the dial. However, Olympus handles this rather unusually with its Mysets custom setting system. You can assign any position on the Mode dial -- from iAuto to Manual to Photo Story -- with a Myset group of shooting settings (drive, focus mode, white balance, ISO, etc.). It's ideal for replacing modes you may not often use, such as iAuto or the Photo Story in-camera collage creator.
How does Mysets work in the E-M1? Get the camera set up exactly the way you want (optimized for a certain shooting situation), then go to the Reset/Myset menu and assign thus group of settings to one of four Myset slots. Once that's done, go to Custom Menu B (Button/Dial/Lever) and dive into the Mode Dial Function sub-menu, and assign your just-created Myset to a Mode dial slot. Any time you turn to that mode while that Myset is active, you'll be shooting with that group of settings rather than the original mode. It's a bit confusing at first, and exactly how this all works unforunately is not detailed in the Owner's Manual, but it does give you four custom Mode dial slots rather than the one or two most advanced cameras have. My fear is I'd put the E-M1 down, forget how I set it up, and then pick it back up days later and miss all my shots because I thought I was shooting in regular Aperture-prioritity mode.
Two ingenious buttons on the front. On the front of the camera are two ingenious buttons, one with a long history in photography, and one that's more recent (and comes from the video world). That first button is the depth-of-field preview, something that has been given a boost by the modern mirrorless design of MFT cameras. Press the DOF preview button and the display shows the effect of a smaller aperture without dimming the image, unlike an optical system.
In practice, I rarely used the DOF preview in DSLRs because it was just easier to bracket a few shots quickly. But with the DOF preview on the Olympus E-M1, it's easy to see the effect of an aperture setting without committing to it -- a feature that's especially handy for new shooters.
The other button should be on every digital camera, and that's the One-Touch White Balance button. Press the button and the camera display instructs the user to put a white sheet of paper in front of the lens. Press the shutter release and the white balance is captured and can be assigned to one of three custom slots.

Menus and endless modifications. The menu system on the E-M1 provides modifications for just about every possible camera feature. In fact, it's advisable to spend a good amount of time reading the manual on this camera before diving in -- there are so many settings that can be modified that it's good to know what's possible.
Despite the pretty blue background on the menus, the options are made up of lists of small lines of text, which can be hard to read. The camera has two shooting menus, a playback menu, a custom menu and a setup menu. The custom menu is the longest with 11 sub menus and tons of choices for each option in each sub menu. There are thousands of permutations here, and for the pro shooter or advanced enthusiast, this is the part of the camera that's most interesting (but also somewhat daunting).

Virtually everything on the Olympus E-M1 can be modified, from the camera's frame rate to the default shooting modes to warning indicators for battery capacity to dial direction. This is by far the most modifiable Micro Four Thirds camera that I've ever tested. Oddly, the menus can't be navigated by touch; touchscreen control would have been great. Interestingly, though, the menus can be navigated using the front and rear control dials, which is quite a bit faster than using the rear control dial alone -- until you find yourself a few levels down into something like the Date/Time setting and can't figure out how to go back.

There's also a Super Control Panel that's available during shooting. Just press the display button and you'll see most major camera settings. Be warned that you have to first press the OK button on the rear arrow pad before being able to jump in and change your settings. From there it's possible to jump to most any setting on the camera for quick modifications using the front and rear control dials. Unfortunately, there's another touchscreen limitation here. While you can use the touchscreen here to access the function you want to set, you can't cycle through that function's settings by touch -- you have to use the control dials.
SuperFine JPEGs. Speaking of custom settings, the OM-D E-M1 comes with a SuperFine JPEG setting that's not immediately obvious. If you get the camera as factory shipped, or after it's been reset, you can only activate the SuperFine JPEG setting by going to Custom Menu G and selecting the picture resolution choice (the first option). You then choose the camera's working set of four JPEG resolutions -- a combination of file size and compression -- ranging from Large SuperFine to Small Basic. These four resolutions are the ones you'll be able to use when shooting, and switching between them (thankfully) is simple using the Super Control Panel.

For RAW shooters, this won't matter much (unless you shoot RAW+JPEG!), and subjectively you may not notice any difference between Fine compression and SuperFine. But for those looking for the best image quality, SuperFine definitely serves up better JPEG images than the default Fine, and you can see a noticeable difference in the file sizes.
Shooting experience. In reviewing the Olympus E-M1, I ventured out to New York City's Union Square Park and Washington Square. I chose them because there's a farmer's market full of color at Union Square and interesting people at Washington Square. Also, my roots in photography came from street photography and I wanted to see how the E-M1 was up to this task. When I was in college in New Jersey I had a girlfriend with relatives that lived near Union Square. I'd often wander around there photographing people to hone my skills. So going with a supreme urban camera back there seemed good.
I also shot at a fire parade in my hometown, too, because I have a three-year old and he likes parades. That's reason enough, isn't it?


Metering and exposure. While out shooting with the E-M1, the metering in the camera felt spot on in almost all situations, from inside low-light rooms to full sun. This is another strong advantage the E-M1 has over other models, as its metering system seems unfazed by any conditions, and consistently produced well-balanced images.
The metering mode has two particularly handy settings -- Spot Highlight and Spot Shadow. Sometimes the best exposure comes not from picking out the subject, but picking out the brightest or darkest part of the scene and letting the camera expose accordingly.
Generally I found the E-M1's exposure system to perform as well as most other professional camera systems I've tested, including full-frame systems from Nikon and Canon. With that said, images from MFT cameras have historically tended to underperform in low-light/high ISO situations when compared to those from bigger-sensored cameras. However, I have to admit that -- in dark settings -- the E-M1 outperformed other Micro Four Thirds cameras that I've tested hands down. That's not to say that the camera's high-ISO images are noise-free, but they proved to show a very pleasing balance between detail and noise that rivals high-ISO images from bigger-sensored cameras.
Image stabilization. In my shooting excursions, I came to truly appreciate the E-M1's five-axis image stabilization built into the camera body. As opposed to a lens-based system, it's available at all times. That means that any lens, be it Micro Four Thirds, Four Thirds or a vintage lens connected by an adapter has stabilization. That also meant that my images were consistently sharp at all f/stops, with very few instances where I saw any motion shake in my photos.
The camera's sensor-shift image stabilization system works well when shooting video, too, and the results were handheld movies that were virtually jostle free. It helps, of course, to be a stable shooter to begin with, but providing there isn't a huge amount of photographer motion at play, handheld videos shot with the Olympus E-M1 proved to be still and calm.


Autofocus. I really hoped the E-M1 would feel like the fastest, most high-performing MFT camera I'd ever used, but in practice I felt like it could still be quicker. Don't get me wrong -- the E-M1 is very fast. It just didn't feel that much faster than other excellent mirrorless models I've shot with, including the Panasonic G6 and GX7. But maybe I just wanted more because I was cradling a pound-and-a half of camera and lens (bigger than most MFT systems) and I expected it to blow everything else away.
IR Lab tests show that the E-M1 is indeed faster than the G6, for instance, clocking in at a lightning full autofocus (single-area AF) speed of 0.139s compared to the G6's 0.216s. Similarly, the E-M1 bested the G6 in our AF timing tests across the board. In fact, it's faster than most enthusiast-level DSLRs. However, in real-world shooting situations, both the E-M1 and G6 autofocusing systems are so fast I couldn't notice a significant difference.
The Olympus E-M1 allows for a number of standard focusing systems -- single focus, continuous and continuous with tracking. When in continuous focus with tracking, the camera uses phase-detect pixels on the image sensor, which theoretically speed up focus and allow for constant tracking of a moving subject with high levels of precision. This is something that contrast detection is notably bad with, so having phase detection to bolster the continuous tracking modes makes a huge difference, and in my shooting experiences, worked great.

The problem from a testing standpoint is that phase detect only works with MFT lenses in the continuous tracking mode, so it makes it difficult to compare between lenses. (No subjects ever move the same way twice.) But what I found was that the E-M1's rock-steady tracking mode could quickly and reliably follow subjects across a variety of situations. As the parent of a three year old, I'm a master of erratic subject behavior photos. A toddler never moves in a straight line, and unlike the sports I shoot (mostly cycling), a running child provides a great deal of confusion to a camera. However, I found the Olympus E-M1's AF to perform quite well despite the zigs and zags of my son.

I did, however, find one minor issue that occasionally threw off the camera's continuous AF: the subject selection. I photographed a group of kids playing basketball and the lead player dribbled before taking a run on the basket. The camera picked up the motion of the basketball as the subject, and while the player stood and dribbled the ball I watched the focus point bounce up and down on the viewfinder.
Performance. When it comes to burst shooting, the Olympus E-M1 is blazing, likely the fastest MFT camera I've shot with so far -- and by far. From a benchmark standpoint it does some incredible things, including 10fps continuous shooting capable of capturing 39 RAW files before the buffer fills (the lab managed 50). Even shooting in SuperFine+RAW, I easily caught 20 shots in a clip without hitting the buffer limit, and could've probably shot more (the lab captured 34). Note that in 10fps mode, autofocus and exposure are locked at the first frame of a burst. For continuous autofocus and exposure, you'll need to drop down to 6.5fps, still pretty fast.
More importantly, during any type of shooting, the camera never struggled to catch up with me. I found startup to be instantaneous, files were written to the card quickly and there was no sense of "hurry up and wait" that other cameras often force upon you. It's clear to me, this is an area where Olympus engineers spent a lot of the work on the camera, and I'm certain that the E-M1 could be used everywhere from a sporting event to a studio without missing a beat.
Image quality. In the end, I had the same feeling about the images I shot with the OM-D E-M1 that I have with all the other top-level cameras in this class -- provided that your image is well and evenly lit, it can produce an immaculate photo. Looking at our lab JPEG test shots of the E-M1 against bigger-sensored cameras such as the Nikon D7100 and Canon 70D, the smaller-sensored Olympus actually edges them out in perfect conditions. And in my subjective tests against other MFT models like the Panasonic G6 and GX7, the E-M1 produces a better image with more sharpness, detail and accurate colors.
But it's important to mention that in areas where high dynamic range are needed, the E-M1 is not going to match up against most larger-sensored cameras. Even in our lab test images, some areas (like where leaves appear behind the beer bottles in our Still Life target) plunge quickly into blurry shadow. Again, that's something that's true across the MFT spectrum, though the E-M1 fares better than most.

In the field, when I'm shooting with subjects that are partially shaded or in mixed lighting environments, it's easier to spot the limitations of smaller-sensored cameras, even though the E-M1 ranks at the top of this class. If I'm spending $500 on a backup mirrorless system, I'm not so worried about nailing the highlights and shadows and maximizing the dynamic range -- I'm not expecting pro results. But once a camera's price point breaks the $1,000 barrier, I'm definitely going to be more critical and demanding. I want to be wowed. And in many cases I was wowed with the E-M1. But in some others, I wish I had a full-frame camera at my disposal instead.
Special creative modes. The Olympus E-M1 comes with a variety of special shooting modes and creative filters to add dramatic oomph to your images. The most notable one is the Color Creator feature that allows you to change hue and saturation in the EVF and preview the effect before you capture the shot. This ranges from Vivid, Natural and Monotone picture modes to High and Low Key effects, as well as B&W filters. I don't add effects such as these much to my own shots, but I can't deny that this is very cool for those who'd use it.
One of the new Scene modes I was especially interested in was the Hand-held Starlight mode, which creates an eight-shot composite designed to reduce noise and maximize detail when shooting at night outdoors or indoors in low-light. I found that this mode forced a -0.3EV compensation on any images I took, and I couldn't make EV adjustments manually. At first when looking at the EXIF, I thought I had made a mistake, but looping through the other scenes, I found that the camera makes similar automatic EV adjustments, including Night Scene and Night Portrait also at -0.3EV, Sunset at -0.7EV, Fireworks at -1.00EV, and Beach/Snow and Candle at +0.3EV. Unfortunately, there's very little in the manual that explains how these Scene modes work, and exactly how these values affect the camera's processing.
For the Hand-held Starlight shots (below), I worried that the shot would turn out too dark, but the gains in detail and noise reduction -- as you can see below -- were well worth it.
| Olympus E-M1 - Hand-held Starlight mode | |
 |
 |
| Program Mode | Scene Mode - Hand-held Starlight On |
 |
 |
| Program Mode detail (100% crop) | Hand-held Starlight detail (100% crop) |
|
Hand-held Starlight mode rapidly fires eight sequential shots and merges them into one image to minimize noise during tricky nighttime or high ISO conditions. Glancing at the images side-by-side (top) it's hard to see the difference, but when you zoom in and pixel peep it's a much different story. Here we see a huge difference in noise levels, almost akin to shooting at a lower ISO. The Starlight crop on the right shows a very reasonable amount of noise for such low light, while the regular Program mode crop on the left shows quite a bit of noise, the kind that would certainly not help out an 8 x 10 print. (Clicking any of the above images will take you to the full resolution image and allow you to see the results of this mode in even more detail.)
|
|

Panorama. The OM-D E-M1 has perhaps the most disappointing panorama mode in any MFT camera I've reviewed. Instead of creating a panorama from a series of images taken while the camera is panned across a scene, the E-M1 simply takes a normal series of photos, providing only an on-screen grid to help line up the shot.
Some other cameras with a similar lack of in-camera stitching go so far as to display the previously shot pano frame in the grid of the next frame to help line up the image, but instead the E-M1 creates a static grid. In practice this is no more helpful than simply capturing a series of images without a grid.
HDR. The E-M1 also features two HDR modes. The first is in-camera HDR that takes four pictures at a range of exposure values and creates a composite image. It's available in two strengths, HDR1 which makes a more subtle image and HDR2 which is more dynamic. What's nifty is that you can preview the in-camera effects, just like you can with the Color Creator. The second HDR mode is simply a bracketing mode that takes three, five or seven photos in your choice of EV steps. The built-in HDR output left me a bit flat -- just as flat as the images were (see below) -- so I'd recommend using the bracketing batch modes and using Photoshop to create your own HDR effects.
| Olympus E-M1 - HDR modes |
 |
 |
|
The E-M1 provides two different in-camera HDR strengths, HDR1 (top) with subtle changes in dynamic range and HDR2 (bottom) which has a more dramatic effect. Neither were bad, per se, but we think you'd be better served by using the camera's bracketing for HDR post-process mode and create the images in Photoshop yourself.
|
Video. Movies recorded with the E-M1 are generally good -- better than what Olympus achieves in its lower-end PENs, for example, and very similar to the higher-end E-P5 -- but not great like the Panasonic GH3. That's primarily because the company hasn't focused much on delivering robust video capabilities in its MFT cameras. (In a recent interview with Olympus, company executives admitted that high-quality still imaging has been their primary goal, and that they haven't invested much in video technologies -- yet.)
Full HD shooting is limited to 1920 x 1080 at 30 frames-per-second -- that's it, no smooth 60p or even film-like 24p. The camera does allow for connecting an external mic for better audio, which is nice but expected on a camera in this class. You can also shoot Time-Lapse Video at reduced resolution, and record in Aperture-priority, Shutter-priority and Manual exposure modes. If Olympus could just have put a bit more into the E-M1's movie-making skills, the camera really could have been a professional's dream come true. As it stands, the camera is merely decent for recording consumer-level videos.
That said, the movies I shot with the camera were reasonably crisp but had some minor artifacting. The only truly odd video effect I observed came when shooting a firefighter parade. The shiny decals used on the side of trucks created a moire-like pattern, perhaps due to the lack of the low-pass filter on the sensor.
Stay tuned for a more in-depth evaluation of the Olympus E-M1's video capabilities.

Wi-Fi. The E-M1 comes equipped with very advanced, built-in Wi-Fi capabilities, most notably a robust set of controls for remote shooting with your smartphone, as well as "Smart & Easy" QR-code-based pairing of the camera to your phone.
At first when I downloaded the free Olympus Image (O.I.) Share app on my family's iPhones running both iOS 6 and 7 -- the app is also available for Android devices -- I had trouble getting it to pair the E-M1 with them. And I wasn't alone, just look at some of the feedback on the apps from frustrated Olympus E-M1 owners. So much for "Smart & Easy." But through trial and error, and a ton of patience, I finally got it to work.
The E-M1 uses a "Private" mode for the camera owner, and allows for image sharing, as well as configuring and remotely controlling the camera. It also has a "One-Time Connection" mode to quickly share images with a friend -- even if they don't have the O.I. Share app -- by creating a temporary web page. Connecting via QR code makes everything move along faster, bypassing the need for you to type in the connection info.
Once paired, image sharing was a relative breeze, but it was the remote control functionality that I was most interested in. Unlike the E-P5 which was the first Olympus MFT model to feature wireless remote control shooting and could only be used in iAuto mode, the E-M1 allows you to make changes to aperture, shutter speed, ISO, exposure compensation and white balance, and even lets you shoot in continuous burst mode.
The O.I. Share app proved to be very intuitive to use, with touch controls for changing the shooting modes as well as the settings, as well as touch focus and touch shutter. Whatever changes I made to the exposure I could see on my smartphone's screen as a preview before I shot. There was a definite lag between the Live View image on the E-M1 and my smartphone, so don't expect to (consistently) capture anything that's moving fast (like a hummingbird) without shooting a burst. There was, fortunately, no noticeable lag between when I used the touch shutter and the camera snapped the picture.
All in all, the Olympus E-M1's Wi-Fi features were a step up from most of what we've seen from other cameras and manufacturers. However, it's still not perfect and the remote shooting capabilities -- though advanced -- probably won't be used much by most owners.

Summary. Returning to the original question of this review -- is this $1,400 camera worth the price tag -- the answer is decidedly "yes." However, many advanced amateurs may be better served by choosing a more mid-level Micro Four Thirds or other mirrorless model that takes photos just a small step below the image quality of the Olympus E-M1. Part of the premium price of the E-M1 is the tremendous amount of rugged design, physical controls and customizability that, frankly, most photographers may never fully take advantage of. Meanwhile, those looking for the ultimate in image quality may want to step up to a full-frame camera instead.
However, for photographers that have already bought into the merits of the Micro Four Thirds system -- small size, fast performance and overall convenience -- the Olympus OM-D E-M1 is the only camera in its class that I think can really be called professional (at least for still images; the Panasonic GH3 shoots exceptional videos). It's bigger than most other mirrorless cameras -- which is definitely something to consider -- but it's also much more fully featured, and in my opinion worth the upgrades over the E-M5. Though it may not be the best value depending on your needs or level of experience, the E-M1 stands apart from all other Micro Four Thirds cameras I've tested, and it lives up to the lofty expectations many photographers had of it when it was first unveiled.
Olympus E-M1 Review -- No Low-Pass Filter and Moiré
by Dave Etchells
There's been a strong move in the camera industry lately to remove optical low-pass filters (aka, anti-aliasing filters or OLPFs) from cameras, in pursuit of greater image sharpness. The Olympus OM-D E-M1 is one of the latest camera models to join this trend. At IR, we feel that eliminating low-pass filters (or making them too weak) is generally a bad idea, and a mistake for the industry. While the vast majority of natural subjects aren't subject to aliasing and moiré issues, many man-made objects have the sort of regular patterns that trigger the problem.
The real problem is that once you've got moiré or color aliasing in your images, it can be very difficult, if not impossible, to remove. In an interview of Olympus executives and R&D engineers at the E-M1 launch event, they noted that they'd built a large library of images in which moiré or aliasing could be a problem, and then worked systematically to eliminate the issue in each individual scenario. We'd say that their efforts were largely successful with the E-M1, but not entirely perfect.
While it's true that you can use more global knowledge of a subject's structure (things like recognizing areas that should be a solid color, etc.) to intelligently remove aliasing effects, it's a fundamental mathematical fact that aliasing cannot be a priori distinguished from subject detail. Bottom line, no matter how intelligent your processing, there will always be situations in which aliasing will be unavoidable, unless you use a low-pass filter to remove spatial frequencies higher than twice the pixel pitch.
The photos below show a couple of examples where we encountered color aliasing or moiré effects with the Olympus E-M1. It's important to note that we're not particularly picking on Olympus here, or at least not on them alone: We've seen similar effects from every camera on the market that lacks an optical low-pass filter (and on a number in which the OLPF is simply too weak to fully do its job.) Still, these examples show the sorts of problems that are ultimately unavoidable with missing or too-weak low-pass filters.
| Olympus E-M1 - Issues with aliasing and moiré effects |
 |
 |
|
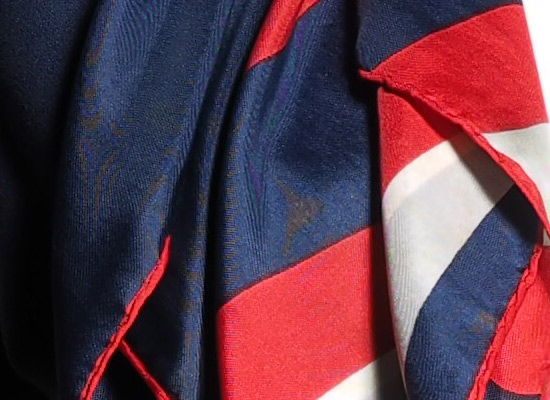
The shot above taken by the E-M1 is an excellent example of color aliasing, caused by the fine thread patterns in the model's outfit. In this particular case, the problem wouldn't be too difficult to eliminate in Photoshop, perhaps using a hue brush to remove the offending colors, however the luminance moiré pattern will remain. Subjects with varying hues or larger-scale detail patterns of their own can make removing color artifacts very difficult or impossible.
|
 |
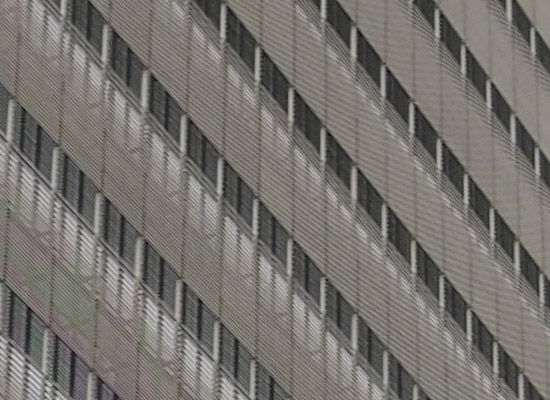 |
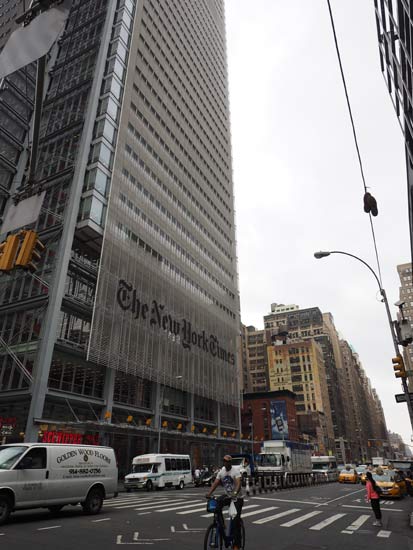
This E-M1 example shows both chrominance and luminance moiré. You can see some faint chroma artifacts in the lower left, and lots of luminance moiré across much of the rest of the frame, in the form of the swirly lines in what should be diagonal louvers on the building's front. This also happens to be a subject in which the chroma aliasing can be dealt with fairly easily, but there's really nothing to be done about the luminance moiré patterns. |
As noted above, these examples don't point a finger at Olympus alone: The same or worse can be found in the output from virtually any high-end camera built without an OLPF, or one that is too weak.
When we got the E-M1 into IRHQ, we knew we wanted to compare it to the E-M5, which has a fairly weak low-pass filter. We were surprised that there wasn't much difference between the two cameras, and in fact, once we set out to produce moiré in the E-M1, we had a bit of a tough time doing so. Our first stop was our moiré-inducing, wrought-iron patio table which features a distinct woven pattern -- but we failed to find any moiré in either JPEGs or RAW files. So we switched over to our patterned office chair, which we previously used to show the effects of removing the OLPF from the Nikon D7100. And then we found what we were looking for, in both the E-M1 and E-M5, but not as much as we expected given our earlier shots above.
Olympus E-M1 vs E-M5: Moiré |
|
E-M1 |
E-M5 |
 |
 |
 |
 |
100% Crop - ACR converted RAW |
100% Crop - ACR converted RAW |
 |
 |
100% Crop - Camera JPEG |
100% Crop - Camera JPEG |
The Olympus E-M1 turned out to display a surprisingly low level of moiré artifacts, and only moderately more than the E-M5. In fact, it was quite difficult to get E-M1 images to display moiré at all -- until we turned to the pattern on the office chair above. On our favorite patio table, which did particularly well in showing moiré with the OLP-filterless Sony RXIR, the E-M1 didn't display any artifacts, and neither did the E-M5. |
|
If you're aware that you're having aliasing problems, you can often deal with the situation in-camera, by any of several means: 1) Tightening or loosening your framing slightly, to put the offending detail at a higher or lower spatial frequency than what's causing the problem; 2) Very slightly defocusing, to eliminate the highest spatial frequencies; or 3) Stopping down to the point that diffraction limiting slightly reduces sharpness. These are all both a hassle and problematic, though, and often times, you won't know that you have a moiré problem until you're off location and back in the studio, looking at your images on a computer.
Is this moiré issue a show-stopper for the Olympus E-M1? That'll be a personal decision for everyone. If you shoot a lot of architectural imagery or fashion with regular fabric patterns, it could be a consideration. On the other hand, if most of your shooting is natural objects, you might never see it.
If it is an issue for you, that begs the question of what other alternatives are available. Unfortunately, as we said at the outset, most camera manufacturers seem to be moving in this direction, especially with their higher-end models -- mainly for the sake of ultimate resolution. There are still some high-end cameras with OLPFs in the market, but in many cases they're weak OLPFs which don't completely address aliasing problems. If a camera has an OLPF at all, it's unlikely that its image processing algorithms will have anti-aliasing routines built in to address the issue, so you may end up worse off with a weak OLPF than one that's missing entirely, but has image processing to help alleviate the problems that result.
Bottom line, this is looking like something we're simply going to have to deal with as photographers, at least until the no-OLPF fad abates. Or maybe we'll see more manufacturers address the opportunity in a different way, as Pentax recently did with the just-announced Pentax K-3. We at IR are hoping that the industry as a whole will come to its senses sooner than later, and focus on eliminating what become unavoidable problems, simply for the sake of an extra smidgen or two of sharpness. In the meantime, this looks like the face of the future.
Olympus E-M1 Review -- Technical Info
by Mike Tomkins
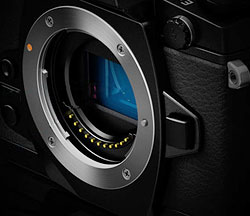
Sensor. Although its 16.1-megapixel resolution is little changed from that of the E-M5, Olympus has based the E-M1 around a brand-new Live MOS image sensor. So if resolution hasn't changed appreciably, what's new? The main tweak is the addition of on-chip phase detection autofocus pixels, staggered across the sensor. These allow for phase-detect autofocus with legacy Four Thirds lenses, and with Micro Four Thirds lenses when using continuous autofocus.
Olympus says that it has also improved noise performance of the sensor versus that in the E-M5, and removed the optical low-pass filter for better per-pixel sharpness. Like any OLPF-free camera -- and they're becoming increasingly common -- that's going to increase the risk of moiré patterning, false color, and other such artifacts, however.
Total resolution of the new sensor is 16.8 megapixels, and it has a 4:3 aspect ratio. Raw images are recorded at a resolution of 4608 x 3456 pixels.
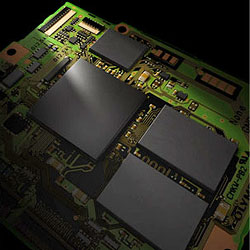
Processor. Alongside the new image sensor sits an equally-new image processor. Dubbed TruePic VII, it's one generation removed from that in the E-M5, and two generations from the processor in the E-5. Changes include a newer-generation Fine Detail Technology II processing function which works to further reduce moiré and false color, and which Olympus says has allowed it to remove the optical low-pass filter altogether.
The new processor also includes adaptive routines for suppressing lateral chromatic aberration and optimizing sharpening in JPEGs, and these take account of both the lens type and aperture value in use. Interestingly, though, we're told the function can correct for at least some third-party lenses as well, including those from Micro Four Thirds partner Panasonic, and perhaps Sigma as well.
Sensitivity. By default, the Olympus E-M1 has a sensitivity range of ISO 100 to 1600 equivalents, with the lower end of the range being described as the Low position. (In other words, the base sensitivity of the sensor is likely above ISO 100. Like the Low positions on other cameras, the sensor would be intentionally overexposed, then the exposure corrected. The result would be a longer exposure, but reduced dynamic range in the highlights.)
Under manual control, a much wider range from ISO 100 (L) to ISO 25,600 equivalents is available, in either 1/3 or 1EV steps. The upper limit for the Auto ISO function can also be adjusted to limit sensitivity to anything from ISO 200 to 25,600 equivalents.

Performance. The Olympus E-M1 is capable of shooting at up to a manufacturer-claimed 10 frames per second in burst mode (we managed 9.9 in the lab), an extra one frame each second beyond the figure given for the E-M5, and double the speed claimed for the E-5. Autofocus and exposure must be locked from the first frame to achieve this rate, however.
Despite the increase in speed, burst depth has also risen, and is now double that of the E-M5, with the E-M1 able to capture 36 raw frames at 10fps (we managed 50). Reduce the shooting rate to 6.5fps with autofocus enabled, and not only do you get autofocus and exposure metering between frames back, but you will also manage 54 RAW frames in a burst, according to Olympus. Note that both frame rate figures are applicable with image stabilization disabled. Enabling it will lower the shooting rate, but Olympus doesn't specify by how much.
Lens mount. Just like the Olympus E-M5 before it, the E-M1 features a Micro Four Thirds mount, and will accept Four Thirds and many other lens types via optional adapters. Support for Four Thirds lenses is much better than in the E-M5 and PEN-series cameras to date, however, thanks to on-chip phase detection autofocus.
Focusing. The addition of phase-detect AF brings with it new branding for the autofocus system in the E-M1: Dual FAST AF. The phase detection system offers up a total of 37 PDAF points, while a further 81 preset contrast-detect AF points are provided by default. (When the Magnified Frame AF function is active, much finer focus-point selection is possible, with a potential 800+ focus points available across the image frame.)
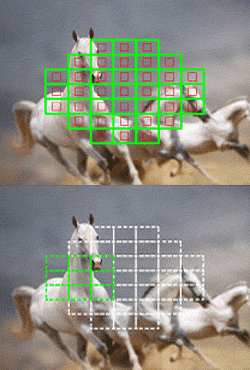
The PDAF pixels are staggered across a central, diamond-shaped phase-detect AF area on the sensor, to ensure that you can't notice artifacts in your final images. (Since these pixels don't contribute image data for the final image, information from surrounding pixels is used to interpolate a value for the "missing" pixels -- exactly the same process most cameras use to fill in for stuck or hot pixels.)
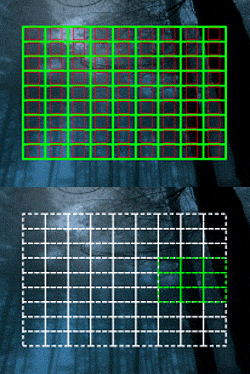
The manner in which the system operates is quite interesting, and gives an indication of Olympus' satisfaction with its FAST-branded AF algorithms, which make up the contrast-detect side of the equation.
Four Thirds lenses use the new phase detection system at all times, both for single and continuous autofocus. Micro Four Thirds lenses, though, use contrast-detection alone for single autofocus and during movie capture. It's only when still image continuous autofocus is enabled that Micro Four Thirds lenses take information from the phase-detect pixels into account. (And by doing so, the E-M1 can offer burst shooting at 6.5 fps complete with continuous autofocus.)
Not only does the new phase-detect system provide greater compatibility with autofocus on Four Thirds lenses, as well as better focus performance and support for continuous autofocus, all absent with adapted Four Thirds lenses on previous Micro Four Thirds bodies -- it also provides for more accurate autofocus. That's because there's no longer a separate phase-detect sensor, and so the data used to focus your Four Thirds lenses will be coming from the image sensor itself, ruling out one source of the front / back focusing issues common on conventional SLR cameras. (And those issues could rear their head even with a well-calibrated sensor when subjected to temperature changes that caused expansion or contraction of the camera's internal components.) Lenses themselves are often the cause of front / back focus issues, though, so the E-M1 provides AF mirco adjustment. In fact, the E-M1 provides separate wide and tele adjustments for zoom lenses, and you can specify offsets per AF area.
Another handy advantage is that the PDAF system has no fixed baseline, unlike most dedicated sensors. That means that where typical SLRs don't provide more accurate autofocus beyond a certain maximum aperture, the on-chip system can do so right up to the maximum aperture of the lens in use.
As in the E-M5, the Olympus E-M1 provides a choice of automatic AF point selection, 9-area grouped point selection, and single-point selection with two point sizes. There's also a Face Detection function with Eye-Detection capability, letting you select whether the camera should focus on the left eye, the right eye, or the eye which is nearer to the camera.
There's also an autofocus assist lamp, a manual focus assist function, and a focus peaking function.
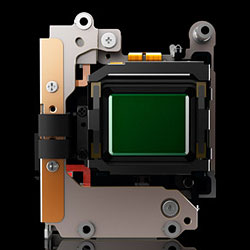
Stabilization. Olympus has retained much the same 5-axis image stabilization system it developed for the E-M5 in the new flagship E-M1. It still corrects for yaw, pitch, vertical motion, horizontal motion, and roll, however it now has refined algorithms. We're told it's more effective at slower shutter speeds, although there's no spec for how much of an improvement the system will show.
The system is said to yield a 4 EV correction, to CIPA testing standards, and has four operating modes. It can stabilize on both axes, horizontally only, vertically only, or choose between the three as the camera deems appropriate. If using a manual lens or a lens adapter, you can dial in an appropriate focal length in 37 steps from 8 to 1000mm.
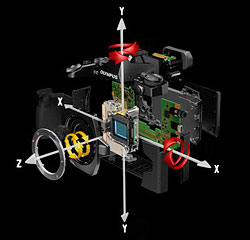
Sensor shift stabilization can also be used for movie capture, unlike some cameras which limit you to digital image stabilization for movies. You can also opt to use the in-lens stabilization provided by certain Panasonic lenses.
Dust. The E-M1 features Olympus' patented Supersonic Wave Filter dust reduction system, just as you'd expect. It operates via a piezoelectric element that vibrates the cover glass overlying the sensor, and shakes dust particles free. They're then captured on an adhesive membrane beneath the imager. We've subjectively found piezoelectric systems like these to be significantly more effective than those using lower-frequency motion from a sensor-shift assembly.
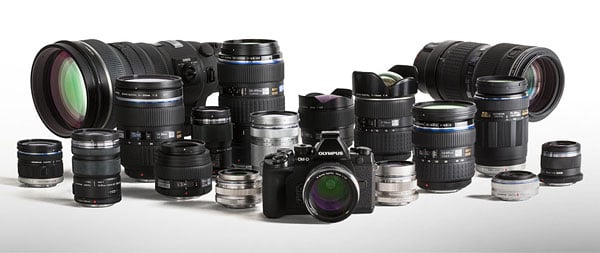
Lenses. As noted, the Olympus E-M1 accepts both Four Thirds lenses via an adapter, and Micro Four Thirds lenses natively. It's worth noting, though, that simultaneous with the launch of the E-M1, Olympus has reorganized its M.Zuiko Micro Four Thirds lens lineup, and introduced a new lens line that aims to mirror its high-grade, durable, dust-and-splashproof body. The new M.Zuiko Pro line launched with just one model, the 12-40mm f/2.8 constant-aperture zoom lens, and a 40-150mm f/2.8 constant-aperture zoom will follow in the second half of 2014. Beneath the M.Zuiko Pro category sit the M.Zuiko Premium lenses, prime lenses with high image quality. Finally, the standard M.Zuiko lenses are intended to offer the most compact, lightest packaging of the trio.
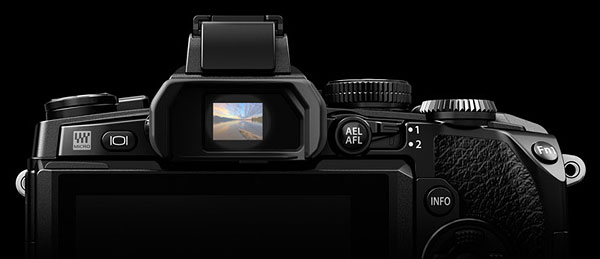
Viewfinder. One of the key challenges Olympus faces in persuading Four Thirds-mount SLR owners to switch to a mirrorless model is the viewfinder. Photographers who've spent much time shooting with an SLR often form a very strong attachment to their optical viewfinder. Although they offer advantages in other areas, electronic viewfinders are hard-put to rival the bright, sharp view of the world, and the instantaneous response provided by their optical brethren.
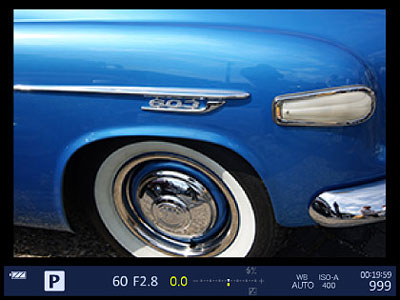
The company clearly recognizes that, and has gifted the Olympus OM-D E-M1 with a refined version of what was already among the best electronic viewfinders we've seen.
Based around much the same display and similar optics to those used in the optional Olympus VF-4 external viewfinder accessory, the E-M1's viewfinder is large, bright, sharp, and responsive.
It has a high resolution of 2.36 million dots, and a default refresh rate of 120 frames per second. Impressively, this speed is able to be boosted to 240 frames per second, if needed. Display latency is a short 29 milliseconds, according to Olympus.
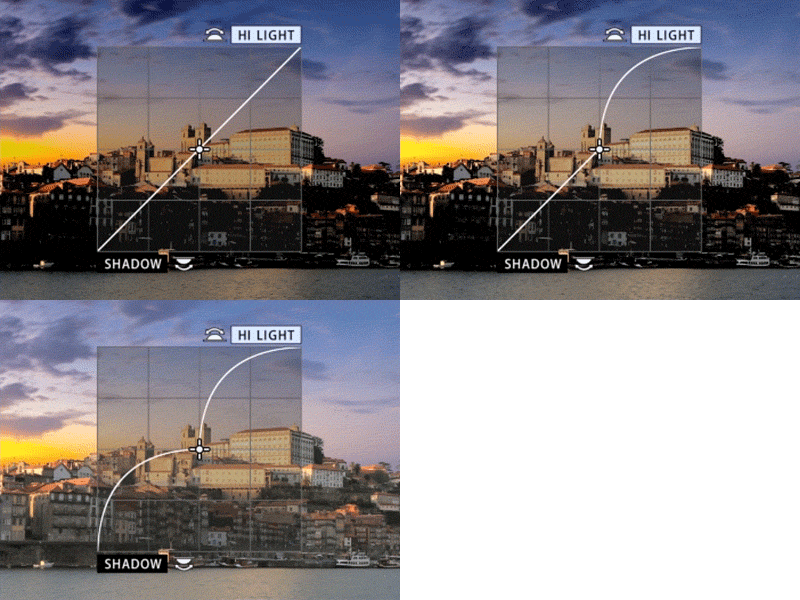
Thanks to a generous 1.48x magnification (35mm equivalent: 0.74x), it yields a viewfinder image larger than that of a full-frame camera like the Nikon D800. And as you'd expect in a camera aimed at enthusiasts and pros, field of view is 100%. There's a diopter correction function, too, which spans a range from -4 to +2 diopters.
Olympus' viewfinder optics are designed to keep chromatic aberration to a minimum for a clear view from corner to corner, and the company has revisited how it handles EVF brightness adjustment as scene brightness changes. Previously, the backlight was constant, and the LCD did all the work. Now, the backlight too is variable, for a more satisfactory experience. The display also has more dynamic range than in the past.
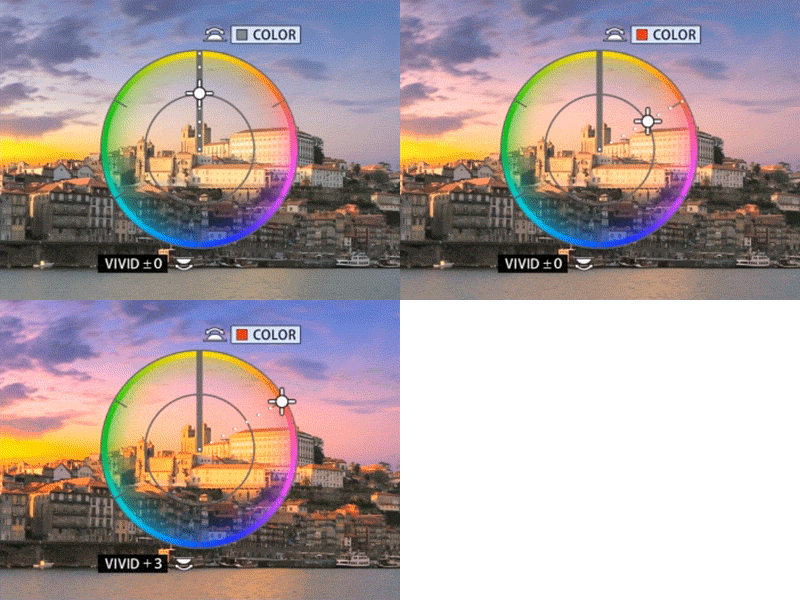
The net result is a viewfinder that, while not optical, is the next-best thing. And of course, it can do things your optical viewfinder can't. You'll get a live image during video capture, for example, and shooting information can be overlaid on the live image.
Filter effects can also be previewed in real time, and impressively, so too can one of the two available HDR effects. And of course, you can preview different aspect ratios, or magnify the viewfinder to aid in focusing. You can even preview highlight and shadow control settings, or the hue / saturation as controlled by the twin dials. And you can overlay one of five different framing grids, or a dual-axis level.
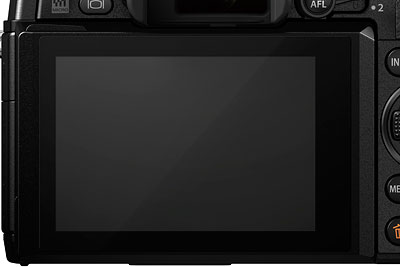
Monitor. Even if the typical Olympus E-M1 shooter will likely be spending most of their time looking through the viewfinder, the LCD monitor is still important too. For one thing, you'll be using it whenever it isn't practical to get your eye to the finder -- when shooting overhead, for example, or low to the ground. For another, if you want to show friends and family your photos without transferring them from the camera, the monitor's your best bet.
Olympus has upgraded the E-M1's 3-inch display, which now sports higher resolution than that of the E-M5. The total dot count is 1.037 million, up from 614 thousand dots in the E-M5. It's also now an LCD panel, rather than an Organic LED. There's a +/- 7-step control over both brightness and color available, and two color-tone selections -- vivid or natural -- so you can tune the display to your tastes, as well.

Touch-sensitive. As in the E-M5, the monitor is also an input device, thanks to a capacitive touchscreen overlay.
Functions that can be controlled via touch include the shutter, autofocus area selection and enlargement, live guide, super control panel, art filter menu, Wi-Fi settings, playback zoom, and playback image selection.
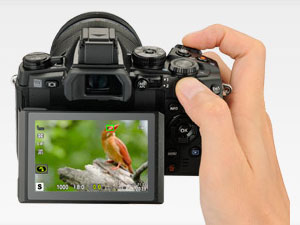
Articulation. The display also caters to viewing from a wide range of angles, thanks to its articulated, tilting design. Just as in the E-M5, the Olympus M1's display tilts upwards by around 80 degrees for shooting from the waist or low to the ground, and downwards by as much as 50 degrees for over-the-head shooting.
Flash. There's no built-in flash on the Olympus E-M1, but that's not surprising. Internal strobes -- while handy if you don't want to lug around a second piece of gear -- are a design feature that's more commonly associated with consumer cameras. Enthusiast and pro gear typically forgoes a built-in strobe in favor of a hot shoe and flash sync terminal, and the Olympus E-M1 does the same.
An FL-LM2 strobe is included, just as it was with the E-M5. The FL-LM2 is weather-sealed, just like the camera body, and has a guide number of 7 meters at ISO 100.
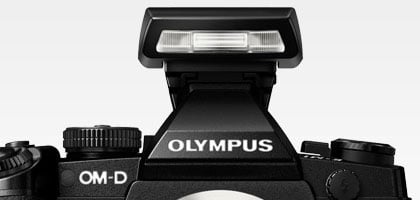
Flash sync is possible at 1/320 second when using the FL-LM1 or FL-LM2 strobes, which are intended specifically for the PEN and OM-D series cameras. With other strobes, flash sync is ordinarily 1/250 second. Super FP-capable strobes can sync at 1/125 to 1/8000 second.
Flash exposure compensation is available within a range of +/-3EV, in steps of 0.3, 0.5, or 1EV.
The E-M1 also supports four-channel wireless flash with the bundled strobe acting as a master, and off-camera flash strobes configured in up to 4 groups.
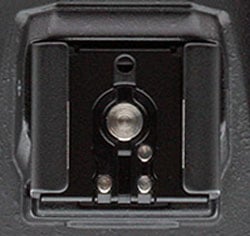
The flash hot shoe is also used to mount Accessory Port 2 accessories. More on that in a moment.
Exposure. The Olympus EM-1 offers shutter speeds ranging from 1/8000 to 60 seconds, set in 1/3, 1/2, or 1EV steps. A Bulb mode is available, and so is a Time mode which defaults to an eight minute exposure, but which allows anywhere up to 30 minutes.
Exposure modes include Intelligent Auto, Program (with Program Shift), Aperture-priority, Shutter-priority, Manual, Bulb, Time, Scene Select, Art Filter, and Underwater Wide / Macro.
Scene modes include Portrait, e-Portrait, Landscape, Landscape + Portrait, Sport, Night, Night + Portrait, Children, High Key, Low Key, DIS mode, Macro, Nature Macro, Candle, Sunset, Documents, Panorama, Fireworks, Beach & Snow, Fisheye Conv., Wide Conv., Macro Conv., and 3D. This last functions only with the H-FT012 3D lens, manufactured by Panasonic.
Exposures are metered using the image sensor, and are considered as 324 distinct multi-pattern areas. The Digital ESP metering system also provides Center-weighted Average, Spot, Highlight Spot, and Shadow Spot metering modes. It has a working range of -2 to 20 EV at ISO 100 with a 17mm f/2.8 lens.
Exposure compensation is available within a generous +/-5EV range, set in 1/3, 1/2, or 1EV steps. You can bracket exposures, too, with a choice of 2, 3, 5, or 7-frame bracketing in 0.3, 0.7, or 1EV steps. (The largest step size is only available for five frames or less, though.) And bracketing isn't just limited to exposure: you can also bracket ISO sensitivity, white balance, flash, and art filters.
You can also adjust the camera's metering system in 1/6EV steps, within a +/-1EV range, and this adjustment will be applied to all exposures, even if no exposure compensation is set. (And if you do set exposure compensation, it will be added to or subtracted from the adjusted value.) This is a great feature if you find that the camera consistently under- or over-exposes slightly for your own personal taste.
Creative. The Olympus E-M1 also offers a generous selection of creative effects. These include a dozen Art Filters, each of which can be coupled with a selection from eight different Art Effects. There are also two in-camera HDR modes, a Time Lapse function, a Multiple Exposure function, a Hand-held Starlight mode, and a PhotoStory function. You can also play with aspect ratios, selecting between the default 4:3, 3:2, 16:9, 1:1, and 3:4. RAW files are simply tagged with the aspect ratio crop, which can be undone in software. JPEGs are permanently cropped.
Perhaps the most interesting options are the new HDR modes, because they mark the first time that Olympus has provided in-camera HDR merging capability in an interchangeable-lens model. You have two choices: HDR1 shoots for a fairly realistic rendering of the scene, much as your eye would see it, while HDR2 goes for a crunchy, in-your-face artistic effect. Exposures with the HDR1 mode can be previewed through the viewfinder. HDR2 exposures don't allow live preview, but provide up to a whopping 14EV range in a single image. Either way, the camera will merge your multiple exposures for you, and handle microalignment if the camera moved slightly between exposures.
The Time Lapse mode has also been revisited since the E-P5, and now allows 999 frames in a single time-lapse session -- more than ten times as many as before. The longest interval time is 24 hours, so if an external power source and sufficient card space were provided, you could conceivably shoot a single time-lapse of close to two years, nine months in duration. You can also create 100-second time lapse movies, in-camera.
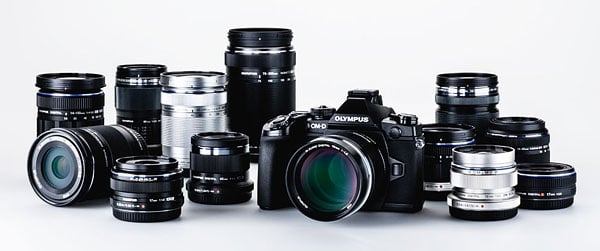
Shooting that many frames at once, though, it pays to note just how many exposures you're shooting. Olympus doesn't rate the shutter life of the E-M1, but typically, life expectancies range from the mid to high tens of thousands of exposures on consumer cameras, up to the mid-hundreds of thousands for professional models. If you're regularly shooting around a thousand exposures at a pop, you could conceivably run out your shutter life in fairly short order. But that's true of any SLR, and we have a feeling, part of why interval modes often have such low exposure limits.
Multiple Exposure mode simply stacks two exposures to create a single image that's an additive combination of the two. It's much like exposing a frame of film twice.
The Starlight mode is similar to Sony's Handheld Twilight, shooting eight frames in a burst and then stacking them to average out the noise. The result is a high-ISO, low-light image with lower noise levels than would be typical, but the technique is best-used with relatively static subjects.
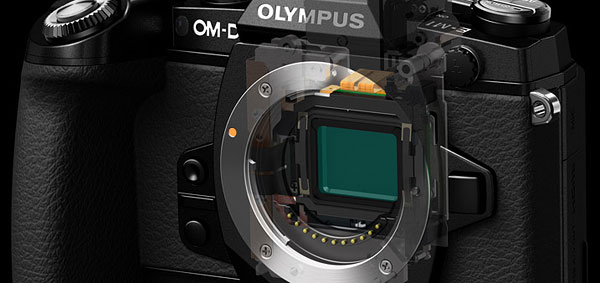
Art Filters offered on the E-M1 include an updated Diorama filter, which can now opt to blur the left / right of the frame, instead of the top / bottom. The strength of the blur effect increases the further the distance from the autofocus point, so if for example you shoot a portrait with focus on the subject's eye, the filter helps to emphasize their eye even more by softening the rest of their face and the background.
Other Art Filters include Pop Art, Soft Focus, Pale & Light Color, Light Tone, Grainy Film, Pin Hole, Cross Process, Gentle Sepia, Dramatic Tone, Key Line and Watercolor. Art Effects which can be paired with these include Soft Focus, Pin-Hole, White Edge, Frame, Star Light, Defocus, B&W (Yellow, Orange, Red or Green) and Picture Tone (Sepia, Blue, Purple or Green). Note that not all effects can be paired with all filters.
And lastly, the PhotoStory feature seen previously in the XZ-10 and E-P5 makes it into the Olympus E-M1 as well. Simply put, this lets you capture several images in sequence, and then they're combined in-camera to make a single-image collage. Not necessarily the kind of feature you'd expect to find in a camera aimed at enthusiasts and pros, but those who like to share from the camera may appreciate it.
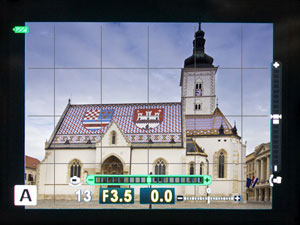
Level gauge. The Olympus E-M1 also includes a dual-axis level gauge that helps ensure both level horizons and parallel verticals -- at least, if that's what you want. Camera tilt can be indicated either in the electronic viewfinder, or the rear-panel LCD.
Video. Like any modern interchangeable-lens camera, the Olympus E-M1 can shoot high-def video. The feature-set is reasonably rich, but there's one important catch: regardless of resolution, the frame rate is fixed at a progressive-scan 30 frames per second. It isn't possible to shoot at a film-like 24p, nor at a higher 60p/60i rate, as in many recent cameras.
If you're willing to live with that, though, you can look forward to automatic, aperture priority, shutter priority, and manual exposure, autofocus both before and during video, internal stereo or external stereo microphone connectivity, and wind noise reduction. You'll get a choice of three resolutions (Full HD 1920 x 1080; HD 1280 x 720; VGA 640 x 480) and two compression types (MPEG-4 AVC / H.264 in a MOV container at 720p or above; Motion JPEG in an AVI container at 720p or below.) You'll also be able to apply a variety of movie Art Filter effects, and these will have less of a frame-rate impact than on previous models. You can even shoot time-lapse movies.
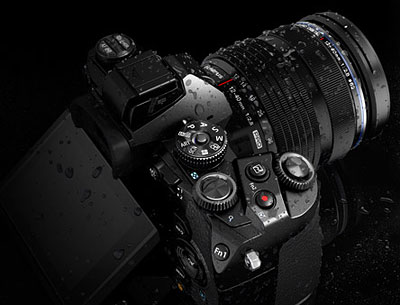
For movie autofocus, you'll find that the Olympus E-M1 uses contrast detection at all times -- both before and during capture -- when a Micro Four Thirds lens is mounted. If you switch to a Four Thirds lens on an adapter, you'll get phase detection autofocus before capture, but will be restricted to manual focus during capture.
That limitation may be related to the demands of reading off the phase detection pixels during movie capture, but we're speculating here. Either way, the experience shooting with autofocus during capture using a Four Thirds lens likely wouldn't have been terribly satisfactory: Four Thirds lenses weren't designed with the needs of movie recording in mind. For the best performance, you'll want a Movie and Still Compatible, MSC-branded lens attached.
Movies are restricted to 29 minutes in length, a 4GB file size limit for H.264 capture, and a 2GB file size limit for Motion JPEG capture.
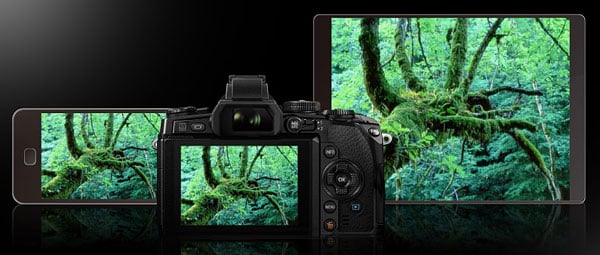
Wireless communications. Another important change between the Olympus E-M1 and the earlier E-M5 is that the new camera sports Wi-Fi wireless networking connectivity. We saw this first on the Olympus E-P5 mirrorless earlier this year, and the E-M1's 802.11 b/g/n Wi-Fi wireless feature set is similar, but refined.
We should note right off the bat, though, that some central-American countries are going to miss out here, because Wi-Fi is disabled in their cameras. That's apparently down to the high cost of getting wireless devices certified by the local equivalent of the FCC in these countries. But for most, Wi-Fi will be available, and even more worth using than ever before.
In-camera Wi-Fi makes it easier to get your photos and videos off the camera, and onto your smartphone or tablet for sharing on social networks. Setup is a slight bugbear, though, and quite a few manufacturers have resolved this using Near Field Communications, which adds an extra radio to the camera. This is great for ease of use, but it's not universally supported by smartphones and tablets (and not supported at all by Apple.) It also adds to the camera's cost.
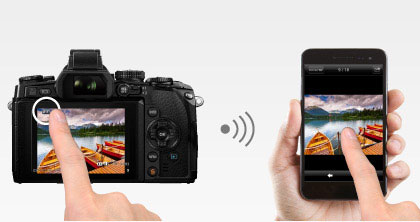
As in the E-P5, Olympus has gone its own route, taking advantage of the near-ubiquitous cameras on smart devices these days. The E-M1 shows a Quick Response code -- a type of two-dimensional barcode -- on its screen when ready to pair via Wi-Fi, and you scan this using your smart device's camera. The connection is then configured between both devices for you, automatically. If you don't have a camera on your smart device, of course, you'll need to pair manually.
Once connected, you can not only download movies or images, but also control the camera remotely. As in the E-P5, this includes a live view feed and remote shutter release, but it also now allows Program, Aperture-priority, Shutter-priority, or Manual exposure. You can thus control aperture, shutter speed, ISO sensitivity, and white balance remotely. You also have access to both single and burst shooting, all without a cable. You can even set autofocus manually, by touching the live view feed on the smart device's screen.
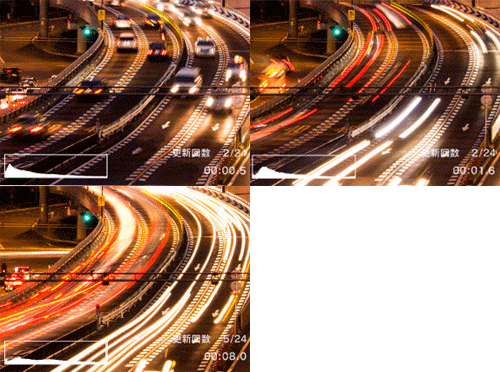
Perhaps coolest of all, you can control Time / Bulb exposure remotely, and see the image being built up over time as it's exposed, on the smart device screen. (Astrophotographers will love this -- at least, so long as they don't mind losing some night vision by looking at a bright phone or tablet screen!)
You can have up to four clients connected to the camera at any one time -- two less than in the E-P5 -- and while only one can be controlling it, all four can receive copies of the camera's images for instant sharing with a group of friends or colleagues at the same location. The Olympus E-M1 also allows you to piggyback on your phone or tablet's GPS receiver for geotagging of images, a function offered by some competitors. (And, we'll be honest, one we've never found terribly useful, since you have to leave power-hungry GPS running on the mobile device to capture a track log, rather than it running on the camera only as needed.)
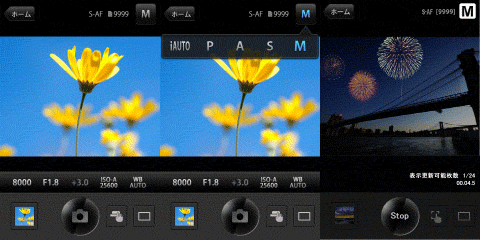
All of these features are provided for with a free app, available for Android or iOS devices. The app also allows you to edit photos remotely, and you can then share them using the features of your smart device.
Wired connectivity. As well as its new wireless connectivity, the Olympus E-M1 offers quite a range of wired inputs and outputs. These include a combined USB 2.0 High Speed data and NTSC / PAL standard-definition video output, a high-definition Micro (Type-D) HDMI video output, and a standard 3.5mm microphone jack, plus a flash hot shoe, flash sync terminal, and Olympus' Accessory Port 2 connector.
This last sits directly behind and beneath the flash hot shoe, and AP2-compatible devices sit in the hot shoe when in use. (And thereby, prevent use of flash at the same time, unless you're using a sync cable.) Compatible devices include several electronic viewfinders (the only reason you might want to use these would be for shooting at low angles, since they can be tilted), the SEMA-1 external microphone adapter (which, again, replicates functionality already provided by the camera body), MAL-1 Macro Arm Light, and PP-1 PenPal Bluetooth adapter.
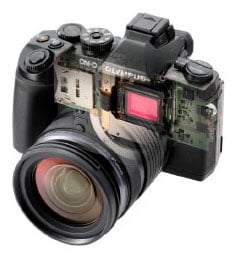
Storage. The Olympus E-M1 stores images and movies on Secure Digital cards. It's compatible with the higher-capacity SDHC and SDXC cards, as well as the higher-speed UHS-I types. At least a Class 6 card is recommended for video capture.
It also works with Eye-Fi cards, although obviously the camera has its own wireless connectivity, so there's little reason to use in-card Wi-Fi unless you already own the card. (And if you do, note that Eye-Fi's Endless Mode is not supported.)
Power. The E-M1 draws power from a proprietary BLN-1 lithium-ion battery pack. Battery life is rated at 350 shots on a charge to CIPA testing standards, which includes image stabilization. (But not flash, we're presuming, since there's not a built-in strobe.)
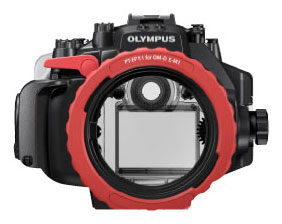
Accessories. A variety of accessory products are offered alongside the E-M1.
Likely the most popular of these will be the HLD-7 Power Battery Holder. This add-on grip mounts on the camera's base, and when attached with batteries installed, yields roughly double the battery life. It also offers a second set of controls for portrait-orientation shooting.
Other accessory options that are or will be available alongside the Olympus E-M1 include the PT-EP11 Underwater Case, GS-5 Grip Strap, CBG-10 Camera Bag, CS-42SF Soft Camera Case, and CSS-P118 Shoulder Strap.
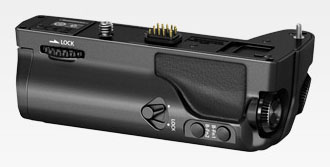
Price and availability. Available since October 2013, the Olympus E-M1 bears a body-only pricetag of US$1,400.
The 12-40mm f/2.8 lens is priced at US$1,000, and the HLD-7 Power Battery Holder costs US$200.
Olympus E-M1 Review -- Image Quality Comparison
Below are crops comparing the Olympus E-M1 with itself at base and extended low ISO, and then with the Olympus E-M5, Canon 70D, Fuji X-Pro1, Nikon D7100, and Panasonic GH3.
NOTE: These images are best quality JPEGs straight out of the camera, at default settings including noise reduction. All cameras in this comparison were shot with our very sharp reference lenses.
Olympus E-M1: ISO Low (approx. ISO 100) vs ISO 200
 |
 |
 |
 |
 |
 |
Olympus E-M1 at ISO 100 |
Olympus E-M1 at ISO 200 |
We typically avoid expanded low ISO settings for our image quality comparisons as we don't normally see much improvement in IQ, and they often come at a price of reduced dynamic range. However, the E-M1 is a different story. Unlike the E-M5, the E-M1 offers an expanded Low ISO, which is stated as "approximately ISO 100." As you can see, it shows significantly more detail compared to the lowest standard ISO of 200, especially in our fabric crop. This is because RAW data is cleaner at the expanded LOW ISO setting so the camera applies less noise reduction, better preserving subtle detail, particularly in the red channel. |
|
Olympus E-M1 versus Olympus E-M5 at base ISO
|
 |
|
 |
|
 |
Olympus E-M1 at ISO 200 |
Olympus E-M5 at ISO 200 |
The Olympus E-M1 and E-M5 look evenly matched at ISO 200, with sharp, crisp details, though the E-M5 appears to use slightly lower default noise reduction and somewhat higher default sharpening. |
|
Olympus E-M1 versus Canon 70D at base ISO
|
 |
|
 |
|
 |
Olympus E-M1 at ISO 200 |
Canon 70D at ISO 100 |
|
Despite having a smaller, lower-resolution sensor than the 70D with its 20-megapixel APS-C imager, the E-M1's JPEG looks better in almost every aspect in these three comparisons. The Olympus produces sharper details, most noticeably in the mosaic and the fabrics.
|
|
Olympus E-M1 versus Fuji X-Pro1 at base ISO
|
 |
|
 |
|
 |
Olympus E-M1 at ISO 200 |
Fuji X-Pro1 at ISO 200 |
Both the Olympus and Fuji do very well at base ISO, as you'd expect. The E-M1 produces slightly crisper detail while the X-Pro1 yields more refined-looking images with lower noise and fewer sharpening artifacts, though the Fuji does suffer from some minor demosaicing errors in other areas of the image. The fabric crop is interesting, as the Olympus does better with the pink fabric, while the Fuji pulls more detail from the red leaf swatch. |
|
Olympus E-M1 versus Nikon D7100 at base ISO
|
 |
|
 |
|
 |
Olympus E-M1 at ISO 200 |
Nikon D7100 at ISO 100 |
The bottle crops looks similar in terms of the detail and sharpness, though the Nikon leaves a little more of the wall texture intact which the Olympus smooths out. In the mosaic crops, the D7100 offers a bit better detail but its more conservative approach to sharpening results in an image that isn't quite as crisp. As usual, the Nikon does much better with the red leaf fabric. |
|
Olympus E-M1 versus Panasonic GH3 at base ISO
|
 |
|
 |
|
 |
Olympus E-M1 at ISO 200 |
Panasonic GH3 at ISO 200 |
|
These two 16-megapixel Micro Four Thirds cameras perform similarly at ISO 200 as you may expect, though the E-M1's images are a touch crisper with a slightly more processed look. The GH3 leaves behind a little more chroma noise, but does much better in the red leaf pattern.
|
|
Most digital SLRs and CSCs will produce an excellent base ISO shot, so we like to push them and see what they can do compared to other cameras at ISO 1600, 3200, and 6400. Recent advances in sensor technology have made ISO 1600 look a lot more like ISO 100, but there are still cameras whose quality starts to fall apart at this setting. We also choose 1600 because we like to be able to shoot at least at this level when indoors and at night.
Olympus E-M1 versus Olympus E-M5 at ISO 1600
 |
 |
 |
 |
 |
 |
Olympus E-M1 at ISO 1600 |
Olympus E-M5 at ISO 1600 |
At ISO 1600, the E-M1 and E-M5 are again very closely matched. Both have fairly low noise while still producing a lot of fine detail in the mosaic. And both cameras have issues rendering subtle detail in the red fabrics. |
|
Olympus E-M1 versus Canon 70D at ISO 1600
|
 |
|
 |
|
 |
Olympus E-M1 at ISO 1600 |
Canon 70D at ISO 1600 |
We can see in the shadows of the bottle crop that default noise reduction is a little stronger in the E-M1. Both cameras do well with the mosaic at ISO 1600, while in the fabric swatch, the Canon 70D does just a bit better in the red leaf pattern and the Olympus does better with the pink. |
|
Olympus E-M1 versus Fuji X-Pro1 at ISO 1600
|
 |
|
 |
|
 |
Olympus E-M1 at ISO 1600 |
Fuji X-Pro1 at ISO 1600 |
Here, the Fuji does better than the E-M1 in all three comparisons. Noise is lower in the first crop, the fine detail in the mosaic is more even and less mottled-looking due to noise reduction, and the Fuji produces a better leaf pattern in the red fabric. |
|
Olympus E-M1 versus Nikon D7100 at ISO 1600
|
 |
|
 |
|
 |
Olympus E-M1 at ISO 1600 |
Nikon D7100 at ISO 1600 |
The default noise reduction of the Nikon is weaker than the E-M1 here, as can be see by the strong luminance noise in the bottle crop. In the mosaic crop, we can see the Olympus works hard to produce a crisper, cleaner-looking image while Nikon's rendering is more detailed and natural-looking, but it's a bit soft in comparison. The D7100 does better with the red-leaf swatch, as Nikons usually do. |
|
Olympus E-M1 versus Panasonic GH3 at ISO 1600
|
 |
|
 |
|
 |
Olympus E-M1 at ISO 1600 |
Panasonic GH3 at ISO 1600 |
Both cameras here show the effects of noise reduction, but the E-M1 produces a slightly better result in the shadows and a cleaner surface to the bottle. The mosaic pattern looks a bit more even from the GH3 and the Panasonic also handles the fabric swatch a little better. |
|
These days, ISO 3200 is a very viable shooting option for most good cameras, so let's take a look at some comparisons there.
Olympus E-M1 versus Olympus E-M5 at ISO 3200
 |
 |
 |
 |
 |
 |
Olympus E-M1 at ISO 3200 |
Olympus E-M5 at ISO 3200 |
Like with the ISO 1600 comparison, both Olympus cameras look very similar at ISO 3200. Noise is well-controlled for this ISO, and detail is still pretty good in the mosaic. Both cameras have difficulty with the fabrics at this sensitivity. |
|
Olympus E-M1 versus Canon 70D at ISO 3200
|
 |
|
 |
|
 |
Olympus E-M1 at ISO 3200 |
Canon 70D at ISO 3200 |
|
Compared to the 70D, the E-M1 shows less noise in the bottle crop comparison, as well as having crisper details in the mosaic. The Olympus struggles more in the red fabrics in this comparison, however.
|
|
Olympus E-M1 versus Fuji X-Pro1 at ISO 3200
|
 |
|
 |
|
 |
Olympus E-M1 at ISO 3200 |
Fuji X-Pro1 at ISO 3200 |
At ISO 3200, the E-M1 is still sharper than the X-Pro1, but the Fuji, once again, produces a cleaner image with superior detail, as well as doing much better with the red leaf fabric. |
|
Olympus E-M1 versus Nikon D7100 at ISO 3200
|
 |
|
 |
|
 |
Olympus E-M1 at ISO 3200 |
Nikon D7100 at ISO 3200 |
An interesting comparison. The E-M1 is less noisy at ISO 3200, but the noise reduction has taken a toll on fine detail compared to the Nikon. The D7100 continues to show better detail in the mosaic and produces a more discernible leaf pattern in the red fabric, though its stronger luminance noise produces a grainy, film-like appearance. |
|
Olympus E-M1 versus Panasonic GH3 at ISO 3200
|
 |
|
 |
|
 |
Olympus E-M1 at ISO 3200 |
Panasonic GH3 at ISO 3200 |
|
The GH3's combination of noise reduction and sharpening is definitely showing its presence here, notable on the bottle's surface and on the pink fabric. The mosaic pattern, however, looks better from the GH3, while both cameras struggle with displaying nearly any detail in the red fabric swatch.
|
|
Detail: Olympus E-M1 versus Olympus E-M5, Canon 70D, Fuji X-Pro1, Nikon D7100, and Panasonic GH3.
 |
 |
 |
 |
 |
 |
 |
 |
 |
 |
 |
 |
 |
 |
 |
 |
 |
 |
| Olympus E-M1 ISO 200 ISO 3200 ISO 6400 |
Olympus E-M5 ISO 200 ISO 3200 ISO 6400 |
Canon 70D ISO 100 ISO 3200 ISO 6400 |
Fuji X-Pro1 ISO 200 ISO 3200 ISO 6400 |
Nikon D7100 ISO 100 ISO 3200 ISO 6400 |
Panasonic GH3 ISO 200 ISO 3200 ISO 6400 |
| Detail comparison. The Olympus E-M5 remains the king in our high-contrast detail crop comparisons, however the E-M1 comes quite close (and don't forget, the E-M1 has a low extended ISO 100 setting). The other four cameras look just a little bit softer than the Olys at base ISO, but not by much. As ISO rises to 3200, the three Micro Four Thirds cameras still hold up well, even surpassing some of the APS-C models. At ISO 6400, the E-M5 manages to best the E-M1, resolving most of the horizontal lines within the letters while the E-M1 blurs about half of them. The GH3 also does well, though it struggles a bit with chroma blotching and sharpening artifacts. The APS-C models look a bit softer at ISO 6400, but they still perform very well, with the Nikon's resolution advantage becoming more apparent. | |||||
Olympus E-M1 Review -- Print Quality
 Excellent 30 x 40 inch prints at ISO 100/200; a good 16 x 20 at ISO 1600; a nice 8 x 10 at ISO 6400; and a good 5 x 7 at ISO 12,800.
ISO 100/200 produces excellent 30 x 40 inch prints, with sharp detail and vibrant colors, and wall display prints possible at 36 x 48 inches.
ISO 400 prints look nice and crisp at 20 x 30 inches, with good wall display prints possible up to 30 x 40 inches.
ISO 800 yields a nice 16 x 20 inch print, with only mild softening in the red channel and minor luminance noise in some flatter areas. The 20 x 30 inch prints here are fine to use for less critical applications.
ISO 1600 shots look amazingly good at 16 x 20 inches, a large size indeed for this ISO.
ISO 3200 prints well up to 11 x 14 inches. All contrast is now lost in our target red swatch, and there is minor noise in shadowy areas, but still a nice print.
ISO 6400 images have good color and nice detail at 8 x 10 inches, with only minor issues similar to the 11 x 14 at ISO 3200.
ISO 12,800 has become our new benchmark for image quality at high ISOs if the camera can yield a good 5 x 7 here, and the E-M1 joins this small club with a nice print.
ISO 25,600 prints at 4 x 6 are really not too bad, with nice colors throughout. They're a bit too muted overall to receive our "good" seal, but can certainly work in a pinch for family photos or less critical applications.
With its latest offering, the OM-D E-M1, Olympus has followed in the hallowed footsteps of the E-M5 and taken the quality yet a step further. Prints from the E-M1 are a joy to look at, and can yield sizes ranging from quite large at and near base ISO all the way to a good 5 x 7 at ISO 12,800. A very solid performance from a very respected offering. Again, please note that default JPEG sharpening in the E-M1 is less aggressive than in the E-M5, but the images are quite similar in RAW comparisons, so take that into consideration when doing your own comparisons of in-camera JPEGs.
In the Box
The Olympus OM-D E-M1 retail package contains the following items:
- Olympus E-M1 body
- Rechargeable Li-ion battery BLN-1
- Battery charger BCN-1
- USB cable
- Shoulder strap
- Instruction manual
- Olympus Viewer 3 CD-ROM
Recommended Accessories
- Large capacity SDHC/SDXC memory card. 16GB Class 6 should be a minimum, and we highly recommend Class 10 UHS-1 for recording video or for shooting in continuous burst mode.
- Spare battery BLN-1 for extended shooting sessions
- Power battery holder HLD-7
- M.Zuiko lenses, especially the M.Zuiko Pro 12-40mm f/2.8
- Four Thirds Lens adapter MMF-3
- External flash FL-600R or FL-50R
- Remote cable release RM-UC1
- External microphone adapter set SEMA-1
- Medium camera bag
- Micro HDMI cable
Olympus E-M1 Review -- Conclusion
| Pro: | Con: |
|---|---|
|
|
Many pros flocked to the Olympus OM-D E-M5 as a lighter, more compact alternative to their big, bulky DSLRs. It was decidedly different from the Micro Four Thirds models that came before it, featuring blazing speed, a 5-axis in-camera stabilization system and best-in-class image quality. The Olympus E-M1 may not be a revolutionary upgrade to the E-M5, but it definitely takes the best of that camera's considerable qualities and reforges them to create a truly pro-level shooting machine with a more ergonomic design and a solid, weatherproof build.
The differences between the E-M1 and the E-M5 are readily apparent, starting with the immense number of physical controls -- most of them customizable -- on the new flagship model. There are now dedicated buttons for one-touch white balance, drive/HDR mode, and a 2x2 Dial Control system that lets you change how you shoot literally at the flick of the switch. The larger 2.36M-dot electronic viewfinder ranks among the best we've ever used, and it even allows you to preview Color Control and HDR effects before you snap the shot.
The Olympus E-M1 delivers the sharpest, most detailed JPEGs we've seen from a Micro Four Thirds camera -- if just by a hair over the E-M5 and E-P5 -- with image quality that rivals that of most high-end APS-C DSLRs and CSCs. And despite its comparatively small chip size and 16-megapixel resolution, the E-M1 does especially well in low-light situations at high ISOs, with its JPEG processing outshining that of the top enthusiast, high-megapixel, crop-sensor models from Nikon and Canon. Add the excellent new M.Zuiko Pro 12-40mm f/2.8 lens -- though it's not a kit lens, it can often be bought bundled with the camera for a discount -- and you have one very impressive still image camera.
That said, the E-M1 is not without its flaws. Its menu system and customization options can be overwhelming to learn -- there's just so much you can tweak. Its lack of an optical low-pass (anti-aliasing) filter increases the risk of incurring moiré (though not much more than we found on the E-M5 which has a rather weak OLPF). Meanwhile, other MFT and mirrorless models are much smaller and lighter, meaning the E-M1 loses some of the advantages that the mirrorless design has over DSLRs. And when it comes to the camera's HD video capabilities, unfortunately Olympus has not spent much effort in upgrading them, apparently content for the E-M1 to be a limited, average moviemaker.
In the end, the question isn't if the Olympus E-M1 is an excellent camera. It most certainly is, ranking as one of the best we've tested this year. The question is: Who is it for? Pro photographers in particular should see the E-M1 as a big upgrade from the E-M5, with most of the added features and performance catering to what they need in a small, lightweight body. The E-M1 is most definitely a no-brainer for them.
Serious enthusiasts considering it versus the E-M5 (or E-P5) may also give the nod to the E-M1 -- despite its extra cost -- as long as they think they'll eventually take advantage of its advanced features and they don't mind its extra heft. (Photographers who shoot a lot of movies probably should look elsewhere, most notably at the Panasonic GH3 which does for video recording what the E-M1 does for still shooting.)
However, most novice photographers who've bought into the benefits of mirrorless cameras are probably best not to invest in the E-M1 and pay for features they most likely won't even scratch. There are tons of great compact system models available for a lot less, with image quality and performance that may not match the E-M1's, but come very close. But if you fall into this camp and can't resist the E-M1, you're still going to love your decision. Suffice it to say we give the Olympus E-M1 our full recommendation, and a very enthusiastic Dave's Pick.
Follow Imaging-Resource.com on Twitter!
Optics
While not officially the kit lens (yet), we tested the new Olympus M.Zuiko 12-40mm f/2.8 with the E-M1 here. Test images on other pages of these test results use our reference prime lenses.
"Kit" Lens Test Results
Zoom
Wider-than-average zoom compared to most kit lenses, with excellent performance.


The new 12-40mm f/2.8 lens possesses an optical zoom ratio of about 3.3x, for a 35mm equivalent focal range of 24-80mm. While zoom ratio is typical for a kit lens, this lens goes wider than most.
Far-field performance is excellent at wide, medium and telephoto settings at f/8, with strong detail and very good contrast across the frame, though there are hints of flare visible around bright objects at wide angle. Chromatic aberration is negligible, but the E-M1 suppresses it in JPEGs. The E-M1 also offers 2x digital zoom which performs fairly well thanks to the sharp lens.
Overall, excellent performance here, especially compared to typical kit lenses. See below for comments on macro performance, geometric distortion, etc.
Macro
A small minimum area, with very good detail. Bundled flash is mostly blocked by the lens at closest distance.


As with zoom performance, the Olympus E-M1's macro performance will depend entirely on the lens in use. However, with the 12-40mm lens set to 40mm, the Olympus E-M1 captures a fairly small minimum area for a kit lens, measuring only 2.02 x 1.51 inches (51 x 39 millimeters). Sharpness is very good over much of the frame, though corners are somewhat soft. (Most lenses have some softening in the corners at macro distances.) The bundled flash seems to throttle down well at closest distance, but the lens casts a dark shadow over about two-thirds of the frame, so you'll want to use alternate lighting when shooting at closest focus with this lens.
Geometric Distortion
Low geometric distortion with the 12-40mm lens in JPEGs, much higher distortion in uncorrected RAW files.
| In-Camera JPEG: Barrel distortion at 12mm is 0.3 percent |
 |
| In-Camera JPEG: Distortion at 40mm is practically nonexistent |
 |
When shooting JPEGs, the 12-40mm lens produces about 0.3 percent barrel distortion at wide angle, which is much lower than average and only slightly noticeable in some of its images. At the telephoto end, there is almost no visible distortion, only about one pixel of barrel distortion. This is the tendency for the lens to bend straight lines outward (like a barrel -- usually at wide-angle) or inward (like a pincushion -- usually at telephoto).
Chromatic Aberration and Corner Sharpness
Very low chromatic aberration in JPEGs as the E-M1 suppresses it. Mild to moderate corner softening wide open.
Aperture: maximum |
|
 |
 |
| 12mm @ f/2.8: Lower left C.A.: Very low Softness: Just a touch of softness |
12mm @ f/2.8: Center C.A.: Very low Softness: Very sharp |
 |
 |
| 40mm @ f/2.8: Lower right C.A.: Very low Softness: Soft |
40mm @ f/2.8: Center C.A.: Very low Softness: Fairly sharp |
Chromatic Aberration. Chromatic aberration is very low, as the E-M1 is the first Olympus Micro Four-Thirds model that suppresses lateral chromatic aberration in JPEGs. See below for uncorrected results.
Corner Softness. Corners are only very slightly soft wide open at wide angle while the center is sharp, which is excellent performance, especially since the lens is both wider and faster than a typical kit lens. At full telephoto, the top corners are sharp, but the bottom corners are moderately soft, with the bottom right the softest. The center exhibits good sharpness.
Vignetting. There's also some moderate vignetting (corner shading) at both wide angle and telephoto at maximum aperture, as indicated by the darker corner crops compared to the center. However, keep in mind this is a constant f/2.8 aperture lens, so performance here is actually pretty good.
Aperture: f/8 |
|
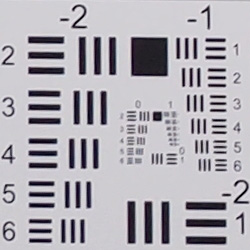 |
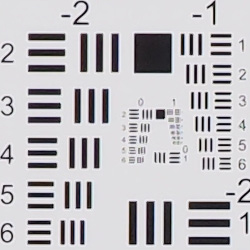 |
| 12mm @ f/8: Lower left C.A.: Very low Softness: Fairly sharp |
12mm @ f/8: Center C.A.: Very low Softness: Very sharp |
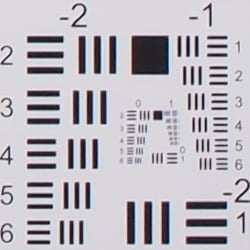 |
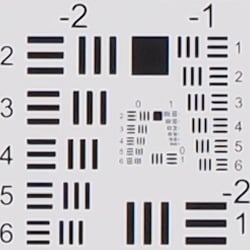 |
| 40mm @ f/8: Lower right C.A.: Very low Softness: Fairly sharp |
40mm @ f/8: Center C.A.: Very low Softness: Fairly sharp |
Chromatic Aberration. With the aperture stopped down to f/8, chromatic aberration remains very low, as expected.
Corner Softness. Corner sharpness is quite good at both wide angle and telephoto when stopped-down to f/8, with the improvement at telephoto more dramatic than wide angle.
Vignetting. Vignetting also improves at f/8, to the point of being negligible.
Overall, excellent optical performance for a wide-angle zoom.
In-camera Lens Corrections
Geometric Distortion Correction
Like all Micro Four-Thirds cameras, the E-M1 automatically applies geometric correction to JPEGs that can't be disabled.
| Uncorrected RAW: Barrel distortion at 12mm is ~2 percent |
 |
| Uncorrected RAW: Pincushion distortion at 40mm is 0.3 percent |
 |
To see how much correction is taking place in the camera, we converted RAW files with dcraw, which does not correct for distortion. As you can see at wide angle, barrel distortion is very high at about 2%, though pincushion distortion at telephoto is a low 0.3%. We expect to see high distortion at wide angle from smaller interchangeable lenses though, so it's nothing to be too concerned about unless you are using a RAW converter which does not understand the embedded "opcodes" to perform distortion corrections automatically. Most RAW converters these days are capable of applying distortion correction automatically, as specified by the manufacturer. There is however going to be some loss of resolution in the corners as a result of such correction, because pixels in the corners of the frame are being "stretched" to correct for the distortion. Obviously, a lens that doesn't require such correction that is also sharp in the corners to begin with would be preferable, but relaxing constraints on barrel and pincushion distortion likely brings other benefits in the lens design, such as cost, size and weight.
Chromatic Aberration Suppression
The Olympus E-M1 now suppresses lateral chromatic aberration automatically in JPEGs
|
In-camera JPEG
|
Uncorrected RAW
|
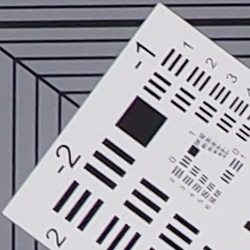 |
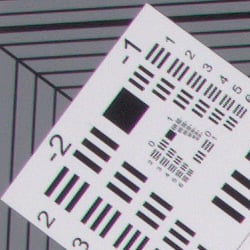 |
| Wide, f/8: Upper left C.A.: Very low |
Wide, f/8: Upper left C.A.: Moderate |
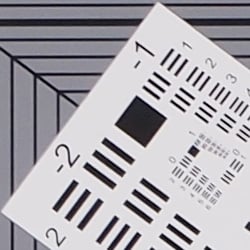 |
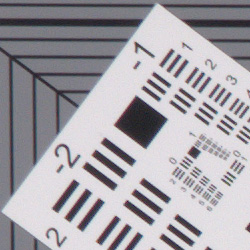 |
| Tele, f/8: Upper left C.A.: Very low |
Tele, f/8 Upper left C.A.: Low |
As mentioned above, the E-M1 is the first interchangeable lens camera from Olympus that corrects for lateral chromatic aberration in JPEGs. Other companies have been doing this for a while, and we're glad to see Olympus has finally implemented it as well. As you can see from comparing the in-camera JPEGs to uncorrected RAW crops above, the E-M1's chromatic aberration suppression is very effective at removing almost all the lateral chromatic aberration in our 12-40mm test shots, though there wasn't a lot of C.A. to suppress to begin with, particularly at the telephoto end.
Shading Compensation
The Olympus E-M1 features optional Shading Compensation to reduce vignetting in JPEG images.
 |
||
| Shading Compensation: (12mm @ f/2.8) |
Off | On |
Mouse over the links above to compare thumbnails, and click on the links to load the full resolution images.
As you can see, the Olympus E-M1's Shading Compensation reduces corner shading with the 12-40mm lens, so it's a useful feature particularly with fast and/or wide lenses. Note that Shading Compensation is off by default, and is not available with all lenses. It may also produce more visible noise in the periphery at higher ISOs.
Olympus E-M1 Viewfinder
Viewfinder Test Results
Accuracy
Excellent accuracy from the EVF and LCD monitor.


The Olympus E-M1's electronic viewfinder and LCD monitor both proved quite accurate in record mode, showing just over 100% coverage with our Olympus Zuiko Digital 50mm f/2.0 prime. Excellent results here, though not a surprise given previews are derived directly from the image sensor.
The images above were taken from our standardized test shots. For a collection of more pictorial photos, see our Olympus OM-D E-M1 Photo Gallery .
Exposure
Color
Saturation & Hue Accuracy
Realistic colors with good hue accuracy.
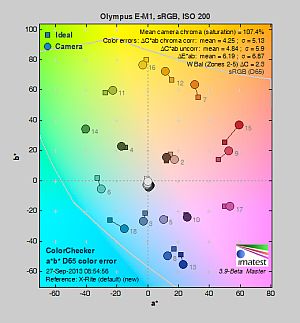 |
||
|
ISO Sensitivity
|
||
| In the diagram above, the squares show the original color, and the circles show the color that the camera captured. More saturated colors are located toward the periphery of the graph. Hue changes as you travel around the center. Thus, hue-accurate, highly saturated colors appear as lines radiating from the center. Mouse over the links above to compare ISOs, and click to view a larger version. | ||


Saturation. The Olympus E-M1 pushes reds by a fair amount and a few other colors by a small amount, but most colors are pretty close to accurate in terms of saturation. Default saturation at base ISO is 107.4% (7.4% oversaturated), which is just a bit lower than average but still brighter than actual. Saturation remains fairly stable across the ISO range, except at ISOs 12,800 and 25,600 where it falls off noticeably. Most consumer digital cameras produce color that's more highly saturated (more intense) than what's found in the original subjects. This is simply because most people like their color a bit brighter than life.
Skin tones. The Olympus E-M1 does fairly well here, producing natural-looking Caucasian skin tones, just slightly on the warm side. Where oversaturation is most problematic is on Caucasian skin tones, as it's very easy for these "memory colors" to be seen as too bright, too pink, too yellow, etc.
Hue. The Olympus OM-D E-M1 does shift cyan toward blue, light green toward yellow, and oranges toward yellow, but shifts are fairly minor. (The shift from cyan to blue is much less pronounced than most cameras, leaving sunny sky colors a little warmer than most.) Overall hue accuracy is very good with a Delta-C color error after correction for saturation of 4.25 at base ISO, which is better than average, and hue accuracy remains better than average across the ISO sensitivity range. Hue is "what color" the color is.
Saturation Adjustment
The Olympus E-M1 lets you adjust the image saturation, contrast, and sharpness in five steps each. As can be seen below, the saturation adjustment is effective, covers a useful range, and does a good job of not impacting contrast, though it boosts red and orange a little more than other colors.
| Saturation Adjustment Examples | ||
 |
 |
 |
| -2 | 0 | +2 |
The table above shows results with the default as well as the two extreme saturation settings. Click on any thumbnail above, then click again to see the full-sized image.


Sensor
Exposure and White Balance
Indoors, incandescent lighting
Warm color cast with Auto and cool with 2,600K white balance settings, but good color with Incandescent and Manual. Average exposure compensation required.


Indoors, under normal incandescent lighting, color balance is very warm with the Auto white balance setting, with a strong orange cast. Results with the Incandescent setting are actually pretty good, just a little warm, while the 2,600 Kelvin setting is quite cool with an obvious blue-green tint. The Manual setting is the most accurate, providing a nearly neutral color balance that is just slightly on the cool side. The Olympus E-M1 required an average amount of positive exposure compensation here, at +0.3 EV. (Our test lighting for this shot is a mixture of 60 and 100 watt household incandescent bulbs, a pretty yellow light source, but a very common one in typical home settings here in the U.S.)
Outdoors, daylight
Natural looking colors overall, with good exposure.
Outdoors, the Olympus E-M1 performed very well, with pleasing colors and good exposure. Skintones are good but slightly warm with the Auto white balance setting in our "Sunlit" Portrait shot, so we preferred Manual white balance, though it too is a touch warm. The Olympus E-M1 required an average amount of positive exposure compensation (+0.7 EV) to keep facial tones reasonably bright. Default contrast is a bit high, but despite the bright appearance there are very few blown highlights in the mannequin's shirt and flowers, which is much better than average. The Far-field shot has good exposure at default settings and almost no blown highlights, though there are some deep shadows. Noise in all but the deepest shadows is however very low for a Micro Four Thirds camera. (Note that these shots were taken at ISO 200 as ISO 100 is an extended setting with inferior dynamic range.)
See full set of test images with explanations
See thumbnails of all test and gallery images
Resolution
Very high resolution, ~2,300 to ~2,400 lines of strong detail in JPEGs, about the same from processed RAW files.
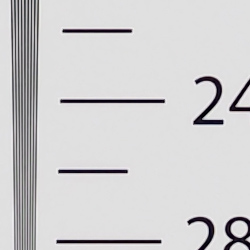
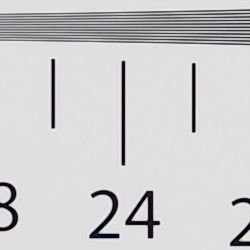
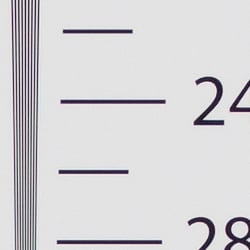
In-camera JPEGs of our laboratory resolution chart reveals sharp, distinct line patterns down to about 2,400 lines per picture height in the horizontal direction, and a little less at 2,300 lines in the vertical direction before aliasing artifacts start to interfere with the pattern. Complete extinction of the pattern doesn't occur until about 3,000 to 3,200 lines, though. Adobe Camera Raw wasn't able to extract more high-contrast detail here, though color moiré is more apparent near the limits of resolution. Use these numbers to compare with other cameras of similar resolution, or use them to see just what higher resolution can mean in terms of potential detail.
See full set of test images with explanations
See thumbnails of all test and gallery images
Sharpness & Detail
Very good sharpness and detail overall, though edge-enhancement artifacts on high-contrast subjects are visible. Mild noise suppression visible in the shadows.


Sharpness. The Olympus OM-D E-M1 captures very sharp images overall, though as is usually the case for most manufacturers, edge enhancement artifacts are visible on high-contrast subjects such as sharpening halos around the lines and lettering in the crop above left. The E-M1 does however seem to apply slightly less aggressive default sharpening than its predecessor, the E-M5, but it also features adaptive sharpening which takes into account the lens and aperture used, so sharpening behavior will vary. Edge enhancement creates the illusion of sharpness by enhancing colors and tones right at the edge of a rapid transition in color or tone.
Detail. The crop above right shows some fairly mild noise suppression artifacts in the darkest areas of the model's hair as base ISO, smudging individual strands together when contrast between them is low, though quite a few individual strands remain visible. Overall detail is very good for a 16-megapixel Micro Four Thirds model, though there are some minor demosaicing errors and aliasing artifacts visible in the hair, the result of the E-M1's lack of a low pass filter. Noise-suppression systems in digital cameras tend to flatten-out detail in areas of subtle contrast. The effects can often be seen in shots of human hair, where the individual strands are lost and an almost "watercolor" look appears.
RAW vs In-Camera JPEGs
As noted above, the Olympus E-M1 produces sharp, detailed in-camera JPEGs, though with some visible sharpening artifacts at default settings. As is almost always the case, though, additional detail can be obtained from carefully processing RAW files than can be seen in the in-camera JPEGs, with fewer sharpening artifacts. Take a look below, to see what we mean:
 |
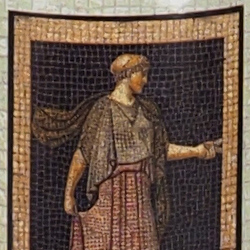 |
|||
|
| ||||
In the table above, mousing over a link at the bottom will load the corresponding crops, and clicking on the link will load the full resolution image. The Super Fine camera JPEG and Olympus Viewer 3 conversion used default settings, while Adobe Camera Raw 8.2 conversion was sharpened in Photoshop using unsharp mask of 400% with a radius of 0.3. (Note that at time of writing, ACR's support for the E-M1 was still preliminary.)
As you can see, the Olympus Viewer conversion resulted in an image similar to the in-camera JPEG in terms of color and contrast, though detail is slightly better. The Adobe Camera Raw (version 8.2) conversion however contains fine detail superior to the camera's Super Fine JPEG and the Olympus software conversion at default settings, especially in the red-leaf swatch where where much the thread pattern is resolved, though it does leave behind more noise at default noise reduction settings. Still, the E-M1's JPEG engine does a very good job capturing most of the detail offered by its 16-megapixel sensor. (And its ISO 100 setting does even better, but at the cost of limited dynamic range.)
ISO & Noise Performance
Very good high ISO performance for its class.
|
Default High ISO Noise Reduction
|
 |
 |
 |
| ISO 100 | ISO 200 | ISO 400 |
 |
 |
 |
| ISO 800 | ISO 1,600 | ISO 3,200 |
 |
 |
 |
| ISO 6,400 | ISO 12,800 | ISO 25,600 |
The Olympus E-M1's high ISO performance is nearly identical to the well-regarded E-M5's, with the added bonus of an extended ISO of 100 offering even less noise (at the cost of reduced dynamic range). Images are quite clean and detailed at ISOs 100 though 400, though some minor chroma noise is visible in the shadows. ISO 800 shows a bit more noise, both luminance and chrominance, but detail is still quite strong. At ISO 1,600, we see some moderate detail loss due to stronger noise and noise reduction efforts, as well as more visible chroma noise in the shadows, but fine detail is still good. At ISO 3,200, additional blurring occurs reducing fine detail, though chroma noise is slightly better controlled. ISO 6,400 is fairly soft and mottled, though some fine detail is left and chroma noise is still fairly well controlled. ISO 12,800 is very noisy, with strong yellow blotching in the shadows. At ISO 25,600, noise and noise reduction is intense, smudging out almost all fine detail, and a lot of yellow and purple chroma blotching is present as well.
Overall, though, high ISO noise performance matches the best we've seen from a Micro Four Thirds model thus far, and competes well with most APS-C rivals. As always, see the Print Quality section below for maximum recommended print sizes at each ISO.
A note about focus for this shot: We shoot this image at f/4, using one of three very sharp reference lenses (70mm Sigma f/2.8 macro for most cameras, 60mm f/2.8 Nikkor macro for Nikon bodies without a drive motor, and Olympus Zuiko 50mm f/2.0 for Four Thirds and Micro Four Thirds bodies). To insure that the hair detail we use for making critical judgements about camera noise processing and detail rendering is in sharp focus at the relatively wide aperture we're shooting at, the focus target at the center of the scene is on a movable stand. This lets us compensate for front- or back-focus by different camera bodies, even those that lack micro-focus adjustments. This does mean, though, that the focus target itself may appear soft or slightly out of focus for bodies that front- or back-focused with the reference lens. If you click to view the full-size image for one of these shots and notice that the focus target is fuzzy, you don't need to email and tell us about it; we already know it. :-) The focus target position will simply have been adjusted to insure that the rest of the scene is focused properly.
Extremes: Sunlit, dynamic range and low light tests
High resolution with very good dynamic range. Good low-light performance as well.


Sunlight. The Olympus E-M1 did very well with this difficult shot, requiring the average amount of exposure compensation (+0.7 EV) to keep the mannequin's face bright in this harsh lighting. As mentioned previously, despite the bright appearance of the mannequin's shirt, dynamic range is surprisingly good, with very few highlights blown and very good detail in the shadows as well. Performance here was well above average.
Because digital cameras are more like slide film than negative film (in that they tend to have a more limited tonal range), we test them in the harshest situations to see how they handle scenes with bright highlights and dark shadows, as well as what kind of sensitivity they have in low light. The shot above is designed to mimic the very harsh, contrasty effect of direct noonday sunlight, a very tough challenge for most digital cameras. (You can read details of this test here. In actual shooting conditions, be sure to use fill flash in situations like the one shown here; it's better to shoot in open shade whenever possible.)
Dynamic Range Analysis
This section coming soon! (Initial indications are that the E-M1's dynamic range is at least as good as the E-M5, if not better.)
Contrast Adjustment
The camera's contrast adjustment was some help in handling the harsh lighting in our "Sunlit" Portrait and Far-field shots.
|
Minimum Contrast
|
|
 |
 |
| Contrast set to lowest, +0.7 EV |
Contrast set to lowest, Auto Exposure |
At its lowest contrast setting, the Olympus E-M1 did a better job of revealing shadows as well as some highlight detail, while maintaining fairly natural-looking skintones in our "Sunlit" Portrait shot.
| "Sunlit" Portrait Contrast Adjustment Examples | ||
|
 |
 |
| -2 | 0 | +2 |
The shots above show the results of the minimum, default and maximum contrast settings. While you can see the extremes, it's pretty hard to evaluate small differences in contrast on small thumbnails like these, click on any thumbnail to go to the full-size image. As you can see, the E-M1's contrast setting is effective on both highlights and shadows, and didn't impact saturation much, which is a good thing.
|
Outdoor Portrait Gradation Comparison
|
|
 |
Gradation Normal (Default) Low Key Auto High Key |
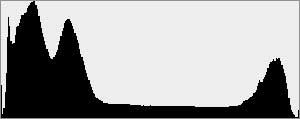 |
|
Gradation
Similar to dynamic range optimization systems from other manufacturers, the Olympus E-M1's Gradation setting applies local contrast adjustments in an attempt to preserve shadow detail and prevent highlight clipping with the Auto setting. Above are examples of the Normal (default), Low Key, Auto, and High Key settings applied to our "Sunlit" Portrait shot with +0.7 EV exposure compensation. Mouse over the links to load the associated thumbnail and histogram, and click on the links to visit the full resolution image.
As you can see, the Low Key setting applies Gradation for making subjects darker (in the thumbnail and histogram above, you can see that the camera shifted levels to the left, darkening the image dramatically), while the High Key setting does the opposite for brighter subjects (shifting levels to the right so that lighter tones are blown, but darker ones are opened up). The Auto setting did a good job toning down highlights while boosting shadows and darker midtones without making the image too flat-looking or washed-out.
| Face Detection | ||
 |
 |
 |
| Off at 0 EV Aperture priority, f/8 |
On at 0 EV Aperture priority, f/8 |
Full Auto f/2 |
Face Detection
Like most cameras these days, the Olympus E-M1 has the ability to detect faces, and adjust exposure and focus accordingly. As you can see from the examples above, it works well, as the center image with face detection enabled is much better exposed for the face without having to use exposure compensation. The Full Auto setting worked even better by choosing Portrait scene mode which used a larger aperture (f/2) and applied Auto Gradation to reduce strong shadows and highlights. An excellent performance under very difficult lighting such as this.
The E-M1's new HDR feature (other current Olympus Micro Four Thirds models only offer the HDR bracketing feature which the E-M1 also retains) works by combining four shots at different exposures. Two strength settings are available: HDR1 and HDR2, with the later providing a more extreme result. ISO is fixed to 200, and slowest shutter speed is 1 second (4 seconds total).
|
Dynamic Range Expansion: Far-field
|
|||
|
|
|||
| Dynamic Range: | |||
HDR.
Here, you can see the E-M1's in-camera HDR mode at work with our Far-field shot. HDR1 did a pretty good job brightening shadows and toning down highlights, though you can probably do better by using the bracketing mode and combining the images yourself in software. HDR2 mode looked overprocessed and was too bright with blown-out highlights as well as fuzzy details and visible noise. C.A. suppression also doesn't appear to work quite as well.
Notice that the HDR images are not cropped compared to the non-HDR image, which can imply the camera does not microalign the source images. This is pretty much confirmed by the user manual which says to use a tripod for HDR shots, potentially making this mode less useful than those offered by some other manufacturers, however we found we were able to capture HDR images hand-held with no alignment issues.
Dynamic Range Analysis (RAW mode)
While we once performed our own dynamic range measurements based on in-camera JPEGs as well as converted RAW images (when the camera was supported by Adobe Camera Raw), we've switched to using DxO Labs' results from their DxOMark website. As technology advanced, the dynamic range of modern high-end cameras in some cases exceeded the range of the Stouffer T4110 density scale that we used for our own measurements. DxO's approach based on RAW data before demosaicing is also more revealing, because it measures the fundamental dynamic range of the sensor, irrespective of whatever processing is applied to JPEGs, or to RAW data by off-the-shelf conversion software.
In the following, we use DxO's "Print" dynamic range results, which are scaled based on camera resolution. As the name suggests, this scaling corresponds to the situation in which you print at a given size, regardless of how many megapixels the camera might have. (In other words, if you've decided to make a 13x19 inch print, that's the size you're printing, whether the camera's resolution is 16 or 300 megapixels.) For the technically-minded, you can find a discussion of the reasoning behind this here on the DxOMark website. Also note that DxO Labs uses a signal-to-noise (SNR) threshold of 1 when defining the lower boundary of acceptable luminance noise in their dynamic range measurements, which corresponds to the "Low Quality" threshold of the Imatest software we used to use for this measurement.

Here, we compare the E-M1's dynamic range to its predecessor the E-M5, as well as to Panasonic's top model, the GH3. As you can see from the above graph (click for a larger image), the E-M1's dynamic range is about 1/3 to 1/2 EV better than its predecessor almost across the board, ranging from a maximum of 12.7 EV at base ISO to a minimum of 6.8 EV at maximum ISO. Dynamic range performance compared to the GH3 is similar, also with a slight advantage across the board. These are great results for a Micro Four Thirds model, but some APS-C mirrorless cameras continue to offer slightly better dynamic range. Click here to visit the DxOMark page for the Olympus E-M1 for more of their test results and additional comparisons.
| 1 fc 11 lux |
1/2 fc 5.5 lux |
1/4 fc 2.7 lux |
1/8 fc 1.3 lux |
1/16 fc 0.67 lux |
1/16fc No NR |
|
|---|---|---|---|---|---|---|
| ISO 100 |
 2 s f2.8 |
 4 s f2.8 |
 8 s f2.8 |
 15 s f2.8 |
 30 s f2.8 |
 30 s f2.8 |
| ISO 200 |
 1 s f2.8 |
 2 s f2.8 |
 4 s f2.8 |
 8 s f2.8 |
 15 s f2.8 |
 15 s f2.8 |
| ISO 400 |
 0.5 s f2.8 |
 1 s f2.8 |
 2 s f2.8 |
 4 s f2.8 |
 8 s f2.8 |
 8 s f2.8 |
| ISO 800 |
 1/4 s f2.8 |
 0.5 s f2.8 |
 1 s f2.8 |
 2 s f2.8 |
 4 s f2.8 |
 4 s f2.8 |
| ISO 1600 |
 1/8 s f2.8 |
 1/4 s f2.8 |
 0.5 s f2.8 |
 1 s f2.8 |
 2 s f2.8 |
 2 s f2.8 |
| ISO 3200 |
 1/15 s f2.8 |
 1/8 s f2.8 |
 1/4 s f2.8 |
 0.5 s f2.8 |
 1 s f2.8 |
 1 s f2.8 |
| ISO 6400 |
 1/30 s f2.8 |
 1/15 s f2.8 |
 1/8 s f2.8 |
 1/4 s f2.8 |
 0.5 s f2.8 |
 0.5 s f2.8 |
| ISO 12800 |
 1/60 s f2.8 |
 1/30 s f2.8 |
 1/15 s f2.8 |
 1/8 s f2.8 |
 1/4 s f2.8 |
 1/4 s f2.8 |
| ISO 25600 |
 1/125 s f2.8 |
 1/60 s f2.8 |
 1/30 s f2.8 |
 1/15 s f2.8 |
 1/8 s f2.8 |
 1/8 s f2.8 |
Low Light. The Olympus E-M1 performed well in low lighting, capturing bright exposures at our lowest light level at all ISOs. Noise was well-controlled up to ISO 3,200 and even ISO 6,400 looks good, though there's some chroma noise noticeable in darker shadows at lower light levels. We didn't notice any significant issues with hot pixels, banding or heat blooming.
White balance was fairly neutral using the Auto setting, just slightly cool at most ISOs, though blacks and dark greys took on a slightly reddish tint at lower light levels.
The camera's autofocus system was able to focus on our subject down to below the 1/16 foot-candle light level unassisted with an f/2.8 lens, which is excellent, and in total darkness with the aid of its focus assist lamp.
How bright is this? The one foot-candle light level that this test begins at roughly corresponds to the brightness of typical city street-lighting at night. Cameras performing well at that level should be able to snap good-looking photos of street-lit scenes.
NOTE: This low light test is conducted with a stationary subject, and the camera mounted on a sturdy tripod. Most digital cameras will fail miserably when faced with a moving subject in dim lighting. (For example, a child's ballet recital or a holiday pageant in a gymnasium.) Thanks to their phase-detect AF systems, digital SLRs tend to do much better than point & shoots, but you still shouldn't expect a quick autofocus lock with moving subjects. The E-M1 uses contrast-detect autofocus (when using Micro Four Thirds lenses), as is found in most point & shoot cameras, so its low-light focusing ability is less than that of most SLRs with phase-detect systems. That said, though, the larger, more sensitive pixels of the E-M1's sensor do better under dim lighting than do the tiny pixels of most point & shoots, (A useful trick is to just prop the camera on a convenient surface, and use its self-timer to release the shutter. This avoids any jiggling from your finger pressing the shutter button, and can work quite well when you don't have a tripod handy.)
Output Quality
Print Quality
Excellent 30 x 40 inch prints at ISO 100/200; a good 16 x 20 at ISO 1600; a nice 8 x 10 at ISO 6400; and a good 5 x 7 at ISO 12,800.
 ISO 100/200 produces excellent 30 x 40 inch prints, with sharp detail and vibrant colors, and wall display prints possible at 36 x 48 inches.
ISO 400 prints look nice and crisp at 20 x 30 inches, with good wall display prints possible up to 30 x 40 inches.
ISO 800 yields a nice 16 x 20 inch print, with only mild softening in the red channel and minor luminance noise in some flatter areas. The 20 x 30 inch prints here are fine to use for less critical applications.
ISO 1,600 shots look amazingly good at 16 x 20 inches, a large size indeed for this ISO.
ISO 3,200 prints well up to 11 x 14 inches. All contrast is now lost in our target red swatch, and there is minor noise in shadowy areas, but still a nice print.
ISO 6,400 images have good color and nice detail at 8 x 10 inches, with only minor issues similar to the 11 x 14 at ISO 3200.
ISO 12,800 has become our new benchmark for image quality at high ISOs if the camera can yield a good 5 x 7 here, and the E-M1 joins this small club with a nice print.
ISO 25,600 prints at 4 x 6 are really not too bad, with nice colors throughout. They're a bit too muted overall to receive our "good" seal, but can certainly work in a pinch for family photos or less critical applications.
With their latest offering the OM-D E-M1, Olympus has followed in the hallowed footsteps of the E-M5 and taken the quality yet a step further. Prints from the E-M1 are a joy to look at, and can yield sizes ranging from quite large at and near base ISO all the way to a good 5 x 7 at ISO 12,800. A very solid performance from a very respected offering. Again, please note that default JPEG sharpening in the E-M1 is considerably less aggressive than in the E-M5, but the images are quite similar in RAW comparisons, so take that into consideration when doing your own comparisons of the in-camera JPEGs.
Testing hundreds of digital cameras, we've found that you can only tell just so much about a camera's image quality by viewing its images on-screen. Ultimately, there's no substitute for printing a lot of images and examining them closely. For this reason, we now routinely print sample images from the cameras we test on our Canon Pro9000 Mark II studio printer, and the Canon Pixma MP610 here in the office. (See the Canon Pixma Pro9000 Mark II review for details on that model.)
The images above were taken from our standardized test shots. For a collection of more pictorial photos, see our Olympus OM-D E-M1 Photo Gallery .
Not sure which camera to buy? Let your eyes be the ultimate judge! Visit our Comparometer(tm) to compare images from the Olympus OM-D E-M1 with those from other cameras you may be considering. The proof is in the pictures, so let your own eyes decide which you like best!
Performance
Timing and Performance
Excellent performance overall for a compact system camera.
| Startup/Shutdown |
||
| Power on |
~0.8 second
|
Time it takes to turn on and capture a shot. |
| Shutdown |
~0.6 second
|
How long it takes camera to turn off before you can remove the memory card. |
|
Buffer clearing time |
13 seconds after 50 large/super fine JPEGs*
|
Worst case buffer clearing time. -- This is the delay after a set of shots before you can remove the card. |
|
16 seconds after 50 RAW files*
|
||
|
26 seconds after 34 RAW + LSF JPEG files*
|
||
|
*Note: Buffer clearing times measured with a SanDisk Extreme Pro 95MB/sec UHS-I SDHC card. Slower cards will produce correspondingly slower clearing times. Slow cards may also limit length of bursts in continuous mode. ISO sensitivity and noise reduction settings can also affect cycle times and burst mode performance.
|
||
Startup time including taking a shot was quite fast for a CSC, at well under a second. With a fast 95MB/s UHS-I SDHC card, the E-M1's buffer clearing times were quite good given the generous buffer depths.
| Mode Switching | ||
|---|---|---|
| Play to Record, |
~0.4 second
|
Time until first shot is captured. |
| Record to Play |
~3 seconds
|
Time to display a large/super fine JPEG file immediately after capture. |
| Display |
~0.6 second
|
Time to display a large/superfine JPEG file already on the memory card. |
Mode switching was quite fast, except for Record to Play which was quite slow.
| Shutter Response (Lag Time) | ||
|---|---|---|
|
Full Autofocus, |
0.139 second
|
Time from fully pressing shutter button to image capture, with the lens already at the proper focal distance setting. (All AF timing performed with the new 12-40mm f/2.8 lens at about 30mm unless otherwise noted.) |
|
Full Autofocus, |
0.138 second
|
Time from fully pressing shutter button to image capture, with the lens already at the proper focal distance setting. |
Full Autofocus, |
0.193 second
|
Time from fully pressing shutter button to image capture, with the lens already at the proper focal distance setting. (With Olympus 14-42mm II R lens.) |
|
Full Autofocus, |
0.269 second
|
Time from fully pressing shutter button to image capture, with the lens already at the proper focal distance setting, TTL Auto flash enabled. |
|
Manual Focus |
0.068 second
|
For most cameras, shutter lag is less in manual focus than autofocus, but usually not as fast as when the camera is "prefocused". |
|
Prefocused |
0.047 second
|
Time to capture, after half-pressing and holding shutter button. |
|
Prefocused |
0.047 second
|
Time to capture, after half-pressing and holding shutter button. |
The Olympus E-M1's full-autofocus shutter lag in single-area AF mode (center AF position) was only 0.139 second when tested with the new 12-40mm f/2.8 lens. That's incredibly fast for a compact system camera and faster than most DSLRs as well. To see how much the lens makes a difference and to compare to the E-M5, we also tested with the 14-42mm R II lens. With it, shutter lag increased to 0.193s, but that's still faster than the E-M5's 0.236s result with the same lens.
In 81-point "All Targets" AF mode, shutter lag was essentially the same as center AF mode, at 0.138 second. Full autofocus shutter lag increased to 0.269 second with the flash enabled, to account for the additional delay for the preflash metering, however that's still quite fast.
When manually focused, the E-M1's shutter lag time was only 0.068 second, also very fast. The E-M1's prefocused shutter lag time of 0.047 second was very quick.
An option to reduce shutter lag is available, however it often did not make a measurable difference in our tests and sometimes actually increased lag slightly.
To minimize the effect of different lens' focusing speed, we test AF-active shutter lag with the lens already set to the correct focal distance.
| Cycle Time (shot to shot) | ||
|---|---|---|
| Single Shot mode |
0.47 second
|
Time per shot, averaged over 20 shots, 2 seconds to clear*. |
|
Single Shot mode |
0.47 second
|
Time per shot, averaged over 20 shots, 2 seconds to clear*. |
|
Single Shot mode |
0.54 second
|
Time per shot, averaged over 20 shots, 9 seconds to clear*. |
| Early shutter |
No
|
Some cameras don't snap another shot if you release and press the shutter too quickly in Single Shot mode, making "No" the preferred answer. |
|
Continuous H Mode |
0.10 second (9.90 frames per second);
50 frames total; 13 seconds to clear* |
Time per shot, averaged over 50 shot buffer capacity. |
| Continuous H Mode |
0.10 second (9.90 frames per second);
50 frames total; 16 seconds to clear* |
Time per shot, averaged over 50 shot buffer capacity. |
|
Continuous H Mode |
0.10 second (9.90 frames per second);
34 frames total; 26 seconds to clear* |
Time per shot, averaged over 34 shot buffer capacity. |
| Flash Recycling |
4.9 seconds
|
Flash at maximum output. |
|
*Note: Buffer clearing times measured with a SanDisk Extreme Pro 95MB/sec UHS-I SDHC card. Slower cards will produce correspondingly slower clearing times. Slow cards may also limit length of bursts in continuous mode. ISO sensitivity and noise reduction settings can also affect cycle times and burst mode performance.
|
||
Single-shot cycle times were quite good for a CSC, at about 0.5 seconds per shot no matter the type of file.
Continuous H mode performance was excellent, at around 9.9 frames per second with any file type. We must point out that I.S. must be disabled, and focus, exposure and white balance are fixed at the first frame of a burst in this mode. There is also a "low speed" mode rated at up to 6.5 fps which supports continuous AF and exposure, however we didn't test that mode.
Buffer depths were excellent, at 50 frames for large/super fine JPEGs or RAW files, and 34 frames for RAW+JPEGs. Note that our test target for this was designed to be difficult to compress, so JPEG burst lengths should be longer with typical subjects. Buffer clearing time was also quite good considering the deep buffers, ranging from 13 seconds after a burst of 50 JPEGs, to 26 seconds after a burst of 34 RAW+JPEG frames.
Flash recycle time was a little slow with the bundled flash, though, at an average of 4.9 seconds after full power discharge. Larger flash units with their own power source would do much better.
| Download Speed | ||
|---|---|---|
| Windows Computer, USB 2.0 |
12,092 KBytes/sec
|
Typical Values: |
Download speeds were quite fast, quick enough that you probably won't feel the need for a separate card reader. (Note that this test was performed with a SanDisk Extreme Pro 95MB/sec UHS-I SDHC card: Slower cards would likely show slower transfer times.)
Bottom line, the Olympus E-M1's performance is generally excellent, and faster on almost all fronts compared to the E-M5, with much deeper buffers as well.
Battery
Battery Life
Average battery life for a CSC.
| Operating Mode | Number of Shots |
|---|---|
|
Still Capture,
(IS on, CIPA standard) |
350
|
The Olympus E-M1 uses a custom rechargeable lithium-ion battery pack for power, and comes with both a single battery and charger. The rated 350 shots per charge (Olympus makes no distinction between using the EVF or LCD monitor) is about average for a compact system camera, but well below the capacity of most DSLRs with their optical viewfinders. We recommend getting a second battery for your E-M1 if you plan any extended outings, and consider purchasing the HLD-7 power grip to increase battery life to about 680 shots.
The table above shows the number of shots the camera is capable of (on a fully-charged rechargeable battery), based on CIPA battery-life and/or manufacturer standard test conditions.
(Interested readers can find an English translation of the CIPA DC-002 standards document here. (180K PDF document))
Flash
Olympus E-M1 Flash

Although like the E-M5, the Olympus E-M1 lacks any internal flash strobe, it provides for external flash strobes courtesy of a hot shoe--but note that it is shared with the accessory port, so use of flash or accessories is an either / or proposition.
The E-M1 comes bundled with an accessory flash (FL-LM2) which has a guide number of 10 meters at ISO 200 equivalent (that works out to about 7m at ISO 100), with coverage specified at 14mm (28mm in 35mm format).
Flash modes include Auto, Fill-in, Red-eye Reduction, Slow Synchronization (1st curtain), Slow Synchronization (1st curtain)/Red-eye Reduction, Slow Synchronization (2nd curtain), Manual (Full, 1/2, 1/4, 1/8, 1/16, 1/32, 1/64), and Off.
The E-M1's hot shoe is compatible with the FL-50R, FL-36/FL-36R, FL-20, FL-14, FL-300R and FL-600R strobes. Flash sync is possible up to 1/320 second with the FL-LM1/2, or 1/250 with other flashes and the E-M1 also allows Super FP flash up to 1/8,000 second, if supported by the attached flash. Flash exposure compensation is available within a range of +/- 3.0 EV, in 1/3, 1/2 or 1 EV steps which can be optionally added to exposure compensation. Finally, the E-M1 supports four-channel wireless flash with the bundled strobe acting as a master, and off-camera flash strobes configured in up to 4 groups.
Bundled Flash Test Results
Coverage and Range
A weak flash despite being external, with narrow coverage.


Coverage. Flash coverage was quite narrow and uneven at wide angle (12mm), and the lens cast a small shadow at the bottom of the frame, though keep in mind the 24mm-equivalent is wider than most kit lenses. Coverage is more uniform at full telephoto (40mm).
Exposure. In our Indoor Portrait flash test, the Olympus E-M1 underexposed our subject despite using an external flash (which are often more powerful than built-ins). +0.7 EV flash compensation produced the brightest exposure (+1.0 EV was actually slightly dimmer), though it was still dim. The camera's Slow-Sync flash mode produced much better results at +1.0 EV aided by the slower 1/6 second shutter speed, though with a stronger orange cast from the ambient room lighting.
| Flash Range: Wide Angle | |||||
|---|---|---|---|---|---|
| 6 ft | 7 ft | 8 ft | 9 ft | 10 ft | 11 ft |
 1/60 sec f2.8 ISO 200 |
 1/60 sec f2.8 ISO 200 |
 1/60 sec f2.8 ISO 200 |
 1/60 sec f2.8 ISO 200 |
 1/60 sec f2.8 ISO 200 |
 1/60 sec f2.8 ISO 200 |
| 12 ft | 13 ft | 14 ft | 15 ft | 16 ft | |
 1/60 sec f2.8 ISO 200 |
 1/60 sec f2.8 ISO 200 |
 1/60 sec f2.8 ISO 200 |
 1/60 sec f2.8 ISO 200 |
 1/60 sec f2.8 ISO 200 |
|
ISO 200 Range. Flash exposure started out a bit dim at 6 feet at wide angle, then became dimmer as distance increased. Since this is a constant aperture lens, we did not repeat this test at telephoto. Poor results here, especially considering the f/2.8 lens. You can always use a more powerful external flash, though.
| Manufacturer-Specified Flash Range |
|---|
 11.7 feet ISO 200 |
Manufacturer Specified Flash Test. The Olympus E-M1's bundled flash has a Guide Number (GN) of 10 meters at ISO 200. That works out to about 11.7 feet at f/2.8, the maximum aperture of the 12-40mm lens. (Since the aperture is constant, the range should technically be the same at any focal length.) In the shot above, the E-M1 did not perform as Olympus says it will, producing a dim exposure at the rated distance. Oddly, though, it is brighter than both our 11 and 12 foot range shots, with differences in metering likely the reason. Our standard test method for flash range uses a fixed setting of ISO 200 (when supported), to provide a fair basis of comparison between cameras. We've now also begun shooting two shots using the manufacturer-specified camera settings, at the range the company claims for the camera, to assess the validity of the specific claims.
High ISO Noise Reduction
Olympus E-M1 High ISO Noise Reduction
The Olympus E-M1 offers four settings for noise reduction, or "Noise Filter" as the company calls it: "Off", "Low", "Standard" and "High". The user manual doesn't state at which ISO noise reduction kicks in, so we've started with ISO 100 (extended) to find out.
See for yourself how the Olympus E-M1's "Standard", "Low" and "Off" High ISO NR settings compare to RAW without noise reduction under daylight-balanced lighting. (Note that these RAW images also have no sharpening applied, so they are softer than camera JPEGs at low ISOs.) Click on any of the crops below to see the corresponding full-sized image.
| High ISO Noise Reduction Comparison Daylight-balanced illumination |
||||
|
"Standard"
|
"Low"
|
"Off"
|
RAW (no NR)
|
|
|
I
S O 1 0 0 |
 |
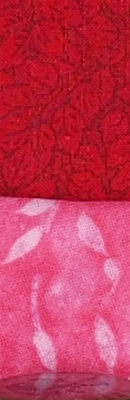 |
 |
 |
 |
 |
 |
 |
|
 |
 |
 |
 |
|
|
"Standard"
|
"Low"
|
"Off"
|
RAW (no NR)
|
|
|
I
S O 2 0 0 |
 |
 |
 |
 |
 |
 |
 |
 |
|
 |
 |
 |
 |
|
|
"Standard"
|
"Low"
|
"Off"
|
RAW (no NR)
|
|
|
I
S O 4 0 0 |
 |
 |
 |
 |
 |
 |
 |
 |
|
 |
 |
 |
 |
|
|
"Standard"
|
"Low"
|
"Off"
|
RAW (no NR)
|
|
|
I
S O 8 0 0 |
 |
 |
 |
 |
 |
 |
 |
 |
|
 |
 |
 |
 |
|
|
"Standard"
|
"Low"
|
"Off"
|
RAW (no NR)
|
|
|
I
S O 1 6 0 0 |
 |
 |
 |
 |
 |
 |
 |
 |
|
 |
 |
 |
 |
|
|
"Standard"
|
"Low"
|
"Off"
|
RAW (no NR)
|
|
|
I
S O 3 2 0 0 |
 |
 |
 |
 |
 |
 |
 |
 |
|
 |
 |
 |
 |
|
|
"Standard"
|
"Low"
|
"Off"
|
RAW (no NR)
|
|
|
I
S O 6 4 0 0 |
 |
 |
 |
 |
 |
 |
 |
 |
|
 |
 |
 |
 |
|
|
"Standard"
|
"Low"
|
"Off"
|
RAW (no NR)
|
|
|
I
S O 1 2 8 0 0 |
 |
 |
 |
 |
 |
 |
 |
 |
|
 |
 |
 |
 |
|
|
"Standard"
|
"Low"
|
"Off"
|
RAW (no NR)
|
|
|
I
S O 2 5 6 0 0 |
 |
 |
 |
 |
 |
 |
 |
 |
|
 |
 |
 |
 |
|
As you can see, all E-M1 noise reduction settings apply noise suppression at all ISOs, even the "Off" setting. The "Low" and "Off" setting do apply progressively less luminance noise suppression than the default, but as you can see, chroma noise is still fairly aggressively suppressed at all settings.
It's interesting to see that JPEGs at the low extended ISO 100 setting show much better detail in the red-leaf fabric than at ISO 200, a much bigger difference than the ISO 100 and 200 RAW files show. It seems Olympus is concerned with showing slightly higher chroma noise at ISO 200 versus 100 in its JPEGs.
Pricing and availability
The Olympus OM-D E-M1 started shipping in October 2013. Originally available body-only at a retail price of US$1,400, it now lists for US$1,300. From September 2014, a Silver body color has been added alongside the existing black one. Pricing for this variant is identical, and so is functionality, except that it comes with the latest firmware already installed.